
Writing on Cakes: Basic Techniques for Beginners

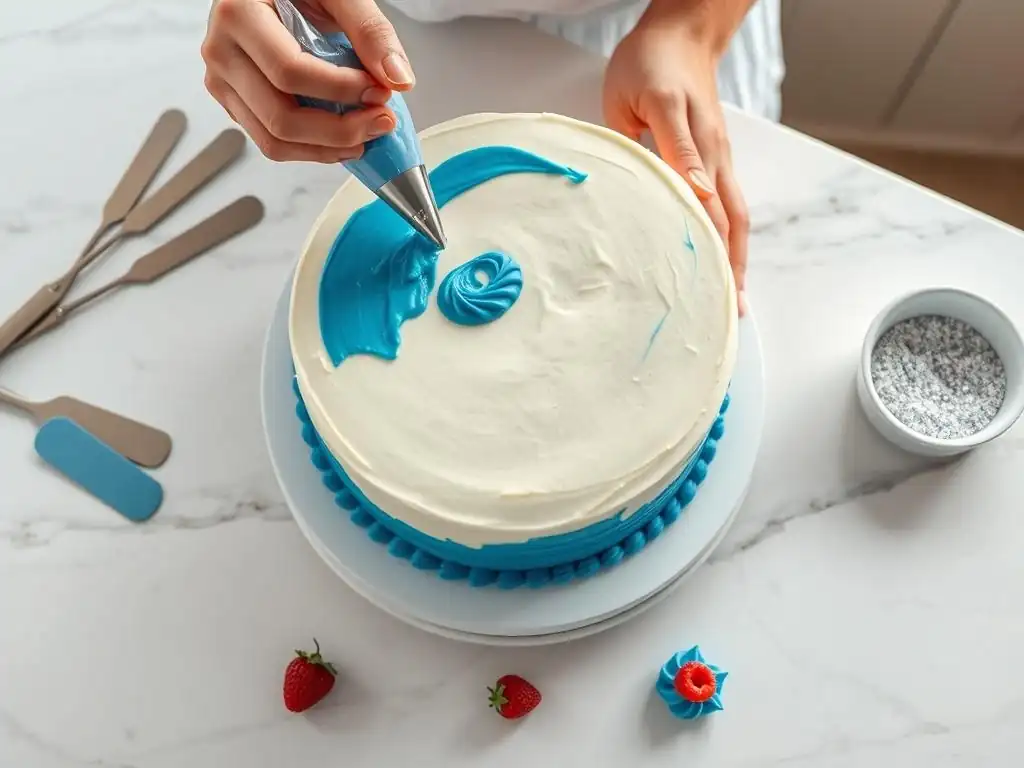
Welcome to BakeWithEase, where baking becomes a joy, not a chore! Ever wondered how to elevate your homemade cakes from simple to stunning? This article dives into the world of easy cake decorating techniques, revealing beginner-friendly methods to transform your creations. Get ready to impress with your newfound skills, and discover that writing on cakes is easier than you think! Intrigued? Let's get started and unlock your inner cake artist.
- Introduction to Buttercream Flower Piping Techniques
- Essential Tools for Buttercream Flower Piping
- Preparing Your Buttercream for Flower Piping: Achieving the Right Consistency
- Mastering Basic Buttercream Flower Techniques: A Step-by-Step Approach
- Easy Buttercream Flower Cake Decorating Ideas
- Troubleshooting Buttercream Flower Piping Issues
- Advanced Buttercream Flower Techniques: Taking Your Skills Further
- Buttercream Flower Inspiration: Examples of Stunning Floral Cakes
- Conclusion: Embrace the Art of Buttercream Flower Piping
-
Frequently Asked Questions
- What are some easy cake decorating techniques for writing on cakes that beginners can use?
- What kind of frosting is best for writing on cakes?
- What tools do I need to write on a cake effectively?
- How can I prevent my writing from smudging on the cake?
- How do I correct mistakes when writing on a cake?
- Final Reflection: The Sweet Art of Simple Decoration
- Unleash Your Inner Cake Artist!
Introduction to Buttercream Flower Piping Techniques
Why Learn Buttercream Flowers? Adding Elegance to Cakes
Learning how to pipe buttercream flowers is one of the most rewarding and visually impactful easy cake decorating techniques a beginner can master. These edible blossoms instantly elevate a plain cake into a stunning centerpiece, perfect for birthdays, anniversaries, or any special occasion. Unlike working with fondant, buttercream is often more accessible, requires fewer specialized tools to start, and tastes delicious! It allows for a wide range of textures and styles, from delicate roses to cheerful daisies, all created with just a few simple tools and a bit of practice.
Beyond the aesthetic appeal, mastering buttercream flowers provides a foundational skill set applicable to many other decorating tasks. It helps develop control over piping pressure, angle, and movement – skills crucial for writing, borders, and other decorative elements. It's a cost-effective way to add significant visual flair compared to using fresh flowers or complex sugar paste decorations. With a little effort, beginners can achieve impressive results, making buttercream flowers a fantastic starting point for anyone exploring easy cake decorating techniques.
Setting Up Your Buttercream Flower Decorating Station
A well-organized workspace is crucial for successful buttercream flower piping, making the process feel much more like easy cake decorating techniques rather than a chaotic mess. Start with a clean, flat, and stable surface, such as a kitchen counter or a large cutting board. Ensure you have adequate lighting so you can clearly see the details of your piping. Gather all your necessary tools – piping bags, tips, couplers, flower nail, palette knife, and pre-colored buttercream – and arrange them within easy reach.
Having everything ready before you start piping minimizes interruptions and helps maintain the correct buttercream consistency. It's also helpful to have a small bowl of warm water nearby to quickly clean tips if they become clogged and a damp cloth for wiping your hands or tools. Place a few squares of parchment paper or wax paper on your workspace; these will be used for practicing or piping flowers directly onto before transferring them to the cake. This preparation might seem minor, but it significantly streamlines the decorating process, transforming potentially tricky steps into genuinely easy cake decorating techniques.
Essential Tools for Buttercream Flower Piping
Piping Bags: Selecting the Right Type and Size
Choosing the right piping bag is fundamental for comfortable and controlled piping, a key element of easy cake decorating techniques. Disposable piping bags are popular for beginners and experienced decorators alike. They are convenient, easy to clean up, and come in rolls or packs. Reusable bags, typically made of nylon or cotton, are more environmentally friendly but require thorough washing after each use. Both types work well, so the choice often comes down to personal preference and how much cleanup you mind.
Piping bags come in various sizes, commonly ranging from 8 inches to 18 inches. For general flower piping, a 12-inch or 14-inch bag is often ideal. It holds a sufficient amount of buttercream without being overly heavy or cumbersome.
Smaller bags (8-10 inches) are great for small details or when using multiple colors in smaller quantities. Larger bags (16-18 inches) are better for covering large areas or piping borders. Using a bag that feels comfortable in your hand and isn't overfilled is essential for achieving smooth, consistent pressure, which is vital for mastering easy cake decorating techniques like flower piping.
Piping Tips: Russian Tips vs. Petal Tips
Piping tips are the nozzles attached to the bag that shape the buttercream as it's piped. For flowers, two main types are commonly used: Russian tips and traditional petal tips. Russian tips are relatively new and are designed to create a complete flower with a single squeeze. They are excellent for creating quick, full blossoms like tulips or roses in mere seconds, making them incredibly useful for easy cake decorating techniques when time is limited or you need many similar flowers.
Traditional petal tips (like Wilton #101, #104, #124, #127) are shaped like a teardrop or a slightly curved slit. These require building the flower petal by petal, often around a central cone or base. While they take more time and practice than Russian tips, they offer much greater control over the size, shape, and arrangement of individual petals, allowing for more detailed and realistic-looking flowers such as intricate roses, carnations, or peonies. Mastering petal tips is a core skill for many easy cake decorating techniques and allows for greater creative expression.
Flower Nail: A Must-Have for Realistic Flowers
The flower nail is a small, specialized tool that makes piping realistic buttercream flowers significantly easier, especially those built petal by petal like roses or carnations. It typically consists of a flat, round head mounted on a slender stem. The head provides a stable, rotatable surface on which to pipe your flower. You hold the stem between your fingers, allowing you to spin the head smoothly with one hand while piping with the other.
Using a flower nail eliminates the need to awkwardly rotate the entire cake or work surface while piping. You can easily turn the nail to position the developing flower precisely for each new petal. Once the flower is complete and chilled slightly to firm up the buttercream, you can gently slide it off the nail head using a palette knife or flower lifter and transfer it directly onto the cake. This simple tool is invaluable for achieving symmetrical, well-formed flowers and is considered essential for anyone serious about mastering easy cake decorating techniques involving piped blossoms.
Couplers: Facilitating Easy Tip Changes
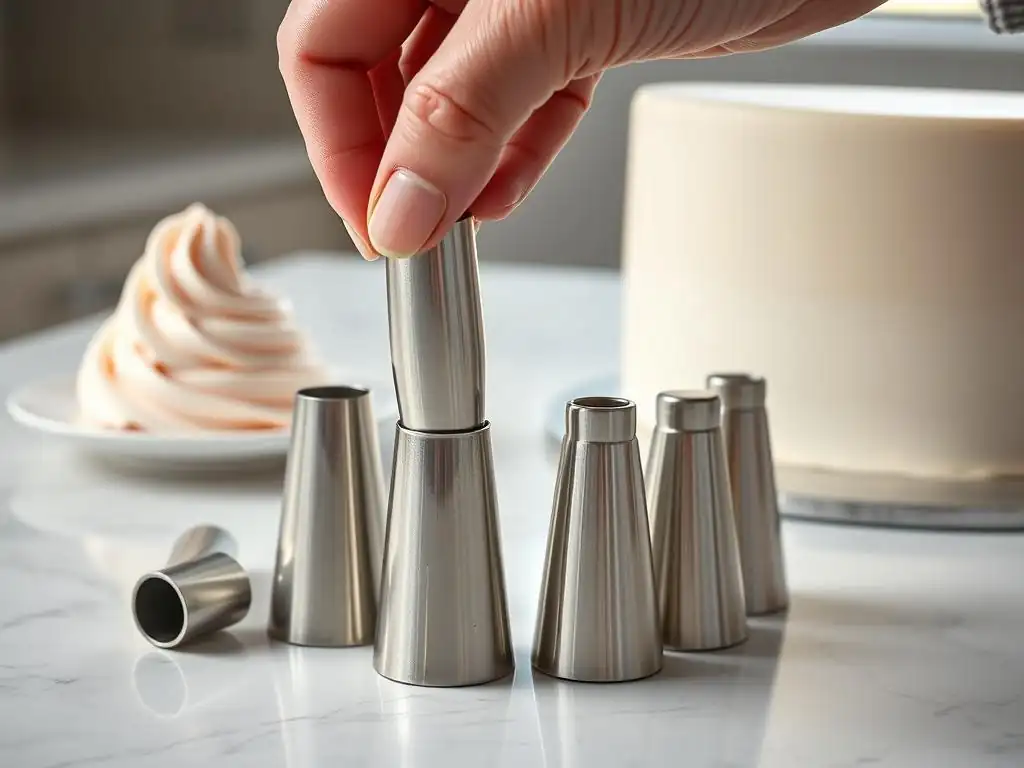
Couplers are ingenious little tools that allow you to change piping tips on a bag without having to empty the bag or use a new one. A standard coupler consists of two parts: a base and a ring. The base is inserted into the piping bag from the inside, with the threaded part poking out of the cut opening. The piping tip is then placed over the threaded base on the outside of the bag, and the ring is screwed on to secure the tip in place.
The primary benefit of using a coupler is efficiency. If you're using the same color buttercream but need to switch from a petal tip to a leaf tip, you simply unscrew the ring, swap the tips, and screw the ring back on. This saves time and reduces the number of piping bags you need to prepare and clean. For beginners exploring various easy cake decorating techniques and trying different tips, couplers are incredibly convenient and make experimentation much simpler.
Palette Knife: Lifting and Transferring Flowers
A small offset palette knife (also sometimes called a spatula) is an essential tool for handling delicate piped buttercream flowers, particularly those made on a flower nail. The thin, flexible blade and offset handle allow you to gently slide the knife underneath the base of a chilled buttercream flower without damaging the petals.
Once the flower is resting on the knife, you can carefully position it on the cake. A quick, confident movement is often best for transferring. Having a clean, sharp-edged palette knife ensures you can lift the flower cleanly from the nail head or parchment paper. It's also useful for smoothing buttercream on the cake surface before adding your floral decorations. While simple, the palette knife is a vital tool in the process, ensuring your beautiful piped creations make it onto the cake intact, contributing to the overall success of your easy cake decorating techniques.
Preparing Your Buttercream for Flower Piping: Achieving the Right Consistency
Types of Buttercream Suitable for Flower Piping
Not all buttercreams are created equal when it comes to piping flowers. The ideal buttercream needs to be stable enough to hold its shape when piped yet smooth enough to flow easily through the tip. American buttercream, made from butter, powdered sugar, milk/cream, and flavoring, is a popular choice for beginners learning easy cake decorating techniques. It's relatively easy to make and holds stiff peaks well, which is crucial for defined petals. However, it can be quite sweet.
Other suitable options include Swiss Meringue Buttercream (SMBC) and Italian Meringue Buttercream (IMBC). These are made by whisking hot sugar syrup into whipped egg whites and then beating in butter. They are known for their silky texture and less sweet flavor compared to American buttercream. Meringue-based buttercreams can produce very smooth, delicate petals but require more precision in their preparation to achieve the correct consistency for piping detailed flowers. For starting out with easy cake decorating techniques like basic flowers, a classic American buttercream is often recommended due to its simplicity and stability.
Achieving the Ideal Buttercream Consistency: Tips for Stiff and Smooth Frosting
The consistency of your buttercream is perhaps the most critical factor for successful flower piping. It needs to be stiff enough to hold defined edges and shape without drooping, but not so stiff that it's difficult to squeeze through the piping tip or results in jagged edges. The ideal consistency is often described as "stiff but pipeable."
If your buttercream is too soft (perhaps due to warm temperatures or too much liquid), the piped flowers will look melted or will collapse quickly. You can fix this by chilling the buttercream in the refrigerator for 10-20 minutes or by beating in a little more powdered sugar, perhaps starting with 1/4 cup and adding more as needed until the desired stiffness is reached. If your buttercream is too stiff and breaks or crumbles when piping, it needs a little liquid.
Beat in milk, cream, or water, adding just a teaspoon at a time until it becomes smooth and pliable. Achieving this balance is key to making these easy cake decorating techniques truly easy.
Coloring Your Buttercream: Gel Food Coloring Techniques
Using gel food coloring is the preferred method for coloring buttercream for piping flowers. Unlike liquid food coloring, gel colors are highly concentrated and do not add significant moisture to the buttercream, which could otherwise affect its consistency. A tiny amount of gel color goes a long way in achieving vibrant hues.
To color your buttercream, scoop the amount you need into a separate bowl. Use a toothpick or the tip of a knife to add a small dab of gel color. Start with a very small amount, as you can always add more. Mix thoroughly using a spatula, scraping down the sides of the bowl, until the color is uniform.
If you want a deeper shade, add another small dab and mix again. For delicate flower shades, use colors sparingly. For more vibrant colors, add more gel incrementally. Mixing colors in separate bowls allows you to control the shades precisely before adding them to your piping bags, ensuring your easy cake decorating techniques result in beautifully colored blossoms.
Mastering Basic Buttercream Flower Techniques: A Step-by-Step Approach
Practice Makes Perfect: Practicing on Parchment Paper
Before you start piping directly onto your cake, practicing on a flat surface covered with parchment paper is highly recommended. This low-stakes environment allows you to get a feel for the piping bag, tip, and buttercream consistency without the pressure of potentially messing up your finished cake. Simply place squares or strips of parchment paper on a baking sheet or cutting board.
Pipe various shapes and flowers onto the parchment paper. Observe how the buttercream behaves – is it too soft and spreading? Too stiff and breaking? Are your petals consistent?
Practice applying even pressure and controlling the speed at which you move the bag. Once you've piped a few flowers, you can gently slide the parchment paper onto a flat surface in the refrigerator to chill the practice flowers. After they firm up, you can easily lift them off the paper with a palette knife. This practice allows you to refine your technique and troubleshoot issues, making the actual cake decorating feel much more like easy cake decorating techniques.
Piping Roses: A Classic Buttercream Flower
The buttercream rose is a classic and surprisingly accessible flower for beginners to learn using easy cake decorating techniques. You'll typically use a petal tip (like #104 or #127) and a flower nail. Start by piping a small cone of buttercream in the center of the flower nail – this forms the base. Place the petal tip against the cone with the wider end down and the narrower end pointing slightly upwards.
Pipe the first petal around the cone, starting at the base and swirling upwards, overlapping slightly where you started. This forms the central bud. For subsequent petals, position the tip with the wide end touching the base of the bud and the narrow end angled outwards. Pipe a curved petal, rotating the flower nail as you go, overlapping each new petal slightly over the previous one.
Use increasing pressure as you move outwards for larger petals. Continue adding layers of petals until your rose is the desired size. Chill the piped rose before transferring it to the cake with a palette knife.
Piping Hydrangeas: Creating Clusters of Delicate Blooms
Buttercream hydrangeas are one of the simplest and most effective easy cake decorating techniques for adding volume and color to a cake quickly. You don't need a flower nail for these. Simply fill a piping bag fitted with a small open star tip (like Wilton #16 or #18) or a small closed star tip (like #21).
To pipe a single hydrangea bloom, hold the piping bag perpendicular to the cake surface. Pipe small clusters of stars or rosettes close together, varying the angle slightly for a more natural look. You can pipe individual dots or tiny pulled stars – it depends on the tip shape.
Build up the cluster, filling in gaps until it resembles a fluffy hydrangea head. Using two or three shades of the same color (e.g., light blue, medium blue, dark blue) in the same bag or piping different colored clusters side-by-side adds depth and realism. This technique is incredibly forgiving and allows you to cover large areas of a cake with beautiful color and texture using relatively easy cake decorating techniques.
Piping Daisies: A Simple and Cheerful Flower
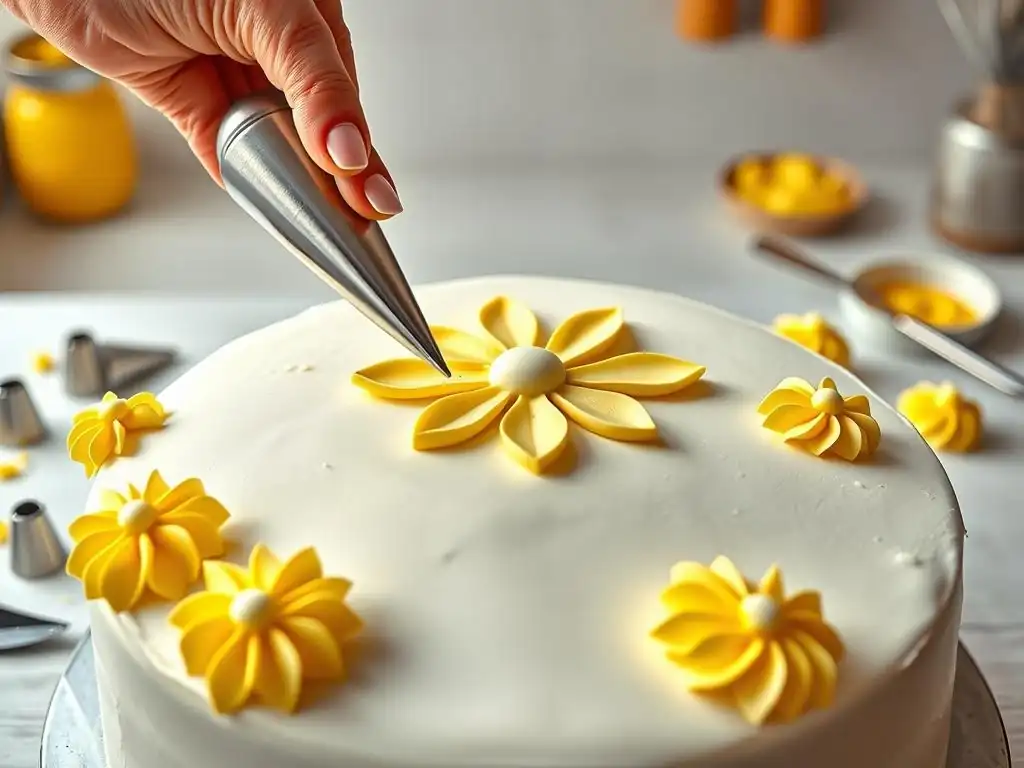
Buttercream daisies are wonderfully simple flowers perfect for beginners practicing easy cake decorating techniques. You'll need a small round tip (like #3 or #4) for the center and a small petal tip (like #101 or #104) for the petals. Start by piping a small dot or mound of yellow buttercream on the cake surface using the round tip for the flower's center.
Next, switch to your petal tip (or use a separate bag with white or colored buttercream). Position the tip with the wide end touching the edge of the center dot and the narrow end pointing outwards. Apply steady pressure and pull the tip straight outwards for a short distance, then release pressure as you pull away, creating a single petal shape.
Repeat this process around the central dot, spacing the petals evenly. You can pipe two layers of petals for a fuller look, piping the second layer in the gaps between the first. This straightforward method makes piping cheerful daisies a truly easy cake decorating technique.
Piping Leaves: Adding Finishing Touches
Adding leaves around your buttercream flowers is a crucial step that brings the floral arrangement to life. Leaves fill in gaps, add contrasting color, and make the flowers look more natural. You'll need a leaf tip (like Wilton #67, #68, #70, or #352). These tips have a V-shaped opening.
To pipe a leaf, hold the piping bag fitted with a leaf tip at a slight angle to the cake surface. Position the tip where you want the base of the leaf to be. Apply steady pressure, allowing the buttercream to fan out and form the width of the leaf. As you pull the bag away, gradually decrease pressure and lift, creating a pointed tip.
Some leaf tips have a serrated edge that automatically creates a vein down the center when piped with consistent pressure. Practice varying the length and angle of your leaves to create a natural look. Adding leaves is one of the most satisfying easy cake decorating techniques that instantly enhances your floral designs.
Easy Buttercream Flower Cake Decorating Ideas
Creating a Floral Wreath on a Cake
One of the most popular and easy cake decorating techniques using buttercream flowers is creating a floral wreath. This involves piping flowers and leaves in a circular pattern, typically around the top edge of the cake, but it can also be done around the base or even around a central design element. Start by lightly marking a circle on the cake surface as a guide, perhaps using a clean compass or the edge of a smaller cake pan.
Begin piping your larger flowers (like roses or daisies) along the guideline, spacing them out. Then, pipe smaller flowers (like hydrangeas or small blossoms) and leaves to fill in the gaps and connect the larger flowers. You can vary the colors and types of flowers for a lush, garden-like effect, or stick to a few types for a more structured look. Ensure some leaves and smaller elements overlap the edge of the cake slightly to create dimension. This design is visually striking yet achievable using basic piping skills, making it a fantastic example of easy cake decorating techniques.
Piping a Bouquet on a Cake
Piping a buttercream flower bouquet is another beautiful and relatively easy cake decorating technique. Instead of distributing flowers evenly, you cluster them together in one area of the cake, mimicking a hand-held bouquet. This works well on the top surface or even cascading down the side of a tiered cake.
Decide where you want your bouquet positioned. Start by piping your largest flowers first in the central area of your intended bouquet. Then, add medium-sized flowers around them. Fill in the remaining spaces with smaller blossoms, buds, and plenty of leaves.
You can vary the height of the flowers slightly by piping them on small mounds of buttercream to add depth. The goal is to create a natural, slightly asymmetrical arrangement that looks like it was just placed on the cake. This technique allows you to focus your piping efforts on one section, making it more manageable for beginners exploring easy cake decorating techniques.
Adding Individual Flowers as Accents
Sometimes, less is more. Simply adding a few individual buttercream flowers as accents is an elegant and incredibly easy cake decorating technique. Instead of covering the entire cake or creating a large arrangement, pipe a few well-placed flowers strategically on the cake surface.
You could place a single large rose in the center of a small cake, add three or five evenly spaced blossoms around the top edge, or pipe a trailing vine with a few flowers down the side. This method highlights the beauty of the individual flowers and requires fewer piped elements overall. It's perfect for when you want a touch of floral decoration without committing to a full floral design. Adding individual flowers is perhaps the most straightforward of the easy cake decorating techniques for blossoms, offering a quick way to personalize any cake.
Troubleshooting Buttercream Flower Piping Issues
Buttercream Too Soft or Too Stiff
Encountering issues with buttercream consistency is common when learning easy cake decorating techniques, especially flower piping. If your buttercream is too soft, your piped flowers will lack definition, appear flat, and might even collapse or slide off the cake. This is often due to the buttercream being too warm or having too much liquid added.
The quickest fix is to chill the buttercream. Place the bowl (or even the filled piping bag) in the refrigerator for 10-20 minutes, then re-mix it. If it's still too soft, beat in a tablespoon or two of extra powdered sugar until it reaches a pipeable consistency.
Conversely, if your buttercream is too stiff, it will be hard to squeeze through the tip, might cause your bag to burst, and the piped shapes will look jagged or broken. This usually means it's too cold or has too much powdered sugar. Let the buttercream sit at room temperature for a few minutes to soften slightly.
If needed, beat in a very small amount of liquid (like 1/2 teaspoon of milk or cream) at a time until it becomes smooth and flows easily. Getting the consistency just right makes easy cake decorating techniques like piping flowers much more successful and less frustrating.
Flowers Falling Apart
It can be disheartening when your beautifully piped buttercream flowers fall apart, either on the flower nail, during transfer, or even after being placed on the cake. This issue is almost always related to the buttercream's consistency or temperature. If the buttercream is too soft, the petals won't hold their shape and the flower structure will be weak, causing it to fall apart, especially larger flowers built layer by layer.
Ensure your buttercream is stiff enough to hold its shape. When piping flowers on a flower nail, it's crucial to chill them thoroughly before attempting to transfer them. Pipe the flower, then place the flower nail with the flower attached into the refrigerator or freezer for 5-10 minutes until the buttercream is firm. This makes the flower stable enough to be lifted off the nail with a palette knife without collapsing.
If flowers are falling off the cake, the cake surface might be too cold (causing condensation) or the buttercream is too soft. Ensure the cake surface is not wet and the flowers are firm before placement. Patience and proper chilling are key to preventing this common problem when using easy cake decorating techniques.
Uneven Petals and Shapes
Achieving consistent, evenly shaped petals and overall flower shapes can be a challenge when first learning easy cake decorating techniques. Uneven results are typically caused by inconsistent pressure on the piping bag, varying the angle of the tip, or inconsistent speed of movement. For instance, when piping a rose petal, if you squeeze harder in one spot or move the bag too quickly or slowly, the petal will be unevenly thick or shaped.
The solution here is primarily practice and muscle memory. Start by piping on parchment paper, focusing on applying steady, even pressure. Try to maintain a consistent angle for your piping tip relative to the surface (the flower nail or cake). Pay attention to the speed at which you move the bag and rotate the flower nail. Watching video tutorials can also be very helpful to see the correct hand movements and angles. Don't expect perfection immediately; consistency comes with repetition. The more you practice these easy cake decorating techniques, the more uniform your piped flowers will become.
Advanced Buttercream Flower Techniques: Taking Your Skills Further
Piping Peonies: Creating Complex and Layered Flowers
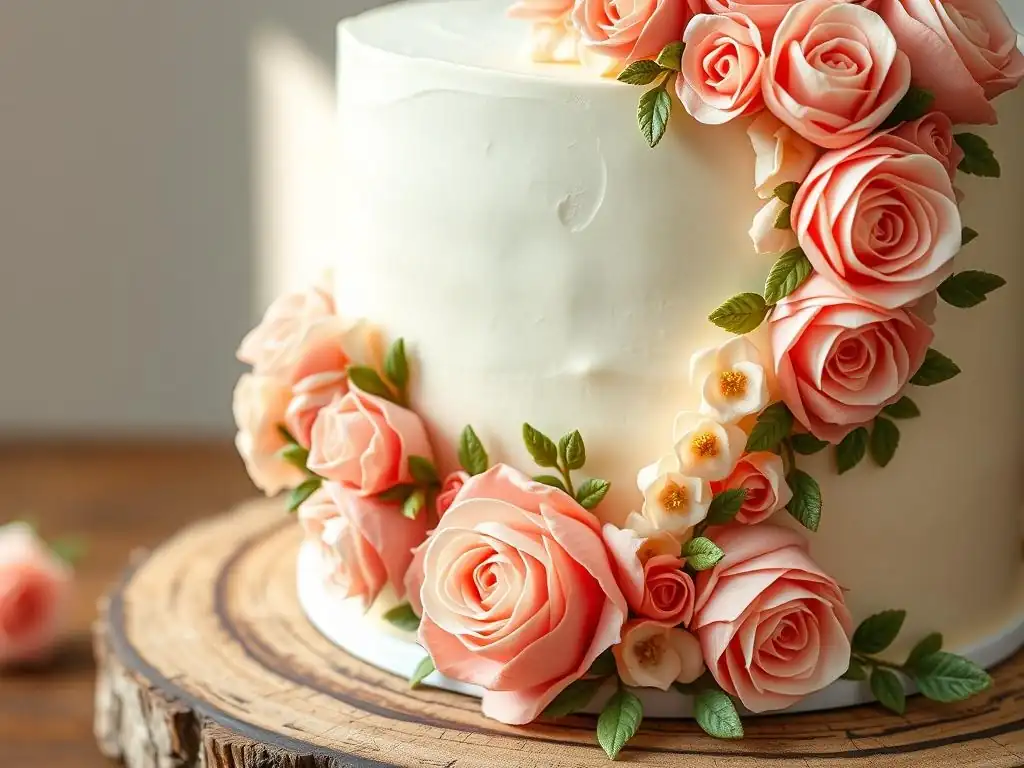
Once you've mastered basic flowers like roses and hydrangeas using easy cake decorating techniques, you might be ready to tackle more complex blooms like buttercream peonies. Peonies require building up multiple layers of delicate, ruffled petals. You'll typically use a large petal tip (like #127 or #150) and a flower nail. Start with a small base or cone, then pipe a few upright, cupped petals around the center.
For the outer layers, the petals become larger and more open. You often pipe these petals by holding the tip with the wide end towards the base and the narrow end angled outwards, wiggling the tip slightly as you pipe to create ruffles. Each layer of petals overlaps the previous one, gradually getting larger and more horizontal. Piping peonies requires more control over pressure and angle to achieve the characteristic full, blousy look. It's a step up from the most easy cake decorating techniques, but very rewarding.
Piping Ranunculus: Delicate and Romantic Blooms
Buttercream ranunculus are another beautiful, slightly more advanced flower that builds upon basic piping skills. These flowers are characterized by many tightly packed, curved petals that spiral outwards from a central point. They can be piped using a medium-sized petal tip (like #104).
Similar to peonies, you start with a small cone base on a flower nail. Begin piping small, tightly curved petals around the top of the cone, keeping them close together. As you work outwards, the petals become slightly larger and more open, still maintaining a curved shape. The key is the spiral arrangement and the delicate curve of each petal. Achieving the full, layered effect requires patience and consistent piping. While not among the absolute easy cake decorating techniques for beginners, piping ranunculus is a fantastic goal to work towards as you build your skills.
Incorporating Different Colors and Textures
Taking your buttercream flower piping skills further also involves experimenting with color and texture. Instead of using a single solid color for a flower, try piping petals with two or more colors in the same bag. This can be achieved by striping the inside of the piping bag with different colors before adding the main color or by loading the bag with swirls of different hues. This technique creates beautiful variegated or shaded petals.
Exploring different piping tips beyond the standard petal and star tips can add interesting textures. Ruffle tips, basketweave tips, or even round tips can be used to create unconventional flower shapes or textures within your floral arrangements. Combining different types of flowers and leaves, varying their sizes, and arranging them in dynamic ways also adds complexity and visual interest to your cake designs. These techniques build upon the foundation of easy cake decorating techniques and open up a world of creative possibilities.
Buttercream Flower Inspiration: Examples of Stunning Floral Cakes
- [Placeholder for photo gallery link as per structure, omitted as per instructions]
Conclusion: Embrace the Art of Buttercream Flower Piping
Recap of Essential Tips
Mastering buttercream flower piping is a journey that starts with foundational easy cake decorating techniques. Remember the key elements: use the right tools (bags, tips, flower nail, palette knife, couplers), prepare your buttercream to the correct stiff-but-pipeable consistency, and use gel colors for vibrant hues without adding excess moisture. Practice is your best friend – spend time piping on parchment paper before attempting your final cake. Remember to chill piped flowers before transferring them, especially those made on a flower nail.
Encouragement to Practice and Experiment
Don't be discouraged if your first attempts aren't perfect. Buttercream flower piping, like any skill, improves with practice. Start with simple flowers like daisies or hydrangeas, then move on to roses. Experiment with different tips, colors, and arrangements. Try creating a simple floral wreath or a small bouquet using your newfound easy cake decorating techniques. Each flower you pipe builds muscle memory and confidence. Embrace the process, have fun with it, and soon you'll be creating beautiful, edible floral art on your cakes that will impress everyone.
Frequently Asked Questions
What are some easy cake decorating techniques for writing on cakes that beginners can use?
Beginners can use simple techniques like piping with buttercream using a star tip or tracing stencils with edible markers. Alternatively, sprinkling edible glitter over a template can also create a beautiful effect.
What kind of frosting is best for writing on cakes?
Buttercream frosting is generally considered the best for writing on cakes because of its smooth consistency and ability to hold its shape. Royal icing is also a good choice for finer details, but it dries hard.
What tools do I need to write on a cake effectively?
You'll need a piping bag, a small round piping tip, and the frosting of your choice. Optional tools include edible markers and stencils for guidance.
How can I prevent my writing from smudging on the cake?
Ensure the cake's surface is smooth and slightly chilled before writing. Avoid pressing too hard with the piping bag or marker. Practice on parchment paper first to perfect your technique.
How do I correct mistakes when writing on a cake?
For buttercream, use a small offset spatula to carefully scrape off the mistake and re-smooth the area. For royal icing, it's more difficult to correct, so plan your design carefully beforehand.
Final Reflection: The Sweet Art of Simple Decoration
The accessibility of cake decorating is surprisingly empowering. It's not just about creating visually stunning desserts; it's about unlocking creativity and finding joy in the process, regardless of skill level. This article explored basic techniques, proving that even beginners can achieve impressive results with a little patience and practice. The beauty lies not in perfection, but in the personal touch.
The impact of simple cake decorating extends beyond the kitchen. It fosters a sense of accomplishment and allows for personalized expressions of love and celebration. From birthdays to holidays, a homemade cake, however simply decorated, carries a unique weight of sentiment. The best things in life are homemade,
a sentiment that rings especially true when considering the joy of creating something beautiful and delicious with your own hands. This simple act connects us to traditions, memories, and the people we share our creations with.
Now, it's your turn. Don't be intimidated by the seemingly complex world of cake decorating. Pick up a piping bag, gather your favorite frosting, and experiment! Let this article be your springboard to unleash your inner artist. Embrace the imperfections, celebrate the successes, and most importantly, enjoy the sweet journey of creating beautiful cakes, one simple technique at a time.
Unleash Your Inner Cake Artist!
Thanks for taking the time to explore the wonderful world of cake decorating with us! We hope you've gained some valuable tips and tricks to get you started on your baking journey. Now it's time to put your new knowledge into practice.
- Dive straight into your first project! Choose a simple design from the article and bake your masterpiece. Don't be afraid to experiment and have fun with it!
- Share your creations! Post a picture of your cake on social media using #BakeWithEase and tag us – we’d love to see your work!
- Challenge yourself: Try a slightly more advanced technique from the article next time you bake, and see what incredible things you can achieve.
Ready to transform your kitchen into a cake-decorating haven? What's the first cake design you're going to tackle?