
Working with Chocolate Shavings: Easy Side Decor

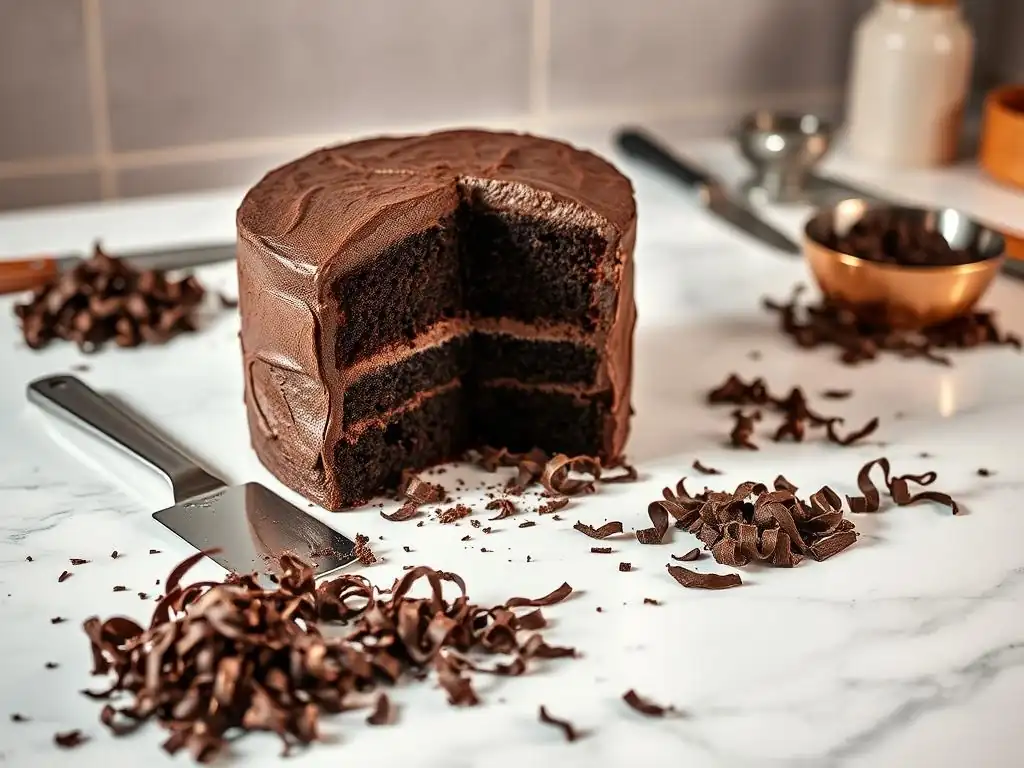
Welcome to BakeWithEase, your companion on the journey to baking bliss! Ever wondered how to elevate your desserts with those elegant chocolate shavings you see in bakeries? It's easier than you think. We'll walk you through easy chocolate shaving techniques to add a professional touch to your cakes and pastries. Intrigued? Let's unlock the secrets to perfect chocolate shavings, even if you're just starting out. Read on to discover how you can effortlessly create stunning side decor!
- Working with Chocolate Shavings: Easy Side Decor for Cakes
- Introduction to Chocolate Shavings for Cake Decorating
- Essential Tools and Chocolate Types for Perfect Shavings
- Easy Chocolate Shaving Techniques: Step-by-Step Guide
- Applying Chocolate Shavings to Your Cake: A Decorating Guide
- Troubleshooting Common Chocolate Shaving Problems
- Advanced Chocolate Shaving Techniques
- Conclusion: Mastering Easy Chocolate Shaving Techniques for Stunning Cakes
-
Frequently Asked Questions
- How do I choose the best chocolate for making shavings?
- What tools are recommended for creating easy chocolate shavings?
- How can I ensure my chocolate shavings don't melt while I'm working with them?
- What are some creative ways to use chocolate shavings for cake decoration?
- Can I store leftover chocolate shavings?
- Final Reflection: The Enduring Allure of Simple Elegance
- Unleash Your Inner Pastry Artist: Elevate Your Baking!
Working with Chocolate Shavings: Easy Side Decor for Cakes
Introduction to Chocolate Shavings for Cake Decorating
Elevate Your Cakes with Simple Chocolate Shaving Techniques
Transforming a simple cake into a stunning centerpiece doesn't require advanced piping skills or intricate fondant work. One of the most accessible and visually appealing methods for enhancing a cake's appearance is using chocolate shavings. These easy chocolate shaving techniques allow even novice bakers to add a touch of elegance and professionalism to their creations with minimal effort and readily available tools. It's a quick way to add texture, richness, and that irresistible chocolate flavor to the exterior of your baked goods.
Consider the impact: a plain frosted cake, while delicious, can look quite basic. By spending just 10-15 minutes implementing simple chocolate shaving techniques, you can create a side decor that suggests hours of detailed work. This method is particularly effective for cakes covered in buttercream or ganache, as these surfaces provide the perfect base for the shavings to adhere to. The contrast in texture between smooth frosting and delicate shavings adds significant visual interest, making your cake stand out on any dessert table.
Why Choose Chocolate Shavings? Versatile and Elegant Cake Decoration
Chocolate shavings offer unparalleled versatility in cake decoration. They can be applied densely for full coverage, sprinkled lightly for a dusting effect, or even used to create patterns. Unlike more complex decorations that require specific tools or expertise, achieving beautiful results with chocolate shavings is straightforward. They work equally well on elegant tiered wedding cakes, casual birthday cakes, or simple loaf cakes, adapting to various styles and occasions.
Beyond their ease of use, chocolate shavings are inherently elegant. The way they catch the light and the rich, varied tones of different chocolate types add a sophisticated touch. Furthermore, they provide an extra layer of flavor that complements almost any cake and frosting combination, from classic vanilla bean to rich red velvet or even zesty lemon.
A standard 8-inch round cake, for example, might require approximately 100-150 grams of chocolate to cover the sides generously with shavings, a relatively small amount for such a dramatic effect. This cost-effectiveness, combined with the simple process, makes easy chocolate shaving techniques a go-to method for bakers looking to elevate their creations effortlessly.
Essential Tools and Chocolate Types for Perfect Shavings
Choosing the Right Chocolate for Shaving: A Guide
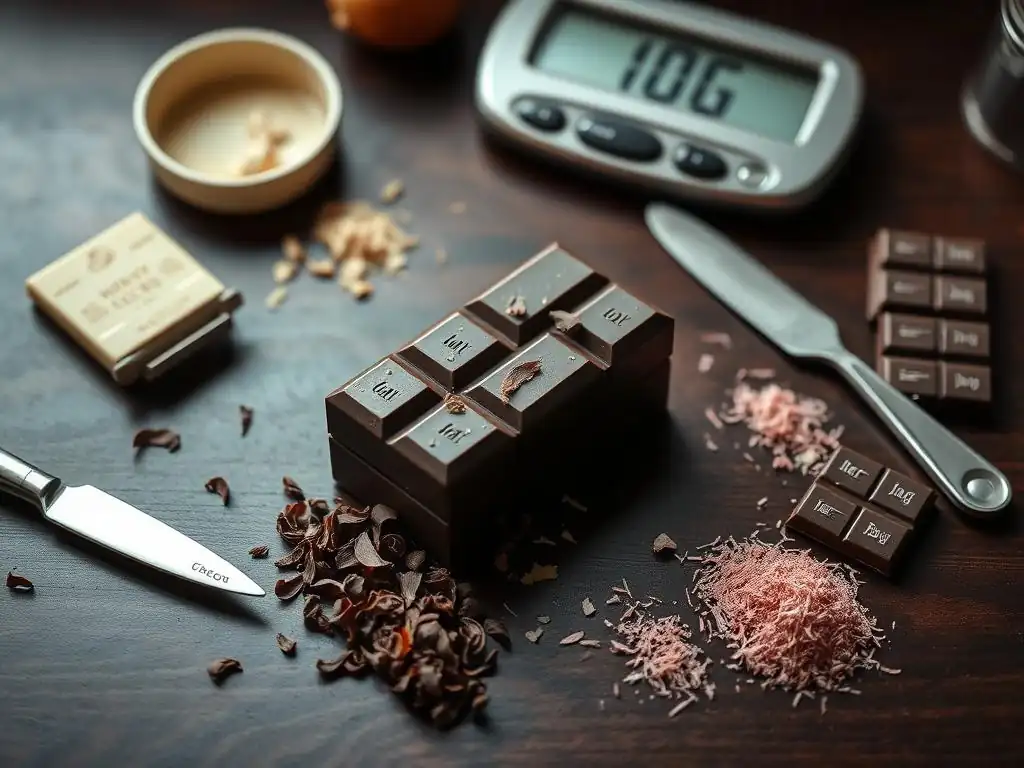
Selecting the appropriate type and quality of chocolate is crucial for successful shaving. Not all chocolates behave the same way when scraped or peeled. Generally, chocolate with a higher cocoa butter content tends to produce better shavings or curls because it has a firmer structure and a cleaner break. Couverture chocolate, known for its high cocoa butter percentage (typically 32-39% or higher), is often recommended by professionals for its superior melting and working properties, making it ideal for easy chocolate shaving techniques.
However, you don't necessarily need expensive couverture to get good results. High-quality baking bars or even premium chocolate chips (though chips can be harder to shave due to their shape) can work well, provided they are firm and not too soft. For example, a good quality dark chocolate bar with around 60-70% cocoa content will usually yield crisp, beautiful shavings. Milk and white chocolate can also be used, but they are often softer due to higher sugar and milk solid content, requiring them to be very cold to achieve clean shavings without melting or smudging.
Dark, Milk, or White Chocolate?
The choice between dark, milk, or white chocolate depends on the desired color, flavor, and ease of handling.
- Dark Chocolate: Generally the easiest to shave due to its firmness. It provides a rich, intense flavor and a deep, appealing color contrast against lighter frostings. A dark chocolate with 65% cocoa solid content, when properly chilled, will produce excellent, crisp shavings.
- Milk Chocolate: Softer than dark chocolate, requiring colder temperatures to shave cleanly. It offers a classic, creamy flavor that is widely loved and a lighter brown color. Milk chocolate with around 30-40% cocoa solids needs to be quite firm for best results.
- White Chocolate: The softest of the three, posing the biggest challenge for achieving perfect shavings without melting. It has a sweet, creamy flavor and a pale color that can be striking. White chocolate, which contains cocoa butter but no cocoa solids, often requires the most chilling.
Using a mix of these can add visual depth and flavor complexity to your cake sides. For instance, combining dark and white chocolate shavings creates a beautiful contrast.
Tempering Chocolate for Optimal Shaving Results
While not strictly mandatory for all easy chocolate shaving techniques, tempering chocolate significantly improves the quality and stability of the shavings, especially for curls. Tempered chocolate has a stable crystalline structure, meaning it sets firmly, has a beautiful sheen, a good snap, and is resistant to melting at room temperature. This makes it much easier to handle and shave without it smudging or melting in your hands as you work.
Untempered chocolate, when melted and simply cooled, can be dull, soft, and prone to melting quickly, making it challenging to create defined shavings or curls. For simple, quick shavings using a peeler or shaver, you can often get away with just chilling the chocolate bar very well.
However, if you're aiming for distinct curls with a knife or want shavings that hold their shape well on a cake at room temperature, taking the extra step to properly temper your chocolate (using methods like seeding or tabling) is highly recommended. This ensures your easy chocolate shaving techniques yield professional-looking results that last.
Must-Have Tools for Creating Chocolate Shavings
Creating chocolate shavings is surprisingly simple and can be done with tools you likely already have in your kitchen. The choice of tool often dictates the style and size of the shavings you produce, from fine dust-like particles to substantial curls. Understanding how each tool works best with chocolate will help you select the right one for your desired cake decoration effect.
The three most common and effective tools for easy chocolate shaving techniques are a dedicated chocolate shaver, a standard vegetable peeler, and a sharp chef's knife. Each offers a different approach and result, allowing you to experiment and find the method that suits your skill level and the specific look you're trying to achieve for your cake sides. Having your chocolate properly chilled is key, regardless of the tool you choose.
Chocolate Shaver, Vegetable Peeler, or Knife?
Let's look at the pros and cons of each tool for creating chocolate shavings:
- Chocolate Shaver: Designed specifically for creating delicate, fine shavings, often resembling grated cheese. It typically involves rubbing a block of chocolate against a blade. This tool is excellent for creating a uniform, snow-like covering on cake sides.
- Vegetable Peeler: A readily available kitchen tool that is surprisingly effective for making slightly wider, flatter shavings or ribbons. Simply run the peeler along the side of a chocolate block. This is perhaps one of the easiest chocolate shaving techniques for beginners, offering quick results.
- Knife: A sharp chef's knife is used to scrape across the flat surface of a chocolate bar to create curls. This technique requires a bit more practice and control but yields beautiful, dramatic chocolate curls that add significant height and texture. Using a knife is essential if you want those classic spiral curls.
Your choice depends on the desired look. For fine, even coverage, a shaver is best. For quick, slightly larger flakes, a peeler is ideal. For elegant curls, a knife is necessary.
Preparing Your Workspace for Easy Chocolate Shaving
Preparation is key to making easy chocolate shaving techniques even smoother and preventing a messy cleanup. Before you start shaving, designate a clean, cool workspace. Chocolate is sensitive to heat, so avoid working near a warm oven or in direct sunlight. Having a chilled surface, such as a marble slab or even a baking sheet placed in the freezer for a few minutes, can be beneficial, especially when working with milk or white chocolate.
Lay down parchment paper or wax paper on your workspace. This provides a non-stick surface for the shavings to land on and makes gathering them incredibly easy. Once you've created your desired amount of shavings, you can simply lift the paper and funnel the shavings directly onto your cake or into a storage container. Ensure your chocolate is properly chilled (usually 20-30 minutes in the refrigerator for a standard bar) before you begin, as this firm texture is essential for creating clean, defined shavings or curls rather than a smudgy mess.
Easy Chocolate Shaving Techniques: Step-by-Step Guide
Achieving beautiful chocolate shavings for your cake sides is simpler than you might think. These techniques are designed to be accessible, allowing you to quickly master the art of transforming a chocolate bar into elegant decor. Remember, the key to success lies in working with well-chilled chocolate and using a steady hand.
We'll cover the three primary methods using different tools, detailing the steps to achieve various types of shavings and curls. Whether you prefer a fine dusting, delicate flakes, or dramatic curls, there's an easy chocolate shaving technique here for you. Practice makes perfect, but you'll likely get lovely results on your first try!
Technique 1: Using a Chocolate Shaver for Fine Shavings
Using a dedicated chocolate shaver is one of the most straightforward methods for producing consistent, fine chocolate shavings. This tool is designed for efficiency and ease, making it perfect for covering large areas of a cake quickly. The resulting shavings are light and delicate, creating a soft, uniform texture on your cake's sides.
This technique works best with a solid block of chocolate rather than a thin bar. The larger surface area allows the shaver to glide smoothly and produce more volume of shavings efficiently. Aim to work relatively quickly to prevent the chocolate from warming up too much from the heat of your hands or the friction of the shaving process.
Preparing the Chocolate Block for the Shaver
To prepare your chocolate for shaving with a specialized shaver, start with a substantial block of chocolate. A block weighing 200-300 grams is ideal. If you only have bars, you might need to stack them or use multiple bars. Ensure the chocolate is thoroughly chilled – at least 30 minutes in the refrigerator, or even 10-15 minutes in the freezer if time is short. The colder the chocolate, the firmer it will be, leading to cleaner, finer shavings instead of a paste.
Hold the chocolate block firmly in one hand. Position the chocolate shaver's blade against one of the flat surfaces of the block. You want to apply firm, even pressure as you move the shaver. Some shavers have adjustable blades that allow you to control the thickness of the shavings; if yours does, experiment to find your preferred setting.
Achieving Consistent and Delicate Chocolate Shavings
To achieve consistent and delicate chocolate shavings using a shaver, hold the chocolate block steady over your prepared surface (parchment paper works well). Gently but firmly draw the shaver across the surface of the chocolate, allowing the fine shavings to fall onto the paper below. Use long, smooth strokes for the most uniform results.
As you shave, you might notice the chocolate warming up slightly. If the shavings start to become clumpy or smeary, stop and return the chocolate block to the refrigerator for a few minutes to re-chill. Continue shaving until you have the desired amount of fine chocolate decor for your cake sides. This method is excellent for creating a dense, all-over coating that resembles velvety chocolate moss or fine sawdust.
Technique 2: Creating Shavings with a Vegetable Peeler
A vegetable peeler is a surprisingly effective and incredibly easy tool for creating chocolate shavings. It produces wider, flatter shavings or ribbons compared to a dedicated shaver. This method is fast, requires no special equipment beyond a standard kitchen peeler, and is perfect for getting lovely chocolate flakes to adorn your cake.
This technique is particularly well-suited for using standard chocolate bars. The shape of the bar works perfectly with the peeler's design, allowing you to quickly run it down the length of the chocolate to produce beautiful, irregular flakes that add wonderful texture to cake sides.
Best Practices for Using a Vegetable Peeler on Chocolate
For best results using a vegetable peeler, start with a well-chilled bar of chocolate. Holding the chocolate bar firmly in one hand, position the vegetable peeler at one end of the bar, along the longest edge. Apply steady, even pressure and draw the peeler down the length of the chocolate bar, away from your hand holding the bar. The chocolate will curl or flake off as you peel it, landing on your prepared surface.
Angle the peeler slightly to vary the width and curl of the shavings. Running the peeler flat against the chocolate will yield wider, flatter flakes, while holding it at a steeper angle can create more curled ribbons. Work quickly and deliberately. If the chocolate starts to get too warm from the heat of your hand, or if the peeler begins to drag and smudge the chocolate, place the bar back in the refrigerator for a few minutes to firm up before continuing.
Varying Shaving Thickness for Different Cake Designs
One of the advantages of using a vegetable peeler is the ability to easily vary the thickness and shape of the chocolate shavings. By adjusting the pressure and angle of the peeler against the chocolate bar, you can create different textures for your cake sides. Applying light pressure with the peeler held almost flat will produce delicate, thin flakes. Increasing the pressure and holding the peeler at a slightly steeper angle will result in thicker, more substantial shavings or even small curls.
Experimenting with these variations allows you to customize the look of your cake decor. Thinner shavings are great for a subtle, textured look, while thicker flakes add a more rustic or dramatic element. You can even combine different thicknesses on the same cake for a dynamic effect. Using easy chocolate shaving techniques with a peeler is all about exploring the possibilities with a simple tool.
Technique 3: Mastering the Knife Technique for Chocolate Curls
Creating elegant chocolate curls with a knife might seem intimidating, but it's an easy chocolate shaving technique that yields stunning results with a little practice. This method produces the most dramatic and visually appealing form of chocolate shavings – beautiful, spiraling curls that add height and sophistication to your cake sides. It's the technique most often used for classic cake decorations featuring chocolate curls.
Success with the knife technique relies heavily on the temperature of the chocolate. It needs to be slightly warmer than refrigerated, but not soft or melted. Think cool room temperature, maybe around 68-72°F (20-22°C). If the chocolate is too cold, it will simply break into shards; if it's too warm, it will smudge. Tempered chocolate works best for this technique for maximum shine and stability.
Achieving Dramatic Chocolate Curls with a Knife
To create dramatic chocolate curls, start with a block or thick bar of chocolate that has been brought to the ideal temperature – not too cold, not too warm. Place the chocolate on a flat, stable surface. Hold the chocolate firmly with one hand. Take a large, sharp chef's knife and hold the blade almost parallel to the surface of the chocolate block.
Using the edge of the blade, scrape it firmly across the surface of the chocolate, pushing away from yourself. The chocolate should curl up as the blade passes over it. The angle of the blade and the pressure you apply will determine the size and tightness of the curl. A steeper angle and more pressure tend to produce tighter, smaller curls, while a flatter angle and lighter pressure can create larger, looser curls. Practice on a small piece first to get the feel for it.
Safety Tips for Working with Chocolate and a Knife
Working with a sharp knife requires caution, especially when combined with a potentially slippery surface like chocolate. Always prioritize safety when using this easy chocolate shaving technique.
- Ensure your knife is sharp. A sharp knife is safer than a dull one because it requires less force to cut or scrape, reducing the chance of slipping.
- Use a stable cutting surface. Place the chocolate on a non-slip cutting board.
- Keep your fingers out of the path of the blade. Hold the chocolate block securely but keep your fingers well above or to the side of where the blade is scraping.
- Scrape away from yourself. Always push the knife blade away from your body.
- Work slowly and deliberately. Don't rush the process.
By following these safety tips, you can confidently master the knife technique for creating beautiful chocolate curls for your cake sides.
Applying Chocolate Shavings to Your Cake: A Decorating Guide
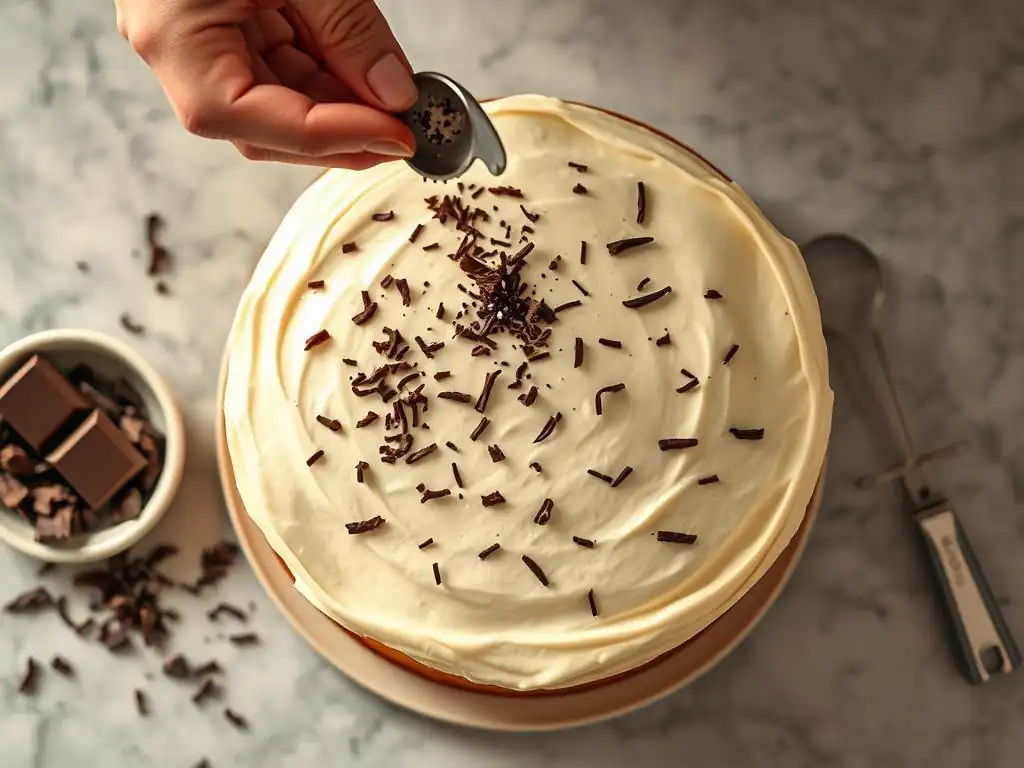
Once you've mastered the easy chocolate shaving techniques and created a beautiful pile of dark, milk, or white chocolate shavings, the next step is applying them to your cake. This is where your simple decor comes to life, transforming your cake's appearance. The process is straightforward, especially when working with a cake that has a slightly sticky or soft frosting.
The goal is often to get the shavings to adhere smoothly and evenly to the sides of the cake, creating a finished, professional look. However, you can also use them to create more textured or patterned effects, adding another layer of interest to your design. Preparation and a gentle touch are key to successful application.
Preparing Your Cake for Chocolate Shaving Decoration
The cake needs a surface that the chocolate shavings can stick to. The most common and effective base is a layer of buttercream, ganache, or cream cheese frosting. This frosting should ideally be slightly soft or "tacky" – not completely set or crusty – so the shavings can embed slightly and hold firmly. If your frosting has crusted over, you can gently warm the sides of the cake with your hands or a warm offset spatula for a moment to make the surface receptive again.
Ensure the sides of your cake are relatively smooth if you're aiming for a uniform layer of shavings, or leave them textured if you want a more rustic look. Place the cake on a cake board or stand, ideally one that is slightly smaller than the cake itself, or use a cake stand with a lip to catch excess shavings. Having your prepared chocolate shavings on a piece of parchment paper nearby will make the application process much easier.
Attaching Chocolate Shavings to the Sides of Your Cake
Attaching the chocolate shavings is typically done by gently pressing them onto the frosted sides of the cake. This can be done using your hands, a bench scraper, or even the piece of parchment paper you collected the shavings on. The method you choose depends on the type of shaving and the desired coverage.
For fine shavings created with a shaver or peeler, gathering a pile of shavings on your parchment paper is efficient. Then, carefully lift the paper and bring it up to the side of the cake, gently pressing and rolling the cake side against the paper to adhere the shavings.
Alternatively, you can scoop up handfuls of shavings and gently press them onto the cake sides with clean hands, rotating the cake as you go. For curls made with a knife, these are often too delicate to press; they are best applied by hand, placing them individually or in small clusters onto the frosting.
Creating a Uniform Chocolate Shaving Layer
To achieve a uniform layer of chocolate shavings covering the entire side of the cake, gather a generous amount of shavings. Place the cake on a turntable if you have one, as this makes rotation easy. If using fine shavings, hold the parchment paper with the shavings against a section of the cake side and gently press the cake into the shavings while rotating the turntable. Repeat until the entire side is covered.
Alternatively, if applying by hand, scoop up a good amount of shavings and, starting from the bottom edge and working upwards, gently press them onto the frosting, ensuring an even distribution. Re-scoop and apply as needed, rotating the cake to cover all sides seamlessly. Don't be afraid to press gently but firmly enough for the shavings to stick. You might need to go back and fill in any sparse spots. A standard 8-inch cake might use around 100-150g of shavings for a full, dense coverage.
Achieving a Textured or Ombre Effect with Chocolate Shavings
Easy chocolate shaving techniques aren't just for uniform coverage; they can also create beautiful textured or ombre effects. For a textured look, simply apply the shavings more randomly, pressing some deeper into the frosting than others, or using a mix of different sized shavings (e.g., fine shavings at the bottom graduating to thicker flakes at the top). You can also use a light touch to sprinkle shavings onto the frosting rather than pressing them in heavily.
To create an ombre effect using different shades of chocolate, you can apply dark chocolate shavings to the bottom third of the cake, milk chocolate to the middle, and white chocolate to the top. Gently blend the edges where the colors meet by lightly pressing them together. This requires a bit more care to keep the sections distinct while ensuring they adhere, but the visual result is stunning. It's a creative way to use easy chocolate shaving techniques for a more artistic finish.
Different Cake Decorating Ideas Using Chocolate Shavings
Once you're comfortable applying chocolate shavings, you can explore various decorative ideas to personalize your cakes. From simple borders to more intricate patterns, shavings offer a flexible medium for creativity.
Think beyond just covering the entire side. Consider using shavings as an accent, a border, or combined with other simple decorating elements. The possibilities are vast, and these easy chocolate shaving techniques can be adapted to suit any cake theme or style.
Simple and Elegant Chocolate Shaving Designs
For a simple yet elegant design, consider applying a band of chocolate shavings around the base of the cake, about 1-2 inches high. This adds a lovely visual weight and texture without covering the entire side. Another easy idea is to cover only the top edge of the cake side, letting the shavings cascade slightly down, creating a subtle, organic look.
You can also combine different types of shavings for a simple pattern. For instance, alternating vertical stripes of dark and white chocolate shavings around the cake side creates a striking, two-tone effect. Or, cover the entire cake side with one type of shaving and then add a simple border of chocolate curls around the base or top edge. These easy chocolate shaving techniques are perfect for adding elegance without complexity.
Creative Chocolate Shaving Patterns and Textures
Get creative with your application to form patterns. While freehand patterns can be tricky on vertical surfaces, you can use stencils or masking techniques. For example, lightly press a stencil against the frosted cake side and then gently press shavings into the open areas of the stencil. Carefully remove the stencil to reveal a patterned area of chocolate shavings.
You can also create interesting textures by varying the density of the shavings. Apply them thickly in some areas and sparsely in others. Another idea is to use a palette knife or offset spatula to create swirls or peaks in your frosting before applying the shavings; the shavings will adhere to the contours, enhancing the textured look. Combining fine shavings with larger flakes or curls on the same cake side also adds visual depth and complexity using easy chocolate shaving techniques.
Troubleshooting Common Chocolate Shaving Problems
Even with easy techniques, you might encounter a few common issues when working with chocolate shavings. Knowing how to troubleshoot these problems will save you frustration and ensure you achieve the beautiful results you're aiming for. The most frequent challenges involve the chocolate melting, breaking, or figuring out how to store leftover shavings.
These problems are usually related to the temperature of the chocolate or the technique being used. A little adjustment often goes a long way in resolving them. Don't get discouraged; these are typical hurdles that every baker faces when starting with easy chocolate shaving techniques.
Preventing Chocolate from Melting During Shaving
The most common problem is the chocolate melting as you work, especially with milk or white chocolate, or if you have warm hands. This results in smudged, greasy streaks instead of clean shavings. The primary solution is temperature control. Ensure your chocolate is thoroughly chilled before you begin – 30 minutes in the refrigerator is usually sufficient for a standard bar.
Work quickly and efficiently. The less time the chocolate is in contact with your warm hands or tool, the less likely it is to melt. If you're working on a large cake or in a warm environment, take breaks to return the chocolate block or bar to the refrigerator for a few minutes to re-chill. You can also try wearing thin disposable gloves to minimize heat transfer from your hands. Keeping your workspace cool also helps significantly in preventing melting while using easy chocolate shaving techniques.
Avoiding Broken or Crumbling Chocolate Shavings
If your chocolate is too cold, instead of shaving or curling cleanly, it will break into small, irregular crumbs and shards. This is common when using the knife technique for curls with overly chilled chocolate. The solution here is to allow the chocolate to warm up slightly from refrigerator temperature before you begin.
If your chocolate is breaking, let it sit at room temperature for 5-10 minutes and try again. You want it to be firm but not brittle. For curls, the chocolate needs a slight give. For fine shavings with a shaver or peeler, a very cold temperature is usually fine, but if you're getting excessive dust rather than delicate flakes, let the chocolate warm up just a touch. Finding that sweet spot for temperature is key to successful easy chocolate shaving techniques.
Storing Chocolate Shavings for Later Use
Sometimes you'll have leftover chocolate shavings, or you might want to prepare them in advance. Proper storage is essential to keep them from melting, clumping, or losing their texture. The best way to store chocolate shavings is in an airtight container at room temperature, away from direct sunlight or heat sources.
If your kitchen is warm, or if you've made shavings from softer chocolate types like milk or white, storing them in the refrigerator is an option. However, be aware that refrigeration can sometimes dull the shine of tempered chocolate and may cause condensation when you take them out, which can affect their texture. If refrigerating, place the container in a zip-top bag to help prevent condensation. Allow refrigerated shavings to come to cool room temperature before using them. Properly stored, chocolate shavings can last for several weeks, ready for your next baking project using easy chocolate shaving techniques.
Advanced Chocolate Shaving Techniques
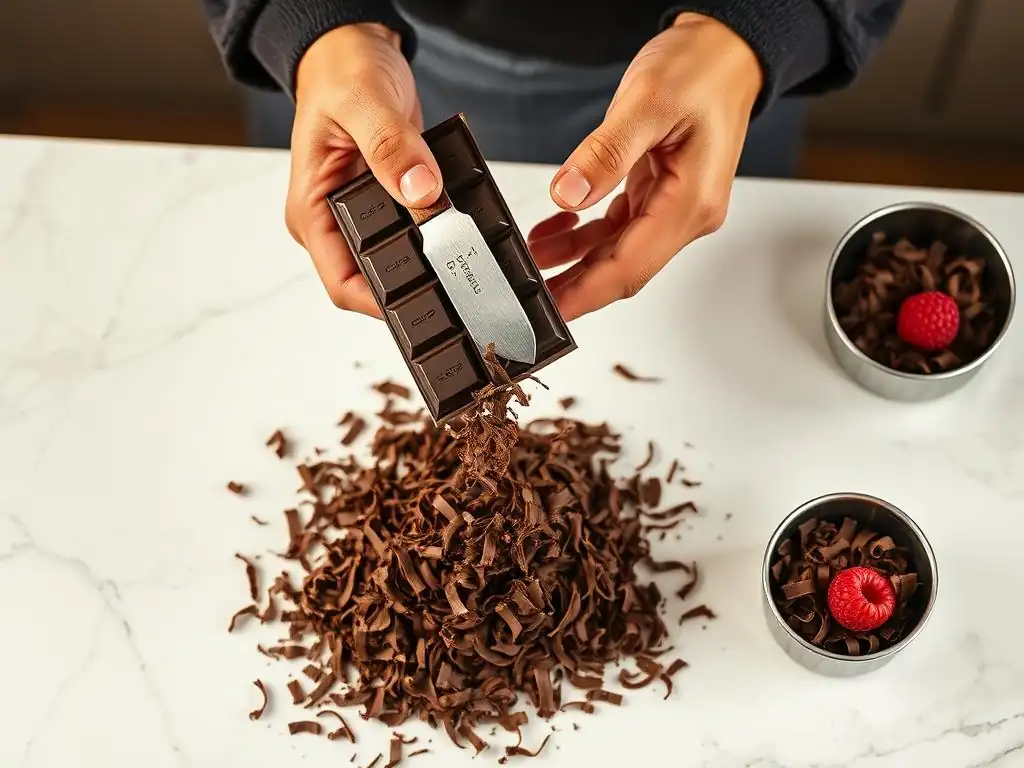
While the basic methods provide a foundation for easy chocolate shaving techniques, there are ways to take your decor a step further. These advanced approaches involve altering the chocolate itself or using the shavings in more creative applications, adding unique flair to your cakes and other desserts.
These techniques build upon the fundamental skills you've learned but introduce new elements like color or combining different forms of chocolate. They are perfect for bakers looking to experiment and push the boundaries of simple chocolate decor.
Creating Colored Chocolate Shavings
Adding color to your chocolate shavings opens up a world of decorative possibilities. This is typically done with white chocolate, as its pale color is easily tinted. You'll need oil-based or special candy food coloring, as water-based food coloring will cause the chocolate to seize and become unusable for shaving.
Melt white chocolate gently (either tempered or untempered, depending on desired stability) and stir in a small amount of oil-based food coloring until you achieve the desired shade. Pour the colored chocolate onto a piece of parchment paper spread thinly, or into a mold to create a block once set. Allow it to cool and solidify completely. Once firm, you can use any of the easy chocolate shaving techniques (shaver, peeler, or knife) on the colored chocolate to create vibrant shavings or curls. This is fantastic for matching cake themes or adding pops of color.
Combining Different Chocolate Types for a Unique Look
Using a mix of dark, milk, and white chocolate shavings creates a visually dynamic and flavorful effect on your cake sides. You can combine them randomly for a marbled or speckled appearance, or apply them in distinct sections or patterns as mentioned earlier (like the ombre effect).
Another approach is to shave different types of chocolate onto the same pile before applying them to the cake. This ensures an even distribution of colors and flavors. For instance, a 50/50 mix of dark and white chocolate shavings creates a striking contrast. Or, use a blend of milk and dark for a softer transition. Experimenting with different ratios and combinations using easy chocolate shaving techniques allows you to create unique and personalized cake decor.
Using Chocolate Shavings for More Than Just Cake Sides
Easy chocolate shaving techniques aren't limited to decorating the sides of a cake. Shavings and curls can be used in numerous ways to enhance the appearance and texture of various desserts. They are a versatile finishing touch that instantly elevates a baked good.
Consider these alternative applications for your chocolate shavings. They can add a simple garnish, provide a textural contrast, or become a key decorative element on smaller treats.
Chocolate Shavings as a Cake Topper
Instead of buying elaborate cake toppers, use your chocolate shavings! A simple mound of chocolate curls piled high in the center of a cake creates a dramatic, edible focal point. You can also sprinkle fine shavings over the entire top surface of a frosted cake for complete coverage, or use a stencil on the cake top to create a specific design or message out of shavings.
For a quick and easy cake topper, arrange chocolate curls artfully around the edge of the cake top, or create a border just inside the perimeter. Combining different sizes and types of curls can add extra visual interest. This is a beautiful and entirely edible way to finish your cake using easy chocolate shaving techniques.
Creating Chocolate Shaving Accents on Cupcakes and Desserts
Chocolate shavings are perfect for decorating smaller individual desserts like cupcakes, brownies, cookies, or even puddings and trifles. A simple sprinkle of fine chocolate shavings over the frosting of a cupcake adds instant appeal and texture.
For a more refined look on cupcakes, you can gently press a few chocolate curls into the top of the frosting. On brownies or cookies, a light dusting of shavings just after they come out of the oven, while they are still warm, allows the shavings to melt slightly and adhere, creating a lovely finish.
For layered desserts in glasses, adding a layer of chocolate shavings between pudding or cream layers provides both visual separation and a burst of chocolate flavor and texture. These easy chocolate shaving techniques make it simple to add a professional touch to any sweet treat.
Conclusion: Mastering Easy Chocolate Shaving Techniques for Stunning Cakes
Enjoy the Art of Chocolate Shaving and Elevate Your Baking Skills
Mastering easy chocolate shaving techniques is a rewarding step in your baking journey. It provides a powerful yet simple way to elevate the visual appeal of your cakes and other desserts without needing complex tools or advanced skills. From creating fine, delicate textures to crafting dramatic curls, the ability to transform a simple bar of chocolate into beautiful decor is an invaluable skill for any home baker.
These techniques are accessible, versatile, and offer endless creative possibilities. Whether you're using a vegetable peeler for quick flakes, a shaver for uniform coverage, or a knife for elegant curls, you now have the knowledge to confidently add stunning chocolate decor to your baked creations. Practice these easy chocolate shaving techniques, experiment with different chocolate types and colors, and discover how enjoyable and impactful this simple decorating method can be. Your cakes will look more professional, taste even better, and impress everyone who sees them.
Frequently Asked Questions
How do I choose the best chocolate for making shavings?
The best chocolate for shavings is tempered, good-quality chocolate with a high cocoa butter content. This allows it to shave smoothly without crumbling.
What tools are recommended for creating easy chocolate shavings?
A vegetable peeler, a cheese planer, or even a sharp knife are ideal. The key is sharpness for clean, even shavings.
How can I ensure my chocolate shavings don't melt while I'm working with them?
Work in a cool environment and handle the chocolate as little as possible. You can also chill the chocolate briefly before shaving.
What are some creative ways to use chocolate shavings for cake decoration?
You can create borders, cover entire cakes, or sprinkle them on top for a rustic or elegant look. The possibilities are endless!
Can I store leftover chocolate shavings?
Yes, you can store them in an airtight container in a cool, dry place, away from direct sunlight. This will keep them fresh and prevent blooming.
Final Reflection: The Enduring Allure of Simple Elegance
The art of creating beautiful chocolate shavings is more than just a culinary technique; it's a testament to the power of simple elegance. In a world obsessed with complex designs and intricate decorations, the ease and impact of perfectly formed chocolate shavings offer a refreshing counterpoint. This understated beauty elevates even the simplest desserts, proving that sometimes, less truly is more.
The enduring appeal of chocolate shavings lies not just in their visual appeal, but in their versatility and accessibility. They can transform a humble cupcake into a decadent treat, add a touch of sophistication to a plain cake, or provide a delightful textural contrast to creamy mousses. Their simplicity allows for creativity and personalization; each shaving, a tiny brushstroke in a larger culinary masterpiece. Simplicity is the ultimate sophistication.
– Leonardo da Vinci. This quote perfectly encapsulates the essence of this seemingly simple yet profoundly impactful technique.
Now, consider your own culinary creations. What simple additions could you incorporate to elevate your dishes? I encourage you to experiment with different chocolate types, shaving techniques, and placement on your desserts. Embrace the joy of creating something beautiful with minimal effort, and discover the surprising power of a perfectly placed chocolate shaving. Let the elegance of simplicity inspire you to create your own culinary masterpieces.
Unleash Your Inner Pastry Artist: Elevate Your Baking!
Thanks for exploring the world of chocolate shavings with us! We hope you've discovered some new ways to add that perfect touch of elegance to your creations. Ready to put your newfound skills to the test?
- Master the Shaving Technique: Practice creating perfectly uniform shavings using different chocolate types and techniques. Experiment with temperature and tools to find your perfect method!
- Share Your Sweet Success: Show off your chocolate-shaving masterpieces on social media using #BakeWithEaseShavings – we’d love to see your creations!
- Try a New Recipe: Use your newfound skills to decorate a cake, cupcake, or even a simple brownie – the possibilities are endless!
What innovative chocolate-shaving design will you create next? Let us know in the comments below!