
Shell Borders Made Simple: A Classic Decorating Skill

Welcome to BakeWithEase, where even the most intricate baking techniques become attainable! Uncover the secrets to transforming your cakes and pastries with elegant designs. This time we are teaching you Easy shell border decorating. Have you ever wanted to add that professional touch to your baked creations? Learn how to master this classic skill and elevate your baking game, leaving everyone wondering where you learned to make such beautiful creations. Keep reading to unlock the secrets!
- Cake Border Techniques: Elevating Your Cake Design
- Introduction to Border Decorating
- Essential Tools and Supplies for Cake Borders
- Preparing Your Frosting and Piping Bag for Borders
- Mastering Basic Border Techniques: Step-by-Step Guides
- Variations and Advanced Border Techniques
- Tips and Tricks for Perfect Cake Borders
- Level Up Your Cake Decorating: Beyond the Basics
- Conclusion: Embrace the Art of Cake Border Decoration
-
Frequently Asked Questions
- How do I make sure my buttercream is the right consistency for easy shell border decorating?
- What kind of piping tip is best for creating shell borders?
- What is the proper technique for piping shell borders to ensure they look uniform?
- Can I use different types of buttercream for shell borders?
- How do I prevent my shell borders from cracking after they've been piped?
- Final Reflection: The Enduring Charm of Shell Borders
- Unleash Your Inner Cake Artist: Master the Shell Border!
Cake Border Techniques: Elevating Your Cake Design
Introduction to Border Decorating
Why Borders are Essential in Cake Design
Borders are the finishing touch that can transform a simple cake into a stunning centerpiece. Think of them as the frame for your edible masterpiece. They provide a clean, defined edge, hiding any imperfections where the cake meets the cake board or where different frosting textures meet.
A well-executed border adds a polished, professional look, making your cake appear complete and thoughtfully designed. For example, a plain 8-inch round cake covered in smooth buttercream looks nice, but adding even an easy shell border decorating technique around the base and top instantly elevates its visual appeal significantly. Borders guide the eye and add structure, enhancing the overall aesthetic without requiring complex sculpting or intricate details on the main cake surface.
Beyond just aesthetics, borders serve practical purposes. They can help contain filling in between cake layers, preventing it from oozing out. They also provide a sturdy base for additional decorations placed along the edge of the cake.
Mastering basic border techniques, like the classic shell border, is often one of the first skills aspiring cake decorators learn because it provides such immediate and visible results. These techniques are fundamental building blocks that boost confidence and prepare you for more elaborate piping work. A simple bead border around the bottom edge can add just the right amount of detail to a minimalist design, while a more elaborate rope border can provide a sense of luxury and craftsmanship.
What You'll Learn: Mastering Various Border Techniques
This guide is designed to walk you through the fundamental skills needed to create beautiful borders on your cakes. We'll start with the essential tools you'll need, discussing how to select the right piping bags and tips, and how to get your frosting to the perfect consistency for piping. You'll learn step-by-step how to prepare your piping bag for use, a crucial skill for any piping technique.
We'll then dive into mastering several classic border techniques, including the rope border, bead border, rosette border, and scallop border, providing detailed instructions for each. These techniques form the foundation for countless other piping designs, including learning an easy shell border decorating method. We'll also explore variations, such as combining different border styles and using color effects. Finally, we'll share essential tips and troubleshooting advice to help you achieve clean, consistent results, ensuring your cake borders look fantastic every time you pipe.
Essential Tools and Supplies for Cake Borders
Piping Bags: Choosing the Right Type for Different Borders
Piping bags are your primary tool for creating cake borders. You'll typically choose between disposable and reusable bags. Disposable piping bags, often made of plastic, are convenient as they require no cleanup – simply toss them after use.
They come in various sizes, with 12-inch and 16-inch being common for border work on standard cakes (like a 9-inch round or 9x13 sheet cake). These are excellent for beginners learning easy shell border decorating or other basic techniques because they are readily available and hygienic. A box of 100 disposable bags might cost around $10-$15, offering great value for frequent baking.
Reusable piping bags are typically made from canvas or silicone. They are more durable and environmentally friendly but require thorough washing after each use. Canvas bags offer a good grip, while silicone bags can be a bit slippery for some users but are very easy to clean.
Reusable bags also come in various sizes; a 14-inch or 16-inch size is versatile for most border work. When choosing a bag, ensure it's strong enough to withstand the pressure of piping frosting, especially thicker buttercreams needed for defined shapes like those in easy shell border decorating. A weak bag can burst, leading to a messy situation!
Piping Tips: Achieving Various Border Effects (e.g., Star, Round, Petal)
Piping tips are interchangeable nozzles inserted into the piping bag that shape the frosting as it's squeezed out. They are essential for creating the distinct patterns of various borders. For basic borders, you'll frequently use a few key types:
- Star Tips: These are arguably the most popular for borders. Open star tips (like Wilton 18, 21, 32) create ribbed lines and are perfect for classic star borders, zigzags, and are fundamental for learning easy shell border decorating. Closed star tips (like Wilton 1M, 2D) create deeper grooves and are ideal for rosettes and more textured stars.
- Round Tips: These tips (like Wilton 12, 4, 1A) produce smooth, round lines or dots. They are used for bead borders, writing, and outlining. A larger round tip (like 1A) creates bold beads, while smaller ones are for finer details.
- Petal Tips: These tips (like Wilton 104, 125) have a wide, curved opening and are used for creating ruffles, petals, and some specific border styles where a flat, wide line is needed.
A basic set of piping tips often includes a few sizes of star and round tips, which is more than sufficient for starting out with easy shell border decorating and the other techniques discussed in this guide. A set of 12-24 basic tips can usually be purchased for under $20, providing great versatility. The size of the tip will determine the size of your border, so having a few options allows you to scale your border to fit the cake.
Frosting: Achieving the Ideal Consistency for Border Application
The consistency of your frosting is paramount to successful piping. If the frosting is too stiff, it will be difficult to squeeze through the tip, leading to hand fatigue and uneven results. It might also tear the piping bag. If it's too soft, the piped shapes will lose their definition and might melt or sag, especially in warmer conditions. A medium consistency is generally best for piping borders. This means the frosting holds its shape when piped but is still smooth and pliable enough to flow easily.
American buttercream, made from butter, powdered sugar, milk or cream, and flavoring, is a popular choice for borders because it holds its shape well. Swiss meringue buttercream or Italian meringue buttercream offer a silkier texture but may require chilling to firm up sufficiently for detailed piping like easy shell border decorating. To test consistency, scoop some frosting into a piping bag fitted with a tip and pipe a practice line or shape on parchment paper.
If it breaks easily or is hard to push, it's too stiff – add a tiny amount of liquid (milk, cream, or even water) and mix well. If the shape sags or doesn't hold sharp edges, it's too soft – add a little more powdered sugar (sifted to avoid lumps) and mix again. Adjust gradually until you achieve the desired texture.
Turntable: Aiding in Smooth and Even Border Application
While not strictly essential for all border techniques (you could pipe on a stationary cake), a cake turntable is incredibly helpful for achieving smooth, consistent borders, especially continuous ones like ropes or scallops. It allows you to smoothly rotate the cake as you pipe, maintaining a consistent angle and pressure relative to the cake's surface. This is particularly beneficial when learning techniques like easy shell border decorating, where a fluid, repetitive motion is key. Trying to walk around a stationary cake while piping often results in breaks or variations in the border's appearance.
A simple plastic turntable can be purchased for around $10-$20, while sturdier metal or heavy-duty plastic ones can cost $30 or more. Even an inexpensive one makes a significant difference in the ease and quality of your border work.
For techniques like the bead border or rosette border, where you stop and start for each element, a turntable still allows you to easily position the cake for the next element without awkward reaching or lifting. Using a turntable helps you keep your body and piping hand in a comfortable, stable position, leading to more uniform results across the entire cake.
Preparing Your Frosting and Piping Bag for Borders
Achieving the Perfect Frosting Consistency for Piping
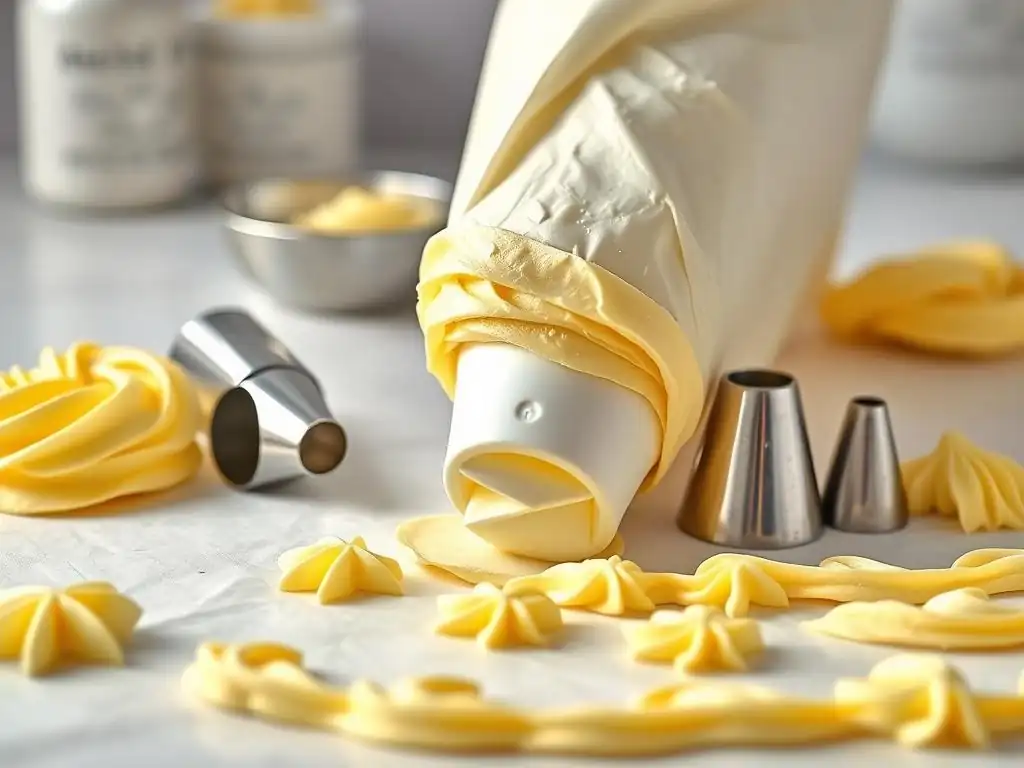
As mentioned earlier, consistency is king for piping beautiful borders. Your frosting should be smooth, free of lumps, and hold a peak without being overly stiff. If you're using American buttercream, ensure the butter is at the right temperature – typically room temperature, but not melted. Cold butter will result in a stiff, lumpy frosting that's impossible to pipe smoothly.
Over-softened or melted butter will make the frosting greasy and too soft to hold any shape. After mixing, if the frosting seems too thick, add liquid (like milk, cream, or even a teaspoon of water or clear extract) very gradually, mixing thoroughly after each addition, until it reaches a pipeable consistency. A good test is to see if it falls off your spatula in a thick ribbon.
Conversely, if your frosting is too thin (perhaps you added too much liquid or it's a warm day), you'll need to thicken it. The easiest way is to gradually beat in more sifted powdered sugar. Add a tablespoon or two at a time, mixing until fully incorporated, then test the consistency again.
You can also try chilling the frosting in the refrigerator for 10-20 minutes; cold helps firm up butter-based frostings. Remember that different types of frosting behave differently; a cream cheese frosting might be softer than a standard buttercream and may require more chilling or a slightly stiffer starting point. The goal is a consistency that allows for smooth, continuous flow while maintaining the crisp definition needed for techniques like easy shell border decorating.
Coloring Your Frosting for Decorative Borders [Optional]
Adding color to your frosting can make your borders pop and match your cake's theme. For the best results, especially when piping detailed borders or learning easy shell border decorating, use gel-based food coloring rather than liquid food coloring. Gel colors are highly concentrated, meaning you need only a small amount to achieve vibrant shades, which helps prevent adding excess liquid that could thin your frosting's carefully calibrated consistency. Liquid colors, on the other hand, can significantly alter the frosting's texture if you need a deep or bright color.
To color your frosting, start by adding a tiny amount of gel color using a toothpick or the tip of a clean small spoon. Mix it into the frosting thoroughly using a spatula, scraping down the sides of the bowl to ensure the color is evenly distributed. Add more color gradually until you reach the desired shade.
Remember that colors often deepen slightly as they sit. If you're dividing your frosting into multiple colors, it's often easiest to color the entire batch one base color (like white or a pale shade) and then divide it into smaller portions to color individually. For techniques like two-tone or ombre borders, you'll prepare different shades or colors separately before loading the bag.
Loading Your Piping Bag: A Step-by-Step Guide
Properly loading a piping bag is crucial for a smooth piping experience and to avoid messy spills. Here’s a simple guide:
- Prepare the Bag and Tip: If using a coupler (recommended for easy tip changes), unscrew the ring, place the coupler base inside the bag with the narrow end pointing down, and snip off just the tip of the bag so the coupler base pokes through. Place the desired piping tip over the coupler base outside the bag and screw the ring back on tightly. If not using a coupler, simply drop the desired tip into the bag and push it down firmly, then snip off the end of the bag just enough for the tip to emerge.
- Create a Cuff: Fold the top few inches of the piping bag down over your hand, creating a wide cuff. This helps keep the top edge clean as you fill the bag.
- Fill the Bag: Use a spatula or spoon to fill the bag with frosting. Scoop the frosting into the bag, pushing it down towards the tip as you go. Fill the bag no more than two-thirds full. Overfilling makes the bag difficult to handle and control, leading to hand fatigue and uneven pressure – a common issue when trying to master easy shell border decorating.
- Remove Air Pockets: Once filled, unfold the cuff. Hold the bag upright and gently tap the tip end on your counter a few times to help the frosting settle and push out large air bubbles.
- Twist the Top: Gather the top of the bag and twist it tightly just above the level of the frosting. This creates pressure and prevents frosting from coming out the wrong end. You can secure the twist with a rubber band or bag clip if needed, especially if you have a large amount of frosting in the bag or are piping for an extended period. You are now ready to pipe!
Mastering Basic Border Techniques: Step-by-Step Guides
Technique 1: Rope Border
The rope border is a classic, elegant design that looks intricate but is relatively simple once you get the motion down. It typically uses a medium to large open star tip (like Wilton 18, 21, or 32). The key is creating overlapping comma-like shapes.
Here’s how to pipe a rope border:
- Hold the piping bag at about a 45-degree angle to the cake surface, with the tip slightly above the surface.
- Apply steady pressure to the bag, allowing the frosting to come out.
- As the frosting emerges, move the tip slightly forward and then curve it back towards your starting point, creating a comma or half-moon shape. Release pressure to stop piping, creating a clean end.
- For the next segment, place the tip slightly over the tail end of the first comma.
- Apply pressure again, piping another comma shape that overlaps the previous one's tail. Continue this overlapping motion all the way around the cake, ensuring each new segment starts by covering the end of the last one. Consistent pressure and overlap are key to a smooth, continuous rope that looks polished and professional.
Technique 2: Bead Border
A bead border is one of the easiest borders to master, perfect for beginners or when you want a clean, simple look. It uses a round piping tip (size depends on desired bead size, e.g., Wilton 12 for medium beads, 1A for large). The technique involves piping individual dots of frosting.
Here’s how to pipe a bead border:
- Hold the piping bag perpendicular (90 degrees) to the cake surface, with the tip touching the surface.
- Apply steady, even pressure to the bag, allowing a dot of frosting to emerge and spread slightly into a bead shape. Keep the tip in the frosting bead as it forms; this helps control the shape.
- Once the bead reaches the desired size, stop applying pressure and quickly lift the tip straight up. The frosting should break cleanly.
- For the next bead, move the tip over slightly, placing it right next to or just barely touching the first bead. Repeat the process of applying pressure, letting the bead form, stopping pressure, and lifting straight up. Continue around the cake, spacing the beads evenly to create a uniform line of frosting 'pearls'. This is an excellent technique for building confidence before moving on to more complex motions needed for easy shell border decorating.
Technique 3: Rosette Border
Rosette borders are charming swirls that add a touch of elegance. They are most commonly made using a closed star tip (like Wilton 1M or 2D). The technique involves piping a spiral shape.
Here’s how to pipe a rosette border:
- Hold the piping bag perpendicular or at a slight angle (around 90 to 45 degrees) to the cake surface, with the tip touching the surface where you want the center of your rosette to be.
- Apply steady pressure to the bag.
- As the frosting emerges, start piping in a tight circular motion, moving outwards from the center point. You can pipe clockwise or counter-clockwise, whichever feels more comfortable.
- Pipe the swirl until it reaches the desired size, then stop applying pressure and quickly lift the tip away, ending the swirl neatly.
- For the next rosette, position your tip next to the first one. You can place them side-by-side or slightly overlapping depending on the desired look. Repeat the swirling motion. Continue piping rosettes around the cake, trying to keep them a consistent size and shape for a uniform border. This technique uses a continuous motion similar to some aspects of piping easy shell border decorating.
Technique 4: Scallop Border
A scallop border creates a series of connected curves, often resembling waves or scales. It can be piped with various tips, including round or star tips (like Wilton 12 or 21). The motion involves piping a curved line and connecting it to the next curve.
Here’s how to pipe a scallop border:
- Hold the piping bag at about a 45-degree angle to the cake surface.
- Apply steady pressure. Begin piping a curved line, moving your tip downwards in a gentle arc and then back up. The curve should resemble a shallow 'U' or a smile.
- As you reach the end of the first curve, maintain pressure and immediately transition into the beginning of the next curve, seamlessly connecting the two. You can slightly overlap the end of one curve with the beginning of the next for a continuous look.
- Continue piping connected curves all the way around the cake. The size and depth of your curves, as well as the tip used, will determine the final appearance of the scallop border. Piping with consistent pressure and a fluid motion is key to achieving smooth, even scallops. This technique involves a 'pulling' motion similar to what is used when creating an easy shell border decorating effect.
Variations and Advanced Border Techniques
Combining Borders for Unique Designs
Once you've mastered individual border techniques, you can unleash your creativity by combining them on a single cake. Layering different borders adds visual interest and complexity. For instance, you could pipe a simple bead border around the very bottom edge of the cake using a medium round tip (like Wilton 12), and then pipe a more prominent rope border above it using a large star tip (like Wilton 32). This creates a two-tiered border effect.
Another popular combination is using a continuous border, like a rope or scallop, along the top edge of the cake, and then piping individual elements, like rosettes or stars, around the bottom edge or even spaced along the continuous top border. Imagine a cake with a delicate scallop border piped in white around the top, and vibrant pink rosettes spaced every few inches around the base. The possibilities are vast and limited only by your imagination and the tips you have available. Experimenting with combinations allows you to develop your own unique cake decorating style.
Using Different Piping Tips for Varied Effects
The same border technique can look dramatically different depending on the size and shape of the piping tip you use. A bead border piped with a small round tip (like Wilton 4) will look delicate and pearl-like, perfect for elegant designs. The same bead border piped with a very large round tip (like Wilton 1A) will be bold and playful, suitable for a child's birthday cake. Similarly, a rope border piped with a small open star tip will have fine ribs, while one piped with a large closed star tip will have deeper grooves and a more textured appearance.
Exploring different tip types beyond the basic star and round opens up even more possibilities. A leaf tip can create a border of overlapping leaves, while a basketweave tip can create a woven pattern around the side of the cake.
Understanding how each tip manipulates the frosting allows you to select the perfect one for the specific look you want to achieve. As you become more comfortable with piping, you'll instinctively know which tip will give you the desired effect, whether it's a simple beaded edge or a more elaborate design requiring techniques similar to easy shell border decorating variations.
Incorporating Color Swirls and Ombre Effects
Adding color variations within your borders can create stunning visual effects. A simple way to do this is to load your piping bag with two different colors of frosting side-by-side. As you pipe, the colors will swirl together, creating a marbled or striped effect. For example, loading white and pink frosting into the same bag fitted with a star tip will produce rosettes or shells with beautiful pink and white swirls.
For an ombre effect, you can prepare frosting in several shades of the same color, from darkest to lightest. Load the darkest shade into the bottom of the bag, followed by the next darkest, and so on, with the lightest shade at the top. As you pipe, the color will gradually transition from dark to light (or vice-versa, depending on how you load).
Alternatively, you can pipe a continuous border, like a scallop or rope, around the cake, switching to a slightly lighter shade of frosting each time you start a new section or layer. This creates a smooth color gradient around the cake, adding depth and sophistication to even an easy shell border decorating approach.
Tips and Tricks for Perfect Cake Borders
Avoiding Air Bubbles in Your Frosting
Air bubbles are a common frustration when piping borders. They cause unsightly gaps or breaks in your otherwise smooth line, disrupting the flow of techniques like easy shell border decorating or a continuous rope. Air can get incorporated into frosting during mixing or when loading the piping bag.
To minimize air bubbles, try the following:
- Mix Frosting Properly: After your frosting is mixed, give it a final stir by hand with a spatula, pressing it against the sides of the bowl to force out any trapped air.
- Load Bag Carefully: When loading the piping bag, try to avoid scooping air along with the frosting. Press the frosting down into the tip as you fill the bag.
- Burp the Bag: Once the bag is loaded and twisted shut, hold the tip end down and gently squeeze the bag until frosting just starts to emerge from the tip. This pushes any large air pockets towards the tip and out. If you encounter a bubble while piping, stop, untwist the top of the bag slightly, squeeze out the bubble onto a paper towel, retwist, and resume piping.
Maintaining Consistent Pressure for Uniform Borders
Consistent pressure is the secret to uniform, professional-looking borders. Whether you're piping individual beads, connected scallops, or practicing an easy shell border decorating motion, the amount of pressure you apply to the piping bag directly impacts the size and shape of the frosting as it comes out. Varying pressure will result in some parts of your border being larger or smaller, thicker or thinner, than others.
Practice holding the bag firmly with your dominant hand near the twisted top, using your other hand to guide the tip. Squeeze from the top with steady, even pressure. Try to maintain that exact same squeeze throughout the entire border. If your hand starts to tire, take a short break. Practicing the motion and pressure on parchment paper before piping on the cake is an excellent way to build muscle memory and ensure you can maintain consistency for the duration of the border. Aim for a consistent flow of frosting that matches the speed of your hand movement.
Practicing Your Piping on Parchment Paper
Before you pipe directly onto your beautifully frosted cake, spend some time practicing your chosen border technique on a piece of parchment paper or wax paper. This is a low-stakes way to get a feel for the pressure, angle, and motion required for each technique, including mastering an easy shell border decorating movement.
Pipe a line of your chosen border along the paper. Observe the results: Are the shapes uniform? Is the pressure consistent? Is the overlap correct for a rope or scallop? Did the frosting break cleanly for beads or rosettes?
If something isn't right, scrape the frosting off the paper back into your bowl (it's perfectly fine to reuse! ), adjust your technique or frosting consistency if needed, and try again. Repeat until you feel confident and can consistently produce the desired result. This practice method saves your cake from early mistakes and helps build the muscle memory needed for smooth, confident piping. You can practice a full border around an imaginary cake circle drawn on the paper.
Troubleshooting Common Border Problems (e.g., Uneven Borders, Broken Sections)
Even with practice, you might encounter issues. Here are some common problems and how to fix them:
- Uneven Borders: This is usually due to inconsistent pressure or speed, or not maintaining a consistent angle to the cake. Focus on applying steady pressure from the top of the bag and moving your hand at a constant speed. Use a turntable to help maintain a consistent angle. Practice on parchment paper to refine your technique.
- Broken Sections or Gaps: Air bubbles are a prime suspect here. Ensure you've burped your bag. Frosting that is too stiff can also break instead of flowing smoothly; try adding a tiny bit of liquid. Sometimes, stopping and starting awkwardly can cause breaks; try to maintain a continuous motion where possible, especially for techniques like the rope or an easy shell border decorating method.
- Shapes Not Holding Definition: This indicates the frosting is too soft or warm. Add more sifted powdered sugar to stiffen it, or chill the frosting (or the entire bag) in the refrigerator for 10-15 minutes. Ensure your butter wasn't too soft when making buttercream.
- Jagged Edges: This could be due to frosting that's too stiff, an air bubble, or lifting the tip away too quickly without stopping pressure first. Ensure smooth frosting, remove air bubbles, and practice stopping pressure before lifting the tip.
Level Up Your Cake Decorating: Beyond the Basics
Incorporating Borders into More Complex Cake Designs
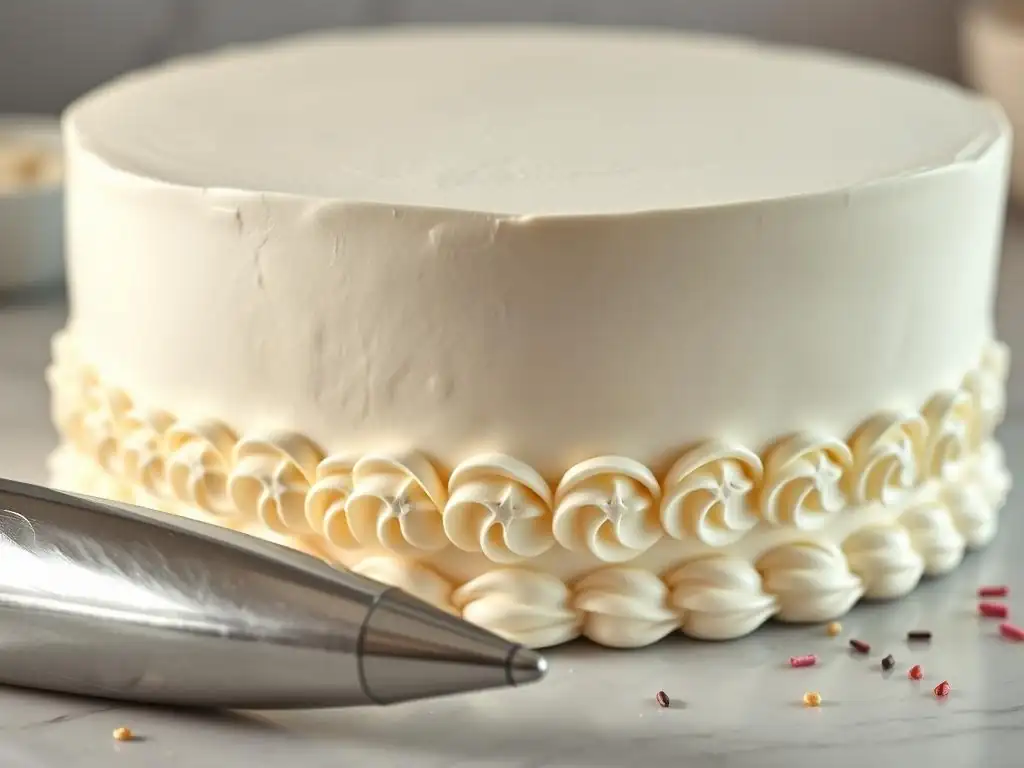
Mastering basic borders opens the door to creating more elaborate cake designs. Borders don't just frame the cake; they can be integral parts of the overall decoration. For example, you can pipe a wide, flat border using a large tip (like a Wilton 789 for sides) and then pipe details on the border itself, such as small stars or dots. A simple bead border can serve as the perfect base for attaching edible pearls or sprinkles, creating a jeweled effect.
Borders can also define different sections or tiers of a cake. On a multi-tiered cake, a distinct border at the base of each tier can visually separate them and add stability if using a frosting dam. You can use borders to outline areas for writing or other piped designs on the top surface of the cake.
Thinking of borders not just as edges but as decorative elements in their own right allows you to integrate them into more intricate and impressive cake artistry. A well-executed classic border, like an easy shell border decorating a tier, can provide a sophisticated counterpoint to more whimsical elements elsewhere on the cake.
Exploring Different Piping Techniques for Unique Border Effects
The world of piping extends far beyond the basic techniques covered so far. Once you're comfortable with controlling pressure and motion, you can explore techniques like basketweave borders (using a flat or basketweave tip), ruffle borders (using a petal tip), or specific tips designed for unique effects. There are tips specifically designed for creating shell borders (often open star tips like Wilton 18, 21, 32), which require a slightly different push-and-pull motion than the scallop border.
Learning these new techniques involves understanding how different tip shapes interact with the frosting and require specific hand movements. A ruffle border requires a back-and-forth motion while moving forward, while a basketweave requires piping overlapping lines. Each technique adds a new texture and dimension to your border repertoire. The skills you build mastering consistent pressure and control with basic techniques are directly transferable and essential for successfully executing these more advanced border styles. Practicing the foundational techniques makes learning something like an easy shell border decorating method much more achievable.
Adding Texture and Embellishments to Your Borders (e.g., Sprinkles, Edible Pearls)
Once your border is piped, you can enhance its visual appeal by adding texture or embellishments. This is often done while the frosting is still fresh and slightly soft, allowing the additions to adhere easily. Small sprinkles, nonpareils, or sanding sugar can be gently pressed into the side or top of a piped border for a touch of sparkle or color. For example, after piping a classic shell border, you could carefully press blue sanding sugar into the wet frosting for a subtle shimmer.
Edible pearls, dragees, or even small candies can be placed individually along a border, adding points of interest and elegance. A bead border, for instance, provides perfect little mounds to top with edible pearls, creating a strand of pearls effect. For a bolder look, you can cover an entire border in sprinkles by holding the cake over a tray to catch the excess and gently pressing the sprinkles onto the freshly piped frosting.
Adding embellishments is a quick way to add extra flair and personalize your cake borders. A simple easy shell border decorating technique can look dramatically different with the addition of metallic dragees or colorful sprinkles.
Conclusion: Embrace the Art of Cake Border Decoration
The Impact of Borders on Overall Cake Aesthetics
Cake borders are far more than just an afterthought; they are integral to a cake's final presentation. They provide structure, definition, and a sense of completion. A cake without a border, no matter how well frosted, can often look unfinished or slightly amateurish. Adding a border, whether it's a simple bead design, a classic rope, or an elegant easy shell border decorating pattern, instantly elevates the cake's aesthetic appeal, making it look polished and professional.
Borders draw the eye and can subtly guide how the viewer perceives the cake's design. They can add height, texture, and color contrast. They frame the main surface decoration and provide a visual resting place. Mastering border techniques gives you the power to add that crucial finishing touch that transforms a simple baked good into a work of edible art, demonstrating attention to detail and skill. The effort put into piping a clean, consistent border is always noticeable and appreciated.
Continued Practice: Honing Your Border Skills
Like any skill, mastering cake border decoration requires practice. Don't be discouraged if your first attempts aren't perfect. Uneven pressure, wobbly lines, or inconsistent shapes are all part of the learning process. The key is to keep practicing. Use parchment paper to refine your technique before working on a cake. Pay attention to your hand position, angle, and pressure.
With consistent effort, you'll build muscle memory and gain confidence. What initially felt awkward will become fluid and natural. As you become more proficient with basic techniques like the bead or rope border, you'll find it much easier to tackle more complex or speed-dependent methods like an easy shell border decorating technique or a continuous ruffle. Each border you pipe is an opportunity to improve. So grab your piping bag, prepare your frosting, and embrace the satisfying process of creating beautiful, finished edges on your cakes. Your cakes (and your guests!) will thank you.
Frequently Asked Questions
How do I make sure my buttercream is the right consistency for easy shell border decorating?
The buttercream should be smooth and pipeable, but not too soft. Aim for a consistency where it holds its shape when piped but isn't so stiff that it's difficult to squeeze out of the bag. Adding a little milk or powdered sugar can help adjust the consistency.
What kind of piping tip is best for creating shell borders?
A star tip is the most common and effective choice for shell borders. A #16, #18, or #21 tip are popular sizes, with the size determining the size of the shell. Experiment to find the size you prefer.
What is the proper technique for piping shell borders to ensure they look uniform?
Apply even pressure to the piping bag while moving in a consistent, rhythmic motion. Start each shell slightly overlapping the previous one to create a seamless, flowing border. Practice on parchment paper first!
Can I use different types of buttercream for shell borders?
Yes, you can use various buttercream types, but American buttercream and Swiss meringue buttercream are generally preferred because of their stability and ease of piping. Italian meringue buttercream is also a viable option.
How do I prevent my shell borders from cracking after they've been piped?
Overmixing the buttercream can cause air bubbles, leading to cracking. Also, ensure the cake is properly chilled before decorating. Lightly misting the finished border with water can also help prevent drying and cracking.
Final Reflection: The Enduring Charm of Shell Borders
The simple act of arranging seashells into a decorative border remains surprisingly relevant today, offering a timeless and accessible way to bring the calming essence of the coast into our homes. This seemingly small craft holds a powerful ability to transform a space, injecting personality and a touch of effortless elegance, regardless of current design trends. The enduring appeal of natural materials and handcrafted details continues to resonate in a world increasingly dominated by mass production.
The influence of shell borders extends beyond mere decoration; they evoke powerful memories and emotions. They represent cherished vacations, carefree childhood summers spent building sandcastles, and the enduring connection between humanity and the natural world. This nostalgic power is undeniable, a sentiment beautifully captured by the words of Henry David Thoreau: I went to the woods because I wished to live deliberately, to front only the essential facts of life, and see if I could not learn what it had to teach, and not, when I came to die, discover that I had not lived.
Shell borders, in their simplicity, encourage us to slow down, appreciate the beauty of the natural world, and connect with the simpler joys of life.
Consider the possibilities. You don't need extensive crafting skills or expensive materials; a walk along the beach, a little creativity, and a willingness to embrace imperfection are all you need to create a unique and personal touch in your home. This isn't just about decorating; it's about creating a space that reflects your memories, your personality, and your connection to the natural world. So, gather your shells, let your imagination flow, and create a shell border that speaks to your soul. Let the simple beauty of the ocean inspire you.
Here's a CTA for an article on BakeWithEase.com titled "Shell Borders Made Simple: A Classic Decorating Skill," following the provided instructions:
Unleash Your Inner Cake Artist: Master the Shell Border!
Thanks for taking the time to explore the art of shell borders! We hope you've gained the confidence to elevate your baking creations. Ready to put your new skills into practice?
- Try decorating a simple cake or cupcake with your newly mastered shell border. This is the perfect way to solidify your technique and see the beautiful results firsthand.
- Share your shell border creations on social media using #BakeWithEaseShellBorder – we'd love to see your masterpieces!
- Challenge yourself: try experimenting with different piping tips and icing consistencies to create unique variations of the shell border.
What delicious treat will you adorn with your stunning shell border next?