
Coloring Buttercream: Deep Colors Without the Mess

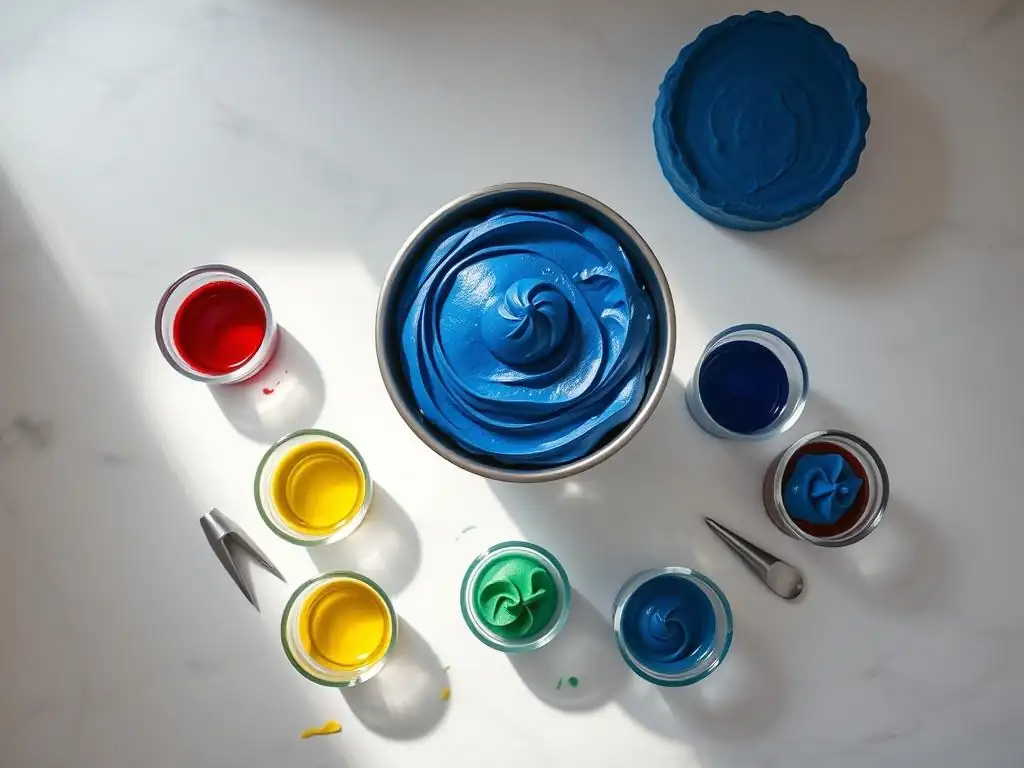
Welcome to BakeWithEase, where we believe everyone can create delicious masterpieces! Are you ready to elevate your baking game? This week, we're tackling a common challenge: achieving vibrant, deep colors in your buttercream frosting without compromising flavor or texture. Discover our easy buttercream color tips and unlock a world of possibilities. Intrigued? Let's dive in and transform your next creation!
- Mastering Deep Buttercream Colors: A Guide for Cake Decorators
- Introduction to Intense Buttercream Hues
- Essential Tools for Effective Buttercream Coloring
- Step-by-Step Guide: Achieving Intense Buttercream Colors
- Troubleshooting Buttercream Coloring Issues
- Professional Buttercream Coloring Techniques
- Buttercream Coloring Techniques: Beyond the Basics
- Key Buttercream Coloring Principles
-
Frequently Asked Questions
- How can I achieve deep, vibrant colors in my buttercream without it looking dull or pastel?
- Why does my buttercream sometimes taste bitter after adding food coloring?
- What are some tips for preventing my buttercream from becoming too soft when adding color?
- Can I use natural food coloring to color buttercream? Will it achieve the same deep colors?
- What is the best way to avoid streaking or uneven color distribution in my buttercream?
- Final Reflection: The Joy of Vibrant, Mess-Free Buttercream
- Unlock Vibrant Buttercream: Deeper Colors, Easier Baking!
Mastering Deep Buttercream Colors: A Guide for Cake Decorators
Introduction to Intense Buttercream Hues
Achieving vibrant, deep colors in your buttercream can elevate a simple cake to a stunning masterpiece. Whether you're aiming for a dramatic black, a rich jewel tone, or a cheerful bright hue, the right coloring techniques are essential. Mastering these techniques not only ensures beautiful results but also helps maintain the perfect consistency of your frosting, which is crucial for smooth piping and frosting. This guide will walk you through easy buttercream color tips to help you achieve those intense shades without compromising texture.
Understanding how different types of food coloring interact with the fat and sugar in buttercream is the first step. Unlike water-based colorings, which can thin your frosting, concentrated color options allow you to add significant pigment with minimal liquid. This distinction is key to vibrant colors and stable buttercream. We'll explore the best types of coloring to use and simple methods to incorporate them effectively.
The Impact of Vibrant Colors on Cake Design
Vibrant colors play a critical role in the visual appeal and overall impact of a cake design. A cake decorated with rich, deep hues can evoke specific moods, celebrate themes, or simply create a breathtaking focal point. For instance, a deep navy or burgundy buttercream can lend an air of sophistication to an anniversary cake, while bright, saturated primary colors are perfect for a fun children's birthday celebration.
Beyond aesthetics, color can communicate a message or tell a story. A cake with gradients of intense sunset colors can transport viewers, while a cake covered in deep forest green might evoke nature or a woodland theme. Mastering easy buttercream color tips allows decorators to fully realize their creative vision, turning simple baked goods into edible art that captures attention and delights onlookers before they even take the first bite.
Common Challenges in Achieving Deep Buttercream Colors
Many home bakers face frustrating challenges when trying to achieve deep, saturated colors in buttercream. One of the most common issues is needing to add excessive amounts of liquid food coloring, which inevitably thins the buttercream to a point where it becomes too soft to hold its shape for piping or frosting. This can lead to collapsed swirls, runny edges, and an overall messy finish.
Another frequent problem is the development of a bitter aftertaste, particularly when trying to achieve intense colors like red or black. This bitterness often results from using large quantities of certain types of artificial dyes. Bakers also struggle with uneven color distribution, resulting in streaky or mottled frosting, or finding that the color deepens significantly over time, sometimes becoming much darker than intended hours after mixing. These hurdles can be discouraging, but with the right easy buttercream color tips, they are entirely surmountable.
Techniques for Vibrant Buttercream Without Altering Texture
Achieving vibrant buttercream colors without sacrificing its perfect consistency is the goal for any cake decorator. The primary technique involves using highly concentrated coloring agents that require only small amounts to achieve intense hues. Gel food colorings are the gold standard here, offering significantly more pigment per drop compared to traditional liquid colorings, thus minimizing the amount of moisture added to your frosting.
Another effective technique is to allow the color to develop over time. Often, the full intensity of a gel color isn't immediately apparent upon mixing. By coloring your buttercream slightly lighter than your target shade and letting it sit for an hour or two (or even overnight, properly stored), the color will often deepen considerably. This reduces the initial amount of coloring needed. Pre-coloring a small amount of buttercream very intensely and then mixing that into your main batch can also help distribute the color evenly and efficiently, minimizing the total amount of color added.
Essential Tools for Effective Buttercream Coloring
Having the right tools makes the process of coloring buttercream much smoother and more successful. While you don't need a vast array of specialized equipment, a few key items are indispensable for achieving deep, even colors. These tools help with everything from selecting the right type of colorant to ensuring it's perfectly incorporated into your frosting base.
Simple tools like sturdy spatulas and appropriately sized mixing bowls are just the beginning. Precision tools for adding color and techniques for thorough mixing without overworking the buttercream are equally important. Utilizing these essentials is part of mastering easy buttercream color tips for consistently beautiful results.
Gel Food Coloring: The Foundation of Rich Color
Gel food coloring is the cornerstone of achieving vibrant, deep buttercream colors without adding excess liquid. Unlike liquid food colorings, which are primarily water or glycerin-based, gel colors are made with a base of corn syrup and glycerin, combined with highly concentrated pigments. This means you need only a fraction of the amount compared to liquid colors to achieve the same level of intensity.
For example, achieving a deep red in 4 cups of buttercream might require nearly a whole bottle (approx. 1 oz) of liquid red food coloring, potentially thinning the frosting significantly. In contrast, you might only need 1-2 teaspoons (approx. 0.17 - 0.34 oz) of concentrated gel red coloring to reach a similar depth, adding minimal moisture. This difference is critical for maintaining the desired consistency for piping and spreading.
Mixing Bowls and Spatulas: Ensuring Uniform Color
The choice of mixing bowls and spatulas might seem simple, but they play a vital role in achieving uniform color throughout your buttercream. Using bowls that are large enough allows you to thoroughly mix and fold the buttercream without spills, ensuring the color is distributed evenly. Stainless steel or glass bowls are ideal as they don't absorb colors, preventing cross-contamination between batches of different hues.
Sturdy rubber or silicone spatulas are essential for folding and scraping the sides of the bowl effectively. The flexibility of the spatula allows you to reach into all corners, ensuring no pockets of uncolored buttercream remain. Gentle folding motions, using the spatula to lift and turn the frosting from the bottom, are more effective for incorporating color evenly than vigorous stirring, which can introduce air and alter texture.
Precision Tools: Controlling Color Addition
Controlling the amount of gel food coloring you add is crucial, especially when aiming for specific shades or deep colors. Precision tools make this task much easier. Toothpicks or small skewers are excellent for transferring tiny amounts of gel color from the container to the buttercream, allowing you to add color incrementally. This is particularly useful when trying to achieve a subtle shade or when working with very concentrated colors.
For larger batches or when adding more significant amounts of color, small measuring spoons (like 1/8 or 1/4 teaspoon) or even droppers can provide better control than simply scooping from the pot. Adding color drop by drop or using the tip of a toothpick allows you to observe the color development and stop adding color precisely when the desired shade is reached, preventing you from accidentally over-coloring your batch.
Step-by-Step Guide: Achieving Intense Buttercream Colors
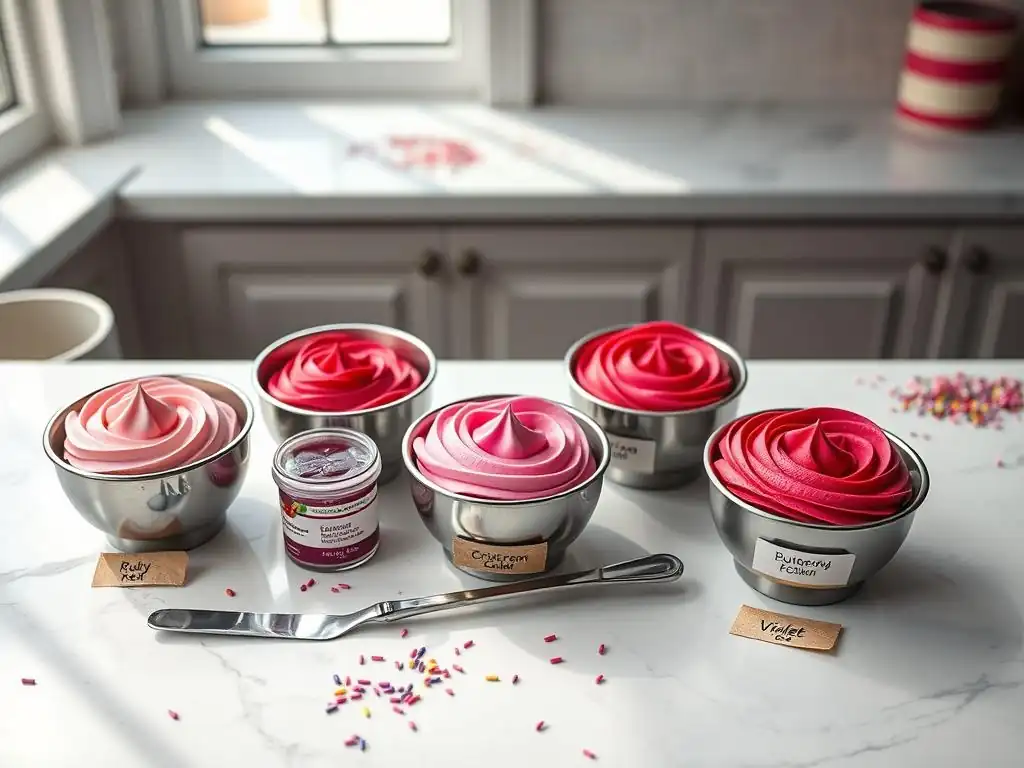
Follow these steps for easy buttercream color tips that will help you achieve those sought-after intense and vibrant shades without hassle. This method focuses on using the right materials and techniques to ensure deep color while preserving the perfect consistency of your frosting.
- Prepare your buttercream base.
- Select the right gel food coloring.
- Gradually incorporate color.
- Mix thoroughly for uniformity.
- Allow color development time.
Step 1: Preparing Your Buttercream Base
Before you start adding color, ensure your buttercream base is properly prepared and at the correct consistency. The ideal base is smooth, creamy, and holds its shape well. If your buttercream is too stiff, it will be difficult to mix in the color evenly without overworking it. If it's too soft, adding color might push it over the edge into being unusable for piping or structural decoration.
Ensure your ingredients, particularly the butter, are at the correct temperature (usually room temperature, around 68-72°F or 20-22°C) before mixing. Beat the butter until light and fluffy, then gradually add powdered sugar and liquid (milk or cream), mixing until smooth. A well-made base accepts color much more readily and evenly than one with lumps or inconsistent texture.
Step 2: Selecting the Right Gel Food Coloring
Choosing the right type and brand of gel food coloring is perhaps the most critical step in achieving deep, vibrant colors. Opt for high-quality, concentrated gel paste or gel food colorings specifically designed for use in frosting and fondant. These typically come in small pots or squeeze bottles. Brands like AmeriColor, Chefmaster, and Wilton's Gel Colors are popular choices known for their intensity and wide range of shades.
Avoid standard liquid food colorings found in grocery stores for achieving deep colors, as they are too diluted. Look for labels that specify "gel paste," "concentrated gel," or "icing color." For challenging colors like true red or black, seek out "super red" or "super black" formulations, which are specifically designed to achieve deep saturation with less product, minimizing the risk of bitterness.
Step 3: Gradual Color Incorporation for Desired Intensity
Adding color gradually is one of the most important easy buttercream color tips for achieving the perfect shade without overshooting. Start with a small amount of gel color – perhaps the tip of a toothpick for a light shade, or a quarter teaspoon for a deeper hue in a standard batch (e.g., 4 cups of buttercream). Mix it thoroughly, then assess the color.
Continue adding very small amounts of color, mixing well after each addition, until you are close to your desired shade. Remember that the color will likely deepen slightly as it sits. It's much easier to add more color than to remove it or correct an overly dark batch. This incremental approach gives you maximum control over the final intensity.
Pro Tip: Incremental Color Addition
Using a toothpick to transfer gel color allows for the most precise control, especially when starting or working towards a very specific shade. Dip a clean toothpick into the gel color pot, then swirl it into your buttercream. Discard the toothpick and use a clean one for subsequent additions to avoid contaminating your color pots with buttercream. This method is particularly useful for delicate shades or when you need just a tiny boost of color.
Step 4: Thorough Mixing for Color Uniformity
Once the color has been added, thorough mixing is essential to ensure the pigment is evenly distributed throughout the buttercream, preventing streaks or splotches. Use a spatula to fold the color into the buttercream, repeatedly scraping down the sides and bottom of the bowl. Gentle folding is preferred over vigorous beating with a mixer, which can incorporate too much air and change the texture.
Continue folding until no streaks of white or uneven color are visible. This might take several minutes of patient folding. If using a stand mixer, use a paddle attachment on a low speed (like setting 1 or 2) for just a minute or two to help distribute the color, then finish with hand folding to ensure everything is scraped from the sides and bottom.
Avoiding Overmixing: Preserving Buttercream Texture
While thorough mixing is needed for uniform color, it's crucial to avoid overmixing, especially if using a stand mixer. Overmixing can incorporate too much air into the buttercream, making it appear bubbly or airy, which can compromise its structure and piping definition. It can also sometimes cause the emulsion to break slightly, leading to a greasy texture.
Once the color appears uniform, stop mixing. A few gentle folds with a spatula to scrape down the sides are usually sufficient after initial incorporation. If you find your buttercream has become too airy from mixing, you can often fix it by stirring it gently by hand with a spatula for a few minutes to push out some of the excess air.
Step 5: Allowing Color Development
Many gel food colorings, particularly deeper shades, will intensify over time as the pigments fully hydrate and disperse within the fat of the buttercream. This is a key easy buttercream color tip that can save you from using too much color initially. After mixing in the color and achieving a shade that is slightly lighter than your target, cover the bowl and let the colored buttercream sit at room temperature for at least 30-60 minutes, or even refrigerate it overnight.
Check the color again after the rest period. You will often find that it has deepened considerably. This technique is particularly effective for reds, blacks, and deep blues or greens. Factoring in this development time means you can achieve rich colors with less dye, further minimizing any potential impact on taste or texture.
Optimal Color Development Time
The optimal time for color development can vary depending on the brand of coloring, the specific color used, and the temperature of the buttercream. Generally, allowing the colored buttercream to rest for at least 30 minutes at room temperature is a good starting point. For very deep or challenging colors, like black or true red, letting it rest overnight in the refrigerator (then re-whipping lightly if needed) can yield the most intense results.
During this rest period, the pigment molecules continue to disperse and saturate the fat crystals in the buttercream. Think of it like tea steeping – the color needs time to fully infuse. Plan your coloring process accordingly, ideally coloring your buttercream several hours or even a day before you need to decorate your cake.
Troubleshooting Buttercream Coloring Issues
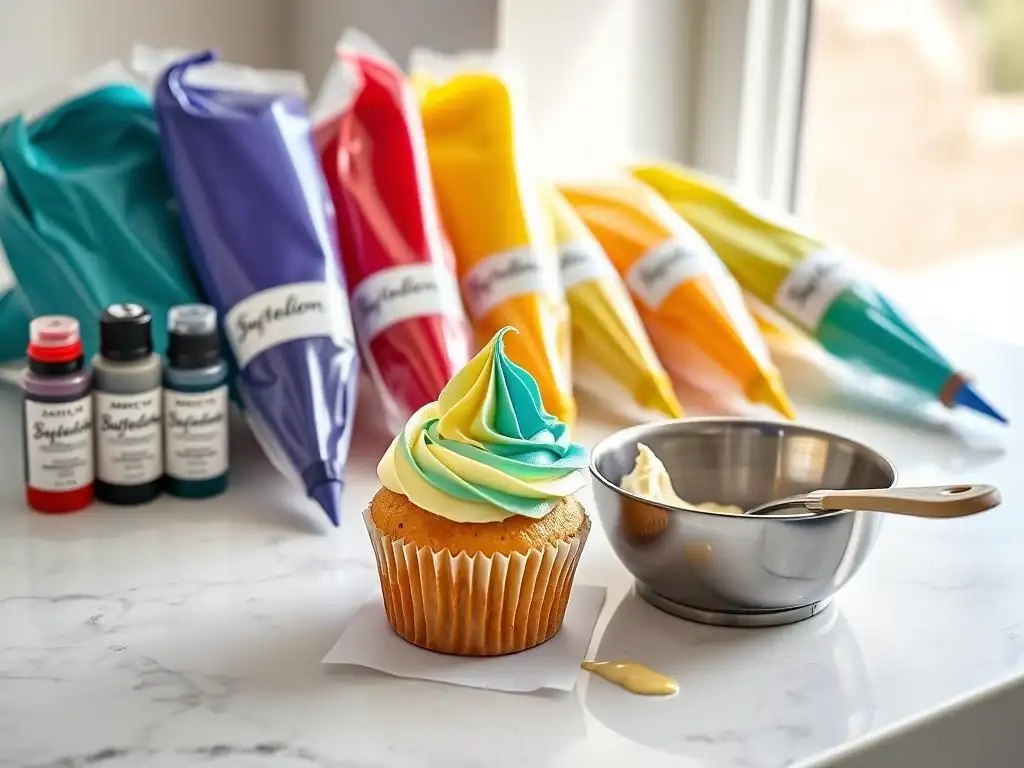
Even with the best easy buttercream color tips, you might occasionally encounter issues. Knowing how to troubleshoot common problems can save your batch of frosting and ensure your cake decorating project stays on track. Here are some typical challenges and their solutions.
Problem: Mottled or Uneven Buttercream
Sometimes, despite your best efforts, your colored buttercream might appear streaky, with visible lines or patches of lighter or darker color. This usually indicates that the color pigment was not fully or evenly dispersed throughout the frosting.
Solution: Gentle Folding Technique
The most effective solution for mottled or uneven buttercream is thorough, gentle folding with a spatula. Transfer the buttercream to a clean bowl if necessary. Use a sturdy spatula to repeatedly scrape the sides and bottom of the bowl, folding the outer portions of the buttercream into the center. Continue this process patiently, scraping and folding, until the color appears completely uniform with no visible streaks. Avoid vigorous whipping, which can incorporate air and make the problem worse or change the texture.
Problem: Altered Buttercream Consistency
Adding too much liquid coloring, or sometimes even too much gel coloring (though less common), can result in buttercream that is too soft or even runny, making it difficult to pipe or spread smoothly.
Solution: Adjusting Liquid or Powdered Sugar
If your buttercream becomes too soft after coloring, you can often correct the consistency by adding a small amount of additional powdered sugar. Add the sugar a tablespoon at a time, mixing on low speed or folding by hand, until the desired stiffness is achieved. Conversely, if the buttercream seems too stiff after adding color (sometimes happens with certain gel brands or if the base was already stiff), you can add a tiny amount of milk, cream, or water (1/2 teaspoon at a time) to loosen it up. Mix gently until smooth.
Problem: Achieving True Red or Black
These two colors are notoriously difficult to achieve deeply and vibrantly without using excessive amounts of coloring or developing a bitter taste. Standard red or black gels may require large quantities.
Solution: Using "No Taste" Red and Concentrated Black Gel
For true red, seek out "no taste" red gel food colorings, specifically formulated to achieve a deep red hue without the bitterness often associated with red dyes. Start with a base color of pink or even a light orange before adding the red, as this can help reduce the amount of red needed. For black, use a highly concentrated black gel paste.
Some bakers start with a chocolate buttercream base (which is already dark brown) before adding black gel, as this requires less black coloring to achieve a deep shade. Allow plenty of time for the color to develop, as both red and black often deepen significantly as they sit.
Professional Buttercream Coloring Techniques
Taking your buttercream coloring skills to the next level involves understanding a few more advanced concepts and techniques used by professional bakers. These easy buttercream color tips go beyond basic color mixing to help you achieve specific effects and maintain quality.
Utilizing Color Theory for Custom Shades
A basic understanding of color theory can significantly enhance your ability to create custom and complex buttercream shades. Knowing how primary colors (red, blue, yellow) mix to create secondary colors (green, orange, purple) and how adding white or black changes the tint or shade allows you to mix almost any color imaginable from a limited set of gel colors.
For instance, to create a specific shade of teal, you'll mix blue and green, then potentially add a tiny amount of yellow or white to adjust the hue and lightness. To achieve a muted or dusty shade, you might add a touch of the color's complement (e.g., a tiny bit of purple to yellow) or a small amount of brown or black. Experimenting with small test batches is key to mastering custom color mixing.
Achieving a Pure White Buttercream Base
Sometimes, the goal isn't a vibrant color, but a pure, stark white buttercream. Standard buttercream, especially American buttercream made with butter, often has a slightly yellowish tint. Achieving a true white can be challenging.
One technique is to add a tiny amount of violet or purple gel food coloring. Purple is the complement of yellow, and adding a minuscule amount can neutralize the yellow tones, making the buttercream appear whiter. Be extremely cautious, adding only the tiniest speck at a time, as too much will turn your buttercream grey or purple. Another approach is to use shortening-based buttercreams (like a crusting buttercream) or meringue-based buttercreams (like Swiss or Italian meringue buttercream), which often have a naturally whiter base than butter-based frostings.
Storing Colored Buttercream Properly
Proper storage is essential for preserving the color and consistency of your colored buttercream. Buttercream, whether colored or plain, should be stored in an airtight container in the refrigerator for up to two weeks or frozen for up to two months.
When refrigerating, cover the surface of the buttercream directly with plastic wrap before putting on the lid to prevent a crust from forming and to minimize oxidation, which can sometimes affect certain colors. When you're ready to use refrigerated or frozen buttercream, allow it to come to room temperature gradually, then re-whip it briefly on low speed with a paddle attachment (or by hand) until it is smooth and pliable again. You may need to add a teaspoon of milk or cream if it seems too stiff.
Buttercream Coloring Techniques: Beyond the Basics
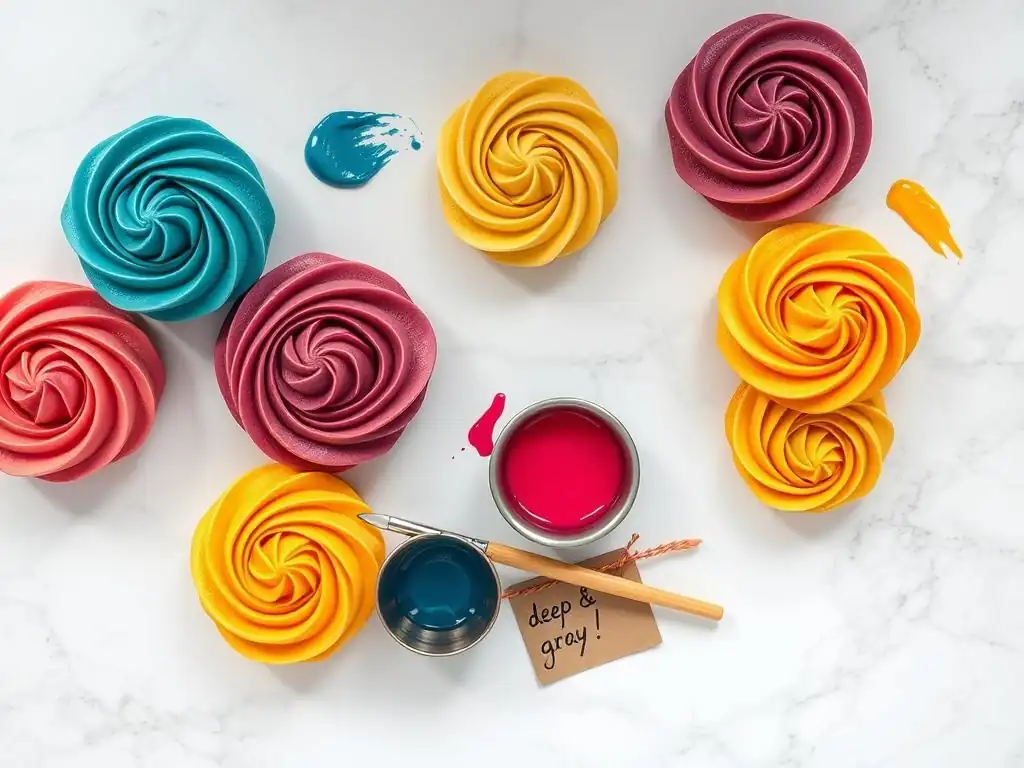
Once you've mastered achieving solid, deep colors, you can explore more advanced techniques that use colored buttercream to create stunning visual effects. These methods leverage multiple colors and specific application styles.
Ombre Buttercream: Achieving a Seamless Gradient
Ombre, or gradient, coloring involves transitioning smoothly from one color to another, often from light to dark within the same hue, or between complementary or analogous colors. To create an ombre effect on a cake, you typically divide your buttercream base into several portions. Color one portion the darkest shade, another the lightest (or leave it white), and color the portions in between with increasingly darker shades.
Pipe bands of each color onto the side of the cake, starting with the darkest at the bottom and lightest at the top. Then, use a cake scraper to smooth the side, gently pulling the scraper around the cake. The scraping action will blend the edges of the different color bands, creating a seamless gradient effect. This technique requires careful color mixing and smooth application for the best results.
Marbled Buttercream: Creating Swirling Patterns
Marbled buttercream creates beautiful, organic swirling patterns of two or more colors. This effect is relatively easy to achieve and looks impressive. Start with your base buttercream and color portions of it with your desired colors. Do not mix the colors completely into the entire batch; keep them separate.
Place dollops or stripes of the different colored buttercreams onto a sheet of plastic wrap. Roll the plastic wrap into a log, gently twisting the ends. Cut off one end of the plastic wrap log and place the log into a piping bag fitted with your desired tip. As you pipe, the different colors will swirl together, creating a marbled effect. The less you mix the colors before putting them on the plastic wrap, the more distinct the swirls will be.
Watercolor Buttercream: A Delicate Painted Effect
The watercolor technique gives the appearance of soft, blended brushstrokes on the cake's surface. This effect is achieved by applying small dabs or strokes of different colored buttercreams onto a base layer of frosting, then gently smoothing and blending them with a clean spatula or scraper.
Color small amounts of buttercream in several shades, including lighter and darker versions of your main colors. Apply a base layer of buttercream to the cake. Then, using a small offset spatula or the back of a spoon, apply small amounts of the colored buttercreams randomly onto the cake's surface. Gently smooth the entire surface with a large cake scraper, rotating the cake. The colors will blend softly, mimicking a watercolor painting. You can repeat the smoothing process to achieve different levels of blending.
Key Buttercream Coloring Principles
Recapping the core principles ensures you can consistently achieve beautiful, deeply colored buttercream for all your baking projects. These easy buttercream color tips are your roadmap to success.
Summary of Best Practices for Intense, Vibrant Colors
- Use Gel Colors: Always opt for concentrated gel paste or gel food colorings over liquid ones to minimize added moisture.
- Start Small: Add color incrementally, mixing thoroughly after each addition, until you approach the desired shade.
- Allow Development Time: Let the colored buttercream rest for at least 30 minutes, or preferably longer, to allow the color to deepen naturally.
- Mix Thoroughly but Gently: Ensure uniform color by scraping down the bowl and folding the buttercream until no streaks remain, but avoid overmixing which can add excess air or change texture.
- Troubleshoot Smartly: Know how to adjust consistency with powdered sugar or liquid, and use specific color formulations for challenging shades like red and black.
- Plan Ahead: Color your buttercream in advance to allow for color development and to ensure it's ready when you need it for decorating.
Enjoying Your Beautifully Colored Buttercream Creations!
Armed with these easy buttercream color tips, you are now equipped to create cakes and other baked goods adorned with stunning, deeply colored buttercream. Experiment with different shades, try out the advanced techniques like ombre or marbling, and don't be afraid to play! The ability to confidently color your frosting opens up a world of creative possibilities in cake decorating. Enjoy the process and take pride in the vibrant, beautiful results you achieve. Happy baking and coloring!
Frequently Asked Questions
How can I achieve deep, vibrant colors in my buttercream without it looking dull or pastel?
Achieving deep buttercream colors requires using gel food coloring rather than liquid. Start with a small amount, mix thoroughly, and allow the color to develop over time, even overnight, for a richer hue.
Why does my buttercream sometimes taste bitter after adding food coloring?
Bitterness is often caused by using too much food coloring, especially with certain brands. To avoid this, use high-quality gel colors and add color gradually, tasting as you go.
What are some tips for preventing my buttercream from becoming too soft when adding color?
Excessive liquid can soften buttercream. Stick to gel or powdered food coloring to minimize liquid addition. If needed, add a small amount of powdered sugar to restore the desired consistency.
Can I use natural food coloring to color buttercream? Will it achieve the same deep colors?
While natural food colorings are an option, they often don't achieve the same intensity of color as artificial gel colors. You may need to use more, and the final color may be more muted.
What is the best way to avoid streaking or uneven color distribution in my buttercream?
Ensure the food coloring is fully incorporated by mixing thoroughly. Using an electric mixer on low speed can help achieve even distribution. Letting the color rest and develop also helps.
Final Reflection: The Joy of Vibrant, Mess-Free Buttercream
Mastering the art of vibrant buttercream coloring isn't just about aesthetics; it's about unlocking the potential for creative expression in baking. The techniques explored in this article—from choosing the right gel colors to employing efficient mixing methods—are more than just tips; they're keys to transforming ordinary cakes into edible masterpieces. This isn't just about pretty frosting; it's about empowering bakers of all skill levels to achieve professional-looking results.
The impact of beautifully colored buttercream extends far beyond the plate. It's a visual feast that elevates celebrations, adds a personal touch to gifts, and transforms everyday moments into something special. The simplest things are often the most beautiful.
This quote rings true when considering the transformative power of a perfectly colored buttercream rose or a delicately shaded ombre cake. The joy it brings, both to the baker and the recipient, is immeasurable. It's a testament to the power of simple ingredients and skillful technique to create something truly remarkable.
Now, it's your turn. Take what you've learned here and experiment! Don't be afraid to try new color combinations, explore different techniques, and most importantly, have fun. The journey of mastering buttercream coloring is a rewarding one, filled with delicious discoveries and the satisfaction of creating something beautiful with your own hands. Let your creativity flow, and remember, even the smallest details can make the biggest impact. Go forth and create stunning, mess-free buttercream masterpieces!
Unlock Vibrant Buttercream: Deeper Colors, Easier Baking!
Thanks for diving into the world of richly colored buttercream! We hope you've gained some helpful tips and tricks for achieving those stunning deep shades without the usual mess. Ready to put your new skills to the test?
- Create your masterpiece: Try out one of the color combinations you learned about today – and share your results with us! We'd love to see your vibrant creations.
- Explore new shades: Experiment with different food coloring brands and techniques to discover your favorite palette.
- Join our community: Share your buttercream successes (and challenges!) on our social media channels – let’s inspire each other! #BakeWithEase #ButtercreamMagic
What stunning color will you create next?