
How to Bake Perfect Easter Sugar Cookies


Welcome to BakeWithEase, your guide to unlocking baking brilliance! Are you ready to create Easter treats that are both beautiful and irresistibly delicious? Dive into our Perfect Easter Sugar Cookie Recipe and discover the secrets to achieving that flawless, melt-in-your-mouth texture and stunning decorated finish. But what makes these sugar cookies truly special? Let's find out...
- How to Bake Perfect Easter Sugar Cookies: A BakeWithEase Guide
- BakeWithEase Presents: The Ultimate Easter Sugar Cookie Recipe
- Gathering Your Ingredients for the Best Easter Sugar Cookies
- Step-by-Step Guide to Baking Perfect Easter Sugar Cookies
- Decorating Your Easter Sugar Cookies: Unleash Your Creativity
- Tips and Tricks for Baking the Best Easter Sugar Cookies
- Perfect Easter Sugar Cookies: A Recipe for Success with BakeWithEase
-
Frequently Asked Questions
- How can I ensure my Easter sugar cookies are perfectly shaped and don't spread during baking?
- What's the secret to achieving soft and chewy Easter sugar cookies instead of hard and crunchy ones?
- Can I substitute ingredients in the Perfect Easter Sugar Cookie Recipe if I have dietary restrictions?
- What are some creative decorating ideas for my Easter sugar cookies, beyond just sprinkles and frosting?
- How long will my Perfect Easter Sugar Cookies stay fresh, and what's the best way to store them?
- Final Reflection: The Enduring Sweetness of Tradition
- Unleash Your Inner Baker: Perfect Easter Cookies Await!
Baking Easter sugar cookies is a cherished tradition, bringing joy and delicious aromas into the home. However, achieving that ideal balance of tender texture, crisp edges, and a surface perfect for decorating can sometimes feel elusive. This specific perfect Easter sugar cookie recipe is designed with simplicity and success in mind, making it accessible for bakers at any skill level. It focuses on classic techniques that yield consistently wonderful results, ensuring your Easter baking is stress-free and incredibly rewarding.
Our approach demystifies the process, breaking down each step from ingredient selection to the final decorative flourish. We address common pitfalls and offer practical tips to guarantee your cookies turn out beautifully every time. Whether you're a seasoned pro or baking your first batch of holiday treats, this guide provides the reliable foundation you need to create a truly perfect Easter sugar cookie that everyone will adore.
A truly perfect Easter sugar cookie embodies several key characteristics. Firstly, the texture is paramount: it should be firm enough to hold its shape and be decorated, yet tender and slightly crisp on the edges, never hard or crumbly. The flavor profile should be rich and buttery, complemented by a hint of vanilla or other natural extracts, providing a delightful taste that isn't overly sweet before icing.
Beyond texture and flavor, a perfect sugar cookie boasts a surface that is smooth and stable, ideal for applying royal icing or other decorations without cracking or bubbling. It also holds its shape well during baking, meaning those intricate bunny or egg cutters you use will result in cookies that actually look like their intended festive forms. Achieving this requires attention to detail in ingredient ratios, mixing technique, chilling, and baking time, all elements emphasized in this perfect Easter sugar cookie recipe guide.
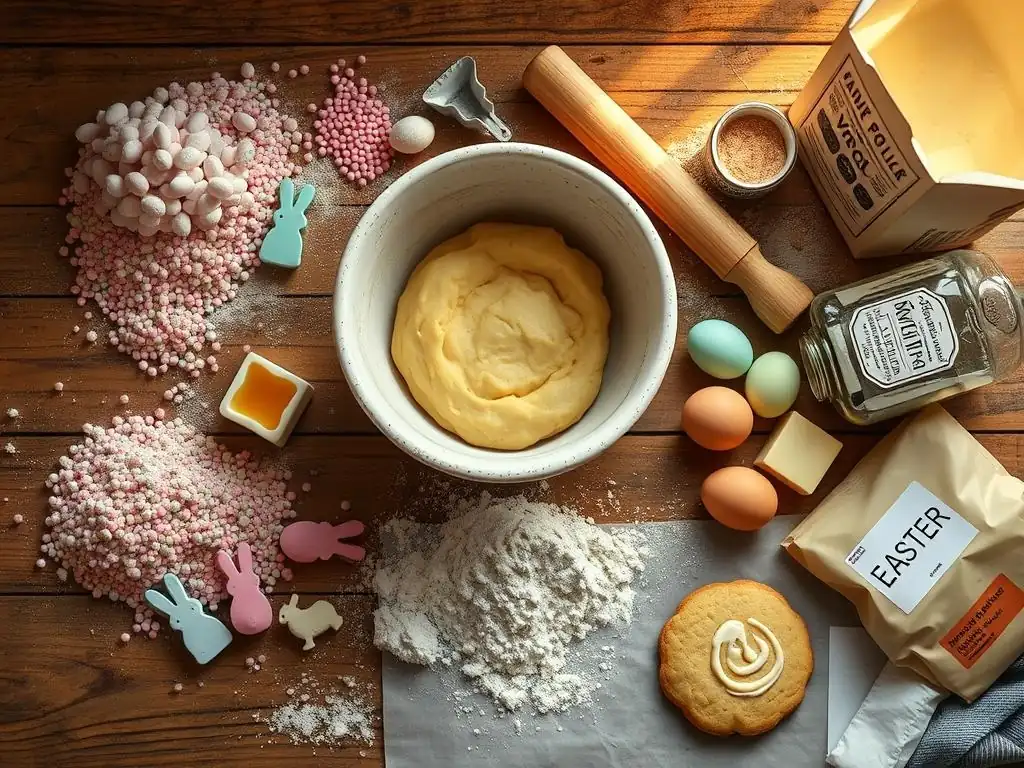
Crafting truly delicious sugar cookies for Easter begins with selecting the right ingredients. At its core, a classic sugar cookie recipe relies on just a few staples: butter, sugar, eggs, flour, and vanilla extract. The quality of each component significantly impacts the final taste and texture. For instance, using high-fat butter (typically around 80% butterfat in standard options) contributes to a richer flavor and more tender crumb compared to lower-fat alternatives or margarines.
Ensuring your ingredients are at the correct temperature is also crucial. Butter should be softened but not melted, allowing it to cream properly with sugar, which incorporates air for a lighter texture. Eggs should be at room temperature so they emulsify smoothly with the butter mixture, preventing a curdled appearance and promoting a more uniform dough. Using fresh ingredients, especially butter and eggs, is key to achieving the vibrant flavor profile expected in a perfect Easter sugar cookie.
High-Quality Flour for a Tender Crumb
The type and quality of flour play a critical role in determining the structure and tenderness of your sugar cookies. All-purpose flour is the standard choice for most sugar cookie recipes, offering a good balance of protein content (typically between 10-12%) that provides structure without making the cookies tough. Using bleached all-purpose flour can sometimes result in a slightly softer cookie compared to unbleached, though either works well for this perfect Easter sugar cookie recipe.
Measuring flour accurately is also vital. Too much flour can lead to dry, crumbly cookies, while too little can cause them to spread excessively during baking. Using the "spoon and level" method – gently spooning flour into your measuring cup and leveling off the excess with a straight edge – is recommended over scooping directly from the bag, which can compact the flour and result in using too much. This attention to detail ensures the dough has the right consistency for a tender crumb.
The Importance of Fresh Butter and Eggs in Easter Baking
Fresh, high-quality butter and eggs are non-negotiable for achieving the rich flavor and perfect texture in your Easter sugar cookies. Unsalted butter is generally preferred as it gives you control over the salt level in the recipe, preventing cookies from being unexpectedly salty. As mentioned, butterfat content contributes significantly to tenderness; look for standard butter with about 80% fat. Ensure your butter is properly softened – it should yield slightly when pressed but not be greasy or melted – for optimal creaming.
Large eggs are the standard size used in most baking recipes, including this perfect Easter sugar cookie recipe. Using large eggs (weighing approximately 50 grams each out of the shell) ensures the correct moisture and binding structure in the dough. Bringing eggs to room temperature helps them incorporate more smoothly into the butter-sugar mixture, creating a more homogenous dough that bakes evenly. Freshness impacts flavor, so check expiration dates to ensure your ingredients are at their peak.
Sugar Selection for Optimal Sweetness and Texture
Granulated sugar is the primary sweetener in most sugar cookie recipes, providing both sweetness and contributing to the cookie's structure and crispness. The size of the sugar crystals affects how they interact with the butter during the creaming process; standard fine granulated sugar works best for incorporating air and creating a tender cookie. Using superfine or caster sugar can result in an even finer crumb, while coarser sugars might not dissolve as completely.
While granulated sugar is essential for the dough's structure and sweetness, some recipes, or the icing, might call for powdered sugar (confectioners' sugar). Powdered sugar contains a small amount of cornstarch, which helps prevent clumping and results in a very fine texture, making it ideal for smooth icings. For the cookie dough itself, stick to the specified granulated sugar for the desired balance of sweetness and texture in this perfect Easter sugar cookie recipe.
Natural Flavorings: Vanilla Extract and Beyond
Vanilla extract is the classic flavoring for sugar cookies, providing warmth and enhancing the buttery sweetness. Using pure vanilla extract, derived from vanilla beans, offers a more complex and authentic flavor compared to imitation vanilla extract, which is made from synthetic vanillin. While imitation vanilla is more affordable, pure vanilla extract is worth the investment for the depth of flavor it imparts to your perfect Easter sugar cookie.
Beyond vanilla, you can explore other natural flavorings to customize your Easter sugar cookies. A touch of almond extract can add a subtle nutty note that pairs wonderfully with vanilla. Lemon zest or extract can brighten the flavor profile, especially fitting for a spring-themed Easter cookie. Just remember that extracts are potent, so use them sparingly, often just a quarter or half teaspoon in addition to or in place of some vanilla, to avoid overpowering the delicate cookie flavor.

Creaming Butter and Sugar for a Light and Airy Base
The first crucial step in creating a perfect Easter sugar cookie dough is properly creaming the softened butter and granulated sugar. Using a stand mixer fitted with the paddle attachment, or a hand mixer, beat the butter on medium speed until it's smooth and creamy. Then, gradually add the granulated sugar.
Continue beating the mixture for 3-5 minutes, or until it becomes light, fluffy, and pale yellow in color. This process incorporates air into the mixture, which helps the cookies rise slightly and contributes to a tender texture, preventing a dense or hard cookie. Scrape down the sides and bottom of the bowl periodically to ensure everything is evenly combined.
Incorporating Eggs and Vanilla Extract
Once the butter and sugar are properly creamed, it's time to add the wet ingredients. Add the room-temperature eggs one at a time, beating well after each addition until fully incorporated. Adding them individually ensures they emulsify correctly with the butter mixture. After the eggs are mixed in, add the vanilla extract (and any other liquid flavorings, like almond extract). Beat for just another minute or so until everything is combined and smooth. Avoid overmixing at this stage once the eggs are in, as it can begin to develop the gluten in the flour prematurely.
Gradually Adding Flour for a Perfect Dough Consistency
With the wet ingredients incorporated, it's time to add the dry ingredients, primarily the flour. In a separate bowl, whisk together the all-purpose flour and any leavening agents like baking powder or baking soda (though many classic sugar cookie recipes rely solely on creaming for lift). Gradually add the dry ingredients to the wet mixture, typically in two or three additions, mixing on low speed just until the flour disappears.
Overmixing the dough after the flour is added develops gluten, which can result in tough cookies. The goal is to mix until the dough just comes together. The resulting dough should be relatively soft but not sticky.
Step 2: Chilling the Dough for Easy Handling
Why Chilling is Crucial for Sugar Cookies
Chilling the sugar cookie dough is perhaps the most critical step for achieving perfectly shaped cookies that don't spread excessively during baking. When the dough is warm, the fat (butter) is soft. Placing the dough in the refrigerator solidifies the butter. This firm butter melts more slowly in the hot oven, allowing the cookie's structure to set before the butter spreads too much. Chilling also makes the dough much easier to handle, roll out, and cut into precise Easter shapes without sticking to surfaces or losing definition.
Tips for Chilling the Dough Quickly and Effectively
To chill the dough effectively for your perfect Easter sugar cookie recipe, flatten the dough into a disc or two before wrapping it tightly in plastic wrap. A flatter disc chills faster than a large ball. Refrigerate for at least 1-2 hours. If you're short on time, you can place the wrapped dough in the freezer for 20-30 minutes, checking periodically to ensure it doesn't freeze solid.
Dough that is too cold will be difficult to roll. The ideal consistency is firm but still pliable enough to roll without excessive force or cracking. You can also roll out the dough before chilling, then chill the rolled sheets, which makes cutting shapes very easy.
Achieving Uniform Thickness for Even Baking
Rolling the dough to a consistent thickness is essential for ensuring your Easter sugar cookies bake evenly. Cookies of varying thickness will require different baking times, leading to some being overdone while others are underbaked. Aim for a thickness of about 1/4 inch (approximately 6mm). Using a rolling pin with adjustable guides is a simple way to achieve this uniformity. If you don't have one, you can use two wooden dowels or rulers of the desired thickness placed on either side of the dough as guides for your rolling pin.
Using Easter-Themed Cookie Cutters for Festive Shapes
This is where the fun truly begins for your perfect Easter sugar cookie! Select your favorite Easter-themed cookie cutters – bunnies, eggs, chicks, flowers, crosses, etc. Dip the edges of your cookie cutters in flour before each cut. This simple trick helps prevent the dough from sticking to the cutter and ensures clean, crisp edges for your shapes. Press the cutter straight down firmly, then lift straight up. Try to place cuts close together to minimize scraps, but leave enough space between cuts to easily lift the shapes.
Preventing Dough from Sticking to the Counter
Working with sugar cookie dough can sometimes involve sticking, but there are several ways to prevent this. Lightly flour your work surface and rolling pin. Avoid using excessive flour, as incorporating too much extra flour into the dough can make the cookies dry.
Alternatively, you can roll the dough between two sheets of parchment paper or wax paper. This method requires no extra flour on the surface and makes transferring the cut shapes to the baking sheet very easy – simply peel away the top layer of paper. If the dough becomes too soft or sticky as you work, pop it back into the refrigerator for a few minutes to firm up.
Optimal Oven Temperature for Golden-Brown Cookies
Baking at the correct temperature is crucial for achieving a perfect Easter sugar cookie with the desired texture and color. A standard temperature for sugar cookies is 350°F (175°C). This temperature allows the cookies to bake through without over-browning the edges too quickly. Ensure your oven is accurately calibrated; an oven thermometer can help verify the true temperature inside. Preheat your oven for at least 15-20 minutes before baking to ensure it reaches and maintains the set temperature throughout the baking process.
Monitoring Baking Time to Avoid Over-Baking
Baking time for sugar cookies is relatively short, typically ranging from 8 to 12 minutes, depending on the thickness of the cookies and your oven. Sugar cookies are done when the edges are lightly golden brown and the centers appear set, not wet or shiny. They should not be deeply browned if you want a surface suitable for decorating. Start checking your cookies around the 8-minute mark. It's better to underbake slightly than to overbake, as cookies will continue to cook slightly on the hot baking sheet after being removed from the oven.
Tips for Even Baking Across the Cookie Sheet
For even baking, place your cookie cutouts on a baking sheet lined with parchment paper or a silicone baking mat, leaving about 1-2 inches between cookies to allow for slight spreading. Avoid overcrowding the baking sheet. If your oven has hot spots, rotate the baking sheet halfway through the baking time (e.g., after 4-5 minutes if baking for 10 minutes). This helps ensure all cookies receive equal heat exposure, resulting in uniformly baked and colored perfect Easter sugar cookies.
Why Cooling on a Wire Rack is Essential
Once your Easter sugar cookies are baked to perfection, letting them cool properly is a critical step before decorating or storing. Leave the cookies on the hot baking sheet for just 1-2 minutes after removing them from the oven; they are still delicate and need a moment to firm up. After this brief resting period, carefully transfer the cookies using a spatula to a wire cooling rack. Cooling on a wire rack allows air to circulate around the entire cookie, preventing condensation on the bottom and ensuring they cool completely and evenly.
Preventing Cookies from Sticking After Baking
Using parchment paper or a silicone baking mat on your baking sheet is the best way to prevent cookies from sticking during and after baking. If you bake directly on an ungreased metal sheet, the hot sugar can cause the cookies to adhere firmly as they cool, making them difficult to remove without breaking. Even with a liner, be gentle when transferring the warm cookies to the cooling rack.
Ensure the cookies are completely cool, which may take 30 minutes to an hour depending on room temperature, before attempting to stack, store, or decorate them. Warm cookies will break easily and melt icing.

Preparing Royal Icing for Professional-Looking Results
Royal icing is a popular choice for decorating sugar cookies due to its smooth finish and ability to dry hard, allowing for stacking and intricate designs. It's typically made from powdered sugar, meringue powder (or egg whites), and water or liquid. The key to successful royal icing is achieving the right consistency, which can vary depending on whether you are outlining or flooding. Generally, a thicker "outline" consistency is like toothpaste or thick syrup, while a thinner "flood" consistency is like honey or pancake batter.
To prepare, whisk together powdered sugar and meringue powder. Gradually add water, mixing on low speed until smooth. Increase speed to medium-high and beat until stiff peaks form (for outlining) or until it reaches the desired runnier consistency (for flooding), adding more water drop by drop as needed. Adding a touch of corn syrup or glycerin can help prevent the icing from drying too hard or brittle. Sift your powdered sugar beforehand to avoid lumps, which can clog piping tips.
Achieving the Right Consistency for Outlining and Flooding
Mastering royal icing consistency is crucial for creating a perfect Easter sugar cookie design. For outlining, you need an icing that is thick enough to hold a defined line but still flows smoothly from a piping bag. Test by lifting your spoon; the ribbon of icing should hold its shape briefly before settling.
For flooding, you need a thinner consistency that will spread smoothly to fill the outlined area. Test by drawing a line through the icing in the bowl; it should disappear and become smooth again within 10-15 seconds. Adjust consistency by adding more powdered sugar to thicken or more water (or lemon juice for a slight tang) to thin.
Coloring Your Royal Icing with Food Gels
For vibrant Easter sugar cookies, food coloring gels are highly recommended over liquid food coloring. Gel colors are concentrated, meaning you need only a small amount to achieve bright, rich colors without adding excess liquid that could alter the icing's consistency. Add color gradually using a toothpick, mixing thoroughly after each addition until you reach the desired shade. Remember that colors can deepen slightly as the icing dries. Separate your prepared icing into small bowls for each color you plan to use before adding the gel colors.
Outlining Cookies with Precision
Once your royal icing is prepared and colored, outlining is the first step for flooded cookies. Transfer the outline-consistency icing to a piping bag fitted with a small round tip (like Wilton #1, #2, or #3). Hold the piping bag like a pencil, hovering slightly above the cookie surface, and let the icing flow out as you guide it along the edge of the cookie.
The slight hover allows the icing to fall into place smoothly. Connect your outline to create a dam that will hold the thinner flood icing inside. Practice on parchment paper first if you're new to piping.
Flooding Cookies for a Smooth, Even Surface
After outlining, let the outline dry for 10-20 minutes to prevent the flood icing from bleeding through. Then, fill the outlined area with your flood-consistency icing. You can use a piping bag with a slightly larger tip or a squeeze bottle for this. Fill the area, then use a scribe tool, toothpick, or clean paintbrush to gently spread the icing to the edges and pop any air bubbles. Work quickly as flood icing can crust over. If covering a large area, flood in sections.
Adding Details with Sprinkles, Edible Markers, and More
Once the flood layer has dried (this can take several hours or overnight), you can add details to your perfect Easter sugar cookie. Use outline-consistency icing with fine tips to pipe designs like flowers, dots, or lines. Apply sprinkles immediately after flooding a section if you want them to sink slightly into the icing, or apply them to wet piped details. Edible markers are great for drawing faces or fine lines on fully dried icing. Edible glitter, sugar pearls, and other confectionery decorations can be attached using a tiny dab of royal icing as glue.
Easter offers a wealth of adorable decorating possibilities for your perfect Easter sugar cookie. Classic designs include pastel-colored eggs, fluffy bunnies with tails made of sprinkles or mini marshmallows, and cheerful chicks. You can also create cross shapes, spring flowers like tulips or daffodils, or simply decorate round cookies with polka dots, stripes, or chevron patterns in Easter colors like lavender, mint green, baby blue, and pale yellow.
Consider themes like Easter baskets, carrots, or even little lambs. Look online or in baking books for inspiration, but don't be afraid to get creative and develop your own unique perfect Easter sugar cookie designs!
Avoiding Spread During Baking
Excessive spread is a common issue that can ruin the defined shapes of your Easter sugar cookies. The primary culprit is often warm dough or too much leavening. Ensure your dough is thoroughly chilled (at least 1-2 hours) before rolling and cutting.
If working in a warm kitchen, roll and cut only a portion of the dough at a time, keeping the rest chilled. Also, check your recipe's leavening (baking powder/soda) amounts; too much can cause excessive puffing and spreading. Using softened but not melted butter during creaming is also key, as melted butter results in a greasy dough prone to spreading.
Preventing Cookies from Burning
Burning usually occurs due to incorrect oven temperature, placing cookies too close to heating elements, or simply baking for too long. Always preheat your oven fully and consider using an oven thermometer to verify the temperature. Position baking sheets in the center of the oven rack, away from the top or bottom elements. Start checking your cookies at the lower end of the suggested baking time (e.g., 8 minutes for a recipe suggesting 8-12). Look for lightly golden edges, not dark brown. Rotate your baking sheet halfway through baking if you notice uneven browning.
Troubleshooting Dry or Crumbly Dough
Dry or crumbly dough is often the result of too much flour or insufficient mixing of wet ingredients. Ensure you measure your flour accurately, preferably by weight if possible, or by using the spoon and level method. Avoid packing flour into the measuring cup.
If your dough feels dry after mixing, you can try adding a teaspoon of milk or cream at a time and mixing minimally until it just comes together. However, adding too much liquid can affect texture. Proper creaming of butter and sugar, and ensuring eggs are at room temperature and fully incorporated, also helps create a well-emulsified dough that isn't dry.
Proper Storage Containers for Baked Cookies
To keep your perfect Easter sugar cookies fresh and delicious after baking (and decorating, if applicable), proper storage is essential. Once the cookies are completely cooled and any icing is fully dried (this can take 12-24 hours for royal icing), store them in an airtight container. Layer cookies between sheets of parchment paper to prevent them from sticking together or decorations from smudging. Store decorated and undecorated cookies separately if possible, as undecorated cookies may absorb moisture from icing. Kept at room temperature, they typically stay fresh for 5-7 days.
Freezing Unbaked Dough for Future Use
One great tip for future baking is to freeze portions of your unbaked perfect Easter sugar cookie dough. Wrap discs of dough tightly in plastic wrap, then place in a freezer-safe bag or container. Label with the date. Dough can be frozen for up to 3 months.
When ready to use, thaw the dough overnight in the refrigerator, then let it sit at room temperature for about 15-20 minutes to become pliable enough to roll. Alternatively, you can roll out the dough, cut shapes, and freeze the cutouts on a baking sheet until solid. Transfer frozen cutouts to an airtight container or bag, layered with parchment, and bake directly from frozen, adding a couple of minutes to the baking time.
We hope this guide has empowered you to bake the most perfect Easter sugar cookies yet! There's immense satisfaction in creating these festive treats from scratch and decorating them to celebrate the season. This perfect Easter sugar cookie recipe is designed to be a reliable friend in your kitchen, leading you to delicious results every time. From selecting the right ingredients to mastering the chilling and baking, each step contributes to that ideal cookie base ready for your creative touch.
We love seeing what our BakeWithEase community creates! After you've baked your batch using this perfect Easter sugar cookie recipe and added your beautiful decorations, we encourage you to share photos of your finished cookies. Whether they are simply glazed or elaborately decorated with royal icing, your creations are sure to inspire others. Tag us or share them on social media – let's spread the joy of baking perfect Easter sugar cookies together!
Frequently Asked Questions
To prevent spreading, ensure your dough is chilled thoroughly before cutting and baking. Using cold butter and avoiding over-mixing are also crucial for maintaining shape.
The key is to avoid overbaking. Look for lightly golden edges and a slightly soft center. Also, using brown sugar can increase moisture and chewiness.
Yes, you can often substitute ingredients. For example, use gluten-free flour blend for gluten-free cookies or dairy-free butter for dairy-free versions. However, results may vary.
Consider using royal icing for intricate designs, edible markers for details, or even adding textured elements like sanding sugar or edible glitter.
Properly stored, Easter sugar cookies can stay fresh for up to a week. Keep them in an airtight container at room temperature, or freeze them for longer storage.
Final Reflection: The Enduring Sweetness of Tradition
The pursuit of the perfect Easter sugar cookie is more than just a recipe; it's a journey into the heart of cherished traditions. This seemingly simple act of baking connects us to generations past, fostering memories and creating new ones with every perfectly iced bunny or lamb. The detailed steps outlined in this guide, from chilling the dough to achieving that crisp-yet-tender bite, are not merely instructions, but a pathway to culinary mastery and the joy of sharing.
The influence of baking, particularly around holidays like Easter, is profound. It's a tangible expression of love and care, a symbol of springtime renewal, and a powerful reminder of the importance of slowing down and appreciating the simple pleasures. Baking is at once child's play and adult joy. And love, of course.
- Alma Flor Ada. This quote perfectly encapsulates the magic that unfolds when we dedicate time and attention to crafting something beautiful and delicious, something that brings joy to ourselves and those we share it with.
Now, I invite you to take what you've learned and embark on your own baking adventure. Don't be afraid to experiment, to personalize the recipes, and to let your creativity flourish. The perfect Easter sugar cookie isn't just about following instructions; it's about the love and care you put into it, the memories you create, and the joy you share. So, gather your ingredients, preheat your oven, and let the sweet magic begin. Happy baking!
Thanks for joining us on this delicious journey to Easter cookie perfection! We hope you've picked up some fantastic tips and tricks to elevate your baking game. Ready to put your new skills to the test?
- Bake a batch of your own masterpiece: Use the recipe and techniques from the article to create stunning Easter sugar cookies. Don't forget to experiment with different frosting colors and designs!
- Share your creations: Post a picture of your finished cookies on social media and tag #BakeWithEaseEaster – we'd love to see your baking brilliance!
- Challenge a friend to a cookie decorating duel: It's a fun way to share the joy of baking and see who can create the most impressive design.
What unique Easter cookie design will you create this year? Let us know in the comments below!