
Beginner's Guide to Easter Cake Decorating

Welcome to BakeWithEase, your kitchen companion for all things baking!
Ever dreamed of creating a stunning Easter cake without the stress? You're in the right place. Dive into our Beginner's Guide to Easy Easter Cake Decorating and discover simple techniques and inspiring ideas to transform an ordinary cake into a festive masterpiece. Get ready to impress your friends and family – let's get baking! But first, what simple trick can elevate your cake from drab to fab? Read on to find out!
- Beginner's Guide to Easy Easter Cake Decorating
- Introduction to Easter Cake Decorating for Beginners
- Essential Easter Cake Decorating Supplies and Tools
- Easy Easter Cake Decorating Techniques for Beginners
- Step-by-Step Guide: Decorating a Basic Easter Cake
- Creative Easter Cake Decorating Ideas for Inspiration
- Tips and Tricks for Perfect Easter Cake Decorating
- Conclusion: Enjoy Your Beautifully Decorated Easter Cake
-
Frequently Asked Questions
- What makes a cake "easy" to decorate for Easter, according to BakeWithEase?
- What kind of recipes does BakeWithEase recommend for a beginner's Easter cake?
- What are some examples of "easy-to-find ingredients" for Easter cake decorating, according to BakeWithEase?
- Does BakeWithEase provide techniques for those who want to try more advanced Easter cake decorating?
- Where can I find step-by-step guides for Easter cake decorating on BakeWithEase?
- Final Reflection: The Joy of Simple Easter Baking
- Unleash Your Inner Cake Artist!
Beginner's Guide to Easy Easter Cake Decorating
Introduction to Easter Cake Decorating for Beginners
Why Easter Cake Decorating is Easier Than You Think
Many aspiring bakers feel intimidated by cake decorating, picturing elaborate, multi-tiered creations seen on television. However, when it comes to easy Easter cake decorating, the focus is often on charming simplicity and joyful themes rather than complex techniques. Think pastel colors, simple shapes like eggs and bunnies, and readily available candies. Learning a few basic skills, like how to frost a cake smoothly or pipe simple shapes, can open up a world of possibilities without requiring years of practice. It's about having fun and adding a personal, festive touch to your holiday baking.
The beauty of easy Easter cake decorating lies in its forgiving nature. Imperfections often add to the homemade charm of an Easter cake. A slightly wobbly piped line can look like a whimsical grass blade, and uneven frosting can resemble a rustic nest. This guide breaks down the process into manageable steps, focusing on beginner-friendly methods and supplies. By the end, you'll see that creating a delightful Easter centerpiece is well within your reach, making your holiday baking experience enjoyable and stress-free.
Get Ready to Bake and Decorate Your Easter Cake with Ease
Preparing for your easy Easter cake decorating adventure involves a few simple steps to ensure everything runs smoothly. Start by selecting a straightforward cake recipe – a basic vanilla or chocolate cake works perfectly. Ensure you have all your ingredients measured and ready before you begin baking. For the decorating part, gather your chosen frosting and any specific tools or candies you plan to use, such as food coloring, sprinkles, or miniature chocolate eggs. Having everything laid out in advance eliminates last-minute scrambling and makes the entire process feel more relaxed and manageable.
The key to decorating your Easter cake with ease is organization and patience. Don't feel rushed to create a masterpiece instantly. Take your time with each step, from baking and cooling the cake to applying the final decorations. Remember that even professional bakers started somewhere, and every cake is a learning opportunity. Embrace the fun of experimenting with colors and textures, and focus on the joy of creating something special for your Easter celebration. This guide will walk you through the essential elements, making easy Easter cake decorating accessible and enjoyable for everyone.
Essential Easter Cake Decorating Supplies and Tools
Must-Have Baking Tools for Easter Cakes
Having the right basic baking tools is fundamental before you even think about decorating your Easter cake. A reliable set of measuring cups and spoons is crucial for accurate ingredient proportions, ensuring your cake bakes correctly. You'll also need mixing bowls of various sizes, a whisk or electric mixer for batters, and cake pans. For a standard round cake, two 8-inch or 9-inch pans are common, allowing you to create layers. Parchment paper is invaluable for lining pans to prevent sticking, making cake removal much easier – a small step that saves significant frustration.
Beyond the absolute basics, a cooling rack is essential for letting your cake layers cool completely before frosting. Attempting to frost a warm cake will result in melted, messy frosting. A sharp serrated knife or a cake leveler is also very helpful for trimming the tops of your cake layers to create a flat surface for stacking and decorating. While not strictly 'decorating' tools, these baking essentials lay the foundation for a successful and easy Easter cake decorating project by ensuring you start with perfectly baked and prepared cake layers.
Key Decorating Supplies for Stunning Easter Cakes
Once your cake is baked and cooled, you'll need specific supplies for the easy Easter cake decorating process. The most crucial is frosting – whether homemade buttercream or store-bought. You'll need enough to cover the entire cake generously.
Food coloring is key for achieving those festive Easter pastels; gel food coloring is often preferred as it provides vibrant color without adding too much liquid to the frosting. Piping bags (disposable or reusable) and a few basic piping tips (like a round tip for dots or writing, and a star tip for borders or simple designs) are incredibly versatile for beginners.
Other helpful supplies include an offset spatula for applying and smoothing frosting, and a cake turntable, which makes frosting the sides of the cake much simpler by allowing you to spin the cake smoothly. For classic easy Easter cake decorating, consider having sprinkles, edible glitter, or small candies like jelly beans, mini chocolate eggs, or edible grass on hand. These simple additions can transform a plain frosted cake into a festive Easter treat with minimal effort. Having these supplies ready before you start decorating streamlines the process significantly.
Choosing the Right Easter Cake Recipe for Beginners
Selecting a simple and reliable cake recipe is the first step to easy Easter cake decorating success. For beginners, a sturdy yet moist cake is ideal. Recipes like a classic vanilla pound cake, a basic butter cake, or a simple chocolate cake are excellent choices.
These cakes tend to have a fine crumb that holds up well to frosting and decorating without crumbling excessively. Avoid very delicate or complex recipes for your first decorating project. A reliable sheet cake recipe can also be a fantastic starting point, as it's often easier to bake and frost a single flat layer than multiple round ones.
Consider the flavor profile that complements your desired decorations. A light vanilla cake pairs beautifully with pastel buttercreams and fruity flavors, while chocolate provides a rich contrast to bright colors and candy toppings. Many beginner-friendly recipes yield a moist cake that remains delicious for several days, which is helpful if you plan to bake the cake a day in advance of decorating. Look for recipes with clear instructions and common ingredients; many online baking resources, including BakeWithEase.com, offer tested recipes perfect for your first easy Easter cake decorating project.
Easy Easter Cake Decorating Techniques for Beginners
Simple Buttercream Frosting Techniques for Easter Cakes
Mastering basic buttercream frosting techniques is fundamental for easy Easter cake decorating. The simplest method is the "crumb coat," a thin layer of frosting applied to seal in loose crumbs before the final, thicker layer. Apply a small amount of frosting with an offset spatula and spread it thinly over the top and sides. Chill the cake for about 15-30 minutes until the crumb coat is firm to the touch. This step is crucial for achieving a smooth final finish, preventing crumbs from marring your beautiful Easter design.
For the final frosting layer, apply a generous amount of buttercream. Use your offset spatula to spread it evenly over the top and sides. To get a smoother finish, hold the spatula at a slight angle against the cake side while rotating the cake on a turntable (if you have one).
For the top, gently smooth the frosting outwards from the center or use a bench scraper held vertically against the side and pulled across the top edge for a clean line. Don't aim for absolute perfection initially; a slightly textured finish can look lovely, especially when adding decorations later.
Mastering Easter Egg Colors and Decorations
Achieving those signature soft pastel colors for your Easter cake decorating is surprisingly easy with food coloring. Start with white buttercream frosting. Add gel food coloring sparingly using a toothpick – a tiny amount goes a long way, especially for pastels.
For a standard batch of frosting (enough for an 8 or 9-inch two-layer cake), one small drop of gel color is often sufficient for a light shade. Mix thoroughly with a spatula until the color is uniform. You can mix small batches of different colors in separate bowls for variety, such as light pink, pale yellow, mint green, and sky blue.
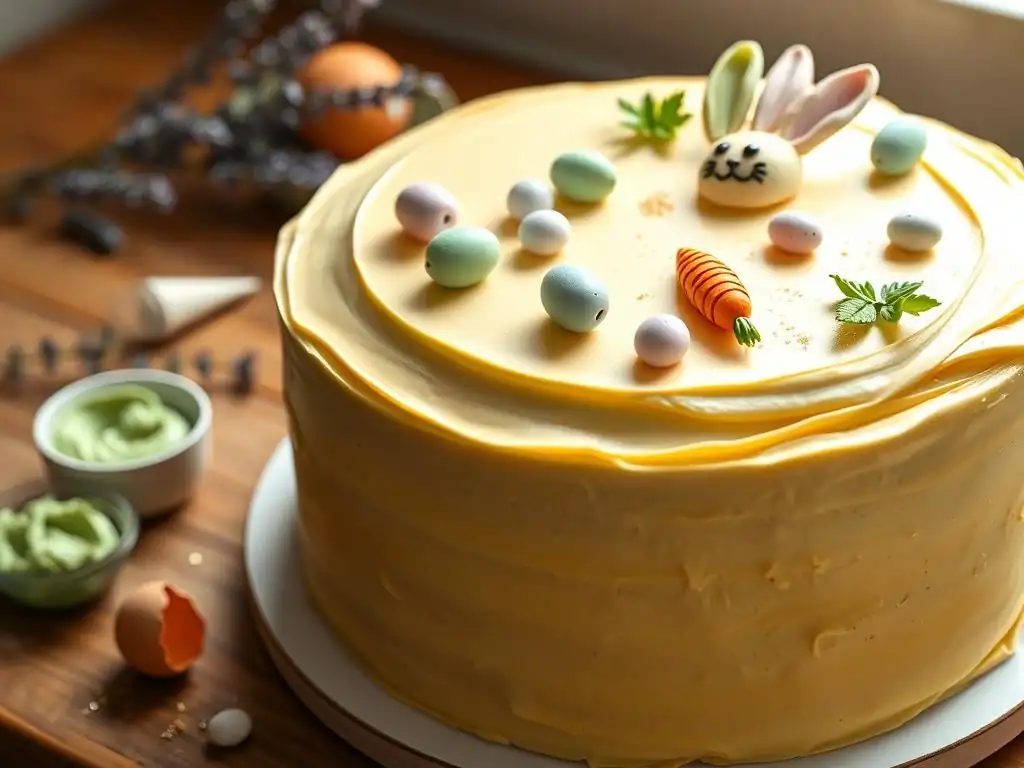
Decorating with Easter eggs is a classic easy Easter cake decorating theme. Miniature chocolate eggs (like Cadbury Mini Eggs or similar) or candy-coated chocolate eggs are perfect for scattering on top of the cake or arranging around the base. You can also create a simple "nest" using piped frosting (see below) and fill it with these candy eggs. For a more hands-on approach, you can dye hard-boiled eggs and place them carefully on top of a flat-topped cake, though this requires careful handling and refrigeration.
Creating Easter-Themed Cake Toppers
Simple Easter-themed cake toppers can instantly elevate your easy Easter cake. One of the easiest involves using store-bought items. Small marshmallow bunnies or chicks can be placed directly on the frosting. Edible sugar decorations, readily available in baking supply aisles around Easter, often come in shapes like flowers, butterflies, or tiny eggs. A handful of these scattered creatively can make a big impact with minimal effort.
Alternatively, you can create simple toppers yourself. For instance, use a cookie cutter to cut shapes like bunnies or eggs from fondant or even thick paper (for non-edible toppers). You can also use pretzel sticks or Pirouette cookies to create a simple "fence" around the cake's edge. Even arranging candy eggs or colorful sprinkles in a specific shape, like a cross or a simple egg outline, counts as creating a topper. The goal is to add a focal point that clearly communicates the Easter theme without requiring intricate sculpting or advanced skills.
Step-by-Step Guide: Decorating a Basic Easter Cake
Step 1: Baking Your Easter Cake Base
The foundation of your easy Easter cake decorating project is, of course, the cake itself. Start by selecting your beginner-friendly recipe (like a simple vanilla or chocolate cake). Preheat your oven to the temperature specified in the recipe, typically around 350°F (175°C). Prepare your cake pans by greasing and flouring them, or lining the bottoms with parchment paper, which is highly recommended for easy release. Mix your batter according to the recipe instructions, being careful not to overmix, which can result in a tough cake.
Divide the batter evenly between your prepared pans. Bake for the time specified in the recipe, usually 25-35 minutes for 8 or 9-inch layers. You can check for doneness by inserting a toothpick into the center; it should come out clean. Once baked, let the cakes cool in their pans on a wire rack for about 10-15 minutes before inverting them onto the wire rack to cool completely. Ensure the cakes are entirely cool, ideally at room temperature for at least 2-3 hours, before attempting to frost them. Warm cakes will melt your frosting.
Step 2: Preparing Your Buttercream Frosting
While your cake layers are cooling, prepare your buttercream frosting. Whether you're using a store-bought tub or making it from scratch, ensure it's the right consistency for spreading and decorating. If homemade, make sure your butter is at room temperature (soft but not melted) for creaming with powdered sugar. Beat the frosting until it is light and fluffy. If it seems too thick, add milk or cream a teaspoon at a time until it reaches a spreadable consistency. If it's too thin, add more powdered sugar gradually.
Now is the time to color your frosting if desired for your easy Easter cake decorating theme. Separate portions into different bowls for various colors. Add gel food coloring sparingly using a toothpick and mix thoroughly until the color is uniform and reaches your desired shade. For pastel Easter colors, use just a tiny amount. Keep any frosting you're not immediately using covered to prevent it from drying out. If piping, load your piping bags now with the desired tips.
Step 3: Crumb Coating Your Easter Cake
Once the cake layers are completely cool, it's time for the crumb coat. If your cake layers have domed tops, use a serrated knife or cake leveler to trim them flat. Place the first layer on your cake plate or stand. Apply a dollop of frosting to the center and spread it thinly across the top and down the sides using an offset spatula. The goal here is not thick coverage but simply to trap any loose crumbs. Don't worry about getting it perfectly smooth.
Place the second cake layer on top. If you want a surprise filling, add a layer of frosting or jam on the first layer before adding the second. Repeat the crumb coating process on the second layer, covering the top and sides thinly. Once the cake is fully coated in this thin layer of frosting, chill it in the refrigerator for about 15-30 minutes. This chilling step allows the crumb coat to set firm, effectively sealing in all those pesky crumbs and preparing the cake for a smooth final frosting layer.
Step 4: Final Frosting and Smooth Finish
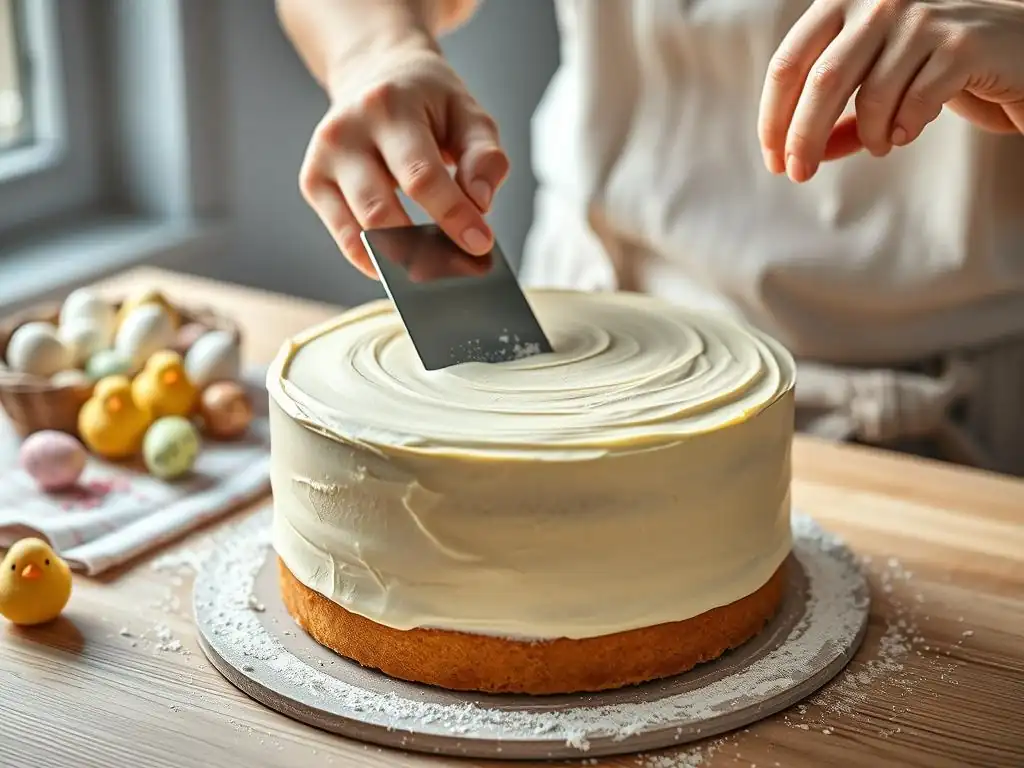
After the crumb coat has chilled and is firm, remove the cake from the refrigerator. Apply a generous amount of your final frosting to the top of the cake using your offset spatula. Spread it outwards towards the edges, then push the excess frosting down the sides. Apply more frosting to the sides as needed, ensuring the entire cake is covered with a thick, even layer.
Now, smooth the frosting. For the sides, hold your offset spatula or a bench scraper vertically against the cake and rotate the cake (if using a turntable) or move the scraper around the cake, applying gentle, even pressure. Excess frosting will build up on the scraper; wipe it off frequently.
For the top, hold the offset spatula almost flat against the surface and gently swipe inwards from the edge towards the center, cleaning the spatula after each swipe, until you achieve a relatively smooth surface. Don't stress about absolute perfection for easy Easter cake decorating; a slightly rustic look is charming!
Step 5: Adding Easter Decorations
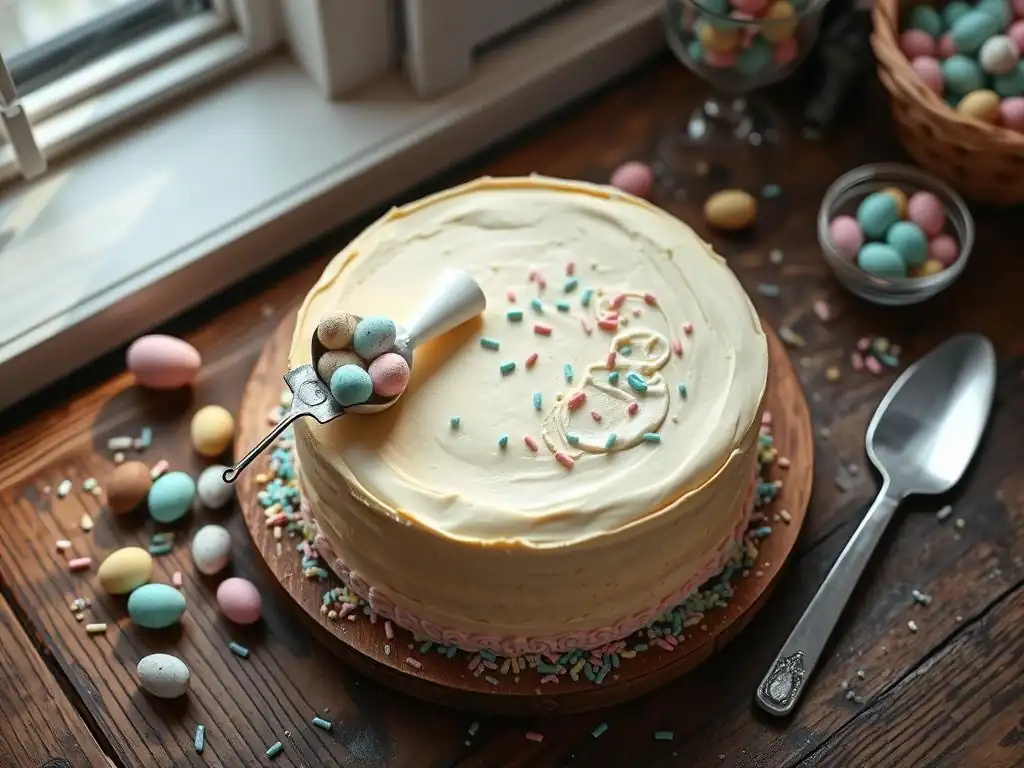
With your cake frosted, it's time for the fun part: adding your easy Easter cake decorating elements! This is where your collected candies, sprinkles, and simple toppers come into play. Scatter colorful sprinkles over the top and/or sides of the cake. Arrange miniature chocolate eggs around the base or in a cluster on top. If you have a piping bag with a star tip, you can pipe swirls or a simple border around the top or bottom edge.
Consider creating a simple "nest" on top by piping short lengths of green frosting (using a grass tip if you have one, or just a small round tip) in a circular pattern, then filling the center with candy eggs. Place marshmallow bunnies or chicks strategically on the cake top or nestled into piped frosting. For a simple floral touch, press edible sugar flowers into the frosting. The goal is to add festive pops of color and recognizable Easter symbols using simple placement and readily available items, making it truly easy Easter cake decorating.
Creative Easter Cake Decorating Ideas for Inspiration
Ideas for Easter Egg Nest Cakes
Creating an Easter egg nest cake is a classic and incredibly easy Easter cake decorating idea perfect for beginners. Start with a round cake frosted with brown or green buttercream. The "nest" can be created using various simple techniques. One popular method is to use a piping bag fitted with a multi-opening grass tip (like Wilton #233) and pipe short strokes of green or brown frosting onto the top of the cake in a circular pattern to mimic grass or twigs.
Alternatively, you can use shredded coconut tinted green with food coloring and gently press it onto the top of the cake in a mound. Another simple approach is to use chocolate frosting and a fork to create textured lines that resemble branches. Once the "nest" is formed, fill the center with a generous pile of colorful candy-coated chocolate eggs or jelly beans. This simple design is visually appealing, clearly communicates the Easter theme, and requires minimal technical skill, embodying the spirit of easy Easter cake decorating.
Bunny-Themed Cake Decorating Ideas for Easter
Bunny themes are adorable and offer many easy Easter cake decorating possibilities. The simplest is using bunny-shaped cookie cutters. You can press a cutter lightly into the frosting to create an outline, then fill it in with sprinkles or different colored frosting. Even easier, use marshmallow bunnies or edible sugar bunny decorations placed directly onto the frosted cake surface.
For a slightly more involved but still beginner-friendly idea, you can create bunny ears and a face. Use pretzel rods or dowels covered in white or pink frosting for ears, or cut ear shapes from construction paper or cardstock (if non-edible). Use candy melts or piped frosting to create eyes and a nose. You can also cover the entire cake in white frosting and use shredded coconut for a fluffy bunny texture. Place two "ears" on top and pipe a simple face on the front. These simple techniques make bunny-themed easy Easter cake decorating accessible and fun.
Spring Flower Cake Decorating Ideas for Easter
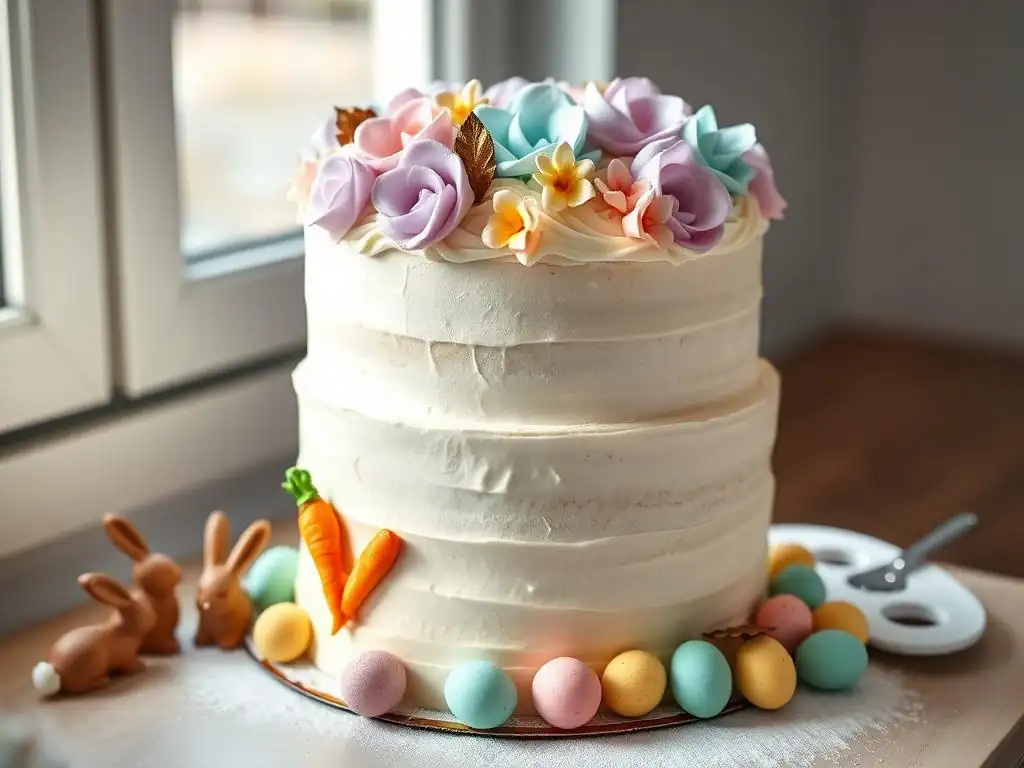
Spring flowers are a beautiful and cheerful theme for easy Easter cake decorating. The simplest method is to use store-bought edible sugar flowers or candy flowers and arrange them artfully on the top and sides of your frosted cake. You can scatter them randomly or arrange them in a specific pattern, like a wreath around the top edge.
If you're comfortable with a piping bag, you can pipe simple flowers using a star tip or a round tip. Small dots can represent flower centers, and short strokes or swirls can form petals. Use green frosting with a small round tip to pipe simple stems and leaves. Alternatively, use green-tinted shredded coconut pressed onto the cake to create a grassy base, then scatter candy flowers on top. This theme allows for lots of color and creativity using very basic decorating skills, perfect for easy Easter cake decorating.
Easter Chick Cake Decorating Techniques
Easter chicks are another delightful and easy subject for Easter cake decorating. The most straightforward approach is to use marshmallow chicks (like Peeps) as toppers, simply arranging them on the cake. You can also find edible sugar chick decorations in many stores around Easter.
For a piped chick, use yellow buttercream and a large round piping tip (like Wilton #1A). Pipe a large dollop for the body and a slightly smaller one on top for the head. Use orange sprinkles or tiny pieces of orange candy for the beak and black sprinkles or melted chocolate dots for the eyes.
You can pipe a few "feathers" around the base using a small star tip and yellow frosting. Covering the cake in yellow frosting and pressing yellow sprinkles or yellow-tinted shredded coconut onto it can also create a fluffy chick texture base for your piped features or marshmallow chicks, making for charmingly easy Easter cake decorating.
Tips and Tricks for Perfect Easter Cake Decorating
Preventing Common Easter Cake Decorating Mistakes
Avoiding a few common pitfalls can make your easy Easter cake decorating experience much smoother. One frequent mistake is trying to frost a warm cake, which leads to a melted, sliding mess. Always ensure your cake layers are completely cooled before applying any frosting. Another issue is crumbs getting into your final frosting layer; the crumb coat step (chilling included!) is essential for preventing this. Don't skip it!
Using frosting that is too warm or too cold can also cause problems. Buttercream should be smooth and spreadable, not greasy or stiff. If it's too warm, refrigerate it briefly; if too cold, let it sit at room temperature or beat it for a minute. When smoothing frosting, wipe your spatula or scraper clean frequently to avoid dragging excess frosting and crumbs. Finally, don't overload your piping bags; fill them only halfway or two-thirds full for better control, especially when attempting easy Easter cake decorating patterns.
How to Store Your Decorated Easter Cake
Proper storage is key to keeping your beautifully decorated easy Easter cake fresh and delicious. If your cake is frosted with buttercream made primarily from butter, it can typically be stored at cool room temperature (around 68-72°F or 20-22°C) for 2-3 days, loosely covered to protect it from dust and air. A cake dome or a large inverted bowl works well. Avoid airtight containers if the decorations are delicate, as condensation can ruin them.
If your cake contains perishable fillings (like fresh fruit, custard, or cream cheese frosting) or if your kitchen is warm, it's best to refrigerate it. Place the cake in a cake carrier or loosely cover it with plastic wrap, being careful not to touch the decorations. Bring the cake back to room temperature for about 30-60 minutes before serving for the best flavor and texture. Simple, non-perishable decorations like candy eggs or sprinkles hold up well under various storage conditions.
Working with Easter Cake Decorating Stencils
Cake stencils can be a fantastic tool for easy Easter cake decorating, allowing you to create intricate-looking patterns with minimal effort. Stencils are typically thin plastic sheets with cut-out designs. To use one, ensure your cake is frosted with a smooth, firm layer of buttercream (a chilled cake works best). Hold or gently press the stencil against the side or top of the cake.
Apply a thin layer of frosting or royal icing over the stencil using an offset spatula or scraper, pushing it into the cut-out areas. Carefully scrape off any excess frosting from the stencil surface. Then, gently peel the stencil away from the cake, revealing the design. For a different effect, you can place the stencil on the cake and dust powdered sugar, cocoa powder, or edible glitter over it. Stencils are available in various Easter themes like bunnies, eggs, or floral patterns, offering a quick way to add sophisticated details to your easy Easter cake.
Conclusion: Enjoy Your Beautifully Decorated Easter Cake
Happy Easter Baking!
You've now walked through the steps and gathered the knowledge needed for easy Easter cake decorating. From baking the perfect base and preparing your frosting to applying simple techniques and adding charming Easter-themed decorations, you have the tools to create a festive and delicious centerpiece for your holiday table. Remember that the most important ingredient is enjoying the process and sharing your creation with loved ones.
Whether you chose to adorn your cake with a simple nest of candy eggs, cheerful piped flowers, or adorable marshmallow bunnies, your homemade Easter cake is sure to bring smiles. Don't worry about achieving professional-level perfection; the beauty of easy Easter cake decorating lies in its heartfelt, handmade appeal. So go forth, bake, decorate, and celebrate! Happy Easter baking from BakeWithEase!
Frequently Asked Questions
What makes a cake "easy" to decorate for Easter, according to BakeWithEase?
An easy Easter cake decoration focuses on simple techniques and readily available ingredients. It avoids complex piping or intricate designs, making it achievable for beginners.
What kind of recipes does BakeWithEase recommend for a beginner's Easter cake?
BakeWithEase suggests recipes with clear, step-by-step instructions and minimal baking experience required. This could include box mix enhancements or simple sponge cake recipes.
What are some examples of "easy-to-find ingredients" for Easter cake decorating, according to BakeWithEase?
Easy-to-find ingredients include store-bought frosting, sprinkles, candies, and simple food coloring. These are readily available at most grocery stores.
Does BakeWithEase provide techniques for those who want to try more advanced Easter cake decorating?
While focusing on simplicity, BakeWithEase may briefly touch upon basic piping techniques or more elaborate designs as a potential next step for learners.
Where can I find step-by-step guides for Easter cake decorating on BakeWithEase?
BakeWithEase provides step-by-step instructions within their recipe posts. These guides often include visual aids like photos or videos to help bakers through the process.
Final Reflection: The Joy of Simple Easter Baking
The art of Easter cake decorating doesn't have to be intimidating; even the simplest techniques can create stunning results, bringing joy to both the baker and the recipient. This guide aimed to demystify the process, proving that beautiful Easter cakes are within everyone's reach, regardless of skill level. We've explored techniques that are both accessible and effective, making this a truly achievable craft for beginners.
The enduring appeal of Easter baking lies not just in the delicious treat itself, but in the act of creation and the sharing of that creation with loved ones. It's a tradition that connects us to our heritage and fosters a sense of community. The simple act of decorating a cake can become a cherished memory, a moment of shared creativity and connection. Baking is at once child's play and adult joy. And love, of course.
– Alma Flor Ada. This quote perfectly encapsulates the spirit of this guide: to make the joy of Easter baking accessible to all.
This Easter, I encourage you to embrace the simplicity of decorating. Don't be afraid to experiment, to let your creativity flow, and to enjoy the process. Pick a technique from this guide, gather your supplies, and let the joy of creating a beautiful Easter cake fill your home with warmth and the sweet scent of springtime. Remember, it's not about perfection; it's about the love and care you put into your creation. Let your Easter cake be a testament to your creativity and a symbol of the season's joy.
Unleash Your Inner Cake Artist!
Thanks for joining us on this sweet journey into Easter cake decorating! We hope you’ve gained the confidence to create beautiful, delicious treats this Easter. Ready to put your new skills to the test?
- Dive into decorating! Grab your frosting and sprinkles, and create your own masterpiece based on the techniques you just learned. Challenge yourself to try a new design element!
- Share your creations! Post a picture of your finished cake on social media and tag us – we’d love to see your Easter baking magic!
- Explore our other Easter baking guides: Want to try a different type of Easter treat? Check out our recipe section for even more inspiration.
What unique Easter cake design will you create this year? Let us know in the comments!