
Common Mistakes When Making Choux Pastry and How to Fix Them

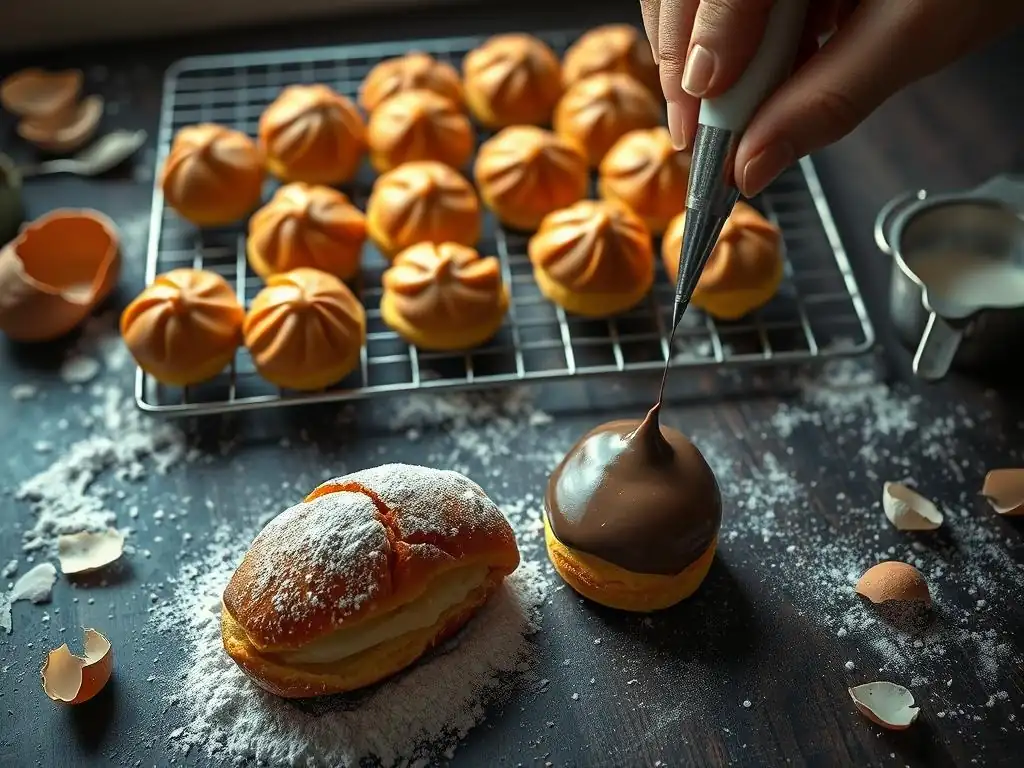
Welcome to BakeWithEase, your haven for all things baking! Ever been frustrated by a batch of choux pastry that just won't cooperate? This article dives deep into the world of choux, revealing the most common pitfalls and, more importantly, providing you with actionable solutions. Discover the secrets to perfectly puffed pastries and bid farewell to baking disappointments. Ready to conquer your choux anxieties? Let's get started!
- Introduction to Choux Pastry: Achieving Baking Perfection
- Mistake #1: Dough is Too Runny - Solutions for a Perfect Consistency
- Mistake #2: Dough is Too Stiff - Achieving the Right Texture
- Mistake #3: Pastries Not Puffing Up - Troubleshooting Expansion Issues
- Mistake #4: Pastries are Collapsing After Baking - Maintaining Structure
- Mistake #5: Uneven Baking - Achieving Uniform Color and Texture
- Mistake #6: Hollow Centers Not Forming - The Importance of Steam
- Mistake #7: Overbaked or Underbaked Choux - Finding the Sweet Spot
- General Tips for Successful Choux Pastry Baking
- Conclusion: BakeWithEase's Path to Choux Pastry Mastery
-
Frequently Asked Questions
- What are the most common mistakes people make when attempting to bake choux pastry?
- My choux pastry is flat and didn't puff up. What could have gone wrong and how can I fix it next time?
- How do I know if my pâte à choux is the right consistency before adding the eggs?
- My choux pastry shells are hollow but collapse after baking. What can I do to prevent this?
- Can I save pâte à choux that is too runny after adding the eggs?
- Final Reflection: Mastering the Art of Choux Pastry
- Unlock Your Perfect Choux Pastry: Take the Next Step!
Introduction to Choux Pastry: Achieving Baking Perfection
What is Choux Pastry and Why is it Tricky?
Choux pastry, also known as pâte à choux, is a delicate dough used to create classic French treats like éclairs, cream puffs (profiteroles), gougères, and more. Unlike other pastries that rely on chemical leaveners or yeast, choux pastry achieves its characteristic airy, hollow center through steam. When baked, the high water content in the dough turns to steam, which pushes the dough outwards, creating a shell. This unique leavening method is both its magic and its challenge.
While the ingredient list for choux pastry is deceptively simple – typically just water (or milk), butter, flour, and eggs – mastering the technique requires precision. The process involves cooking the flour with the liquid and fat to create a paste, then incorporating eggs one by one to achieve the perfect consistency.
Getting any of these steps slightly wrong can lead to a variety of issues, from dough that's too wet or too dry to pastries that don't puff or collapse after baking. Understanding these common pitfalls is the first step in fixing choux pastry mistakes and achieving consistently beautiful results.
BakeWithEase's Guide to Troubleshooting Choux
Successfully baking choux pastry is incredibly rewarding, but it's also a journey where you're likely to encounter a few bumps along the way. From the initial mixing of the panada (the cooked flour-butter-liquid base) to the final bake, several factors can influence the outcome.
Common problems include dough that's too loose or too stiff, pastries that bake flat, collapse post-baking, or have dense interiors instead of the desired hollows. This guide is designed to walk you through the most frequent errors encountered when working with pâte à choux, offering practical, step-by-step solutions for fixing choux pastry mistakes as they arise.
We'll delve into recognizing the signs of each issue, understanding the science behind why it happens, and most importantly, providing actionable tips for correcting choux dough consistency and improving your baking technique. Whether you're struggling with flat éclairs or dense cream puffs, learning to troubleshoot these common choux pastry problems will empower you to achieve those coveted light and airy shells every time. Let's get started on your path to mastering this classic pastry.
Mistake #1: Dough is Too Runny - Solutions for a Perfect Consistency
Identifying Runny Choux Pastry Dough
Recognizing dough that is too runny is crucial before you attempt to pipe it. A correctly mixed pâte à choux should have a glossy sheen and a consistency that is thick but pliable. When you lift the dough with a spoon or spatula, it should fall back into the bowl slowly in a 'V' shape or a thick ribbon, sticking slightly to the utensil.
If your dough slides off the spoon very quickly, pools excessively, or lacks any structure, it's likely too runny. This typically happens when too many eggs have been added or the eggs were added too quickly without proper mixing in between.
A good way to test the consistency is the "finger test": dip a clean finger into the dough and pull it up. A small peak should form and hold its shape briefly before slowly collapsing. If the dough immediately runs off your finger without forming any peak, you have a runny dough problem. Using dough this wet will result in pastries that spread excessively on the baking sheet and fail to puff upwards properly during baking, leading to flat, dense results. Fixing choux pastry mistakes related to consistency early on is key.
How to Thicken Runny Choux Pastry Dough: Step-by-Step
Unfortunately, adding extra flour directly to a runny choux dough is generally not recommended as it can lead to a tough texture. However, there are a couple of methods you can attempt to salvage overly wet dough, though success is not guaranteed and depends on how runny the dough is.
One cautious approach involves gently heating the dough again. Place the dough back into a clean saucepan over very low heat, stirring constantly with a wooden spoon or spatula for just a minute or two. The goal is to evaporate a tiny bit of excess moisture without cooking the eggs already incorporated.
Watch it carefully – you'll see steam gently rising. Remove from heat immediately once it seems slightly thicker. Another, albeit risky, method sometimes suggested is to make a very small, separate batch of panada (just the cooked flour-liquid-fat base) and gradually beat the runny dough into it.
This requires precision and can easily make the dough too stiff if not done carefully. For slightly-too-runny dough, try chilling it for 15-30 minutes; sometimes this helps it firm up slightly. However, the most reliable method for fixing choux pastry mistakes like this is often to discard the batch and start over, focusing on the egg incorporation step.
Preventing Runny Dough in Future Choux Pastry Batches
Prevention is the best strategy when it comes to runny choux dough. The primary culprit is adding too much egg or adding eggs too quickly. The amount of egg needed can vary slightly depending on factors like the humidity, the type of flour used, and how much moisture evaporated during the initial cooking phase of the panada.
To prevent runny dough, always add the eggs one at a time, or in small increments if using beaten eggs. After adding each portion of egg, beat it thoroughly into the dough until it is fully incorporated and the dough comes back together. Then evaluate the consistency before adding the next portion. Stop adding egg as soon as the dough reaches the desired "ribbon" consistency – it should be thick enough to hold its shape when piped but still fall from a spoon in that characteristic 'V'.
It might take slightly less or more egg than the recipe specifies. Trust the visual cues and the feel of the dough over a strict measurement of eggs. Paying close attention during this critical step is essential for successful choux pastry.
Mistake #2: Dough is Too Stiff - Achieving the Right Texture
Recognizing Stiff Choux Pastry Dough
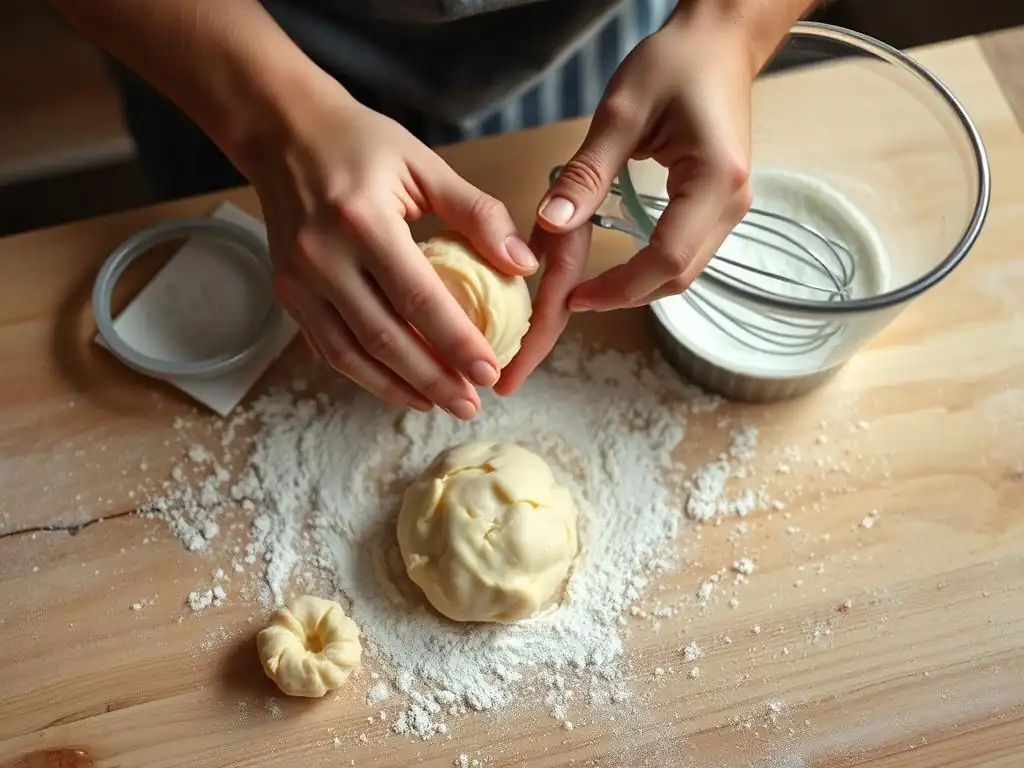
Stiff choux pastry dough is the opposite problem of runny dough, and it's usually easier to fix. You can identify stiff dough if it feels very firm and heavy, is difficult to stir, and doesn't easily fall from a spoon. When you lift it, it might break off in clumps rather than forming a smooth ribbon. If you try the "finger test," the peak will be very rigid and won't collapse at all.
This issue often arises if not enough eggs were added, or if the panada was cooked for too long, causing excessive moisture evaporation before the eggs were incorporated. Using dough that is too stiff will result in pastries that are dense and heavy, with thick walls and little to no hollow interior. They might also crack excessively during baking because the dough lacks the elasticity needed to expand smoothly with the steam. Fixing choux pastry mistakes related to stiffness is usually quite straightforward.
Correcting Stiff Choux Pastry: Adding Moisture Back
Fortunately, fixing stiff choux pastry dough is much simpler than fixing runny dough. You just need to add a little more moisture in the form of egg. Beat an extra egg in a small bowl. Add a very small amount (perhaps a teaspoon or two) of the beaten egg to the stiff dough.
Beat the dough vigorously, either by hand with a sturdy spoon or spatula, or using a stand mixer with the paddle attachment. Mix until the small amount of egg is fully incorporated and the dough is smooth again. Then, check the consistency using the ribbon test or finger test.
If it's still too stiff, add another tiny amount of beaten egg and mix again. Repeat this process, adding egg in small increments and mixing thoroughly each time, until the dough reaches the correct, glossy, ribbon-like consistency. It's crucial to add the egg very gradually to avoid overshooting and making the dough too runny.
Tips for Avoiding Stiff Dough When Making Choux
Preventing stiff dough starts with the initial steps of making the panada. Ensure you cook the flour into the butter/liquid mixture over medium heat, stirring constantly, until it forms a cohesive ball and a thin film forms on the bottom of the pan. This cooking step gelatinizes the starch and evaporates excess moisture, but don't overdo it. Cooking for 1-2 minutes after the dough comes together is usually sufficient for a standard batch using about 150g flour. Excessive cooking can make the dough too dry before you even add the eggs.
The most important tip for avoiding stiff dough is, again, the careful incorporation of eggs. Make sure your eggs are at room temperature, as cold eggs can seize the dough. Add them one by one (or in small beaten increments), mixing thoroughly after each addition and checking the consistency before adding the next.
Don't rely solely on the number of eggs specified in a recipe; use the visual and tactile cues of the dough to determine when you've added enough. Stopping just before the dough becomes too wet is the goal, ensuring you don't end up with dough that's too stiff or, worse, too runny.
Mistake #3: Pastries Not Puffing Up - Troubleshooting Expansion Issues
Why Your Choux Pastries Aren't Rising
Flat, sad choux pastries are a common frustration. Several factors can contribute to a lack of puff. One major reason is insufficient steam production, which is the sole leavening agent.
This can happen if the initial cooking of the panada wasn't done properly, meaning the flour didn't fully gelatinize or enough moisture didn't evaporate, leading to a dough that's too wet or doesn't have the right structure to trap steam. Another frequent cause is an oven that isn't hot enough or opening the oven door too early during baking. The initial blast of high heat is essential to create that burst of steam and set the structure of the pastry shell.
Furthermore, dough consistency plays a critical role. Dough that is too stiff won't expand readily, while dough that is too runny will spread out rather than puffing up. Using cold eggs or not mixing the dough sufficiently after adding eggs can also impact the dough's ability to rise properly. Understanding these potential causes is the first step in fixing choux pastry mistakes that result in flat shells.
Increasing Puffiness: Baking Techniques for Choux
Proper baking technique is paramount for maximizing the puff in your choux pastries. Start with a hot oven – typically between 400°F (200°C) and 425°F (220°C). This initial high temperature creates a strong burst of steam, rapidly expanding the dough. After 10-15 minutes, reduce the oven temperature to a lower setting, usually around 350°F (180°C) to 375°F (190°C), to allow the pastries to continue baking and dry out without burning.
Crucially, do not open the oven door during the first 15-20 minutes of baking, or until the pastries look fully puffed and slightly golden. Opening the door releases the steam and drops the temperature, causing the pastries to deflate before their structure is set. Baking time will vary depending on the size of your pastries, but they typically need 20-35 minutes total.
They should be deeply golden brown and feel light and hollow when lifted. Some bakers also recommend placing a tray of hot water on the bottom rack of the oven during the initial high-heat phase to create extra steam, though this isn't always necessary if the dough consistency is right and the oven is properly preheated.
Ensuring Proper Puffing: Key Ingredients and Their Role
The ingredients themselves play a vital role in achieving maximum puff. High-quality butter contributes to the richness and helps create steam. The liquid (water or milk) provides the moisture that turns into steam – using milk can result in a richer, slightly softer pastry, while water tends to yield crispier shells. The flour provides structure; using a good quality all-purpose flour with a moderate protein content (around 10-12%) works well. Sifting the flour can help ensure it incorporates smoothly into the panada.
Eggs are perhaps the most critical ingredient for proper puffing. They provide moisture, fat, and protein, contributing to the dough's elasticity and structure. Using the correct amount of egg to achieve the perfect dough consistency is non-negotiable for good rise. Too little egg results in stiff dough that won't expand, while too much results in runny dough that spreads flat. Ensuring eggs are at room temperature helps them emulsify better into the dough, leading to a smoother batter and more even expansion. Fixing choux pastry mistakes often comes back to getting the dough right from the start.
Mistake #4: Pastries are Collapsing After Baking - Maintaining Structure
Identifying Collapsed Choux Pastries
You've watched your choux pastries puff beautifully in the oven, but then, after taking them out, they slowly deflate, leaving you with sad, wrinkled shells. This is a classic sign of underbaking or insufficient drying. Collapsed choux pastries look shrunken and wrinkled, often with a dense, moist interior rather than the desired hollow space.
This issue typically occurs because the pastry shell's structure hasn't been fully set and dried out in the oven. The steam initially creates the hollow, but the heat needs to continue to bake the dough walls until they are firm enough to hold their shape once cooled. If removed too early, the relatively moist, delicate walls can't support the structure as the steam inside condenses and cools, leading to collapse. Fixing choux pastry mistakes related to collapse is mostly about adjusting your baking duration and technique.
Preventing Collapse: Cooling and Drying Techniques
Preventing collapse is primarily about ensuring the pastries are fully baked and dried out in the oven before removal. After the initial high-heat puffing phase and the subsequent lower-heat baking, the pastries should be deeply golden brown and feel very light when lifted. If you're unsure, you can sacrifice one pastry: cut it open; the inside walls should be relatively dry and the center mostly hollow. If it's still moist or doughy inside, the batch needs more time.
Many recipes recommend a final drying phase. After the pastries are fully puffed and colored, you can turn off the oven, prop the door open slightly (with a wooden spoon, for example), and leave the pastries inside for another 10-15 minutes. This allows them to cool down gradually and dry out further in the residual heat, strengthening their structure and significantly reducing the risk of collapse. Once removed from the oven, cool them completely on a wire rack to allow air circulation around all sides.
Strengthening the Structure of Your Choux Pastry
Beyond proper baking time and drying, a few other factors can contribute to a stronger choux pastry structure. Ensuring the dough has the correct consistency is fundamental – dough that is too wet or too stiff will result in weaker walls. Using high-quality ingredients, particularly flour with adequate protein, provides the necessary gluten structure.
Proper piping technique also helps. Pipe consistent, evenly sized pastries so they bake uniformly. Avoid overcrowding the baking sheet, as this can impede air circulation and lead to uneven baking, potentially leaving some pastries underbaked and prone to collapse. Some bakers also pierce the finished pastries with a sharp knife or skewer immediately upon removing them from the oven. This allows steam to escape quickly, which can help prevent condensation inside and contribute to a crisper, more stable shell, further aiding in fixing choux pastry mistakes related to structure.
Mistake #5: Uneven Baking - Achieving Uniform Color and Texture
Recognizing Unevenly Baked Choux Pastries
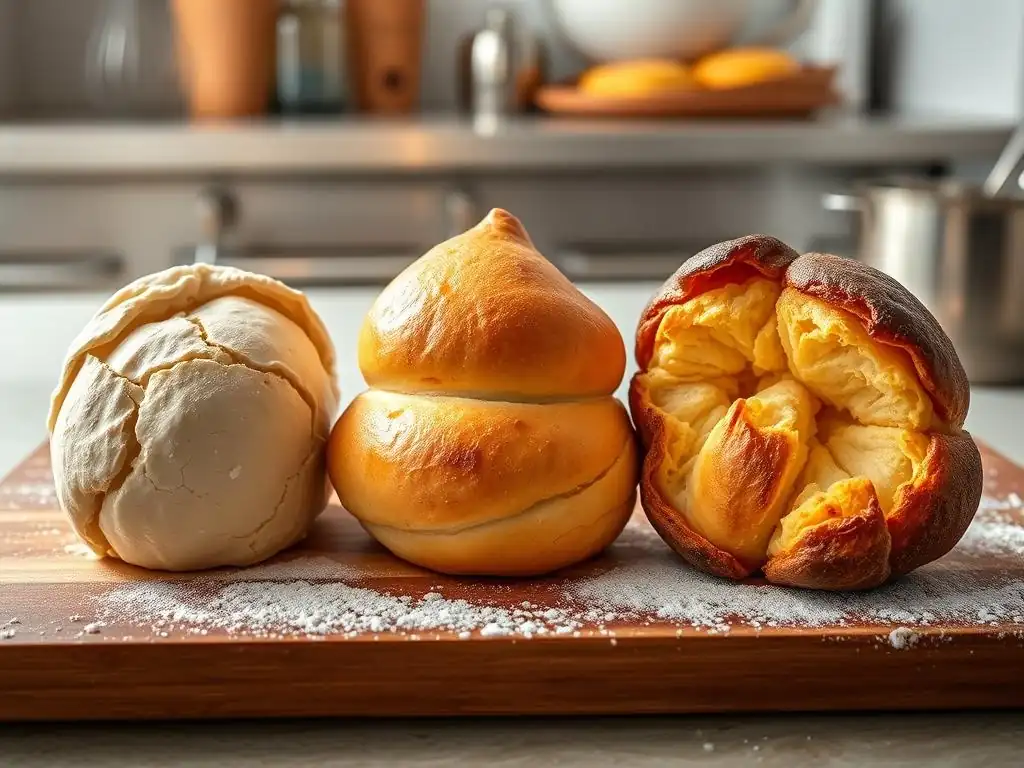
Uneven baking is evident when pastries on the same baking sheet have significant variations in color and texture. Some might be pale and soft (underbaked), while others are dark brown and potentially burnt (overbaked). This leads to inconsistent results, where some pastries might collapse, others might be dense, and none have the ideal uniform crispness and color.
This issue is almost always related to how heat is distributed in your oven and how the pastries are placed. Hot spots in the oven, overcrowding the baking sheet, or placing the sheet too close to a heating element are common culprits. Air circulation around the pastries is essential for even baking and color development. Fixing choux pastry mistakes caused by uneven baking requires attention to your oven and baking setup.
Tips for Even Baking: Oven Temperature and Placement
To combat uneven baking, the first step is to understand your oven's hot spots. Most ovens have them. Using an oven thermometer can help you verify the actual temperature inside, as oven thermostats can be inaccurate, sometimes by as much as 25-50°F (15-30°C). If your oven has significant hot spots, rotating the baking sheet halfway through the baking time (after the initial puffing period, when it's safe to open the door) is crucial.
Ensure the oven is fully preheated to the initial high temperature before putting the pastries in. Place the baking sheet in the center of the oven rack for the most even heat distribution. Avoid placing the sheet on the very top or bottom rack unless specifically instructed by a recipe designed for that placement. If baking multiple sheets, rotate their positions between racks as well as turning the sheets themselves.
Achieving Uniform Choux Pastry: Baking Sheet Preparation
How you prepare your baking sheet can also influence even baking. Using parchment paper or a silicone baking mat ensures the pastries don't stick and helps with even heat transfer from the sheet to the dough. Avoid greasing the sheet directly, as this can cause the dough to spread rather than rise vertically.
Pipe the pastries onto the sheet keeping them evenly spaced. Allow at least 1.5 to 2 inches (4-5 cm) of space around each pastry. Overcrowding prevents hot air from circulating freely around each piece, leading to some pastries shielding others from the heat and resulting in uneven cooking.
For consistent size and shape, use a piping bag with a round or star tip. Piping uniform shapes ensures they require the same amount of time to bake through. Attention to these details on the baking sheet is a simple yet effective way of fixing choux pastry mistakes related to inconsistent results.
Mistake #6: Hollow Centers Not Forming - The Importance of Steam
Understanding Hollow Centers in Choux Pastry
One of the defining characteristics of successful choux pastry is its large, airy, hollow center, perfect for filling with creams, mousses, or ice cream. If your pastries are dense and filled with dough rather than air, it means the steam leavening process didn't work effectively.
The hollow forms when the intense heat of the oven rapidly converts the water in the dough into steam. This steam expands, pushing the dough outwards from the center, creating a cavity. As the pastry bakes, the walls of this cavity set, and the steam eventually escapes through pores in the crust. If the dough consistency isn't right, if there isn't enough moisture to create sufficient steam, or if the initial oven temperature isn't high enough, the steam won't generate with enough force to create a substantial hollow.
Maximizing Steam: The Key to Hollow Centers
Maximizing steam production and retention is critical for achieving hollow centers. Start by ensuring your dough has the correct consistency – it must contain enough moisture (from the liquid and eggs) to generate steam, but not so much that it spreads flat. The initial cooking of the panada should evaporate just the right amount of moisture, and the egg incorporation should bring the dough to the perfect ribbon stage.
Baking at a high initial temperature (400-425°F / 200-220°C) is non-negotiable. This sudden heat shock is what causes the rapid conversion of water to steam. Baking the pastries on parchment paper can help trap a little steam initially around the base. As mentioned earlier, some bakers place a tray of hot water in the oven for the first part of the bake to increase the overall humidity, which can contribute to steam production within the pastries. However, the most crucial factor is the dough itself having the right amount of moisture.
Techniques for Creating Perfect Hollows in Choux
Beyond proper dough consistency and high initial heat, ensuring the pastries bake long enough is vital for setting the hollow structure. The lower temperature phase of baking (350-375°F / 180-190°C) allows the walls of the pastry to cook through and firm up. If you remove them too early, the walls are weak and can collapse inward, diminishing or eliminating the hollow.
Allowing steam to escape after baking can also help preserve the hollow. Piercing the finished pastries with a small knife or skewer as soon as they come out of the oven lets the hot, moist air inside escape quickly, preventing it from condensing and potentially making the interior doughy or causing it to shrink. Cooling on a wire rack is also important for air circulation. By focusing on correct dough hydration, high initial heat, sufficient baking time, and proper cooling, you can effectively address fixing choux pastry mistakes that lead to dense interiors and achieve those perfect hollows.
Mistake #7: Overbaked or Underbaked Choux - Finding the Sweet Spot
Identifying Overbaked vs. Underbaked Choux Pastry
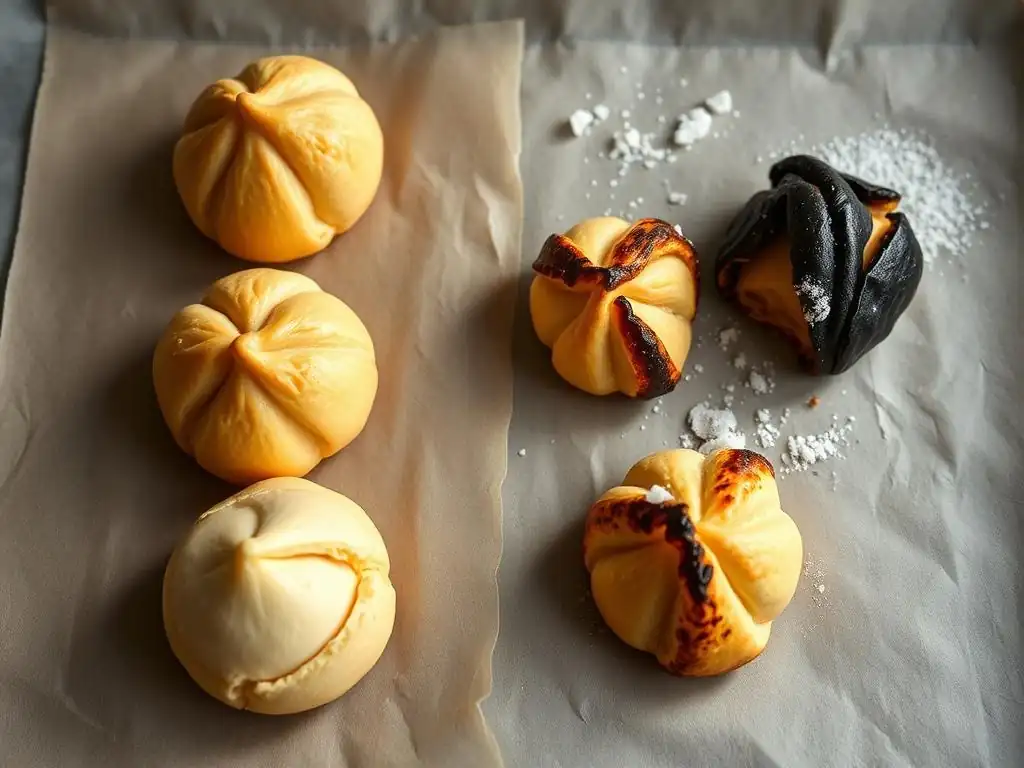
Knowing when your choux pastry is perfectly baked is a skill that comes with practice, but there are clear signs for both over and underbaking. Underbaked choux pastry will be pale in color, feel heavy, and likely collapse or wrinkle significantly upon cooling. When cut open, the interior walls will be wet, doughy, and possibly sticky. They lack the crispness and lightness of properly baked choux.
Overbaked choux pastry, on the other hand, will be excessively dark brown, potentially burnt on the edges, and might taste slightly bitter. While they will be very crisp, they can also be brittle and lack the slight chewiness of a perfectly baked shell. They will feel extremely light, sometimes almost too light. Finding the sweet spot ensures a pastry that is golden brown, crisp on the outside, has firm, dry internal walls, and is perfectly hollow.
Adjusting Baking Time for Perfect Choux
Baking time for choux pastry is not a fixed number; it depends heavily on the size of your piped pastries and the specific characteristics of your oven. A standard cream puff about 2 inches in diameter might take 25-30 minutes total, while smaller gougères might need only 18-20 minutes, and larger éclairs perhaps 30-35 minutes.
Always use the recipe's suggested time as a guideline, but rely more on visual cues. The pastries should be a deep golden brown color – not just light blonde. They should look dry and feel light when you gently lift one (carefully, as they'll be hot!). If they look done but you're unsure, extend the baking time by 5-7 minutes at the lower temperature setting. It's better to slightly overbake than underbake, especially when you're still learning. Fixing choux pastry mistakes related to timing comes down to observation and experience.
Achieving the Ideal Color and Texture: Visual Cues
The ideal choux pastry should have a beautiful, even golden-brown color all over, including the sides and bottom. This color indicates that the crust has caramelized and dried out sufficiently. The surface should be crisp and firm to the touch.
When you cut or break open a perfectly baked choux pastry, the interior should be mostly hollow. The walls of the pastry should be relatively thin, dry, and set – not wet, sticky, or thick like bread dough. There might be a few wisps of cooked dough inside, but the majority of the space should be air.
The crisp exterior combined with the dry, hollow interior is the hallmark of successful choux. If your pastries aren't achieving this, consider the temperature adjustments, baking time, and potentially adding a final drying step in the turned-off oven to improve texture and prevent underbaking issues.
General Tips for Successful Choux Pastry Baking
Essential Ingredients for Choux: Quality Matters
Using high-quality ingredients is fundamental for successful choux pastry. This simple dough relies on the properties of each component to achieve its unique texture. Start with fresh, unsalted butter for the best flavor and fat content. Use good quality all-purpose flour – a protein content around 10-12% provides enough structure without making the pastry tough. Sifting your flour is a good practice to ensure it incorporates smoothly without lumps.
Fresh, large eggs are crucial. Eggs provide moisture, fat, and protein necessary for emulsification, elasticity, and structure. Ensure your eggs are at room temperature before adding them to the dough, as this helps them incorporate more smoothly and evenly. Using cold eggs can sometimes cause the dough to seize up. While water gives a crispier shell, milk can be used for a richer, slightly softer pastry; ensure your liquid is the correct temperature when you start the panada. Using quality ingredients sets you up for success and minimizes potential problems from the outset.
Mastering the Pâte à Choux Technique
Mastering the technique involves precision at each stage. First, cook the butter and liquid together until the butter is melted and the mixture is at a rolling boil. Add all the flour at once and stir vigorously with a wooden spoon or sturdy spatula. Cook this mixture over medium heat, stirring constantly, for 1-2 minutes. This crucial step, making the panada, cooks the flour, gelatinizes the starch, and drives off excess moisture. The dough should pull away from the sides of the pan and form a ball, with a thin film forming on the bottom.
Next, transfer the panada to a mixing bowl (or leave it in the pan off the heat) and let it cool slightly for a few minutes before adding the eggs. This prevents the hot dough from cooking the eggs. Then, beat in the eggs one at a time (or in very small increments if using pre-beaten eggs), ensuring each addition is fully incorporated and the dough comes back together before adding the next.
Mix until the dough is smooth, glossy, and reaches the correct ribbon consistency. This careful egg incorporation is the most critical step for achieving the right texture and elasticity needed for proper puffing.
Troubleshooting Common Choux Pastry Problems
Even with the best technique, you might still encounter issues. Knowing how to troubleshoot common choux pastry problems is part of the learning process.
- If your panada is lumpy: You likely added the flour too slowly or didn't stir vigorously enough. Try beating it very hard off the heat to smooth it out, or gently heat it again while stirring constantly.
- If the dough is too hot when adding eggs: The eggs will scramble slightly, giving the dough a grainy texture. There's no real fix for this; you'll likely need to start over. Always let the panada cool for a few minutes.
- If pastries crack excessively during baking: The dough might be too stiff, or your oven temperature is too high initially. Ensure correct dough consistency and verify oven temperature accuracy.
- If pastries stick to the baking sheet: Ensure you are using parchment paper or a silicone mat. Avoid greasing the sheet directly.
- If your piped shapes are uneven: Practice piping on parchment paper without dough first. Use a consistent pressure and angle.
By understanding the potential issues and their causes, you are better equipped for fixing choux pastry mistakes and improving your results with each batch.
Conclusion: BakeWithEase's Path to Choux Pastry Mastery
Recap of Common Mistakes and Solutions
Mastering choux pastry can feel intimidating, but by understanding the common pitfalls and how to address them, you can significantly improve your success rate. We've covered the key issues: runny or stiff dough caused by incorrect egg incorporation, pastries that don't puff due to insufficient steam or low oven temperature, collapsed shells resulting from underbaking or improper cooling, uneven results from poor heat distribution, and dense interiors stemming from inadequate steam or insufficient baking time.
The solutions often revolve around precise technique: cooking the panada correctly, incorporating eggs gradually to achieve the perfect consistency, starting with a hot oven for maximum steam, baking until deeply golden and dry, and cooling properly. Fixing choux pastry mistakes is less about magic and more about attentive technique and understanding the science behind the puff. Don't be discouraged by initial failures; each attempt provides valuable learning experience.
Further Resources for Perfecting Your Choux Pastry
Achieving choux pastry mastery is a journey of practice and continuous learning. At BakeWithEase.com, we offer a wealth of resources to help you perfect your skills.
- Explore our collection of classic choux pastry recipes, from basic cream puffs to intricate éclairs and savory gougères.
- Dive deeper into specific techniques with our step-by-step guides and video tutorials (available on the website).
- Read articles on ingredient science to understand how flour, butter, liquid, and eggs interact in the choux process.
- Join our community forums to share your experiences, ask questions, and get advice from fellow bakers who are also troubleshooting choux pastry issues.
By utilizing these resources and applying the knowledge gained about fixing choux pastry mistakes, you'll be well on your way to creating consistently beautiful, light, and airy choux pastries that are perfect for any filling. Happy baking!
Frequently Asked Questions
What are the most common mistakes people make when attempting to bake choux pastry?
The most common mistakes include not cooking the pâte à choux long enough on the stovetop, adding the eggs too quickly, and opening the oven door during baking. These all can lead to flat or soggy pastry.
My choux pastry is flat and didn't puff up. What could have gone wrong and how can I fix it next time?
This is usually caused by a lack of steam. Ensure the pâte à choux is cooked thoroughly on the stovetop to remove enough moisture and avoid opening the oven during baking.
How do I know if my pâte à choux is the right consistency before adding the eggs?
The pâte à choux should form a ball that pulls away from the sides of the pan. You should also see a thin film form on the bottom of the pan.
My choux pastry shells are hollow but collapse after baking. What can I do to prevent this?
This often means the shells haven't baked long enough. Try poking a small hole in each shell after baking and returning them to the oven (turned off) to dry out completely.
Can I save pâte à choux that is too runny after adding the eggs?
Yes, you can! Make another half batch of the base (water, butter, flour, salt) on the stovetop, then gradually incorporate the runny mixture until the correct consistency is achieved.
Final Reflection: Mastering the Art of Choux Pastry
The seemingly simple choux pastry, with its delicate balance of flour, water, butter, and eggs, often presents a frustrating challenge even to experienced bakers. A perfectly puffed, airy éclair or delicate cream puff is a testament to precision and understanding, while a collapsed, gummy mess speaks volumes about the subtle nuances often overlooked. This article has highlighted the most common pitfalls, offering practical solutions to transform frustrating failures into delightful successes.
The journey of mastering choux pastry is a microcosm of the creative process itself – a dance between precision and intuition. It's a reminder that even the most seemingly straightforward recipes require attention to detail and a willingness to learn from mistakes. The only true wisdom is in knowing you know nothing.
- Socrates. This quote, while seemingly unrelated to baking, perfectly encapsulates the continuous learning involved in perfecting any culinary skill, especially one as temperamental as choux pastry. The subtle shifts in temperature, the precise measurements, the feel of the dough – these are all lessons learned through experience and a commitment to improvement.
Now, it's your turn. Don't be discouraged by a less-than-perfect batch. Embrace the challenges, analyze your results, and use the knowledge gained from this article to refine your technique. The next time you attempt choux pastry, remember the lessons learned, and approach the process with renewed confidence. The reward – a perfectly puffed, golden-brown pastry filled with your favorite cream – is well worth the effort. Go forth and conquer the choux!
Unlock Your Perfect Choux Pastry: Take the Next Step!
Thanks for taking the time to explore the common pitfalls of choux pastry with us! We hope you now feel more confident in tackling this delightful—and sometimes tricky—recipe. Ready to put your new knowledge into practice?
- Master the Perfect Choux: Try baking the recipe again, focusing on the techniques we discussed—precise temperature control and gentle mixing are key! See the difference it makes!
- Share Your Success (or Challenges!): Tell us about your choux pastry journey in the comments below! What worked best for you, and what are you still working on?
- Experiment with Fillings: Now that you understand choux pastry better, get creative with fillings! What delicious flavor combinations will you try?
What unexpected choux pastry creation will you make next? Let's hear your ideas!