
Simple Vanilla Cake Decorating Ideas for Beginners

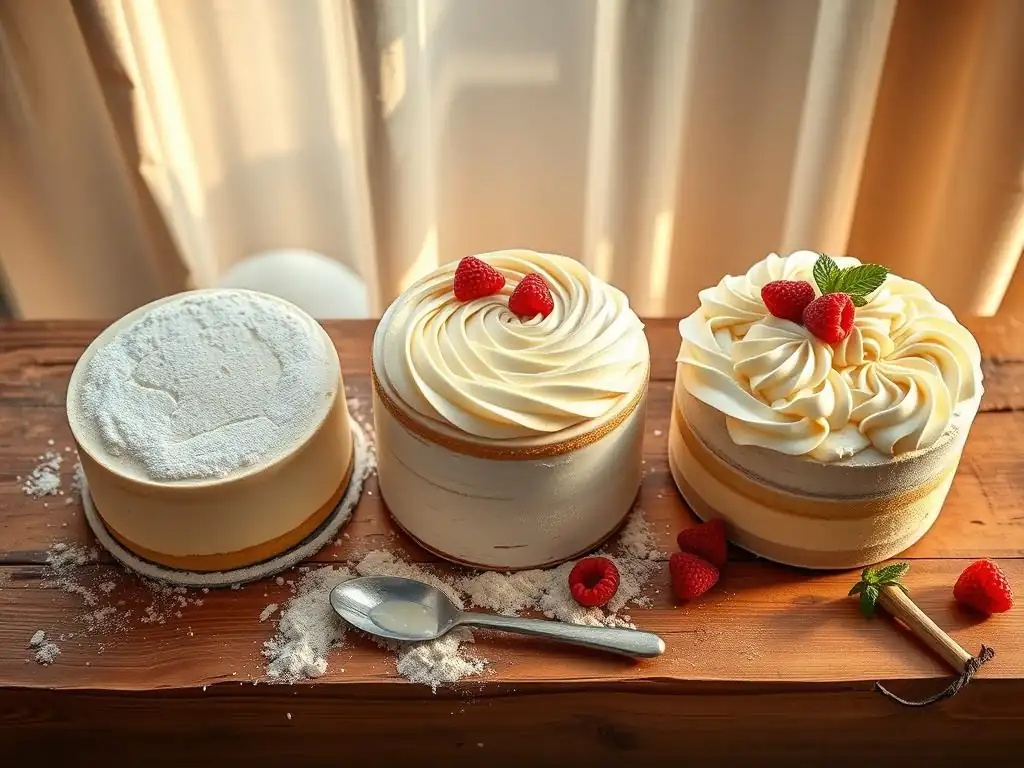
Welcome to BakeWithEase, your haven for all things baking! Ever dreamt of creating a stunning vanilla cake but felt intimidated by elaborate designs? Fear not! This article unlocks the secrets to easy vanilla cake decorating, proving that beautiful doesn't have to mean complicated. Prepare to be inspired by simple techniques and readily available ingredients that will transform your next vanilla cake into a masterpiece. Intrigued? Let's get started!
- BakeWithEase Presents: Easy Vanilla Cake Decorating Made Simple
- Essential Tools & Supplies for Easy Vanilla Cake Decorating
- Simple Vanilla Cake Decorating Techniques for Beginners
- Easy Vanilla Cake Decorating Ideas: Step-by-Step
- Tips & Tricks for Effortless Vanilla Cake Decoration
- Beyond the Basics: Leveling Up Your Vanilla Cake Decorating Skills
- Final Thoughts: Enjoying the Process of Vanilla Cake Decoration
-
Frequently Asked Questions
- What are some easy vanilla cake decorating ideas for beginners?
- What type of frosting is best for easy vanilla cake decorating?
- Where can I find easy vanilla cake recipes to decorate?
- What are some easy-to-find ingredients for vanilla cake decorating?
- What tools do I need for easy vanilla cake decorating?
- Final Reflection: The Sweet Simplicity of Celebration
- Unleash Your Inner Cake Artist!
BakeWithEase Presents: Easy Vanilla Cake Decorating Made Simple
Welcome to the World of Cake Decorating for Vanilla Cakes
Stepping into the world of cake decorating might seem daunting at first, but with a simple vanilla cake as your canvas, it becomes an incredibly accessible and rewarding endeavor. Vanilla cake, with its classic appeal and forgiving nature, is the perfect starting point for anyone new to decorating. It’s a blank slate, ready to be transformed with frosting, sprinkles, fruits, or a simple drizzle. Our goal here at BakeWithEase is to show you just how easy vanilla cake decorating can be, breaking down techniques into simple, manageable steps.
This guide is specifically designed for beginners, focusing on fundamental skills and readily available tools. You don't need fancy equipment or years of experience to create a beautiful and delicious cake. We'll cover everything from preparing your cake surface to applying simple frosting techniques and adding delightful finishing touches. Think of this as your friendly introduction to making your homemade vanilla cakes look as good as they taste, proving that easy vanilla cake decorating is well within your reach.
Why Vanilla Cake is Perfect for Decorating
Vanilla cake offers a uniquely versatile foundation for decoration, primarily due to its light color and neutral, universally loved flavor profile. Unlike darker cakes, the pale crumb of a vanilla cake allows vibrant frosting colors and decorations to truly pop, creating a visually stunning contrast. This makes it ideal for experimenting with bold designs, bright sprinkles, or colorful fruit arrangements without any underlying color interference. Its tender yet stable texture also holds up well to frosting and gentle handling during the decorating process.
Furthermore, the classic taste of vanilla pairs wonderfully with almost any frosting flavor and decoration you can imagine. Whether you choose a simple buttercream, a tangy cream cheese frosting, a rich chocolate ganache, or a light whipped cream, vanilla cake complements them all beautifully. This flexibility allows you to focus purely on the decorative aspects without worrying about complex flavor pairings, making your journey into easy vanilla cake decorating straightforward and enjoyable.
Essential Tools & Supplies for Easy Vanilla Cake Decorating
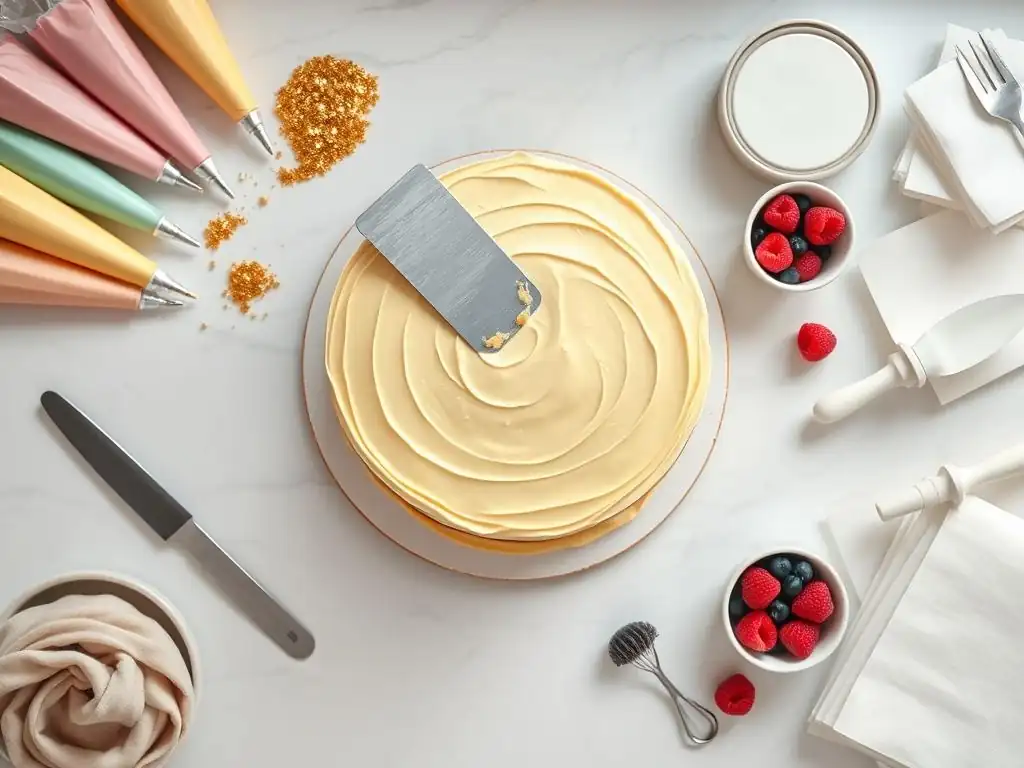
Must-Have Decorating Tools for Beginners
To begin your easy vanilla cake decorating adventure, you don't need a professional bakery's worth of tools. A few key items will make a significant difference in achieving clean, smooth finishes and simple decorative effects. An offset spatula, for instance, is indispensable for spreading frosting evenly across the top and sides of your cake. Its angled blade keeps your knuckles clear of the cake surface, allowing for smoother application than a regular knife. For beginners, a medium-sized offset spatula, around 8-10 inches in length, is versatile enough for most tasks.
Another essential tool is a set of piping bags and a couple of basic piping tips. Disposable piping bags are convenient for easy cleanup, while reusable ones are more eco-friendly. For easy vanilla cake decorating, start with just a round tip (like Wilton #12) for dots and lines, and a star tip (like Wilton #1M or #21) for swirls and borders. These two tips alone open up a world of simple yet effective decorating possibilities, allowing you to add flair beyond just spreading frosting.
Choosing the Right Buttercream Frosting for Your Cake
The type of frosting you choose significantly impacts the ease and success of your vanilla cake decoration. For beginners focusing on easy vanilla cake decorating, a classic American buttercream is often the best choice. It's made primarily from butter, powdered sugar, a liquid (milk or cream), and vanilla extract. This frosting is relatively stable, holds its shape well when piped, and is simple to make. Its firmness makes it easy to spread smoothly and create defined borders or swirls without melting too quickly at room temperature, provided your kitchen isn't excessively warm.
While other frostings like Swiss meringue or Italian meringue buttercreams offer a silkier texture, they can be more challenging for beginners to master in terms of consistency and stability. For simple vanilla cake decorating, stick with a reliable American buttercream recipe. Aim for a consistency that is spreadable but holds a peak when lifted with a spatula. If it's too stiff, add a tiny bit more liquid; if too soft, add a little more powdered sugar. Getting the consistency right is crucial for smooth finishes and successful piping.
Essential Cake Decorating Supplies: Sprinkles, Piping Bags, and More
Beyond spatulas and tips, a few other supplies are vital for adding those fun finishing touches to your easy vanilla cake decorating projects. Sprinkles are perhaps the simplest way to add color and festivity. Jimmies (the rod-shaped ones), nonpareils (tiny balls), and sanding sugar are all great options. A variety pack can give you lots of colors to play with. Ensure you have enough powdered sugar and butter on hand for your frosting, as running out mid-decoration is a common beginner's hiccup!
As mentioned earlier, piping bags are essential for using tips. While reusable silicone bags are durable, disposable plastic bags are often preferred by beginners for their convenience – no messy cleanup required! You might also find a cake turntable helpful; it allows you to rotate the cake smoothly while frosting or piping, making it much easier to achieve an even finish or consistent border. While not strictly essential for your very first easy vanilla cake decorating attempt, it's a tool that quickly becomes invaluable as you practice.
Simple Vanilla Cake Decorating Techniques for Beginners
The Crumb Coat: Your Foundation for a Flawless Finish
The crumb coat is a thin layer of frosting applied to a cake before the main frosting layer. Its primary purpose is to trap any loose crumbs, preventing them from showing up in your final, smooth frosting layer. This is a crucial step for achieving professional-looking results in easy vanilla cake decorating.
To apply a crumb coat, ensure your vanilla cake is completely cool. Use an offset spatula to spread a thin layer of frosting evenly over the entire cake – top and sides. Don't worry about perfection; the goal is just to cover the cake and pick up crumbs.
Once the cake is thinly coated, place it in the refrigerator for about 15-30 minutes, or until the frosting is firm to the touch. This chilling period allows the crumb coat to set, effectively sealing in all those pesky crumbs. After chilling, you'll have a stable, crumb-free surface ready for your final, thicker layer of frosting. Skipping this step often leads to frustrating moments where crumbs are dragged through your beautiful outer layer, so taking these extra minutes is well worth the effort for successful easy vanilla cake decorating.
Mastering the Basic Buttercream Swirl
One of the easiest and most visually appealing ways to decorate the top of a vanilla cake is with a basic buttercream swirl using an offset spatula. This technique requires no piping tips and creates a lovely, rustic texture. Start with your crumb-coated (and chilled) cake. Apply a generous amount of your final frosting layer to the top of the cake. Using your offset spatula, spread the frosting roughly to cover the top.
Now, for the swirl: place the tip of your offset spatula near the center of the cake. With gentle pressure, begin moving the spatula in a circular motion, spiraling outwards towards the edge of the cake. As you move, you can lift the spatula slightly to create peaks and valleys in the frosting. Don't strive for perfect symmetry; the beauty of this technique lies in its slightly imperfect, artisanal look. This simple swirl is a fantastic way to elevate the appearance of your easy vanilla cake decorating with minimal effort.
Easy Piping Techniques for Vanilla Cake Decoration
Piping might sound advanced, but there are several incredibly simple techniques perfect for easy vanilla cake decorating beginners using just those basic tips we discussed. Piping allows you to add decorative elements like borders, dots, or simple patterns that add polish to your cake. Using a piping bag filled with buttercream (ensure it's lump-free for smooth piping) and a basic tip opens up many possibilities. Remember to twist the top of the bag closed to prevent frosting from squeezing out the wrong end and apply steady, even pressure from the top of the bag.
Holding the bag at a consistent angle and applying consistent pressure are key to uniform piping. For simple techniques, practice on a piece of parchment paper first. Try piping straight lines, dots, and small stars. Get a feel for how the frosting comes out and how much pressure is needed. Once you're comfortable, move to the cake. These foundational piping skills are invaluable for adding simple yet effective decorations to your easy vanilla cake decorating projects.
Simple Rosette Piping for Vanilla Cakes
The rosette is a beautiful and surprisingly easy piping technique using a star tip (like the Wilton 1M open star tip). It creates a lovely floral-like swirl. To pipe a rosette, hold the piping bag fitted with the star tip perpendicular to the cake surface. Apply steady pressure to start the flow of frosting. Begin piping in the center of where you want the rosette to be, then pipe in a circular motion, moving outwards and around the center point.
Complete the circle back where you started, then stop applying pressure and pull the bag away cleanly. This should leave you with a lovely swirled rosette. You can pipe several rosettes close together to cover the top of the cake, or space them out for a simpler look. This technique instantly makes your easy vanilla cake decorating look more sophisticated than just spread frosting.
Creating a Shell Border with Basic Piping Skills
A shell border is a classic, elegant way to finish the edge of a cake, and it's quite achievable for beginners using a star tip (like Wilton #21). This border technique creates a series of connected shell shapes along the base or top edge of the cake. To pipe a shell, hold the piping bag fitted with the star tip at about a 45-degree angle to the cake surface, with the tip facing slightly downwards and towards the cake.
Apply pressure to pipe a small mound of frosting, then gradually decrease the pressure as you pull the bag slightly towards you, dragging the tip through the frosting to create a tail. Stop pressure completely and pull away. For the next shell, start with the fat part of the tip overlapping the tail of the previous shell. Repeat the process, creating a continuous border of overlapping shells. This adds a neat, decorative edge to your easy vanilla cake decorating.
Easy Vanilla Cake Decorating Ideas: Step-by-Step
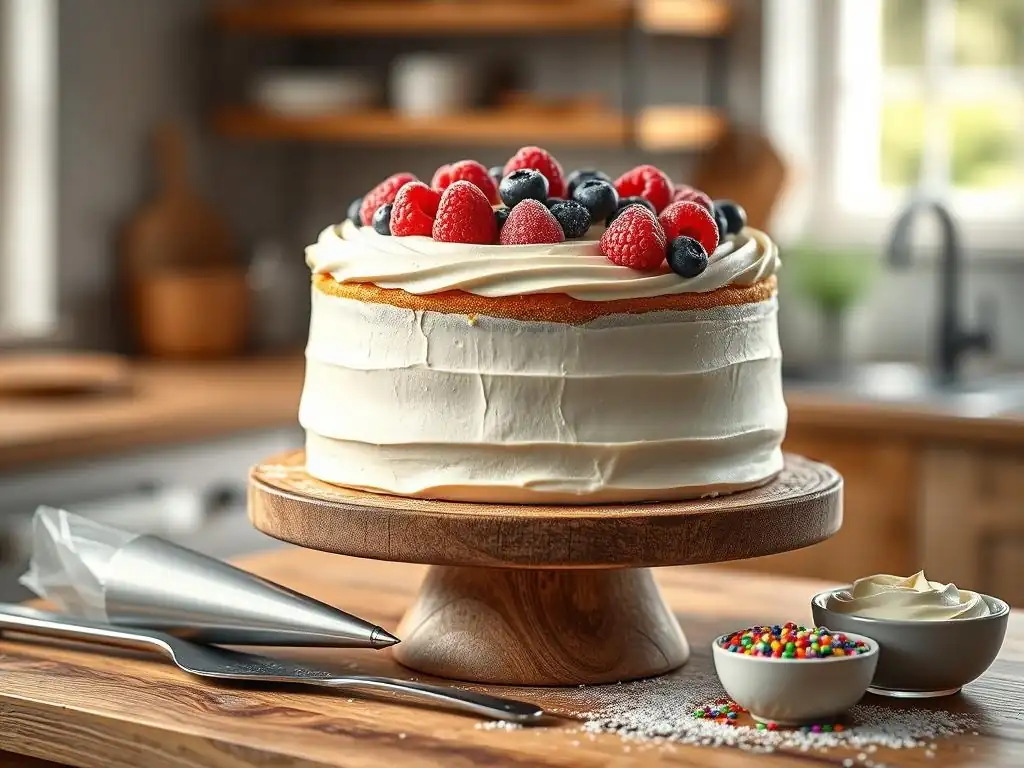
Idea 1: Classic Sprinkles and a Simple Border
This idea is the epitome of easy vanilla cake decorating, combining a smooth finish with fun, colorful sprinkles and a simple piped border. It's perfect for birthdays or any celebration.
Step 1: Frosting Your Vanilla Cake Smoothly
Start with your completely cooled and crumb-coated vanilla cake. Apply a generous amount of your final buttercream frosting to the top and sides. Using your offset spatula, spread the frosting, working your way around the cake. For the top, use the offset spatula to smooth the surface. For the sides, hold the spatula vertically against the side of the cake while rotating the cake (if using a turntable) or moving around it, gently smoothing the frosting until you achieve an even layer. Don't worry about absolute perfection yet; the sprinkles will hide minor imperfections!
Step 2: Applying Sprinkles for a Festive Look
Once your frosting is relatively smooth, it's time for the sprinkles! Place the cake on a plate or piece of parchment paper to catch excess sprinkles. Gently press sprinkles onto the sides of the cake with your hand or the offset spatula. For the top, simply scatter sprinkles over the surface.
You can cover the entire cake, just the sides, or create patterns. A typical 8-inch round cake might use anywhere from 2 to 4 ounces of sprinkles to cover the sides and top, depending on how densely you apply them. Jimmies are particularly easy to apply and give great coverage for simple vanilla cake decorating.
Step 3: Creating a Shell Border with Buttercream
With the sprinkles applied, add a simple piped border using a star tip (like Wilton #21 or 1M) and leftover buttercream. Pipe a shell border (as described earlier) around the base of the cake where the sides meet the cake plate. This creates a neat transition and adds a finished look. You can also pipe a small border around the top edge if desired. This final touch elevates the simple vanilla cake decorating from just "sprinkled" to thoughtfully decorated.
Idea 2: Berry Topping for a Fresh Vanilla Cake
Adding fresh berries is a beautiful, simple, and delicious way to decorate a vanilla cake, perfect for summer gatherings or lighter desserts.
Step 1: Preparing Fresh Berries for Cake Decoration
Choose a variety of fresh, ripe berries like strawberries, blueberries, raspberries, and blackberries. You'll likely need about 1-2 cups of mixed berries for an 8-inch cake top. Gently wash the berries under cool water. Hull strawberries if necessary and slice larger ones if desired. Pat all berries very dry with paper towels. Excess moisture can cause colors to bleed into the frosting or make the glaze (if using) slide off.
Step 2: Arranging Berries on Your Vanilla Cake
Frost your vanilla cake smoothly with buttercream or even a simple whipped cream frosting. Once frosted, arrange the prepared berries creatively on top of the cake. You can cover the entire surface densely with a mix of berries, create concentric circles, arrange them in a pattern, or simply pile them artfully in the center. Consider the colors and shapes of the berries to create an appealing visual design. This step is all about personal touch in your easy vanilla cake decorating.
Step 3: Adding a Glaze for Extra Shine
For a professional touch and to keep the berries looking fresh, you can brush them with a simple glaze. A common glaze is made by warming about 1/4 cup of apricot jam with a teaspoon of water until liquid and smooth, then straining out any fruit pieces. Alternatively, you can use a store-bought berry glaze or even a simple syrup (equal parts sugar and water heated until dissolved, then cooled).
Use a pastry brush to lightly brush the glaze over the tops of the berries. This adds a beautiful shine and helps prevent the berries from drying out, enhancing your easy vanilla cake decorating.
Idea 3: Chocolate Ganache Drizzle for a Decadent Vanilla Cake
Combining vanilla cake with chocolate ganache is a classic pairing, and a simple ganache drizzle is an easy way to add elegance and richness.
Step 1: Making Chocolate Ganache for Drizzling
Chocolate ganache is incredibly simple to make, typically using a 1:1 ratio of chocolate to heavy cream by weight for a drizzle consistency. For an 8-inch cake drizzle, start with about 4 ounces of good quality chocolate (chopped or chips) and 4 ounces (about 1/2 cup) of heavy cream. Place the chopped chocolate in a heatproof bowl.
Heat the heavy cream in a small saucepan over medium heat until it just begins to simmer around the edges. Pour the hot cream over the chocolate, let it sit for 5 minutes, then whisk gently until smooth and glossy. Let it cool slightly until it reaches a pourable consistency – warm but not hot.
Step 2: Drizzling Chocolate Ganache Over Your Vanilla Cake
Ensure your vanilla cake is frosted and chilled slightly (about 15 minutes in the fridge) so the frosting is firm. This helps the ganache drizzle set cleanly. Spoon the slightly cooled ganache into a piping bag with the tip snipped off, or simply use a spoon. Start at the edge of the cake, letting the ganache drip down the sides naturally.
Vary the amount you let drip to create different lengths. Then, fill in the top of the cake by pouring or spooning the remaining ganache, spreading it gently with an offset spatula if needed. The drips create a beautiful, effortless look for your easy vanilla cake decorating.
Step 3: Adding Chocolate Curls for Texture
To complement the ganache drizzle, add some simple chocolate curls to the top. You can buy ready-made curls or make your own easily. To make curls, take a bar of chocolate (at room temperature is easiest) and use a vegetable peeler or a sharp knife held at an angle to shave off pieces, which will curl as they come off. Gently place the chocolate curls on top of the ganache or around the edge of the cake. This adds a lovely textural contrast and reinforces the chocolate theme in your easy vanilla cake decorating.
Idea 4: Edible Pansies for an Elegant Vanilla Cake
For a touch of natural elegance, decorating your vanilla cake with fresh, edible flowers like pansies is surprisingly simple and stunning.
Step 1: Selecting and Preparing Edible Pansies
It is absolutely critical to use only flowers that are specifically grown and certified as edible and are free from pesticides. Do not use flowers from florists, garden centers, or your backyard unless you are certain they are safe to eat and organically grown. You can often find edible flowers at farmers' markets or specialty food stores. You'll need about 10-15 small to medium-sized pansies for an 8-inch cake. Gently rinse the edible pansies under cool water and very carefully pat them dry with paper towels. Handle them delicately as they are fragile.
Step 2: Arranging Edible Pansies on Your Vanilla Cake
Frost your vanilla cake with a smooth layer of buttercream or cream cheese frosting. Once the frosting is applied, carefully arrange the dried edible pansies on the top and/or sides of the cake. You can place them randomly, create a cluster, or arrange them in a pattern. Think about the colors of the pansies and how they complement the vanilla cake and frosting. The flat shape of pansies makes them easy to place and they adhere well to slightly soft frosting.
Step 3: Securing Flowers with a Dab of Frosting
While pansies will naturally stick to fresh buttercream, for extra security, especially if transporting the cake, you can add a tiny dab of frosting to the back of each flower before placing it on the cake. This helps them stay firmly in place. This method of using edible flowers adds a sophisticated yet easy touch to your vanilla cake decoration, perfect for tea parties or elegant occasions.
Tips & Tricks for Effortless Vanilla Cake Decoration
Achieving a Smooth Frosting Finish on Your Vanilla Cake
Getting a smooth frosting finish is key to many easy vanilla cake decorating techniques. The crumb coat, as discussed, is essential. After applying the crumb coat and chilling, apply your final, generous layer of frosting. Use an offset spatula to spread it over the top and sides. For the smoothest finish, heat a metal spatula or bench scraper by dipping it in hot water and wiping it dry. Use the warm, dry tool to gently smooth the sides and top of the cake, wiping the tool clean frequently.
Another trick is to use the "hot spatula" method on the top surface. Once the top is roughly covered, apply a generous dollop of frosting in the center. Starting from the center and moving outwards, use a clean offset spatula held at a slight angle to gently push and smooth the frosting towards the edges, removing any excess. For even smoother results, some bakers use a piece of parchment paper laid gently over the chilled, frosted cake and lightly smooth over the paper with their hand or a smoother tool before peeling the paper away.
Preventing Air Bubbles in Your Piping Bag
Air bubbles in your piping bag can cause frustrating interruptions and uneven frosting flow when you're trying to pipe borders or rosettes for your easy vanilla cake decorating. To minimize bubbles, ensure your buttercream is well-mixed and free of large pockets of air before you put it in the bag. After filling the piping bag (don't overfill it – about two-thirds full is ideal), twist the top tightly closed.
Before you start piping on the cake, hold the bag tip-down over a bowl and gently squeeze until frosting comes out smoothly and any trapped air is expelled. You might hear a little puff of air before the frosting starts flowing consistently. If you encounter a bubble while piping, stop, untwist the bag, gently push the frosting down to force the bubble out, retwist, and continue. Taking these steps ensures a smoother, less interrupted piping experience.
How to Fix Common Cake Decorating Mistakes
Even when attempting easy vanilla cake decorating, mistakes can happen! The good news is that most beginner errors are easily fixable. If your frosting isn't smooth, you can often scrape off the problematic area and reapply frosting, especially if you used a crumb coat. If a piped design goes wrong, gently scrape off the frosting with a clean spatula or knife before it crusts over and try again. Buttercream is forgiving and can often be re-whipped slightly if it stiffens up.
If your cake layer breaks during frosting, don't panic! You can often "glue" it back together with frosting and proceed with the crumb coat. The frosting and subsequent decoration will usually hide the repair. If a piped border is uneven, you can carefully scrape off a section and re-pipe it. Remember, the goal of easy vanilla cake decorating for beginners is to have fun and learn. Imperfections are part of the process, and often, a slightly rustic look adds charm!
Beyond the Basics: Leveling Up Your Vanilla Cake Decorating Skills
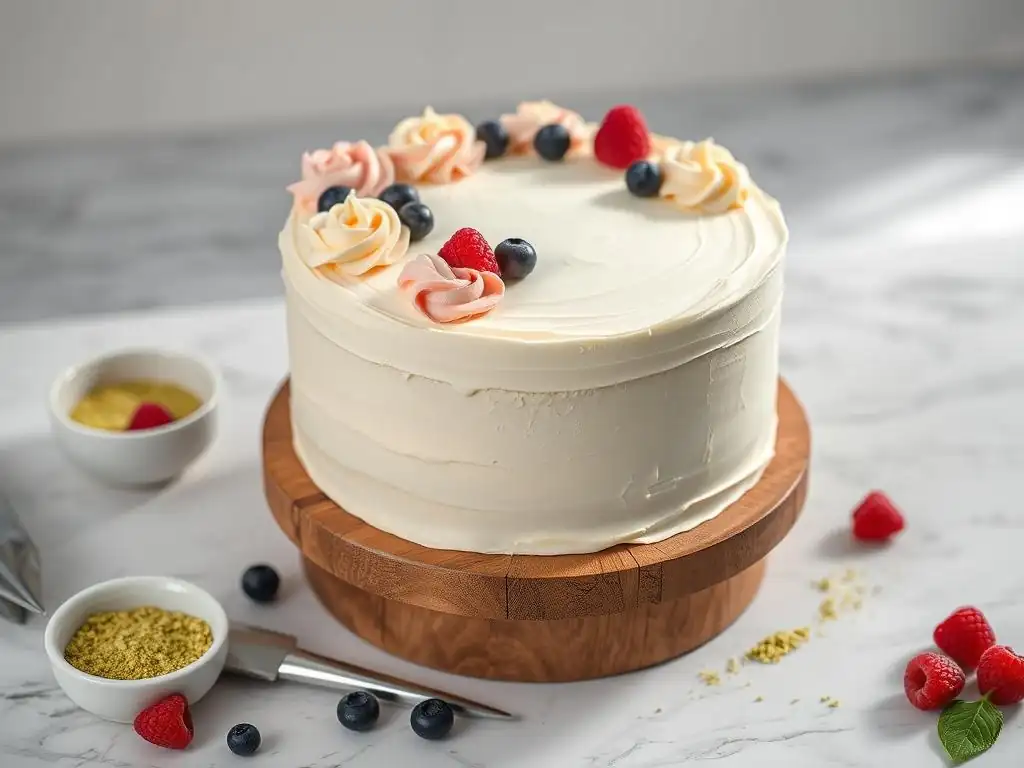
Exploring Different Frosting Flavors for Vanilla Cake
Once you're comfortable with basic buttercream and simple vanilla cake decorating techniques, try experimenting with different frosting flavors. Vanilla cake is a perfect partner for a wide array of frostings. A classic pairing is chocolate buttercream, offering a richer contrast. Cream cheese frosting provides a tangy counterpoint that works beautifully, especially with berry decorations. You could also try a lemon buttercream for a bright, zesty flavor, or a coffee-flavored frosting for a sophisticated twist.
Each different frosting type might have slightly different handling properties – some are softer, some are firmer. For instance, a whipped cream frosting is lighter but less stable for intricate piping than buttercream. Experimenting with these variations not only expands your flavor repertoire but also helps you understand how different textures and consistencies affect your decorating capabilities, preparing you for slightly more involved easy vanilla cake decorating challenges.
Introduction to More Advanced Piping Techniques
With basic piping skills under your belt (like dots, lines, rosettes, and shells), you might be ready to explore a few more advanced techniques. Using different piping tips can create a vast array of textures and designs. A basketweave tip can create a woven pattern on the side of the cake. Leaf tips can add simple greenery next to piped flowers or fruit. Petal tips allow you to pipe ruffles or even realistic-looking flower petals directly onto the cake.
These techniques require a bit more practice to master consistent pressure and movement, but they build directly upon the foundational skills you've already learned. Watching video tutorials and practicing on parchment paper are great ways to develop these skills. As you gain confidence, you'll find that easy vanilla cake decorating can evolve into creating more detailed and intricate designs.
Final Thoughts: Enjoying the Process of Vanilla Cake Decoration
Remember that the most important ingredient in easy vanilla cake decorating is patience and a willingness to have fun. Don't strive for unattainable perfection on your first try. Each cake you decorate is an opportunity to practice, learn, and discover what techniques you enjoy most. The process of transforming a simple baked cake into a decorated centerpiece is incredibly rewarding.
Celebrate Your Baking Achievements with BakeWithEase.
Whether you've added a simple sprinkle border, arranged fresh berries, or mastered your first piped rosettes, take pride in your creation! Share your decorated vanilla cake with friends and family, or simply enjoy a slice yourself. BakeWithEase is here to support you on your baking and decorating journey, providing simple guides and ideas every step of the way. Keep practicing, keep exploring, and most importantly, keep baking with ease!
Frequently Asked Questions
What are some easy vanilla cake decorating ideas for beginners?
Beginners can start with simple frosting techniques like swirls or rosettes using a piping bag. Sprinkles are also a great way to add instant visual appeal to a vanilla cake. Another option is using fresh fruit for a natural and elegant decoration.
What type of frosting is best for easy vanilla cake decorating?
A classic buttercream frosting is ideal for beginners due to its ease of use and ability to hold its shape. You can also use whipped cream, but it needs to be refrigerated and is less stable. Cream cheese frosting offers a tangy flavor and smooth texture.
Where can I find easy vanilla cake recipes to decorate?
BakeWithEase.com offers a variety of simple vanilla cake recipes suitable for all skill levels. You can also find recipes on other baking websites or in beginner-friendly cookbooks. Remember to choose a recipe that matches your experience level.
What are some easy-to-find ingredients for vanilla cake decorating?
Common ingredients include sprinkles, fresh fruit (berries, citrus slices), and basic food coloring. You can also use chocolate shavings or pre-made frosting decorations for an effortless touch.
What tools do I need for easy vanilla cake decorating?
Essential tools include a spatula (offset is helpful), a piping bag and tips (optional), and a turntable (for smoother frosting). You'll also need bowls, measuring cups, and spoons for frosting preparation. A cake leveler can help ensure even cake layers.
Final Reflection: The Sweet Simplicity of Celebration
The art of cake decorating, once perceived as an exclusive skill, is now readily accessible to everyone. This article has demonstrated that creating beautiful and delicious vanilla cakes doesn't require years of training or specialized tools. Even the simplest techniques can transform a basic bake into a stunning centerpiece, bringing joy to both the baker and those who share in the sweet reward.
The enduring appeal of the vanilla cake lies not just in its classic flavor, but in its versatility as a blank canvas for creativity. It's a testament to the power of simple ingredients and techniques to evoke profound emotions. As we've explored various decorating ideas, from fresh fruit arrangements to elegant piped frosting, it's become clear that the true magic lies in the personal touch. The best things in life are simple.
This sentiment perfectly captures the essence of this article and the joy found in creating something beautiful from humble beginnings.
Now, it's your turn. Don't be intimidated by the seemingly complex world of cake decorating. Pick up your piping bag, gather your favorite toppings, and let your imagination run wild. Embrace the imperfections, celebrate the successes, and most importantly, enjoy the process of creating something delicious and visually appealing. The next time you bake a vanilla cake, remember the simple joy of transforming a basic recipe into a personalized masterpiece. You might surprise yourself with what you can create!
Unleash Your Inner Cake Artist!
Thanks for joining us on this delicious journey into the world of vanilla cake decorating! We hope you gained some confidence and inspiration for your next baking adventure. Ready to transform your cakes from simple to stunning?
- Try out one of the decorating techniques from the article today! Even a small change can make a big difference. Grab your frosting and get creative!
- Share your creation with us! We’d love to see your beautiful vanilla cakes on social media – use #BakeWithEaseVanilla to show us your results.
- Explore our other beginner-friendly recipes for even more delicious inspiration and techniques.
What’s your favorite vanilla cake decorating tip, and what will you create next?