
Bake a Rustic French Country Bread (Pain de Campagne) Easily

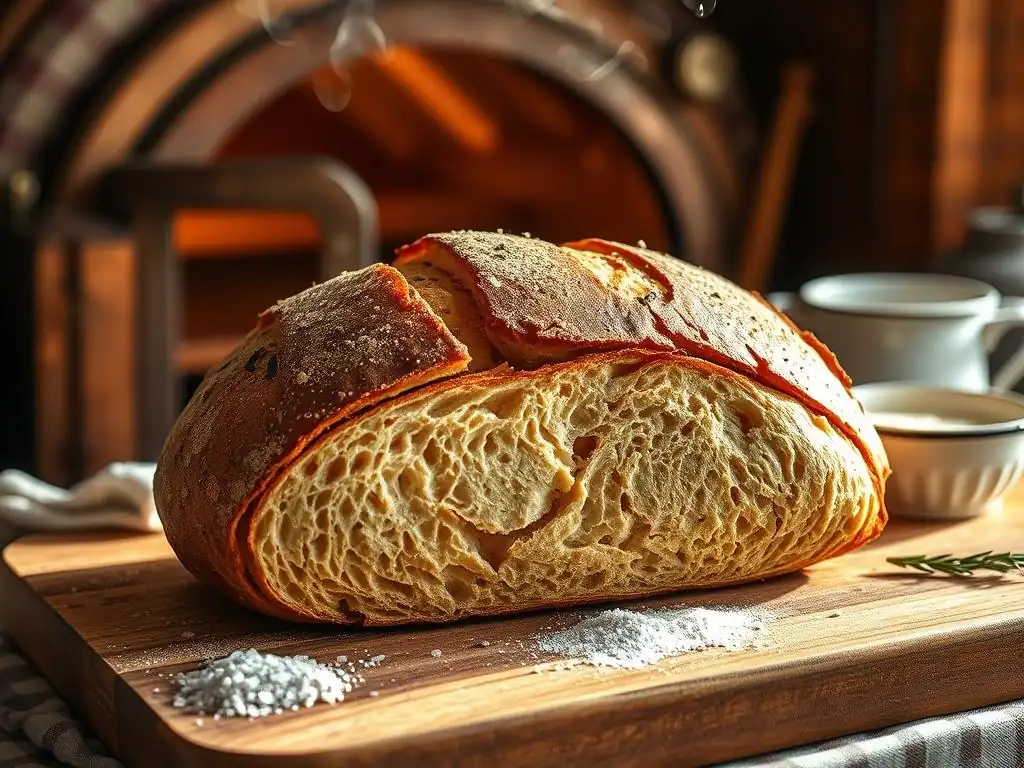
Welcome to BakeWithEase, your guide to unlocking the joy of baking! Ever dreamt of effortlessly crafting that perfect, crusty loaf? This week, we're diving deep into the heart of French baking with a Rustic French Country Bread recipe that's surprisingly simple. Pain de Campagne, with its earthy aroma and satisfying chew, is more attainable than you think. Curious to discover the secret to achieving that authentic taste and texture in your own kitchen? Read on and let's get baking!
- Bake a Rustic French Country Bread (Pain de Campagne) Easily - BakeWithEase
- Discover the Art of Pain de Campagne: An Easy Rustic French Country Bread Recipe
- Mastering the Rustic French Country Bread Recipe: A Step-by-Step Guide
-
Pain de Campagne Recipe: Detailed Instructions for Perfect Rustic Bread
- Step 1: Preparing the Dough - Mixing and Initial Fermentation
- Step 2: Bulk Fermentation - Developing Flavor and Structure
- Step 3: Shaping the Dough - Creating a Rustic Loaf
- Step 4: Proofing the Dough - Achieving the Perfect Rise
- Step 5: Baking the Pain de Campagne - Creating a Crispy Crust
- Step 6: Cooling and Slicing - Enjoying Your Homemade Rustic Bread
- Tips and Tricks for Baking the Best Rustic French Country Bread
- Storing Your Homemade Pain de Campagne for Maximum Freshness
- Enjoying Your Rustic French Country Bread: Serving Suggestions
- More French Baking Classics from BakeWithEase.
-
Frequently Asked Questions
- How difficult is this Rustic French Country Bread recipe for beginner bakers?
- What makes this bread "rustic" and what are the main ingredients?
- How long does the entire process of making this bread take from start to finish?
- Can I substitute any of the flours in this Rustic French Country Bread recipe?
- What's the best way to store this Rustic French Country Bread to keep it fresh?
- Final Reflection: The Enduring Allure of Rustic Bread
- Unleash Your Inner Boulanger: Bake Your Own Pain de Campagne!
Bake a Rustic French Country Bread (Pain de Campagne) Easily - BakeWithEase
Discover the Art of Pain de Campagne: An Easy Rustic French Country Bread Recipe
What is Pain de Campagne? Exploring the Essence of French Country Bread
Pain de Campagne, meaning "country bread" in French, is a traditional loaf known for its hearty texture, complex flavor, and characteristic thick, crackling crust. Unlike a pure white baguette, this rustic French country bread often incorporates a blend of flours, typically a mix of white bread flour with a smaller percentage of whole wheat or rye flour. This combination contributes to its slightly denser, more flavorful crumb and its signature rustic appearance. Historically, Pain de Campagne was the staple bread baked in rural French households and shared within communities, often made from the grains readily available in the countryside.
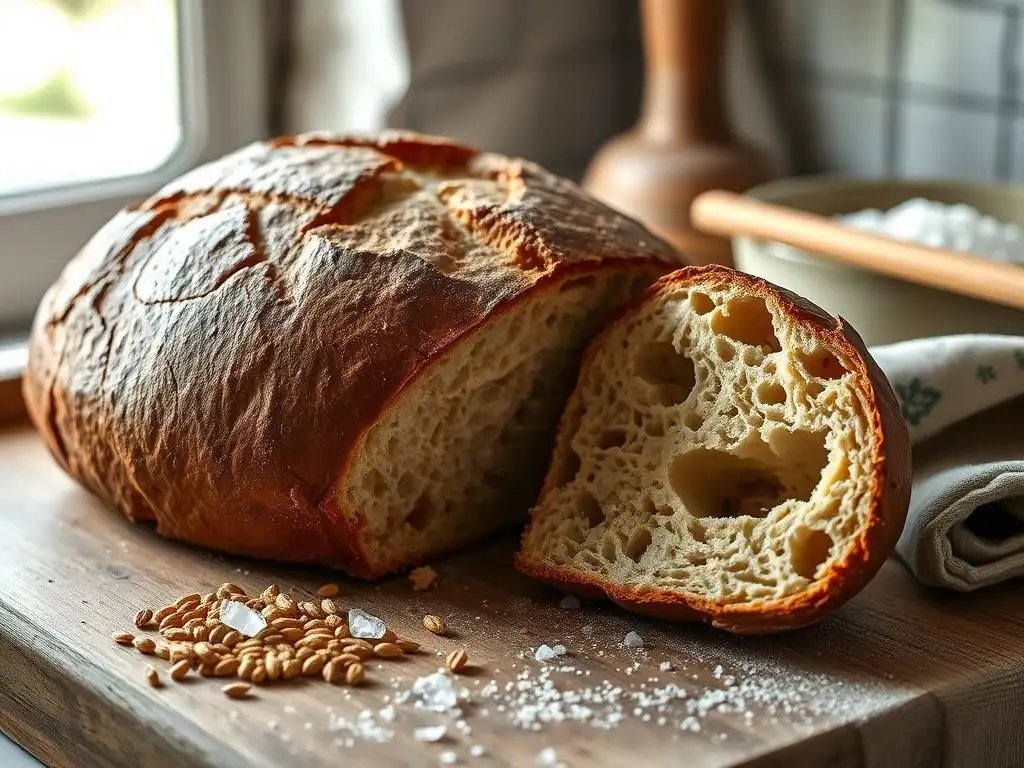
The hallmark of authentic Pain de Campagne is its robust structure, achieved through long fermentation periods. This slow process develops deep, nuanced flavors that are simply not present in quick-rise breads. The crumb is typically open and irregular, with varying pore sizes, reflecting the natural activity of the yeast or sourdough starter used. The crust, baked at high temperatures, forms a substantial shell that protects the interior and provides a delightful contrast in texture. Mastering this rustic French country bread recipe at home allows you to recreate a piece of French culinary heritage right in your kitchen.
Why Bake Your Own Rustic French Bread at Home? Benefits and Advantages
Baking your own rustic French country bread offers numerous benefits, extending beyond just the delicious result. Firstly, you gain complete control over the ingredients. You can select high-quality flours, use filtered water, and avoid additives often found in commercial breads. This means a cleaner, healthier loaf for you and your family. The process itself is incredibly rewarding; the aroma filling your home as the bread bakes is unmatched, and pulling a golden, crackling loaf from the oven provides a sense of accomplishment that's hard to beat.
Beyond ingredient control and the sensory experience, baking your own Pain de Campagne can also be cost-effective in the long run, especially if you bake frequently. While initial equipment might require a small investment (like a Dutch oven or baking stone, perhaps costing around $40-$80), the cost per loaf using basic ingredients (flour, water, salt, yeast) can be significantly lower than purchasing artisanal bread from a bakery, potentially saving you several dollars per loaf. Furthermore, homemade bread, when stored correctly, maintains its freshness and superior texture for several days, often outperforming store-bought alternatives which might dry out faster.
Mastering the Rustic French Country Bread Recipe: A Step-by-Step Guide
Ingredients for Authentic Pain de Campagne
Essential Flour Selection for Rustic Flavor and Texture
The foundation of a great rustic French country bread recipe lies in the flour. A typical Pain de Campagne uses a blend, often starting with strong white bread flour (high in protein, around 12-14%) to provide the structure and gluten development needed for an open crumb. To achieve that characteristic "country" flavor and darker hue, a percentage of whole wheat flour or dark rye flour is included. A common ratio might be 85% strong white bread flour and 15% whole wheat or rye flour. Using freshly milled flour can further enhance the flavor profile, introducing nutty and earthy notes.
The protein content of the flour is crucial for gluten development, which creates the internal structure of the bread. Bread flour's higher protein content allows for stronger gluten networks to form, trapping the gases produced by fermentation and resulting in a well-risen loaf with a desirable open crumb. While all-purpose flour (protein around 10-11.5%) can be used, it will typically result in a less structured, slightly denser loaf compared to using dedicated bread flour for this rustic French country bread recipe.
The Role of Water and Salt in French Bread Baking
Water is more than just a hydrating agent in bread making; it's essential for activating the gluten in the flour and allowing the yeast (or starter) to do its work. Pain de Campagne is often a high-hydration dough, meaning the weight of the water is relatively high compared to the weight of the flour, often ranging from 70% to 80% hydration.
Higher hydration doughs are typically stickier and harder to handle but contribute significantly to an open, airy crumb and a crisp crust. Using lukewarm water (around 80-90°F / 27-32°C) can help kickstart yeast activity, though cooler water and longer fermentation develop more complex flavors.
Salt is a critical, often underestimated, ingredient. It doesn't just add flavor; it plays a vital role in controlling the rate of fermentation and strengthening the gluten structure. Without salt, dough can ferment too quickly, and the gluten can become weak and sticky. Salt tightens the gluten network, allowing the dough to hold its shape better and trap gases more effectively. Typically, salt is used at a rate of about 1.8% to 2.2% of the total flour weight in a rustic French country bread recipe. Using non-iodized fine sea salt is often preferred by bakers for its clean flavor.
Yeast Options: From Instant to Sourdough Starter
This easy rustic French country bread recipe can be adapted to use different leavening agents, each offering a distinct result. Instant dry yeast is the simplest and fastest option. It can be mixed directly into the dry ingredients and provides a reliable, relatively quick rise. A standard amount might be around 0.5% to 1% of the flour weight. Active dry yeast requires proofing in warm water first but functions similarly to instant yeast once activated.
For a more traditional and complex-flavored Pain de Campagne, a sourdough starter is the preferred leavening. A mature, active starter contributes wild yeasts and lactic acid bacteria, resulting in the characteristic tangy flavor and chewy texture associated with true Pain de Campagne. Using a starter means a longer fermentation time, often involving an overnight bulk ferment or cold proof, but the depth of flavor developed is unparalleled. While this specific "easy" recipe might lean towards commercial yeast for simplicity, understanding the role of a sourdough starter is key to appreciating the bread's heritage.
Equipment Needed for Baking Pain de Campagne
The Importance of a Dutch Oven or Baking Stone
Achieving the signature crust and crumb of rustic French country bread at home often relies on creating a steamy environment during the initial phase of baking. A Dutch oven is arguably the easiest way to do this. By preheating the Dutch oven in a hot oven and then baking the dough inside with the lid on for the first 20-25 minutes, you trap the moisture released by the dough.
This steam keeps the crust soft initially, allowing the loaf to expand fully before the crust sets, resulting in a better rise and a thin, crisp crust rather than a thick, tough one. A standard 5 to 6-quart cast iron Dutch oven is ideal for baking a loaf weighing around 500-800g of flour.
Alternatively, a baking stone or steel can be used in conjunction with a steam setup. Placing the dough directly onto a preheated stone or steel provides excellent heat transfer to the base of the loaf, promoting oven spring and a crispy bottom crust.
To create steam when using a stone, bakers often place a tray of water or ice cubes on a rack below the stone or spray the oven walls with water. While requiring a bit more effort to generate sufficient steam compared to a Dutch oven, a baking stone setup, perhaps costing between $30-$60 for a good quality stone, can also yield fantastic results for your rustic French country bread recipe.
Other Essential Baking Tools: Bowls, Scrapers, and Thermometers
Beyond the primary baking vessel, a few other tools are highly recommended for successfully executing this rustic French country bread recipe. A large mixing bowl is necessary for combining ingredients and the initial bulk fermentation; a 4-6 quart bowl is usually sufficient for a single loaf recipe.
A dough scraper (or bench scraper) is invaluable for handling the wet, sticky dough typical of high-hydration Pain de Campagne, helping you to move, divide, and shape the dough without it sticking excessively to your hands or the work surface. A plastic bowl scraper is also useful for getting all the dough out of the mixing bowl.
Precision is key in baking, especially with ratios of ingredients. A kitchen scale that measures in grams is strongly recommended, as measuring flour and water by volume can be inaccurate and lead to inconsistent results. Using a scale ensures you hit the target hydration and salt percentages precisely.
While not strictly essential, an instant-read thermometer can be helpful for checking the internal temperature of the finished loaf (it should be around 205-210°F / 96-99°C for a fully baked Pain de Campagne) and for checking the temperature of your water if using active dry yeast. These tools, readily available and often costing less than $30 combined, make the process of baking this rustic French country bread recipe much smoother and more reliable.
Pain de Campagne Recipe: Detailed Instructions for Perfect Rustic Bread
Step 1: Preparing the Dough - Mixing and Initial Fermentation
Begin by accurately weighing your flours, water, salt, and yeast (or starter) using a kitchen scale. In a large mixing bowl, combine the flours and water. Mix just until no dry flour remains. This initial mixing phase, often called the autolyse, allows the flour to hydrate fully and gluten development to begin naturally without the interference of salt or yeast. Let this mixture rest for 20-30 minutes. This simple step improves the dough's extensibility and makes subsequent mixing easier.
After the rest period, add the salt and yeast (or starter) to the dough. If using instant yeast, it can be added with the salt. If using active dry yeast, ensure it's proofed first according to package directions. Incorporate the salt and yeast into the dough, mixing by hand or with a stand mixer on low speed for 5-10 minutes until the dough comes together and starts to show some elasticity. The dough will likely be quite sticky and shaggy at this stage, especially given the high hydration typical for this rustic French country bread recipe.
Achieving the Right Dough Consistency: Tips and Tricks
The ideal dough consistency for Pain de Campagne is relatively wet and sticky, but not soupy. After the initial mixing, it should be shaggy and difficult to handle cleanly with your hands. As you perform folds later, the dough will develop strength and become less sticky, though it will remain hydrated. If your dough feels too dry after mixing, you can add a tiny bit more water (a tablespoon at a time) during the first set of folds, allowing it to absorb slowly.
Conversely, if the dough feels excessively wet and doesn't show any sign of coming together after 10 minutes of mixing or feels like batter, check your measurements – especially the flour. Humidity can also play a small role, but precise weighing is the best defense against consistency issues. Remember that a wet dough is desirable for an open crumb in this rustic French country bread recipe, so embrace the stickiness; it's part of the process! Using a dough scraper will become your best friend for managing this hydration level.
Step 2: Bulk Fermentation - Developing Flavor and Structure
Bulk fermentation is the crucial first rise where the dough develops most of its flavor and structure. Place the mixed dough in a lightly oiled bowl or container large enough for it to at least double in size. Cover it tightly. The duration of bulk fermentation depends heavily on the ambient temperature and the type of leavening used. At room temperature (around 70-75°F / 21-24°C), a yeast-leavened dough might take 2-4 hours, while a sourdough dough could take 4-6 hours or even longer. The dough should look visibly puffy and have increased significantly in volume.
During bulk fermentation, you will perform a series of "stretch and folds" to build the dough's strength and even out the temperature. Typically, 3-4 sets of folds are performed during the first 1.5 to 2 hours of bulk fermentation, with 30-45 minutes rest in between. To perform a fold, gently wet your hands, grab one edge of the dough, stretch it upwards, and fold it back over the center.
Rotate the bowl and repeat this 3-4 times for each set. This process aligns the gluten strands and helps the dough develop the structure needed to hold its shape and trap gases during baking, contributing to the airy crumb of your rustic French country bread.
Folding Techniques for a Strong Gluten Network
Stretch and folds are a gentle yet effective way to strengthen the gluten in high-hydration doughs like Pain de Campagne without vigorous kneading. The process involves wetting your hands slightly to prevent sticking, then reaching under the dough in the bowl, grabbing about a quarter of it, stretching it upwards, and folding it over the rest of the dough. Rotate the bowl a quarter turn and repeat this action three more times, effectively folding the dough onto itself from all four sides.
Performing these folds every 30-45 minutes during the early part of bulk fermentation encourages the gluten proteins to link together, forming a strong, elastic network. This network is what gives the bread its structure and allows it to rise properly. As you perform successive sets of folds, you will notice the dough becoming smoother, less sticky, and holding its shape better. This development is essential for achieving the desired open crumb and good oven spring in your rustic French country bread recipe.
Step 3: Shaping the Dough - Creating a Rustic Loaf
Once bulk fermentation is complete (the dough is significantly increased in volume and feels airy), gently turn the dough out onto a lightly floured work surface. Be careful not to deflate it too much. Gently pre-shape the dough into a loose ball (a boule) or an oval (a bâtard) and let it rest for 15-20 minutes. This "bench rest" allows the gluten to relax, making the final shaping much easier.
For the final shaping, you want to create tension on the surface of the dough. This surface tension is crucial for the loaf to hold its shape during proofing and baking and contributes to a good crust. For a boule, gently cup the dough with your hands or use a bench scraper to pull and tuck the edges underneath, rotating the dough to create a smooth, tight surface.
For a bâtard, gently flatten the dough into a rectangle, fold the top third down, the bottom third up, and then fold it in half lengthwise, sealing the seam. Roll it gently to elongate slightly.
Mastering the Art of Shaping Round and Oval Loaves
Shaping a boule (round loaf) involves creating a taut skin on the outside. Start with your dough resting on a lightly floured surface. Using the palms of your hands or a bench scraper, gently pull the dough towards you while simultaneously rotating it. Imagine you are trying to tuck the edges of the dough underneath itself. Continue this motion, rotating the dough, until you have a smooth, round ball with tension on the surface.
Shaping a bâtard (oval loaf) is ideal if you plan to bake in a Dutch oven that is oval or if you simply prefer the shape. After the bench rest, gently pat the dough into a rough rectangle. Fold the top edge down to the center, then fold the bottom edge up to meet the top edge fold. Press the seam gently.
Now, fold the dough in half lengthwise, sealing the final seam firmly with the heel of your hand. Roll the loaf back and forth slightly to achieve an even oval shape. Proper shaping is key to getting a well-formed loaf of rustic French country bread.
Step 4: Proofing the Dough - Achieving the Perfect Rise
Proofing, or the final rise, is when the shaped loaf increases in volume before baking. The shaped dough is typically placed seam-side up in a proofing basket (banneton) dusted generously with rice flour (which helps prevent sticking) or seam-side down on parchment paper for free-form baking. Cover the dough to prevent a skin from forming.
Proofing can be done at room temperature or in the refrigerator (cold proof). Room temperature proofing is faster (typically 1-2 hours at 70-75°F / 21-24°C), while cold proofing in the refrigerator (8-12 hours or even up to 24 hours at 38-40°F / 3-4°C) slows fermentation significantly, developing more complex flavors and making the dough easier to score. The duration depends on temperature, hydration, and yeast activity. The dough should look visibly puffy and feel light.
Determining Readiness for Baking: The Poke Test
The "poke test" is the standard method for determining if your dough is perfectly proofed and ready for baking. Gently flour your finger and press it into the side of the dough to a depth of about half an inch (1-2 cm). Observe how quickly the indentation springs back.
- If the indentation springs back immediately and completely, the dough is under-proofed. It needs more time.
- If the indentation springs back slowly, only partially filling, the dough is perfectly proofed. It's ready for the oven.
- If the indentation remains completely and doesn't spring back at all, the dough is over-proofed. It may collapse when scored or during baking.
Getting the proofing right is crucial for good oven spring and the final texture of your rustic French country bread. An under-proofed loaf will have explosive oven spring but a tight crumb, while an over-proofed loaf may have little to no oven spring and a dense crumb.
Step 5: Baking the Pain de Campagne - Creating a Crispy Crust
Preheat your oven with your Dutch oven or baking stone inside for at least 45-60 minutes, typically to a very high temperature like 450-500°F (230-260°C). This ensures the baking vessel/stone is fully saturated with heat. Carefully remove the hot Dutch oven from the oven, or prepare your steaming setup if using a stone.
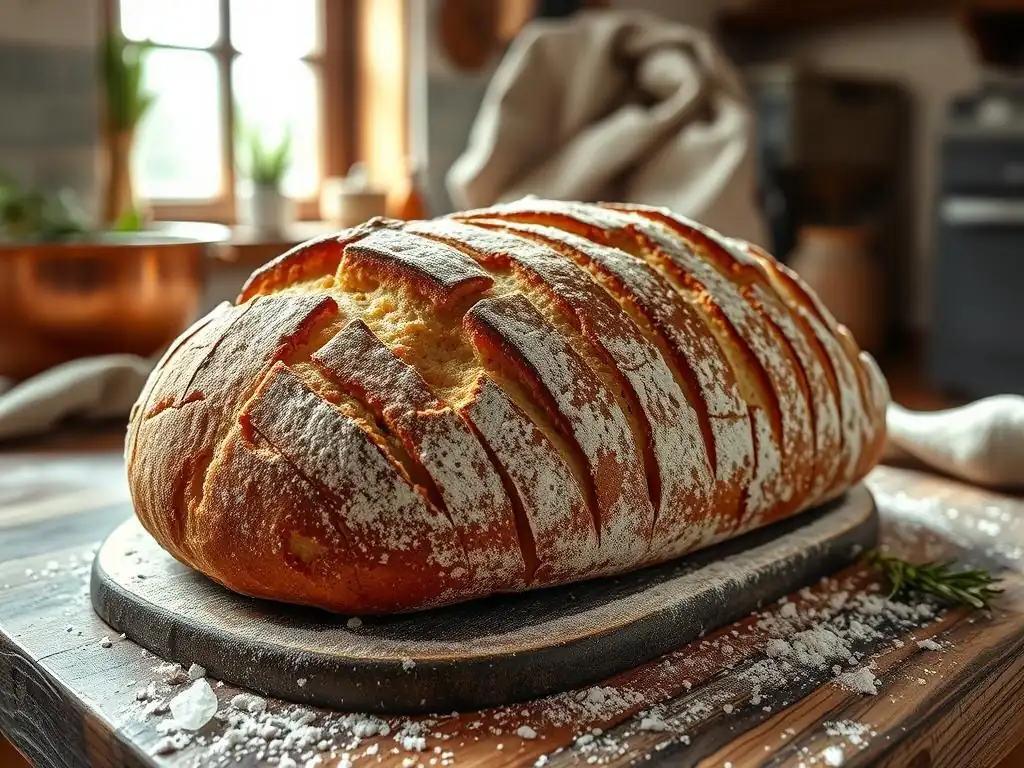
If using a proofing basket, gently invert the dough onto a piece of parchment paper or directly into the hot Dutch oven. Score the top of the loaf with a sharp razor blade (lame) or knife. Scoring allows the bread to expand in a controlled manner during baking. Popular scoring patterns for Pain de Campagne include a simple cross, a square, or multiple parallel cuts.
Baking with a Dutch Oven for Optimal Crust and Crumb
Baking Pain de Campagne in a preheated Dutch oven is an excellent method for home bakers to replicate professional oven conditions. Once the dough is scored and placed inside the hot Dutch oven (on parchment paper for easy transfer), immediately put the lid on. The lid traps the steam released by the dough as it heats up. Bake with the lid on for the first 20-25 minutes at the high temperature. This steamy environment keeps the crust soft, allowing the loaf to achieve maximum oven spring before the crust hardens.
After the initial steamed phase, carefully remove the lid. The loaf should have expanded significantly and be pale but set. Reduce the oven temperature slightly, perhaps to 425-450°F (220-230°C), and continue baking for another 20-25 minutes, or until the crust is deeply golden brown and the internal temperature reaches 205-210°F (96-99°C). Baking without the lid allows the crust to dry out and crisp up beautifully, resulting in that signature crackle of rustic French country bread.
Baking on a Baking Stone: Achieving a Rustic Finish
Baking Pain de Campagne on a baking stone requires a different approach to steam. Place the proofed, scored dough (ideally on parchment paper for easy transfer) onto the preheated baking stone. Immediately introduce steam into the oven. This can be done by carefully pouring a cup of hot water into a preheated pan on the rack below the stone or by spraying the oven walls with water (avoid spraying the light or glass door). Close the oven door quickly to trap the steam.
Bake with steam for the first 15-20 minutes at a high temperature (450-500°F / 230-260°C). After this initial period, carefully remove the steam source (or open the door briefly to let steam escape if you sprayed).
Reduce the oven temperature slightly to 425-450°F (220-230°C) and continue baking for another 25-30 minutes, or until the crust is a deep golden brown and the internal temperature is 205-210°F (96-99°C). While perhaps slightly less efficient at trapping steam than a Dutch oven, a baking stone can still produce a wonderful rustic French country bread with a great crust, especially if your oven holds steam well.
Step 6: Cooling and Slicing - Enjoying Your Homemade Rustic Bread
Once your Pain de Campagne is baked to a deep golden brown and sounds hollow when tapped on the bottom, remove it from the oven. If using a Dutch oven, carefully lift it out using the parchment paper handles. If using a baking stone, use a peel or spatula to transfer it. The bread must now cool completely on a wire rack.
Cooling bread on a wire rack allows air to circulate around the entire loaf, preventing the bottom crust from becoming soggy from trapped steam. It also allows the internal structure, or crumb, to set properly. Slicing into hot bread is a common mistake that can result in a gummy, dense crumb because the internal moisture hasn't had time to redistribute and evaporate correctly.
Allowing the Bread to Cool Completely: Preventing a Gummy Crumb
Patience is key during the cooling phase of baking rustic French country bread. While the smell of fresh bread is incredibly tempting, resist the urge to slice into your Pain de Campagne for at least 1-2 hours after it comes out of the oven. For larger loaves, it might even benefit from cooling for 3 hours. During this time, the internal temperature of the bread drops, and the moisture inside the loaf stabilizes.
If you slice the bread too early, the steam and heat trapped inside will escape rapidly, leading to a doughy or gummy texture in the center. The crust, which was crisp when it came out of the oven, can also soften prematurely. Allowing the bread to cool completely ensures that the crumb structure is fully set and the moisture is evenly distributed, giving you that perfect chewy texture and crisp crust characteristic of a well-baked rustic French country bread.
Tips and Tricks for Baking the Best Rustic French Country Bread
Troubleshooting Common Pain de Campagne Baking Problems
Even with a great rustic French country bread recipe, you might encounter issues. One common problem is a dense or gummy crumb. This can be caused by several factors: under-proofing (the dough didn't rise enough before baking), under-baking (the internal temperature didn't reach the necessary 205-210°F / 96-99°C), or slicing the bread before it has cooled completely. Ensure you perform the poke test correctly, bake until the internal temperature is reached, and always let the bread cool fully on a wire rack.
Another issue can be a burnt crust, particularly on the bottom. This might happen if your oven runs hot, if the baking stone/Dutch oven was preheated for too long at an excessively high temperature, or if the bottom of your baking vessel is too thin.
To prevent this, you can try reducing the oven temperature slightly during the second half of the bake, placing a baking sheet on the rack below your baking stone to shield the bottom, or placing a small piece of parchment paper under the loaf in the Dutch oven (though be cautious about it burning at high temps). Using a reliable oven thermometer can help you verify your oven's actual temperature.
Addressing a Dense or Gummy Crumb
If your rustic French country bread consistently has a dense or gummy interior, consider these adjustments. First, evaluate your proofing process using the poke test. Is the dough springing back too quickly? If so, increase the proofing time. Second, ensure you are baking the bread long enough and at the correct temperature. Use an instant-read thermometer to confirm the internal temperature reaches the target range.
Third, are you using the correct type of flour? Using all-purpose flour instead of bread flour can lead to a weaker gluten structure and a denser crumb. Fourth, review your hydration level. If the dough is too low in hydration for a Pain de Campagne, it might result in a tighter crumb. Lastly, and very commonly, ensure you are letting the bread cool completely on a wire rack for the recommended 1-3 hours before slicing. Impatience during cooling is a major culprit for gummy interiors.
Preventing a Burnt Crust
A burnt crust, especially the bottom crust, is frustrating after putting in the effort to bake your rustic French country bread. If you're using a Dutch oven and the bottom is burning, try placing a layer of cornmeal or rice flour on the bottom of the Dutch oven before adding the parchment paper and dough. Alternatively, place a baking sheet on the rack beneath the Dutch oven to deflect some of the direct heat.
If you are baking on a stone, ensure your oven rack is positioned appropriately – sometimes moving it up or down by one level can make a difference. If the top crust is burning before the bread is fully baked, you can loosely tent the loaf with aluminum foil for the final 10-15 minutes of baking. Monitoring your oven's actual temperature with a separate thermometer is also a good practice, as oven thermostats can sometimes be inaccurate by as much as 25-50°F (15-30°C).
Flavor Variations: Adding Herbs, Seeds, and Other Ingredients
While classic rustic French country bread is simple flour, water, salt, and yeast/starter, you can easily introduce variations to add new dimensions of flavor. Seeds are a popular addition; incorporating sunflower seeds, pumpkin seeds, or sesame seeds (perhaps 50-80g per loaf based on 500g flour) adds nuttiness and crunch. They can be mixed directly into the dough during the initial mixing or the first fold, or some can be sprinkled on the outside before baking.
Herbs like fresh rosemary or thyme (around 20-30g chopped) bring aromatic notes, pairing wonderfully with the earthy flavors of the bread. Olives, particularly Kalamata or other brine-cured varieties (50-100g, pitted and roughly chopped), add a salty, savory element that transforms the loaf. Chopped nuts such as walnuts or hazelnuts (50-80g) also complement the rustic profile.
Incorporating Olives, Rosemary, or Walnuts for Unique Flavors
Adding ingredients like olives, rosemary, or walnuts to your rustic French country bread recipe is straightforward. The best time to incorporate them is after the initial mixing and autolyse period, when you add the salt and yeast/starter. Gently fold them into the dough during the first few sets of stretch and folds. This ensures they are evenly distributed throughout the dough without tearing the gluten structure excessively.
For a loaf made with 500g of flour, aim for approximately:
- 50-100g pitted and chopped olives (drain brine well)
- 20-40g fresh chopped rosemary leaves (or 1-2 tbsp dried)
- 50-80g chopped walnuts or other nuts/seeds
Be mindful that adding inclusions, especially olives, can affect the dough's hydration and fermentation slightly due to their moisture and salt content. You might need minor adjustments to water or salt depending on the specific additions, but generally, these amounts integrate well into a standard Pain de Campagne dough.
Storing Your Homemade Pain de Campagne for Maximum Freshness
Proper Storage Techniques to Maintain Crust and Flavor
Proper storage is key to keeping your homemade rustic French country bread fresh and delicious for as long as possible. Once the loaf has cooled completely (this is vital! ), the best way to store it at room temperature is in a paper bread bag or a clean linen/cotton cloth bag. These materials allow the crust to breathe, helping it retain its crispness while protecting the interior from drying out too quickly.
Avoid storing the bread in plastic wrap or airtight containers immediately after baking, as this traps moisture and can quickly turn your beautiful crispy crust soft and rubbery. If the bread is cut, store it cut-side down on a cutting board or counter, loosely covered with a cloth or placed in a paper bag. Stored this way, a Pain de Campagne typically stays fresh for 2-3 days at room temperature. If the crust softens over time, a quick reheat in a hot oven (350-400°F / 175-200°C) for 5-10 minutes can help crisp it up again.
Freezing Pain de Campagne for Later Enjoyment
If you won't consume your entire loaf of rustic French country bread within a few days, freezing is an excellent option to preserve its quality. Allow the loaf to cool completely. You can freeze it whole or sliced. To freeze whole, wrap it tightly in plastic wrap, then wrap it again in aluminum foil or place it in a large freezer bag, pressing out as much air as possible.
For sliced bread, slice the cooled loaf, then either stack slices and wrap them tightly as a block, or lay them flat on a baking sheet to freeze individually before transferring to a freezer bag. Freezing individual slices allows you to take out just what you need. Properly wrapped, Pain de Campagne can be stored in the freezer for up to 3 months.
To thaw a whole loaf, remove all wrapping and let it thaw at room temperature for several hours. For best results with a frozen whole loaf, you can then reheat it in a preheated oven at 350°F (175°C) for 15-20 minutes to refresh the crust. Slices can be toasted directly from frozen.
Enjoying Your Rustic French Country Bread: Serving Suggestions
Pairing Pain de Campagne with Cheese, Soups, and More
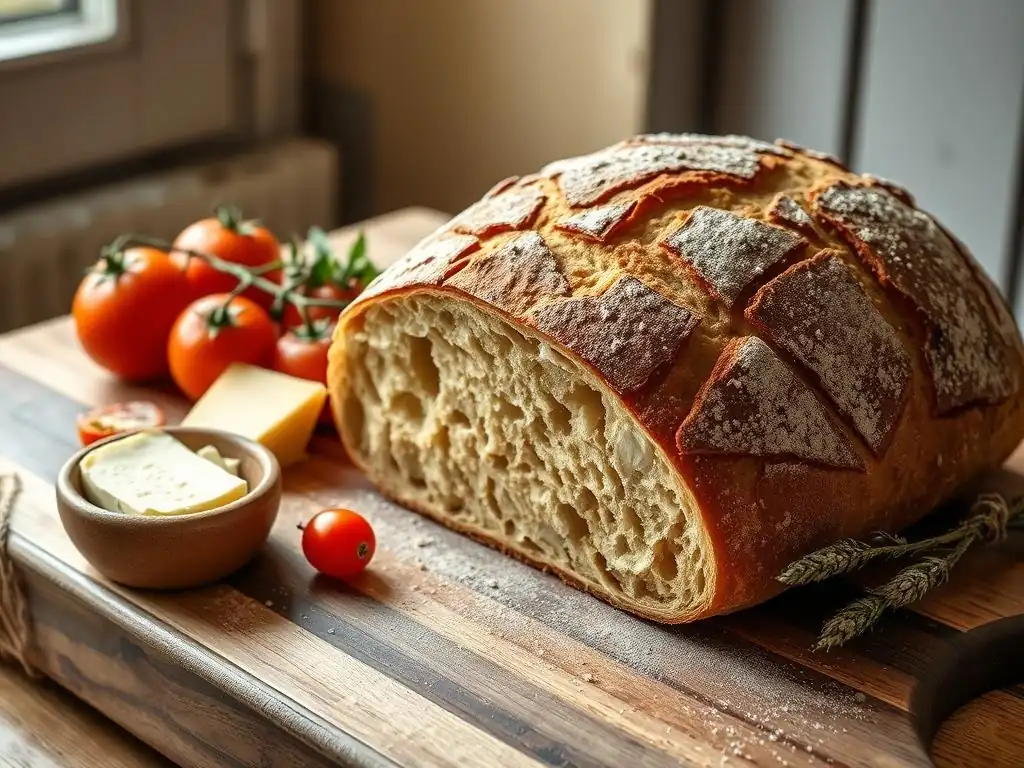
The robust flavor and hearty texture of rustic French country bread make it incredibly versatile and a perfect companion to many dishes. It's a classic addition to a cheese board, pairing beautifully with a wide range of cheeses, from soft and creamy Bries to firm and nutty Comtés. The crust provides a satisfying crunch against the smooth cheese.
Pain de Campagne is also the ideal bread for serving with soups and stews. Its sturdy crumb can soak up rich broths and sauces without falling apart. Think classic French Onion Soup, hearty lentil soup, or a beef bourguignon. A thick slice toasted and rubbed with garlic (bruschetta style) is also simple yet delicious. Don't forget the simple pleasure of tearing off a piece and dipping it into good quality olive oil and balsamic vinegar.
Creating Delicious Sandwiches with Your Homemade Bread
The firm structure and flavorful crumb of homemade rustic French country bread lend themselves perfectly to creating substantial and delicious sandwiches. Unlike softer sandwich loaves, Pain de Campagne holds up well to various fillings, wet or dry.
Consider making open-faced sandwiches (tartines) topped with ingredients like goat cheese and roasted red peppers, or smoked salmon and cream cheese. For traditional sandwiches, try fillings like sliced ham and Gruyère cheese (a classic French combination), roasted chicken with pesto, or grilled vegetables with hummus. The bread's texture provides a satisfying chew, elevating even simple sandwich fillings. A simple spread of good butter and a slice of ham on Pain de Campagne is a quintessential French light meal.
More French Baking Classics from BakeWithEase.
Frequently Asked Questions
How difficult is this Rustic French Country Bread recipe for beginner bakers?
This recipe is designed to be relatively simple, even for beginners. While it requires some patience due to the long fermentation, the steps are straightforward.
What makes this bread "rustic" and what are the main ingredients?
The "rustic" character comes from the simplicity of ingredients and the free-form shaping. The main ingredients are flour, water, salt, and yeast (or sourdough starter).
How long does the entire process of making this bread take from start to finish?
The entire process, including fermentation, proofing, and baking, typically takes around 12-24 hours. Most of this time is hands-off while the dough rests and develops flavor.
Can I substitute any of the flours in this Rustic French Country Bread recipe?
While the recipe is optimized for a specific flour blend, you can experiment. However, altering the flour mix may affect the texture and rise of the bread.
What's the best way to store this Rustic French Country Bread to keep it fresh?
Store the bread in a breathable linen bag or loosely wrapped in parchment paper at room temperature. Avoid plastic bags, which can trap moisture and lead to staleness.
Final Reflection: The Enduring Allure of Rustic Bread
The simple act of baking a rustic French country loaf connects us to a rich culinary heritage, a heritage that remains surprisingly relevant in our fast-paced modern world. More than just a recipe, baking this bread offers a tangible link to tradition, a moment of mindful creation in a world often dominated by instant gratification. The satisfying aroma filling your kitchen, the satisfying crust yielding to a soft, airy crumb – these are sensory experiences that ground us and remind us of the simple pleasures.
The enduring appeal of rustic bread, I believe, lies in its inherent imperfection. It's a testament to the beauty of handmade things, a counterpoint to the uniformity of mass-produced goods. Bread is the staff of life,
a common saying reminds us, but it's more than just sustenance; it's a symbol of comfort, community, and shared history. The process itself, from kneading the dough to the anticipation of the first slice, fosters a sense of connection – to the ingredients, the process, and ultimately, to ourselves.
Now, I invite you to take this recipe and make it your own. Experiment with different flours, explore variations in shaping, and most importantly, savor the experience. Don't be afraid to embrace the imperfections; they are what give your loaf its unique character and charm. The journey of baking this rustic French country bread is as rewarding as the final product itself. Let the aroma, the texture, and the taste transport you, even if just for a moment, to a simpler, more connected time. And remember, the best bread is often the one you bake with your own hands.
Unleash Your Inner Boulanger: Bake Your Own Pain de Campagne!
Thanks for joining us on this rustic bread baking adventure! We hope you gained confidence and inspiration to tackle this classic French loaf. Now it's time to get your hands floury!
- Master the art of Pain de Campagne: Use this recipe as your springboard! Experiment with different flours, add-ins, and shaping techniques to make this bread truly your own.
- Share your baking journey: Snap a picture of your gorgeous loaf and share it on social media – tag us @BakeWithEase so we can admire your creation!
- Dive deeper into rustic bread: Explore other recipes on our site for more delightful bread adventures (search "rustic bread" in our recipe index)!
Ready to transform your kitchen into a charming French boulangerie? What unique twist will you add to your Pain de Campagne?