
Beginner's Guide to Baking Perfect Focaccia

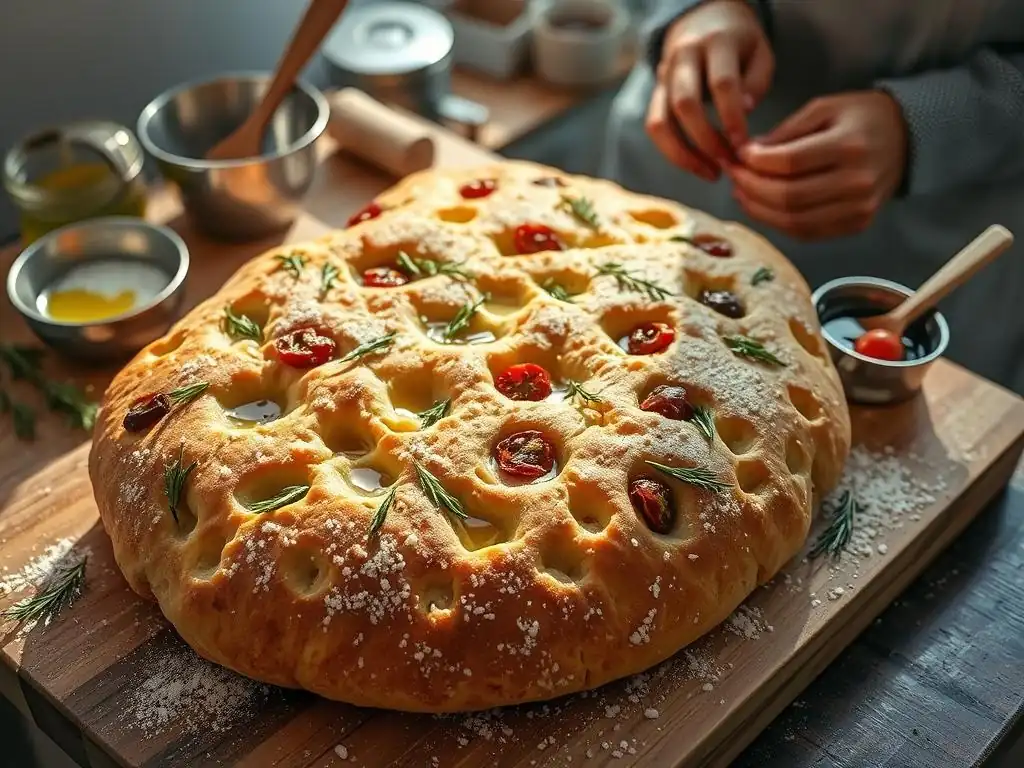
Welcome to BakeWithEase, your kitchen companion for unlocking baking brilliance! Ever dreamt of crafting that perfect, golden-crusted focaccia? This guide demystifies the process, taking you from baking novice to focaccia fanatic. Discover the secrets to creating this Italian staple, and prepare to impress with every delicious bite. Ready to embark on your focaccia adventure?
- Beginner's Guide to Baking Perfect Focaccia: BakeWithEase
- Introduction to Focaccia: An Italian Baking Tradition
- Essential Ingredients for Perfect Focaccia Baking
-
Step-by-Step Guide to Baking Focaccia: A Beginner's Recipe
- Step 1: Preparing the Focaccia Dough – A Simple Recipe
- Step 2: First Rise – Letting the Dough Develop Flavor
- Step 3: Shaping the Focaccia – Creating the Signature Dimples
- Step 4: Second Rise – Achieving a Light and Airy Texture
- Step 5: Topping and Baking – Adding Flavor and Achieving Golden Perfection
- Tips and Tricks for Perfect Focaccia Baking
- Mastering Focaccia: Advanced Baking Techniques
- Enjoying Your Homemade Focaccia: Serving Suggestions
- Conclusion: Unleash Your Inner Baker with Perfect Focaccia
-
Frequently Asked Questions
- How easy is it for a complete beginner to bake focaccia using BakeWithEase's guide?
- What are the key ingredients I need to bake focaccia, according to BakeWithEase?
- What specific baking techniques does BakeWithEase recommend for achieving a perfect focaccia crust?
- How does BakeWithEase help beginners avoid common focaccia baking mistakes?
- What variations of focaccia recipes can I explore after mastering the basic recipe on BakeWithEase?
- Final Reflection: The Enduring Magic of a Perfect Crust
- Unleash Your Inner Focaccia Artist!
Beginner's Guide to Baking Perfect Focaccia: BakeWithEase
Introduction to Focaccia: An Italian Baking Tradition
What is Focaccia? Exploring the Origins
Focaccia is a beloved Italian flatbread, known for its airy texture, golden crust, and generous use of olive oil. Its name is thought to come from the Latin word "focus," meaning hearth or fireplace, suggesting its ancient origins as a bread baked directly on hot coals or stones.
This simple yet versatile bread hails from the Liguria region in northwestern Italy, particularly Genoa, where it is a daily staple enjoyed plain, topped, or used as a base for sandwiches. Over centuries, focaccia has evolved, with various regional interpretations emerging across Italy and beyond, but the core elements of flour, water, yeast, salt, and olive oil remain constant.
Unlike many other breads that aim for a dense, even crumb, focaccia is characterized by large air pockets and a wonderfully irregular interior. The distinctive dimples pressed into the dough's surface before baking serve a crucial purpose: they prevent large bubbles from forming and ensure the olive oil pools beautifully, infusing the bread with flavor and contributing to its signature moist yet crisp texture.
While traditional focaccia Genovese is often enjoyed simply with coarse sea salt and olive oil, modern variations incorporate a wide array of toppings, from herbs like rosemary and sage to vegetables, cheese, and even sweet additions.
Why Focaccia is Perfect for Beginners: Simple Baking
For anyone new to baking, focaccia offers a remarkably forgiving and rewarding experience. Unlike complex sourdoughs or delicate pastries, the process for making perfect focaccia baking beginner style is straightforward and less prone to failure. The dough is typically high in hydration, meaning it contains a relatively large amount of water compared to flour, which makes it sticky but also very easy to handle and shape – there's no need for intricate kneading or shaping techniques. You can often achieve a wonderful result with minimal hands-on time, relying on time and temperature for the dough's development.
Furthermore, the visual nature of making focaccia is inherently satisfying. Watching the dough rise, pressing in the dimples, and seeing the olive oil pool are all simple, enjoyable steps. The final baked product, with its golden crust and aromatic scent, feels like a significant accomplishment, even for a first-time baker. The high oil content and rustic nature of focaccia mean that minor imperfections in shaping or proofing are much less noticeable than in, say, a baguette or a brioche. This makes perfect focaccia baking beginner goals easily achievable, building confidence for future baking adventures.
Essential Ingredients for Perfect Focaccia Baking
Flour Power: Choosing the Right Flour for Focaccia
The type of flour you choose significantly impacts the texture of your perfect focaccia baking beginner attempt. While professional bakers might use specific Italian "Tipo 00" flour, which is very finely milled and low in protein, beginners can achieve excellent results with more readily available options. All-purpose flour works well, providing a relatively tender crumb.
However, for a slightly chewier texture with more structure, often desired in focaccia, a bread flour with a higher protein content (typically 12-14%) is an excellent choice. The higher protein develops more gluten, which helps trap the gases produced by the yeast, resulting in a lighter, airier bread with those characteristic large holes.
When selecting flour, consider starting with a good quality bread flour for your first perfect focaccia baking beginner project. This will provide a reliable base for developing the necessary structure. For example, using 500 grams of bread flour will require approximately 350-400 ml of water to achieve the high hydration typical of focaccia dough, resulting in a wet, sticky mixture that transforms into a beautiful, airy bread after baking. Experimenting with different flours later can help you discover your preferred texture, but starting simple is key.
Olive Oil: The Key to Focaccia's Flavor and Texture
Olive oil is not just an ingredient in focaccia; it's a fundamental building block of its flavor and texture. It's used generously in the dough, on the pan, and drizzled over the top before baking. For the best flavor, use a good quality extra virgin olive oil. Its fruity, slightly peppery notes infuse the bread, creating a richer taste than refined oils. The oil added to the dough contributes to its tenderness and helps create a soft crumb.
Crucially, olive oil poured over the surface of the focaccia before baking creates that signature golden, slightly crisp crust and helps prevent the top from drying out. The dimples hold pools of this liquid gold, which fry the surface of the dough as it bakes, resulting in delicious, slightly crisp pockets and a wonderfully moist interior.
Don't be shy with the oil; a typical recipe for a 9x13 inch pan might use anywhere from 60 ml to 120 ml (1/4 to 1/2 cup) of olive oil throughout the process, ensuring that characteristic richness and texture that define perfect focaccia baking beginner success.
Yeast: Understanding and Activating Yeast for Focaccia Dough
Yeast is the magical ingredient that makes your focaccia dough rise, creating that light and airy structure. For perfect focaccia baking beginner recipes, instant dry yeast is often the easiest to work with as it can usually be mixed directly into the dry ingredients without prior activation. However, understanding how to activate yeast (especially active dry yeast) is a useful basic baking skill.
Active dry yeast typically needs to be dissolved in warm water (around 105-115°F or 40-46°C) with a pinch of sugar for about 5-10 minutes until it becomes foamy. This "blooming" process confirms the yeast is alive and active before you add it to your flour.
Using the correct amount of yeast is also important. Too much can lead to a rapid rise but potentially an off-flavor, while too little means a slow or incomplete rise. For a typical recipe using 500 grams of flour, around 7-10 grams (about 2-2.5 teaspoons) of instant dry yeast is usually sufficient for a good rise within a couple of hours at room temperature. Ensuring your water is the correct temperature (lukewarm, not hot, which can kill the yeast) and that your yeast isn't expired are key steps for successful dough development in your perfect focaccia baking beginner journey.
Water and Salt: The Basics of Focaccia Dough Hydration
Water is essential for activating the yeast and hydrating the flour, allowing gluten to develop. Focaccia dough is known for its high hydration, often ranging from 70% to 85% hydration (meaning the weight of water is 70-85% of the weight of the flour). This high water content is what contributes to the dough's stickiness and, ultimately, the airy, open crumb structure of the finished bread. Using warm water (around 80-90°F or 27-32°C) can help kickstart yeast activity, especially in cooler environments.
Salt, while seemingly simple, plays multiple critical roles. It enhances the flavor of the focaccia, making it taste less bland. More importantly from a technical perspective, salt helps control the rate of yeast fermentation, preventing the dough from rising too quickly.
It also strengthens the gluten structure, which is vital for the dough to hold its shape and trap air pockets during rising and baking. Using approximately 10-12 grams (about 1.5-2 teaspoons) of fine sea salt per 500 grams of flour is a good starting point for achieving both excellent flavor and proper dough structure in your perfect focaccia baking beginner recipe.
Step-by-Step Guide to Baking Focaccia: A Beginner's Recipe
Step 1: Preparing the Focaccia Dough – A Simple Recipe
Creating the dough for your perfect focaccia baking beginner project is surprisingly simple. You'll typically start by combining the warm water and yeast in a large bowl. If using active dry yeast, let it bloom for 5-10 minutes until foamy. If using instant dry yeast, you can often mix it directly with the flour and salt. Next, add the flour and salt to the bowl. Many beginner-friendly recipes use a no-knead or minimal-knead method for focaccia, which involves simply mixing the ingredients with a spoon or spatula until just combined into a shaggy, sticky dough.
Once the ingredients are mixed, you might perform a few "stretch and folds" over the next hour or so, wetting your hands and gently stretching and folding the dough over itself a few times directly in the bowl. This helps develop gluten structure without intensive kneading. After mixing or folding, drizzle the top of the dough with a little olive oil, cover the bowl tightly with plastic wrap, and prepare it for its first rise. A typical recipe using 500g flour might use 375g water, 10g salt, and 7g instant yeast, mixed until no dry flour remains.
Step 2: First Rise – Letting the Dough Develop Flavor
The first rise, also known as bulk fermentation, is a crucial step where the yeast gets to work, producing carbon dioxide gas that makes the dough expand. This process also allows enzymes to break down starches, developing complex flavors in the dough. For perfect focaccia baking beginner success, patience is key here.
Place your covered bowl of dough in a warm, draft-free spot. The duration of the first rise can vary significantly depending on the temperature of your kitchen and the amount of yeast used, but typically ranges from 1 to 2 hours at room temperature (around 70-75°F or 21-24°C) until the dough has roughly doubled in size.
Alternatively, for even deeper flavor development, you can opt for a slower, cold fermentation in the refrigerator. After an initial hour at room temperature, transfer the covered bowl to the fridge for anywhere from 8 to 24 hours. This slow rise enhances the complexity of the dough's flavor profile. Whichever method you choose, the goal is to allow the dough to expand and become bubbly, indicating the yeast is active and the gluten is developing.
Step 3: Shaping the Focaccia – Creating the Signature Dimples
After the first rise, it's time to transfer the dough to your baking pan. Focaccia is typically baked in a rectangular or square pan, often lined with parchment paper and generously coated with olive oil. Pour a good amount of olive oil (e.g., 3-4 tablespoons) into the bottom of your pan and spread it around. Gently scrape the dough from the bowl into the prepared pan. The dough will be very wet and loose. Avoid punching it down forcefully; you want to preserve the air bubbles that have developed.
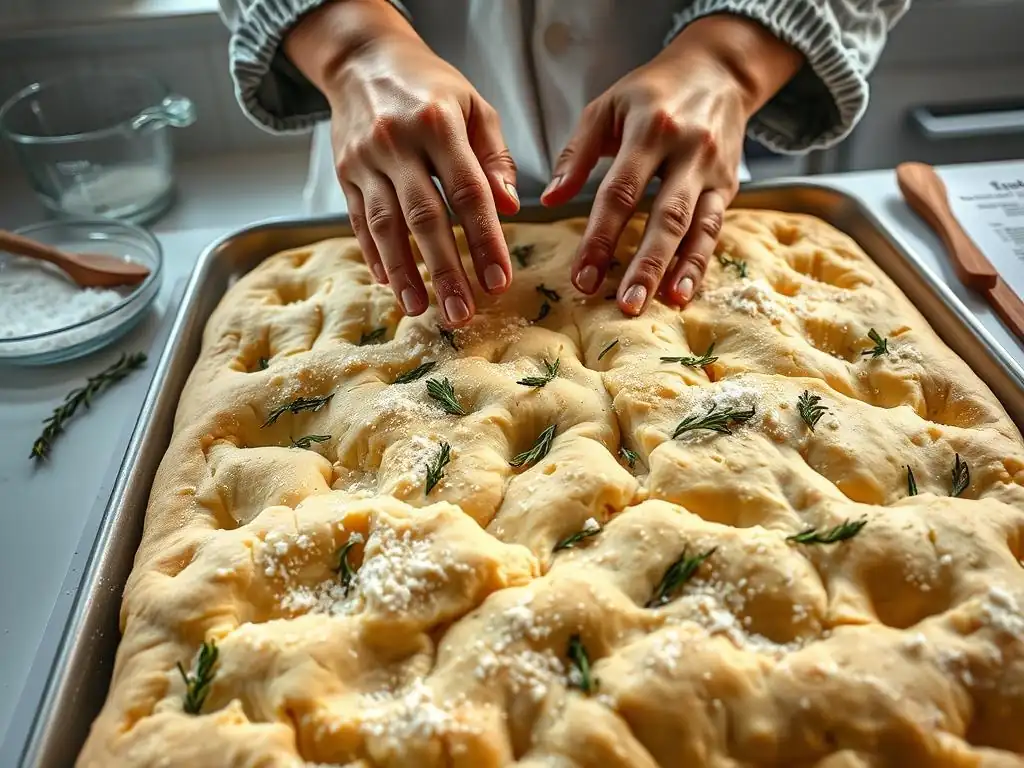
Now comes the fun part: shaping and dimpling! Gently nudge the dough towards the corners of the pan. It might not fill the pan immediately, especially if cold from the fridge. Let it rest for 15-20 minutes, and it will relax and spread more easily.
Once it covers most of the pan, generously oil your fingertips and gently but firmly press them straight down into the dough, creating those characteristic dimples. Don't be afraid to press all the way down to the bottom of the pan. This step helps redistribute air and creates the perfect little pockets for olive oil and toppings. This is a defining step for perfect focaccia baking beginner technique.
Step 4: Second Rise – Achieving a Light and Airy Texture
Once the dough is shaped and dimpled in the pan, it needs a second rise, also known as proofing. This final rise allows the dough to lighten up and become airy before baking. Cover the pan loosely with plastic wrap or a clean kitchen towel and let it rest in a warm spot. This rise is usually shorter than the first, typically lasting 30 to 60 minutes at room temperature. You'll know it's ready when the dough looks visibly puffy, soft, and has expanded to fill the pan completely, and the dimples look pillowy rather than sharp.
During this time, the yeast continues to produce gas, making the dough even lighter. Proper proofing is essential for achieving that wonderful open crumb structure. If the dough is under-proofed, the bread can be dense; if over-proofed, it might collapse in the oven. Aim for a dough that springs back slowly when gently poked. This careful observation during the second rise is key for perfect focaccia baking beginner success.
Step 5: Topping and Baking – Adding Flavor and Achieving Golden Perfection
With the dough perfectly proofed and puffy, it's time to add the final touches before baking. Drizzle another generous amount of olive oil over the entire surface, allowing it to pool in the dimples. This is the moment to add your desired toppings, such as coarse sea salt, fresh rosemary sprigs, sliced olives, or cherry tomatoes pressed gently into the dimples. Be creative with your toppings, but start simple for your first perfect focaccia baking beginner attempt.
Preheat your oven to a hot temperature, typically between 400°F and 450°F (200°C to 230°C). A hot oven helps the dough spring up quickly, contributing to a light texture. Bake the focaccia for 20 to 30 minutes, or until the crust is deep golden brown and the underside sounds hollow when tapped.
The high heat ensures a crispy bottom crust while the oil keeps the interior moist. Once baked, remove the pan from the oven and, for an extra layer of flavor and a softer crust, you can drizzle a little more olive oil over the hot bread immediately. Let it cool in the pan for a few minutes before transferring it to a wire rack to cool slightly before slicing and serving.
Tips and Tricks for Perfect Focaccia Baking
Achieving the Perfect Crust: Baking Techniques for Focaccia
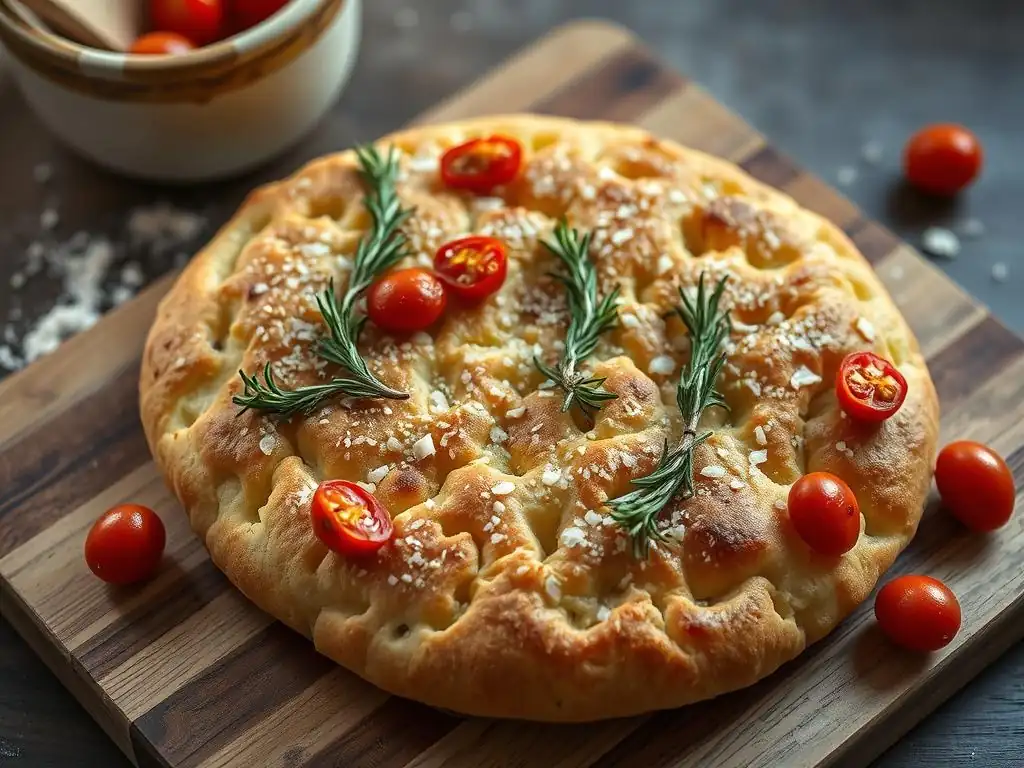
A signature of perfect focaccia is its delightful crust: crisp on the bottom and edges, and golden and slightly chewy on top. Achieving this requires a combination of factors. Firstly, using a generous amount of olive oil in the pan is paramount. This oil essentially fries the bottom of the dough as it bakes, creating that coveted crispy base. Using a metal pan, particularly dark metal or cast iron, can also help conduct heat efficiently to the bottom crust, promoting browning and crispness.
Secondly, baking at a high temperature is crucial. A hot oven (400-450°F or 200-230°C) ensures rapid heat transfer, causing the dough to puff up quickly and the exterior to set before the interior dries out. Placing the pan on the lowest rack of the oven can help ensure the bottom gets sufficient heat. Finally, don't underbake it!
The top should be a rich golden brown, not just pale yellow. If the top is browning too quickly but the bottom isn't done, you can loosely tent the top with foil for the last few minutes of baking. Mastering these techniques is key for perfect focaccia baking beginner success.
Flavor Variations: Exploring Different Focaccia Toppings
While classic focaccia with just olive oil and sea salt is divine, one of the joys of baking this bread is the endless possibility for toppings. For a simple yet aromatic variation, press fresh rosemary sprigs and flaky sea salt into the dimples before baking. Other herbs like thyme, oregano, or sage also work beautifully. For vegetable toppings, try thinly sliced cherry tomatoes (halved or whole), caramelized onions, thinly sliced potatoes, or roasted garlic cloves. These can be pressed into the dough along with the olive oil.
Cheese is another popular addition. Crumbled feta, dollops of ricotta, or grated Parmesan can be added during the last 10-15 minutes of baking to prevent them from burning. Olives, capers, or even sliced jalapeños can add a briny or spicy kick. For a sweeter version, some regions make focaccia with raisins or honey. When exploring toppings for your perfect focaccia baking beginner adventure, start with one or two simple additions to see how they bake, then get more creative!
Troubleshooting Common Focaccia Baking Problems
Even with a simple recipe, beginners can encounter common issues. If your focaccia is dense and doesn't have many air pockets, it could be due to several reasons: the yeast wasn't active, the water temperature was wrong, the dough was under-proofed (didn't rise long enough), or you handled the dough too roughly, deflating the air bubbles. Ensure your yeast is fresh and properly activated, use lukewarm water, and allow sufficient time for both the first and second rises until the dough is visibly puffy.
If the crust is not crispy, you might not be using enough olive oil in the pan or on top, or your oven temperature isn't high enough. Ensure the pan is well-oiled and preheat your oven fully to at least 400°F (200°C). If the focaccia is too dry, it could be overbaked or didn't have enough hydration initially.
Focaccia should be moist inside due to the high hydration and oil. Aim for a deep golden brown crust, but avoid baking for so long that the interior dries out. These are common hurdles in perfect focaccia baking beginner attempts, but easily overcome with practice.
Storing Your Focaccia: Keeping it Fresh
Focaccia is best enjoyed fresh, warm from the oven, when its texture is at its peak. However, if you have leftovers, proper storage can help maintain its quality for a day or two. Once completely cooled, store focaccia at room temperature, wrapped tightly in plastic wrap or aluminum foil, or placed in an airtight container. This prevents it from drying out. Avoid refrigerating focaccia, as this can cause the starches to crystallize and make the bread stale more quickly.
To refresh leftover focaccia, you can lightly sprinkle it with water and warm it in a preheated oven at around 350°F (175°C) for 5-10 minutes. This helps soften the crumb and crisp up the crust again. Focaccia can also be frozen for longer storage. Wrap cooled focaccia tightly in plastic wrap, then in aluminum foil or a freezer bag. It can be kept frozen for up to 3 months. Thaw at room temperature and reheat as described above. Knowing how to store and reheat ensures you can enjoy your perfect focaccia baking beginner creation for longer.
Mastering Focaccia: Advanced Baking Techniques
Sourdough Focaccia: Taking Your Baking to the Next Level
Once you've mastered the basic perfect focaccia baking beginner recipe, you might want to explore the world of sourdough focaccia. This variation uses a sourdough starter instead of commercial yeast, resulting in a bread with a more complex, tangy flavor and a slightly different texture. The process is similar to the yeasted version but involves working with a living culture, which requires regular feeding and maintenance. Sourdough fermentation is also typically slower than commercial yeast fermentation, often requiring longer proofing times, sometimes overnight at room temperature or in the refrigerator.
Creating sourdough focaccia involves incorporating an active sourdough starter into your dough mix, adjusting the water and flour quantities slightly to account for the starter's hydration. The long fermentation develops organic acids that contribute to the characteristic sourdough tang and improve the dough's structure and keeping quality. While it adds a layer of complexity, successfully baking sourdough focaccia is a rewarding step for those looking to deepen their baking skills beyond the perfect focaccia baking beginner stage.
Different Focaccia Styles: Exploring Regional Variations
While focaccia Genovese is perhaps the most famous, Italy boasts a variety of regional focaccia styles, each with its own unique characteristics. Exploring these variations can expand your baking repertoire. Focaccia di Recco, from a town near Genoa, is a very thin, unleavened focaccia filled with creamy stracchino cheese, baked until the cheese is melted and bubbly. Focaccia Barese, from the Puglia region, often includes mashed potato in the dough, which results in an incredibly soft and moist crumb, and is traditionally topped with cherry tomatoes and olives.
Another interesting variation is Focaccia Messinese from Sicily, which is typically topped with tomatoes, anchovies, and sometimes other vegetables. Exploring these regional differences highlights the versatility of the basic focaccia concept and provides inspiration for new perfect focaccia baking beginner experiments, showcasing how simple ingredients can be transformed in diverse ways across Italy.
Enjoying Your Homemade Focaccia: Serving Suggestions
Focaccia as an Appetizer: Creative Serving Ideas
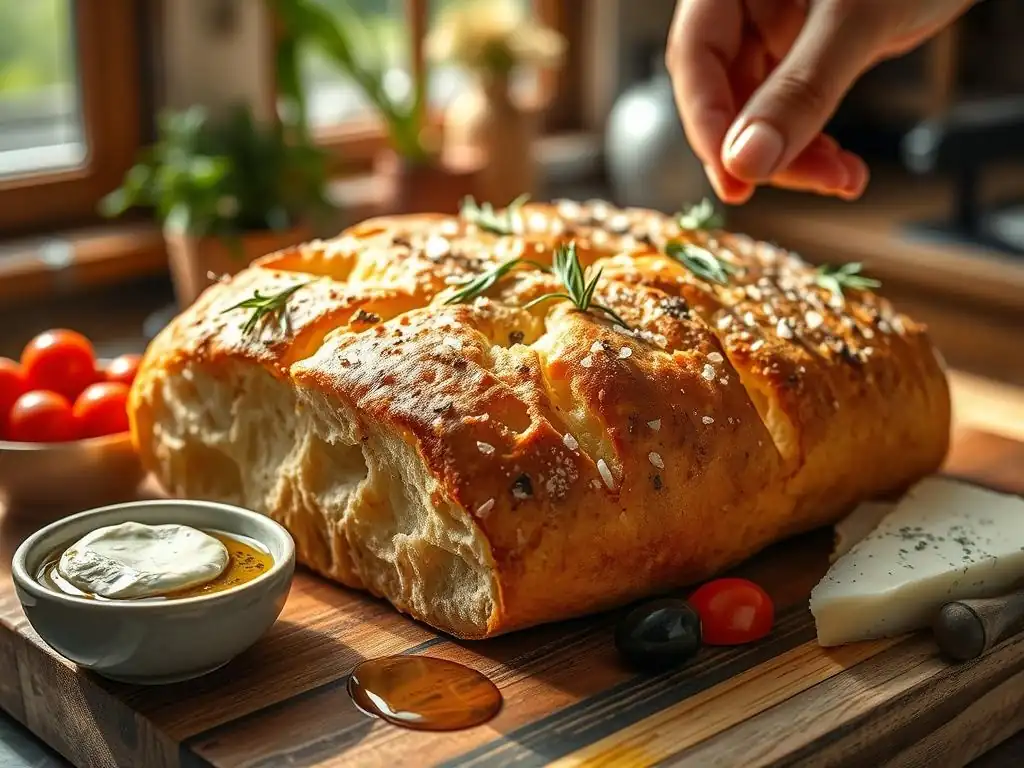
Homemade focaccia makes a fantastic appetizer, either served warm on its own or as a base for other delicious components. Cut the focaccia into squares or strips and serve it alongside a bowl of high-quality olive oil for dipping – perhaps infused with garlic or herbs. It pairs wonderfully with antipasti platters featuring cured meats like prosciutto and salami, various cheeses, marinated vegetables, and olives.
Consider serving it with dips like balsamic glaze, pesto, or a sun-dried tomato spread. For a simple yet elegant presentation, top warm focaccia squares with a spoonful of ricotta cheese and a drizzle of honey, or with some fresh mozzarella and basil for a caprese-inspired bite. The rustic charm and delightful texture of your perfect focaccia baking beginner creation make it an instant crowd-pleaser.
Focaccia as a Side Dish: Pairing with Italian Meals
Focaccia is a natural accompaniment to a wide range of Italian dishes, serving as a versatile bread component for soaking up sauces or complementing main courses. It's perfect served alongside pasta dishes, from simple spaghetti aglio e olio to rich ragus. Use it to sop up the delicious broth from a seafood stew like cacciucco or the tomatoey sauce from chicken cacciatore.
It also pairs well with soups, adding substance and flavor. Imagine dipping a piece of warm focaccia into a hearty minestrone or a creamy tomato soup. Furthermore, focaccia can serve as the bread for delicious sandwiches or paninis. Slice a large piece horizontally and fill it with Italian deli meats, cheese, roasted vegetables, and pesto for a satisfying meal. Your perfect focaccia baking beginner success means you now have the ideal bread for countless culinary pairings.
Conclusion: Unleash Your Inner Baker with Perfect Focaccia
Embarking on the journey of baking perfect focaccia as a beginner is a truly rewarding experience. From understanding the simple yet powerful ingredients like flour, water, yeast, salt, and copious amounts of olive oil, to mastering the straightforward steps of mixing, rising, dimpling, and baking, you've learned the fundamentals of creating this iconic Italian flatbread. The forgiving nature of focaccia dough makes it an ideal starting point for anyone new to baking, offering delicious results with minimal stress.
Remember that perfect focaccia baking beginner success comes with practice and perhaps a little experimentation with temperatures and timings in your own kitchen. Don't be discouraged by your first attempt; each bake is a learning opportunity. Whether you enjoy it plain, topped with herbs, or as part of a larger meal, your homemade focaccia is sure to bring joy to your table. So gather your ingredients, preheat your oven, and confidently bake your way to delicious, perfect focaccia!
Frequently Asked Questions
How easy is it for a complete beginner to bake focaccia using BakeWithEase's guide?
BakeWithEase provides a step-by-step beginner's guide, ensuring even those with no prior experience can successfully bake focaccia. The guide focuses on simple recipes and easy-to-find ingredients, making the process manageable.
What are the key ingredients I need to bake focaccia, according to BakeWithEase?
The guide highlights the importance of high-quality flour, olive oil, and active dry yeast. Specific measurements and alternatives, if any, are detailed within the beginner-friendly recipe.
What specific baking techniques does BakeWithEase recommend for achieving a perfect focaccia crust?
BakeWithEase emphasizes the importance of proper hydration and proofing for a crispy crust. The guide also details the "dimpling" technique, crucial for creating the signature focaccia texture.
How does BakeWithEase help beginners avoid common focaccia baking mistakes?
The guide includes troubleshooting tips and tricks to address common errors such as over-proofing or under-baking. It focuses on ensuring the dough is properly hydrated and handled.
What variations of focaccia recipes can I explore after mastering the basic recipe on BakeWithEase?
Once comfortable with the basic recipe, BakeWithEase offers suggestions for adding flavorful toppings like herbs, vegetables, or cheeses. These variations allow bakers to experiment and personalize their focaccia creations.
Final Reflection: The Enduring Magic of a Perfect Crust
The pursuit of the perfect focaccia, seemingly a simple culinary goal, reflects a deeper human desire for mastery and connection. It's a journey that transcends the kitchen, offering a tangible representation of patience, precision, and the rewarding satisfaction of creating something beautiful from humble ingredients. In a world increasingly dominated by instant gratification, the slow, deliberate process of baking focaccia offers a powerful antidote.
The influence of this simple bread extends far beyond the individual baker. It's a symbol of sharing, of bringing people together around a table laden with fragrant, golden-brown squares. The act of kneading, proofing, and baking becomes a meditative practice, a moment of mindful creation in a busy world. As the renowned baker, Jim Lahey, once said, Bread baking is a metaphor for life. You put in the work, you wait patiently, and then you are rewarded with something beautiful and nourishing.
This sentiment perfectly encapsulates the experience of baking focaccia, and its lasting impact on our appreciation for simple pleasures.
Now, I invite you to take what you've learned from this guide and embark on your own focaccia journey. Don't be afraid to experiment, to adjust the recipe to your own tastes, and most importantly, to enjoy the process. The perfect focaccia isn't just about achieving a flawless crust; it's about the journey, the connection to tradition, and the joy of sharing your creation with others. So, gather your ingredients, preheat your oven, and let the magic begin. Your perfect focaccia awaits.
Unleash Your Inner Focaccia Artist!
Thanks for joining us on this focaccia journey! We hope you now feel confident and inspired to create delicious, golden-brown loaves. Ready to take your baking skills to the next level?
- Bake your own masterpiece! Use the recipe and tips from this guide to create your first (or next!) perfect focaccia. Experiment with different herbs, oils, and toppings – let your creativity shine!
- Share your focaccia success! Post a picture of your creation on social media and tag us – we'd love to see it! Use #BakeWithEaseFocaccia to connect with other baking enthusiasts.
- Explore our other baking guides. Discover new recipes and techniques to expand your culinary horizons – from sourdough to croissants, we've got you covered.
What unique topping will you create for your next focaccia adventure? Let us know in the comments!