
Understanding Italian Flours for Better Home Baking

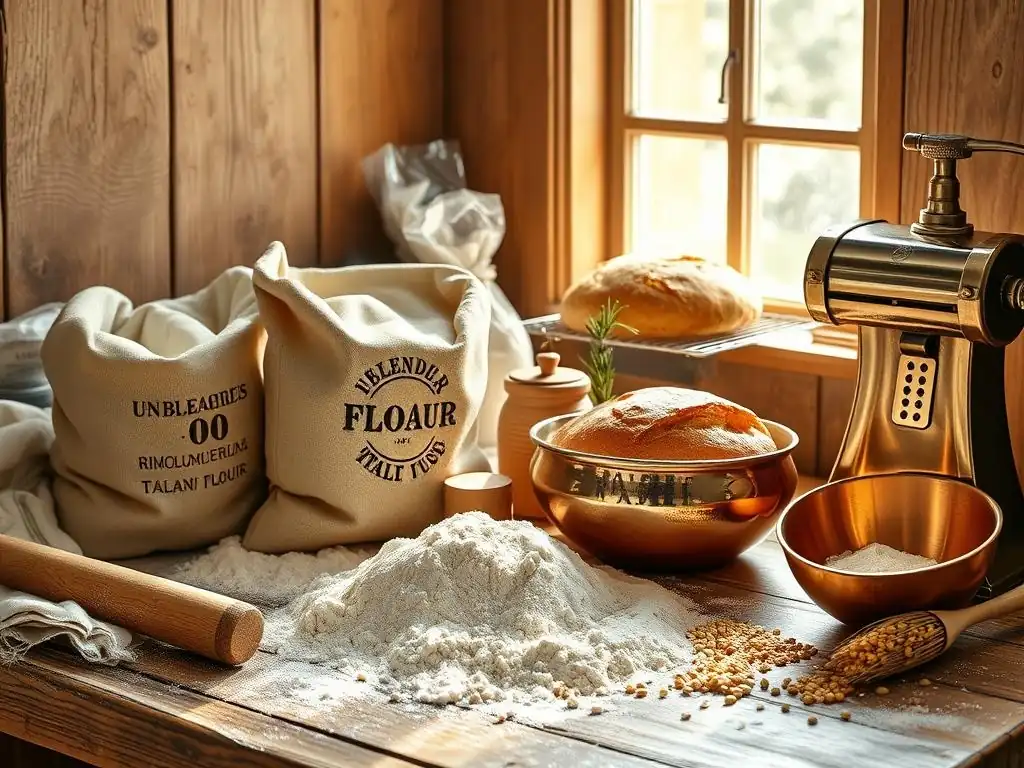
Welcome to BakeWithEase, your partner in creating delicious baked goods! Ever wondered why Italian pastries have that irresistible texture and flavor? This week, we're diving deep into the secrets behind it all with our article, "Understanding Italian Flours for Better Home Baking." Discover how different Italian flour baking tips can transform your creations from ordinary to extraordinary, and unlock the secrets to authentic Italian baking right in your own kitchen. Intrigued? Let's get started!
- Introduction to Italian Flour and Baking Excellence
- Demystifying Italian Flour Types: A Baker's Guide
- The W-Value: Decoding Flour Strength for Italian Recipes
- Italian Flour Baking Tips for Home Bakers
- Italian Flour Recipes to Try at Home
- Storing Italian Flour for Long-Lasting Freshness
- Sourcing High-Quality Italian Flour: What to Look For
- Troubleshooting Common Issues When Baking with Italian Flour
- Conclusion: Elevate Your Baking with Italian Flour Knowledge
-
Frequently Asked Questions
- What is the main advantage of using Italian flour for baking?
- How does the "00" designation affect baking results with Italian flour?
- Can I substitute Italian flour for all-purpose flour in my recipes?
- What types of baked goods are best suited for using Italian flour?
- Where can I typically find Italian flour, and what should I look for on the packaging?
- Final Reflection: The Flour Power of Italian Baking
- Unlock Your Baking Potential: Mastering Italian Flour
Introduction to Italian Flour and Baking Excellence
Mastering Baking with Italian Flour
Embarking on the journey of baking with Italian flour can truly transform your homemade creations. Italian flours, particularly those milled from soft wheat (grano tenero) and durum wheat (grano duro), are renowned for their specific characteristics that lend themselves beautifully to traditional Italian baked goods.
Understanding the nuances between types like "00," Type 0, Type 1, Type 2, and Semola di Grano Duro is the first step towards achieving authentic textures and flavors, whether you're aiming for a light, airy pizza crust or a rich, rustic loaf of bread. Applying specific Italian flour baking tips can significantly elevate your results, moving beyond standard all-purpose flours to explore a world of baking possibilities.
The secret lies not just in the origin of the grain, but in the milling process and the inherent protein and gluten structure of the flour. Italian mills often grind the flour to different fineness levels and extract varying amounts of the bran and germ, resulting in distinct flour types suited for particular applications.
For instance, the very fine grind of "00" flour creates doughs that are smooth and pliable, perfect for pizza and pasta, while coarser flours like Type 1 or Type 2, containing more of the grain's components, impart deeper flavors and heartier textures ideal for certain breads. By familiarizing yourself with these differences and applying targeted Italian flour baking tips, you can select the perfect flour for your desired outcome, ensuring successful and delicious results every time you bake.
Exploring Regional Baking: A Deep Dive into Italy
Italy's diverse culinary landscape is deeply reflected in its regional baking traditions, each often relying on specific types of flour and techniques. From the thin, crispy pizza of Naples made with high-protein "00" flour to the hearty, rustic breads of Tuscany using Type 1 or Type 2 flours, the choice of flour is intrinsically linked to the identity of the baked good.
Exploring these regional variations provides invaluable Italian flour baking tips by demonstrating how different flours behave in various climates and with distinct hydration levels and fermentation times. Consider the dense, flavorful pane Pugliese from the Puglia region, which traditionally utilizes a significant portion of semola rimacinata (twice-milled durum wheat semolina) for its unique crumb structure and golden hue.
Understanding the regional context also sheds light on historical practices and ingredient availability that shaped these baking methods. For example, areas historically rich in durum wheat cultivation, like Southern Italy, developed robust bread and pasta traditions around semola, while regions with soft wheat production, like the North, perfected pastries and lighter breads using grano tenero flours.
By studying these traditions, home bakers gain insight into the fundamental principles of using Italian flour effectively. These principles, often passed down through generations, offer practical Italian flour baking tips on everything from hydration ratios specific to the flour type to optimal proofing environments, allowing you to recreate authentic regional flavors in your own kitchen.
Demystifying Italian Flour Types: A Baker's Guide
Understanding the "00" Flour: The King of Italian Baking
Italian "00" flour, or doppio zero, is perhaps the most famous Italian flour abroad and is often considered the gold standard for specific types of baking. The "00" classification refers to the fineness of the grind and the amount of bran and germ removed – "00" is the most refined and finely ground Italian flour. This results in a flour that is incredibly soft to the touch, almost like powder, and typically low in ash content.
While it's finely ground, its protein content can vary significantly, influencing its strength (W-value). A "00" flour intended for pizza might have a protein content around 12-13% and a high W-value, making it strong and elastic, whereas a "00" flour for delicate pastries might have a lower protein content, perhaps 9-10%, and a lower W-value for tenderness.
This superfine texture and variable protein content make "00" flour exceptionally versatile, though it's most celebrated for pizza and fresh pasta. For Neapolitan-style pizza, a high-protein "00" flour is essential for developing a strong, elastic gluten network capable of trapping gases produced during fermentation, resulting in a light, airy crust with characteristic blistering (cornicione).
When making fresh pasta, a lower-protein "00" flour creates a silky, smooth dough that is easy to roll thinly and yields tender pasta once cooked. Mastering Italian flour baking tips for "00" flour involves understanding that not all "00" flours are created equal and selecting one appropriate for your specific project, paying attention not just to the "00" label but also to the protein content or W-value if provided.
Type 0 Flour: Versatility for Bread and Pizza
Italian Type 0 flour is slightly less refined than "00" flour, meaning it contains a touch more of the outer layers of the wheat kernel (bran and germ). This results in a flour that is still relatively fine but not as powdery as "00". Like "00," the protein content and strength of Type 0 flour can vary.
It often falls into a medium-strength category, making it a highly versatile flour suitable for a wide range of baking applications. Many Italian bakers use Type 0 flour for general bread making, some pizza styles (especially those requiring a less airy or chewier crust than Neapolitan), and even some cakes and pastries where a slightly less refined texture is desired.
The slight presence of bran and germ in Type 0 flour contributes subtly more flavor compared to the very neutral "00" flour. It provides a good balance of extensibility and elasticity, making it easier to handle for many home bakers compared to very high-hydration doughs often associated with strong "00" flours.
For instance, a Type 0 flour with around 10.5-11.5% protein might be excellent for a general-purpose Italian loaf or a Roman-style pizza in teglia (pan pizza). Using Type 0 flour is a fantastic way to practice Italian flour baking tips across different recipes, as its forgiving nature allows for experimentation with hydration levels and fermentation times, bridging the gap between the highly refined "00" and the more rustic Type 1 and 2 flours.
Type 1 and Type 2 Flour: Rustic Flavors and Nutritional Benefits
Moving further up the scale of Italian flour types, Type 1 and Type 2 flours are progressively less refined, containing increasing amounts of the wheat kernel's bran and germ. Type 1 flour retains a noticeable amount of these components, giving it a coarser texture and a light, speckled appearance.
Type 2 flour, sometimes referred to as semi-integrale (semi-wholemeal), contains even more of the outer layers, approaching the composition of whole wheat flour, though it's still typically sifted to remove some of the coarsest particles. These flours are prized in Italian baking for the depth of flavor and aroma they contribute, as well as their higher nutritional value compared to Type 0 or "00" due to the presence of fiber, vitamins, and minerals concentrated in the bran and germ.
Baking with Type 1 and Type 2 flours often results in breads with a more rustic character, denser crumb, and a delightful chew. They are excellent choices for traditional Italian loaves like pane integrale or specific regional breads that benefit from a heartier texture and flavor. While they absorb water differently than more refined flours, requiring adjustments in hydration, they offer a unique baking experience.
For example, a Pugliese bread might incorporate Type 1 flour alongside semola for added flavor complexity. Incorporating these flours into your baking allows you to explore different dimensions of Italian flour baking tips, focusing on longer fermentation times to develop flavor and managing the dough's structure which is influenced by the larger particles of bran and germ.
Semola di Grano Duro: The Secret to Authentic Pasta and Bread
Semola di Grano Duro is milled from durum wheat (grano duro), a different species of wheat than the soft wheat (grano tenero) used for "00," Type 0, 1, and 2 flours. Durum wheat is hard, vitreous, and has a naturally high protein content, often ranging from 12% to 14% or even higher.
Semola is typically coarser than soft wheat flours, with a granular texture and a distinctive golden-yellow color. While semola can be milled to different fineness levels, the most common for home use is semola rimacinata, which is durum wheat semolina that has been milled twice, resulting in a finer, flour-like consistency that is easier to work with for doughs.
Semola di Grano Duro is the cornerstone of traditional Italian pasta making, particularly in the South. When mixed with water (and sometimes egg), its high protein and gluten content, combined with the specific properties of durum wheat gluten, create a dough that is firm, elastic, and holds its shape beautifully during cooking, resulting in pasta with a desirable al dente texture.
Beyond pasta, semola rimacinata is also widely used in Italian bread baking, especially in regions like Puglia and Sicily, to produce loaves with a characteristic golden crust, tight crumb, and wonderful flavor. Applying Italian flour baking tips for semola involves appreciating its unique absorption properties and the strength it imparts, making it ideal for robust doughs that require structure and chewiness.
The W-Value: Decoding Flour Strength for Italian Recipes
What is the W-Value and Why Does it Matter?
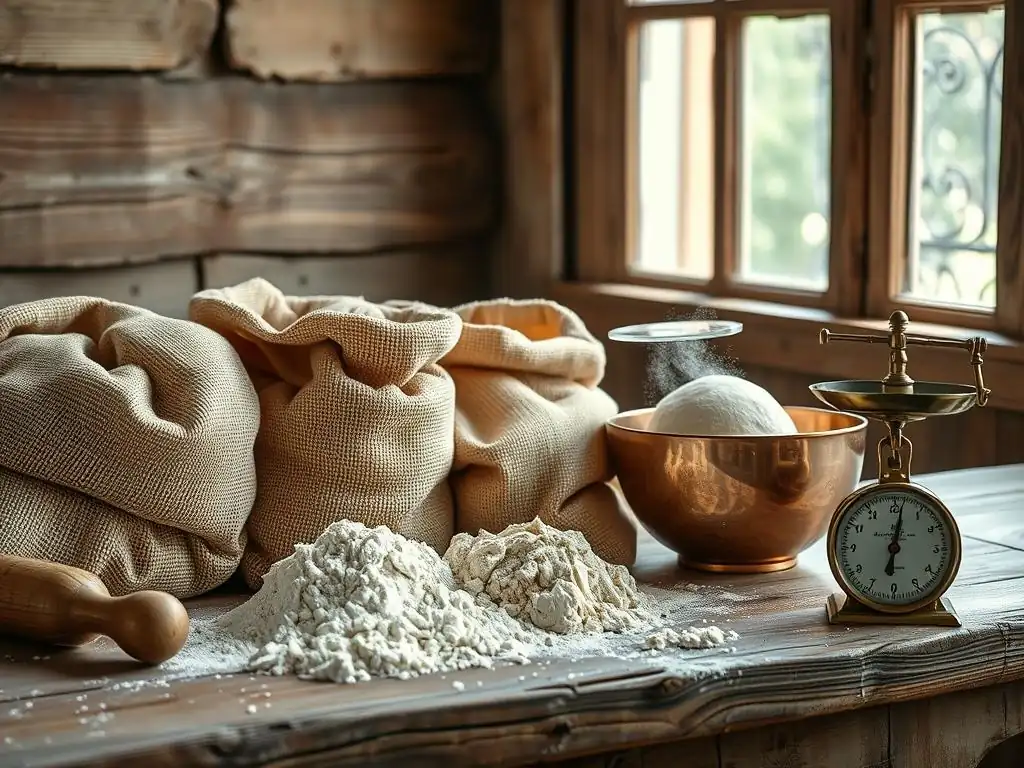
The W-value is a measure of flour strength, widely used in Italy and other parts of Europe, that indicates the flour's ability to resist deformation and its capacity to absorb water and retain gas during fermentation. It is determined using a Chopin Alveograph, which inflates a bubble of dough and measures the pressure and extensibility until it bursts.
The 'W' represents the total energy required to inflate the bubble, reflecting the flour's strength. A higher W-value indicates a stronger flour with higher protein content and a more robust gluten network, capable of handling longer fermentation times and higher hydration levels, essential for many artisanal Italian breads and pizzas.
Understanding the W-value is crucial for achieving predictable results when using Italian flours. Using a flour with an inappropriate W-value for a recipe can lead to issues like dough that won't develop properly, collapses during proofing, or results in a dense or flat baked good.
For example, a weak flour (low W-value, say W150) is suitable for biscuits or cakes where minimal gluten development is desired, while a strong flour (high W-value, say W300) is necessary for a lengthy-fermented sourdough ciabatta or a high-hydration pizza dough. Many Italian flour mills provide the W-value on their packaging, offering invaluable Italian flour baking tips right on the bag, guiding bakers to select the right flour for their specific project based on its required strength and fermentation time.
Choosing the Right W-Value for Different Baking Projects
Selecting the appropriate W-value is a key Italian flour baking tip that directly impacts the success of your recipe. The required strength of the flour depends on the type of baked good, the intended fermentation time, and the hydration level. Here's a general guide to W-values and their common applications:
- Low W-value (W100-W180): Very weak flours, low in protein. Ideal for short fermentation recipes like biscuits, shortcrust pastries, tart crusts, and some cakes where minimal gluten development is desired.
- Medium W-value (W180-W250): Medium-strength flours. Suitable for shorter fermentation breads (a few hours), direct method pizzas, focaccia, and some pastries. Many Type 0 and some "00" flours fall into this category.
- Medium-High W-value (W250-W320): Strong flours. Excellent for classic Neapolitan pizza (often W270-W300 is preferred), indirect method breads (using a preferment like a poolish or biga), ciabatta, and other breads requiring significant structure and moderate fermentation (8-12 hours). Many high-protein "00" flours fall here.
- High W-value (W320+): Very strong flours, often referred to as Manitoba flour (though true Manitoba is a specific wheat variety, the term is sometimes used generically for very strong flours). Necessary for long fermentation doughs (12-48+ hours), enriched doughs containing high amounts of fat, sugar, or eggs (like panettone or pandoro, which can use flours with W values approaching W400), and high-hydration doughs.
Choosing the correct W-value ensures the flour has the structural integrity to support the dough through mixing, fermentation, and baking, leading to the desired volume, crumb structure, and texture in your final product.
W-Value and Gluten Development in Italian Doughs
The W-value is intrinsically linked to the gluten-forming proteins (glutenin and gliadin) present in the flour and how they interact to form the gluten network. A higher W-value generally indicates a higher protein content and a greater potential for developing a strong, elastic gluten structure when the flour is hydrated and kneaded.
This strong network is vital for trapping the carbon dioxide gas produced by yeast or sourdough starter during fermentation, allowing the dough to rise and achieve a light, open crumb structure. Without sufficient gluten strength (i.e., using a flour with too low a W-value for a long fermentation), the gas will escape, resulting in a dense or flat loaf.
Conversely, using a flour that is too strong (too high a W-value) for a recipe that doesn't require much gluten development or fermentation can make the dough difficult to work with – stiff, rubbery, and resistant to shaping. It might also lead to a tough final product. Applying Italian flour baking tips means balancing the flour's strength (W-value) with the recipe's demands.
For a long-fermented pizza dough, for instance, you need a flour strong enough (W270-W300) to withstand the extended proofing without collapsing. For a simple focaccia with a shorter rise, a medium-strength flour (W200-W250) might be perfectly adequate. Understanding this relationship between W-value, protein, and gluten development empowers you to select the right Italian flour and tailor your mixing and kneading techniques to achieve optimal results.
Italian Flour Baking Tips for Home Bakers
Achieving the Perfect Texture with Italian Flour
Achieving the perfect texture is often the primary goal when baking with Italian flour. Whether it's the crisp-chewy contrast of a pizza crust, the open, airy crumb of ciabatta, or the tender bite of fresh pasta, the right texture is paramount. This is heavily influenced by the type of Italian flour used and how you handle it.
For instance, using a high-protein "00" flour with a high W-value is key for the characteristic blistering and airy edge of Neapolitan pizza. The fine grind allows for excellent hydration, and the strong gluten network can withstand the high temperatures of a pizza oven, creating that perfect puff.
For breads requiring a rustic, chewier texture, like many Southern Italian loaves, incorporating Semola di Grano Duro (especially rimacinata) is essential. Its unique gluten structure and granular nature contribute to a tighter, yet still moist, crumb and a wonderfully chewy crust. Mastering Italian flour baking tips for texture involves understanding how different flour types absorb water and develop gluten.
It also requires patience, allowing adequate time for fermentation and proofing, which are crucial steps in developing both flavor and the desired internal structure of your baked goods. Experimentation with hydration levels, kneading techniques, and fermentation times tailored to the specific Italian flour type will be your guide to achieving that coveted texture.
Hydration Levels: Mastering the Art of Water Absorption
Hydration level, expressed as a percentage of water to flour weight, is a critical factor when using Italian flour. Different Italian flour types absorb water differently based on their protein content, starch composition, and the presence of bran and germ. Generally, stronger flours with higher protein content (higher W-value) can absorb more water and still form a workable dough, leading to a more open crumb structure.
For example, a strong "00" flour for ciabatta might handle hydration levels of 75-85% or even higher, while a weaker Type 0 flour for a simpler loaf might be best at 60-65% hydration. Semola rimacinata also has unique absorption properties, often requiring careful hydration to avoid a sticky or overly stiff dough.
Mastering hydration is a fundamental Italian flour baking tip. It's not just about following a recipe's percentage; it's about feeling the dough and understanding how the specific flour you are using is behaving. Environmental factors like humidity can also influence how much water your flour absorbs on any given day.
Start with the recipe's recommended hydration but be prepared to adjust slightly, adding a touch more water if the dough feels too stiff or a little more flour if it's excessively sticky. Learning to assess the dough's consistency and adjust hydration accordingly is a skill that improves with practice and is essential for successful baking with the diverse range of Italian flours.
Kneading Techniques for Optimal Gluten Development
Effective kneading is vital for developing the gluten network in doughs made with Italian flour, particularly for breads and pizzas. Gluten development gives the dough structure, elasticity, and the ability to hold its shape and trap gases. The kneading method you choose can depend on the flour type and hydration level. For lower-hydration doughs made with medium-strength flours like Type 0, traditional hand kneading or machine kneading until the dough is smooth and passes the windowpane test (stretching a small piece thin enough to see light through it without tearing) is effective.
When working with high-hydration doughs typical for ciabatta using strong "00" or Type 0 flour, less intensive kneading methods combined with folds during bulk fermentation are often preferred. Techniques like the stretch and fold method, performed every 30-60 minutes over a couple of hours, gently align the gluten strands without overworking the wet dough.
For pasta doughs made with "00" or semola, kneading develops just enough gluten for structure and elasticity without making it tough. Applying the right kneading technique tailored to your Italian flour type and recipe is a key Italian flour baking tip for achieving the desired dough consistency and ultimately, the perfect texture in your baked goods.
Temperature Control: Key to Successful Fermentation
Temperature control plays a critical role in the fermentation process when using Italian flour, influencing the activity of yeast or sourdough starter, the rate of gluten development, and the production of flavor compounds. Fermentation is the process where yeast consumes sugars in the flour, producing carbon dioxide (which makes the dough rise) and alcohol, while also initiating enzymatic activity that breaks down proteins and starches, contributing to flavor and texture.
The optimal temperature range for yeast activity is typically between 75°F and 80°F (24°C-27°C), though slower, cooler fermentation (e.g., in the refrigerator at 40°F/4°C) develops more complex flavors and can strengthen the dough structure over longer periods.
Controlling dough temperature is a crucial Italian flour baking tip, especially when using flours designed for long fermentation (high W-value "00" or Type 0/1). The dough temperature is influenced by the ambient room temperature, the temperature of the water used, and friction from kneading. Aiming for a target dough temperature after mixing (often around 75°F/24°C) ensures fermentation begins at a predictable rate.
If your kitchen is cool, you might need to use warmer water or find a warmer spot for proofing. If it's warm, cooler water and monitoring the dough closely are necessary to prevent over-fermentation. Proper temperature management ensures your dough rises correctly, develops excellent flavor, and is ready to bake at the optimal time.
Italian Flour Recipes to Try at Home
Classic Pizza Dough Recipe using "00" Flour
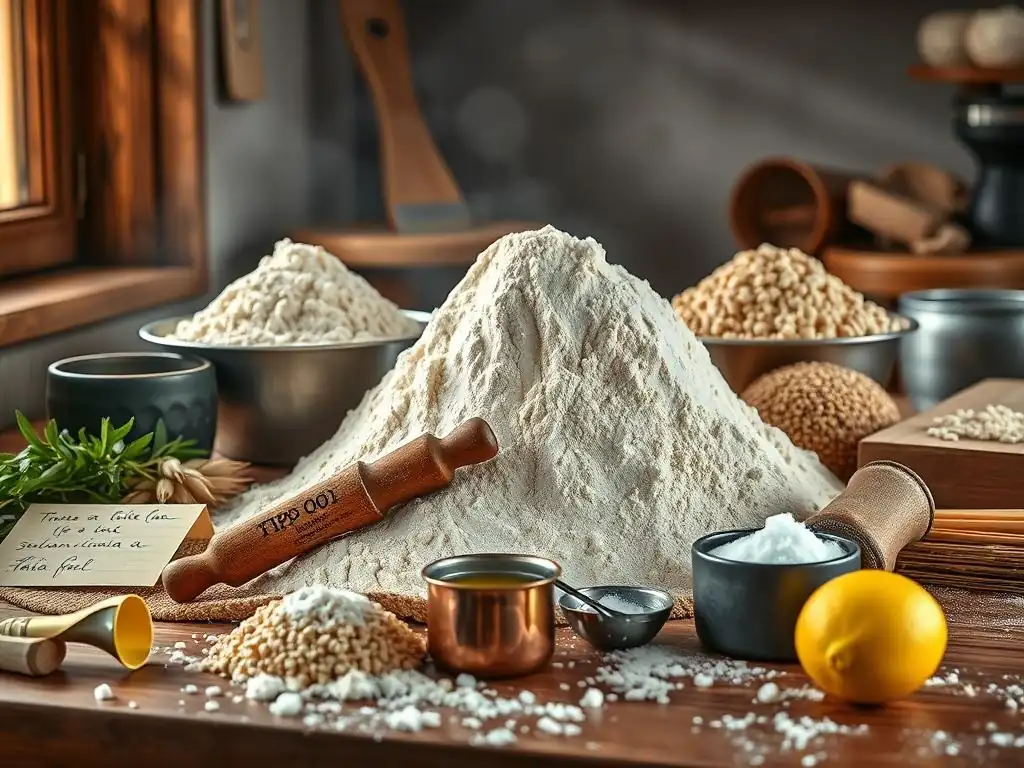
Creating a classic Neapolitan-style pizza at home is a fantastic way to experience the magic of high-quality Italian "00" flour. The goal is a dough that is pliable, easy to stretch thinly, and puffs up beautifully in a hot oven, forming the characteristic airy, blistered edge known as the cornicione. This requires a "00" flour with a medium-high W-value, typically W270-W300, and a hydration level often between 60-65%. The dough is usually made with just flour, water, yeast (fresh or active dry), and salt, sometimes with a tiny pinch of sugar.
The process typically involves mixing the ingredients, a relatively short kneading period to develop gluten, followed by a long, slow fermentation, often cold fermentation in the refrigerator for 24-48 hours. This extended proofing time allows the gluten to fully relax and develop, making the dough exceptionally extensible and flavorful.
When you are ready to bake, the dough is portioned, gently shaped by hand (avoiding rolling pins which can deflate the edges), topped simply, and baked in a very hot oven (ideally 500°F/260°C or higher). The result, when using the right "00" flour and applying these Italian flour baking tips, is a pizza crust that is soft and airy on the inside with a delightful chew, and crisp on the outside.
Homemade Pasta Recipe with Semola di Grano Duro
Making fresh, homemade pasta is incredibly rewarding, and using Semola di Grano Duro, particularly semola rimacinata, is the key to achieving that authentic Italian texture and golden color. While pasta can be made solely with "00" flour or a blend, traditional Southern Italian pasta often relies entirely on semola and water. The high protein content and unique gluten structure of durum wheat create a dough that is firm, elastic, and holds its shape perfectly when cooked, resulting in that desirable al dente bite.
The basic ratio for semola pasta is simple: approximately 2 parts semola rimacinata to 1 part warm water, plus a pinch of salt. The ingredients are mixed and kneaded until a firm, smooth, and elastic dough forms. Unlike bread dough, pasta dough requires significant kneading, usually 10-15 minutes by hand or machine, to become smooth and pliable.
The dough is then rested, covered, for at least 30 minutes to allow the gluten to relax, making it easier to roll. It can then be shaped into various forms like orecchiette, cavatelli, or rolled thin for tagliatelle or ravioli. Using semola and mastering the kneading and resting steps are essential Italian flour baking tips for authentic, satisfying homemade pasta.
Focaccia Recipe with Type 0 or Type 1 Flour
Focaccia, the beloved Italian flatbread, is a versatile canvas for various toppings and can be made successfully with several Italian flour types, including Type 0 or Type 1. These flours, being less refined than "00," contribute a slightly heartier flavor and texture, which complements the rustic nature of focaccia. A medium-strength Type 0 flour (W180-W250) works well for a classic focaccia with a soft, airy interior and crisp bottom, while a Type 1 flour will yield a focaccia with a more pronounced flavor and slightly denser crumb, reflecting its whole grain components.
Focaccia dough is typically high in hydration, often 70-80% or more, and enriched with generous amounts of olive oil, both in the dough and drizzled on top before baking. The process often involves a period of autolyse (resting the flour and water mixture before adding yeast and salt) followed by gentle mixing and several sets of stretch and folds over a couple of hours to build strength without intensive kneading.
The dough is then spread into a pan, dimpled generously with olive oil-coated fingers, and proofed until airy and bubbly before baking. Using Type 0 or Type 1 flour provides a wonderful balance of structure and flavor for this classic Italian bread, making it a staple for applying Italian flour baking tips in your home kitchen.
Ciabatta Recipe with Type 0 Flour
Ciabatta, meaning "slipper" in Italian, is famous for its irregular, open crumb and crisp crust, achieved through a very wet dough and minimal handling. While some bakers use strong "00" or even Manitoba flour for ciabatta, a medium-high strength Type 0 flour (W250-W280) is also an excellent choice, offering a good balance of strength for high hydration while contributing a touch more flavor than a pure "00". The high hydration level, often 75-85%, is key to the characteristic open structure, making the dough very slack and sticky.
Making ciabatta involves creating a preferment (like a biga or poolish) the day before to boost flavor and strength. The final dough is mixed minimally, just enough to combine ingredients, relying on time and periodic stretch and folds during a long bulk fermentation (several hours) to develop gluten. The dough is then gently divided and shaped, taking care not to deflate the precious air pockets.
Baking ciabatta requires a hot oven, often with steam, to achieve a thick, crisp crust before the interior finishes cooking. Mastering the handling of a wet dough and understanding the importance of fermentation and minimal manipulation are key Italian flour baking tips for successful ciabatta.
Storing Italian Flour for Long-Lasting Freshness
Proper Storage Techniques to Prevent Rancidity
Proper storage is essential for preserving the quality and extending the shelf life of your Italian flour, preventing it from going rancid or developing off-flavors. Flour, especially less refined types like Type 1, Type 2, and Semola, contains natural oils in the germ, which can oxidize and become rancid when exposed to air, light, and heat. The ideal storage environment for all flour types is cool, dark, and dry. Temperatures below 60°F (15°C) are best, though room temperature is acceptable if not excessively warm (below 75°F/24°C).
Once opened, transfer flour from its original paper bag into an airtight container. Food-grade plastic containers, glass jars, or heavy-duty zip-top bags work well. This protects the flour from moisture, pests, and odors from other foods. Storing flour in the refrigerator or freezer can significantly extend its shelf life, particularly for whole grain or less refined flours.
In the freezer, flour can last for up to a year or even longer. Just be sure to bring it back to room temperature before using it in recipes, as cold flour can affect dough temperature and hydration. Applying these simple Italian flour baking tips for storage ensures your flour remains fresh and performs optimally whenever you're ready to bake.
Identifying Signs of Spoiled Flour
Knowing how to identify spoiled flour is important to avoid ruining your baked goods. While flour doesn't typically "go bad" in the way fresh food does (it doesn't grow harmful bacteria if kept dry), its quality can degrade, affecting flavor and performance. The most common signs of spoiled flour are changes in smell and taste. Fresh flour has a mild, slightly sweet, or neutral aroma. If your Italian flour smells musty, stale, or distinctly like old nuts or crayons, it has likely gone rancid due to the oxidation of its oils. This off-flavor will transfer to your baked goods.
Another sign is the presence of pests. Flour moths or weevils can infest improperly stored flour. Check for small webs, larvae, or tiny beetles within the flour.
If you find pests, it's best to discard the entire batch of flour and thoroughly clean the storage area and containers. While a slight change in color (some refined flours might yellow slightly over time) isn't always an indicator of spoilage, a dramatic discoloration or the presence of mold (which occurs if the flour gets wet) means the flour is definitely spoiled and should be discarded immediately. Following proper storage Italian flour baking tips helps prevent these issues.
Extending the Shelf Life of Your Italian Flour
Extending the shelf life of your Italian flour goes beyond just using airtight containers. While "00" and Type 0 flours, being more refined, have a naturally longer shelf life (often 6-12 months at room temperature) because less of the oily germ is present, Type 1, Type 2, and Semola flours are more perishable (typically 3-6 months at room temperature) due to their higher oil content. To truly maximize freshness, temperature control is key.
Storing flour in the refrigerator can extend its life by several months, while the freezer can keep it fresh for a year or more. For home bakers who don't use large quantities of Italian flour frequently, freezing is an excellent option. Simply portion the flour into smaller, airtight bags or containers before freezing so you can take out only what you need.
Remember to let the flour come to room temperature for several hours before measuring and using it in your recipes. This temperature acclimatization is an important Italian flour baking tip to ensure accurate hydration and proper dough development. By implementing these practices, you can keep your Italian flours fresh and ready for your next baking project.
Sourcing High-Quality Italian Flour: What to Look For
Understanding Flour Labels and Certifications
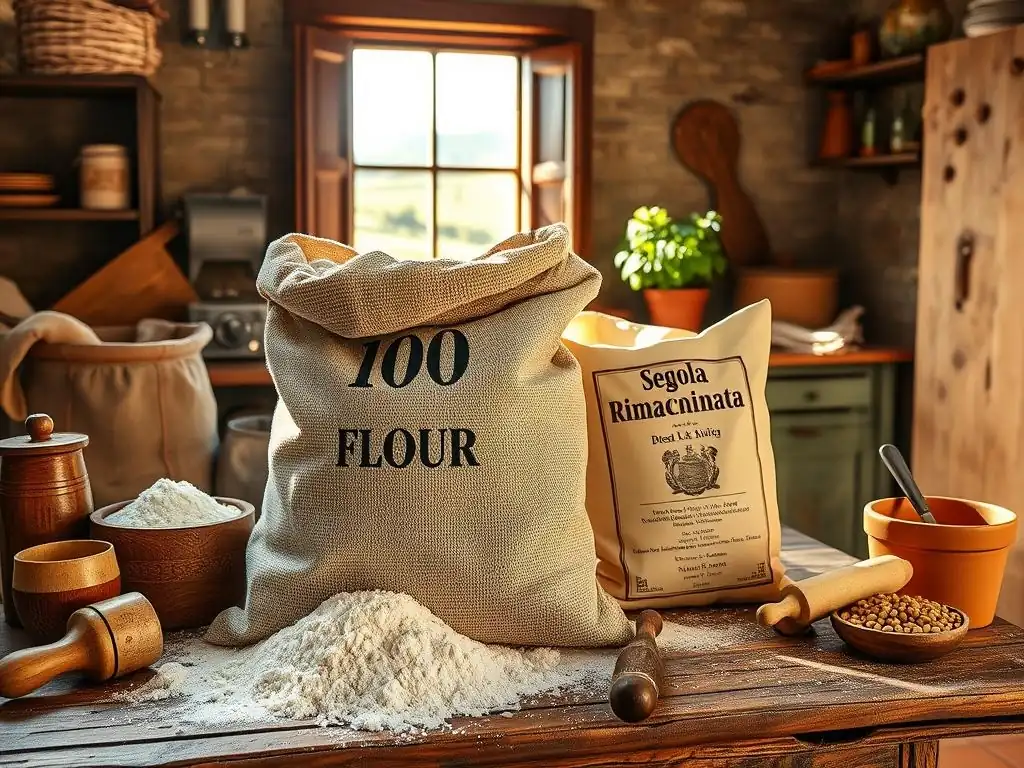
When sourcing high-quality Italian flour, understanding the labels is crucial. Look beyond just the "00," "Tipo 0," "Tipo 1," "Tipo 2," or "Semola di Grano Duro" classification. Reputable Italian mills often provide additional information that serves as valuable Italian flour baking tips. Key details to look for include:
- W-value: As discussed, this indicates flour strength. Look for W values appropriate for your intended use (e.g., W270-W300 for pizza, W320+ for panettone).
- Protein Content: Often listed as a percentage. Higher protein generally correlates with higher strength, though the quality of the protein matters.
- Absorption Rate: Some professional flours list the percentage of water the flour can absorb while maintaining optimal consistency.
- Intended Use: Labels may specify "Per Pizza," "Per Pane," "Per Pasta," "Per Pasticceria" (for pastry), guiding you to the flour's ideal application based on its characteristics.
- Certifications: Look for certifications like "True Neapolitan Pizza" (AVPN) approved flour, which guarantees the flour meets strict standards for making authentic Neapolitan pizza. Organic certifications (like EU Organic) indicate farming practices.
Paying attention to these details on the packaging provides crucial Italian flour baking tips directly from the mill and helps you select the flour best suited to your baking goals, ensuring you start with the right foundation for authentic results.
Where to Buy Authentic Italian Flour Online and Locally
Finding authentic Italian flour can sometimes be a challenge depending on your location. In areas with a strong Italian-American community or large international grocery stores, you might find a selection of common types like "00" and perhaps Type 0. Specialty food shops or delis that import goods from Italy are also good local sources. Look for well-known Italian brands like Antimo Caputo, Le 5 Stagioni, Molino Dallagiovanna, or Molino Quaglia.
For a wider selection, including specific W-values, Type 1, Type 2, or Semola rimacinata, online retailers are often the best option. Many online specialty food stores or baking supply websites import a broad range of Italian flours. Some Italian mills even have their own online stores that ship internationally. While buying online might involve shipping costs, it provides access to the specific flours needed for authentic Italian flour baking tips and recipes. When buying online, consider purchasing slightly larger quantities if you bake frequently to potentially save on shipping per pound, but ensure you have adequate storage space.
Organic Italian Flour Options
For bakers interested in organic options, many Italian mills also produce organic versions of their popular flours. Organic Italian flour is milled from wheat grown without synthetic pesticides, herbicides, or fertilizers, adhering to strict organic farming standards, often certified by the EU organic label. Choosing organic flour supports sustainable agricultural practices and some bakers feel it offers a purer flavor.
You can find organic "00," Type 0, Type 1, Type 2, and Semola flours. Organic Type 1 and Type 2 flours, in particular, retain more of the bran and germ where some pesticide residues might accumulate in non-organic farming, making organic a preferred choice for many when using these less refined types.
Availability of organic Italian flour might be more limited in local stores compared to conventional Italian flours, but they are readily available from online specialty retailers. When exploring organic Italian flour baking tips, remember that organic flours can sometimes behave slightly differently due to variations in protein structure or absorption compared to their conventional counterparts, so slight adjustments in hydration might be necessary.
Troubleshooting Common Issues When Baking with Italian Flour
Dough Too Sticky or Dry: Adjusting Hydration Levels
One of the most common issues when baking with Italian flour is the dough being too sticky or too dry. This usually points to an issue with hydration, the ratio of water to flour. Different Italian flours, even within the same type like "00," can have varying absorption rates depending on the mill, the specific wheat variety used, and even the batch. Environmental factors like humidity also play a significant role.
If your dough is excessively sticky and unmanageable, it likely has too much water for the specific flour you are using, or the gluten hasn't developed enough to handle the hydration. Try adding a small amount of flour, a tablespoon at a time, kneading it in until the dough reaches the desired consistency. If the dough is too dry, stiff, and crumbly, it needs more water.
Add water a teaspoon at a time, kneading until it's fully incorporated before adding more. Learning to feel the dough and make these small adjustments is a crucial Italian flour baking tip that comes with practice. Always err on the side of caution, adding liquids or solids gradually, as it's easier to add more than to take away.
Poor Gluten Development: Kneading and Rest Time
If your dough lacks elasticity, tears easily when stretched, or doesn't hold its shape, it likely suffers from poor gluten development. This can happen if the flour is too weak for the intended recipe (e.g., using a low W-value flour for a long-fermented bread), or if the dough hasn't been kneaded or rested sufficiently. Gluten develops when the proteins in the flour (glutenin and gliadin) are hydrated and agitated through kneading. This process creates a network that gives the dough structure and elasticity.
If you suspect poor gluten development, assess your kneading time and technique. Were you kneading long enough? Was the technique effective for the hydration level of your dough? For medium-hydration doughs, ensure you knead until the dough is smooth and elastic. For high-hydration doughs, ensure you are performing enough sets of stretch and folds during the bulk fermentation.
Also, consider the rest time. A period of rest (autolyse before adding salt/yeast or a rest period after initial mixing) allows the flour to fully hydrate and enzymatic activity to begin breaking down proteins, making gluten development easier during subsequent kneading or folding. Using a flour with the appropriate W-value for your recipe is also paramount; a weak flour simply won't develop a strong network regardless of kneading. These Italian flour baking tips regarding gluten are foundational for achieving good structure.
Flat or Dense Baked Goods: Addressing Fermentation Problems
Flat or dense baked goods are often the result of fermentation issues. Fermentation is where yeast or sourdough cultures produce the gas that makes dough rise. Problems can stem from inactive yeast, improper dough temperature, or incorrect proofing times.
If your dough didn't rise adequately during bulk fermentation or proofing, the final product will be dense. This could be because your yeast was old or the water temperature used to activate it was too hot or too cold. Ensure your yeast is active by testing it in warm water with a pinch of sugar before adding it to the flour.
Dough temperature significantly impacts fermentation speed. If the dough is too cold, fermentation will be very slow, potentially leading to under-proofing within the recipe's timeframe. If it's too warm, fermentation can happen too quickly, leading to over-proofing where the gluten structure collapses after initially rising, or the dough runs out of food before baking. Ensure your dough is within the optimal temperature range (75-80°F / 24-27°C) during bulk fermentation unless intentionally doing a cold proof.
Finally, over-proofing during the final rise (proofing) can also lead to a dense product, as the dough rises and then collapses. Pay attention to visual cues: the dough should be airy and significantly increased in volume but still have some structure and spring back slowly when gently poked. Mastering temperature and timing are crucial Italian flour baking tips for successful fermentation and a well-risen bake.
Conclusion: Elevate Your Baking with Italian Flour Knowledge
Your Partner in Italian Baking Adventures
Embarking on the journey of understanding and using Italian flours opens up a world of authentic flavors and textures in your home baking. From the finely milled "00" perfect for delicate pasta and airy pizza, to the rustic charm of Type 1 and Type 2 flours in hearty breads, and the unique strength of Semola di Grano Duro for traditional loaves and pasta, each Italian flour type offers distinct characteristics.
Armed with knowledge about classifications, W-values, and how these flours interact with water and fermentation, you are well-equipped to tackle a wide range of Italian recipes. Applying the Italian flour baking tips discussed, from managing hydration and kneading to controlling temperature and proper storage, will empower you to achieve consistently excellent results.
This guide serves as your partner in these Italian baking adventures, providing the foundational knowledge needed to select the right flour for the job, troubleshoot common issues, and elevate your skills. Moving beyond basic all-purpose flour allows you to delve into the nuances that define regional Italian baking traditions.
Experimentation is key – don't be afraid to try different flour types, adjust hydration based on feel, and observe how doughs behave under various conditions. With practice and attention to these Italian flour baking tips, you'll soon be creating delicious, authentic Italian baked goods that rival those from the finest panetterie and pizzerie.
Further Resources and Learning
Continuing your education about Italian flours and baking is a rewarding pursuit. While this article provides a comprehensive overview and essential Italian flour baking tips, there are many avenues for deeper learning. Exploring books dedicated to Italian bread making and pizza making can offer more detailed recipes and techniques specific to different flour types and regional variations. Online baking forums and communities dedicated to Italian baking are excellent places to ask questions, share experiences, and learn from other home bakers.
Many reputable Italian mills also provide extensive information on their websites about their specific flour products, including technical specifications like W-values, protein content, and recommended uses. Following experienced Italian bakers on social media or through their blogs can offer visual guidance and advanced techniques. Consider experimenting with different brands of the same flour type ("00" from different mills, for example) to experience the subtle differences in how they perform. Continuous learning and hands-on practice, guided by sound Italian flour baking tips, will solidify your understanding and mastery of using these wonderful ingredients.
Frequently Asked Questions
What is the main advantage of using Italian flour for baking?
Italian flour often has a lower protein content than some other flours, which can result in a more tender and delicate crumb in your baked goods. This is especially beneficial for pastries and cakes.
How does the "00" designation affect baking results with Italian flour?
The "00" refers to the fineness of the grind, not the protein content. A finer grind allows for better gluten development and a smoother texture in your dough or batter.
Can I substitute Italian flour for all-purpose flour in my recipes?
While you can substitute, be mindful of the potential differences in hydration and protein content. You may need to adjust the liquid ratio in your recipe to achieve the desired consistency.
What types of baked goods are best suited for using Italian flour?
Italian flour is particularly well-suited for pizza dough, pasta, and delicate pastries like croissants. Its lower protein content contributes to a softer, more pliable texture.
Where can I typically find Italian flour, and what should I look for on the packaging?
Italian flour can often be found in specialty stores or online retailers. Look for the "00" designation and check the protein percentage to ensure it aligns with your baking needs.
Final Reflection: The Flour Power of Italian Baking
Understanding the nuances of Italian flours is not just about achieving perfect pasta; it's about unlocking a deeper connection to the culinary heritage and achieving superior results in all your baking endeavors. The subtle differences in protein content, texture, and even the milling process significantly impact the final product, from airy focaccia to delicate biscotti. This knowledge empowers home bakers to elevate their skills and create truly authentic Italian-inspired treats.
The impact of flour choice extends far beyond the kitchen; it reflects a deep-rooted agricultural tradition and a respect for quality ingredients. This appreciation for the source of our food, for the careful cultivation and processing, is something I find increasingly important in today's fast-paced world. The simplest things are often the most extraordinary.
This quote resonates deeply as I reflect on the transformative power of understanding something as seemingly basic as flour. The journey of discovery, from selecting the right type of flour to mastering the techniques, has been incredibly rewarding, and I hope it inspires you to explore the world of Italian baking with renewed curiosity.
Now, it's your turn. Consider the flours you currently use and how they might be limiting your baking potential. Experiment! Try substituting different Italian flours in your favorite recipes. Don't be afraid to embrace the unexpected results – each experiment is a step toward mastering the art of Italian baking and discovering the unique character each flour brings to your creations. The journey of culinary exploration is a lifelong adventure, and I invite you to embark on this one with me.
Unlock Your Baking Potential: Mastering Italian Flour
Thanks for diving into the world of Italian flours with us! You've now got the knowledge to elevate your baking game. Ready to put your new-found expertise to the test?
- Bake a masterpiece: Try a classic Italian recipe using your favorite newly-discovered flour type. Share your results with us!
- Explore regional variations: Research a specific Italian region and find a traditional bread or pasta recipe to make. What unique flour characteristics will you discover?
- Challenge your skills: Experiment with substitutions in your existing recipes to see how different Italian flours impact texture and taste.
What unexpected flavor or texture profile will you uncover in your next baking adventure?