
Easy Millefeuille (Napoleon) Layers You Can Bake

Welcome to BakeWithEase, your kitchen companion for creating delightful baked goods!
Ever dreamt of crafting a show-stopping dessert without the stress? You're in the right place. Dive into the world of Regional & Cultural Baking and discover our Easy Layered Millefeuille Recipe – a surprisingly simple approach to this classic pastry. Intrigued? Prepare to unlock the secrets to perfect, flaky layers and impress your family and friends with a Napoleon masterpiece. Let's bake!
- Easy Millefeuille (Napoleon) Layers You Can Bake: A BakeWithEase Guide
- Introduction to Millefeuille: The Easy Layered Pastry
- Mastering the Puff Pastry: Key to the Perfect Millefeuille Layers
- The BakeWithEase Method: Baking Your Millefeuille Layers to Perfection
- Crafting the Crème Pâtissière: The Heart of Your Easy Napoleon
- Assembling Your Easy Layered Millefeuille (Napoleon)
- Creating the Classic Millefeuille Glaze: The Finishing Touch
- Storing Your Homemade Millefeuille for Optimal Freshness
- Troubleshooting Your Easy Millefeuille Recipe
- BakeWithEase's Final Thoughts: Enjoying Your Homemade Millefeuille
-
Frequently Asked Questions
- What exactly is a millefeuille, and why is it sometimes called a Napoleon?
- Is this "Easy Millefeuille" recipe really easier than traditional versions?
- What kind of filling is recommended for this easy millefeuille recipe?
- How do I prevent the puff pastry from becoming soggy after assembly?
- Can I make the puff pastry from scratch for this recipe, or is store-bought recommended?
- Final Reflection: Mastering the Delicate Art of the Millefeuille
- Unleash Your Inner Pastry Chef: Master the Millefeuille!
Easy Millefeuille (Napoleon) Layers You Can Bake: A BakeWithEase Guide
Introduction to Millefeuille: The Easy Layered Pastry
What is Millefeuille? Understanding the Napoleon Pastry
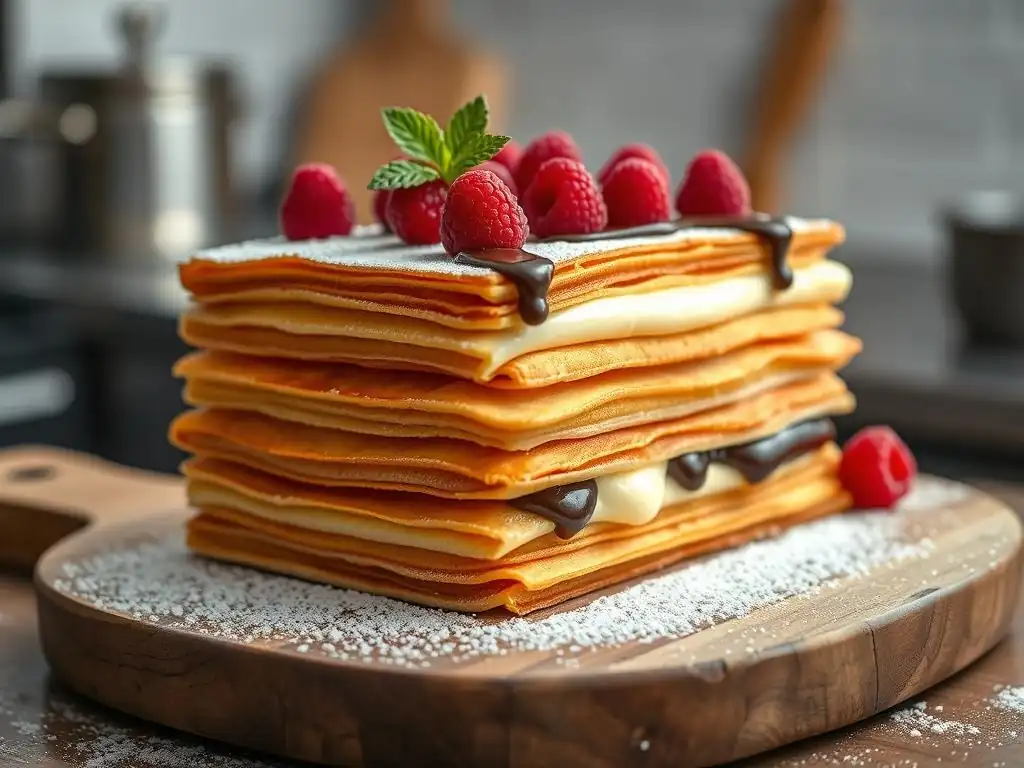
Millefeuille, meaning "thousand leaves" in French, is a classic pastry renowned for its delicate, crisp layers of puff pastry interspersed with rich, creamy filling, most commonly crème pâtissière. Despite its elegant appearance and association with professional patisseries, the core components – flaky pastry, smooth cream, and a simple glaze – are entirely achievable for home bakers.
The beauty of the millefeuille lies in the contrast between the shattering crispness of the pastry and the velvety texture of the cream, creating a truly delightful sensory experience with each bite. It's often referred to as a Napoleon in some parts of the world, though variations exist, the fundamental layered structure remains the same.
Historically, the millefeuille's origins are debated, but it gained prominence in French cuisine during the 19th century. Its construction typically involves three layers of puff pastry and two layers of crème pâtissière, often topped with a simple icing or fondant glaze, sometimes marbled with chocolate. While traditional recipes can be quite involved, focusing on perfecting countless thin layers of dough, our approach at BakeWithEase simplifies the process, making this luxurious dessert accessible for anyone wanting to bake an easy layered millefeuille recipe without intimidation.
BakeWithEase's Approach to a Simplified Millefeuille Recipe
At BakeWithEase, our philosophy is to demystify classic baking, and the millefeuille is a perfect candidate for this. We focus on techniques that maximize results with minimal fuss, making an easy layered millefeuille recipe a reality for home bakers. Instead of spending hours on complex dough folding, we guide you through methods that leverage either simplified homemade puff pastry or even high-quality store-bought options, drastically cutting down prep time while still delivering impressive flakiness.
Our simplified method emphasizes precision in baking the pastry layers – ensuring they are uniformly golden and crisp – and provides a straightforward, foolproof recipe for the essential crème pâtissière. We break down the assembly into manageable steps, transforming what might seem like a daunting task into an enjoyable baking project. This easy layered millefeuille recipe is designed so that even bakers new to French pastries can achieve stunning results, perfect for impressing guests or simply indulging in a personal baking triumph.
Mastering the Puff Pastry: Key to the Perfect Millefeuille Layers
Homemade vs. Store-Bought Puff Pastry: A BakeWithEase Comparison
Choosing between homemade and store-bought puff pastry is a crucial decision when embarking on an easy layered millefeuille recipe. Homemade puff pastry, while offering the ultimate control over ingredients and potentially yielding the most delicate, buttery layers, is undeniably time-consuming. It involves multiple folds and rests, requiring several hours or even days of commitment. A classic puff pastry can have hundreds or even thousands of micro-layers of butter and dough, achieved through a precise lamination process involving repeated rolling and folding.
Conversely, high-quality store-bought puff pastry provides a fantastic shortcut without sacrificing too much on quality, making it ideal for an easy layered millefeuille recipe. Many brands available today use real butter and are made with traditional folding techniques, resulting in good lift and flakiness. When selecting store-bought, look for "all-butter" varieties in the frozen section, as these will deliver the best flavor and texture closest to homemade. Using a quality store-bought pastry can cut preparation time by 80-90%, allowing you to focus on the baking and assembly.
Achieving Flaky Layers: Tips for Working with Puff Pastry
Working with puff pastry, whether homemade or store-bought, requires attention to temperature and handling to ensure those desirable flaky layers for your easy layered millefeuille recipe. The key principle is to keep the butter within the dough cold and solid until it hits the hot oven. As the butter melts and turns to steam, it forces the layers of dough apart, creating the characteristic puff and flakiness. This is why dough temperature is paramount; if the dough gets too warm, the butter can leak out, resulting in fewer, denser layers.
Always work with chilled puff pastry. If rolling is needed, do so quickly on a lightly floured surface, using firm, even strokes. Avoid overworking the dough, which can develop gluten and make the pastry tough. When cutting the pastry, use a sharp knife or pizza cutter and cut straight down without sawing; sawing can seal the edges of the layers, preventing them from rising properly. Chilling the cut pastry pieces for 15-30 minutes before baking is also a highly recommended step to ensure the butter is firm, ready to create maximum lift in the oven.
Preparing Your Puff Pastry for the Easy Millefeuille Recipe
Proper preparation of your puff pastry sheets is essential for achieving uniform, perfectly baked layers for your easy layered millefeuille recipe. If using frozen store-bought pastry, ensure it is properly thawed in the refrigerator according to package instructions, which typically takes several hours or overnight. Avoid thawing at room temperature, as this can make the butter too soft. Once thawed (or if using chilled dough), gently unfold or unroll the pastry sheet.
For the classic three-layer millefeuille structure, you will typically need enough pastry to cut three equal rectangles of your desired size. Standard store-bought sheets often yield three rectangles measuring approximately 4x10 inches each, depending on the brand and sheet size. To prevent excessive puffing and ensure flat layers suitable for stacking, the pastry needs to be "docked" (pricked all over with a fork) and often baked between two baking sheets. Docking allows steam to escape evenly, preventing large, uneven bubbles, while baking under a weight helps maintain a flat surface.
The BakeWithEase Method: Baking Your Millefeuille Layers to Perfection

Step-by-Step Baking Instructions for Flaky Millefeuille
Baking the puff pastry layers is a critical step in creating an easy layered millefeuille recipe with optimal texture. Preheat your oven to a relatively high temperature, typically between 400°F and 425°F (200°C-220°C). This high heat helps the butter in the pastry melt rapidly and produce maximum steam, resulting in a quick rise and flaky layers. Place your prepared and docked pastry rectangles on a baking sheet lined with parchment paper.
To ensure the layers bake flat and evenly, place a second sheet of parchment paper directly on top of the pastry, followed by another baking sheet or a heavy oven-safe pan to act as a weight. Bake for about 10-15 minutes with the weight until the pastry has puffed slightly and is starting to set. Then, carefully remove the top baking sheet and parchment paper.
Continue baking for another 10-20 minutes, or until the pastry is golden brown and appears dry and crisp. The total baking time will depend on your oven and the thickness of your pastry, often ranging from 20 to 35 minutes.
Achieving Even Baking: Avoiding Common Mistakes
Achieving evenly baked layers for your easy layered millefeuille recipe requires careful monitoring during the baking process. A common mistake is not baking the pastry long enough, resulting in a pale, slightly soft, or even doughy texture rather than the desired crispness. The layers should be a deep golden brown, indicating they are fully cooked and dry all the way through. If they are pale, they may become soggy quickly once filled.
Another pitfall is uneven oven temperature. If your oven has hot spots, rotate the baking sheet halfway through the baking time to ensure all the pastry pieces brown uniformly. Also, make sure the pastry pieces are spaced adequately on the baking sheet to allow for even air circulation. Using the weighting method (baking between two sheets) as described previously is one of the most effective ways to prevent uneven puffing and ensure flat, easy-to-stack layers, crucial for the structure of your easy layered millefeuille recipe.
Cooling and Handling Your Baked Puff Pastry Layers
Once your puff pastry layers are baked to a perfect golden crispness, proper cooling and handling are essential before assembly. Immediately transfer the hot pastry layers from the baking sheet to a wire rack using a spatula. Cooling on a wire rack allows air to circulate around the layers, preventing condensation that could make the bottom soggy and helping them maintain their crisp texture as they cool completely.
Allow the layers to cool fully to room temperature before attempting to trim or assemble your easy layered millefeuille recipe. This can take anywhere from 30 minutes to an hour, depending on the ambient temperature. Handling warm pastry can cause it to break easily. Once cool, you may need to gently trim the edges with a sharp serrated knife to create clean, straight lines for stacking, ensuring a professional look for your finished easy layered millefeuille. Handle the cooled layers carefully, as they will be quite brittle.
Crafting the Crème Pâtissière: The Heart of Your Easy Napoleon
The Secret to a Smooth and Creamy Crème Pâtissière
Crème pâtissière, or pastry cream, is the classic filling for an easy layered millefeuille recipe, providing a smooth, rich contrast to the crisp pastry. The secret to achieving a perfectly smooth and creamy texture lies in careful whisking and proper cooking technique. A basic crème pâtissière involves egg yolks, sugar, milk, and a thickener like cornstarch or flour, often flavored with vanilla. The process involves tempering the egg yolks with hot milk, then cooking the mixture gently over medium heat while whisking continuously.
Constant whisking is crucial to prevent lumps and ensure the cream thickens evenly without scorching the bottom of the pan. Once the cream thickens to a pudding-like consistency and coats the back of a spoon, it should be cooked for another minute or two to ensure the starch is fully cooked out, which prevents a raw, starchy taste and helps the cream set properly. Passing the finished cream through a fine-mesh sieve immediately after cooking is a pro tip to catch any small lumps, resulting in an incredibly smooth and luxurious texture for your easy layered millefeule.
Vanilla Bean vs. Vanilla Extract: Which to Choose?
When flavoring your crème pâtissière for an easy layered millefeuille recipe, the choice between vanilla bean and vanilla extract significantly impacts the final aroma and flavor. Vanilla bean provides the most authentic, complex, and visually appealing vanilla flavor, characterized by tiny black specks (vanilla seeds) throughout the cream. Using half a vanilla bean, split lengthwise with seeds scraped into the milk, infuses a deep, aromatic vanilla profile that is truly unparalleled.
Vanilla extract, while more convenient and significantly less expensive, offers a simpler vanilla note. For a high-quality result in your easy layered millefeuille, opt for pure vanilla extract rather than imitation vanilla. You'll typically use about 1-2 teaspoons of extract per standard batch of crème pâtissière, added after the cream has thickened and been removed from the heat to preserve its delicate flavor compounds. While vanilla bean is preferred for the purest flavor, a good quality extract will still yield a delicious crème pâtissière suitable for an easy layered millefeuille recipe.
Making Crème Pâtissière Ahead of Time: A Time-Saving Tip
Crème pâtissière is an excellent component to prepare ahead of time when making an easy layered millefeuille recipe, saving valuable time on assembly day. It needs to be completely chilled before it can be used as a filling anyway, as warm cream will melt the pastry and create a soggy mess. Crème pâtissière can be made up to 2-3 days in advance and stored in the refrigerator.
To store, transfer the finished, still-warm crème pâtissière to a clean bowl or container. Immediately press a layer of plastic wrap directly onto the surface of the cream. This prevents a skin from forming as it cools, which can create lumps. Once covered, let it cool slightly at room temperature before transferring it to the refrigerator to chill thoroughly for at least 2-3 hours, or until firm. Before using, give the chilled cream a vigorous whisk to loosen it and restore its smooth, creamy consistency.
Assembling Your Easy Layered Millefeuille (Napoleon)
Layering Techniques for a Visually Stunning Millefeuille
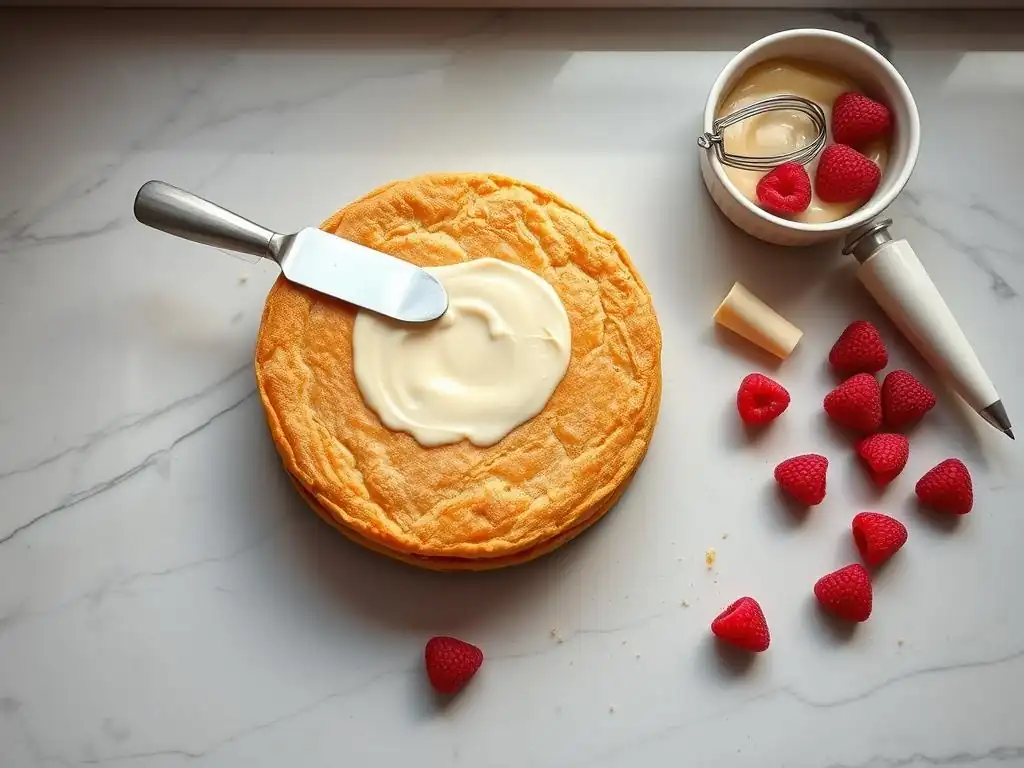
Assembling your easy layered millefeuille recipe is where the magic truly happens, transforming simple components into an elegant dessert. The standard structure involves three layers of baked puff pastry and two layers of crème pâtissière. Start with one layer of pastry on your serving plate or board. If you've trimmed your layers, choose the neatest one for the top.
Next, pipe or spread an even layer of chilled crème pâtissière over the first pastry layer. Using a piping bag with a round or star tip allows for neat, consistent application and a professional look, but spreading with an offset spatula works perfectly too. You'll typically use about half of your crème pâtissière for this first layer. Carefully place the second pastry layer on top, pressing gently to ensure it sits flat. Repeat the process with the remaining crème pâtissière, spreading it evenly over the second pastry layer. Finally, top with the third and final pastry layer.
Tips for Preventing Soggy Layers: Maintaining Crispness
Preventing soggy pastry is paramount for a successful easy layered millefeuille recipe. The crispness of the puff pastry is arguably the most defining characteristic of this dessert. The primary cause of sogginess is moisture migrating from the crème pâtissière into the pastry. This is why it is absolutely crucial that both the pastry layers are completely cooled and the crème pâtissière is thoroughly chilled before assembly.
Assemble the millefeuille as close to serving time as possible. Ideally, assemble within 1-2 hours of serving. While the crème pâtissière should be made ahead and chilled, the final layering should be one of the last steps. Some bakers also brush the inside surface of the pastry layers with a thin layer of melted white chocolate or a simple sugar glaze (made from powdered sugar and a tiny bit of water/lemon juice) and let it set before adding the cream. This creates a barrier against moisture, helping the layers stay crisp slightly longer.
Piping Techniques for Crème Pâtissière Application
Using a piping bag for applying the crème pâtissière offers several advantages for your easy layered millefeuille recipe, including even distribution and a clean finish. If using a piping bag, fit it with a plain round tip (about 1/2 inch or 1-2 cm diameter) or a large star tip. Fill the bag with your chilled, whisked crème pâtissière.
For a uniform layer, pipe lines of cream across the pastry layer, close together, until the entire surface is covered. Alternatively, you can pipe dollops or rosettes if using a star tip, covering the whole surface. Ensure the cream goes right to the edges if you want a full layer, or leave a small border if you prefer a cleaner edge when sliced. Piping allows for precise control over the amount of cream, ensuring you have enough for both layers without overloading, which could lead to the cream squeezing out when the layers are pressed together.
Creating the Classic Millefeuille Glaze: The Finishing Touch
Simple Icing Recipe for a Professional Look
The classic finish for an easy layered millefeuille recipe is a smooth, white fondant glaze, often marbled with chocolate. While traditional fondant can be tricky, a simple powdered sugar icing provides a perfectly acceptable and easy alternative that still delivers a professional look. To make a basic icing, you'll need about 1-2 cups of powdered sugar and 2-4 tablespoons of liquid (milk, water, or lemon juice).
Sift the powdered sugar into a bowl to remove any lumps. Gradually whisk in the liquid, starting with a small amount (e.g., 2 tablespoons), adding more just a teaspoon at a time until you achieve a thick, yet pourable consistency. The icing should be thick enough to coat the back of a spoon but thin enough to spread smoothly over the pastry. If it's too thick, add a few more drops of liquid; if too thin, whisk in a little more sifted powdered sugar. Work quickly, as this simple icing sets relatively fast.
Chocolate Drizzle or Marbling: Glaze Variations
Adding a chocolate element to the glaze is a classic variation for an easy layered millefeuille recipe, creating the iconic feathered or marbled pattern. While the white icing is still wet, melt a small amount of dark or semi-sweet chocolate (about 1-2 ounces). You can do this in a microwave in 30-second intervals, stirring between each, or over a double boiler. Transfer the melted chocolate to a small piping bag with a very fine tip, a paper cone, or even just drizzle it off a spoon.
Pipe thin, parallel lines of melted chocolate across the wet white icing on the top pastry layer, spacing them about 1/2 inch to 1 inch apart. While the chocolate and icing are still wet, use a skewer, toothpick, or the tip of a knife to gently draw lines perpendicular to the chocolate lines. Alternate the direction of your strokes (e.g., draw one line down, the next line up) to create a feathered or marbled effect. This technique adds both visual appeal and a hint of chocolate flavor to your easy layered millefeuille.
Achieving a Smooth and Even Glaze Finish
Applying the glaze smoothly is the final step in perfecting the appearance of your easy layered millefeuille recipe. Once your simple icing is the correct consistency, carefully pour or spoon it over the top pastry layer. Use an offset spatula or the back of a spoon to quickly spread the icing evenly across the entire surface, going right to the edges.
If you are adding the chocolate marbling, ensure the white icing is applied first, then the chocolate lines, and then the marbling technique is performed while both are still wet. The key to a smooth finish is working relatively quickly before the icing starts to set. Any imperfections can often be smoothed out with a warm, damp spatula held briefly against the surface, though this works best with traditional fondant. For simple icing, a quick, even application is best. Allow the glaze to set completely before slicing the easy layered millefeuille.
Storing Your Homemade Millefeuille for Optimal Freshness
Best Practices for Storing Millefeuille
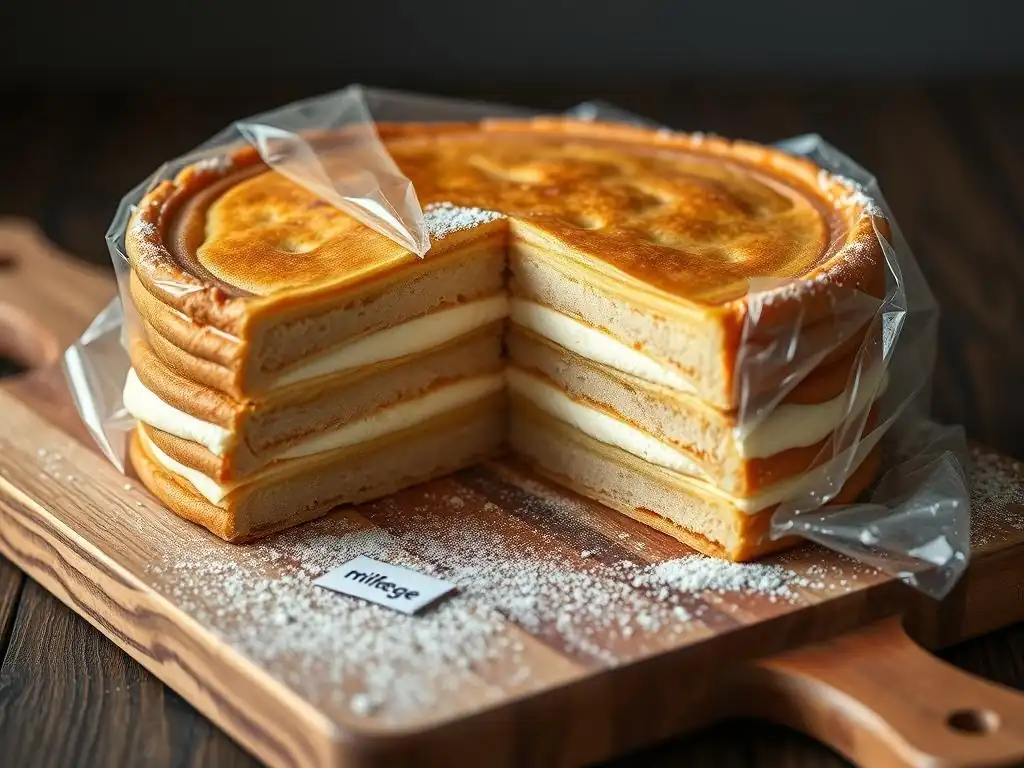
Storing an easy layered millefeuille recipe to maintain its delicate balance of crisp pastry and creamy filling is challenging, as moisture is the enemy of crispness. The best practice is to assemble and glaze the millefeuille as close to serving time as possible. If you must store it, it should be kept in the refrigerator due to the crème pâtissière filling, which is dairy-based and needs to be kept cold for food safety.
Store the assembled millefeuille uncovered if possible, or in a loose-fitting container to allow air circulation. Tightly wrapping it will trap moisture, which will quickly make the pastry soggy. If storing overnight, some sogginess is inevitable, especially in humid environments. For best results, store individual components (baked pastry layers, chilled crème pâtissière, and glaze) separately and assemble just before serving.
Shelf Life and Serving Suggestions
Due to its structure and filling, an easy layered millefeuille recipe has a relatively short optimal shelf life once assembled. While it is safe to eat for 2-3 days if kept refrigerated, the pastry will begin to lose its crispness significantly after just a few hours. The peak enjoyment window is within 2-4 hours of assembly.
For serving, use a very sharp, serrated knife to slice through the layers cleanly. It helps to slightly warm the knife blade by dipping it in hot water and wiping it dry between slices. This allows the knife to cut through the crisp pastry and creamy filling without crushing the layers. Serve the slices chilled directly from the refrigerator for the best texture contrast.
Troubleshooting Your Easy Millefeuille Recipe
Common Problems and Solutions for Perfect Layers
Several issues can arise when making an easy layered millefeuille recipe, particularly with the puff pastry. If your pastry layers don't puff properly, it might be due to the dough being too warm, the butter leaking out, not enough steam being generated (oven not hot enough), or the layers being cut with a sawing motion that sealed the edges. Ensure your dough is cold, your oven is preheated to the correct high temperature (e.g., 400-425°F), and you cut the pastry cleanly.
Another common problem is uneven puffing, leading to bumpy layers. This can often be solved by properly docking the pastry all over with a fork before baking. Baking the pastry between two heavy baking sheets also helps significantly in achieving flat, even layers suitable for stacking in your easy layered millefeuille. If layers are slightly uneven after baking, they can often be gently pressed flatter while still warm (use oven mitts!) or trimmed once cool.
Addressing Soggy Pastry: Prevention and Remedies
Soggy pastry is perhaps the most disappointing outcome when making an easy layered millefeuille recipe. The primary prevention is assembling the dessert as close to serving time as possible, ideally within a couple of hours. Ensure both your baked pastry layers and your crème pâtissière are thoroughly chilled before assembly.
As mentioned earlier, applying a thin moisture barrier like melted white chocolate or a quick sugar glaze to the inside surface of the pastry layers before adding the cream can help delay sogginess. If you have leftover assembled millefeuille, unfortunately, there's no real "fix" for soggy pastry once it happens. The best approach is prevention through timing and proper technique.
Crème Pâtissière Consistency Issues: How to Fix Them
Issues with crème pâtissière consistency can also impact your easy layered millefeuille recipe. If the cream is too thin, it might not hold its shape and could leak out, making the pastry soggy. This is often due to not cooking the starch long enough or not using enough thickener. Return the cream to the saucepan and cook gently over medium heat, whisking constantly, until it thickens properly (coats the back of a spoon and bubbles for a minute).
If the cream is too thick or lumpy after chilling, it might have been overcooked or not whisked properly. To fix overly thick cream, whisk in a tablespoon of cold milk or cream at a time until it reaches the desired smooth consistency. If it's lumpy, vigorously whisking it or pressing it through a fine-mesh sieve after chilling can help restore smoothness.
BakeWithEase's Final Thoughts: Enjoying Your Homemade Millefeuille
Variations and Adaptations for your Easy Millefeuille
Once you've mastered this easy layered millefeuille recipe, feel free to experiment with variations. While vanilla crème pâtissière is classic, you can flavor the cream with coffee, chocolate, fruit purees (like raspberry or passion fruit), or even liqueurs. Consider adding a layer of fresh berries between the cream layers for added freshness and color.
The glaze can also be varied; instead of simple icing, you could dust the top layer with powdered sugar, drizzle with caramel sauce, or top with toasted nuts. Some modern takes use whipped cream or diplomat cream (crème pâtissière lightened with whipped cream) instead of pure crème pâtierie, offering a lighter texture. These adaptations allow you to personalize your easy layered millefeuille while keeping the core technique of layered crisp pastry intact.
We love seeing your baking triumphs! Making an easy layered millefeuille recipe is a rewarding experience, and we encourage you to share your results with the BakeWithEase community. Whether it's your first attempt or a beautifully marbled creation, your success inspires others.
Join our forums, tag us on social media, or simply drop a comment on the recipe page to let us know how your millefeuille turned out. Sharing photos, tips, or questions helps build our community and makes baking even more enjoyable. We believe that with the right guidance and a little practice, anyone can create stunning and delicious pastries like this easy layered millefeuille. Enjoy every flaky, creamy bite!
Frequently Asked Questions
What exactly is a millefeuille, and why is it sometimes called a Napoleon?
A millefeuille is a classic French pastry made of layers of puff pastry and cream. It's often called a Napoleon, though the exact origin of that name is debated and may vary by region.
Is this "Easy Millefeuille" recipe really easier than traditional versions?
Yes, this recipe focuses on simplified techniques and easy-to-find ingredients to make the millefeuille more accessible to home bakers. We've streamlined the process without sacrificing flavor!
What kind of filling is recommended for this easy millefeuille recipe?
While traditional fillings include pastry cream, this recipe allows for variations. You can use a classic vanilla pastry cream, or experiment with fruit curds or whipped cream for different flavors.
How do I prevent the puff pastry from becoming soggy after assembly?
To prevent sogginess, assemble the millefeuille shortly before serving. You can also brush the pastry with melted chocolate to create a moisture barrier.
Can I make the puff pastry from scratch for this recipe, or is store-bought recommended?
While making puff pastry from scratch is possible, this "Easy Millefeuille" recipe is designed to be convenient, so store-bought puff pastry is recommended. This saves time and effort.
Final Reflection: Mastering the Delicate Art of the Millefeuille
The seemingly daunting millefeuille, with its crisp layers and delicate cream, is surprisingly accessible. This recipe proves that achieving pastry perfection doesn't require years of culinary school; with a little patience and the right techniques, anyone can create this elegant dessert. The ease of this recipe democratizes a classic, making it achievable for home bakers of all skill levels.
The enduring appeal of the millefeuille lies not just in its exquisite taste, but in its symbolic representation of layered complexity and delicate balance. It's a testament to the power of simple ingredients transformed into something truly special. The simplest things are often the most beautiful,
a sentiment that perfectly captures the essence of this classic pastry. This recipe, I hope, has inspired you to appreciate the artistry involved in even the most seemingly straightforward baking projects, and to find joy in the process of creation.
Now, I invite you to roll up your sleeves and try your hand at this recipe. Don't be intimidated by the layers; embrace the challenge and savor the satisfaction of creating something beautiful and delicious. The journey of baking this millefeuille is as rewarding as the final taste, a testament to your own capabilities and a delicious treat to share with loved ones. Let the delicate crunch and creamy filling be a reminder of the sweet rewards that come from embracing a challenge and mastering a new skill.
Unleash Your Inner Pastry Chef: Master the Millefeuille!
Thanks for joining us on this delicious journey into the world of millefeuille! We hope you've gained the confidence to tackle this classic pastry. Ready to take your baking skills to the next level?
- Bake your own masterpiece: Try our recipe today – you'll be amazed at how easy it is to create perfectly crisp layers.
- Share your success: Post a picture of your millefeuille on social media using #BakeWithEaseMillefeuille and inspire others!
- Explore our other easy pastry recipes for more baking adventures.
Now, tell us: What's your favorite element of this elegant dessert – the flaky pastry, the creamy filling, or the satisfying crunch? Let's discuss in the comments!