
Bake French Choux Pastry Dough from Scratch (Foolproof Method)

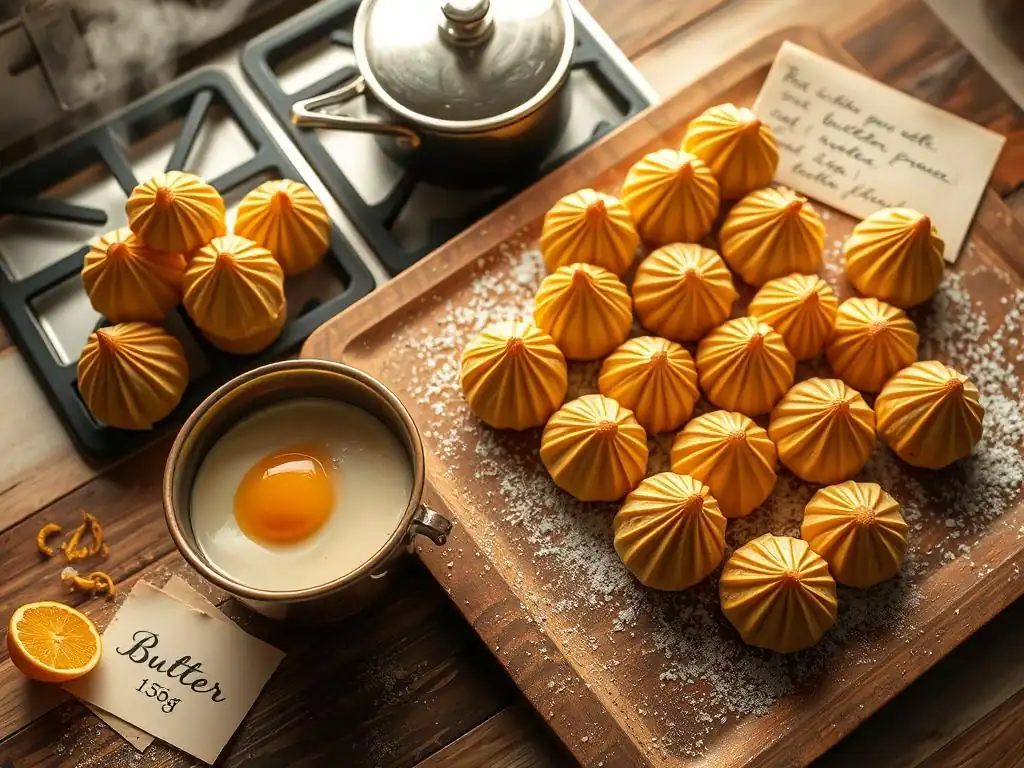
Welcome to BakeWithEase, your secret ingredient to baking success! Ever dreamt of creating delicate, airy French pastries but felt intimidated? You're in the right place. Today, we're demystifying the art of choux pastry. Discover our foolproof French choux pastry dough recipe, a cornerstone of classic baking, and unlock a world of delicious possibilities. Ready to embark on a pastry adventure? Let's get baking!
- Introduction to Foolproof French Choux Pastry Dough
- Essential Ingredients for Perfect Choux Pastry
- Step-by-Step Guide: Foolproof Choux Pastry Recipe
- Piping Techniques for Choux Pastry
- Baking Choux Pastry: Achieving Golden Perfection
- Troubleshooting Common Choux Pastry Problems
- Flavor Variations and Creative Uses for Choux Pastry
- Storing and Freezing Choux Pastry
- Mastering the Art of French Choux Pastry: Final Tips
-
Frequently Asked Questions
- What exactly is French choux pastry dough?
- What makes the BakeWithEase.com method "foolproof"?
- What are the most common mistakes people make when baking choux pastry, and how can I avoid them?
- Can I use different types of flour for the choux pastry dough?
- How long can I store baked choux pastry, and what's the best way to do it?
- Final Reflection: Mastering the Art of the Perfect Choux
- Unleash Your Inner Pâtissier: Master the Art of Choux!
Introduction to Foolproof French Choux Pastry Dough
Why Master Choux Pastry Dough? A Baker's Essential
Mastering choux pastry dough, also known as pâte à choux, is a truly rewarding milestone for any home baker. This versatile dough is the foundation for countless classic French pastries, from elegant éclairs and delicate cream puffs to savory gougères and impressive Saint-Honoré cakes. Its unique ability to puff dramatically in the oven, creating a hollow shell perfect for filling, makes it indispensable in the baker's repertoire. Learning to make a reliable, foolproof French choux pastry dough opens up a world of creative possibilities in your kitchen.
Beyond the delicious outcomes, understanding how to make choux pastry teaches fundamental baking principles like emulsification and controlled hydration. It requires attention to detail but is surprisingly forgiving once you grasp the basic technique. A successful batch provides a light, airy structure with a crisp exterior – a texture that is simply unmatched by other doughs. This foolproof method aims to guide you through the process, building your confidence with this essential French baking classic.
What is Choux Pastry Dough? Understanding the Basics
Choux pastry dough is unique among doughs because it is cooked twice: first on the stovetop to create a thick paste called a panade, and then again in the oven where it puffs up. Unlike yeasted doughs or cake batters, choux relies on steam trapped within the high-moisture dough to create its characteristic hollow interior. The process begins by heating liquid (water or milk) with butter, adding flour to form the panade, and finally incorporating eggs to achieve the correct consistency.
The magic of choux pastry lies in its simple ingredients – typically just water, butter, flour, and eggs – transforming into something spectacular through a specific cooking method. The high fat content from the butter and the structure provided by the cooked flour and eggs work together to create a dough that is strong enough to hold the steam generated during baking. When done correctly, this simple combination results in a light, airy, and hollow shell, ready to be filled with creams, mousses, or even savory mixtures.
Essential Ingredients for Perfect Choux Pastry
The Role of Flour in Choux Pastry
Flour provides the essential structure for choux pastry dough. When added to the hot liquid and butter mixture and cooked, the starch in the flour gelatinizes, creating a thick, paste-like base known as the panade. This cooked flour structure is crucial because it provides the necessary framework to trap the steam generated during baking, which is what causes the dough to puff. Using the right type and amount of flour is vital for a foolproof French choux pastry dough.
Typically, all-purpose flour is recommended for choux pastry. Its moderate protein content (around 10-12%) provides enough structure without making the dough tough. Using too much flour can result in a stiff dough that doesn't puff well, while too little can lead to a weak structure that collapses. The key is incorporating the flour all at once into the hot liquid and stirring vigorously to cook it thoroughly, ensuring proper starch gelatinization.
The Importance of Butter for a Rich Dough
Butter plays a dual role in choux pastry: it adds richness and flavor, and it contributes to the dough's structure and puffing ability. The fat from the butter helps to tenderize the dough and, when melted with the liquid, creates an emulsion that aids in smooth incorporation of the flour. High-quality unsalted butter is generally preferred to control the salt content in the final product, especially for sweet applications.
During baking, the butter melts and creates pockets within the dough. As the steam expands, these fat pockets help the dough stretch and puff evenly. The amount of butter is typically equal to the amount of liquid by weight or volume in many standard recipes (e.g., 1 part butter to 1 part liquid). Using too little butter can result in a less tender dough, while too much might make it greasy.
Eggs: The Binding Agent for Lightness
Eggs are arguably the most critical ingredient for achieving a light and airy choux pastry. They serve as the primary binding agent, bringing the cooked panade together into a smooth, pipeable dough. More importantly, the proteins in the eggs provide structure, and the moisture content contributes significantly to the steam that causes the dough to puff dramatically in the oven. The number of eggs needed can vary slightly depending on their size and the hydration of your panade.
Eggs are added gradually to the cooled panade. This gradual addition is essential because you need to achieve a specific consistency: the dough should be smooth, glossy, and fall from a spoon in a thick ribbon or V-shape. Adding too many eggs will result in a runny dough that won't hold its shape and won't puff properly; adding too few will yield a stiff dough that is difficult to pipe and won't expand adequately. It's often recommended to whisk the last egg lightly and add it in small increments, checking the consistency as you go.
Water vs. Milk: Choosing the Right Liquid
The choice between water and milk as the liquid base for choux pastry affects the final texture and appearance. Water is the simplest option and results in a crispier, drier shell with maximum puff. This is because water turns entirely into steam during baking, creating a larger volume of steam than milk. Using water is a classic choice for achieving a very airy, hollow interior, making it ideal for fillings.
Milk, on the other hand, contributes to a richer flavor and a softer crust with a slightly less dramatic puff. The milk solids and fat in milk interfere slightly with steam production but result in a more tender and flavorful dough. Some recipes call for a mixture of water and milk to achieve a balance between crispness and richness. For a truly foolproof French choux pastry dough, starting with water is often recommended for its reliable puff, but experimenting with milk can yield delicious variations.
Step-by-Step Guide: Foolproof Choux Pastry Recipe
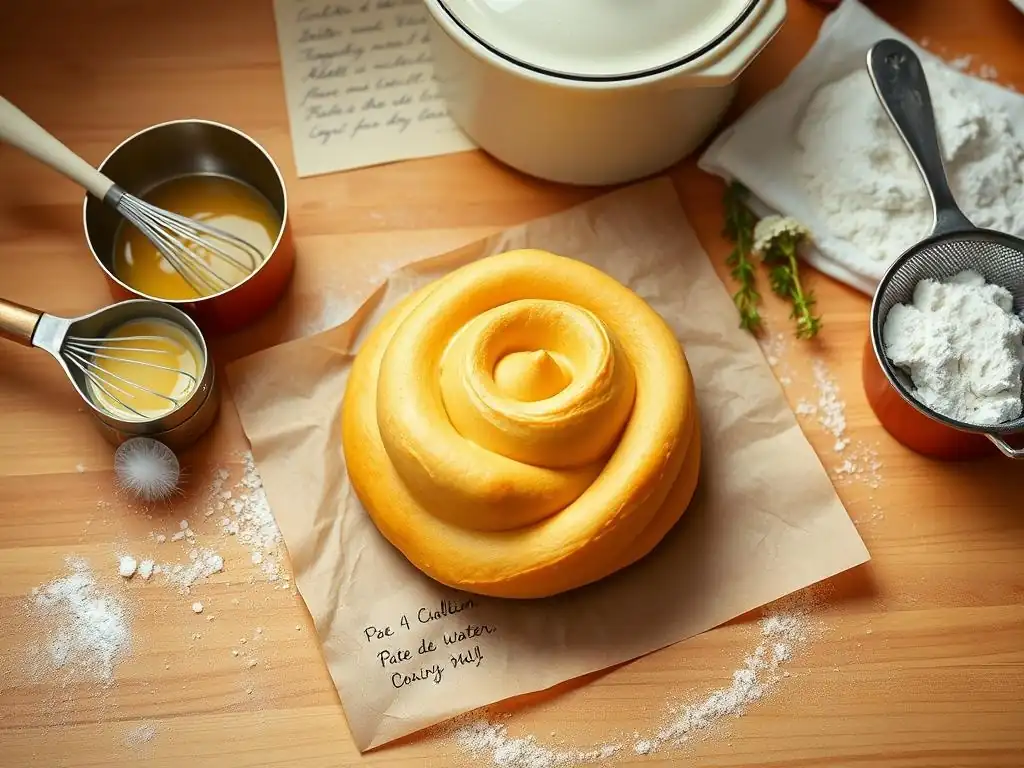
Step 1: Preparing Your Baking Equipment
Before you even start heating ingredients, ensure your workspace and equipment are ready. This is crucial for a smooth process, especially when cooking the panade, which requires swift action. You will need a sturdy saucepan (preferably non-stick or heavy-bottomed to prevent burning), a wooden spoon or heatproof spatula, a bowl (preferably shallow to help the panade cool), a whisk, a piping bag fitted with your desired tip (or just a large round tip), and baking sheets lined with parchment paper or silicone mats.
Having everything measured and ready to go (this is called mise en place) is particularly important for Step 3, where the flour is added all at once. Preheat your oven according to the recipe (typically around 400°F or 200°C, though this varies), as the dough should go into a hot oven immediately after piping. A prepared baking sheet ensures you can pipe directly onto the surface without delay.
Step 2: Melting the Butter and Water (or Milk)
Combine your measured liquid (water, milk, or a mixture) and cubed butter in the saucepan. Add a pinch of salt, especially if using unsalted butter, as salt enhances the flavor. Place the saucepan over medium heat and bring the mixture to a rolling boil. It's important that the butter is completely melted and the liquid is boiling before adding the flour. This ensures the correct temperature for the starch to gelatinize immediately upon flour addition.
Maintain a close watch on the pan. Once the mixture reaches a boil, remove it from the heat momentarily before adding the flour. This prevents the liquid from evaporating excessively and ensures the temperature is just right for the next step. A rapid boil helps distribute the heat evenly and melts the butter quickly.
Step 3: Adding the Flour and Creating the Panade
Remove the saucepan from the heat and add all of the measured flour at once. This is a critical step for a foolproof French choux pastry dough. Immediately begin stirring vigorously with your wooden spoon or spatula. The mixture will look lumpy at first, but keep stirring. Return the pan to low or medium-low heat and continue to cook and stir the mixture.
As you stir, the dough will come together, forming a cohesive ball. You need to cook this dough, or panade, for 2-3 minutes while stirring constantly. This process cooks the starch in the flour, gelatinizing it and drying out some of the moisture. You'll know it's ready when the dough pulls away cleanly from the sides and bottom of the pan, and a thin film forms on the bottom of the saucepan. This cooking step is essential for a proper panade structure that can absorb the eggs later.
Step 4: Cooling the Panade: The Key to Success
After cooking the panade, immediately transfer it to a clean bowl. This stops the cooking process and allows it to cool down. It is absolutely crucial that the panade cools significantly before you add the eggs. If the panade is too hot, it will cook the eggs, resulting in scrambled eggs mixed into your dough – definitely not a foolproof French choux pastry dough!
Spread the panade out in the bowl to help it cool faster. Stirring it occasionally will also speed up the cooling process. You want the panade to cool to around 140°F (60°C) or ideally lower, warm to the touch but not hot. This might take 5-10 minutes depending on the amount of dough and the bowl. Patience here prevents disaster in the next step.
Step 5: Incorporating the Eggs Gradually
This is where the magic happens, transforming the stiff panade into a glossy, pipeable dough. Break your eggs into a separate bowl and whisk them lightly. Add the whisked eggs to the cooled panade one at a time, mixing thoroughly after each addition. Using a wooden spoon, spatula, or even an electric mixer with a paddle attachment (on low speed) works well.
After adding each egg, the dough will look slippery and separated at first. Keep mixing until the egg is fully incorporated and the dough comes back together smoothly before adding the next egg. This gradual addition allows the dough to properly absorb the moisture and fat from each egg, developing the right consistency and structure needed for a successful puff.
Step 6: Achieving the Right Dough Consistency
The final consistency of your choux pastry dough is paramount for a foolproof result. After incorporating the eggs gradually, you'll reach a point where the dough is smooth, glossy, and thick but still falls from your spoon or spatula in a characteristic "V" shape or a thick ribbon. This is often called the "choux consistency."
To test for the correct consistency, lift your spoon or spatula out of the dough. If the dough is ready, it should hang from the spoon in a thick mass and then slowly fall away, leaving a V-shape (or sometimes described as a bird's beak) on the part still attached to the spoon. If the dough breaks off cleanly and is stiff, it needs more egg.
If it runs off the spoon too quickly, it has too much egg and might be difficult to salvage. It's better to err on the side of slightly too stiff than too runny, as you can sometimes beat in a tiny bit more egg, but you can't remove it. A standard batch using ~1 cup flour often requires 3-5 large eggs.
Piping Techniques for Choux Pastry
Choosing the Right Piping Tip
Selecting the correct piping tip is essential for giving your choux pastry its intended shape, whether it's an éclair, a cream puff, or a gougère. For simple cream puffs or gougères, a large round tip (like an Ateco 805 or 806) is ideal. This allows the dough to expand evenly in all directions during baking, creating a nice, round shape. A tip with an opening of about 1/2 inch to 3/4 inch (1.2 cm to 2 cm) is usually sufficient for standard sizes.
For éclairs, a large plain round tip can also be used, but a large open star tip (like an Ateco 826 or 827) is often preferred. The ridges created by the star tip give the finished éclairs a more traditional appearance and can sometimes aid in even expansion. Experimenting with different large tips can help you achieve the desired look for your foolproof French choux pastry dough creations.
Filling the Piping Bag
Properly filling a piping bag prevents mess and ensures you can pipe smoothly. First, fit your bag with the chosen tip. If it's a reusable bag, you might need to cut the end to fit the tip snugly. Stand the piping bag tip-down in a tall glass or pitcher and fold the top edge of the bag down over the rim of the glass. This creates a wide opening that is easy to fill and keeps the outside of the bag clean.
Spoon the prepared choux pastry dough into the bag using a spatula or spoon, filling it no more than two-thirds full. Overfilling makes the bag difficult to handle. Once filled, unfold the top edge of the bag and twist it closed just above the dough. Push the dough down towards the tip, ensuring there are no large air pockets. You are now ready to pipe your foolproof French choux pastry dough shapes onto the prepared baking sheet.
Piping Éclairs: Achieving Uniform Shapes
Piping éclairs requires a steady hand to create uniform, straight logs of dough. Hold the piping bag at a slight angle, about 1/2 inch above the parchment-lined baking sheet. Apply even pressure to the twisted end of the bag, moving steadily in a straight line towards you. Aim for lengths of about 4-5 inches (10-12 cm), but consistency is key for even baking.
To stop piping cleanly, stop applying pressure and quickly flick the bag upwards or to the side. If you have peaks, you can gently smooth them down with a wet fingertip or the back of a wet spoon. Leave about 2 inches (5 cm) of space between éclairs on the baking sheet, as they will expand significantly in the oven. Uniform size ensures they all bake through at the same time, contributing to a foolproof outcome.
Piping Cream Puffs: Creating Round Perfection
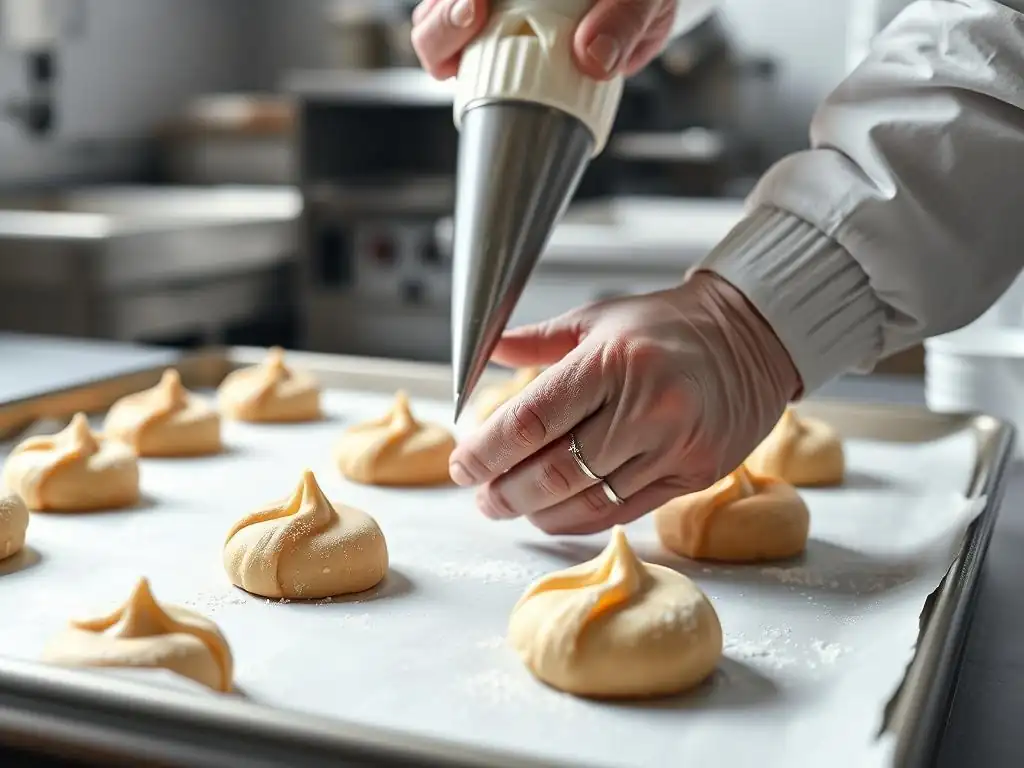
Piping cream puffs is simpler than éclairs, focusing on creating round mounds of dough. Using a large round tip, hold the piping bag perpendicular to the baking sheet, about 1/2 inch above the surface. Apply steady, even pressure, allowing the dough to mound up into a circular shape. Aim for mounds about 1.5 to 2 inches (4-5 cm) in diameter for standard-sized puffs.
To finish piping, stop applying pressure and lift the bag straight up. Again, if there's a slight peak, you can smooth it down with a wet finger. Ensure adequate spacing between the mounds (at least 2 inches or 5 cm) as they will puff up significantly. Piping consistent sizes is important for even baking and achieving those perfect, hollow shells.
Piping Gougères: Savory Cheese Puffs
Gougères are savory choux pastries often flavored with cheese. The piping technique is very similar to cream puffs, aiming for round mounds. However, because cheese is added to the dough (typically grated Gruyère or Parmesan), the dough might be slightly stiffer or lumpier depending on the cheese type and amount. Use a large round tip for best results.
Pipe mounds of dough onto the baking sheet, similar in size to cream puffs (1.5-2 inches in diameter). The cheese may create some bumps, which is fine. You can lightly brush the tops with an egg wash and sprinkle with extra cheese or herbs before baking for added flavor and a golden finish. Like their sweet counterparts, ensure ample space between gougères for puffing.
Baking Choux Pastry: Achieving Golden Perfection
Oven Temperature and Baking Time
Baking choux pastry requires careful temperature management to achieve maximum puff and a stable structure. A common and effective method involves starting the oven at a high temperature, typically around 400-425°F (200-220°C), for the first 10-15 minutes. This initial blast of high heat causes rapid steam expansion within the dough, resulting in a strong puff.
After the initial high-heat period, the temperature is usually reduced to a lower setting, around 350-375°F (175-190°C), for another 15-25 minutes, or until the pastries are deeply golden brown and feel light and hollow when lifted. The lower temperature allows the pastry to dry out and crisp up internally without burning the exterior. The total baking time for standard-sized cream puffs or éclairs is often between 25-40 minutes, but this can vary significantly based on size and your specific oven. Baking until truly golden brown is key to preventing collapse.
The Importance of Steam for Puffing
Steam is the leavening agent in choux pastry, making it unique among doughs. The high moisture content from the water/milk and eggs turns into steam when subjected to the oven's heat. This steam is trapped within the structure created by the cooked flour and egg proteins, causing the dough to expand rapidly and dramatically.
To enhance this process, some bakers introduce extra steam into the oven at the beginning of baking. This can be done by placing a pan of hot water on the bottom rack when preheating the oven, or by quickly pouring hot water into a preheated pan immediately after placing the choux in the oven (be cautious of steam burns!).
The moist environment helps the exterior of the choux stay pliable longer, allowing for maximum expansion before the crust sets. After the initial puff (around 10-15 minutes), it's often recommended to remove the steam source or open the oven vent (if your oven has one) to allow the pastries to dry out and crisp up.
Avoiding a Soggy Bottom: Baking Tips
A common frustration with choux pastry is a soggy or underbaked bottom, which can lead to collapse after cooling. This often happens if the pastries are removed from the oven too early, before they are fully dried out inside and the crust is firm. To avoid this, bake the choux pastry until it is a deep, rich golden brown color all over, not just on top. They should look hollow and feel very light when you pick one up.
Another tip is to use a baking sheet lined with parchment paper or a silicone mat, as these provide even heat distribution. Placing the baking sheet on the middle rack of the oven is usually best. Some recipes suggest turning off the oven and leaving the choux inside with the door slightly ajar for 5-10 minutes after the main baking time is complete. This allows them to dry out further in the residual heat, ensuring a crisp bottom and preventing collapse.
Cooling the Choux Pastry: Preventing Collapse
Proper cooling is just as important as proper baking for a foolproof French choux pastry dough. Removing hot choux pastries directly from a hot oven into a cool kitchen can cause a sudden temperature change that leads to immediate collapse. Once the choux are deeply golden brown and appear dry and crisp, turn off the oven.
You can either leave the choux inside the turned-off oven with the door propped open slightly (using a wooden spoon, for example) for 5-10 minutes, or transfer them immediately to a wire rack to cool completely. Cooling on a wire rack allows air to circulate around the entire pastry, preventing condensation on the bottom and ensuring a crisp crust. Do not fill the choux pastries until they are completely cool; filling warm pastries will make them soggy.
Troubleshooting Common Choux Pastry Problems
Dough Too Runny: How to Fix It
One of the most common issues when making choux pastry is a dough that is too runny after adding the eggs. This happens when too much egg has been added relative to the amount of panade, or if the panade wasn't cooked sufficiently to dry it out. A runny dough will not hold its shape when piped and will likely spread into flat discs rather than puffing upwards.
Unfortunately, there is no guaranteed fix for a significantly over-hydrated choux dough once the eggs are fully incorporated. Adding more flour at this stage won't integrate properly. The best approach is prevention: always add the eggs gradually, especially the last one, and check the consistency frequently using the "V" test.
If you realize it's slightly too loose early on while still adding the last egg, stop adding egg immediately. If it's already too runny, you can try adding a tablespoon or two of cooked panade (if you happened to make extra) or a bit more cooked flour paste (mix flour with hot water, cook, cool slightly) and beating it in, but this is a risky maneuver. Sometimes, it's better to start a new batch, ensuring the panade is cooked thoroughly and eggs are added cautiously.
Dough Too Stiff: Adjusting the Consistency
A choux pastry dough that is too stiff is usually the result of not adding enough egg, or occasionally, adding too much flour to the initial panade. A stiff dough will be difficult to pipe and will not puff as much or as evenly in the oven, often resulting in dense, heavy pastries rather than light, hollow ones.
Fortunately, a stiff dough is much easier to fix than a runny one. Simply whisk another egg (or half an egg) in a small bowl and gradually beat it into the dough, a tablespoon at a time. Continue adding small amounts of whisked egg and mixing until the dough reaches the correct consistency – smooth, glossy, and forming that characteristic V-shape when it falls from the spoon. Always check the consistency after each small addition to avoid over-hydrating the dough.
Choux Pastry Not Puffing: Potential Causes
Several factors can contribute to choux pastry failing to puff properly. The most frequent culprits include:
- Panade not cooked enough: If the panade isn't cooked for the required 2-3 minutes, the starch won't gelatinize properly, resulting in a weak structure unable to trap steam.
- Eggs added to a hot panade: Hot panade cooks the eggs, reducing their ability to provide structure and moisture for steam.
- Dough consistency is wrong: Dough that is too stiff or too runny will not puff correctly.
- Oven temperature too low: Insufficient heat prevents rapid steam generation needed for the initial puff.
- Opening the oven door too early: Releasing trapped steam before the structure is set will cause collapse.
Ensuring each step, from cooking the panade thoroughly to adding eggs at the right temperature and baking in a sufficiently hot oven without opening the door prematurely, is key to achieving a successful puff. Reviewing the steps in the foolproof French choux pastry dough guide can help pinpoint where things might have gone wrong.
Collapsed Choux Pastry: Prevention and Solutions
Choux pastry that collapses after baking is typically a sign that it was underbaked. The crust wasn't allowed to fully dry out and set, so when removed from the heat, the internal steam condensed, and the weak structure buckled under its own weight. Other causes can include removing the pastries from the oven too quickly into a cold environment or opening the oven door too early during baking.
To prevent collapse, always bake choux until they are a deep golden brown and feel light and hollow – don't rely solely on time. If you're unsure, bake them for a few extra minutes. Consider the technique of turning off the oven and leaving the choux inside with the door ajar for 5-10 minutes to allow them to dry out further. If your choux have collapsed, unfortunately, they cannot be re-puffed. However, they are often still edible and can be used in other ways, perhaps crumbled over desserts or used as a base for trifles.
Flavor Variations and Creative Uses for Choux Pastry
Sweet Variations: Vanilla, Chocolate, Coffee
The basic foolproof French choux pastry dough is a blank canvas for sweet flavors. The simplest way to add flavor is through the filling, but you can also subtly infuse the dough itself. Adding a teaspoon of vanilla extract with the eggs is a common practice that enhances the overall sweetness. For chocolate choux, you can sift a tablespoon or two of unsweetened cocoa powder with the flour. This will require slightly more liquid or egg to achieve the correct consistency, so adjust cautiously.
Coffee flavor can be incorporated by using strong brewed coffee or espresso instead of some or all of the water in the initial liquid step. For example, substitute half of the water with coffee. Be mindful that this adds moisture, so you may need to cook the panade slightly longer to dry it out sufficiently. These simple additions allow you to create flavored shells that perfectly complement various sweet fillings like pastry cream, whipped cream, or mousse.
Savory Variations: Cheese, Herbs, Spices
Choux pastry isn't limited to sweet treats; it also makes delicious savory applications like gougères. The most popular savory variation involves incorporating grated cheese directly into the dough after the eggs have been added. Hard cheeses like Gruyère, Parmesan, or mature cheddar work well, adding a wonderful nutty or sharp flavor. A typical ratio might be 1/2 to 1 cup of grated cheese per batch made with 1 cup of flour.
Freshly chopped herbs like chives, parsley, or thyme can also be folded into the dough with the cheese, adding freshness and aroma. Spices like black pepper, paprika, or a pinch of cayenne can also be included for a subtle kick. Savory choux dough is often piped into smaller rounds and baked until golden. These gougères are excellent served warm as appetizers, often brushed with egg wash and topped with more cheese before baking.
Using Choux Pastry for Éclairs, Cream Puffs, and More
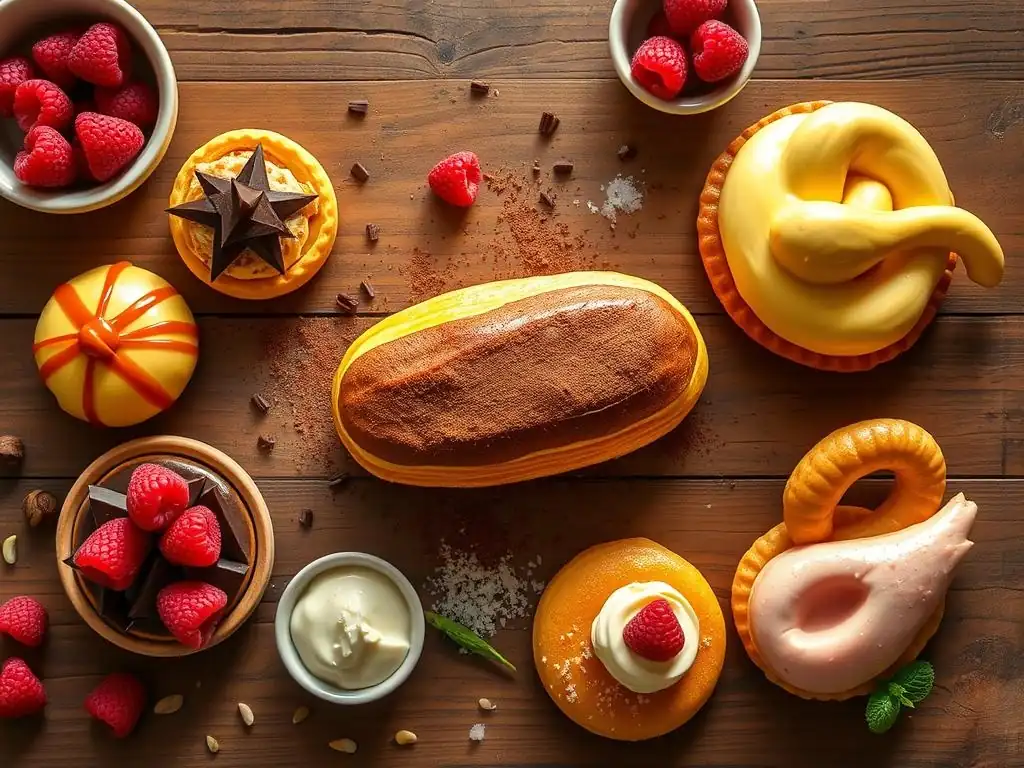
The versatility of a foolproof French choux pastry dough is truly remarkable. Its most classic uses are for éclairs (long, finger-shaped pastries) and cream puffs (round pastries), which are typically filled after baking. Éclairs are traditionally filled with pastry cream (crème pâtissière) and topped with chocolate glaze, while cream puffs can hold anything from whipped cream and fruit to ice cream (for profiteroles) or pastry cream.
Beyond these staples, choux pastry forms the base for more elaborate desserts like the Croquembouche (a cone of profiteroles glued together with caramel) and the Paris-Brest (a ring of choux pastry filled with praline cream). Savory choux, or gougères, are fantastic as a simple snack or appetizer. The hollow structure makes it perfect for injecting various fillings, both sweet and savory, showcasing the adaptability of this fundamental dough.
Exploring Different Fillings and Toppings
Once you have successfully baked your light and airy choux pastry shells, the fun of filling and topping begins! For sweet applications, classic choices include:
- Pastry Cream (Crème Pâtissière): Smooth, rich, and stable, perfect for éclairs and cream puffs. Common flavors include vanilla, chocolate, or coffee.
- Whipped Cream: Light and airy, often paired with fruit or chocolate sauce.
- Mousses: Chocolate mousse, fruit mousse, or coffee mousse add a delicate texture.
- Ice Cream: Profiteroles filled with ice cream and topped with warm chocolate sauce are a popular dessert.
Toppings for sweet choux can range from simple powdered sugar or glaze to chocolate ganache, caramel, or fondant icing for éclairs. Savory choux (gougères) are typically served as is or with a simple sprinkle of extra cheese or herbs before baking. They can also be filled with savory mousses, cheese spreads, or even smoked salmon and cream cheese for elegant appetizers. The possibilities are nearly endless once you have mastered the basic foolproof French choux pastry dough.
Storing and Freezing Choux Pastry
Storing Baked Choux Pastry
Baked choux pastry is best enjoyed the day it is made, as it is prone to becoming soft or stale quickly due to its crisp, hollow structure. However, if you need to store them, ensure they are completely cool first. Store unfilled baked choux pastry in an airtight container at room temperature for up to 1-2 days. To help maintain crispness, you can place a piece of parchment paper or paper towel in the bottom of the container.
If the pastries have lost some crispness, you can often revive them by placing them on a baking sheet in a preheated oven at 300°F (150°C) for 5-10 minutes. This helps dry them out again. Once filled, choux pastries should generally be stored in the refrigerator due to the perishable nature of most fillings (like pastry cream or whipped cream) and are best consumed within 24 hours. Filled pastries cannot typically be re-crisped in the oven.
Freezing Unbaked Choux Pastry Dough
Freezing unbaked choux pastry dough is an excellent way to prepare ahead and have fresh pastries whenever you want. After the dough is made and has reached the correct consistency, transfer it to a piping bag. Pipe the desired shapes (éclairs, cream puffs, etc.) onto a baking sheet lined with parchment paper, just as if you were going to bake them immediately.
Place the entire baking sheet in the freezer until the piped shapes are completely frozen solid, usually about 1-2 hours. Once frozen, transfer the individual frozen choux shapes to an airtight container or a freezer bag, separating layers with parchment paper to prevent sticking. Label and date the container; the dough can be frozen for up to 1-2 months.
When ready to bake, place the frozen shapes directly onto a parchment-lined baking sheet (no need to thaw) and bake according to your recipe, adding a few extra minutes to the baking time. This method allows you to bake a small batch of foolproof French choux pastry dough on demand.
Freezing Baked and Filled Choux Pastry
Freezing baked choux pastry is also possible, though it's generally best to freeze them unfilled for optimal texture. If you must freeze filled choux, it's important to consider the filling. Fillings like pastry cream or whipped cream might change texture upon thawing, potentially becoming watery or grainy. Fillings with higher fat content, like buttercream or praline cream (used in Paris-Brest), tend to freeze better.
To freeze baked and filled choux, place them on a baking sheet in the freezer until solid. Then, transfer them to an airtight container. Thaw filled choux in the refrigerator. Baked unfilled choux can be frozen similarly. To thaw baked unfilled choux, place them on a wire rack at room temperature. Once thawed, you can re-crisp them in a 300°F (150°C) oven for 5-10 minutes before filling. Freezing baked choux (filled or unfilled) is typically recommended for no more than 1 month for best quality.
Mastering the Art of French Choux Pastry: Final Tips
Practice Makes Perfect: Don't Be Afraid to Experiment
Like many baking techniques, mastering a foolproof French choux pastry dough takes practice. Your first batch might not be perfect, and that's okay! Pay attention to what happened at each stage – was the panade dry enough? Was the dough consistency correct? Did they puff evenly? Did they collapse? Each attempt provides valuable learning.
Don't be afraid to experiment with slight variations in cooking time for the panade, the number of eggs (while being cautious), or even trying different liquids like a mix of water and milk. As you practice, you'll develop a feel for the dough's correct consistency and learn to recognize the visual cues during the cooking and baking processes. Persistence is key to unlocking the art of choux.
Understanding Your Oven: Adjusting Baking Times
Every oven is different. Factors like calibration, hot spots, and whether it's convection or conventional significantly impact baking time and temperature. The recommended temperatures and times in any choux pastry recipe, including this foolproof method, should be treated as guidelines. It's crucial to get to know your own oven's behavior.
Observe your choux as they bake. Are they browning too quickly on one side? Are they puffing unevenly? You may need to rotate the baking sheet halfway through the baking time. If they aren't getting golden brown within the suggested time, they likely need longer. If they are browning too fast, your oven might run hot, and you could try a slightly lower temperature on subsequent batches. Using an oven thermometer can help verify that your oven is reaching and maintaining the set temperature accurately.
The Secret to Success: Patience and Precision
While this guide aims to provide a foolproof French choux pastry dough recipe, the ultimate secret lies in a combination of precision and patience. Precision is needed in measuring ingredients (especially the eggs added gradually) and in following the cooking steps carefully, ensuring the panade is properly cooked and cooled.
Patience is required during the cooling of the panade before adding eggs, during the baking process where resisting the urge to open the oven door too early is vital, and during the cooling of the baked pastries before filling. Rushing any of these steps can compromise the final result. Embrace the process, follow the steps diligently, and you will be well on your way to consistently baking beautiful, light, and airy choux pastry.
Frequently Asked Questions
What exactly is French choux pastry dough?
Choux pastry dough, or pâte à choux, is a light and airy dough used to make pastries like éclairs, cream puffs, and gougères. It's unique because it's cooked twice: first on the stovetop and then baked, resulting in a hollow center perfect for fillings and a crisp exterior.
What makes the BakeWithEase.com method "foolproof"?
Our method focuses on clear, step-by-step instructions and precise measurements, minimizing common errors that beginners often encounter. We also provide troubleshooting tips to ensure a successful outcome, even if you're new to baking.
What are the most common mistakes people make when baking choux pastry, and how can I avoid them?
Common mistakes include not cooking the dough long enough on the stovetop, adding the eggs too quickly, or opening the oven during baking. Ensure the dough forms a smooth ball on the stovetop and add eggs gradually. Resist the urge to open the oven until the pastry is golden brown.
Can I use different types of flour for the choux pastry dough?
While all-purpose flour is generally recommended for its gluten content, you might experiment with bread flour for a slightly chewier texture. However, avoid using cake flour as it lacks the necessary gluten structure.
How long can I store baked choux pastry, and what's the best way to do it?
Baked choux pastry is best enjoyed fresh, but it can be stored in an airtight container at room temperature for a day. For longer storage, freeze the un-filled pastries. Reheat in a warm oven before filling to restore their crispness.
Final Reflection: Mastering the Art of the Perfect Choux
The pursuit of the perfect French choux pastry, once a daunting culinary challenge, is now within everyone's reach. This foolproof method, detailed throughout this article, empowers home bakers to confidently tackle this seemingly delicate dough, unlocking a world of delicious possibilities from airy éclairs to delicate cream puffs. The accessibility of this technique democratizes pastry-making, bringing the joy of creating these elegant treats to a wider audience.
The enduring appeal of choux pastry lies not just in its exquisite taste and versatility, but in the sense of accomplishment it brings. The transformation from simple ingredients into light, crisp shells is truly magical. It's a testament to the power of precise technique and the rewarding nature of culinary exploration. As Julia Child once wisely said, Find something you're passionate about and keep tremendously interested in it.
For me, that passion lies in the meticulous process of choux pastry making, and sharing that passion with others is incredibly fulfilling.
Now, it's your turn. Don't be intimidated by the seemingly complex nature of choux pastry. Take the leap, gather your ingredients, and embark on this rewarding culinary journey. Embrace the process, learn from any minor imperfections, and savor the delicious results. The perfect choux pastry isn't just about the recipe; it's about the journey of mastering a classic technique and the joy of sharing those delectable creations with loved ones. So, what are you waiting for? Let the baking begin!
Unleash Your Inner Pâtissier: Master the Art of Choux!
Thanks for joining us on this choux pastry adventure! You've just unlocked the secrets to creating flawlessly light and airy puffs – a skill that will impress even the most discerning palates. Now it's time to put your newfound knowledge into practice.
- Bake your first batch of choux pastry today! Use the recipe from the article as your guide, and don’t be afraid to experiment with different fillings and toppings.
- Share your choux creations with us on social media using #BakeWithEaseChoux – we’d love to see your stunning results!
- Explore more delightful baking recipes on BakeWithEase.com and discover your next culinary masterpiece.
What unique filling will you create to showcase your perfectly crafted choux pastry? Let us know in the comments below!