
The Secret to a Perfect Italian Bread Crust, Revealed

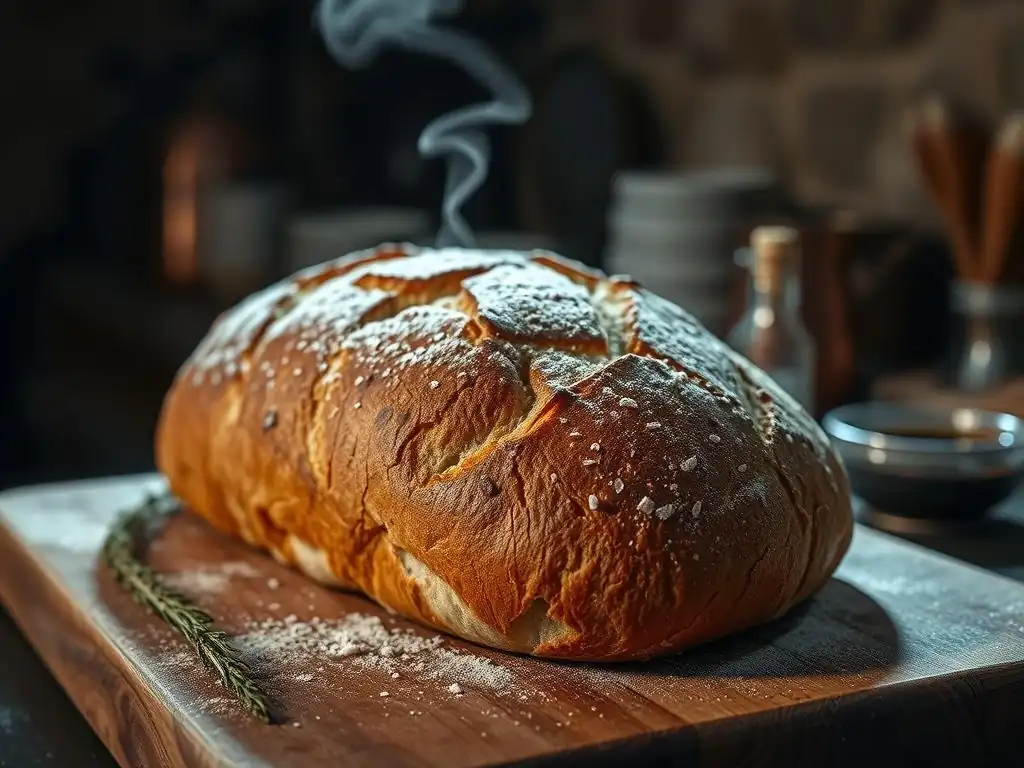
Welcome to BakeWithEase, your guide to unlocking baking brilliance! Ever dreamt of achieving that perfect, crispy Italian bread crust that shatters just so? We're about to reveal the secrets behind this coveted texture. Prepare to elevate your baking game and discover the surprisingly simple steps that will have you creating bakery-worthy Italian bread from the comfort of your own kitchen. Intrigued? Let's dive in!
- Achieving the Perfect Sourdough Bread Crust | The Artisan Baker
- Introduction: The Allure of Sourdough's Signature Crust
- Understanding the Science Behind a Great Sourdough Crust
- Essential Elements for a Perfect Sourdough Bread Crust
- Mastering the Dough for Optimal Crust Development
- Baking Techniques for a Superior Sourdough Bread Crust
- Troubleshooting Common Sourdough Crust Problems
- Advanced Techniques for Crust Perfection
- Recipe: The Artisan Baker's Signature Sourdough with Perfect Crust
- Conclusion: Savoring Your Perfect Sourdough Bread Crust
-
Frequently Asked Questions
- How crucial is hydration in achieving a perfect Italian bread crust?
- What type of flour is best for developing a desirable Italian bread crust?
- Can I achieve a perfect Italian bread crust without a Dutch oven?
- What role does oven temperature play in crust formation?
- How important is the proofing process in achieving the desired crust?
- Final Reflection: The Enduring Allure of the Perfect Crust
- Unleash Your Inner Pizzaiolo: Master the Perfect Crust!
Achieving the Perfect Sourdough Bread Crust | The Artisan Baker
Introduction: The Allure of Sourdough's Signature Crust
Welcome, fellow baking enthusiasts, to the journey of mastering the perfect Italian bread crust! There's something truly magical about biting into a loaf of authentic Italian bread – the satisfying crackle, the delicate chew, and the rich aroma. While often associated with rustic loaves like ciabatta or pane casereccio, achieving that perfect crust is a skill that elevates any homemade Italian-style bread. It's not just about aesthetics; a great crust locks in moisture, contributes significantly to the flavor profile, and provides that essential textural contrast to a soft, airy interior.
This guide is designed for everyone, from beginners taking their first steps into the world of Italian baking to those looking to refine their technique. We'll demystify the process, breaking down the science and providing practical tips to help you achieve that coveted, golden-brown exterior with a delightful crunch. Forget tough or pale crusts; we're aiming for a crust that sings with flavor and texture, making your homemade Italian bread truly unforgettable. Let's unlock the secrets to your perfect Italian bread crust together!
Why Crust Matters: The Foundation of Sourdough Flavor and Texture
The crust isn't merely a protective layer; it's a crucial component of the overall sensory experience of enjoying Italian bread. During baking, the outer layer of the dough undergoes intense heat, leading to a series of chemical reactions that are responsible for the crust's color, flavor, and texture. A well-developed crust provides structural integrity to the loaf, preventing it from collapsing and helping to maintain its shape, especially in high-hydration doughs common in many Italian bread types like ciabatta.
Furthermore, the crust contributes complex flavors that are distinct from the bread's interior. The caramelization of sugars and the Maillard reaction create hundreds of new flavor compounds, giving the crust its characteristic depth and richness. Think of the nutty, slightly bitter notes on a perfectly baked focaccia edge or the sweet undertones on a rustic pane di campagna. These flavors are essential to the authentic taste of Italian bread and are primarily developed in that beautiful outer layer. Achieving that perfect Italian bread crust means unlocking the full flavor potential of your bake.
The Artisan Baker's Guide to Sourdough Crust Mastery
While the heading uses "Sourdough" and "Artisan Baker," our focus here is on achieving a perfect Italian bread crust using methods accessible to any home baker. The principles of crust development are universal, whether you're using commercial yeast or a starter, and we'll apply these principles to classic Italian styles. This guide will walk you through selecting the right ingredients, preparing your dough correctly, and employing specific baking techniques that promote optimal crust formation.
We'll cover everything from the importance of using the right kind of flour to understanding the role of steam in the oven. You'll learn how factors like hydration levels, fermentation time, and shaping techniques directly impact the final crust. By the end of this guide, you'll have a clear understanding of how to consistently achieve that beautiful, crackling, perfect Italian bread crust that will impress everyone who tries your baking. Let's dive into the technical details and practical steps needed for crust mastery.
Understanding the Science Behind a Great Sourdough Crust
Achieving a perfect Italian bread crust involves understanding a bit of the science happening inside and outside your dough as it bakes. It's a fascinating process where heat transforms simple ingredients into complex structures and flavors. Two key reactions are at play: gelatinization and the Maillard reaction, along with the impact of gluten development and acidity. Getting these elements right is fundamental to developing that desired texture and color on your Italian loaves.
By controlling factors like oven temperature, baking time, and the presence of steam, you directly influence these scientific processes. This control allows you to move beyond guesswork and bake with intention, leading to more consistent and satisfying results. Understanding why certain steps are important helps you adapt techniques for different types of Italian bread and troubleshoot issues when they arise. Let's explore the science that makes a perfect Italian bread crust possible.
The Maillard Reaction: Achieving Deep Color and Complex Flavors
The Maillard reaction is a complex series of chemical reactions that occur between amino acids and reducing sugars when heated. It's responsible for the browning and development of rich, savory flavors in many foods, including bread crusts. This reaction typically begins to occur significantly above 140°C (around 284°F). As the outer surface of your Italian bread reaches these temperatures, the Maillard reaction kicks into high gear, creating the beautiful golden to dark brown color and the characteristic deep, complex flavors we associate with a great crust.
The intensity of the Maillard reaction is influenced by factors like temperature, time, and the presence of sugars and proteins in the dough. Higher baking temperatures and longer baking times promote more extensive browning and flavor development. The type of flour used, the fermentation process (which breaks down starches into sugars), and even the addition of ingredients like a touch of sugar or malt can affect the availability of reactants for the Maillard reaction. Controlling these elements is key to achieving that perfect Italian bread crust color and depth of flavor.
Gluten Development: Strength and Elasticity for Structure
Gluten, formed when proteins in flour (glutenin and gliadin) combine with water and are worked through kneading or mixing, provides the structural network for your bread dough. Proper gluten development is essential for trapping the gases produced by yeast (or starter), allowing the dough to rise and create an open, airy crumb. But gluten also plays a vital role in crust formation. A well-developed gluten structure provides the necessary elasticity and strength for the dough to expand during the initial phase of baking (oven spring) without tearing the surface.
This expansion stretches the outer layer of the dough thinly, which is crucial for developing a crisp, rather than thick and tough, crust. If the gluten is underdeveloped, the dough may not expand properly, resulting in a denser crumb and a less appealing crust. Conversely, over-developed gluten can make the dough too tight. Achieving the right level of gluten development through proper mixing, kneading, and resting periods is a foundational step towards that perfect Italian bread crust. Techniques like autolyse and stretch-and-folds are specifically designed to optimize this process.
Acidity's Role: Enhancing Crust Crispness and Keeping Quality
Acidity, particularly in bread made with a sourdough starter, plays a subtle but important role in crust development and texture, although it's also relevant in long-fermented yeast doughs where some acidity develops. The slightly acidic environment can impact the enzymatic activity in the dough, influencing sugar availability for the Maillard reaction and potentially affecting the gelatinization of starches. This can contribute to a more desirable crust color and flavor.
Beyond flavor and color, acidity can also influence the final texture and keeping quality of the crust. While the science is complex, some research suggests that acidity can contribute to a slightly thinner, crispier crust and may help the crust stay crisp for longer by affecting moisture migration within the loaf. For traditional Italian breads, especially those with longer fermentation times, managing the dough's acidity through controlled fermentation is part of achieving that signature perfect Italian bread crust.
Essential Elements for a Perfect Sourdough Bread Crust
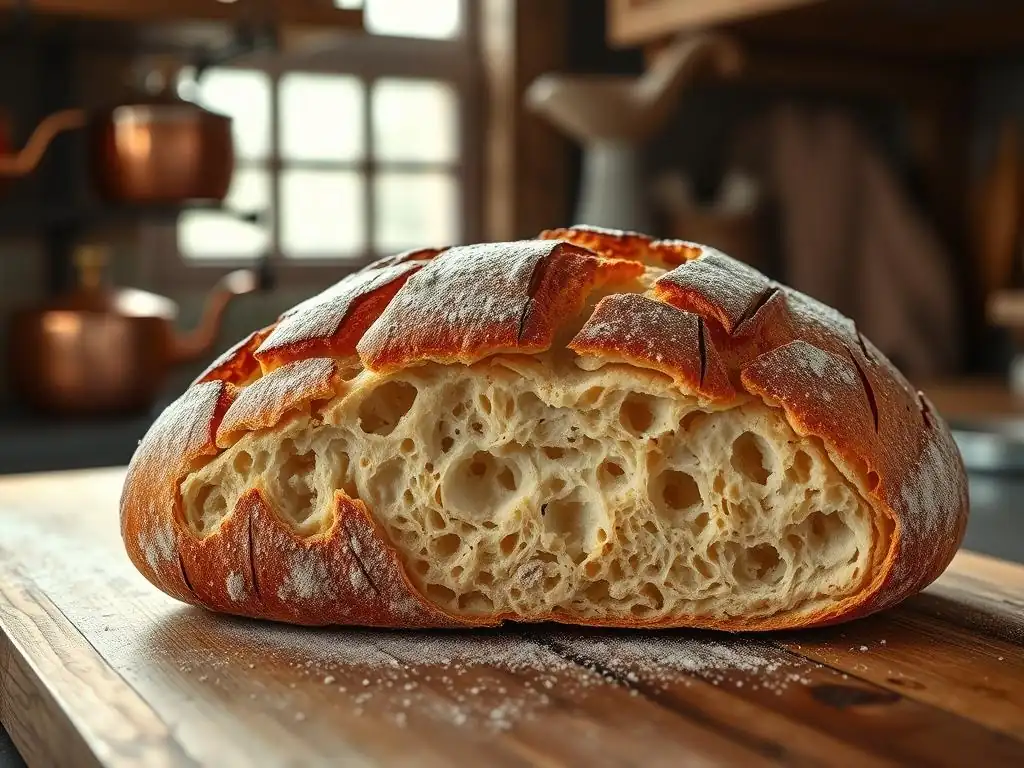
While the title mentions sourdough, the essential elements for a perfect Italian bread crust are largely the same, focusing on foundational ingredients and their quality. The right flour, water, salt, and leavening agent (whether yeast or a starter) all play critical roles in building the structure, flavor, and texture that lead to that desired crust. Understanding how each ingredient functions allows you to make informed choices that significantly impact your final result.
Using high-quality ingredients is paramount. Just as a chef selects the best produce, a baker chooses the best flour and other components. The specific characteristics of each ingredient, from the protein content of the flour to the temperature of the water, influence the dough's behavior during mixing, fermentation, and baking, ultimately affecting the development of that beautiful perfect Italian bread crust. Let's look at each element in detail.
Flour Selection: High-Protein Varieties for Optimal Crust
For many traditional Italian breads known for their excellent crust, like ciabatta or pane rustico, using a high-protein flour is often beneficial. Flour protein content is typically measured as a percentage; a higher percentage indicates more protein available to form gluten. Bread flour, for example, usually has a protein content between 12-14%, compared to all-purpose flour at 10-12%. The stronger gluten network formed by high-protein flour provides the necessary structure to support the dough's expansion during baking.
This robust structure is crucial for achieving good oven spring, which stretches the dough's surface thinly and evenly. A thin, well-stretched surface is more likely to develop into a light, crisp crust rather than a thick, dense one. While some Italian breads might use lower protein flours or blends (like Type '00' for certain purposes), for a rustic loaf aiming for a pronounced, perfect Italian bread crust, opting for a good quality bread flour or even a blend including some high-gluten flour can make a significant difference. Experimenting with different flours is part of the journey!
Water Temperature: Influencing Dough Hydration and Fermentation
Water temperature is a surprisingly important factor in dough making, influencing both the dough's final temperature and the rate of fermentation. Yeast (or starter) activity is highly dependent on temperature; warmer water speeds up fermentation, while colder water slows it down. For achieving a perfect Italian bread crust, controlling fermentation is key. Consistent, controlled fermentation allows for proper flavor development and ensures the dough reaches the oven with the right amount of energy for good oven spring.
Beyond fermentation speed, water temperature affects how easily the flour absorbs the water, influencing the dough's hydration. Using very cold water can make the dough stiffer initially, while warmer water can make it seem more slack. Some bakers use a specific target dough temperature (often around 24-26°C or 75-79°F) and adjust the water temperature based on the temperature of the flour and the room to hit this target consistently. This consistency in dough temperature helps ensure predictable fermentation, a cornerstone for reliable crust development.
Salt's Impact: Flavor Enhancement and Gluten Regulation
Salt is far more than just a flavor enhancer in bread dough; it plays a critical technical role. Salt strengthens the gluten network by tightening it, making the dough less sticky and easier to handle. This regulated gluten development contributes to a stronger structure, which, as discussed, is essential for good oven spring and a thin, crisp crust. Without salt, the dough would be slack, difficult to shape, and wouldn't hold its structure well during baking, leading to a flatter loaf with a less impressive crust.
Salt also helps control the rate of yeast (or starter) activity. It slows down fermentation, allowing for a longer, slower rise. This extended fermentation period is crucial for developing complex flavors in the dough, which carry through to the final crust. Typically, salt is added at about 1.8% to 2.2% of the flour weight. Adding it at the right stage, often after the initial mixing or autolyse, ensures it's evenly distributed and doesn't interfere with the very beginning of gluten formation or yeast activity. Proper salt inclusion is non-negotiable for a perfect Italian bread crust.
The Levain (Sourdough Starter): The Heart of Flavor and Rise
While this guide focuses on achieving a perfect Italian bread crust, many traditional and modern Italian bread recipes, like certain types of pane integrale or even some versions of ciabatta, utilize a sourdough starter (levain) or a pre-ferment like a biga or poolish (which use commercial yeast but are fermented longer). A sourdough starter provides both leavening and significant flavor complexity due to the wild yeasts and lactic acid bacteria it contains.
The acids produced by the starter contribute to flavor and also affect the dough's physical properties, potentially influencing crust crispness and color development through effects on enzymatic activity and sugar availability. Using a vigorous, well-maintained starter is key to achieving good oven spring, which is fundamental for a well-formed crust. Even if using commercial yeast, incorporating a pre-ferment like a biga (a stiff, Italian-style pre-ferment) adds depth of flavor and can improve crust quality compared to a straight dough method by promoting longer, slower fermentation.
Mastering the Dough for Optimal Crust Development
The quality of your dough before it even hits the oven is the most significant factor determining the final perfect Italian bread crust. Proper dough handling, from initial hydration to final shaping, sets the stage for successful crust development. Each stage of the dough-making process contributes to building strength, developing flavor, and creating the necessary tension that results in a beautiful, well-defined crust.
Paying attention to the dough's texture, temperature, and activity throughout the process is crucial. It's about learning to read your dough and understanding what it needs. Let's explore the key techniques involved in mastering the dough for that ultimate perfect Italian bread crust.
Hydration Levels: Balancing Moisture for Crispness and Open Crumb
Dough hydration, the ratio of water to flour by weight, is a critical factor influencing both crumb structure and crust. Higher hydration doughs (those with a greater percentage of water relative to flour, often above 70%) are typically stickier and more challenging to handle but can result in a more open, airy crumb and a thinner, crispier crust. Think of ciabatta, known for its very high hydration (often 80% or more) which contributes to its characteristic open crumb and delicate, crisp crust.
Lower hydration doughs (e.g., 60-65%) are easier to handle, resulting in a tighter crumb and often a thicker crust. While a thicker crust can be desirable in some rustic loaves, for a light, crackling perfect Italian bread crust, aiming for moderate to high hydration is often beneficial. The higher water content provides more moisture to turn into steam during baking, which is essential for good oven spring and preventing the crust from setting too early. Finding the right hydration for your specific Italian bread recipe and comfort level is key.
Autolyse: Enhancing Gluten Development and Dough Extensibility
Autolyse is a simple yet powerful technique where you mix just the flour and water from your recipe and let it rest for 20 minutes to an hour (or sometimes longer) before adding the salt and yeast/starter. During this resting period, the flour hydrates fully, and enzymatic activity begins to break down proteins, initiating gluten development without the need for mechanical kneading.
This process makes the dough significantly more extensible and easier to work with after the rest. It allows the gluten network to start forming in a relaxed state, leading to a more pliable dough that requires less kneading to reach optimal development. A well-developed, extensible gluten network is essential for allowing the dough to expand properly during oven spring, which is vital for achieving a thin, even perfect Italian bread crust that doesn't tear. Implementing an autolyse step can noticeably improve your crust results.
Bulk Fermentation: Flavor Development and Dough Strengthening
Bulk fermentation (or the first rise) is the period after mixing the ingredients and before shaping the dough. This is where the yeast (or starter) is most active, producing gases that make the dough rise, and where significant flavor development occurs through the production of organic acids and other compounds. Bulk fermentation also allows the gluten network to continue developing and strengthening through enzymatic action and occasional folding (like stretch-and-folds).
The duration and temperature of bulk fermentation are crucial. Too short, and the dough won't have developed enough strength or flavor; too long, and it might over-ferment, leading to a dense crumb and potentially a pale crust. During bulk fermentation, performing a few sets of stretch-and-folds (typically every 30-60 minutes for the first couple of hours) helps build tension and strength in the dough. This tension is vital for creating a strong structure that can achieve good oven spring, contributing directly to a beautiful perfect Italian bread crust.
Shaping Techniques: Creating Tension for a Well-Defined Crust
Proper shaping is the final step before the dough's final rise (proofing) and baking, and it plays a critical role in the final appearance and crust quality. The goal of shaping is to create surface tension on the dough while gently degassing it and forming it into the desired shape (e.g., a round boule, an oval batard, or a flat ciabatta). This surface tension is absolutely key for achieving a perfect Italian bread crust.
When the dough is shaped with good tension, the surface skin is stretched taut. During oven spring, this taut skin expands under pressure from the rising dough within. This controlled expansion, particularly when the surface is scored (cut), allows the crust to develop evenly and thinly, resulting in a crisp texture. Shaping techniques vary depending on the type of Italian bread, but all aim to create that essential surface tension. Practicing shaping builds muscle memory and significantly improves your crust results.
Baking Techniques for a Superior Sourdough Bread Crust
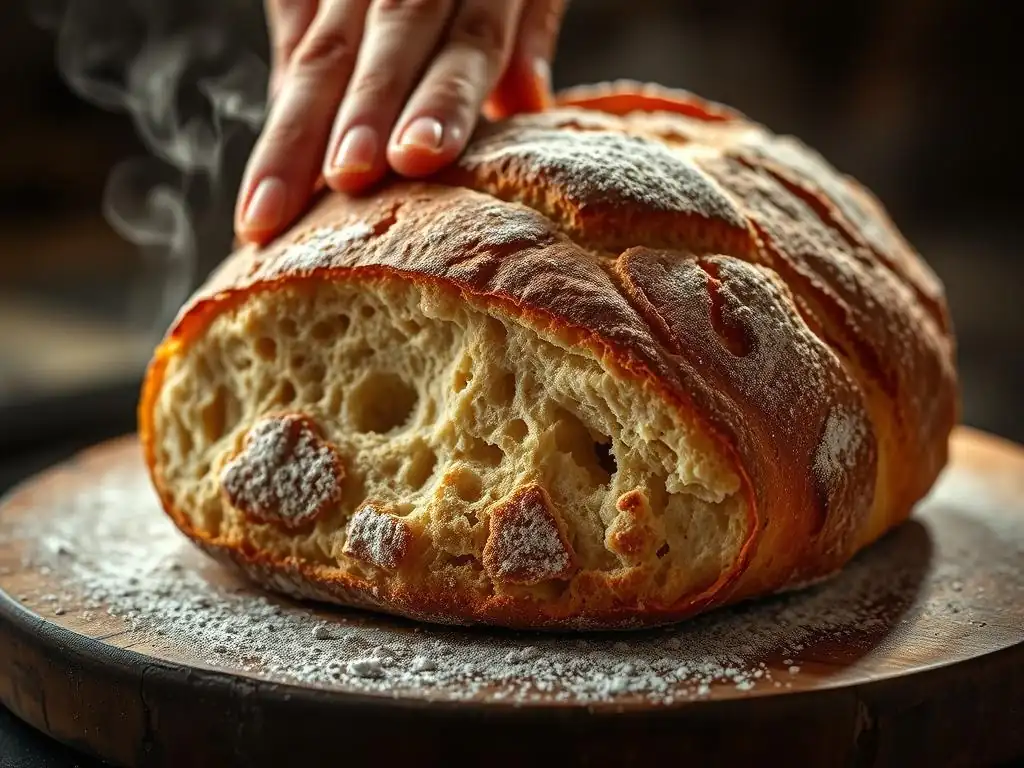
Once your dough is perfectly prepared and proofed, the baking process is where the magic truly happens for the crust. The environment inside the oven – specifically the temperature and the presence of steam – is paramount. These factors directly influence how the dough behaves in the first crucial minutes of baking, which determines the ultimate quality of your perfect Italian bread crust.
Getting these baking techniques right can transform a good loaf into a truly exceptional one. It's about creating the optimal conditions for the dough to expand fully and for the crust to develop that beautiful color and texture. Let's look at the key elements of the baking process.
Oven Temperature: High Heat for Initial Spring and Crust Formation
High initial oven temperature is essential for achieving good oven spring and setting the perfect Italian bread crust. When the dough enters a very hot oven (typically preheated to 230-260°C or 450-500°F), the rapid transfer of heat causes the gases within the dough to expand dramatically. This rapid expansion is oven spring. The high heat also quickly sets the outer layer of the dough, forming a skin.
If the oven temperature is too low, the dough expands more slowly, and the crust begins to set before maximum expansion is reached, resulting in a denser loaf and a less developed crust. Baking at high temperatures ensures maximum lift before the crust becomes too firm. After the initial intense heat period (often 15-20 minutes), the temperature is usually reduced to allow the inside of the bread to bake through without burning the crust, but the initial high heat is non-negotiable for that initial burst of oven spring and crust development.
Steam Injection: Creating a Moist Environment for Crust Expansion
Steam is arguably the most critical factor for achieving a thin, crisp, perfect Italian bread crust. In the first 10-20 minutes of baking, the presence of steam in the oven keeps the surface of the dough moist and pliable. This moisture prevents the crust from hardening too quickly, allowing the dough to expand fully during oven spring without cracking or restricting the rise.
As the loaf expands, the moist surface stretches thinly. Only after the dough has achieved its maximum volume and the steam dissipates does the crust begin to dry out and harden, allowing the Maillard reaction and caramelization to create color and crispness. Without sufficient steam, the crust sets too early, restricting oven spring and resulting in a thicker, tougher crust. Home bakers can create steam by placing a tray of hot water at the bottom of the oven, spraying the oven walls, or, most effectively, using a Dutch oven or baking vessel that traps the dough's own steam.
Baking Time: Achieving the Desired Color and Internal Temperature
Baking time is a balance between achieving the desired crust color and ensuring the interior of the bread is fully cooked. The total baking time for a loaf of Italian bread can range from 25 minutes for smaller loaves or flatbreads like focaccia to 45-60 minutes or more for larger, rustic loaves. The initial period at high heat with steam is crucial for crust development and oven spring, but the remaining time at a slightly lower temperature is necessary to cook the crumb through.
A perfect Italian bread crust should be deeply golden brown to reddish-brown, depending on the recipe and desired style. This color indicates that the Maillard reaction and caramelization have occurred sufficiently, contributing flavor and crispness. The bread is fully baked when its internal temperature reaches approximately 96-100°C (205-210°F). Baking until the correct internal temperature is reached ensures the crumb is set and prevents a gummy interior, while allowing the crust sufficient time to develop its final color and texture.
Utilizing a Dutch Oven or Baking Stone: Maximizing Crust Development
Using a Dutch oven or a preheated baking stone with added steam are two of the most effective methods for achieving a perfect Italian bread crust in a home oven. A Dutch oven acts like a miniature steam oven; when the lid is on for the first part of the bake, the moisture released by the dough is trapped inside, creating the ideal steamy environment for maximum oven spring and thin crust development. After 15-25 minutes, the lid is removed to allow the crust to dry out and brown.
A preheated baking stone or steel provides intense radiant heat from below, which helps contribute to a strong oven spring and a well-colored bottom crust. When using a stone, it's essential to create steam manually in the oven cavity (e.g., by pouring hot water into a preheated tray) to prevent the top crust from setting too early. Both methods effectively replicate aspects of a professional deck oven, leading to significantly improved crust quality compared to baking on a standard baking sheet in a dry oven.
Troubleshooting Common Sourdough Crust Problems
Even with the best intentions and techniques, baking can sometimes present challenges. When aiming for a perfect Italian bread crust, you might encounter issues like a crust that's too pale, too thick, gummy, or even burnt. Understanding the common causes behind these problems allows you to diagnose what went wrong and adjust your process for the next bake. Don't get discouraged; troubleshooting is a normal part of the baking journey!
Pinpointing the exact cause often involves reviewing your steps: checking oven temperature, steam levels, fermentation time, and dough hydration. Let's look at some frequent crust complaints and their likely culprits, helping you get back on track to achieving that perfect Italian bread crust.
Pale Crust: Insufficient Heat or Steam
A pale crust is often a sign that the Maillard reaction and caramelization haven't occurred sufficiently. The most common reasons for this are insufficient oven temperature, not enough baking time at high heat, or lack of sufficient steam in the initial phase of baking. If the oven isn't hot enough, or if the dough goes in before the oven is fully preheated (including your baking stone or Dutch oven), the crust won't reach the temperatures needed for proper browning.
Insufficient steam can also lead to a pale crust because it causes the crust to set too quickly, restricting expansion and potentially preventing the surface from reaching the optimal temperature for browning. Ensure your oven is fully preheated (allow 30-60 minutes after it signals it's reached temperature), use adequate steam methods (like a Dutch oven or steam tray), and consider baking for a few extra minutes if the color is still too light, keeping an eye on it to prevent burning.
Thick, Hard Crust: Over-Baking or Low Hydration
A crust that is excessively thick or hard can be caused by several factors. Over-baking is a common culprit; baking for too long at a high temperature can dry out the crust excessively, making it tough. Similarly, baking in a dry oven without sufficient steam in the initial phase will cause the crust to set too early and thicken.
Low dough hydration can also contribute to a thicker crust. Doughs with less water tend to form a denser structure, and the crust reflects this density. If you're consistently getting a thick, hard perfect Italian bread crust, try increasing your dough hydration slightly in future bakes (perhaps by 2-3%) and ensure you are providing adequate steam during the crucial first 15-20 minutes of baking. Also, check your oven temperature calibration – an oven running hotter than it indicates can lead to over-baking.
Gummy Crust: Under-Baking or Improper Cooling
While a gummy crumb is more common with under-baking, a gummy crust can sometimes occur, particularly if the loaf is moved or cut too soon after baking. The crust finishes developing and hardening as it cools on a wire rack. If it's placed on a solid surface, moisture can condense underneath, making the bottom crust soggy.
The primary cause of a gummy texture, however, is usually that the bread interior hasn't finished cooking, and residual moisture is migrating outwards. Ensure your bread reaches the target internal temperature of 96-100°C (205-210°F) before removing it from the oven. Always cool your Italian bread completely on a wire rack for at least 1-2 hours (depending on size) before slicing. This allows steam to escape and the internal structure and crust to set properly, ensuring a beautiful perfect Italian bread crust and a well-cooked interior.
Burnt Crust: Excessive Heat or Sugar Content
A burnt crust, especially on the bottom, is usually a result of excessive heat. This could mean your oven temperature is too high, your baking surface (stone or Dutch oven) is too hot, or the bread is baking for too long directly on a hot surface. If using a baking stone, ensure it's not placed too close to the top heating element.
Dough composition can also contribute to burning. Doughs with higher sugar content (like those containing malt syrup or honey, or enriched doughs) will brown and potentially burn faster due to the increased availability of reactants for caramelization and the Maillard reaction. If your recipe includes sugar and you're experiencing burning, you might need to reduce the baking temperature slightly after the initial steam phase or tent the loaf loosely with foil once it reaches your desired color to prevent further browning while the interior finishes cooking. Adjusting shelf position can also help.
Advanced Techniques for Crust Perfection
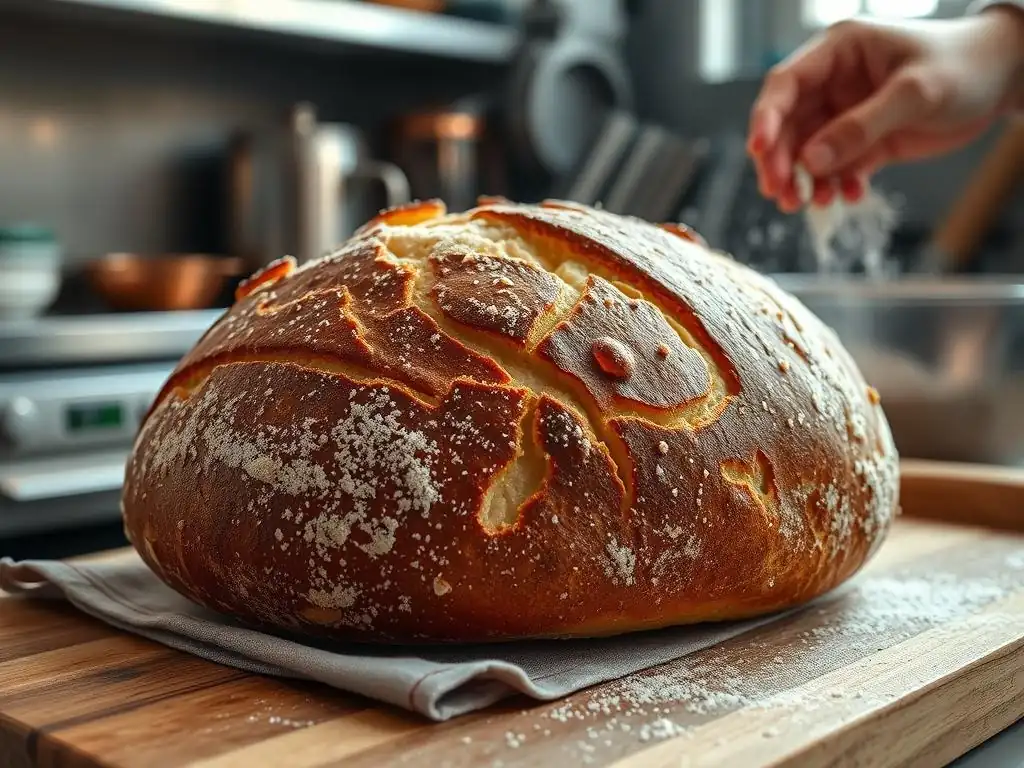
Once you've mastered the basics and are consistently achieving a good perfect Italian bread crust, you might want to explore techniques that can further enhance its appearance, texture, and flavor. These methods often involve manipulating the dough or baking environment in specific ways to achieve subtle but noticeable improvements.
These advanced techniques aren't strictly necessary for a good crust, but they can take your Italian bread from good to truly exceptional, adding layers of complexity and visual appeal. Let's look at a few ways to push your crust perfection even further.
Scoring Patterns: Controlling Expansion and Creating Visual Appeal
Scoring (or "lame-ing") involves making cuts on the surface of the dough just before it goes into the oven. These cuts serve a crucial technical purpose: they provide controlled points of weakness on the dough's surface, allowing the expanding gases during oven spring to escape predictably. Without scoring, the dough would burst randomly at its weakest point, resulting in an uneven shape and a less attractive crust.
Beyond functionality, scoring patterns are also an art form, allowing bakers to add their signature touch and enhance the visual appeal of the perfect Italian bread crust. Different patterns can influence the shape of the final loaf and how the crust opens up. A single bold cut on a batard, multiple parallel cuts, or intricate decorative patterns all guide the oven spring and contribute to the final look and texture of the crust's bloom. Mastering scoring takes practice but is rewarding.
Cold Proofing: Enhancing Flavor and Crust Complexity
Cold proofing, or retarding the final rise in the refrigerator (typically for 12-48 hours), is a technique widely used in artisan baking, including for many Italian bread styles. While its primary benefit is developing deeper, more complex flavors in the crumb due to the slow fermentation, it also has positive effects on the crust.
Cold dough is easier to score cleanly, which leads to better-controlled oven spring and crust development. The longer fermentation also slightly alters the dough's chemistry, which can subtly influence the Maillard reaction and caramelization during baking, potentially leading to a more nuanced perfect Italian bread crust color and flavor. Furthermore, the chilled surface can remain pliable slightly longer in the oven, contributing to better expansion before the crust sets.
Using Malt Syrup: Adding Color, Flavor, and Crispness
Malt syrup (like barley malt syrup) is a natural sweetener derived from sprouted grains. It contains enzymes that break down starches into sugars, and it also contains reducing sugars itself. Adding a small amount of malt syrup (often 1-2% of flour weight) to bread dough can significantly impact the perfect Italian bread crust.
The sugars in malt syrup provide more fuel for the Maillard reaction and caramelization, leading to darker, richer crust color even without over-baking. The enzymes can also help make sugars available for yeast and browning. Malt syrup contributes a subtle sweetness and malty flavor to the crust and can help achieve a thinner, crisper texture. It's a common addition in many professional bakeries for its positive effects on both crumb and perfect Italian bread crust quality.
Recipe: The Artisan Baker's Signature Sourdough with Perfect Crust
(As this section is meant to contain a specific recipe with ingredients, instructions, and visual aids, which cannot be fully provided in this text-only format, the content below will outline what would typically be included in this section of the article, tailored to an Italian bread recipe focusing on crust.)
This section would typically feature a detailed recipe for a classic Italian-style bread known for its excellent crust, perhaps a rustic loaf or a ciabatta. It would break down the process into clear, actionable steps suitable for the BakeWithEase audience.
Ingredients List and Detailed Instructions
This part would list all necessary ingredients with precise measurements (in grams for accuracy, plus possibly volume equivalents for convenience). It would specify the type of flour recommended, salt quantity, water temperature, and yeast or pre-ferment details. The instructions would cover mixing (potentially including an autolyse step), bulk fermentation with folding schedules, pre-shaping, resting, final shaping with emphasis on creating tension, and proofing times and conditions.
Step-by-Step Baking Guide with Visual Aids
This sub-section would focus specifically on the baking process to achieve that perfect Italian bread crust. It would detail oven preheating temperature and duration, how to introduce steam (e.g., using a Dutch oven or steam tray setup), the initial high-heat baking time, reducing the temperature, and the remaining baking time until the internal temperature is reached. If visual aids were possible, this is where photos or diagrams illustrating shaping, scoring, and the steam setup would be included to guide the reader visually.
Conclusion: Savoring Your Perfect Sourdough Bread Crust
Congratulations! By understanding the science, mastering your dough, and refining your baking techniques, you are well on your way to consistently achieving a perfect Italian bread crust. That moment when you slice into a loaf and hear that satisfying crackle is incredibly rewarding. Enjoy the fruits of your labor – a delicious bread with a crust that's a true testament to your skill and patience.
Remember that baking is a journey of continuous learning and experimentation. Don't be discouraged by imperfect results along the way. Each bake offers an opportunity to learn and improve. Keep practicing, pay attention to the details, and most importantly, have fun with the process. You've unlocked the secret to a perfect Italian bread crust, and now you can share that wonderful experience with friends and family. Happy baking!
Tips for Storing Sourdough to Preserve Crust Quality
Storing your beautiful Italian bread correctly is essential to maintain that perfect Italian bread crust for as long as possible. The enemy of a crisp crust is moisture. As the bread sits, moisture from the interior migrates to the crust, causing it to soften. To minimize this, store the bread at room temperature. Avoid refrigerating bread, as this actually causes it to stale faster.
The best way to store bread with a crisp crust is uncovered on a cutting board with the cut side down, or in a paper bag. Plastic bags or airtight containers will trap moisture and quickly turn that perfect Italian bread crust soft and chewy. If the crust does soften after a day, you can often revive some of its crispness by reheating the bread in a hot oven (around 180-200°C or 350-400°F) for 5-10 minutes.
Further Exploration: [Link to other Sourdough Baking Resources on The Artisan Baker]
(As per instructions, no links are allowed. This section title would typically lead to other relevant content on the BakeWithEase website.)
To continue your baking journey and explore more aspects of Italian baking traditions or other regional bread styles, we invite you to browse other articles and recipes available on BakeWithEase. Discover guides on making specific types of Italian breads like focaccia, ciabatta, or pane di casa, learn more about using different types of flour, or delve into the world of using preferments like biga and poolish. There's always more to learn and bake!
Frequently Asked Questions
How crucial is hydration in achieving a perfect Italian bread crust?
Hydration is extremely important. A higher hydration dough creates more steam during baking, leading to a thicker and crispier crust. This is a key element for Italian bread.
What type of flour is best for developing a desirable Italian bread crust?
Using high-protein bread flour is recommended. This type of flour helps develop more gluten, resulting in a stronger dough and a crust with a good chew.
Can I achieve a perfect Italian bread crust without a Dutch oven?
Yes, you can! While a Dutch oven helps trap steam, you can create a similar environment by using a baking stone and adding ice cubes to a hot pan in the oven to generate steam.
What role does oven temperature play in crust formation?
A high oven temperature is vital for a good crust. The initial high heat allows for rapid expansion and quick crust formation, preventing the bread from drying out before the crust sets.
How important is the proofing process in achieving the desired crust?
Proper proofing is crucial. Over-proofing can lead to a weak crust, while under-proofing can result in a dense bread. You want the dough to be sufficiently risen but still have some spring.
Final Reflection: The Enduring Allure of the Perfect Crust
The pursuit of the perfect Italian bread crust is more than just a culinary quest; it's a reflection of our deep-seated desire for authenticity and connection. The techniques detailed in this article – from the precise hydration levels to the crucial final steam burst – aren't merely recipes; they are pathways to understanding the artistry behind this seemingly simple food. Mastering the crust is mastering a piece of history, a tradition passed down through generations.
The impact of a perfectly crafted crust extends far beyond the immediate sensory experience. It speaks to a cultural heritage, a connection to the simple pleasures of life, and the satisfaction of creating something beautiful from humble ingredients. Bread is the staff of life,
a saying as old as time itself, perfectly encapsulates the significance of this seemingly simple food. The crust, its golden-brown sheen and satisfying crackle, is the visual manifestation of that life-giving essence. It's a reminder of the importance of patience, precision, and the rewarding feeling of accomplishment that comes from mastering a craft.
Now, I invite you to take what you've learned and embark on your own journey to crust perfection. Don't be afraid to experiment, to adjust the techniques to your own style, and to savor the process as much as the final product. The perfect crust isn't just a destination; it's a journey of discovery, a testament to your dedication, and a delicious reward for your efforts. The aroma alone, as your bread emerges from the oven, is a promise of the satisfaction that awaits. Go forth, and bake!
Unleash Your Inner Pizzaiolo: Master the Perfect Crust!
Thanks for joining us on this delicious journey into the world of perfect Italian bread crusts! We hope you gained valuable insights and newfound confidence in your baking abilities. Now it's time to put your knowledge into action.
Here's what you can do next:
- Bake your masterpiece! Try out the techniques we've shared and create your own perfect crust. Don't be afraid to experiment with different flours and hydration levels.
- Share your creations! Post a picture of your perfectly crusted bread on social media and tag us – we'd love to see your results!
- Consider experimenting with different toppings and recipes to expand your culinary creativity. Explore the endless possibilities of this classic base.
Ready to transform your baking game? What unique ingredient will you experiment with in your next crust?