
Shortbread Fingers, Rounds, or Wedges? Bake Your Favorite Shape

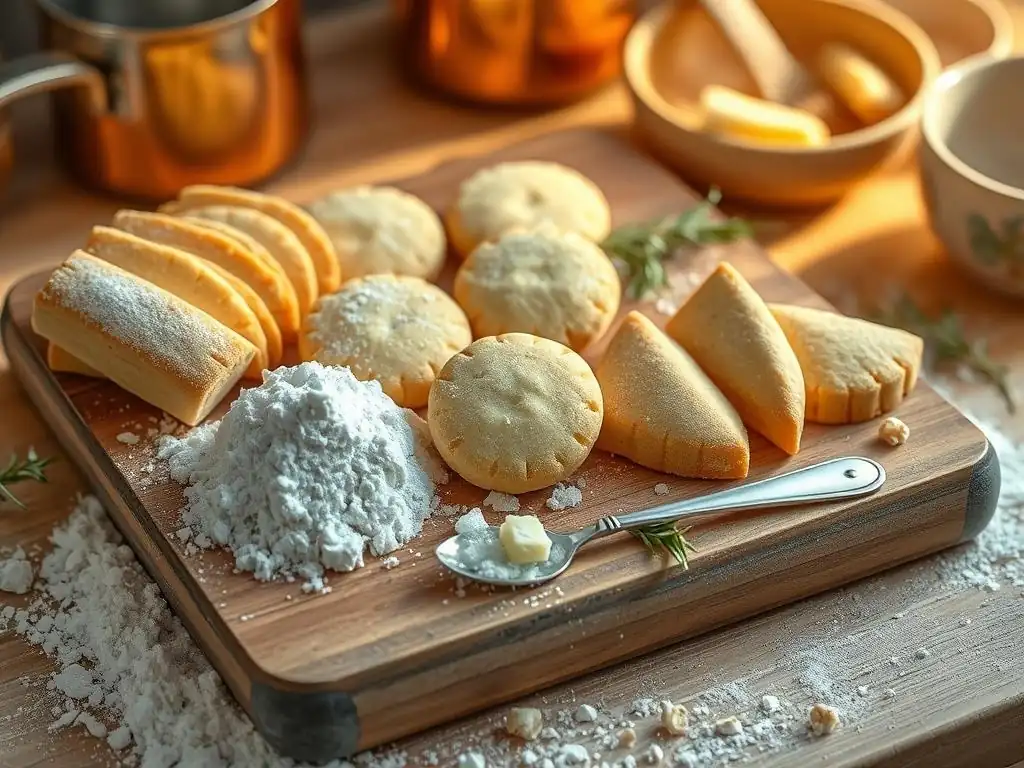
Welcome to BakeWithEase, where creating delicious treats is simpler than you think! Ever wondered how to transform a single easy shortbread recipe into a delightful array of flavors and shapes? Discover the secrets to baking perfect shortbread fingers, rounds, or wedges, and unlock a world of regional baking traditions. Intrigued? Let's explore the buttery goodness together...
- BakeWithEase Presents: Mastering Shortbread Shapes
- Understanding the Classic Shortbread Recipe
- Exploring Easy Shortbread Recipe Variations: Shape Matters!
- Choosing Your Shortbread Shape: Factors to Consider
- Tips for Baking the Perfect Shortbread, Regardless of Shape
- Beyond the Basics: Adding Flavor to Your Shortbread Shapes
- Troubleshooting Common Shortbread Baking Problems
- Showcasing Your Shortbread Creations
-
Frequently Asked Questions
- What makes this shortbread recipe considered "easy"?
- Can I easily adapt this shortbread recipe for different flavors?
- What are the main differences between shortbread fingers, rounds, and wedges?
- How do I ensure my shortbread has that signature "crumbly" texture?
- Where can I find the step-by-step instructions for this shortbread recipe?
- Final Reflection: The Enduring Allure of a Simple Shortbread
- Unleash Your Inner Baker: Shape Your Shortbread Success!
BakeWithEase Presents: Mastering Shortbread Shapes
Welcome to BakeWithEase, where we believe that delicious baking should be accessible and fun for everyone! Today, we're diving into the wonderful world of shortbread, a beloved classic known for its buttery richness and delightful crumbly texture. While the basic recipe is wonderfully simple, one of the easiest ways to introduce variations is through shape. Whether you prefer the classic fingers, elegant rounds, or rustic wedges, each shape offers a slightly different experience and aesthetic.
Exploring these easy shortbread recipe variations is not just about presentation; the shape can subtly influence baking time, texture, and even how you enjoy each bite. This guide will walk you through the fundamentals of making perfect shortbread dough and then show you exactly how to transform it into these three popular shapes, offering tips for achieving the best results every time. Get ready to bake your favorite shape and discover the simple joys of this timeless treat!
Understanding the Classic Shortbread Recipe
The Foundation of All Shortbread: Ingredients and Technique
The beauty of shortbread lies in its simplicity, requiring just a few core ingredients to create something truly magical. At its heart, classic shortbread relies on a specific ratio of butter, sugar, and flour. A widely accepted traditional ratio is typically 1 part sugar, 2 parts butter, and 3 parts flour by weight. This generous proportion of butter is what gives shortbread its characteristic melt-in-your-mouth texture and rich flavor. Using high-quality ingredients, especially good butter, is paramount to achieving the best results, as there are so few components.
Beyond the ingredients, the technique used to bring them together is crucial. Unlike many cookie doughs, shortbread is often mixed minimally to avoid developing gluten, which would result in a tougher texture. The goal is a tender, crumbly biscuit.
Creaming the butter and sugar until just combined, then gently incorporating the flour until a cohesive dough forms is key. Overworking the dough leads to a less desirable, hard texture. Chilling the dough before shaping and baking is also a critical step, helping to firm up the butter and prevent excessive spreading in the oven, ensuring your chosen shape holds beautifully.
Key Ingredients for a Perfect Shortbread
Achieving that signature sandy, buttery texture in shortbread hinges on the careful selection and handling of just a few ingredients.
- Butter: Unsalted butter is the standard, allowing you to control the salt level. It's essential that the butter is at room temperature but not melted. This allows it to cream properly with the sugar and distribute evenly throughout the flour. The high fat content (typically around 80-82%) is the source of the rich flavor and tender crumb. Using a high-quality butter with good flavor makes a significant difference.
- Sugar: Caster sugar (superfine sugar) or confectioners' (icing) sugar is often preferred over granulated sugar because their finer textures dissolve more easily into the butter, resulting in a smoother dough and preventing a gritty texture in the baked shortbread. Granulated sugar can be used, but it might give a slightly coarser crumb. The amount of sugar is relatively low compared to other cookies, allowing the butter flavor to shine.
- Flour: Plain all-purpose flour is commonly used. Some traditional recipes call for a portion of rice flour or cornstarch (cornflour in the UK) to replace some of the all-purpose flour. For instance, replacing about 1/4 of the all-purpose flour with rice flour or cornstarch can enhance the crumbly, melt-away texture. Ensure the flour is accurately measured, preferably by weight, as too much flour can result in a dry, tough shortbread.
Mastering the Shortbread Dough: A Step-by-Step Guide
Creating the perfect shortbread dough is straightforward, but paying attention to detail ensures success. Follow these steps for a reliable base dough that's ready for your easy shortbread recipe variations.
- Step 1: Prepare the Ingredients: Measure your ingredients accurately. Ensure your butter is softened but still cool to the touch, around 65-70°F (18-21°C).
- Step 2: Cream Butter and Sugar: In a mixing bowl, cream the softened butter and sugar together using a wooden spoon, electric mixer, or stand mixer fitted with the paddle attachment. Mix just until they are combined and slightly lighter in color and texture, about 2-3 minutes. Do not over-cream; you're not trying to incorporate a lot of air, unlike in a cake batter.
- Step 3: Add Flour: Gradually add the flour (and any rice flour or cornstarch if using) to the butter mixture. Mix on low speed or by hand until the ingredients just come together and form a dough. The dough will likely look crumbly at first.
- Step 4: Bring the Dough Together: Turn the dough out onto a clean surface. Gently bring it together using your hands, pressing it into a cohesive mass. Avoid kneading. The warmth of your hands will help it come together.
- Step 5: Chill the Dough: Shape the dough into a disc or log, wrap it tightly in plastic wrap, and refrigerate for at least 30 minutes. Chilling is vital; it firms the butter, making the dough easier to handle and preventing excessive spread during baking, which is key for maintaining your chosen shape.
**Basic Shortbread Ratio (by weight):**
- Sugar: 1 part
- Butter: 2 parts
- Flour: 3 parts
Exploring Easy Shortbread Recipe Variations: Shape Matters!
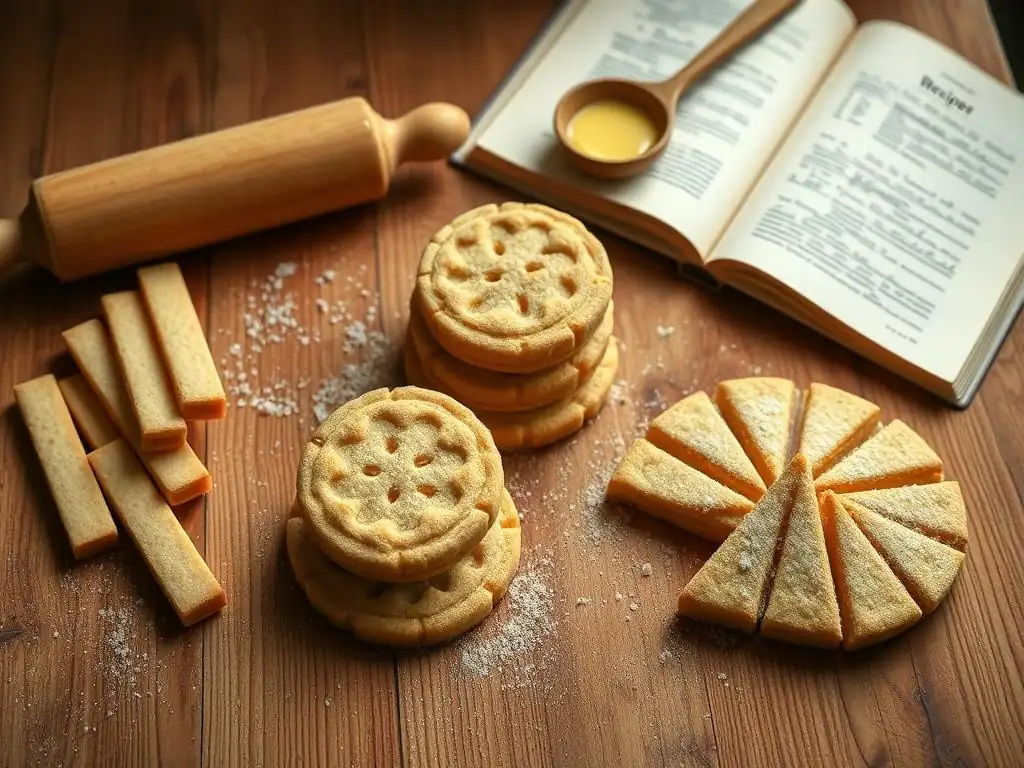
One of the simplest yet most effective ways to add flair and variety to your baking is through easy shortbread recipe variations focused on shape. Each classic shape – fingers, rounds, and wedges – offers a distinct look and feel, subtly influencing the baking process and the final eating experience. Let's explore these popular options.
Shortbread Fingers: The Traditional and Convenient Choice
Shortbread fingers are perhaps the most iconic shape, instantly recognizable and wonderfully practical. Their long, slender form makes them easy to hold, dunk (perhaps in tea! ), and package. This shape is achieved by pressing or rolling the dough into a rectangle and then simply cutting it into uniform strips before baking. It's a straightforward method that requires minimal fuss or special equipment, embodying the "easy" in easy shortbread recipe variations.
Traditionally, shortbread fingers are baked in a rectangular pan, often specifically designed for this purpose, which helps maintain their straight edges. However, you can easily bake them on a standard baking sheet. The uniform thickness and size of fingers lead to consistent baking, ensuring each piece is perfectly done. Their shape also maximizes the surface area relative to volume, contributing to a delightful crispness, especially around the edges, while retaining a tender middle.
How to Cut Perfect Shortbread Fingers
Cutting uniform shortbread fingers is simple and ensures even baking. After chilling your dough, you have a couple of options depending on your preferred method.
- Method 1 (Pressing): Press the chilled dough evenly into a rectangular pan (like an 8x8 inch or 9x13 inch pan, depending on the batch size and desired thickness) that has been lightly greased or lined with parchment paper. Aim for a consistent thickness, typically around 1/2 to 3/4 inch (1.2 to 2 cm). Score the dough before baking using a knife or a special shortbread scoring tool. Score lines should be about 1 inch (2.5 cm) apart for the width and the length of the pan, creating the finger shapes. You can pierce the top of each finger with a fork (docking) to prevent puffing and encourage an even bake.
- Method 2 (Rolling): Roll the chilled dough out on a lightly floured surface to a uniform thickness of 1/2 to 3/4 inch (1.2 to 2 cm) into a rough rectangle. Use a sharp knife or a pizza cutter to trim the edges to create a neat rectangle. Then, cut the rectangle into strips approximately 1 inch (2.5 cm) wide and 3-4 inches (7.5-10 cm) long. Carefully transfer the cut fingers to a parchment-lined baking sheet, leaving about 1/2 inch between them. Dock each finger with a fork.
Baking Time for Shortbread Fingers: Tips and Tricks
Baking time for shortbread fingers is relatively consistent due to their uniform shape and thickness. Typically, they bake in a moderate oven, often around 325°F (160°C) to 350°F (175°C), for about 15-25 minutes. The exact time depends on the oven calibration, the thickness of the fingers, and your desired level of doneness.
You'll know shortbread fingers are ready when they appear pale golden around the edges. They should still look relatively pale in the center. Avoid overbaking, as this can lead to a hard, dry texture instead of the desired tender, sandy crumb. If baking in a pan, they are done when the edges pull slightly away from the sides. For fingers baked on a sheet, they should be firm to the touch but not deeply browned. Allowing them to cool completely on the baking sheet helps them firm up before handling.
Shortbread Rounds: Elegance in Every Bite
Shortbread rounds, sometimes called Petticoat Tails when cut into wedges from a large round, offer a classic, elegant presentation. Baking shortbread as a large round disc is a traditional method, particularly associated with the "Petticoat Tails" style, where the large round is scored into triangles before baking. However, smaller individual rounds cut with a cookie cutter are also very popular and allow for easy shortbread recipe variations in size.
This shape is often associated with a slightly thicker shortbread than fingers, though thickness can vary. The round shape results in a different surface-area-to-volume ratio compared to fingers, which can subtly affect the texture, sometimes yielding a slightly softer center while still having a crisp edge. They are perfect for serving on a plate or packaging as a thoughtful gift.
Creating Uniform Shortbread Rounds: Using Cutters and Molds
Creating perfectly uniform shortbread rounds is straightforward and can be done in a few ways.
- Method 1 (Cookie Cutters): The most common method for individual rounds is using cookie cutters. After chilling your dough, roll it out evenly on a lightly floured surface to your desired thickness, typically 1/2 to 3/4 inch (1.2 to 2 cm). Use a round cookie cutter to cut out the shapes. Carefully transfer the rounds to a parchment-lined baking sheet, leaving about 1 inch between them. You can re-roll the scraps, but handle them minimally. Dock each round with a fork.
- Method 2 (Molds): Traditional shortbread molds, often round with decorative patterns, can also be used. Press the dough firmly and evenly into the mold. Trim any excess dough from the edges. Some molds are designed to be baked directly in the mold, while others require inverting the dough onto a baking sheet. Follow the specific instructions for your mold. Docking might not be necessary if the mold has a pattern.
- Method 3 (Large Round): For a large traditional round (Petticoat Tails style), press or roll the dough into a disc about 8-10 inches (20-25 cm) in diameter and 3/4 inch (2 cm) thick. Place it on a parchment-lined baking sheet. Score the disc into 6, 8, or 12 wedges using a knife, cutting almost all the way through but leaving them attached in the center. Dock the entire surface or each wedge with a fork.
Achieving a Golden Brown Hue on Shortbread Rounds
Baking time for shortbread rounds will vary based on their size and thickness. Individual rounds (2-3 inches diameter, 1/2 inch thick) typically bake at 325-350°F (160-175°C) for 15-20 minutes. A large round (8-10 inches diameter, 3/4 inch thick) will take longer, perhaps 30-40 minutes at a slightly lower temperature, say 300-325°F (150-160°C), to ensure the center bakes through without the edges burning.
Shortbread rounds are done when the edges are lightly golden and the center looks pale and set. The surface may still look slightly soft but will firm up as it cools. For a large round, the scoring lines might start to deepen in color.
If you want a more uniformly pale shortbread, you can cover the edges loosely with foil partway through baking if they are browning too quickly. Allow rounds to cool on the baking sheet for at least 10-15 minutes before attempting to move them; large rounds should cool almost completely on the sheet before breaking them apart along the scored lines.
Shortbread Wedges: Rustic Charm and Easy Portions
Shortbread wedges, often cut from a large round disc either before or after baking, offer a charmingly rustic look. This shape is inherently linked to the traditional "Petticoat Tails" presentation but can also be achieved by simply cutting a round of pressed or rolled dough into triangles. It's an incredibly easy method, requiring just a knife, and is perfect for showcasing the simplicity of an easy shortbread recipe.
Wedges are convenient for serving, providing individual portions that are easy to pick up and enjoy. When cut from a large round, the outer edges of the wedges are typically crispier, while the inner point might be slightly softer, offering a pleasant variation in texture within a single piece. This shape is less prone to breaking than long fingers and presents beautifully fanned out on a plate.
Cutting Shortbread into Wedges: A Simple Method
Cutting shortbread dough into wedges is perhaps the easiest shaping method. After chilling your dough, you'll form it into a round disc.
- Method 1 (Before Baking): This is the most common method for wedges cut from a large round. Press or roll your chilled dough into a disc about 8-10 inches (20-25 cm) in diameter and 3/4 inch (2 cm) thick directly onto a parchment-lined baking sheet. Using a sharp knife or pizza cutter, score the disc into equal wedges. Start by cutting it in half, then quarter, then eighths, and so on, depending on how many wedges you want (6, 8, 10, or 12 are common). Cut almost all the way through the dough, leaving about 1/4 inch (0.5 cm) attached in the center so the disc stays together during baking. Dock the surface with a fork.
- Method 2 (After Baking): For a crisper edge on all sides, you can bake the entire disc without scoring. Once baked and still warm (but not hot), transfer the round to a cutting board and use a sharp knife to cut it into wedges. Be careful, as warm shortbread can be crumbly. Allowing it to cool slightly first can help.
Serving Shortbread Wedges: Presentation Ideas
Shortbread wedges are inherently elegant and lend themselves well to various serving presentations. Their triangular shape makes them easy to arrange attractively.
- Classic Fan: The most traditional way to serve wedges is to arrange them in a fanned circle on a round plate, recreating the original disc shape. This showcases the scored pattern (if cut before baking) and looks very inviting.
- Stacked: For a more modern look, you can stack a few wedges neatly on a small plate alongside a cup of tea or coffee.
- Gift Packaging: Wedges are also great for gifting. Stack them in small cellophane bags tied with a ribbon or arrange them in a decorative tin. The sturdy shape travels well.
- Accompaniments: Serve shortbread wedges simply on their own, or pair them with fresh berries, a dollop of whipped cream, or a drizzle of chocolate sauce for a more decadent treat. Their buttery flavor complements both fruity and rich additions beautifully.
Choosing Your Shortbread Shape: Factors to Consider
Deciding whether to bake shortbread fingers, rounds, or wedges goes beyond mere aesthetics. The shape you choose can influence the baking process, the final texture, and how the shortbread is best enjoyed. Considering these factors will help you select the perfect shape for your easy shortbread recipe variations.
Baking Time Adjustments for Different Shortbread Shapes
The shape of your shortbread directly impacts its surface area and thickness, which in turn affects how quickly and evenly it bakes.
- Fingers: Being relatively thin and having a high surface area (especially if cut individually), fingers tend to bake the fastest, usually within 15-25 minutes. Their uniform size means they are likely to be done at the same time.
- Individual Rounds: Similar to fingers, individual rounds bake fairly quickly, typically 15-20 minutes, especially if they are not too thick. The baking time will depend on the diameter and thickness.
- Large Round/Wedges: Baking a large, thick disc (to be cut into wedges) takes the longest, often 30-40 minutes or more, especially at a lower temperature. The heat needs to penetrate to the center of the disc. Cutting into wedges after baking might result in slightly shorter overall baking time for the disc compared to scoring deeply before baking.
It's always wise to start checking for doneness at the lower end of the suggested time range, regardless of shape, as oven temperatures can vary.
Texture Variations: How Shape Affects the Crumb
While the ingredients and technique are the primary drivers of shortbread texture, the shape can introduce subtle variations.
- Fingers: Fingers, particularly if cut individually before baking, have more exposed edges that crisp up beautifully in the oven, offering a higher ratio of crisp edge to tender center.
- Individual Rounds: Rounds also develop crisp edges, but their circular shape means the ratio of edge to center is different from fingers. If baked thicker, the center will be softer.
- Wedges: When cut from a large round baked disc, the outer, curved edge of the wedge will be crispier than the inner point that was closer to the center of the original round. This provides a lovely textural contrast within a single piece. Scoring before baking can lead to a slightly more uniform texture across the wedge as the heat penetrates the score lines.
Ultimately, all shapes should aim for that classic sandy, crumbly, buttery texture, but these minor differences can enhance the eating experience.
Presentation and Serving: Matching the Shape to the Occasion
The shape of your shortbread is a key part of its presentation and can be chosen to suit the occasion or how you plan to serve it.
- Fingers: Ideal for dunking in tea or coffee. Their shape makes them easy to hold. They pack well for lunchboxes or picnics. They are a classic choice for a casual tea time or everyday treat.
- Rounds: Small individual rounds are perfect for serving alongside desserts, as part of a cookie platter, or packaged as small gifts. A large, decorative round is a beautiful centerpiece for a tea party or special gathering, intended to be broken or cut into wedges.
- Wedges: Particularly suited for serving from a central plate at a gathering. The rustic charm of wedges cut from a large round feels generous and traditional. They are easy to share and enjoy.
Choosing the shape is one of the fun aspects of exploring easy shortbread recipe variations, allowing you to tailor your bake to your needs and preferences.
Tips for Baking the Perfect Shortbread, Regardless of Shape
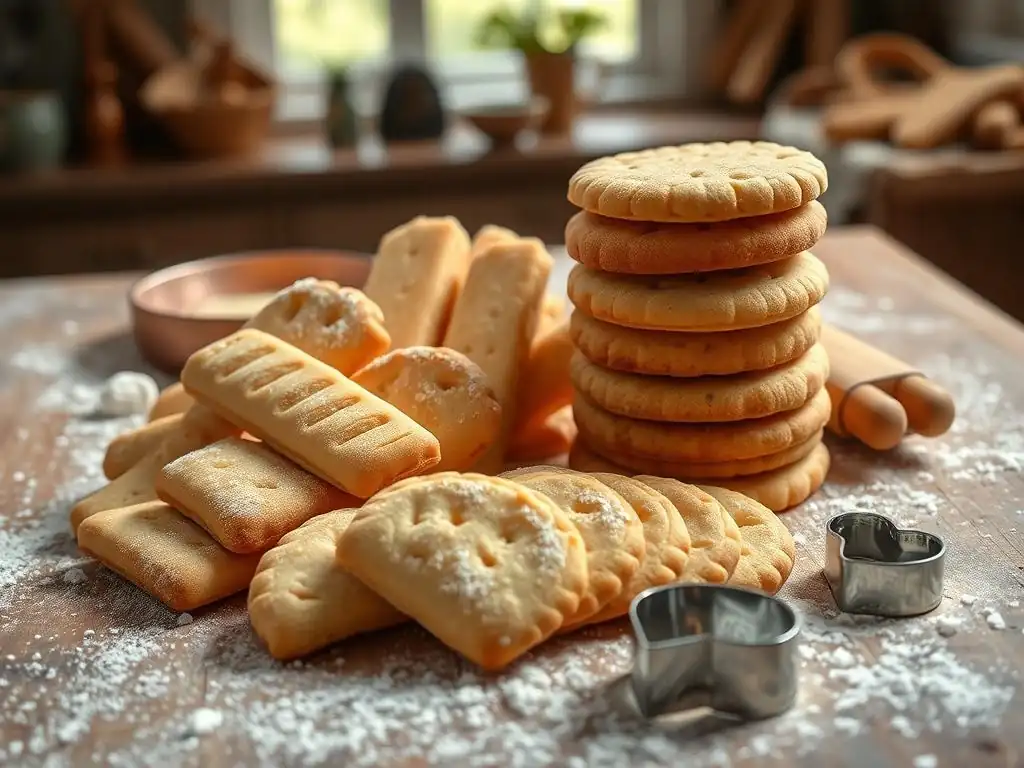
While shaping offers easy shortbread recipe variations, the core principles of achieving perfect shortbread remain the same. Here are some essential tips to ensure your shortbread is always wonderfully buttery, tender, and crumbly, no matter the shape.
Preventing Cracking and Crumbling in Your Shortbread
Shortbread is meant to be crumbly, but excessive cracking before or during baking can be frustrating.
- Proper Dough Consistency: The dough should just come together; it shouldn't be dry or overly wet. If it's too dry after mixing, a tiny splash of milk or cream (just a teaspoon at a time) might help it cohere, but be cautious.
- Chill Thoroughly: Chilling the dough is crucial. Cold dough is less likely to crack when handled and holds its shape better in the oven. Chill for at least 30 minutes, but longer (up to an hour or more) is often beneficial, especially if rolling or cutting shapes.
- Handle Gently: Avoid overworking the dough when bringing it together or rolling it out. Excessive handling can develop gluten and make the dough less pliable and more prone to cracking.
- Bake at the Right Temperature: Baking at too high a temperature can cause the shortbread to bake too quickly on the outside before the inside is ready, leading to cracks. A moderate oven (300-350°F or 150-175°C) is best.
Achieving the Ideal Shortbread Texture: Sandy and Buttery
The signature texture of shortbread is sandy (or 'short') and melt-in-your-mouth, a direct result of its high butter content and minimal gluten development.
- High Butter Ratio: Stick to the classic high butter ratio (e.g., 1:2:3 sugar:butter:flour by weight). This is the foundation of the texture.
- Use Softened, Not Melted, Butter: Creaming softened butter with sugar incorporates just enough air for lift without developing too much structure. Melted butter would result in a greasy, flat cookie.
- Minimal Mixing: Once the flour is added, mix only until the dough just comes together. Stop as soon as there are no dry streaks of flour. Overmixing develops gluten, leading to a tough texture.
- Consider Rice Flour or Cornstarch: As mentioned earlier, replacing a small portion of the all-purpose flour (say, 1/4 cup per 1.5 cups total flour) with rice flour or cornstarch can inhibit gluten development further, resulting in an even more tender, crumbly texture.
- Bake Until Just Done: Don't overbake! Shortbread should remain relatively pale. Overbaking dries it out and makes it hard rather than sandy.
Storing Your Shortbread: Keeping It Fresh and Delicious
Proper storage is key to maintaining the crispness and buttery flavor of your baked shortbread, preserving your easy shortbread recipe variations for later enjoyment.
- Cool Completely: Ensure the shortbread is completely cool before storing. Storing warm shortbread will create condensation, making it soft and potentially soggy.
- Airtight Container: Store baked shortbread in an airtight container at room temperature. A cookie tin or plastic container with a tight-fitting lid works well.
- Separate Layers: If stacking multiple layers of shortbread, especially if they are delicate or have decorations, place parchment paper between the layers to prevent them from sticking together or breaking.
- Avoid Refrigeration: Refrigerating shortbread is generally not recommended as it can introduce moisture and dull the flavor.
- Shelf Life: Properly stored, shortbread will keep well at room temperature for 1-2 weeks. It can also be frozen for longer storage (see below).
**Task List: Storing Baked Shortbread**

*   [ ] Ensure shortbread is completely cool.
*   [ ] Place in an airtight container.
*   [ ] Use parchment paper between layers if needed.
*   [ ] Store at room temperature.
*   [ ] Avoid refrigeration.
Beyond the Basics: Adding Flavor to Your Shortbread Shapes
Once you've mastered the basic dough and different shapes, you can explore exciting easy shortbread recipe variations by adding flavorings. These simple additions can transform your classic shortbread into something new and delightful, perfectly complementing any shape you choose to bake.
Infusing Shortbread with Citrus Zest
Adding citrus zest is one of the easiest and most effective ways to brighten up the rich, buttery flavor of shortbread. Lemon, orange, or even lime zest works beautifully.
To infuse the flavor, zest the citrus fruit and add the finely grated zest to the sugar before creaming it with the butter. Rubbing the zest into the sugar with your fingertips helps release the oils and distribute the flavor evenly. A good starting point is the zest of one medium lemon or orange for a standard batch using about 1.5 cups (180g) of flour.
The citrus oils mingle with the sugar and butter during the creaming process, ensuring the vibrant flavor is present throughout the shortbread. This simple variation adds a refreshing counterpoint to the richness, making it a popular choice.
Adding Chocolate Chips or Dried Fruit to Your Shortbread
Adding mix-ins like chocolate chips or dried fruit is a classic way to create easy shortbread recipe variations with added texture and flavor.
Mini chocolate chips work well as they distribute evenly and don't add too much bulk. About 1/2 cup (approx. 80g) of mini chips per standard batch is usually sufficient. For dried fruit, finely chopped cranberries, currants, or apricots are excellent choices. Aim for about 1/4 to 1/2 cup (approx.
40-80g) of chopped fruit. Fold the mix-ins gently into the dough after the flour has been incorporated and the dough is just coming together. Be careful not to overmix once the additions are in. This ensures they are distributed but the dough isn't overworked. These additions provide bursts of sweetness and chewiness that contrast nicely with the tender shortbread crumb.
Creating a Lavender-Infused Shortbread: A Unique Twist
For a more sophisticated and unique easy shortbread recipe variation, consider infusing your shortbread with culinary lavender. The subtle floral notes pair surprisingly well with butter.
Use only culinary-grade lavender, which is grown specifically for cooking and is free from pesticides. Start with a small amount, as the flavor can be potent. About 1 to 1.5 teaspoons of dried culinary lavender, finely chopped or ground slightly, is a good amount for a standard batch.
Steep the lavender in the melted butter for about 10-15 minutes before allowing the butter to cool and solidify again, or add the finely chopped lavender directly to the sugar and rub them together before creaming with the butter, similar to the citrus zest method. Strain the butter if you steeped it, or proceed with creaming if you used the sugar method. The lavender adds an intriguing aroma and a delicate, slightly floral taste that elevates the simple shortbread to something truly special.
> Experimenting with flavors is a fun way to personalize your easy shortbread recipe variations! Try adding a pinch of salt to enhance the sweetness, or perhaps some finely chopped nuts for crunch.
Troubleshooting Common Shortbread Baking Problems
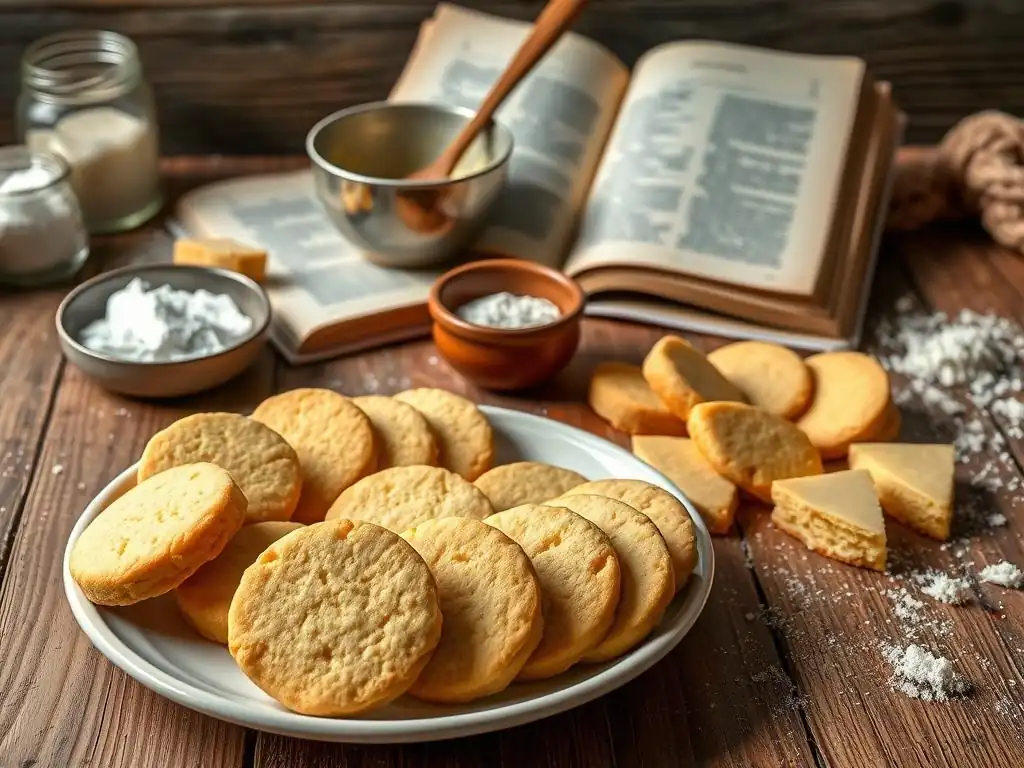
Even with a simple recipe, sometimes things don't go exactly as planned. Understanding common issues and how to fix or prevent them ensures your easy shortbread recipe variations turn out perfectly every time.
My Shortbread is Too Dry: Solutions and Prevention
Shortbread should be tender and crumbly, but not dry or hard. If your shortbread turned out too dry, several factors might be at play.
- Too Much Flour: The most common culprit is adding too much flour. Flour measurements, especially by volume (cups), can be inconsistent. Weighing your flour is the most accurate method. For instance, 1 cup of all-purpose flour typically weighs around 120-125 grams. If you used too much, the fat content isn't sufficient to coat all the flour particles properly, resulting in dryness.
- Overmixing: Overmixing after adding the flour can develop gluten, leading to a tougher, drier texture.
- Overbaking: Baking the shortbread for too long or at too high a temperature will dry it out. Shortbread should remain relatively pale.
Prevention: Weigh your ingredients, especially flour. Mix the dough just until it comes together. Bake at the recommended temperature and check for doneness at the minimum time, looking for pale golden edges, not deep brown color.
Solution (for the current batch): Unfortunately, once baked dry, it's hard to fully rescue the texture. You can try serving it with something moist, like jam or a fruit compote, or even crumble it over ice cream. For future batches, adjust your method based on the prevention tips.
My Shortbread is Too Hard: Adjusting the Recipe and Technique
Hard shortbread is often a sign that the dough was overworked or the gluten developed too much.
- Overmixing: This is the primary reason for hard shortbread. Vigorously mixing after the flour is added causes gluten strands to form, making the shortbread tough like a cookie instead of tender like a biscuit.
- Not Enough Butter: While less common if you follow a standard recipe, a ratio with too little butter relative to flour will result in a less 'short' (crumbly) and harder texture.
- Using Cold Butter: If you didn't use softened butter and tried to cream cold butter with sugar, it wouldn't emulsify properly, leading to an inconsistent dough and potentially a harder result.
Prevention: Use softened butter. Mix the dough gently and stop as soon as the flour is incorporated. Kneading is unnecessary and detrimental to shortbread dough.
Solution (for the current batch): Like dry shortbread, hard shortbread is difficult to fix post-baking. You might break it into pieces and use it as a base for a trifle or cheesecake. For future batches, focus on gentle mixing.
My Shortbread Spread Too Much: Tips for Controlling Spread
Excessive spreading can ruin the shape of your easy shortbread recipe variations.
- Insufficient Chilling: This is the most common cause. If the butter in the dough is too warm when it goes into the oven, it melts too quickly before the flour structure has a chance to set, causing the shortbread to spread outwards.
- Too Much Butter or Sugar: While a high butter content is key, an excessive amount, or too much sugar, can lead to increased spread. Stick to tested ratios.
- Over-greased Pan: If you heavily grease your baking sheet, it can act as a lubricant, causing the dough to spread more. Using parchment paper is usually sufficient and helps prevent sticking without encouraging spread.
- Warm Kitchen: Working in a very warm kitchen can cause the dough to warm up quickly, even after chilling.
Prevention: Always chill your dough thoroughly, ideally for at least 30-60 minutes, until it's firm. Ensure your butter is softened, not melted, when you start. Use parchment paper instead of excessive grease on your baking sheets. Work quickly with the dough once it's out of the fridge.
Showcasing Your Shortbread Creations
Once your easy shortbread recipe variations are baked, cooled, and perfected, the final step is sharing them! Whether for gifting, a party, or simply enjoying at home, presentation makes the experience even sweeter.
Beautifully presented shortbread makes a wonderful homemade gift or a lovely addition to any gathering.
- Gifting:
- Stacked & Tied: Stack fingers or rounds neatly and tie them with kitchen twine or a festive ribbon.
- Decorative Tins: Arrange shortbread in pretty cookie tins or boxes. Separate layers with parchment or tissue paper.
- Cellophane Bags: Place a few pieces in clear cellophane bags tied with a ribbon for simple, elegant packaging.
- Gift Boxes: Use small, food-safe gift boxes lined with tissue paper. Mix different shapes or flavors for variety.
- Presentation:
- Platters: Arrange fingers in rows, rounds in concentric circles, or wedges fanned out on a serving platter.
- Cake Stands: Elevate your shortbread by displaying it on a cake stand or tiered tray.
- With Tea/Coffee: Serve shortbread alongside hot beverages, perhaps with a small dish of jam or clotted cream for dipping.
- Dessert Accompaniment: Use a small shortbread round or finger as a garnish for a scoop of ice cream or a fruit dessert.
The simple elegance of shortbread, regardless of its shape, makes it easy to present beautifully. Enjoy the process of creating and sharing these delightful easy shortbread recipe variations!
Frequently Asked Questions
What makes this shortbread recipe considered "easy"?
This recipe focuses on simple ingredients and straightforward instructions, making it manageable even for beginner bakers. There are no complicated techniques involved.
Can I easily adapt this shortbread recipe for different flavors?
Absolutely! The base recipe is perfect for adding flavor extracts, citrus zest, or even chocolate chips to create your own unique shortbread variations.
What are the main differences between shortbread fingers, rounds, and wedges?
The primary difference is the shape and presentation. All three use the same core shortbread recipe, but are cut and baked differently.
How do I ensure my shortbread has that signature "crumbly" texture?
Avoid overmixing the dough. The key to a crumbly texture is to gently combine the ingredients until just combined and to use cold butter.
Where can I find the step-by-step instructions for this shortbread recipe?
Visit BakeWithEase.com and search for "Shortbread Fingers, Rounds, or Wedges? Bake Your Favorite Shape" to find the complete recipe and detailed instructions.
Final Reflection: The Enduring Allure of a Simple Shortbread
The humble shortbread cookie, a seemingly simple treat, holds a surprising depth of versatility and personal connection. Its ease of preparation belies the profound satisfaction derived from creating variations, from classic fingers to whimsical wedges, each bite a testament to the power of culinary creativity. This exploration of shortbread shapes highlights not just a recipe, but a pathway to personalized baking experiences.
The influence of shortbread extends far beyond the kitchen; it's a symbol of comfort, tradition, and shared moments. It's a recipe passed down through generations, adapted and personalized to reflect individual tastes and family histories. Baking is at once child's play and adult joy. And love, of course.
– This sentiment perfectly captures the essence of shortbread's enduring appeal, transforming a simple act of baking into an expression of care and connection.
Now, consider your own baking journey. What shapes resonate with you? What flavors would you add to elevate this classic? Don't be afraid to experiment, to deviate from the norm, and to create your own signature shortbread. Embrace the freedom to bake your favorite shape, and in doing so, bake a piece of your own story. The possibilities are as limitless as your imagination, and the reward? A delicious, personalized treat that brings joy to you and those you share it with.
Unleash Your Inner Baker: Shape Your Shortbread Success!
Thanks for joining us on this delicious journey into the world of shortbread! We hope you've gained some inspiration and newfound confidence in your baking abilities. Ready to take your skills to the next level?
- Master your favorite shortbread shape: Experiment with different cutters and techniques to perfect your ideal shortbread finger, round, or wedge. Don't be afraid to get creative!
- Share your creations: Show off your baking prowess by posting pictures of your shortbread masterpieces on social media—use #BakeWithEase to connect with our community!
- Try a new flavor twist: Challenge yourself to experiment with adding different extracts, spices, or even dried fruits to your shortbread recipe. What unique flavor combination will you create?
So, what exciting shortbread adventure awaits you in the kitchen?