
Simple Roggenmischbrot (Mixed Rye Bread) Recipe for Home Bakers

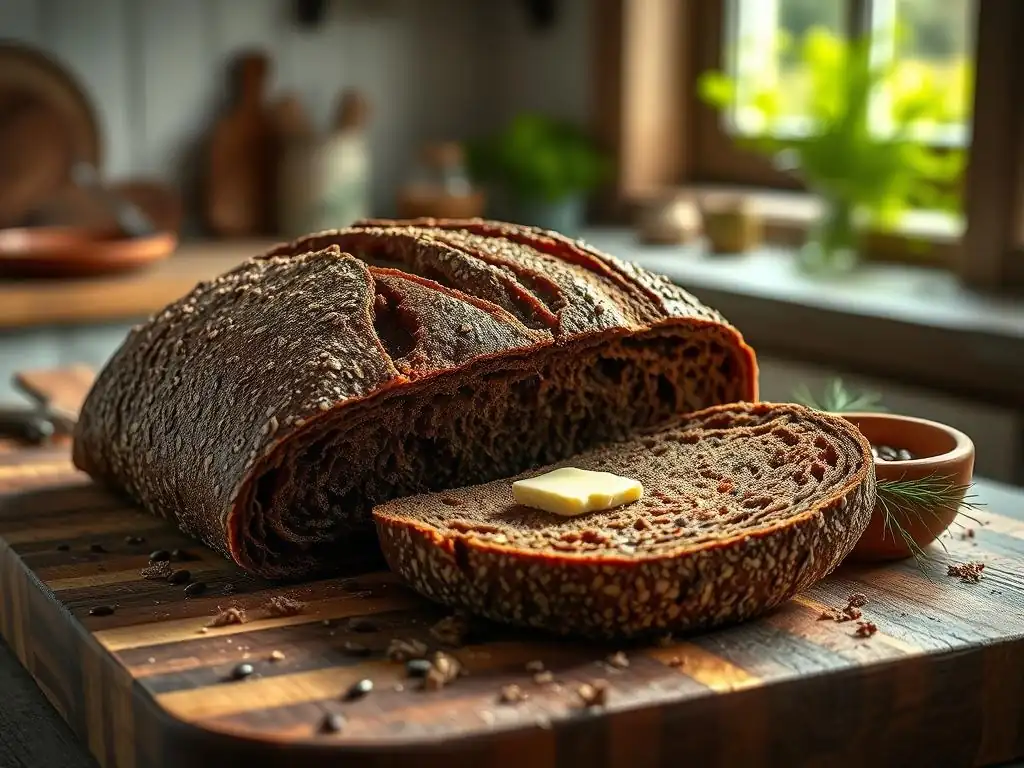
Welcome to BakeWithEase, your trusted guide to the delightful world of baking! Ever wondered how to achieve that perfect, crusty loaf of Roggenmischbrot (Mixed Rye Bread) at home? This article dives into a simple yet authentic recipe, perfect for both novice and experienced bakers. Prepare to unlock the secrets of this regional favorite and discover how easy it can be to bring the flavors of Germany to your own kitchen. Intrigued? Let's get baking!
- Bake Authentic German Rye Bread at Home with Ease
- What is Roggenmischbrot? Understanding German Mixed Rye Bread
- Easy Mixed Rye Bread Recipe: A Step-by-Step Guide for Beginners
- Mastering the Roggenmischbrot Dough: A Detailed Process
- Baking Your Roggenmischbrot to Perfection
- Tips and Tricks for Perfect Roggenmischbrot Every Time
- Variations and Enhancements to Your Easy Mixed Rye Bread
- Enjoying Your Homemade Roggenmischbrot: Serving Suggestions
- Conclusion: Embrace the Art of Baking Delicious Roggenmischbrot at Home.
-
Frequently Asked Questions
- What exactly is Roggenmischbrot, and how does it relate to the "Easy mixed rye bread" recipe?
- What makes this mixed rye bread recipe "easy," especially for beginners?
- Can I substitute any ingredients in this "Easy mixed rye bread" recipe, and if so, what are some suggested alternatives?
- What are some common mistakes to avoid when baking "Easy mixed rye bread" at home?
- How does this "Easy mixed rye bread" recipe help me improve my baking skills beyond just making this one loaf?
- Final Reflection: The Enduring Appeal of Simple, Perfect Bread
- Unleash Your Inner Baker: Craft Your Perfect Roggenmischbrot!
Bake Authentic German Rye Bread at Home with Ease
Baking your own bread can be incredibly rewarding, and mastering a classic like Roggenmischbrot, or German mixed rye bread, is a truly satisfying achievement for any home baker. This hearty loaf, a staple across Germany, is known for its dense crumb, chewy texture, and distinctive tangy flavor, which comes from the combination of rye and wheat flours, often enhanced by a sourdough starter.
While it might sound intimidating, creating a delicious easy mixed rye bread at home is more accessible than you think. With a clear guide and a little patience, you can soon enjoy a warm slice right from your own oven.
This article will walk you through a simple yet effective recipe for crafting your own Roggenmischbrot. We'll cover everything from understanding the unique characteristics of this bread to gathering your ingredients and equipment, mastering the dough process, and finally, baking it to perfection. Get ready to fill your kitchen with the wonderful aroma of freshly baked German rye bread and impress yourself, your family, and friends with your baking prowess.
Discover the Deliciousness of Homemade Roggenmischbrot
Homemade Roggenmischbrot offers a depth of flavor and texture that is often hard to replicate with store-bought versions. The slow fermentation process, whether using a sourdough starter or commercial yeast with specific techniques, allows complex flavors to develop, resulting in a bread that is both nutty and slightly sour. The crust develops a beautiful dark brown hue and satisfying crunch, while the interior remains moist and substantial, perfect for pairing with savory toppings like cheese, cold cuts, or even just butter.
Beyond the taste, baking Roggenmischbrot at home gives you complete control over the ingredients. You can select high-quality flours, adjust the salt level to your preference, and even add seeds or spices to customize your loaf. This control not only leads to a healthier bread but also ensures that every loaf is made with care and attention, reflecting your dedication to the craft of baking. Embracing the process of making this easy mixed rye bread connects you to a rich baking tradition and provides a delicious, versatile staple for your table.
What is Roggenmischbrot? Understanding German Mixed Rye Bread
Roggenmischbrot translates directly to "rye mixed bread" in German. It is a broad category encompassing a variety of breads made with a blend of rye flour and wheat flour. The ratio of rye to wheat can vary significantly, typically ranging from 50:50 (known as Kommissbrot) to as high as 90% rye, with the remainder being wheat.
The presence of wheat flour, particularly bread flour or all-purpose flour with a decent protein content, is crucial as it provides gluten structure, which rye flour lacks in the same way. This mix results in a loaf that is denser and moister than a purely wheat loaf but less dense than a 100% rye bread.
The character of Roggenmischbrot is heavily influenced by the proportion of rye flour and the leavening method used. Higher rye content leads to a darker, denser, and more intensely flavored bread. Traditional Roggenmischbrot often utilizes a sourdough starter, which contributes significantly to the characteristic tangy flavor and improves the bread's texture and keeping quality. The specific type of rye flour (light, medium, or dark) also plays a role in the final color and flavor profile of the easy mixed rye bread.
Exploring the Flavor Profile of Roggenmischbrot
The flavor profile of Roggenmischbrot is complex and deeply satisfying, primarily defined by the interaction of rye flour and fermentation. Rye flour itself imparts earthy, slightly sweet, and often subtly sour notes. When combined with a sourdough starter, these flavors are amplified, adding a distinct tanginess that complements the inherent sweetness of the rye. The specific sourdough culture used can introduce variations, from a mild sourness to a more pronounced, almost vinegary bite, depending on the starter's hydration, feeding schedule, and the ambient temperature during fermentation.
The Maillard reaction and caramelization during baking contribute to the flavor by developing a rich, dark crust with roasted notes. The balance between the sourness from the sourdough, the earthiness of the rye, and the subtle sweetness from the caramelized crust is what makes a great Roggenmischbrot so appealing. Additional ingredients like caraway seeds, coriander, or fennel are sometimes included, adding layers of aromatic complexity that are classic in many German rye breads and can enhance your easy mixed rye bread.
Roggenmischbrot vs. Other Rye Breads: Key Differences
While Roggenmischbrot falls under the umbrella of rye breads, it differs significantly from other types, such as pumpernickel or purely wheat loaves. Pumpernickel, for example, is typically a 100% rye bread, often made with coarse rye meal and baked at a low temperature for many hours, resulting in a very dark, dense, and intensely flavored loaf with a slightly sweet, almost molasses-like taste due to extended starch breakdown. Roggenmischbrot, with its mix of rye and wheat, is generally lighter in color and texture than pumpernickel.
Compared to lighter rye breads common in other parts of the world (which might use a much smaller percentage of rye or be made primarily with white rye flour), Roggenmischbrot usually contains a substantial amount of medium or dark rye flour, giving it a more pronounced rye character. It also differs from purely wheat breads (like a classic baguette or challah) which rely heavily on gluten for structure and result in a much lighter, airier crumb.
The blend in Roggenmischbrot strikes a unique balance, offering the distinctive flavor of rye with enough structure from the wheat to create a manageable, sliceable loaf, making it an excellent easy mixed rye bread to start with.
Easy Mixed Rye Bread Recipe: A Step-by-Step Guide for Beginners
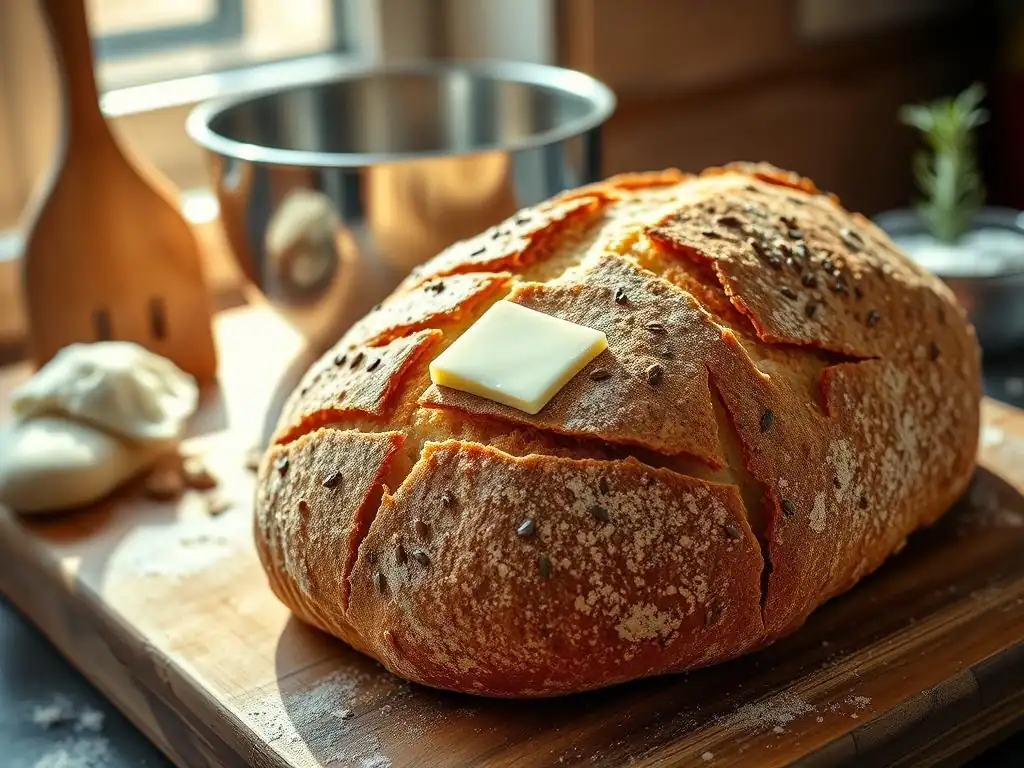
Embarking on your first Roggenmischbrot can feel like a journey, but this step-by-step guide breaks down the process into manageable parts, making it an easy mixed rye bread recipe suitable for beginners. We'll focus on a popular ratio, like 60% rye and 40% wheat, which provides a good balance of classic rye flavor and manageable dough handling thanks to the wheat gluten. While traditional recipes often use sourdough, we'll also touch upon yeast-based approaches that simplify the process for those new to rye baking or sourdough maintenance.
Success in baking this German staple lies in understanding the characteristics of rye dough, which is stickier and less elastic than pure wheat dough. Patience is key, especially during fermentation and proofing. By following these instructions carefully, paying attention to dough consistency and timing, you can achieve a wonderful, flavorful loaf with a satisfying texture. This recipe is designed to be forgiving while still producing an authentic-tasting Roggenmischbrot.
Gather Your Ingredients for Homemade Roggenmischbrot
Having all your ingredients measured and ready before you begin mixing is a crucial step in any baking project, especially when working with rye dough, which can develop quickly. For a typical medium-sized loaf (around 900-1000 grams), you'll need specific types of flour, water, salt, and your leavening agent. The quality of your ingredients will directly impact the final taste and texture of your easy mixed rye bread, so opt for the best you can find.
Ensure your flours are fresh and stored properly. Rye flour, particularly, can oxidize and lose quality over time. Filtered water is often recommended, especially if your tap water has a strong chemical taste. The type of salt matters too; non-iodized fine sea salt or kosher salt is preferred by many bakers over iodized table salt, which can sometimes interfere with yeast activity.
Essential Ingredients for a Perfect Rye Bread Loaf
For a standard 60% rye, 40% wheat Roggenmischbrot (approximately a 950g loaf):
- 300g Medium Rye Flour (Type 1150 in Germany, or equivalent)
- 200g Strong Bread Flour (High-gluten wheat flour, ~12-14% protein)
- 350g Water (around 30-35°C or 85-95°F if using commercial yeast)
- 10g Salt
- Leavening:
- Option A (Sourdough): 100g Active Rye Sourdough Starter (100% hydration)
- Option B (Yeast): 5g Instant Dry Yeast (or 6-7g Active Dry Yeast, proofed) + 50g extra water
These figures represent a starting point. The exact amount of water might need slight adjustment based on the specific flours you use, as hydration levels vary between flour types and brands. For instance, some rye flours absorb more water than others. Using a kitchen scale for precise measurements is highly recommended for consistent results when baking this easy mixed rye bread.
Understanding Rye Flour and Its Role in Baking
Rye flour is fundamentally different from wheat flour, primarily in its protein composition. While wheat contains gluten-forming proteins (gliadin and glutenin) that create an elastic network when hydrated and kneaded, rye contains less of these proteins, and the gluten structure it does form is weaker. Furthermore, rye flour contains pentosans, complex carbohydrates that absorb large amounts of water and contribute to the sticky, dense nature of rye dough. These pentosans also play a role in preventing the formation of a strong gluten network.
Due to these properties, rye dough is typically stickier and less extensible than wheat dough. It doesn't require extensive kneading in the same way wheat dough does; over-kneading can actually break down the weak gluten structure. The high pentosan content also helps retain moisture, resulting in a bread with a longer shelf life and a moist crumb. Understanding how rye flour behaves is key to successfully baking Roggenmischbrot and other rye-heavy loaves.
Equipment You'll Need
Having the right tools makes the baking process smoother and helps ensure a better outcome for your easy mixed rye bread. You don't necessarily need professional-grade equipment, but a few basic items are essential for handling and baking rye dough. Accuracy in measurement and temperature control are particularly important when working with rye.
A sturdy mixing bowl, accurate scales (for both ingredients and potentially dough portions), and a dough scraper are indispensable. A thermometer to check water temperature (especially for yeast) is also very helpful. For baking, a baking stone or steel is beneficial for achieving a good crust, but a heavy baking sheet will also work.
Must-Have Baking Tools for Roggenmischbrot
Here is a list of essential tools:
- Digital Kitchen Scale: For precise measurement of all ingredients (flour, water, salt, leavening).
- Large Mixing Bowl: At least 3-4 liters capacity to accommodate the dough.
- Dough Scraper: Both a bench scraper (metal) and a bowl scraper (plastic) are useful for handling sticky rye dough.
- Measuring Cups and Spoons: While scaling is preferred, these are useful for smaller quantities or liquids.
- Thermometer: Instant-read or probe thermometer for checking water and internal bread temperature.
- Proofing Basket (Banneton): A round or oval basket, often lined with linen, dusted with flour, helps hold the dough's shape during proofing. A bowl lined with a floured tea towel can substitute.
- Baking Surface: Baking stone, baking steel, or a heavy-duty baking sheet.
- Oven Mitts: For safety when handling hot baking surfaces.
- Cooling Rack: Essential for allowing the bread to cool properly.
- Lame or Sharp Knife: For scoring the dough before baking.
Optional but helpful tools include a stand mixer with a dough hook (though hand mixing is perfectly fine), a spray bottle for creating steam in the oven, and a Dutch oven or baking cloche for baking in a humid environment.
Mastering the Roggenmischbrot Dough: A Detailed Process
Working with rye dough is different from working with pure wheat dough, mainly because of its stickiness and lack of strong gluten development. The process focuses less on intensive kneading and more on mixing ingredients thoroughly, allowing time for the dough to hydrate, and gentle handling. Whether you use sourdough or commercial yeast, the steps of mixing, fermentation, shaping, and proofing are crucial for developing flavor and achieving the correct structure for your easy mixed rye bread.
Patience is a virtue when baking rye bread. The dough will feel different – it won't become smooth and elastic like a white bread dough. Embrace its unique texture. Focus on achieving a well-mixed, hydrated dough and giving it adequate time to ferment.
Preparing the Rye Sourdough Starter (if applicable)
If you're opting for the traditional sourdough method, having an active, bubbly rye sourdough starter is the first step. An active starter is one that has been fed recently (typically 4-12 hours prior, depending on temperature) and has doubled or tripled in volume, showing visible bubbles throughout and on the surface. Using a rye starter adds a characteristic tang and improves the keeping quality of the Roggenmischbrot.
If you don't have a rye starter, you can convert a wheat starter by feeding it with rye flour for a few cycles, or you can build a new rye starter from scratch, which typically takes 7-14 days. For this recipe, we assume you have an active starter ready to use.
Feeding and Activating Your Rye Sourdough
To ensure your starter is active and ready for baking your easy mixed rye bread, follow a regular feeding schedule. For this recipe, you'll need 100g of active starter. If your starter is in the refrigerator, take it out 12-24 hours before you plan to mix the dough. Discard most of the starter, leaving just a small amount (e.g., 10-20g). Feed this remaining starter with equal parts rye flour and water by weight (e.g., 50g rye flour and 50g water) to create a 100% hydration starter.
Mix thoroughly until no dry flour remains. Cover the container loosely and leave it at room temperature (ideally 22-26°C or 72-79°F). The starter is ready when it has become very bubbly, has significantly increased in volume (at least doubled), and passes the float test (a small piece dropped in water floats). This usually takes 4-8 hours depending on the temperature and starter vitality. If it's not ready, wait a bit longer, or if it seems sluggish, give it another small feeding.
Mixing the Dough for Your Roggenmischbrot
Mixing the dough for Roggenmischbrot is less about developing a strong gluten network through intensive kneading and more about ensuring all ingredients are evenly distributed and the flours are fully hydrated. The rye flour absorbs water more slowly than wheat flour, so giving the dough time to rest after initial mixing (autolyse) can be beneficial, although not strictly necessary for a basic easy mixed rye bread.
Whether mixing by hand or with a machine, the goal is to bring everything together into a shaggy, cohesive mass. The dough will be sticky and won't pull away from the sides of the bowl cleanly like a wheat dough. Resist the urge to add too much extra flour during mixing; proper hydration is key to a moist crumb.
Combining Ingredients for Optimal Texture and Flavor
Start by combining the water and your leavening agent (active sourdough starter or dissolved yeast) in your mixing bowl. Stir briefly. Add the rye flour and wheat flour. Mix with a spoon, spatula, or the dough hook of a stand mixer on low speed until no dry flour is visible.
This initial mix should take just a minute or two. At this point, the dough will look shaggy and feel very sticky. Cover the bowl and let the dough rest for 20-30 minutes. This rest period allows the flours to start absorbing the water, making the dough slightly easier to handle and beginning the gluten development process in the wheat flour.
After the rest, add the salt. Mix again for 3-5 minutes (by hand or low speed in a mixer). The dough will still be sticky but should come together into a more cohesive mass. It won't look smooth like wheat dough. Avoid over-mixing, as this can break down the rye's structure. The final dough consistency should be quite wet but manageable with wet hands or a dough scraper.
The Importance of Water Temperature
Water temperature plays a critical role in controlling fermentation speed, especially when using commercial yeast. For yeast-leavened Roggenmischbrot, using warm water (30-35°C or 85-95°F) helps activate the yeast quickly and promotes consistent fermentation. If your kitchen is cold, slightly warmer water can help; if it's very warm, cooler water might be preferred.
When using sourdough, the water temperature is less critical for activating the starter (as it's already active), but it still influences the overall dough temperature, which in turn affects fermentation speed. Aim for a final dough temperature between 24-26°C (75-79°F) for optimal sourdough activity and flavor development. You can adjust the water temperature up or down to achieve this target dough temperature, considering the temperature of your starter and flour.
Achieving the Right Dough Consistency
The correct dough consistency for Roggenmischbrot is crucial for a good crumb structure. It should be sticky and soft, but not so wet that it's impossible to handle. When you lift a portion with a wet hand or scraper, it should stretch slightly before breaking. It won't pass the "windowpane test" like wheat dough. The dough will feel heavier and denser than a typical wheat dough.
If the dough feels too dry after mixing, add a tablespoon of water at a time and mix until incorporated, being careful not to add too much. If it feels too wet, you can add a tablespoon of rye or wheat flour, but this should be avoided if possible, as it can alter the hydration ratio. A good indication of correct hydration is that the dough is manageable with wet hands or a floured dough scraper but would stick firmly to dry hands. This high hydration contributes to the moist crumb characteristic of good Roggenmischbrot.
Bulk Fermentation: Letting the Flavors Develop
Bulk fermentation, also known as the first rise or primary fermentation, is the period after mixing where the dough rests and ferments as a single mass. This is where much of the flavor develops, particularly in sourdough Roggenmischbrot. During this time, yeast (or sourdough microbes) produce carbon dioxide, causing the dough to rise, and enzymes break down complex carbohydrates into simpler sugars, which feed the yeast and contribute to flavor and crust browning.
Unlike wheat dough, which often requires multiple folds during bulk fermentation to strengthen gluten, rye dough benefits more from simply being left undisturbed. The structure comes more from the pentosans and the limited gluten development in the wheat portion, rather than mechanical strengthening.
Understanding Bulk Fermentation Time and Temperature
The duration of bulk fermentation for Roggenmischbrot varies significantly depending on the leavening agent and ambient temperature.
- Sourdough: At room temperature (22-24°C or 72-75°F), bulk fermentation typically takes 2.5 to 4 hours. The dough might increase in volume by only about 30-50% – it won't necessarily double like a wheat dough. Look for signs of fermentation: the surface may show small bubbles, and the dough will feel slightly softer and puffier. Over-fermenting rye dough can be detrimental, leading to a dense, gummy crumb.
- Commercial Yeast: If using instant dry yeast (5g for this recipe), bulk fermentation might be faster, potentially 1.5 to 2.5 hours at room temperature. The dough should increase in volume by about 50-75%.
Monitor the dough, not just the clock. Warmer temperatures will speed up fermentation, while cooler temperatures will slow it down. A good indicator that bulk fermentation is complete is when the dough shows visible signs of activity (bubbles) and has increased noticeably in size, but hasn't started to collapse.
Shaping Your Roggenmischbrot Loaf
Shaping rye dough is different from shaping wheat dough. Because of the limited gluten structure, rye dough doesn't have the same elasticity and surface tension. Aggressive shaping or pulling can tear the delicate structure. The goal is to create enough surface tension to help the loaf hold its shape during proofing and baking, without degassing it too much or damaging the crumb structure.
Often, rye dough is shaped into a simple round (boule) or oval (batard). Due to its stickiness, shaping is usually done on a well-floured surface (using rye flour or a mix of rye and wheat) or with wet hands and a dough scraper.
Gentle Shaping Techniques for Rye Bread
Turn the dough out onto a generously floured surface. Dust the top of the dough with flour as well. Using a bench scraper and/or wet hands, gently coax the dough into a rough shape. For a round loaf, gently pull the edges towards the center, rotating the dough as you go, to create a somewhat smooth surface tension on top.
Flip the dough seam-side up. For an oval loaf, gently pat the dough into a rectangle, then fold the top down about two-thirds of the way and the bottom up to meet the top fold, sealing the seam. Then, gently cup your hands around the sides and pull the loaf towards you a few times to create tension on the bottom.
The key is to be gentle and quick. Avoid excessive handling. Once shaped, the loaf is immediately placed seam-side up into a well-floured proofing basket (banneton) or a bowl lined with a floured tea towel. Using rye flour or a 50/50 mix of rye and rice flour works well for dusting the proofing basket to prevent sticking.
Proofing the Dough: Preparing for Baking
Proofing, or final fermentation, is the last rise the dough undergoes before baking. This period allows the shaped loaf to gain volume and develop its final structure and flavor compounds. For Roggenmischbrot, proofing is often done in a proofing basket to help the relatively soft dough hold its shape. The duration and conditions of proofing significantly impact the final loaf.
Rye dough proofs faster than wheat dough and doesn't expand as dramatically. Over-proofing is a common issue that can lead to a flat loaf with a dense, gummy crumb. Therefore, it's important to monitor the dough carefully during this stage.
Proofing Time and Ideal Conditions
Proofing for Roggenmischbrot is typically shorter than for wheat bread.
- Sourdough: At room temperature (22-24°C or 72-75°F), proofing may take 60-90 minutes. For better flavor development and oven spring, a cold proof in the refrigerator for 8-16 hours is often recommended. Cold proofing slows down yeast activity while allowing enzymes to continue breaking down starches and proteins, enhancing flavor.
- Commercial Yeast: At room temperature, proofing might take 45-75 minutes.
Regardless of the leavening, the dough should increase noticeably in size but should not double. A cold proof is highly recommended for sourdough Roggenmischbrot as it makes the sticky dough much easier to handle, score, and transfer to the oven.
The Poke Test: Determining Readiness for Baking
The poke test is a simple method to gauge if your dough is ready for baking. Gently flour your finger and lightly press the surface of the dough about half an inch deep.
- If the indentation springs back immediately, the dough is under-proofed. Give it more time.
- If the indentation slowly springs back halfway, the dough is optimally proofed and ready to bake.
- If the indentation remains completely or mostly, the dough is likely over-proofed. It might still be salvageable, but handle it very gently.
For rye dough, the poke test response is usually less pronounced than with wheat dough. The indentation might spring back very slowly or only slightly. Trust your visual cues alongside the poke test: look for a puffy appearance and small surface bubbles.
Baking Your Roggenmischbrot to Perfection
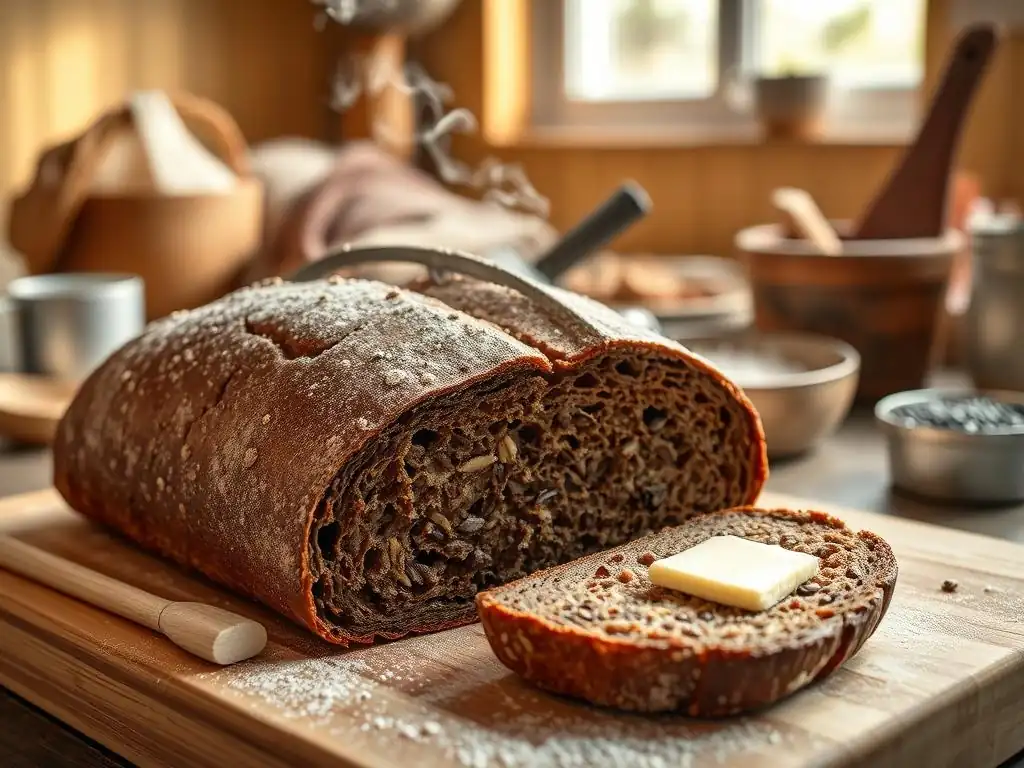
Baking is the final, transformative step where your proofed dough turns into a beautiful loaf of easy mixed rye bread. Proper oven temperature, baking time, and creating steam are key factors in achieving a well-risen loaf with a desirable crust and crumb structure. Roggenmischbrot is often baked at relatively high initial temperatures to encourage good oven spring before the temperature is reduced to ensure the interior cooks through without burning the crust.
Creating steam in the oven during the initial phase of baking is crucial. Steam keeps the surface of the dough moist, allowing it to expand fully before the crust sets. This leads to better oven spring and a thinner, crispier crust.
Oven Temperature and Baking Time
Preheat your oven, ideally with a baking stone or steel inside, to a high temperature. A common starting temperature is 240-250°C (465-480°F). Allow the oven and stone/steel to preheat for at least 30-60 minutes to ensure they are fully heated.
Carefully transfer the proofed loaf to the hot baking surface (this is where a cold proof helps, as the dough is firmer). Immediately create steam. Bake at the high temperature for the first 15-20 minutes. Then, reduce the oven temperature to 200-210°C (390-410°F) and continue baking for another 30-40 minutes, or until the loaf is deeply colored and sounds hollow when tapped on the bottom. The internal temperature should register around 93-96°C (200-205°F) when measured with an instant-read thermometer inserted into the center of the loaf.
Achieving a Crispy Crust and a Soft Interior
To achieve a crispy crust and soft interior, the high initial temperature and steam are essential. The intense heat provides a burst of energy, causing the dough to expand rapidly (oven spring). The steam prevents the crust from forming too early, allowing this expansion to happen optimally. After the initial high-heat, steamy phase, reducing the temperature allows the interior to cook through gently without the crust getting too dark.
Methods for creating steam include:
- Dutch Oven/Baking Cloche: Preheating the covered vessel traps the dough's own steam. Bake covered for the first 20-25 minutes, then uncovered for the remaining time. This is one of the easiest and most effective methods for home bakers.
- Water Tray: Place a metal tray on the bottom rack of the oven during preheating. Carefully pour a cup of hot water into the tray just as you load the bread.
- Ice Cubes: Scatter a handful of ice cubes on the bottom of the oven (if it's safe for your oven type) or into a hot tray as you load the bread.
- Spraying: Spray the oven walls with water using a clean spray bottle (be cautious with hot steam). Repeat once or twice during the first 10 minutes.
Using a baking stone or steel helps transfer heat efficiently to the bottom of the loaf, promoting good oven spring and a well-browned bottom crust.
Scoring the Dough: Preventing Cracks and Controlling Expansion
Scoring, or slashing, the surface of the dough just before baking serves both functional and aesthetic purposes. Functionally, it provides controlled weak points on the crust, allowing the dough to expand predictably during oven spring without bursting irregularly. This is particularly important for loaves with a taut surface tension. Aesthetically, scores can create beautiful patterns on the finished loaf.
For rye bread, scoring needs to be done with a very sharp blade (like a razor blade or lame) and a quick, confident hand, as the dough is sticky and can easily drag.
Different Scoring Patterns for Roggenmischbrot
The simplest and most common scoring pattern for a round Roggenmischbrot is a single, deep cut across the top. This "ear" or flap that lifts during baking is characteristic of many German loaves.
- Single Slash: A straight or slightly curved cut about 1-2 cm deep across the top of a round loaf.
- Cross: Two perpendicular cuts forming a cross on a round loaf.
- Diagonal Slashes: Multiple parallel diagonal slashes on an oval loaf.
- Box Pattern: A series of perpendicular cuts forming squares or a grid, often seen on some traditional rye breads.
Choose a pattern you are comfortable with. The key is to make clean, decisive cuts. If the dough is sticking to the blade, try dusting the surface lightly with flour or wetting the blade slightly. Deeper scores encourage more expansion through the cuts, while shallow scores create more surface pattern.
Cooling and Slicing: Enjoying Your Homemade Rye Bread
One of the hardest parts of baking Roggenmischbrot is waiting to slice into it. However, allowing the bread to cool completely is absolutely crucial for developing the final crumb structure and flavor. Rye bread, especially sourdough versions, continues to undergo changes as it cools. Slicing too early can result in a gummy, sticky crumb.
Place the baked loaf on a wire cooling rack immediately after taking it out of the oven. This allows air to circulate around the entire loaf, preventing the bottom crust from becoming soggy.
Allowing the Bread to Cool Completely
Roggenmischbrot, due to its density and moisture content from the rye flour, requires a significant cooling period. A medium-sized loaf (around 1kg) needs at least 2-4 hours to cool completely at room temperature. For larger or denser loaves, or those with a very high rye content, 6 hours or even overnight cooling is often recommended.
During cooling, residual heat continues to cook the interior slightly, and moisture redistributes throughout the loaf. This process sets the crumb structure and allows the complex flavors to mellow and integrate. Slicing too soon traps steam and moisture inside, leading to that undesirable gummy texture. Patience here is rewarded with a superior crumb and flavor.
Best Practices for Slicing Rye Bread
Once your easy mixed rye bread has cooled completely, it's ready to be sliced and enjoyed. A good serrated bread knife is essential for slicing rye bread cleanly without crushing the loaf. A straight-edged knife will struggle with the crust and dense crumb.
Place the cooled loaf on a stable surface. Use a gentle sawing motion with your serrated knife. Avoid pressing down hard, which can compress the crumb. Slice the bread to your desired thickness. For open-faced sandwiches or with soup, thicker slices (1-1.5 cm) are great. For toast or smaller servings, thinner slices work well. Store the unsliced portion correctly to maintain freshness.
Tips and Tricks for Perfect Roggenmischbrot Every Time
Baking Roggenmischbrot, like any bread, benefits from practice and attention to detail. While this is an easy mixed rye bread recipe, sometimes things don't go exactly as planned. Understanding common issues and having strategies to address them will help you achieve consistently great results. Don't be discouraged by imperfections in early attempts; every loaf is a learning opportunity.
Paying close attention to the feel of the dough, the fermentation time relative to temperature, and proper cooling are key to success.
Troubleshooting Common Rye Bread Baking Issues
Even experienced bakers encounter challenges. Here are a few common problems with rye bread and how to address them:
- Problem: Dense or gummy crumb.
- Possible Causes: Dough was under-proofed or over-proofed; sliced before cooling completely; insufficient hydration; oven temperature too low; not enough steam during baking.
- Solutions: Ensure dough passes the poke test before baking; always cool completely (at least 2-4 hours); check your hydration percentage; ensure oven is fully preheated and use steam.
- Problem: Flat loaf, poor oven spring.
- Possible Causes: Over-proofed dough; insufficient surface tension during shaping; not enough steam during baking; oven temperature too low; weak starter (if using sourdough).
- Solutions: Proof dough correctly (don't let it double); practice gentle shaping to create tension; use ample steam; preheat oven fully; ensure your sourdough starter is active and bubbly.
- Problem: Crust cracking excessively or irregularly.
- Possible Causes: Dough surface dried out during proofing; insufficient scoring; not enough steam during baking.
- Solutions: Cover dough during proofing to prevent drying; score the dough properly with a sharp blade; ensure adequate steam in the oven.
By identifying the likely cause, you can adjust your process for the next loaf of easy mixed rye bread. Keeping a baking journal can help track variables like temperature, timing, and hydration to pinpoint what works best in your kitchen.
Addressing a Dense or Gummy Texture
A dense, gummy crumb is perhaps the most common and frustrating issue with rye bread. It often stems from the unique properties of rye flour. Rye contains enzymes (amylases) that can break down starch into sugars during fermentation and baking. In wheat bread, the gluten network helps hold structure even if some starch breakdown occurs. In rye bread, without a strong gluten network, excessive amylase activity can lead to a sticky, gummy interior.
One primary way to mitigate this is by using a sourdough starter. The acidity produced by the lactic acid bacteria in sourdough inhibits the activity of these amylase enzymes. This is a major reason why traditional Roggenmischbrot is often made with sourdough. If using commercial yeast, incorporating a small amount of acid, like vinegar (1-2 tsp per loaf), can help replicate this effect. Another critical factor, as mentioned, is allowing the bread to cool completely before slicing. This gives the crumb structure time to set properly.
Preventing a Flat Loaf
A flat loaf with poor oven spring can be disappointing. This often relates to issues with fermentation and structure. Over-proofing is a frequent culprit; if the dough rises too much before baking, its structure weakens, and it collapses in the oven instead of expanding. Rye dough doesn't have the structural strength of wheat dough, so it's more susceptible to this. Pay close attention to the poke test and signs of fermentation.
Lack of surface tension from shaping can also contribute to a flat loaf. While rye dough doesn't hold tension like wheat, gentle shaping to create a relatively smooth, taut surface on top helps the loaf hold its shape during proofing and baking. Finally, inadequate steam or an oven that isn't hot enough can hinder oven spring, as the crust sets too quickly before the dough has fully expanded. Ensure your oven is fully preheated and use an effective steaming method.
Storing Your Homemade Roggenmischbrot for Maximum Freshness
Roggenmischbrot has excellent keeping qualities compared to many wheat breads, thanks to the moisture retention provided by rye flour and the acidity from sourdough (if used). Proper storage is key to enjoying your easy mixed rye bread for several days.
Avoid refrigerating the bread, as this can actually make it stale faster. The ideal storage involves protecting the loaf from drying out while still allowing a little air circulation to prevent mold.
Proper Storage Techniques to Extend Shelf Life
Here are effective ways to store your homemade Roggenmischbrot:
- Cut-side Down: If you've sliced the loaf, place the cut side down on a clean cutting board or counter. This minimizes the exposed surface area.
- Bread Box: A traditional bread box is excellent. It provides a dark, slightly humid environment that is ideal for bread storage.
- Linen or Cotton Bag: Store the loaf in a clean linen or cotton bread bag. This allows the crust to remain somewhat crisp while protecting the interior from drying out too quickly. Avoid plastic bags for long-term storage, as they trap moisture and can encourage mold growth, although they can be used for short-term (1-2 day) storage if the bread is completely cool.
- Wrapping: Wrap the cooled loaf loosely in beeswax wrap or a clean tea towel, then place it in a paper bag.
- Freezing: For longer storage, Roggenmischbrot freezes very well. Slice the cooled loaf, wrap individual slices or portions tightly in plastic wrap, then place them in a freezer bag. It can be frozen for up to 3 months. Thaw slices at room temperature or toast directly from frozen.
Stored properly, your easy mixed rye bread should remain fresh and delicious for 3-5 days at room temperature.
Variations and Enhancements to Your Easy Mixed Rye Bread
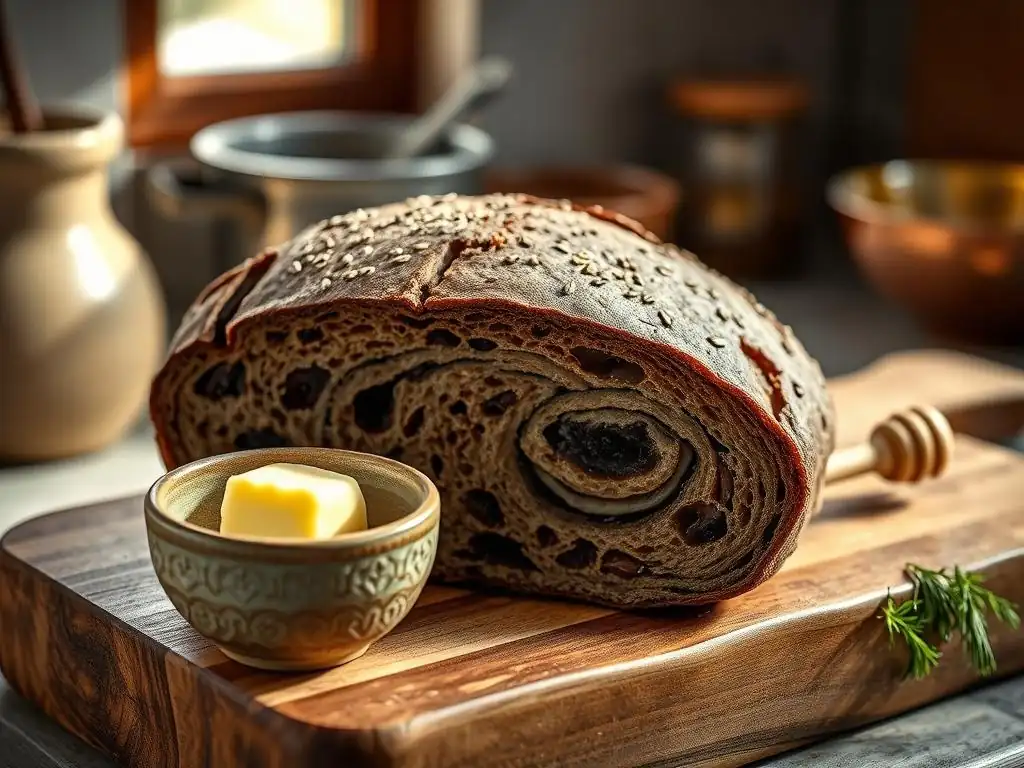
Once you've successfully baked your first basic Roggenmischbrot, you might want to experiment with variations to add different flavors and textures. Rye bread is a versatile canvas, and small additions can significantly change the character of the loaf.
These variations allow you to customize your easy mixed rye bread to your personal preference and explore the range of possibilities within this bread style.
Adding Seeds and Grains for Extra Flavor and Texture
Many German rye breads incorporate seeds or whole grains, adding nutritional value, flavor, and a pleasant chewiness or crunch. These additions are typically soaked before being added to the dough to prevent them from absorbing water from the dough during fermentation, which can result in a dry crumb.
A common method is to create a "soaker" (Quellstück) by mixing the seeds/grains with an equal weight of hot water and letting it sit for several hours or overnight until the water is absorbed. This soaker is then added to the main dough during mixing.
Popular Add-ins for Roggenmischbrot
Here are some popular seeds and grains to add to your easy mixed rye bread:
- Caraway Seeds: A classic addition to German rye bread, providing a distinct aromatic flavor. Add 5-15g per loaf.
- Sunflower Seeds: Add a nutty flavor and soft crunch. Use 20-40g, soaked.
- Pumpkin Seeds (Pepitas): Similar to sunflower seeds, offering a different nutty profile. Use 20-40g, soaked.
- Flaxseeds: Add moisture and nutrients. Use 10-20g, soaked (they form a gel).
- Sesame Seeds: Can be added to the dough or sprinkled on the crust.
- Whole Rye Berries or Cracked Rye: Add a chewy texture. Requires soaking or cooking before adding to the dough. Use 20-50g, soaked.
- Spices: Ground coriander, fennel seeds, or anise seeds are sometimes added alongside caraway for a more complex spice profile. Use 1-5g total spices.
Start with a small amount of any add-in and adjust in subsequent bakes based on your preference.
Exploring Different Rye Flour Ratios
The ratio of rye to wheat flour is perhaps the most defining characteristic of a Roggenmischbrot. Experimenting with different ratios will dramatically change the bread's texture, density, and flavor intensity. A 50:50 ratio will yield a lighter loaf than a 70:30 or 80:20 ratio.
Higher rye percentages result in denser, darker, and more intensely flavored loaves that rely more heavily on acidity (from sourdough or added acid) for structure and to counteract amylase activity. These loaves also tend to be stickier to work with.
Experimenting with Different Rye to Wheat Ratios
- 50% Rye / 50% Wheat (Kommissbrot): A common starting point, offering a good balance of rye flavor and wheat structure. Relatively easy to handle.
- 60% Rye / 40% Wheat: The ratio used in the core recipe above, providing a more pronounced rye character while still being manageable.
- 70% Rye / 30% Wheat: Results in a significantly denser, more flavorful loaf. Requires careful handling and benefits greatly from sourdough.
- 80% Rye / 20% Wheat: Approaching the character of a pure rye bread. Very dense, strong flavor. Sourdough is almost essential at this ratio for structure and flavor balance. The dough will be very sticky and require minimal handling.
When increasing the rye percentage, you may need to slightly increase the hydration as rye flour absorbs a lot of water. Also, ensure your sourdough starter is vigorous, as it plays a larger role in leavening and preventing gumminess in higher-rye loaves. Gradually increase the rye ratio over several bakes to get a feel for how the dough behaves.
Enjoying Your Homemade Roggenmischbrot: Serving Suggestions
Your freshly baked easy mixed rye bread is incredibly versatile and forms the base for countless delicious meals and snacks. Its hearty texture and tangy flavor pair wonderfully with a variety of toppings and dishes, particularly those common in German and European cuisine.
Serving Roggenmischbrot warm from the oven (after cooling!) with just butter is a simple pleasure. But it truly shines when paired with savory accompaniments.
Classic Pairings for German Rye Bread
Here are some traditional and popular ways to enjoy your homemade Roggenmischbrot:
- Butter and Salt: The simplest, letting the bread's flavor shine.
- Cheese: Pairs exceptionally well with strong cheeses like aged Gouda, sharp cheddar, or German cheeses like Handkäse or Limburger.
- Cold Cuts: A staple for open-faced sandwiches (known as Butterbrot or Abendbrot in Germany) with ham, salami, or liverwurst.
- Pickled Herring or Smoked Fish: A classic Scandinavian and Northern European pairing that works beautifully with rye's tang.
- Smoked Salmon and Cream Cheese: A popular modern pairing.
- Soups and Stews: The dense crumb is perfect for soaking up hearty soups and stews.
- Sweet Spreads: While less common traditionally, some enjoy it with jam or honey, especially a less sour version.
Roggenmischbrot is also excellent when toasted, bringing out its nutty flavors and creating a satisfying crunch. Enjoy experimenting with different toppings to find your favorite way to eat this delicious bread.
Conclusion: Embrace the Art of Baking Delicious Roggenmischbrot at Home.
Baking Roggenmischbrot at home is a rewarding journey into the world of German baking. While working with rye dough presents unique characteristics compared to wheat, this easy mixed rye bread recipe provides a solid foundation for success. From understanding the role of rye flour and leavening to mastering mixing, fermentation, and baking techniques, you now have the knowledge to create a truly authentic and delicious loaf.
Remember that patience, attention to detail, and practice are your best tools. Don't be afraid to experiment with different ratios or add-ins once you're comfortable with the basic recipe. The rich history and diverse variations of German rye bread offer endless possibilities for exploration in your kitchen. Enjoy the process, savor the incredible aroma, and delight in sharing your homemade Roggenmischbrot with others. Happy baking!
Frequently Asked Questions
What exactly is Roggenmischbrot, and how does it relate to the "Easy mixed rye bread" recipe?
Roggenmischbrot is a German term for mixed rye bread. This recipe aims to provide an easy-to-follow version for home bakers wanting to try this traditional bread. It's a simplified approach to a classic loaf.
What makes this mixed rye bread recipe "easy," especially for beginners?
The recipe focuses on simple instructions and easy-to-find ingredients. We break down the process into manageable steps, making it less intimidating for those new to baking with rye flour.
Can I substitute any ingredients in this "Easy mixed rye bread" recipe, and if so, what are some suggested alternatives?
While following the recipe closely is recommended, some substitutions are possible. For example, you might substitute whole wheat flour for a portion of the rye flour, but this will alter the flavor and texture.
What are some common mistakes to avoid when baking "Easy mixed rye bread" at home?
Over-proofing the dough or not using a reliable recipe are common pitfalls. Also, ensuring your oven temperature is accurate is crucial for a properly baked loaf with a great crust and interior.
How does this "Easy mixed rye bread" recipe help me improve my baking skills beyond just making this one loaf?
By mastering this recipe, you'll gain confidence in working with rye flour, understanding dough hydration, and learning about proofing techniques. These skills are transferable to other bread recipes.
Final Reflection: The Enduring Appeal of Simple, Perfect Bread
The pursuit of a perfectly textured, flavorful loaf of mixed rye bread remains a timeless culinary quest, and its accessibility to home bakers is more relevant than ever in today's world of fast food and processed ingredients. The simple act of creating something nourishing and delicious from scratch offers a powerful antidote to the pressures of modern life, connecting us to a rich culinary heritage and fostering a sense of accomplishment.
The enduring popularity of rye bread, and particularly its mixed variations, speaks volumes about our desire for wholesome, flavorful food that transcends fleeting trends. It's a testament to the enduring power of tradition and the satisfaction derived from mastering a fundamental skill. Bread is the staff of life,
a proverb often repeated, truly encapsulates the importance of this staple food and the comfort it provides. This simple recipe, therefore, is not just about baking bread; it's about connecting with something deeply human and profoundly satisfying.
Now, I invite you to consider the possibilities. Don't just bake this bread; experience it. Savor the aroma as it fills your kitchen, feel the satisfaction of shaping the dough with your own hands, and relish the taste of a loaf crafted with care and intention. Let this simple recipe be a gateway to a deeper appreciation for the art of baking and the simple pleasures found in creating something beautiful and delicious from humble ingredients. The journey of a thousand miles begins with a single step – or perhaps, a single loaf of perfectly mixed rye bread.
Unleash Your Inner Baker: Craft Your Perfect Roggenmischbrot!
Thanks for taking the time to explore the world of Roggenmischbrot with us! We hope you gained valuable insights into creating this delicious and satisfying bread. Now it's time to put your newfound knowledge into action!
- Bake your own Roggenmischbrot: This is the ultimate test of your baking skills. Follow the recipe, adjust to your preferences, and enjoy the satisfaction of creating something truly special.
- Share your creation: Snap a picture of your freshly baked loaf and share it on social media using #BakeWithEaseRoggenmischbrot – we'd love to see your results!
- Experiment with flavors: Try adding different seeds, herbs, or even fruits to your Roggenmischbrot. What unique twist will you discover?
What exciting variations will you add to your Roggenmischbrot recipe? Let's hear your ideas in the comments below!