
Effortless Elegance: Simple Meringue Nests with Berries

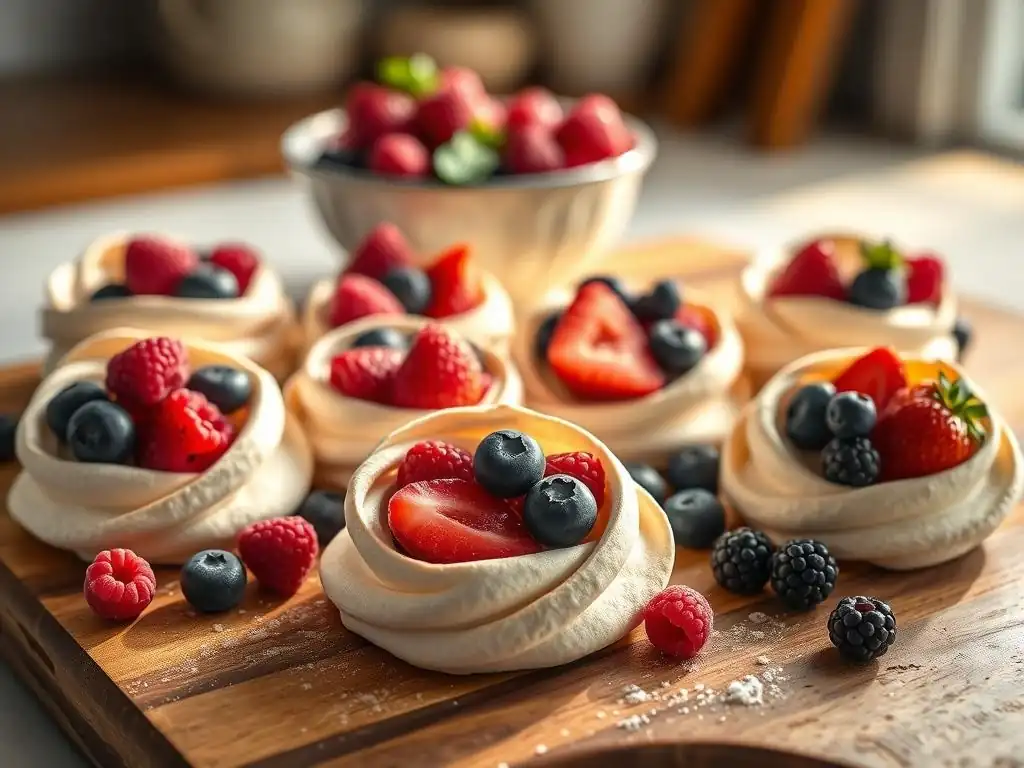
Welcome to BakeWithEase, your haven for unlocking the joy of baking! Ever dreamt of creating a dessert that's both stunning and surprisingly simple? Dive into our world of effortless elegance and discover the secrets behind our Easy Meringue Nests with Berries recipe. But that's just the beginning... what other seasonal delights are waiting to be unveiled? Keep reading to find out!
- Lemon Meringue Nests with Raspberry Coulis | Spring Baking
- Introduction to Lemon Meringue Nests with Raspberry Coulis
- Mastering the Meringue: A Detailed Guide
- Baking Your Meringue Nests: Achieving the Ideal Texture
- Assembling Your Lemon-Flavored Meringue Nests
- Variations and Adaptations for Meringue Nests
- Tips for Storing and Serving Meringue Nests
- Frequently Asked Questions About Meringue Nests (FAQ)
- The Perfect Spring Dessert: Enjoy Your Lemon Meringue Nests with Raspberry Coulis!
- Frequently Asked Questions
- Final Reflection: The Enduring Allure of Simple Delights
- Unlock Your Inner Pastry Chef: Craft Your Meringue Masterpiece!
Lemon Meringue Nests with Raspberry Coulis | Spring Baking
Introduction to Lemon Meringue Nests with Raspberry Coulis
Discover the Delight of Tangy and Sweet Meringue Nests
Imagine a cloud-like shell, impossibly light and crisp, cradling a vibrant, tangy fruit filling. That's the magic of meringue nests. These delicate desserts offer a delightful contrast in textures and flavors – the airy sweetness of the baked meringue perfectly complementing the bright acidity of berries or fruit coulis. They look incredibly elegant, suggesting hours of complex work, yet the process for creating these stunning treats is surprisingly straightforward, making them accessible even for novice bakers. Mastering a good, easy meringue nests berries recipe opens up a world of possibilities for beautiful, customizable desserts.
Creating meringue requires just a few simple ingredients: egg whites and sugar, primarily. The transformation that occurs when these are whipped together and slowly baked is truly fascinating. The protein in the egg whites creates a stable foam when air is incorporated, and the sugar stabilizes this foam, preventing it from collapsing.
Baking at a low temperature then dries out the meringue, resulting in that characteristic crisp, melt-in-your-mouth texture. While the basic technique is simple, small details in whipping and baking temperatures can dramatically impact the final result, turning a potentially chewy or cracked meringue into a perfectly ethereal nest.
Why This Lemon Meringue Nests Recipe is Perfect for Spring Baking
Spring is a season of renewal, marked by lighter meals and the arrival of fresh, vibrant produce, especially berries. This lemon meringue nests recipe with raspberry coulis embodies that spirit perfectly. It's a dessert that feels light and refreshing after a spring meal, unlike heavier cakes or pastries. The combination of zesty lemon flavor, sweet meringue, and tart raspberry coulis is reminiscent of sunny days and blooming flowers, making it an ideal fit for Easter, Mother's Day, or simply a delightful spring weekend treat. It's an easy meringue nests berries recipe that delivers impressive results with relatively little fuss.
Furthermore, the visual appeal of these nests, often adorned with fresh berries, aligns beautifully with the aesthetic of spring. The pale, delicate meringue provides a neutral canvas that highlights the bright colors of the raspberry coulis and any additional berry garnishes.
It's a dessert that looks as good as it tastes, perfect for celebrations or simply adding a touch of elegance to an everyday moment. The components – the meringue nests and the coulis – can even be prepared slightly ahead of time, making assembly on the day of serving quick and stress-free, which is always a bonus for entertaining.
Mastering the Meringue: A Detailed Guide
Essential Ingredients for Lemon Meringue Nests
To create truly spectacular lemon meringue nests, you'll need just a handful of high-quality ingredients. At the core are large, fresh egg whites, ideally separated from the yolks when the eggs are cold, but allowed to come to room temperature before whipping. This temperature change helps the proteins whip up to their maximum volume, yielding approximately 3-4 times the initial liquid volume. For a recipe yielding about 8-10 medium nests, you'll typically need the whites from 4-5 large eggs. Ensure absolutely no yolk contaminates the whites, as even a tiny amount of fat can prevent them from whipping properly.
The second crucial ingredient is sugar. Granulated sugar is the standard choice, but superfine or caster sugar dissolves more easily, leading to a smoother, glossier meringue and reducing the risk of a gritty texture. For every large egg white (roughly 30-35 grams), you'll generally use about 50-60 grams of granulated or caster sugar.
The sugar not only sweetens but also stabilizes the whipped egg whites, creating a more robust structure that holds its shape during piping and baking. A touch of acid, like cream of tartar (about ¼ teaspoon per 4 egg whites) or white vinegar, is also essential as it helps strengthen the protein structure, making the meringue more stable and less prone to weeping. Finally, fresh lemon zest adds that bright, signature flavor, typically the zest of one medium lemon per 4-5 egg whites.
Equipment You'll Need for Baking Lemon Meringue Nests
Having the right tools makes the process of creating meringue nests much smoother and more successful. The most important piece of equipment is a clean, dry bowl for whipping the egg whites. Glass or metal bowls are preferred over plastic, as plastic can retain greasy residues that inhibit whipping. A stand mixer with a whisk attachment is highly recommended for efficiency and achieving the stiff peaks necessary for stable meringue, though a hand mixer can also work with a bit more effort. Ensure your whisk attachment is also meticulously clean and dry.
You'll also need a baking sheet (or two, depending on the size of your nests) lined with parchment paper. Parchment paper is non-stick and makes removing the delicate baked meringues easy. For shaping the nests, a piping bag fitted with a large star or round tip (like an Ateco 826 star tip or a simple large round tip) is ideal for creating defined shapes and edges.
If you don't have a piping bag, you can use a sturdy zip-top bag with a corner snipped off, though the shape won't be as defined. An oven thermometer is also incredibly helpful to ensure your oven maintains the low, consistent temperature required for slow-drying the meringue without browning it too quickly or cracking it.
Step-by-Step: How to Make Lemon Meringue Nests
Whipping the Egg Whites with Cream of Tartar
Start by ensuring your egg whites are at room temperature. This allows them to whip up to maximum volume. Place the room-temperature egg whites into your exceptionally clean and dry mixing bowl. Begin whipping them on medium-low speed using your stand mixer or hand mixer.
This gentle start helps break up the egg white proteins without incorporating too much air too quickly. Once the egg whites become foamy, like soap bubbles, add the cream of tartar (or vinegar). For 4 large egg whites, use approximately ¼ teaspoon of cream of tartar. This acid helps stabilize the foam and makes the meringue stronger and less likely to collapse.
Increase the mixer speed to medium-high. Continue whipping until the egg whites reach soft peaks. This stage is characterized by the meringue holding a shape that curls over when the whisk is lifted. It should look opaque and airy, but not yet stiff.
At this point, the protein structure is developing, and you're ready to start incorporating the sugar gradually. Whipping to soft peaks before adding sugar is important; adding sugar too early can weigh down the egg whites and prevent them from reaching their full volume. The process to reach soft peaks typically takes about 2-4 minutes with a stand mixer.
Adding Sugar and Lemon Zest for Flavor and Gloss
Once soft peaks are achieved, it's time to add the sugar. This is a critical step for achieving a glossy, stable meringue. Gradually add the granulated or caster sugar, about 1 tablespoon at a time, while the mixer is still running on medium-high speed. Allow each addition of sugar to be mostly incorporated before adding the next. This slow process gives the sugar crystals time to dissolve into the egg white foam, which is essential for a smooth, non-gritty texture. Adding sugar too quickly can deflate the meringue or result in undissolved sugar, which can cause weeping later.
Continue whipping after all the sugar has been added. The meringue will become very thick, shiny, and glossy. Whip until stiff peaks form. When you lift the whisk, the meringue should stand straight up without drooping. Rub a tiny bit of the meringue between your fingers; it should feel smooth, with no discernible sugar granules.
This indicates the sugar has dissolved. Finally, gently fold in the fresh lemon zest using a spatula. Avoid overmixing once the zest is added, as this can knock air out of the meringue. The zest adds a beautiful aroma and tangy counterpoint to the sweetness. This easy meringue nests berries recipe relies on this perfect balance.
Piping and Shaping Your Meringue Nests
Preparing your baking sheet is the first step in shaping. Line it with parchment paper. If you want uniformly sized nests, you can draw circles on the underside of the parchment paper using a glass or cookie cutter as a guide (perhaps 3-4 inches in diameter), leaving ample space between each circle as the meringues can spread slightly. Fit your piping bag with your chosen tip (a large open star tip gives nice ridges) and fill it with the prepared meringue. Don't overfill the bag; it's easier to handle with smaller batches.
To pipe the nests, start by piping a flat disc as the base within your drawn circle. Then, pipe one or two layers on top of the outer edge of the disc, building up the sides to create a nest shape with a clear indentation in the center. Aim for sides that are about 1-1.5 inches high. The indentation should be deep enough to hold your filling later.
Be consistent with the size and height of your nests so they bake evenly. For approximately 8-10 nests using 4-5 egg whites, you'll likely need two baking sheets. Once piped, the nests are ready for their slow bake.
Baking Your Meringue Nests: Achieving the Ideal Texture
Understanding Low Oven Temperature for Meringue
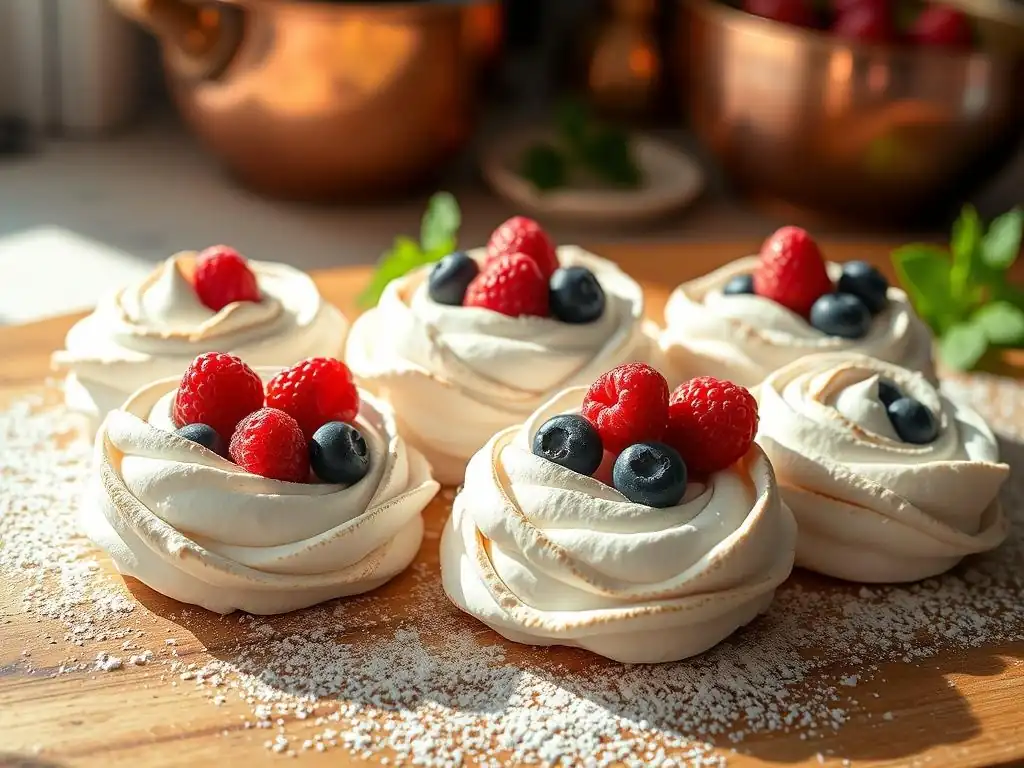
Baking meringue is less about cooking and more about drying it out slowly. This requires a very low oven temperature. High temperatures will cause the meringue to expand too quickly, resulting in cracks, browning, and potentially a chewy or sticky interior instead of the desired crispness. The ideal temperature range is typically between 200°F and 225°F (95°C and 110°C). This low heat allows the water content in the egg whites to evaporate gradually, leaving behind the stable sugar-protein matrix that is the crisp meringue.
Using an oven thermometer is highly recommended, as oven thermostats can be inaccurate, sometimes by as much as 25-50°F. Preheating your oven thoroughly to the low temperature is crucial before placing the meringues inside. Some recipes even suggest leaving the oven door slightly ajar during baking (you can prop it open with a wooden spoon) to help moisture escape, further promoting drying. This slow, gentle heat is the secret to achieving those perfectly pale, crisp, and light meringue shells that are essential for an easy meringue nests berries recipe.
Baking Time and Tips for Pale and Crispy Meringue
The baking time for meringue nests at a low temperature is quite long, often ranging from 1.5 to 3 hours, depending on the size of the nests and the exact oven temperature. For medium-sized nests (about 3-4 inches in diameter), expect a baking time closer to 2 hours at 200°F (95°C). The meringues are ready when they are completely firm to the touch and lift easily off the parchment paper. They should be pale white or just faintly cream colored, not browned. If they start to brown, your oven temperature is too high.
Once the baking time is complete, turn off the oven but do not open the door. Allow the meringues to cool completely inside the oven for several hours, ideally overnight. This slow cooling process prevents sudden temperature changes that can cause cracking and helps ensure the meringues are thoroughly dried out and crispy all the way through.
Removing them from the oven too soon, while they are still warm and pliable, will likely result in them becoming chewy or collapsing. Patience during the cooling phase is just as important as the low baking temperature for achieving the perfect, crispy texture needed for this easy meringue nests berries recipe.
Troubleshooting Common Meringue Baking Problems
Meringue can be finicky, and encountering issues like cracking, weeping, or chewiness is common, especially for beginners. Cracking often occurs if the oven temperature is too high or if the meringues are exposed to a sudden temperature change (like being removed from the oven too quickly). Ensure your oven temperature is accurate using a thermometer and always cool the meringues completely inside the switched-off oven. Another cause for cracking can be piping the nests too tall or the meringue being slightly under-whipped.
Weeping, which is when liquid beads form on the surface or base of the meringue, is usually caused by undissolved sugar or high humidity. Using superfine sugar and ensuring the sugar is completely dissolved during whipping helps prevent this. Baking on a dry day is also beneficial.
If meringues turn out chewy or sticky, it's typically because they haven't been baked long enough or at a low enough temperature to fully dry out. Extend the baking time at the low temperature or try the slightly-ajar oven door method to facilitate moisture escape. Persistence and slight adjustments based on your environment and oven are key to mastering meringue.
Assembling Your Lemon-Flavored Meringue Nests
Preparing the Raspberry Coulis
Selecting Fresh Raspberries
The quality of your raspberry coulis starts with the quality of the fruit. For the brightest flavor and best results, opt for fresh, ripe raspberries. Look for berries that are plump, firm, and uniformly colored – a rich red indicates ripeness. Avoid packages with bruised or moldy berries.
While fresh is preferred, frozen raspberries can also be used, especially if fresh aren't in season or are expensive. If using frozen, there's no need to thaw them before making the coulis; they can go straight into the pan. For a batch of coulis sufficient for about 8-10 meringue nests, you'll need approximately 10-12 ounces (about 300-350 grams) of raspberries.
Taste a few berries before making the coulis to gauge their sweetness. This will help you adjust the amount of sugar needed. Perfectly ripe raspberries are a balance of sweet and tart, which is exactly what you want to complement the sweet meringue. If your berries are particularly tart, you might need a little extra sugar in the coulis. Conversely, very sweet berries will require less. Rinsing the berries gently under cool water and draining them thoroughly before use is also important, especially if using fresh ones.
Making and Straining the Raspberry Coulis
Making raspberry coulis is incredibly simple. Combine the fresh or frozen raspberries in a small saucepan with a small amount of sugar (start with 2-3 tablespoons for 10-12 ounces of berries, adjusting to taste) and a squeeze of lemon juice (about 1 teaspoon). The lemon juice brightens the flavor of the raspberries. Heat the mixture over medium heat, stirring occasionally, until the raspberries break down and release their juices. This usually takes about 5-10 minutes. The mixture should simmer gently.
Once the raspberries have softened and the sauce has thickened slightly, remove it from the heat. For a smooth coulis, you'll need to strain it to remove the seeds. Place a fine-mesh sieve over a bowl and pour the raspberry mixture into the sieve. Use the back of a spoon or a rubber spatula to press the pulp through the sieve, leaving the seeds behind. Discard the seeds.
You should be left with a vibrant, smooth raspberry sauce. Taste the coulis and add more sugar if needed to balance the tartness. Allow the coulis to cool completely before using it to fill the meringue nests. This easy meringue nests berries recipe gets a major flavor boost from this simple coulis.
Filling the Meringue Nests: A Delicate Approach
Once your meringue nests are completely cool and crispy, and the raspberry coulis has chilled, it's time for assembly. This step should be done just before serving to prevent the meringue from absorbing moisture from the filling and becoming soft. Place each cooled meringue nest on your serving plate. The indentation you created during piping is where the delicious filling will go.
Carefully spoon the cooled raspberry coulis into the center of each nest. Avoid overfilling, as the coulis might spill over the sides. About 1-2 tablespoons per nest is usually sufficient, depending on the size of your nests. The goal is to fill the well without letting the liquid soak into the meringue walls too much. If you have a thicker filling, like a citrus curd, it can be piped using a pastry bag for precision, but the coulis is typically spooned. Handle the meringue nests gently, as they are fragile and can break easily.
Garnishing for Added Elegance: Lemon Zest
Adding a final garnish elevates the visual appeal and reinforces the flavors of your lemon meringue nests. A sprinkle of fresh lemon zest over the raspberry coulis adds a burst of citrus aroma and a pop of bright yellow color against the red. Use a microplane zester to get very fine strands of zest, avoiding the bitter white pith underneath. Just a light dusting over the top of the coulis in each nest is enough to make a statement.
For an extra touch of freshness and color, you can also garnish with a few fresh raspberries or small mint sprigs placed alongside or on top of the coulis. A tiny dusting of powdered sugar over the meringue itself can also add a delicate, snowy finish, though be mindful that powdered sugar can absorb moisture over time. The combination of the white meringue, red coulis, yellow zest, and perhaps some fresh berries creates a stunning presentation that is perfect for spring entertaining. This easy meringue nests berries recipe looks incredibly sophisticated with just these simple finishing touches.
Variations and Adaptations for Meringue Nests
Meringue Nests with Different Citrus Curds
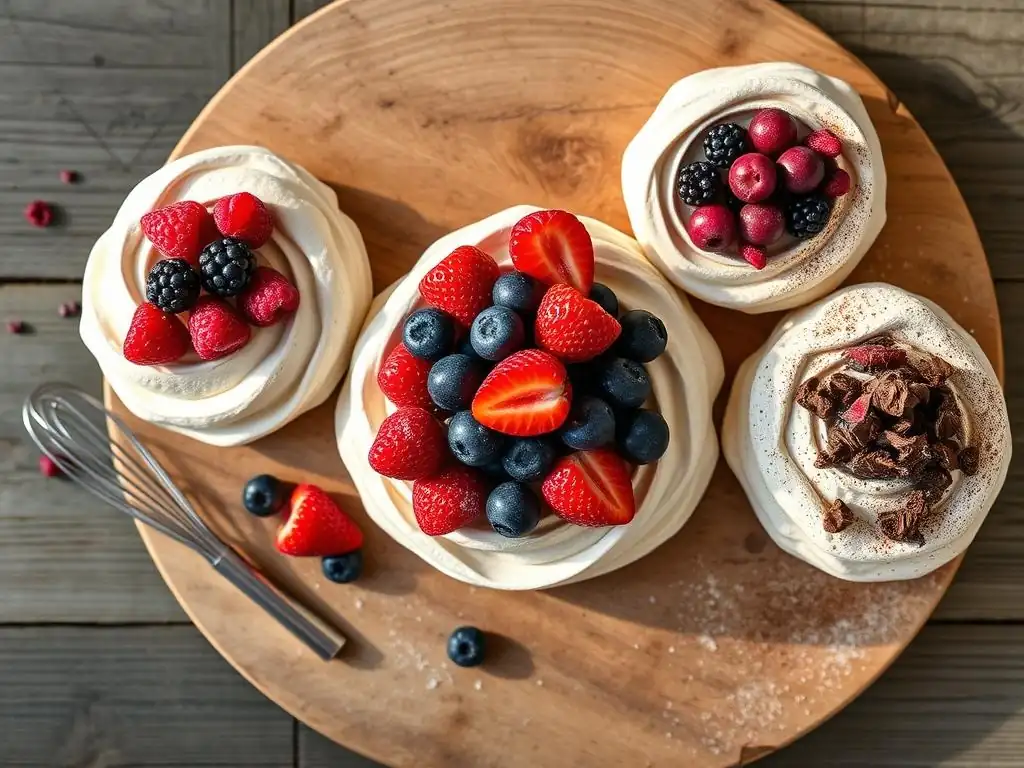
While lemon is classic, meringue nests pair beautifully with other citrus curds, offering a delightful twist on the traditional. Lime curd provides a sharper, more intense tang that contrasts wonderfully with the sweet meringue. Use fresh lime juice and zest following a standard curd recipe (typically involving egg yolks, sugar, butter, and citrus juice/zest, cooked until thickened). For about 8-10 nests, you'll need roughly 1 to 1.5 cups of cooled curd. Orange curd, on the other hand, offers a sweeter, milder citrus flavor with lovely floral notes.
Grapefruit curd is another intriguing option, offering a pleasant bitterness alongside its tartness. The process for making these curds is similar to lemon curd; the key is using fresh, vibrant fruit. These curds are often thicker than a coulis, making them ideal for piping into the meringue nests for a clean, polished look. Pairing these different citrus curds with complementary berries – perhaps lime curd with blackberries or orange curd with strawberries – allows for endless flavor combinations built upon the easy meringue nests berries recipe foundation.
Meringue Nests with Chocolate Ganache and Berries
For a richer, more indulgent take, fill your meringue nests with smooth chocolate ganache instead of fruit coulis. A simple ganache is made by pouring hot cream over chopped chocolate and stirring until smooth. A ratio of 1:1 (equal parts chocolate and cream by weight) creates a pourable ganache, while a 2:1 ratio results in a thicker, truffle-like consistency perfect for filling. For 8-10 nests, about 6-8 ounces (170-225g) of chocolate and the corresponding amount of cream should suffice. Dark chocolate provides a sophisticated bitterness, while milk or white chocolate offers sweeter options.
Once the ganache has cooled and thickened slightly (it should be spreadable or pipeable, not liquid), spoon or pipe it into the cooled meringue nests. Top generously with fresh berries, such as raspberries, strawberries, or blueberries. The combination of crisp, sweet meringue, rich chocolate, and juicy, tart berries is a truly decadent treat. This variation shows how versatile the easy meringue nests berries recipe base can be, easily adapting to different flavor profiles beyond just fruit.
Meringue Nests with Toasted Almonds and Caramel
Another delicious adaptation involves incorporating nutty and caramel flavors. Fill the meringue nests with a dollop of whipped cream or vanilla pastry cream, then top with a drizzle of homemade or good-quality store-bought caramel sauce and a sprinkle of toasted slivered almonds. Toasting the almonds brings out their nutty flavor; you can do this in a dry pan over medium heat for a few minutes until fragrant and lightly browned, or spread on a baking sheet and bake at 350°F (175°C) for 5-10 minutes.
The crunch of the toasted almonds provides a wonderful textural contrast to the crisp meringue and smooth cream/caramel. A simple caramel sauce can be made by melting sugar with a little water, then adding butter and cream. For about 8-10 nests, you'll need roughly ½ cup of toasted almonds and about ½ cup of caramel sauce. This variation moves away from the berries focus of the easy meringue nests berries recipe, but showcases the meringue nest as a versatile vehicle for various toppings, proving its adaptability for different tastes and occasions.
Tips for Storing and Serving Meringue Nests
How to Store Meringue Nests for Maximum Crispness
Meringue is highly susceptible to humidity, which can quickly turn a crisp shell into a sticky, chewy mess. Therefore, proper storage is crucial for maintaining their texture. Once completely cooled (ideally after several hours or overnight in the turned-off oven), store the unfilled meringue nests in an airtight container at room temperature. Layer them carefully between sheets of parchment paper to prevent them from sticking or breaking.
Avoid storing meringue in the refrigerator, as the humid environment will cause them to soften rapidly. Similarly, storing them in an open container or exposing them to humid air for extended periods will compromise their crispness. If stored correctly in a cool, dry place, meringue nests can last for several days, sometimes even up to a week, retaining their delicate texture. This allows you to bake the nests ahead of time and assemble the dessert just before serving, which is a great benefit of this easy meringue nests berries recipe.
Serving Suggestions for a Stunning Dessert Presentation
Presenting your lemon meringue nests with raspberry coulis beautifully enhances the dining experience. Arrange the filled nests on individual dessert plates. The vibrant red of the coulis against the white meringue is naturally eye-catching. As mentioned earlier, garnishing with fresh raspberries, a few additional mixed berries (like blueberries or sliced strawberries), a sprinkle of lemon zest, or a small mint leaf adds color and freshness.
For an extra touch of indulgence, you can serve the nests with a small dollop of lightly sweetened whipped cream or crème fraîche alongside the filled nest. The richness of the cream provides another layer of texture and flavor that complements both the meringue and the tart coulis. Consider serving them with small dessert forks or spoons that allow guests to easily break into the delicate shell. Serving these elegant nests is the perfect finale to any spring meal, showcasing the simple beauty achievable with this easy meringue nests berries recipe.
Frequently Asked Questions About Meringue Nests (FAQ)
Can I Make Meringue Nests Ahead of Time?
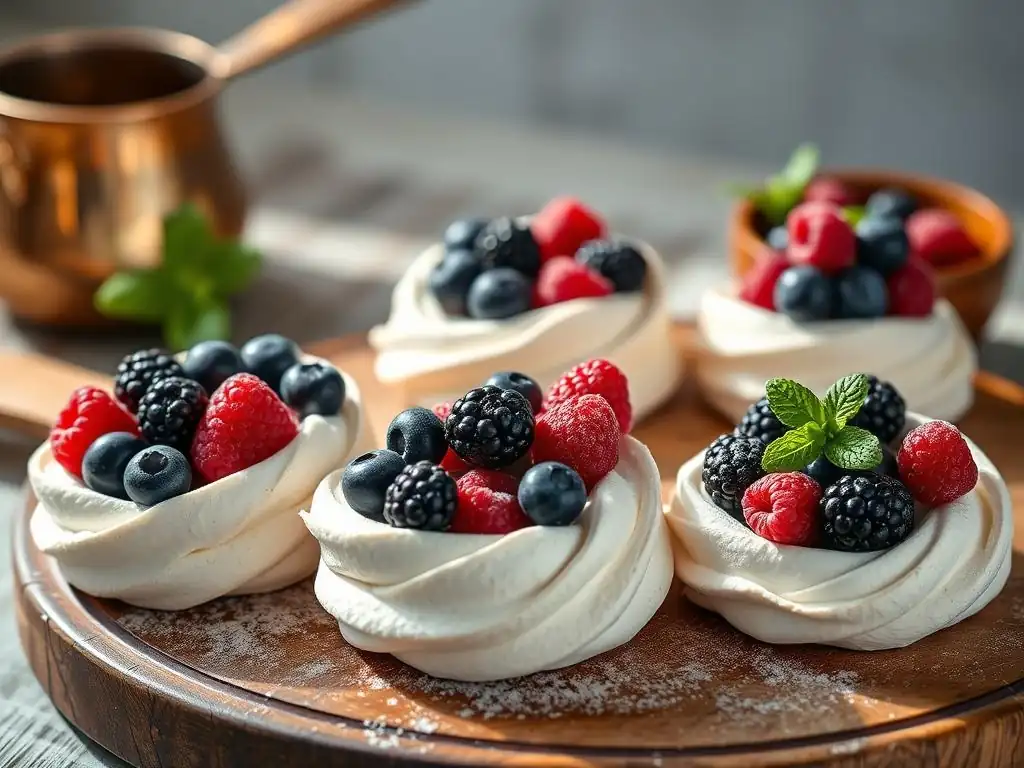
Absolutely! One of the great advantages of this easy meringue nests berries recipe is that the meringue shells themselves can be made well in advance. As detailed in the storage section, properly baked and cooled meringue nests, stored in an airtight container in a cool, dry place, will remain crisp for several days, potentially up to a week. This makes them an excellent component for entertaining, as you can complete the most time-consuming part of the process days before your event.
However, the filling (like the raspberry coulis) and any garnishes should be prepared and added just before serving. Spooning the coulis into the nests more than an hour or two ahead of time will likely result in the meringue absorbing moisture and losing its crisp texture, becoming soggy. So, bake the nests ahead, prepare the coulis perhaps a day ahead and store it chilled, and then assemble right before you plan to serve them for the best possible result.
What's the Best Way to Prevent Meringue from Cracking?
Preventing meringue from cracking primarily comes down to managing temperature and humidity. The most common cause of cracking is baking at too high a temperature. Ensure your oven is accurately calibrated to the low temperature required (200-225°F or 95-110°C) using an oven thermometer. Baking slowly at this low heat allows the meringue to dry out gently without expanding too rapidly.
Another critical factor is cooling. Never remove hot meringues from the oven and expose them to cool room air. This sudden temperature change is a major culprit for cracks. Always turn off the oven and let the meringues cool down completely inside the closed oven for several hours or overnight. Avoiding opening the oven door during baking also helps maintain a stable temperature. Lastly, ensure your meringue is whipped to stiff, stable peaks; under-whipped meringue is weaker and more prone to collapsing or cracking during baking.
Can I Use Pasteurized Egg Whites for Meringue Nests?
Yes, you can use pasteurized liquid egg whites sold in cartons for making meringue, and they can be a convenient option. Pasteurized egg whites are generally considered safe and whip up similarly to fresh egg whites. However, some bakers find that they don't achieve quite the same volume or stability as fresh egg whites, possibly due to the pasteurization process slightly altering the protein structure. You might need to whip them for a slightly longer time to reach stiff peaks.
If using pasteurized egg whites, ensure they are at room temperature before whipping, just like fresh ones. Follow the same ratios of sugar and acid (cream of tartar) as you would for fresh egg whites based on the weight or volume specified by the carton. While they might require a little more attention during whipping, pasteurized egg whites are a perfectly viable alternative for making meringue nests, offering peace of mind regarding safety, especially when serving to vulnerable populations.
The Perfect Spring Dessert: Enjoy Your Lemon Meringue Nests with Raspberry Coulis!
Frequently Asked Questions
What makes this meringue nest recipe considered "easy"?
This recipe focuses on simplified techniques and readily available ingredients, making it accessible even for beginner bakers. We eliminate complex steps for a faster, more manageable process.
Can I use different types of berries for the meringue nests?
Absolutely! Feel free to experiment with your favorite berries. Fresh, seasonal berries are ideal, but thawed frozen berries can also work well.
How do I prevent my meringue nests from cracking?
Cracking can be minimized by baking at a low temperature and allowing the meringue nests to cool completely in the oven. This slow cooling process helps prevent rapid temperature changes.
What's the best way to store meringue nests?
Store them in an airtight container at room temperature. Humidity can make them sticky, so keeping them sealed is crucial for maintaining their crispness.
Can I make the meringue nests ahead of time?
Yes! Meringue nests can be made a day or two in advance. Just ensure they are stored properly to prevent them from becoming soft. Proper storage is key to their longevity.
Final Reflection: The Enduring Allure of Simple Delights
The art of effortless elegance isn't about complexity; it's about finding beauty in simplicity. This recipe for meringue nests with berries proves that point perfectly. In a world obsessed with elaborate culinary creations, sometimes the most satisfying experiences come from the simplest ingredients, expertly combined. The delicate crunch of the meringue, the burst of juicy berries – it's a symphony of texture and flavor that speaks volumes.
The enduring appeal of this dessert, and recipes like it, lies in its accessibility and its ability to evoke a sense of calm and joy. It's a recipe that transcends generations, a testament to the timeless comfort of classic baking. The simplest things are often the most beautiful,
a sentiment that rings true when considering the understated elegance of these meringue nests. The process itself is meditative, a quiet moment of creation that allows for mindful engagement, a welcome respite in our often-frantic lives.
Now, I invite you to consider the power of simplicity in your own life. Don't be afraid to embrace the beauty of the uncomplicated. Try this recipe, savor the process, and allow yourself to experience the joy of creating something beautiful and delicious with minimal effort. Let the effortless elegance of these meringue nests inspire you to find moments of peace and contentment in the everyday. Perhaps you'll even discover your own "simple delight" waiting to be uncovered.
Unlock Your Inner Pastry Chef: Craft Your Meringue Masterpiece!
Thanks for joining us on this delicious journey into the world of meringue nests! We hope you've gained some valuable tips and tricks to create effortlessly elegant desserts. Now it's time to put your newfound skills to the test!
- Whip up a batch of your own meringue nests: Use our recipe as a starting point, but don't be afraid to experiment with different flavorings and toppings! This is your chance to shine!
- Share your beautiful creations on social media using #BakeWithEaseMeringues – we'd love to see your culinary artistry!
- Challenge a friend to a meringue-making competition: Who can create the most impressive nest?
Ready to transform your kitchen into a meringue haven? What unique twist will you add to your next batch?