
Master the Art of Lattice Pie Topping (Easy Steps)

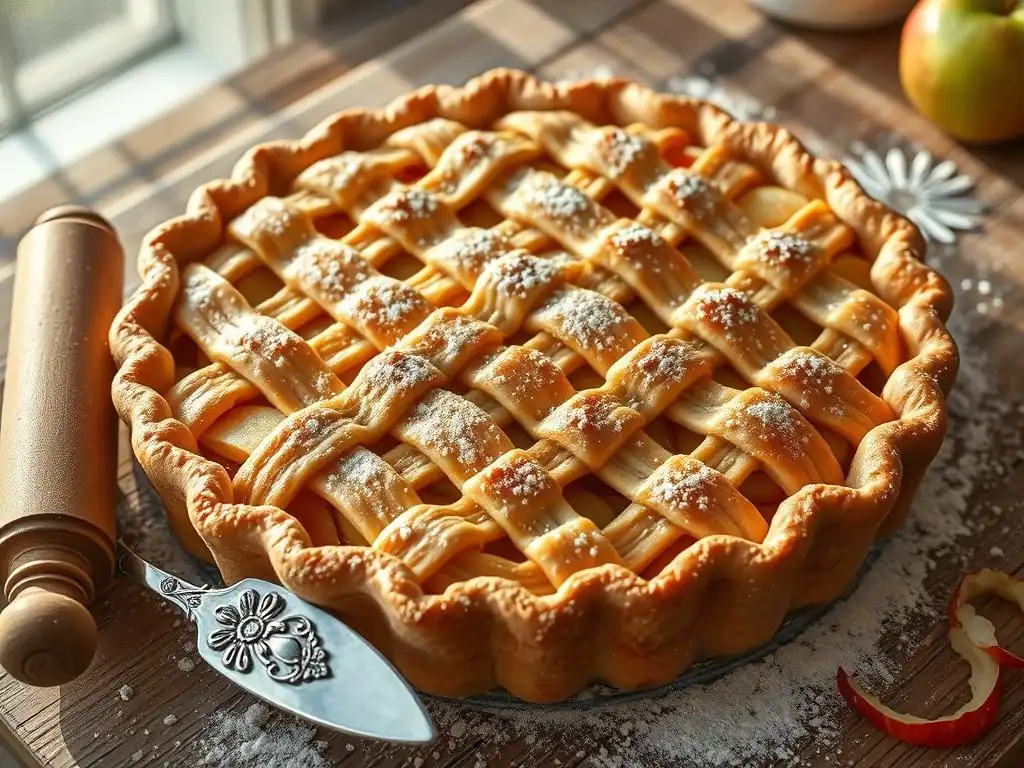
Welcome to BakeWithEase, your guide to confident baking! Ever wondered how to achieve that picture-perfect lattice pie topping without the fuss? You're in the right place. We're about to unlock the secrets to creating a stunning, easy-to-achieve lattice design that will transform your next pie into a showstopper. Intrigued? Let's get baking!
- Master the Art of Easy Lattice Pie Topping (Easy Steps) - BakeWithEase
- Introduction to Lattice Pie Crust: A Fall Baking Essential
- Preparing for Your Easy Lattice Pie Topping
- Step-by-Step Guide: Creating an Easy Lattice Pie Topping
- Baking Your Lattice Pie to Golden Perfection
- Troubleshooting Common Lattice Pie Topping Problems
- Variations and Creative Lattice Pie Designs
- Enjoying Your Homemade Lattice Pie
- Conclusion: Embrace the Art of Easy Lattice Pie Making
- Frequently Asked Questions
- Final Reflection: Weaving a Legacy, One Lattice Square at a Time
- Unleash Your Inner Pie Artist: Master Lattice Perfection!
Master the Art of Easy Lattice Pie Topping (Easy Steps) - BakeWithEase
Introduction to Lattice Pie Crust: A Fall Baking Essential
Why Choose a Lattice Pie Topping for Your Apple & Pumpkin Pies?
A lattice pie topping isn't just visually stunning; it serves a practical purpose, especially for fruit pies like apple and pumpkin that are staples of fall baking. The open weave allows steam from the bubbling filling to escape during baking. This crucial ventilation prevents the crust from becoming soggy on the bottom and helps the filling thicken properly. Without adequate steam release, you could end up with a watery pie, even if your filling recipe is perfect.
Beyond functionality, the easy lattice pie topping adds a touch of homemade elegance that's hard to beat. For fall favorites like warm apple pie or spiced pumpkin, a beautiful lattice signals care and craftsmanship. It transforms a simple pie into a centerpiece, making it ideal for holiday gatherings or just a cozy weekend treat. This classic design is achievable even for beginner bakers, proving that beautiful results don't require complex techniques.
Achieving the Perfect Lattice: Simplicity and Elegance Combined
Many bakers are intimidated by the lattice, assuming it requires advanced pastry skills. However, the core technique for an easy lattice pie topping is surprisingly straightforward – it's essentially a simple weaving pattern. The elegance comes from uniform strips and careful execution, not intricate maneuvers. With a little practice and attention to detail, you can create a professional-looking lattice that bakes up golden and crisp.
The key to simplicity lies in preparation and technique. Chilling your dough properly, cutting even strips, and using a systematic weaving method are the foundations. There's no need for fancy tools; a ruler and a knife work perfectly. This approach demystifies the lattice, making it accessible to anyone eager to elevate their pie game. By focusing on these basic steps, you'll find that achieving a beautiful lattice pie crust is well within your reach.
Preparing for Your Easy Lattice Pie Topping
Essential Tools for a Beautiful Lattice Pie Crust
Having the right tools can significantly streamline the process of creating an easy lattice pie topping. While you don't need a full professional setup, a few key items make a big difference in achieving clean, uniform results. A rolling pin is fundamental for rolling out your dough to an even thickness, which is critical for consistent baking. Look for one that feels comfortable and allows for smooth, even pressure.
Another indispensable tool is something to cut straight, uniform strips. A sharp knife and a ruler are the simplest option, ensuring your strips are the same width. Alternatively, a fluted pastry wheel or a pizza cutter can be used, though a ruler is still helpful for guiding straight cuts. Finally, a baking sheet placed on the oven rack below your pie is essential to catch any drips from the filling during baking, saving you from a messy oven cleanup.
Choosing the Right Pie Dough for Your Lattice Top: Homemade vs. Store-Bought
The quality of your dough is paramount for a successful lattice pie topping. A good dough should be pliable enough to roll and weave without cracking excessively, yet sturdy enough to hold its shape and bake up flaky. You have two main options: homemade or store-bought.
Homemade dough, often made with butter, shortening, or a combination, typically offers the best flavor and flakiness. A classic recipe usually involves combining about 2 ½ cups of all-purpose flour with a teaspoon of salt, cutting in ½ cup of cold, cubed unsalted butter and ½ cup of cold shortening until pea-sized crumbs form, then adding about ½ cup of ice water a tablespoon at a time until the dough just comes together. This dough needs to be chilled thoroughly (at least 1-2 hours) before rolling.
Store-bought dough is a convenient shortcut and many brands perform well for lattice work, provided they are handled gently and kept cold. Whichever you choose, ensure it's well-chilled before you begin rolling and cutting.
Recipe for a Perfect Pie Crust Suitable for Lattice Topping
Here is a reliable recipe for a double-crust pie dough, yielding enough for a bottom crust and an easy lattice pie topping.
Yields: 2 pie crusts (one bottom, one lattice top)
Prep time: 20 minutes
Chill time: 1-2 hours minimum
Ingredients:
- 2 ½ cups all-purpose flour
- 1 teaspoon salt
- 1 cup (2 sticks) unsalted butter, very cold, cut into ½-inch cubes
- ½ cup ice water, plus more if needed
Instructions:
- In a large bowl, whisk together the flour and salt.
- Cut in the cold butter using a pastry blender, fork, or your fingertips until the mixture resembles coarse crumbs with some larger, pea-sized pieces of butter remaining.
- Gradually add the ice water, 1 tablespoon at a time, mixing gently with a fork until the dough just comes together. Be careful not to overmix. You may not need all the water, or you might need a tiny bit more.
- Divide the dough in half, form each half into a disc, wrap tightly in plastic wrap, and flatten slightly.
- Refrigerate for at least 1 to 2 hours before using. This chilling step is crucial for preventing shrinkage and making the dough easier to handle for your lattice pie crust.
Step-by-Step Guide: Creating an Easy Lattice Pie Topping
Step 1: Rolling Out Your Pie Dough for Lattice Strips
Once your pie dough is thoroughly chilled, take one disc out of the refrigerator. Allow it to sit at room temperature for just 5-10 minutes if it's very hard, but keep it cold. Lightly flour a clean work surface and your rolling pin. Place the dough disc in the center and begin rolling from the center outwards, rotating the dough occasionally to prevent sticking and ensure an even circle or rectangle.
Aim to roll the dough to a thickness of about ⅛ inch. This thickness provides enough structure for the strips to hold their shape during weaving and baking, while still baking through nicely. If the dough becomes too soft or sticky, slide it onto a baking sheet and pop it back into the refrigerator for 10-15 minutes to firm up before continuing. A consistently rolled sheet is the first step to a uniform and easy lattice pie topping.
Step 2: Cutting Uniform Pie Dough Strips for a Professional Look
After rolling your dough to the desired thickness, it's time to cut the strips for your lattice pie crust. For a standard lattice pattern on a 9-inch pie, you'll typically need about 8-12 strips. The width of the strips is up to your preference, but uniformity is key for a clean look. Common widths range from ½ inch to 1 inch. Using a ruler and a sharp knife or pastry wheel, cut straight lines across the rolled dough.
Tips for Cutting Perfect Lattice Strips
- Chill the rolled dough: If the dough has softened while rolling, place the rolled sheet on a baking sheet and chill it for 10-15 minutes before cutting. This makes the dough firmer and easier to cut cleanly without stretching or tearing.
- Use a guide: Lay a ruler along the edge of the dough and use it as a guide for your knife or pastry wheel to ensure perfectly straight lines. Move the ruler over by your desired strip width for each subsequent cut.
- Cut efficiently: Plan your cuts to minimize scraps. Cutting a rectangle first can be more efficient than cutting strips from a circle, though either works.
- Keep strips separate: As you cut, carefully lift the strips and lay them flat on a baking sheet lined with parchment paper. If you won't be weaving immediately, return the strips on the baking sheet to the refrigerator to keep them cold and firm until you're ready. Cold strips are much easier to handle and weave for an easy lattice pie topping.
Step 3: Arranging the First Layer of Pie Dough Strips
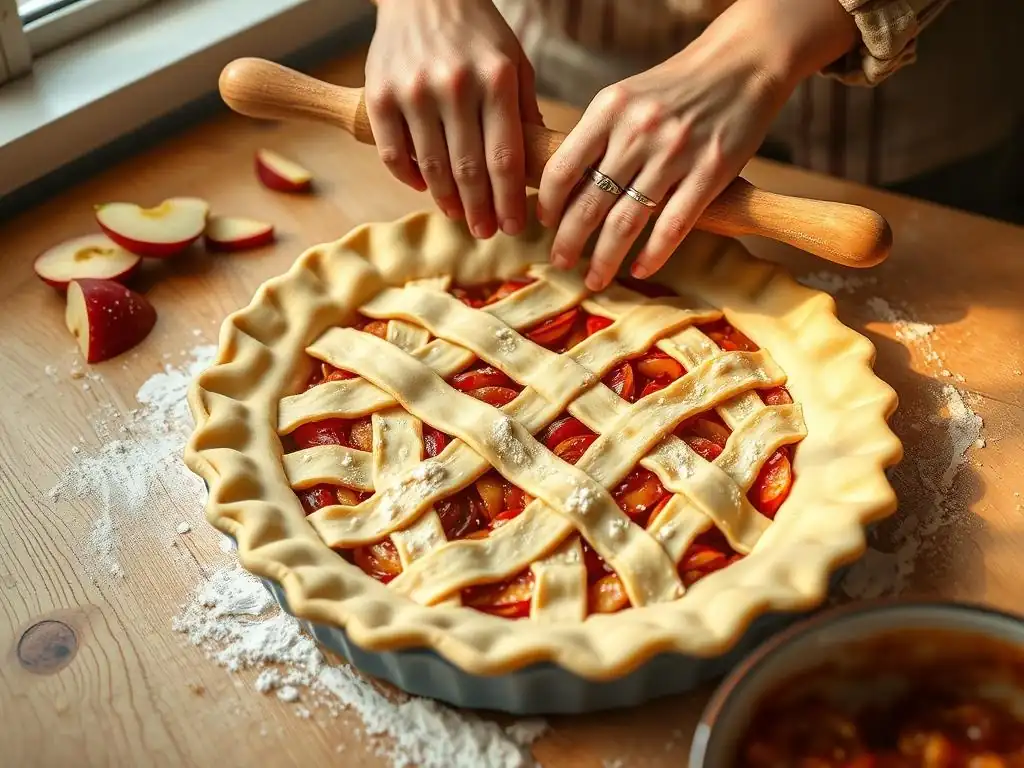
With your pie filling ready in the bottom crust, it's time to start building your easy lattice pie topping. Take your chilled dough strips from the refrigerator. For a classic lattice, you'll arrange half of your strips running parallel in one direction across the pie.
Carefully lift each strip and lay it across the pie, spacing them evenly. For example, if you're using 1-inch strips on a 9-inch pie, you might space them about 1 inch apart. Don't worry about the excess length hanging over the edges for now. Just focus on laying the first set of strips straight and parallel across the pie filling. This forms the base layer of your weave.
Step 4: Folding Back and Weaving the Second Layer
This is where the magic of the easy lattice pie topping happens – the weaving! Start with one of the strips running perpendicular to your base layer. Place this strip across the center of the pie, perpendicular to the strips already laid down.
Now, starting from the center, carefully lift every other strip of the base layer that is currently underneath the new perpendicular strip. Fold these lifted strips back towards the edge of the pie. Lay down the perpendicular strip you just placed. Then, unfold the strips you lifted back over the perpendicular strip.
Move to the next perpendicular strip, placed parallel to the first one you wove. This time, lift the opposite strips from the base layer (the ones you didn't lift before). Lay down the new perpendicular strip and unfold the lifted base strips over it. Continue this pattern, alternating which base strips you lift, until you have woven all your perpendicular strips across the pie.
Weaving Techniques for a Stunning Lattice Design
- Start in the center: Beginning your weave with a strip placed across the center of the pie helps ensure your design is centered and balanced.
- Lift every other strip: The core of the classic weave is lifting alternating strips of the base layer. If you lifted strips 1, 3, 5, etc., for the first perpendicular strip, you'll lift strips 2, 4, 6, etc., for the next one placed parallel to it.
- Keep strips cold: If your strips warm up and become difficult to handle or tear, place the entire pie (carefully!) back into the refrigerator for 10-15 minutes to chill the dough before continuing the weave. Cold dough is much more forgiving for creating a perfect easy lattice pie topping.
- Gentle handling: Lift and fold the base strips gently to avoid stretching or breaking them.
Step 5: Securing the Edges and Crimping for a Finished Look
Once your lattice pie topping is woven, you'll have excess dough strips hanging over the edge of the pie dish. Use a sharp knife or kitchen shears to trim these strips, leaving about a ½ to ¾ inch overhang around the entire perimeter of the pie dish.
Now, it's time to secure the lattice to the bottom crust and create a decorative edge. Moisten the edge of the bottom crust slightly with a little water. Fold the trimmed overhang of the lattice strips underneath the edge of the bottom crust. Press the edges together firmly to seal them completely.
Finally, crimp the edges decoratively. You can use your fingers to create a fluted edge, press with the tines of a fork, or use a pastry crimper. A well-sealed and crimped edge is essential for preventing the filling from bubbling out and ensuring a tidy finish for your easy lattice pie topping.
Preventing Shrinkage: Tips for a Perfect Pie Crust Edge
- Keep dough cold: Cold dough is less likely to shrink dramatically during baking. Ensure your dough is well-chilled before rolling, cutting, and weaving.
- Don't stretch the dough: When rolling and placing strips, avoid stretching the dough. Stretching causes the gluten to tighten, which leads to shrinkage in the oven.
- Rest the pie: After assembling the lattice and crimping the edges, refrigerate the entire pie for at least 20-30 minutes before baking. This allows the gluten to relax and the butter to firm up, further reducing shrinkage.
- Proper sealing: Ensure the top and bottom crusts are firmly sealed together around the edge. This creates a strong barrier that helps maintain the edge shape.
Baking Your Lattice Pie to Golden Perfection
Preparing the Pie Filling: Apple & Pumpkin Filling Recipes
While this guide focuses on the easy lattice pie topping, the filling is equally important! For classic fall pies suitable for a lattice, consider these general approaches:
- Apple Pie Filling: Combine thinly sliced apples (about 6-8 medium apples, like Granny Smith, Honeycrisp, or a mix – approximately 2-2.5 lbs) with sugar (typically ½ to ¾ cup, depending on apple sweetness), 2-4 tablespoons of flour or cornstarch (for thickening), cinnamon (1-2 tsp), nutmeg (½ tsp), and a pinch of salt. A tablespoon of lemon juice adds brightness and helps prevent browning. Toss everything together gently to coat the apples evenly before spooning into your prepared bottom crust.
- Pumpkin Pie Filling: Traditional pumpkin pie uses a custard-based filling. This typically involves whisking together about 2 cups of pumpkin puree (from a 15-ounce can, approximately 425g), ¾ cup packed light brown sugar, 1 teaspoon ground cinnamon, ½ teaspoon ground ginger, ¼ teaspoon ground cloves, ¼ teaspoon ground nutmeg, and a pinch of salt. Whisk in 2 large eggs, then gradually whisk in 1 ½ cups of evaporated milk or heavy cream. This mixture is then poured into the bottom crust. Note that pumpkin pie is often baked at a higher temperature initially (like 425°F for 15 minutes) before reducing the temperature to 350°F to finish baking, which helps set the edge crust before the custard fully bakes.
Ensure your filling is prepared and ready to go into the bottom crust before you start the final assembly of your easy lattice pie topping.
Baking Temperatures and Times for Lattice-Topped Pies
Baking a lattice-topped pie requires careful temperature control to ensure the crust is golden and flaky without burning the top or leaving the bottom soggy. A common method involves starting the pie at a relatively high temperature to help set the bottom crust quickly, then reducing the temperature to allow the filling to cook through and the top crust to brown evenly.
For fruit pies like apple, a good starting point is often 425°F (220°C) for the first 15-20 minutes, then reducing the oven temperature to 375°F (190°C) for the remaining 35-55 minutes, or until the crust is deeply golden brown and the filling is bubbling visibly through the lattice openings. For pumpkin pie, as mentioned, you might start at 425°F for 15 minutes, then reduce to 350°F (175°C) and bake for another 35-45 minutes, or until the center is mostly set (a knife inserted near the edge comes out clean).
Total baking time for a 9-inch lattice pie typically ranges from 50 to 75 minutes, depending on the filling and your oven. Always bake until you see clear signs of doneness, not just by the clock.
Achieving a Golden-Brown Lattice: Egg Wash or Milk Wash?
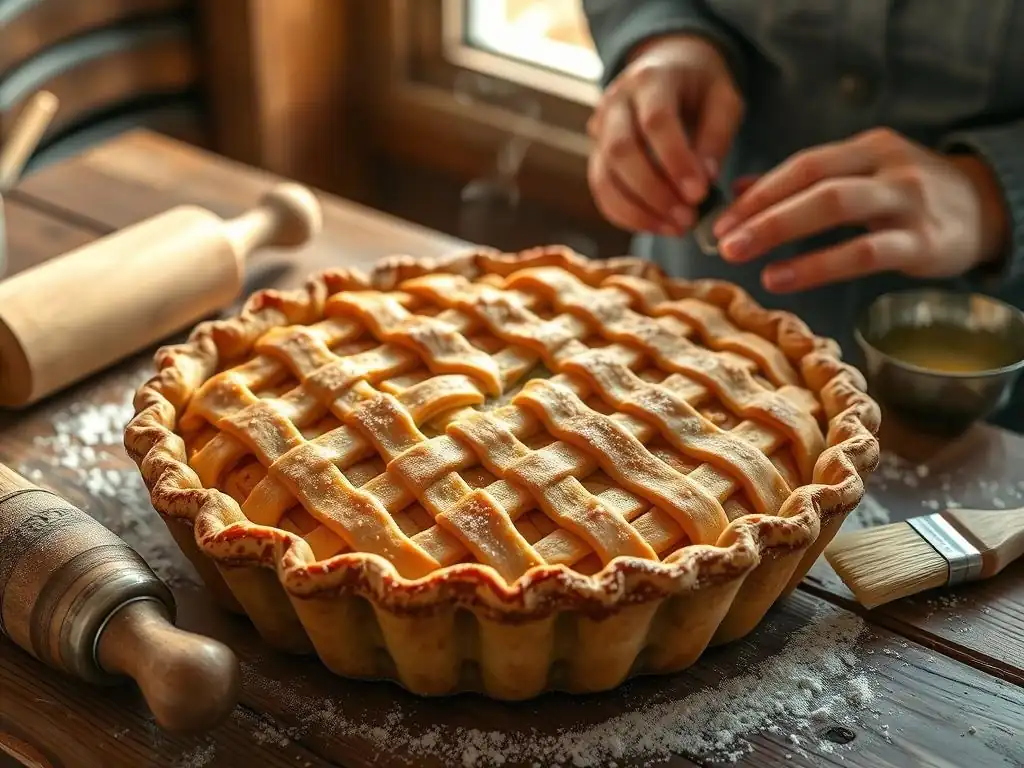
To give your easy lattice pie topping that beautiful, glossy golden-brown finish, applying a wash before baking is highly recommended. The most common options are an egg wash or a milk/cream wash.
- Egg Wash: An egg wash provides the richest color and a lovely sheen. Whisk together one large egg with 1-2 tablespoons of water or milk. Brush this mixture lightly and evenly over the surface of your lattice strips just before placing the pie in the oven. Be careful not to let it pool between the strips.
- Milk or Cream Wash: For a slightly less intense shine and a more matte finish, you can use milk or heavy cream. Simply brush milk or cream directly onto the lattice. This still helps promote browning but won't give the same glossy effect as an egg wash.
Sprinkling a little coarse sugar (like turbinado or sanding sugar) over the wash before baking adds sparkle and a pleasant crunch, enhancing the visual appeal of your lattice pie crust.
Troubleshooting Common Lattice Pie Topping Problems
Preventing Soggy Pie Crust: Tips and Tricks
A soggy bottom crust is a common frustration, but several techniques can help prevent it, especially with a juicy filling under your easy lattice pie topping.
- Blind Baking (Par-baking): For very wet fillings or deep-dish pies, partially baking the bottom crust before adding the filling can create a barrier against moisture. Roll out the bottom crust, fit it into the pan, trim and crimp the edges, then chill it for 30 minutes. Line it with parchment paper or foil and fill with pie weights, dried beans, or rice. Bake at 375°F (190°C) for 15-20 minutes until the edge is set. Remove weights and parchment/foil and bake for another 5-10 minutes until the bottom looks dry. Let cool before adding filling and your lattice pie crust.
- High Initial Baking Temperature: Starting the pie at a higher temperature (like 425°F) for the first 15-20 minutes helps the bottom crust firm up quickly before the filling has a chance to soak into it.
- Thickening the Filling: Ensure your fruit filling has enough thickener (flour, cornstarch, tapioca starch). Using the right amount for the type and quantity of fruit is key. Approximately 2-4 tablespoons of flour or cornstarch per 6-8 cups of fruit is a common ratio, but this can vary.
- Egg Wash on Bottom Crust: Some bakers brush the bottom crust with a lightly beaten egg white before adding the filling. This creates a thin, waterproof layer that helps prevent sogginess.
Fixing a Broken or Uneven Lattice: Quick Solutions
Even when aiming for an easy lattice pie topping, dough strips can sometimes break during weaving or baking, or the spacing might turn out uneven. Don't despair!
- For Broken Strips: If a strip breaks while weaving, gently press the ends back together. If it's a clean break, it might seal during baking. For a more significant break, you can patch it by cutting a small piece of dough and carefully pressing it over the break, blending the edges. Alternatively, you can strategically place a small decorative cutout (like a leaf or star) over the break to hide it.
- For Uneven Spacing: If your strips aren't perfectly spaced, try to adjust them gently before baking. Slide a knife or offset spatula under a strip to carefully nudge it into place. If the dough is too soft, chill the pie briefly before attempting adjustments. Once baked, minor imperfections are often charming and part of the homemade appeal! Remember, the goal is an easy lattice pie topping, and perfection is less important than deliciousness.
Avoiding Over-Browning: Protecting Your Lattice Pie Crust
The delicate strips of an easy lattice pie topping can brown faster than the rest of the pie, sometimes becoming too dark before the filling is fully cooked.
- Use a Pie Shield: The simplest and most effective method is to use a reusable silicone pie crust shield or strips of aluminum foil wrapped around the edge of the pie dish. Apply the shield or foil about halfway through the baking time, or whenever the crust edges have reached your desired level of golden brown.
- Tent the Entire Pie: If the entire top lattice is browning too quickly, you can loosely tent the entire pie with a sheet of aluminum foil. This reflects heat away from the top while allowing the rest of the pie to continue baking.
- Adjust Oven Rack: Sometimes, placing the pie on a lower rack in the oven can help shield the top from direct radiant heat from the upper element.
Monitor your pie's browning frequently during the last half of the baking time and apply protective measures as needed to ensure a perfectly golden lattice pie crust.
Variations and Creative Lattice Pie Designs
Different Lattice Patterns: From Simple to Intricate
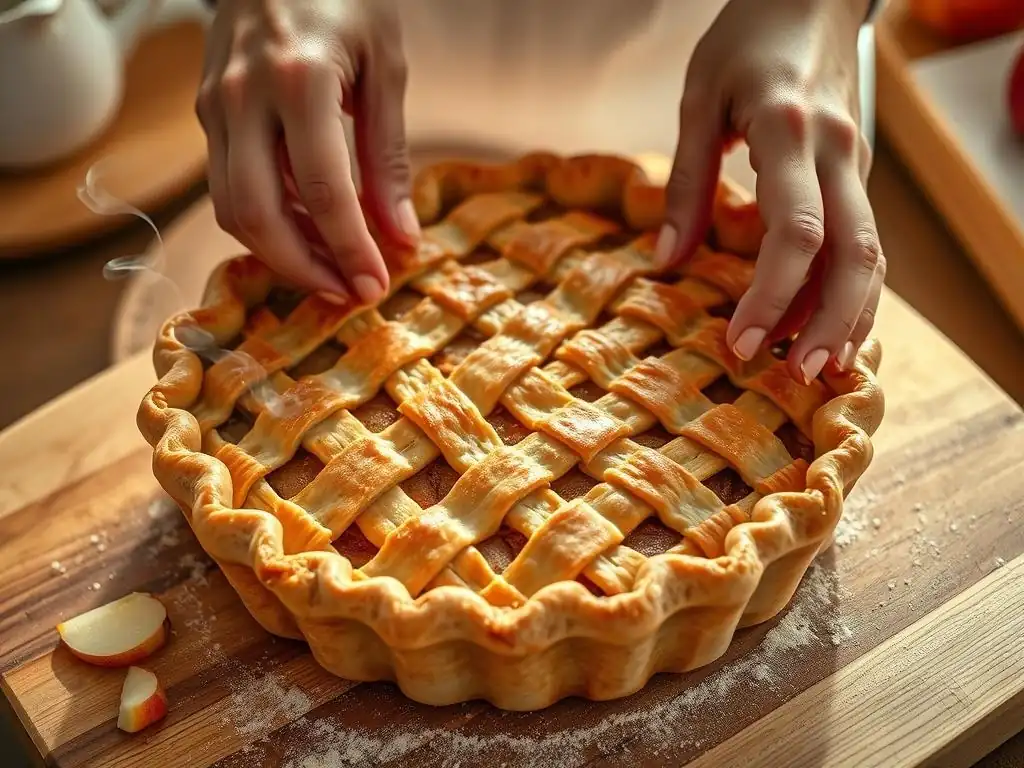
While the classic over-under weave is the most common and forms the basis of an easy lattice pie topping, you can explore variations to add visual interest.
- Varying Strip Widths: Instead of using all strips of the same width, try alternating between wide strips (1-1.5 inches) and narrow strips (0.5 inches). This creates a dynamic pattern.
- Diagonal Lattice: Instead of laying the first set of strips parallel to the pie dish edges, lay them diagonally. Then weave the second set diagonally in the opposite direction. This creates a diamond pattern.
- Braided Edges or Strips: For a more intricate look, you can braid three thin strips together to create a thicker, decorative strip to weave into your lattice or use as a border around the edge of your lattice pie crust.
- Cutouts: Use small cookie cutters (like mini leaves, apples, or stars for fall pies) to cut shapes from dough scraps. You can place these cutouts on top of the lattice strips for extra decoration, or even weave thin strips of dough through holes punched in wider strips.
Experimenting with these variations can take your easy lattice pie topping from simple to stunning with just a few tweaks to the basic method.
Adding Decorative Elements to Your Lattice Pie
Beyond the weave itself, adding small decorative touches can personalize your lattice pie topping and make it truly special.
- Leaf or Shape Cutouts: Use small cookie cutters to cut shapes from leftover dough. You can arrange these around the outer edge of the pie, place them strategically over the lattice weave, or even stack them slightly for dimension. For fall pies, leaf shapes are particularly popular.
- Ruffled or Braided Edges: Instead of a simple finger crimp, try a more elaborate edge treatment. A ruffled edge is created by pushing the edge of the dough between your thumb and index finger of one hand and the index finger of the other. A braided edge involves braiding three thin strips and attaching the braid around the perimeter of the pie before adding the lattice.
- Sugar Sprinkles: As mentioned, sprinkling coarse sugar over the egg wash before baking adds sparkle and texture. Consider using colored sanding sugars that match your pie's theme (e.g., red and green for apple, orange for pumpkin).
These small additions take minimal effort but significantly enhance the visual appeal of your easy lattice pie topping.
Fruit-Infused Lattice: Experimenting with Flavors
While not a visual technique, infusing flavor directly into your lattice pie crust can complement the filling beautifully.
- Citrus Zest: Add finely grated lemon or orange zest to your pie dough recipe when you add the dry ingredients. This imparts a subtle citrus aroma and flavor that pairs wonderfully with apple or berry fillings.
- Spices: Incorporate ground spices like cinnamon, nutmeg, ginger, or cardamom into the dough. This is especially lovely for pumpkin or apple pies, enhancing the overall warm, spiced flavor profile. Use about ½ to 1 teaspoon of spice per double crust recipe.
- Herbs: For savory pies (though we're focusing on fall sweets here, it's a variation worth noting), dried herbs like rosemary, thyme, or sage can be added to the dough for a flavorful crust that complements fillings like chicken pot pie or quiche.
Adding flavorings to the dough itself creates a multi-dimensional taste experience that elevates your easy lattice pie topping beyond just texture and visuals.
Enjoying Your Homemade Lattice Pie
Serving Suggestions: Pairings and Toppings
Your beautiful homemade pie with an easy lattice pie topping deserves to be served well! Classic pairings enhance the experience.
- A La Mode: A scoop of vanilla bean ice cream is the quintessential topping for warm apple pie. The cold, creamy ice cream melts slightly into the warm, spiced fruit, creating a delightful contrast.
- Whipped Cream: Freshly whipped cream, perhaps lightly sweetened and flavored with vanilla or a hint of maple, is perfect for pumpkin pie. Its lightness complements the dense, rich custard filling.
- Cheese: For a traditional twist, particularly with apple pie, serve a thin slice of sharp cheddar cheese on the side. The tanginess of the cheese surprisingly enhances the sweetness of the apples.
- Caramel Sauce: A drizzle of warm caramel sauce is a decadent addition to apple pie, especially if you've used an easy lattice pie topping that can hold up to the extra moisture.
Serve slices slightly warm to best appreciate the flaky crust and bubbling filling.
Storing Your Lattice Pie for Maximum Freshness
Proper storage ensures your delicious pie remains enjoyable for as long as possible.
- Cool Completely: Always let the pie cool completely at room temperature before storing. Cutting into a hot pie can cause the filling to run and the crust to steam, potentially leading to sogginess. Cooling allows the filling to set fully.
- Room Temperature Storage: Fruit pies, especially those with a lot of sugar and acid like apple pie, can typically be stored loosely covered with foil or plastic wrap at room temperature for up to 2 days. The sugar content acts as a preservative.
- Refrigeration: Custard-based pies like pumpkin pie must be refrigerated due to the dairy and eggs. Cover the pie loosely with plastic wrap or foil once completely cool and store in the refrigerator for up to 3-4 days.
- Freezing: For longer storage, pies (especially fruit pies) can often be frozen. Cool the pie completely, then wrap it tightly in plastic wrap followed by a layer of aluminum foil. Label and freeze for up to 3-4 months. Thaw overnight in the refrigerator and reheat gently in a low oven (300-325°F / 150-160°C) until warmed through, which helps re-crisp the lattice pie crust.
Conclusion: Embrace the Art of Easy Lattice Pie Making
Mastering the Lattice: Practice Makes Perfect
Creating an easy lattice pie topping is a skill that improves with practice. Your first attempt might not be flawless, but each pie you make will build your confidence and refine your technique. Don't strive for absolute perfection initially; focus on understanding the steps: keeping the dough cold, rolling evenly, cutting uniform strips, and mastering the simple over-under weave.
The beauty of a homemade lattice pie crust lies in its rustic elegance and the pride you feel in creating something so lovely and delicious from scratch. Embrace the process, learn from each bake, and soon you'll find that making a beautiful lattice is not only easy but also incredibly rewarding. The satisfaction of pulling a perfectly golden, bubbling pie with a stunning lattice from the oven is a true joy of baking.
We love seeing what our community bakes! Once you've mastered your easy lattice pie topping using these steps, snap a photo of your beautiful pie. Share it with us on social media! Use hashtags like #BakeWithEase #LatticePie #FallBaking to connect with other baking enthusiasts.
Your creations inspire us and fellow bakers looking to try their hand at a lattice pie crust. Whether it's a classic apple, a spiced pumpkin, or a unique variation, your successful bake is a testament to the simple elegance of the lattice. Happy baking!
Frequently Asked Questions
What is the easiest way to create a lattice pie topping?
The easiest method involves using pre-made pie crust and a simple weaving technique. You can also use pie crust strips and a simple overlay to form the lattice.
What are some common mistakes to avoid when making a lattice pie topping?
Avoid using too much flour when rolling out the dough. Also, ensuring your pie crust strips are evenly sized is crucial, as is over-baking.
What kind of pie crust is best for a lattice topping?
A buttery and flaky pie crust made from scratch is often preferred, but a high-quality store-bought crust works well too. The key is to ensure it's easy to handle and doesn't tear easily.
How can I prevent my lattice pie topping from burning?
Use a pie shield or create your own with foil to protect the crust edges. Also, be sure to monitor the pie closely during the last part of baking and reduce the oven temperature if needed.
Can I make a lattice pie topping ahead of time?
Yes, you can prepare the lattice strips in advance and store them in the refrigerator. However, it's best to assemble the lattice just before baking to prevent the crust from becoming soggy.
Final Reflection: Weaving a Legacy, One Lattice Square at a Time
The seemingly simple art of creating a lattice pie topping is, in reality, a microcosm of life's larger endeavors: patience, precision, and a touch of creativity all woven together to produce something beautiful and delicious. From the careful preparation of the dough to the satisfying snap of each perfectly placed strip, the process itself offers a rewarding experience that transcends the final product. This isn't just about making a pretty pie; it's about mastering a skill, finding joy in the process, and sharing the results with loved ones.
The enduring appeal of pie, and specifically the elegant lattice topping, speaks volumes about our desire for both comfort and artistry in our lives. It's a tradition passed down through generations, a symbol of home and hearth, and a testament to the power of simple pleasures. As Julia Child once wisely said, Find something you're passionate about and keep tremendously interested in it.
For many, that passion lies in the kitchen, in the act of creating something beautiful and delicious from humble ingredients. The lattice pie topping, in its intricate simplicity, embodies this perfectly.
Now, I invite you to consider your own "lattice topping" – that project, skill, or passion that requires patience, precision, and a touch of creativity. Don't be afraid to experiment, to embrace the imperfections, and to find joy in the process. The beauty lies not just in the final result, but in the journey itself. So, gather your ingredients (metaphorical or otherwise), and begin weaving your own legacy, one carefully placed square at a time.
Unleash Your Inner Pie Artist: Master Lattice Perfection!
Thanks for taking the time to explore the art of lattice pie topping with us! We hope you now feel confident and inspired to create stunning, delicious pies. Ready to put your new skills to the test?
- Craft your masterpiece: Try making a lattice-topped pie today—use your favorite filling and watch your skills blossom! Don't be afraid to experiment with different designs.
- Share your success: Post a picture of your beautiful lattice creation on social media and tag us! We'd love to see your baking triumphs. #BakeWithEaseLattice
- Challenge yourself: Try creating a more intricate lattice pattern next time – perhaps even adding decorative elements!
What unique twist will you add to your next lattice pie? Let us know in the comments!