
Baking Basic White Bread by Hand: The Traditional Method

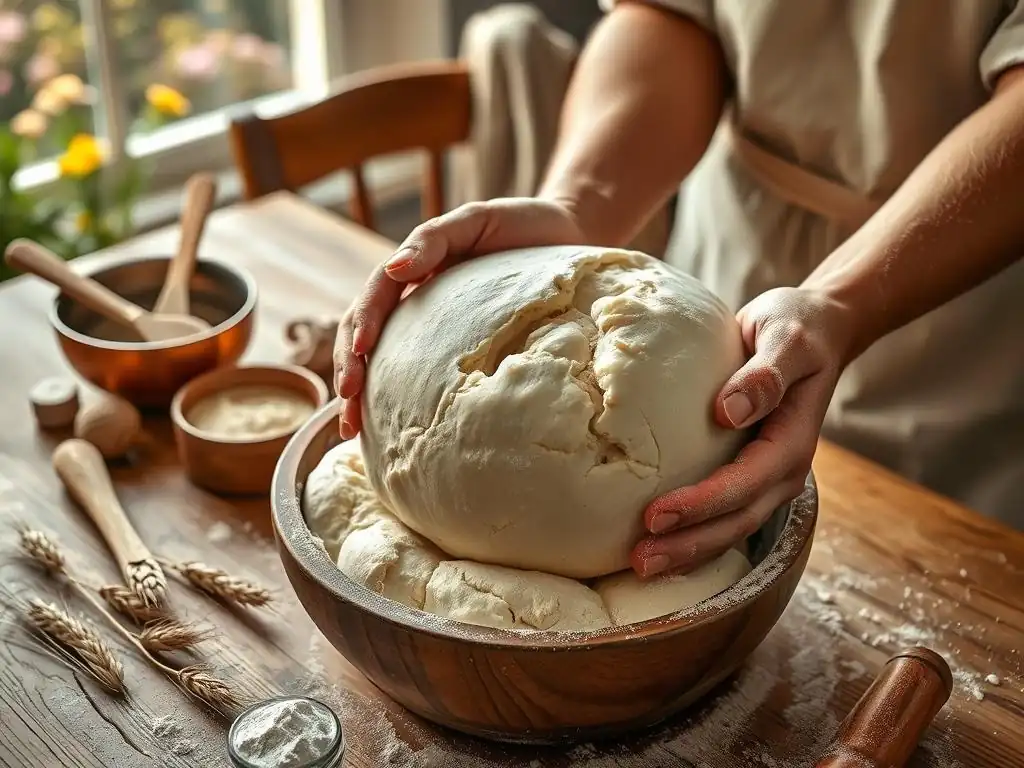
Welcome to BakeWithEase, your guide to confident baking! Ever wondered if you could create bakery-quality bread without fancy equipment? Discover the secrets to crafting delicious, Easy Handkneaded White Bread using the traditional method. We'll walk you through each step, transforming simple ingredients into a golden loaf. Ready to experience the satisfaction of homemade bread? Let's get baking!
- Baking Basic White Bread by Hand: The Traditional Method - BakeWithEase
- Introduction to Easy Handkneaded White Bread
- Essential Ingredients for Handkneaded White Bread
-
Step-by-Step Guide to Baking Handkneaded White Bread
- Step 1: Activating the Yeast for Your Handkneaded Dough
- Step 2: Combining Ingredients for the Initial Dough
- Step 3: The Art of Hand Kneading White Bread Dough
- Step 4: First Proofing: Allowing the Dough to Rise
- Step 5: Shaping the Handkneaded White Bread Loaf
- Step 6: Second Proofing: The Final Rise Before Baking
- Step 7: Baking Your Handkneaded White Bread Loaf
- Step 8: Cooling and Slicing Your Freshly Baked Bread
- Tips and Tricks for Perfect Handkneaded White Bread
- Storing Your Homemade Handkneaded White Bread
- Conclusion: Enjoying the Simplicity of Handkneaded White Bread
-
Frequently Asked Questions
- What makes this white bread recipe "easy," even though it's hand-kneaded?
- How long do I need to knead the dough for this hand-kneaded white bread?
- Can I substitute any ingredients in this hand-kneaded white bread recipe?
- What's the best way to tell if my hand-kneaded white bread is properly proofed?
- What temperature should I bake this hand-kneaded white bread at, and for how long?
- Final Reflection: The Enduring Magic of Hand-Kneaded Bread
- Unleash Your Inner Baker: Knead to Know More?
Baking Basic White Bread by Hand: The Traditional Method - BakeWithEase
Introduction to Easy Handkneaded White Bread
Baking bread from scratch is a rewarding experience, and starting with a basic white loaf kneaded by hand offers a unique connection to the craft. This guide walks you through creating a delicious, easy handkneaded white bread using traditional methods. It's a process that requires patience and a willingness to get your hands a little floury, but the result – a warm, fragrant loaf straight from your oven – is absolutely worth it. Whether you're a complete beginner or looking to refine your technique, mastering this simple recipe is a fundamental step in your baking journey.
This article focuses specifically on the technique of hand kneading, which develops the gluten structure necessary for a light and airy loaf without relying on stand mixers. We'll cover everything from understanding your ingredients to troubleshooting common issues, ensuring your first or fiftieth loaf of easy handkneaded white bread is a success. Get ready to discover the simple pleasure of transforming basic ingredients into something truly wonderful with just your hands and a little time.
Why Bake White Bread by Hand? The Joy of Traditional Baking
Baking white bread by hand connects you directly to the dough, allowing you to feel its texture evolve as you work it. This tactile experience is incredibly satisfying and teaches you intuitive cues about the dough's readiness that a machine can't replicate. It's a mindful process, a break from the fast pace of modern life, offering a moment of focused creation. The rhythmic motion of kneading can be almost meditative, transforming simple flour and water into a smooth, elastic mass.
Furthermore, hand kneading allows for subtle adjustments based on how the dough feels. Is it a bit too sticky? You can feel it immediately and add a touch more flour. Is it resisting development?
You can sense the tension and adjust your technique. This intimate interaction fosters a deeper understanding of the baking process and the ingredients themselves. Many bakers find that the loaves they produce by hand have a unique character and texture, a subtle difference that speaks to the personal touch infused during the kneading process. It's not just about making bread; it's about engaging with a time-honored tradition.
What Makes This Handkneaded White Bread Recipe Special?
This specific recipe for easy handkneaded white bread is designed with simplicity and reliability in mind, making it perfect for those new to hand kneading. It uses readily available ingredients and focuses on clear, step-by-step instructions that demystify the process. The ingredient ratios are balanced to produce a dough that is manageable to knead by hand, neither excessively sticky nor too stiff, which is a common challenge for beginners.
What sets this recipe apart is its emphasis on understanding why each step is important. We don't just tell you to knead for 10 minutes; we explain what happens during kneading and how to tell when the dough is ready. We provide visual and tactile cues for proofing, shaping, and baking, empowering you with the knowledge to adapt if conditions aren't exactly perfect (like a slightly cooler kitchen). The goal is to build your confidence and intuition, ensuring that baking this easy handkneaded white bread becomes a joyful, repeatable success.
Essential Ingredients for Handkneaded White Bread
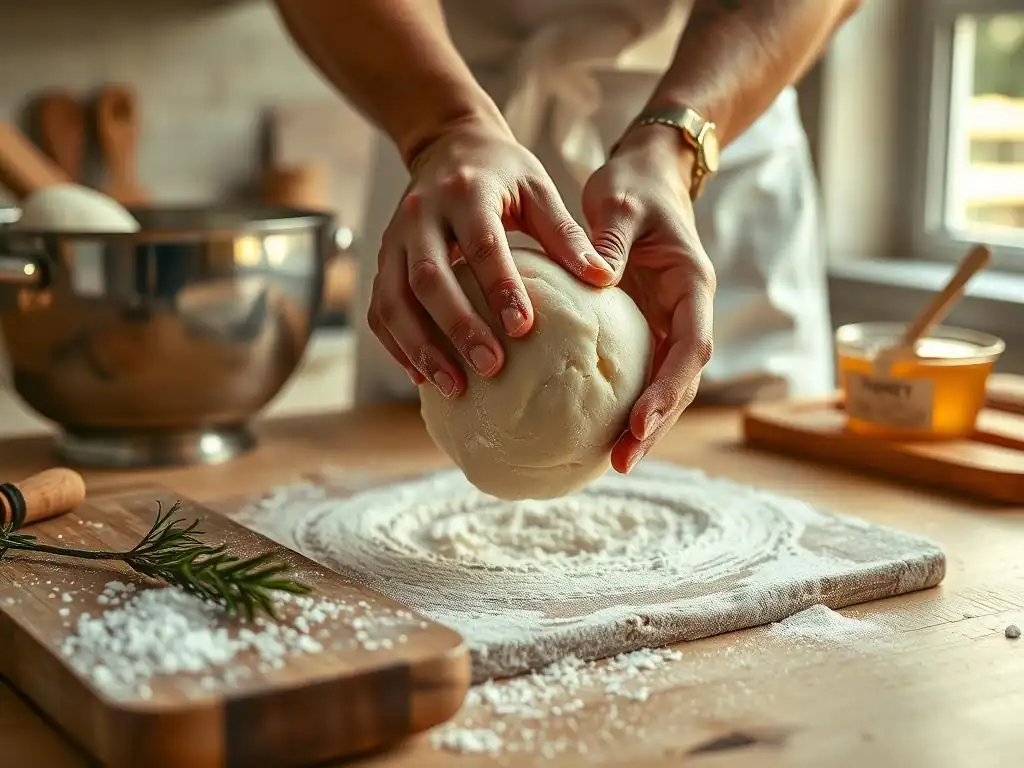
Making delicious easy handkneaded white bread requires only a few basic ingredients, but understanding their specific roles is crucial for a successful bake. High-quality ingredients make a noticeable difference in the final product's flavor, texture, and rise. By paying attention to the type of flour, the freshness of your yeast, and even the temperature of your water, you set yourself up for a much smoother baking experience.
- All-Purpose Flour or Bread Flour
- Active Dry or Instant Yeast
- Water
- Salt
- A pinch of Sugar (optional, but recommended)
Understanding Bread Flour for Handkneaded Dough
Bread flour is the preferred choice for many bakers making handkneaded white bread due to its higher protein content, typically ranging from 12% to 14%. This higher protein level is critical because protein develops into gluten when hydrated and kneaded.
Gluten forms an elastic network that traps the gases produced by the yeast, allowing the bread to rise and giving it that desirable chewy texture and structure. While all-purpose flour (with 10-12% protein) can certainly be used to make a fine loaf, bread flour generally yields a loaf with a better rise and a more open, airy crumb structure, which is often sought after in traditional white bread.
Using bread flour specifically for hand kneading helps build a strong gluten network more efficiently. As you work the dough, you'll feel it become smoother and more elastic, less sticky, and more capable of holding its shape. This development is less pronounced and takes longer with lower-protein flours. For the best results with your easy handkneaded white bread, investing in good quality bread flour is a worthwhile step.
The Role of Yeast in White Bread Baking
Yeast is a living microorganism that is essential for making leavened bread like our easy handkneaded white bread. It feeds on the sugars in the dough and produces carbon dioxide gas and alcohol through a process called fermentation. The carbon dioxide gas gets trapped within the gluten network created by kneading, causing the dough to expand or "rise." The alcohol contributes to the bread's flavor. Without active yeast, you would end up with a flat, dense loaf.
There are primarily two types of dry yeast commonly used: active dry yeast and instant yeast. Active dry yeast typically needs to be proofed in warm water before being added to the dry ingredients, while instant yeast can often be mixed directly with the flour.
For this easy handkneaded white bread recipe, we'll detail the method for active dry yeast, which involves that initial step of ensuring the yeast is alive and active – a crucial check before you commit to mixing the whole dough. Using fresh yeast, stored properly in a cool, dry place or the refrigerator, is key to a good rise.
Water Temperature: Key to Activating Yeast for Handkneaded Bread
The temperature of the water used to activate yeast is critically important for the success of your easy handkneaded white bread. Water that is too cold will not properly awaken the dormant yeast, resulting in a slow or non-existent rise. Conversely, water that is too hot can kill the yeast, rendering it inactive and unable to leaven your bread. The ideal temperature range for activating active dry yeast is typically between 105°F and 115°F (about 40°C to 46°C). This range provides a warm, comfortable environment for the yeast to become active and begin its work.
Using a thermometer is the most accurate way to ensure your water is within this optimal range. If you don't have a thermometer, the water should feel warm to the touch but not hot – think comfortably warm bath water. Water slightly cooler, say around 95°F (35°C), is acceptable if using instant yeast and mixing directly with flour, but for proofing active dry yeast, hitting that 105-115°F window is best. Getting the water temperature right is a foundational step for a successful easy handkneaded white bread.
Salt and Sugar: Flavor Enhancers in Basic White Bread
While flour, water, and yeast form the structure and leavening of easy handkneaded white bread, salt and sugar play vital roles in flavor, texture, and the baking process itself. Salt isn't just for taste; it also helps control the yeast's activity, slowing down fermentation slightly, which allows for a more complex flavor to develop. It also strengthens the gluten structure, contributing to a better crumb and crust. Too little salt results in bland bread with potentially too rapid a rise, while too much can inhibit yeast activity significantly.
Sugar, while optional in some lean bread recipes, is included in many easy handkneaded white bread formulas for several reasons. It provides food for the yeast, helping to jumpstart fermentation, especially in the initial stages. A small amount of sugar also contributes to a more tender crumb and helps the crust brown nicely during baking through caramelization. The amount of sugar is typically small, just enough to aid the yeast and enhance flavor without making the bread taste sweet. A tablespoon or two per loaf is common.
Step-by-Step Guide to Baking Handkneaded White Bread
Baking an easy handkneaded white bread is a process that unfolds in distinct stages. Following these steps carefully will guide you from a simple mixture of ingredients to a beautiful, homemade loaf. Each stage builds upon the last, ensuring proper gluten development, fermentation, and structure. Don't rush the process, especially the resting and rising times – they are crucial for a light and airy texture.
Here is a breakdown of the essential steps:
- Step 1: Activating the Yeast
- Step 2: Combining Ingredients
- Step 3: Hand Kneading
- Step 4: First Proofing
- Step 5: Shaping
- Step 6: Second Proofing
- Step 7: Baking
- Step 8: Cooling
Step 1: Activating the Yeast for Your Handkneaded Dough
The first step in making your easy handkneaded white bread is to activate the yeast, assuming you are using active dry yeast. Measure the warm water (ideally between 105°F and 115°F / 40-46°C) into a small bowl or measuring cup. Sprinkle the recommended amount of yeast (typically around 2 teaspoons per loaf) and a pinch of sugar over the surface of the water. The sugar provides immediate food for the yeast. Gently stir or just let it sit for 5 to 10 minutes.
During this time, the yeast should dissolve and begin to feed, producing carbon dioxide. You will see a foamy layer or bloom appear on the surface of the water. This foam is a clear indication that your yeast is alive and active, ready to leaven your easy handkneaded white bread. If you don't see any foam after 10-15 minutes, your water might have been too hot or too cold, or the yeast may be old. In this case, it's best to discard the mixture and start again with fresh yeast and properly tempered water to ensure a good rise.
Step 2: Combining Ingredients for the Initial Dough
Once your yeast is activated and foamy, it's time to combine it with the dry ingredients to form the initial dough for your easy handkneaded white bread. In a large mixing bowl, measure out your flour (typically 3-4 cups per loaf), salt (around 1.5 to 2 teaspoons), and optional sugar. Whisk these dry ingredients together briefly to distribute the salt and sugar evenly throughout the flour. This prevents the salt from potentially inhibiting the yeast if it's in direct contact in high concentration.
Pour the activated yeast mixture into the bowl with the dry ingredients. Use a sturdy spoon or spatula to mix everything together. The mixture will quickly come together into a shaggy, sticky mass. Continue mixing until most of the flour is incorporated and there are no large pockets of dry flour remaining. At this point, the dough will look rough and uneven – this is perfectly normal. It's now ready to be turned out onto a surface for kneading.
Step 3: The Art of Hand Kneading White Bread Dough
Kneading is where the magic happens in making easy handkneaded white bread. It's the process of working the dough to develop the gluten structure. Turn the shaggy dough out onto a lightly floured surface. Don't add too much flour at this stage; just enough to prevent sticking. The dough will initially be quite sticky, but as you knead, it will become smoother and less adhesive. Resist the urge to add excessive flour, as this can result in a dry, dense loaf.
Begin kneading by using the heel of one hand to push the dough away from you, then fold it back over itself with the other hand. Give the dough a quarter turn and repeat the push-fold-turn motion. This action stretches and aligns the gluten strands, creating that elastic network. It takes practice, but the rhythm will become natural. As you knead, the dough will gradually transform from a sticky, lumpy mass into a smooth, elastic ball.
Mastering the Kneading Technique for Perfect Texture
Mastering the technique for kneading your easy handkneaded white bread dough involves developing a feel for the dough's resistance and elasticity. Start with a gentle rhythm, pushing the dough away with the heel of your hand, stretching it, and then folding it back towards you. Rotate the dough a quarter turn after each push and fold. If the dough is very sticky, you can use a bench scraper to help lift and fold it initially, or lightly flour your hands and the surface.
As you knead, the dough will become less sticky and more cohesive. You'll notice it start to resist being stretched, pulling back slightly – this is a sign that gluten is developing. The surface will become smoother and more uniform. A good test for sufficient kneading is the "windowpane test."
Pinch off a small piece of dough (about the size of a golf ball) and gently stretch it between your fingers. If you can stretch it thin enough to see light through the center without it tearing easily, the gluten is well-developed, and your dough is ready. This typically takes anywhere from 10 to 15 minutes of continuous kneading for a basic white bread dough.
How Long to Knead Your White Bread Dough by Hand
Determining exactly how long to knead your easy handkneaded white bread dough is more about feel and the dough's appearance than a strict timer, though 10-15 minutes is a common range for a single loaf. Start by kneading vigorously using the push-fold-turn method described above. Initially, the dough will be rough, sticky, and tear easily when stretched.
After about 5-7 minutes of kneading, you'll notice a significant change. The dough will be less sticky, smoother on the surface, and will hold its shape better. Continue kneading, focusing on the rhythm. By the 10-15 minute mark, the dough should be smooth, elastic, and no longer sticky.
The surface should look taut and somewhat shiny. When you poke it gently with a finger, it should spring back slowly. Perform the windowpane test: if you can stretch a small piece thin enough to see light through it without it tearing, your kneading is complete. Over-kneading by hand is difficult, so err on the side of kneading longer rather than shorter if you're unsure.
Step 4: First Proofing: Allowing the Dough to Rise
After kneading your easy handkneaded white bread dough, the next crucial step is the first proofing, also known as bulk fermentation. This is the period where the yeast gets to work, producing carbon dioxide and causing the dough to rise and develop flavor. Lightly grease a clean large bowl with oil or cooking spray. Place the kneaded dough ball into the bowl, turning it once to coat the surface with oil. This prevents a dry skin from forming.
Cover the bowl tightly with plastic wrap or a clean damp tea towel. Place the bowl in a warm, draft-free place to rise. An ideal temperature for proofing is between 75°F and 85°F (about 24°C to 30°C). The dough needs to rise until it has roughly doubled in size, which typically takes about 1 to 1.5 hours, but could take longer in a cooler environment. Be patient; the rise is essential for a light texture.
Creating the Ideal Environment for Dough Proofing
Creating the right environment is key to a successful first proof for your easy handkneaded white bread dough. Yeast is most active in a warm, humid environment. Avoid placing the dough in a cold or drafty spot, which will significantly slow down or even halt the rise. A kitchen counter near a warm appliance (but not too hot) is often a good spot.
If your kitchen is cool, you can create a makeshift proofing box. One common method is to turn your oven off, but turn the oven light on (the heat from the bulb is usually enough to create a warm environment). Place the covered bowl inside the oven (ensure the oven is off).
Another technique is to boil a small pot of water and place it on the bottom rack of your turned-off oven, then place the dough bowl on the rack above it. The steam from the hot water creates a warm, humid atmosphere. Aim for the dough to double in size, which is the primary indicator of readiness, regardless of the exact time elapsed.
Knowing When Your Dough is Ready for the Next Step
Knowing when your easy handkneaded white bread dough is ready after the first proof is essential before moving on to shaping. The most reliable indicator is visual: the dough should have roughly doubled in volume from its original size. It will look puffy and feel light. The time it takes to double will vary depending on the temperature of your proofing environment and the activity of your yeast, but typically ranges from 60 to 90 minutes at room temperature (around 70°F/21°C) or faster in a warmer spot (75-85°F/24-30°C).
A good way to test if the dough is ready is the "poke test." Gently flour one of your fingers and press it about half an inch into the dough. If the indentation remains and springs back only very slowly, the dough is perfectly proofed. If the indentation springs back immediately, the dough needs more time to rise. If the indentation collapses completely, the dough is likely over-proofed. For a simple white bread, aiming for the slow spring-back is ideal before gently deflating it (punching it down) to prepare for shaping.
Step 5: Shaping the Handkneaded White Bread Loaf
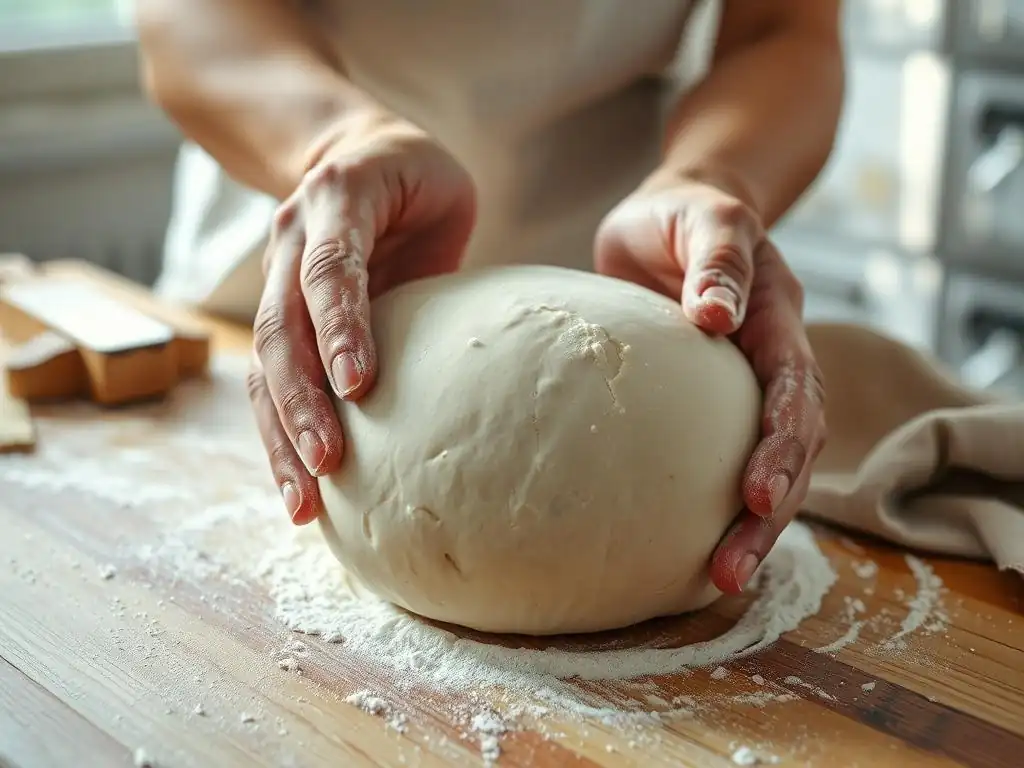
Once your easy handkneaded white bread dough has completed its first rise and you've gently punched it down to deflate the gas, it's time to shape it into a loaf. Turn the dough out onto a lightly floured surface. At this stage, handle the dough gently to avoid knocking out all the air; you just want to redistribute the gases. Briefly knead it a few times to create a smooth surface again.
For a standard loaf shape (batard or boule), flatten the dough into a rough rectangle or circle. For a batard (oval loaf, good for loaf pans), fold the top third of the rectangle down to the center, then fold the bottom third up over the top fold. Gently seal the seam with the heel of your hand.
Then, fold the loaf in half lengthwise and seal the final seam firmly by pinching it together. Roll the loaf back and forth slightly to create tension on the surface and achieve an even shape. For a boule (round loaf), pull the edges of the dough into the center and pinch them together to form a seam on the bottom, then cup your hands around the dough ball and gently rotate it against the surface to create surface tension and a smooth, round top.
Different Loaf Shapes and How to Achieve Them
While a simple batard (oval) or boule (round) are common shapes for easy handkneaded white bread, you can explore others. A standard loaf pan shape is achieved similarly to the batard: flatten the dough into a rectangle roughly the width of your pan, fold the top and bottom thirds to the center, seal, then fold in half lengthwise and seal the seam. Place the shaped dough seam-side down in a greased loaf pan.
For dinner rolls, divide the dough into equal portions (e.g., 12-16 pieces for a typical recipe yields about 1.5-2 oz rolls). Shape each piece into a small ball by pulling the edges underneath and rolling it against a clean, unfloured surface under the palm of your hand until a smooth ball forms. Place these rolls on a baking sheet.
Braids are another option, requiring dividing the dough into three strands and braiding them. Each shape requires developing surface tension to hold its form during the second rise and baking. For a simple, classic easy handkneaded white bread, the standard loaf pan shape or a freeform boule are excellent starting points.
Step 6: Second Proofing: The Final Rise Before Baking
The second proofing, also called the final proof or 'proving', is the last rise your easy handkneaded white bread dough undergoes before it hits the hot oven. After shaping your loaf (or rolls), place it in its final baking vessel – a greased loaf pan, on a baking sheet lined with parchment paper, or in a proofing basket. Cover the shaped dough loosely but completely with plastic wrap or a light tea towel to prevent a skin from forming.
Place the dough in a warm, draft-free spot again for its final rise. This rise is generally shorter than the first proof, typically lasting about 30 to 45 minutes. The dough should increase significantly in size again, though it may not quite double this time. It should look puffy and airy.
A good indicator of readiness is that when you gently poke the dough with a floured finger, the indentation springs back very slowly, leaving a slight mark. If it springs back quickly, it needs more time. If it collapses, it's over-proofed. Getting this final rise right is crucial for achieving a good oven spring and a well-textured crumb.
Step 7: Baking Your Handkneaded White Bread Loaf
Baking is the culmination of your efforts in creating an easy handkneaded white bread. Preheat your oven well in advance to the correct temperature. For most white bread recipes, a temperature between 375°F and 400°F (190°C to 200°C) is standard.
A properly preheated oven is essential for good oven spring – the final burst of rising that occurs when the dough hits the heat. If baking in a loaf pan, place the pan in the center of the preheated oven. If baking a freeform loaf on a baking sheet, carefully transfer the proofed loaf to the hot baking sheet (often done by flipping a proofed loaf from a proofing basket onto the sheet).
Baking time for a standard 1.5 to 2-pound loaf of easy handkneaded white bread is typically between 25 and 35 minutes. The exact time will depend on your oven and the size of your loaf. The bread is done when the crust is a deep golden brown and it sounds hollow when tapped on the bottom. For ultimate certainty, use an instant-read thermometer inserted into the center of the loaf; it should register between 200°F and 210°F (93°C to 99°C).
Oven Temperature and Baking Time for Perfect Bread
Achieving a perfectly baked easy handkneaded white bread relies heavily on the correct oven temperature and duration. As mentioned, a preheated oven at 375-400°F (190-200°C) is standard. Baking at too low a temperature will result in a pale crust and potentially a dense, undercooked interior. Baking too hot might burn the crust before the interior is fully cooked. Many recipes suggest starting at a slightly higher temperature for the first 10-15 minutes (e.g., 400°F/200°C) to encourage oven spring, then reducing it slightly (e.g., to 375°F/190°C) for the remainder of the bake to ensure even cooking and crust development.
Monitor your bread as it bakes, especially towards the end of the estimated baking time. If the crust is browning too quickly before the internal temperature reaches 200°F (93°C), you can lightly tent the loaf with aluminum foil. Remember, the tap test (listening for a hollow sound when tapping the bottom) and checking the internal temperature are the most reliable ways to confirm your easy handkneaded white bread is fully baked.
Achieving a Golden-Brown Crust
A beautiful golden-brown crust is a hallmark of delicious homemade easy handkneaded white bread. Several factors contribute to crust color and texture. The sugar in the dough, even a small amount, aids in caramelization during baking, creating that appealing brown hue. Baking at the correct temperature ensures the Maillard reaction (responsible for browning and complex flavors) occurs effectively on the surface.
Steam in the oven during the initial part of baking also plays a significant role in crust development. Steam keeps the surface of the dough moist for longer, allowing the loaf to expand fully before the crust sets. This results in a thinner, crispier crust and better oven spring. You can create steam by placing a pan of hot water on the bottom rack of your oven when you preheat it, or by spraying the oven walls with water (carefully!)
just before loading the bread. Some bakers also brush the loaf with water or milk before baking for added shine and color. These techniques help transform the pale, proofed dough into that satisfyingly golden and slightly crisp crust on your easy handkneaded white bread.
Step 8: Cooling and Slicing Your Freshly Baked Bread
Perhaps the hardest step in baking easy handkneaded white bread is waiting for it to cool! As soon as the bread comes out of the oven, carefully remove it from the loaf pan (if used) or off the baking sheet and transfer it to a wire cooling rack. This allows air to circulate around the entire loaf, preventing the bottom from becoming soggy and ensuring even cooling.
Allow the bread to cool completely before slicing, which can take at least 1 to 2 hours for a standard loaf. While it's tempting to slice into a warm loaf (and a small end piece is often irresistible! ), slicing hot bread can compress the crumb, making it gummy and dense inside. As the bread cools, the internal structure sets, and moisture redistributes evenly throughout the loaf. Patience at this stage is rewarded with the best possible texture for your easy handkneaded white bread. Once fully cooled, use a serrated bread knife for clean slices.
Tips and Tricks for Perfect Handkneaded White Bread
Even with a straightforward recipe, baking can sometimes present challenges. Understanding common issues and having a few tricks up your sleeve can help you achieve consistently great results with your easy handkneaded white bread. From fixing sticky dough to ensuring a good rise, these tips are designed to make your baking experience smoother and more successful.
Here are some common issues and how to address them:
- Dough is too sticky
- Dough is not rising
- Crust is too hard or too pale
- Crumb is dense
Troubleshooting Common Handkneaded Bread Problems
Encountering issues is part of the baking learning curve, even with an easy handkneaded white bread recipe. Don't get discouraged! Most problems have simple solutions. One frequent issue is the dough being too sticky to handle. This could be due to inaccurate measuring (too much water or not enough flour) or high humidity. Another common problem is the dough not rising properly, which could be caused by inactive yeast, incorrect water temperature, or a too-cold proofing environment.
Other potential issues include a crust that's too hard (possibly from overbaking or lack of steam) or too pale (oven not hot enough, not baked long enough, or lack of sugar/fat which isn't typically an issue with basic white bread). A dense crumb can result from insufficient kneading, under-proofing, or over-proofing. Learning to identify these signs and adjust your approach will significantly improve your future easy handkneaded white bread bakes.
Dough is Too Sticky: Solutions
If your easy handkneaded white bread dough is too sticky to knead comfortably, don't panic. This is a common occurrence, especially when starting out or dealing with humid conditions. The primary solution is to add a little more flour. Add flour gradually, about a tablespoon at a time, onto your work surface and knead it into the dough. Continue adding small amounts of flour and kneading until the dough is manageable – it should still be slightly tacky but shouldn't stick excessively to your hands or the counter.
Avoid adding large amounts of flour all at once, as this can make the dough too stiff and result in a dry loaf. Work the added flour in thoroughly each time before deciding if more is needed. Your hands and the surface can also be lightly floured to reduce sticking.
Remember that different flours absorb moisture differently, so you might need slightly more or less flour than the recipe specifies depending on the brand and type you use. A bench scraper is also an invaluable tool for handling sticky dough, helping you scrape it from the surface and fold it during the initial stages of kneading.
Dough is Not Rising: Possible Causes and Fixes
A dough that fails to rise is one of the most frustrating problems when baking easy handkneaded white bread. The most common culprit is inactive or dead yeast. Ensure your yeast is fresh and stored properly (check the expiration date!). Always proof active dry yeast in warm water (105-115°F / 40-46°C) with a pinch of sugar to verify it's active before adding it to the flour. If it doesn't foam, get new yeast.
Another cause is incorrect water temperature – water that is too hot kills the yeast, while water that is too cold keeps it dormant. Ensure your water is within the recommended range. A cold proofing environment will also drastically slow down or prevent rising.
Make sure your dough is in a warm, draft-free spot (75-85°F / 24-30°C is ideal). If your dough is rising very slowly in a cool kitchen (below 70°F/21°C), give it more time; it might take 2-3 hours or longer to double. If you've checked yeast activity and temperature, and the dough still isn't rising after an extended period in a warm place, the yeast is likely dead, and you'll need to start over with fresh yeast.
Variations on Basic Handkneaded White Bread
Once you've mastered the basic easy handkneaded white bread, you can easily introduce variations to change the flavor profile and texture. Simple additions can transform a plain loaf into something special. These tweaks are a great way to personalize your baking and use your hand-kneading skills on slightly different doughs.
Consider these simple variations:
- Adding herbs or spices
- Incorporating seeds
- Mixing in cheese or garlic
- Using a portion of whole wheat flour
Adding Herbs and Spices for Enhanced Flavor
Adding herbs and spices is an easy way to elevate the flavor of your easy handkneaded white bread. Dried herbs like rosemary, thyme, or oregano can be kneaded directly into the dough after the initial mixing stage, before the main kneading process begins. Start with about 1 to 2 tablespoons of dried herbs per standard loaf. Fresh herbs can also be used, typically requiring a larger quantity (2-3 tablespoons) and should be added towards the end of the kneading process to preserve their flavor.
Spices such as garlic powder, onion powder, or even a pinch of black pepper or red pepper flakes can also add interesting dimensions. A teaspoon of garlic powder or onion powder per loaf is usually sufficient. Consider combinations like rosemary and garlic, or oregano and a pinch of red pepper flakes. Ensure the herbs and spices are evenly distributed throughout the dough during the final few minutes of kneading. This simple addition transforms a basic loaf into a flavorful accompaniment for soups or savory dishes.
Exploring Different Flour Combinations
While this guide focuses on easy handkneaded white bread using primarily bread or all-purpose flour, you can easily experiment with incorporating other types of flour. Substituting a portion of the white flour with whole wheat flour, for example, adds fiber, nutrients, and a nuttier flavor.
Start by substituting about 10-20% of the white flour with whole wheat flour (e.g., replace 1/2 cup of white flour with 1/2 cup whole wheat flour in a 3-cup recipe). Whole wheat flour absorbs more water than white flour, so you might need to add a tablespoon or two of extra water during mixing or kneading.
Other flours like rye, spelt, or even cornmeal can be incorporated in small percentages (5-15%) to alter the flavor and texture. These flours often have lower gluten content, so using them in small amounts alongside bread flour helps maintain the structure necessary for a good rise. Experimenting with these combinations allows you to create unique, flavorful loaves while still utilizing your hand-kneading technique learned from mastering the easy handkneaded white bread.
Storing Your Homemade Handkneaded White Bread
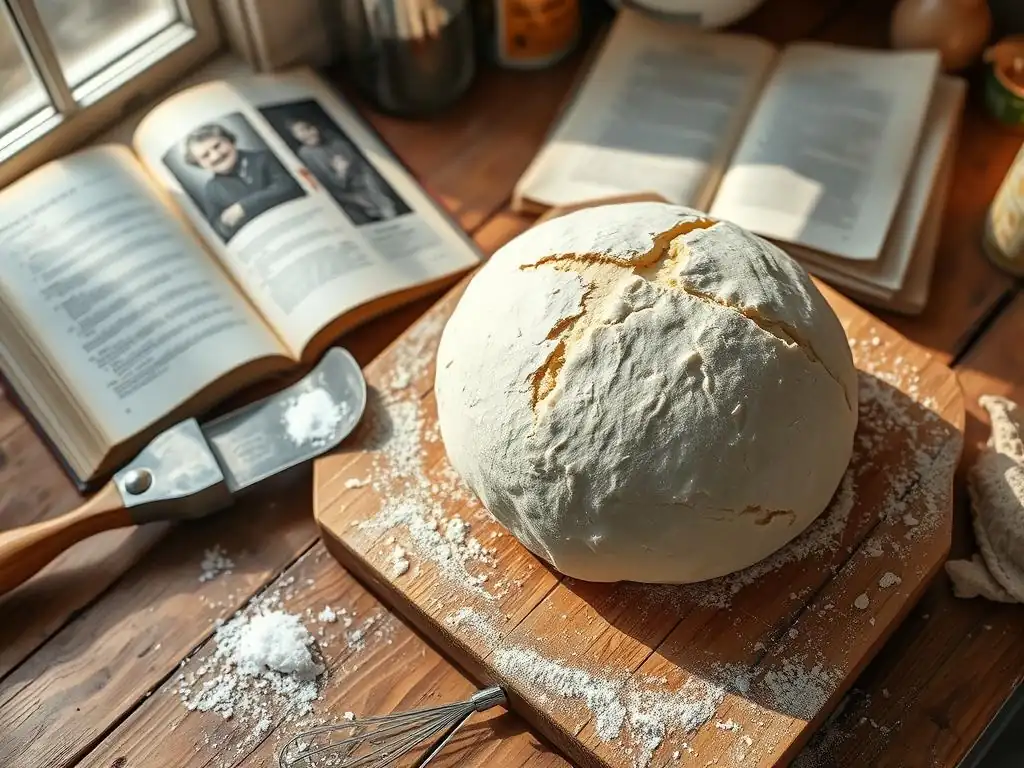
Once you've baked and enjoyed a few slices of your delicious easy handkneaded white bread, proper storage is key to keeping the rest of the loaf fresh. Homemade bread typically doesn't contain the preservatives found in commercial breads, so it will stale faster if not stored correctly. Staling is primarily caused by the retrogradation of starch molecules as the bread cools and ages.
Here are the best ways to store your bread:
- At room temperature for short-term storage
- Freezing for longer-term storage
Keeping Your Bread Fresh for Longer
The best way to store your easy handkneaded white bread for daily consumption is at room temperature. Once it has completely cooled, store the loaf in a bread box, a clean paper bag, or wrapped loosely in plastic wrap or beeswax wrap. A bread box is ideal as it allows some air circulation while preventing the bread from drying out too quickly. Paper bags are great for maintaining a crisp crust initially but will allow the bread to dry out faster. Plastic wrap is effective at preventing drying but can soften the crust.
Avoid storing your homemade white bread in the refrigerator. Refrigeration temperatures actually accelerate the staling process, making the bread dry and hard much faster than if left at room temperature. A loaf of easy handkneaded white bread stored properly at room temperature should remain fresh and enjoyable for 2 to 4 days. For longer storage, freezing is the best option.
Freezing Handkneaded White Bread for Future Use
Freezing is an excellent way to preserve your easy handkneaded white bread and enjoy it later. Ensure the loaf is completely cooled before freezing. You can freeze the loaf whole, sliced, or in halves/quarters depending on how you plan to use it. Freezing sliced bread is particularly convenient, as you can take out just the amount you need.
To freeze, wrap the cooled bread tightly in plastic wrap, making sure there are no gaps. Then, wrap it again in aluminum foil or place it in a freezer-safe bag. This double layer of protection helps prevent freezer burn. Frozen easy handkneaded white bread can be stored for up to 3 months.
To thaw, simply remove it from the freezer and let it sit at room temperature. Slices can be toasted directly from frozen. A whole loaf can be thawed at room temperature, or you can reheat a whole loaf wrapped in foil in a moderate oven (300-325°F / 150-160°C) for 15-20 minutes to revive the crust and warm the interior.
Conclusion: Enjoying the Simplicity of Handkneaded White Bread
Baking an easy handkneaded white bread is a deeply rewarding experience. From the simple act of mixing flour and water to the physical work of kneading and the patience required for the dough to rise, you are intimately involved in every step of the process. The aroma that fills your kitchen as the bread bakes is incomparable, a scent of comfort and home. Pulling that golden-brown loaf from the oven, tapping its bottom to hear that satisfying hollow sound – these are moments of genuine accomplishment.
This traditional method connects you to generations of bakers who have nourished their families with bread made by hand. While modern conveniences like stand mixers exist, there's a unique satisfaction in feeling the dough transform under your hands. We hope this guide empowers you to try making your own easy handkneaded white bread and discover the joy and delicious results of this classic technique.
The Satisfaction of Baking Bread from Scratch
There's a profound satisfaction that comes from baking bread from scratch, especially an easy handkneaded white bread. You start with basic, humble ingredients – flour, water, yeast, and salt – and through your own effort and time, you transform them into a staple food. This tangible creation is a reminder of simple pleasures and the power of making things with your hands. Sharing a slice of warm, homemade bread with loved ones is a special moment, far removed from unwrapping a plastic-clad loaf from the grocery store.
The process itself, from feeling the dough develop during kneading to watching it magically double in size during proofing, is incredibly engaging. It's a practice that requires attention and patience, offering a welcome contrast to the instant gratification often sought in modern life. Successfully baking your first loaf of easy handkneaded white bread instills a sense of accomplishment and encourages further exploration in the world of baking. It's more than just food; it's a craft, a connection, and a source of simple, pure satisfaction.
Frequently Asked Questions
What makes this white bread recipe "easy," even though it's hand-kneaded?
This recipe is considered easy because it uses simple, readily available ingredients and provides clear, step-by-step instructions suitable for beginners. It focuses on the fundamental techniques of hand-kneading.
How long do I need to knead the dough for this hand-kneaded white bread?
You should knead the dough for approximately 8-10 minutes until it becomes smooth and elastic. This is crucial for developing the gluten and achieving a good texture.
Can I substitute any ingredients in this hand-kneaded white bread recipe?
While substitutions can be made, it's best to stick to the recipe for your first attempt. Altering ingredients can impact the final texture and rise. Using bread flour is highly recommended.
What's the best way to tell if my hand-kneaded white bread is properly proofed?
The dough should approximately double in size during proofing. You can also gently poke the dough; if the indentation slowly springs back, it's ready to bake.
What temperature should I bake this hand-kneaded white bread at, and for how long?
Bake the bread at 375°F (190°C) for 30-35 minutes, or until the crust is golden brown and the internal temperature reaches 200-210°F (93-99°C).
Final Reflection: The Enduring Magic of Hand-Kneaded Bread
The simple act of kneading dough by hand connects us to a culinary heritage spanning millennia, a heritage that remains surprisingly relevant in our fast-paced modern world. In a time of instant gratification and pre-packaged convenience, the deliberate process of creating bread from scratch offers a powerful antidote to the frenetic energy of daily life. It's a reminder that sometimes, the most rewarding experiences are found in the slow, mindful creation of something beautiful and nourishing.
The journey of baking this basic white bread, while seemingly simple, reveals a deeper truth about the connection between our hands, our food, and our history. The rhythmic kneading, the satisfying rise of the dough, the warm aroma of freshly baked bread – these are sensory experiences that transcend mere sustenance. They evoke a sense of calm and accomplishment, a feeling deeply rooted in our ancestral past. Bread is the staff of life,
a saying as old as time itself, perfectly encapsulates the enduring significance of this humble food. This simple recipe allows us to reconnect with that profound truth.
Now, consider the possibilities. You've experienced the satisfaction of creating something delicious and wholesome entirely by hand. Don't let this experience end here. Experiment with different flours, add herbs or seeds, and share your freshly baked bread with loved ones. Embrace the imperfections, celebrate the successes, and remember the quiet joy found in the simple act of making bread. Let the rhythmic kneading become a meditation, a moment of mindful creation in your busy day. The world needs more moments like these.
Unleash Your Inner Baker: Knead to Know More?
Thanks for taking the time to explore the world of traditional bread baking! You’ve now unlocked the secrets to a perfectly crafted loaf—and the satisfaction that comes with making it from scratch. Ready to take your baking journey further?
- Bake your own basic white bread today! Use the recipe and techniques you learned to create a delicious loaf, perfect for sharing (or keeping all to yourself! ).
- Experiment with different flours or add-ins – try whole wheat, rye, or even some herbs and seeds. Share your results with us!
- Join our BakeWithEase community forum – connect with other bread lovers and share your baking triumphs (and challenges!)
Have you considered what unique twist you’ll add to your next loaf?