
Master the Art of Fermenting Pizza Dough for Better Taste

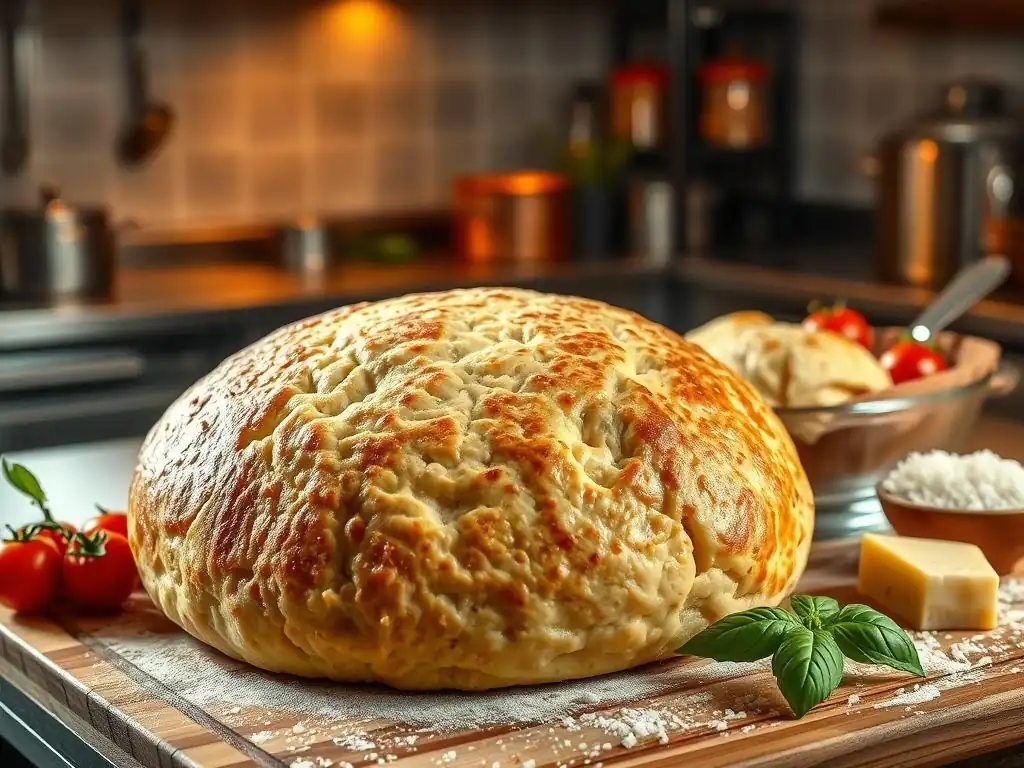
Welcome to BakeWithEase, where the joy of baking meets simplicity!
Ever dreamt of crafting pizza with an unparalleled depth of flavor? You're in the right place. Unlock the secrets to a truly exceptional pizza with our guide on the fermented pizza dough recipe. Discover how this seemingly simple technique can elevate your homemade pizza to restaurant-quality levels. Intrigued? Let's dive in and transform your next pizza night!
- Introduction to Fermented Pizza Dough: Elevate Your Baking with BakeWithEase
- Why Ferment Your Pizza Dough? Unlocking Superior Flavor and Texture
- Fermented Pizza Dough Recipe: A Step-by-Step Guide for BakeWithEase Bakers
- Understanding Different Fermentation Times for Pizza Dough
- Troubleshooting Your Fermented Pizza Dough: Common Issues and Solutions
- Tips and Tricks for Perfect Fermented Pizza Dough Every Time
- Baking Your Fermented Pizza Dough: Achieving a Crispy Crust
- Serving and Storing Your Fermented Pizza: Maintaining Freshness
- Conclusion: Enjoying the Rewards of Fermented Pizza Dough
- Frequently Asked Questions
- Final Reflection: The Transformative Power of Patience in Pizza Making
- Unleash Your Inner Pizzaiolo: Elevate Your Dough Game!
Introduction to Fermented Pizza Dough: Elevate Your Baking with BakeWithEase
Welcome to BakeWithEase, where we believe that mastering the art of baking is within everyone's reach. Today, we're diving deep into a technique that can truly transform your homemade pizza: fermentation. Forget quick doughs that result in bland, flat crusts. By allowing your pizza dough to ferment properly, you unlock levels of flavor, texture, and digestibility that are simply impossible with a rapid rise. This process, often overlooked by home bakers, is the secret behind the best pizzerias around the world.
Understanding and implementing a good fermentation process is key to elevating your pizza game. It's not just about mixing ingredients and letting them rise; it's a patient process that develops the dough's structure and flavor profile. Whether you're aiming for a chewy Neapolitan-style crust or a crispy Roman-style base, learning about fermentation is the first step. We'll guide you through the science, the benefits, and provide a comprehensive fermented pizza dough recipe to get you started on your journey to perfect homemade pizza.
Why Ferment Your Pizza Dough? Unlocking Superior Flavor and Texture
Fermentation is the magic that happens when yeast (or other microorganisms) interacts with the sugars in your dough. This biological process produces gases that make the dough rise, but it also creates a myriad of complex flavors and improves the dough's structure. Skipping or rushing this step means missing out on the true potential of your pizza crust. A well-fermented dough yields a crust that is not only delicious but also has a desirable airy crumb structure and a pleasant chew.
Beyond taste and texture, fermentation also impacts the dough's digestibility. The long fermentation process breaks down complex carbohydrates and proteins, making them easier for your body to process. This is why some people find that pizza made with long-fermented dough is less likely to cause bloating or discomfort compared to pizzas made with quick-rise doughs. It's a fundamental technique for achieving professional-quality results at home.
The Science Behind Fermentation: How Yeast Creates Delicious Pizza
At its core, yeast fermentation is an anaerobic process where yeast organisms consume simple sugars present in the flour and convert them into ethanol (alcohol) and carbon dioxide (CO₂). The CO₂ gas gets trapped within the gluten network of the dough, causing it to expand and rise. This is the primary driver of leavening in traditional bread and pizza dough.
During longer fermentation periods, particularly in cold conditions, other biochemical reactions occur. Enzymes naturally present in the flour, like amylase, break down complex starches into simpler sugars that the yeast can consume. Protease enzymes begin to break down proteins, which can help tenderize the dough and improve its extensibility.
Meanwhile, lactic acid and acetic acid bacteria (often present in wild fermentation or sourdough starters, but also in commercial yeast doughs to a lesser extent) produce organic acids that contribute significantly to the dough's flavor complexity and slightly tangy notes. These processes are slow and require time to fully develop, hence the benefit of longer fermentation times for a truly flavorful fermented pizza dough.
Benefits of Long Fermentation for Pizza Dough
Opting for a long fermentation, often involving a period in the refrigerator (cold fermentation), offers significant advantages over a quick room-temperature rise. This extended time allows the yeast and enzymes to work more thoroughly, resulting in a dough with superior characteristics. While a quick dough might be ready in an hour or two, a long-fermented dough can take anywhere from 24 to 72 hours, or even longer, in a cold environment.
This patient approach pays off in multiple ways. The breakdown of starches and proteins, the production of organic acids, and the gradual buildup of CO₂ all contribute to a better final product. It's the difference between a serviceable crust and one that is memorable and truly enhances your pizza experience.
Enhanced Flavor Profiles in Pizza Dough
One of the most significant benefits of long fermentation is the development of complex, nuanced flavors. As the yeast and bacteria consume sugars and break down compounds in the flour over time, they produce a wide array of aromatic substances, including various alcohols, esters, and organic acids. These compounds are responsible for the characteristic "bready," slightly tangy, and sometimes nutty notes found in artisan breads and high-quality pizza crusts.
Think of the difference between a quickly risen white bread and a slow-fermented sourdough. The sourdough's deep, layered flavor comes from the extensive work done by microorganisms over many hours. A long-fermented pizza dough undergoes a similar flavor transformation. The simple sweetness of the flour gives way to more sophisticated notes that complement your toppings beautifully, making your homemade pizza taste more authentic and delicious.
Improved Dough Texture and Digestibility
Long fermentation also dramatically improves the texture of your pizza dough. As the yeast slowly produces CO₂, the gluten network (the protein structure that gives dough its elasticity and strength) develops and becomes more robust yet extensible. This allows the dough to hold more gas, resulting in a lighter, airier crust with large, irregular holes (the crumb). The slow breakdown of proteins also contributes to a more tender chew.
Furthermore, the extended fermentation process breaks down complex starches and phytic acid, which can make grains harder to digest and inhibit nutrient absorption. This breakdown makes the final pizza crust easier on the stomach for many people. Studies on bread fermentation, for example, have shown a reduction in certain anti-nutrients and a partial breakdown of gluten proteins, though it's important to note that long fermentation does not make dough gluten-free. The result is a crust that is not only wonderfully textured but also potentially more comfortable to eat.
Better Crust and Oven Spring
A well-fermented dough has excellent "oven spring," which is the rapid expansion of the dough when it hits the hot oven. This happens because the trapped CO₂ gases expand rapidly with the heat, and the strong, well-developed gluten network is able to capture this expansion effectively. A dough with good oven spring will puff up beautifully, creating those desirable airy pockets and a light, crispy exterior crust.
Conversely, a dough that hasn't fermented long enough may have a weak gluten structure and insufficient gas production, leading to a dense, flat crust with poor oven spring. The organic acids produced during long fermentation also contribute to a lower pH, which can help enzymes break down starches into sugars that caramelize better during baking. This results in a richer color and a crispier crust compared to a quickly risen dough.
Fermented Pizza Dough Recipe: A Step-by-Step Guide for BakeWithEase Bakers
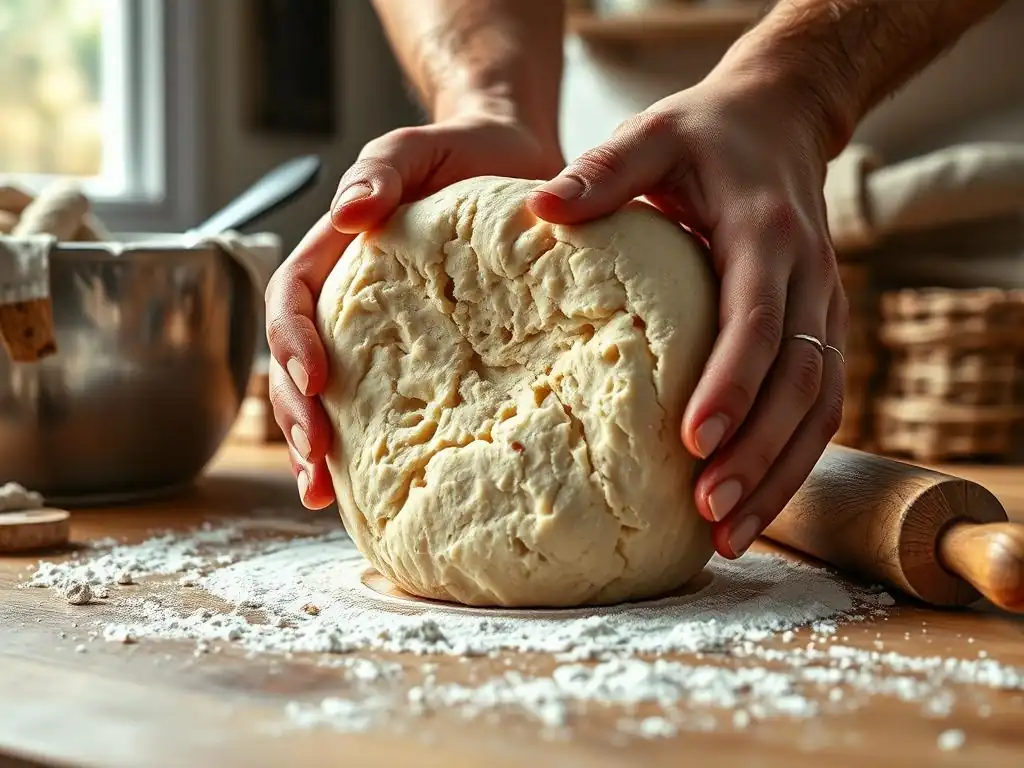
Ready to make your own delicious fermented pizza dough? This recipe is designed for home bakers looking to achieve superior results using the principles of long, cold fermentation. It's straightforward but requires patience. This guide focuses on a versatile dough suitable for various pizza styles, aiming for a hydration level that is manageable for beginners while yielding excellent texture and flavor development over time.
This recipe typically yields enough dough for two medium (approx. 12-inch) pizzas. You can easily scale it up or down. Remember that ambient temperature and the specific flour you use can affect fermentation times, so use this as a guide and observe your dough.
Ingredients for the Perfect Fermented Pizza Dough
Gathering the right ingredients is the first step to a successful fermented pizza dough recipe. The quality and type of each component play a crucial role in the final outcome. Using accurate measurements, preferably by weight, is highly recommended for consistency, especially with hydration levels.
Here's a breakdown of the essential ingredients and considerations for each:
Flour Selection: Choosing the Right Flour for Fermented Dough
For pizza dough, many bakers prefer using bread flour or Italian "Tipo 00" flour. Bread flour has a higher protein content (typically 12-14%) compared to all-purpose flour (10-12%), which helps develop a strong gluten network capable of trapping the gases produced during long fermentation. This results in a chewier, more structured crust.
Italian Tipo 00 flour is specifically milled for pizza and pasta. It is very finely ground and has a moderate to high protein content (often 10-13%), but its unique milling process allows for excellent gluten development and a very smooth dough texture. If you can find it, Tipo 00 is fantastic for Neapolitan-style pizza. If not, a good quality bread flour is an excellent substitute. Avoid using cake or pastry flour, as their low protein content is unsuitable for pizza dough fermentation. Using approximately 300-400 grams of flour per pizza is a common starting point.
Water: The Importance of Hydration in Fermentation
Water is crucial for activating the yeast and developing the gluten structure. The ratio of water to flour is called the hydration level and is expressed as a percentage of the flour weight. For a good fermented pizza dough recipe, hydration levels typically range from 60% to 70%. A higher hydration (more water) generally leads to a more open crumb structure and a crispier crust, but the dough will be stickier and harder to handle. A lower hydration results in a more manageable dough but a denser crust.
Using lukewarm water (around 90-100°F or 32-38°C) is often recommended to help activate active dry yeast quickly, but for long, cold fermentation, room temperature or even cool water is perfectly fine and can help slow down the initial fermentation phase before refrigeration. The exact amount of water will depend on the type of flour used, as different flours absorb water differently. Starting with a 65% hydration (e.g., 260g water for 400g flour) is a good baseline for many flours.
Yeast: Selecting the Best Yeast for Your Pizza Dough (Instant vs. Active Dry)
Yeast is the leavening agent in our fermented pizza dough recipe. You can use either instant dry yeast or active dry yeast.
- Instant Dry Yeast: This type of yeast is very convenient as it can be mixed directly into the dry ingredients without prior hydration. It is highly active and reliable. You generally use slightly less instant yeast than active dry yeast. For a long, cold fermentation, a very small amount is sufficient – perhaps just 0.2% to 0.5% of the flour weight (e.g., 0.8g to 2g for 400g flour). Using too much yeast will cause the dough to over-ferment too quickly, even in the fridge.
- Active Dry Yeast: This yeast requires activation before use. You should dissolve it in lukewarm water (part of the recipe's total water) with a pinch of sugar for 5-10 minutes until it becomes foamy. This proves the yeast is alive. Once activated, it can be added to the dry ingredients. You typically use about 20-25% more active dry yeast than instant yeast. Again, for long fermentation, a small amount is key.
Both types work well for a fermented pizza dough recipe, but instant yeast is often preferred for its ease of use.
Salt: Controlling Fermentation and Enhancing Flavor
Salt is a critical ingredient in any bread or pizza dough. It does more than just add flavor; it also controls the rate of yeast activity and strengthens the gluten structure. Salt slows down fermentation by drawing water out of the yeast cells through osmosis. This is beneficial in long fermentation as it helps prevent the dough from rising too quickly.
Without salt, dough can rise uncontrollably and result in a bland, pale crust. The typical salt percentage in pizza dough is around 1.8% to 2.5% of the flour weight. Using non-iodized salt, such as fine sea salt or kosher salt, is often recommended as iodine can sometimes interfere with yeast activity. For 400g of flour, this would be approximately 7g to 10g of salt.
Equipment Needed for Fermenting Pizza Dough at Home
You don't need a professional kitchen setup to make excellent fermented pizza dough. Most of the equipment you'll need is standard in a home kitchen. However, having the right tools can make the process easier and more consistent.
Here's a list of helpful equipment:
- Digital Scale: Essential for accurate measurement of flour, water, yeast, and salt by weight. Precision is key in baking.
- Large Mixing Bowl: You'll need a bowl large enough to comfortably mix the dough and allow it to expand significantly during bulk fermentation. Glass, plastic, or ceramic bowls work fine.
- Plastic Wrap or Airtight Container: Crucial for covering the dough during fermentation to prevent it from drying out. An airtight plastic container is ideal for cold fermentation as it allows the dough to expand without sticking to the lid.
- Dough Scraper (Optional but Recommended): Helpful for handling sticky dough, dividing it, and cleaning your work surface.
- Kitchen Thermometer (Optional but Recommended): Useful for checking the temperature of your water and the dough itself, especially if you want to be precise with fermentation times.
- Clean Kitchen Towels: For covering the dough during initial resting periods.
Having these items on hand will ensure your fermented pizza dough recipe process goes smoothly from start to finish.
Step-by-Step Instructions: Crafting Your Fermented Pizza Dough
Now, let's get hands-on and make some dough! This process outlines the steps from mixing to preparing the dough for its long, cold rest. Patience is a virtue here; resist the urge to rush any step, especially the fermentation.
Follow these steps to create your delicious fermented pizza dough:
Mixing the Dough: Achieving the Right Consistency
- Measure Ingredients: Accurately weigh your flour, water, salt, and yeast using a digital scale.
- Combine: In your large mixing bowl, combine the water and yeast (if using active dry yeast, ensure it's bloomed first). Stir briefly. Add the salt and most of the flour (hold back a little flour initially).
- Mix: Mix with a spoon, spatula, or your hands until a shaggy dough forms and there are no dry bits of flour remaining. It will be sticky at this stage.
- Kneading (Optional but Recommended): Turn the dough out onto a lightly floured surface. Knead for 5-10 minutes until the dough becomes smoother and more elastic. Alternatively, if you prefer a no-knead method, simply ensure all ingredients are combined. A stand mixer with a dough hook can also be used for 5-7 minutes on low speed. The goal is to start developing the gluten network. The dough should pass the "windowpane test" (you can stretch a small piece thin enough to see light through it without tearing) after sufficient kneading or resting.
After mixing and initial kneading, shape the dough into a rough ball and place it back in the clean bowl.
Bulk Fermentation: Allowing the Dough to Rise
Bulk fermentation is the first rise of the entire mass of dough before it's divided. This step allows the yeast to become active and start producing gas, while enzymes begin their work breaking down starches and proteins. The duration and temperature of this phase are flexible depending on your schedule and the desired outcome.
- Option 1: Room Temperature Bulk Ferment: Cover the bowl with plastic wrap or a damp towel and let it rest at warm room temperature (70-78°F or 21-26°C) for 1-2 hours. The dough should increase in volume by about 20-30%. This kickstarts the process before moving to cold fermentation.
- Option 2: Direct Cold Ferment: Immediately after mixing/kneading, place the dough in an airtight container or a bowl covered tightly with plastic wrap and put it straight into the refrigerator (38-42°F or 3-5°C). The rise will be very slow, but flavor development will begin immediately.
For a long-fermented pizza dough recipe, a combination of a short room-temperature bulk ferment (say, 1 hour) followed by cold fermentation is often ideal, but direct cold fermentation also works well.
Folding the Dough: Strengthening the Gluten Network
Folding the dough during bulk fermentation helps to strengthen the gluten structure, redistribute yeast and nutrients, and equalize the dough's temperature. This is especially beneficial during the initial room-temperature rise.
- After the first 30-60 minutes of bulk fermentation, perform a series of folds. Gently lift one side of the dough, stretch it up, and fold it over the center. Rotate the bowl a quarter turn and repeat with the next side. Do this 3-4 times until all sides have been folded towards the center, creating a taut package.
- Repeat this folding process 1-2 more times during the initial room-temperature bulk ferment, with 30-60 minutes between folds. If doing a direct cold ferment, you can do one set of folds after about 1-2 hours in the fridge, or simply skip the folds entirely – the long rest will still develop the gluten.
Folding isn't strictly necessary for a very long cold ferment, but it does contribute to a slightly better structure and can help manage stickiness.
Dividing and Shaping the Dough: Preparing for the Final Rise
Once the bulk fermentation (or initial phase before cold ferment) is complete, it's time to divide the dough into individual portions for each pizza.
- Turn out the dough: Gently turn the dough out onto a lightly floured surface. Avoid deflating it completely.
- Divide: Use a dough scraper or knife to divide the dough into the desired number of portions. For two medium pizzas, divide it into two equal pieces.
- Shape into balls: Take each portion and gently shape it into a taut ball. You can do this by folding the edges underneath the dough or by using the surface tension trick: cup your hand around the dough on the counter and move your hand in circles, pulling the dough towards you slightly to create tension on the surface.
- Place in containers: Place each dough ball into its own lightly oiled airtight container or a tray covered tightly with plastic wrap. Ensure there is enough space for the dough to expand significantly.
These dough balls are now ready for the crucial cold fermentation phase.
Cold Fermentation: Slowing Down the Process for Maximum Flavor (Optional)
This is where the magic of a truly great fermented pizza dough recipe happens. Cold fermentation involves placing the shaped dough balls in the refrigerator for an extended period. The cold temperature drastically slows down yeast activity but allows enzymes to continue breaking down complex compounds, leading to superior flavor development and improved dough structure.
- Place the containers with the shaped dough balls in the refrigerator (38-42°F or 3-5°C) for at least 24 hours.
- For optimal flavor and texture, aim for a cold fermentation period of 48-72 hours. Some bakers even go up to 5 days or more!
- During this time, the dough will slowly expand, potentially doubling or even tripling in size. The surface might develop small bubbles.
When you're ready to bake, remove the dough from the refrigerator 1-2 hours before use to allow it to come to room temperature. This makes the dough more relaxed and easier to stretch.
Understanding Different Fermentation Times for Pizza Dough
The duration of fermentation significantly impacts the flavor, texture, and handling characteristics of your pizza dough. While long fermentation is often praised for superior results, understanding the differences between short, medium, and long fermentation times can help you choose the best approach for your schedule and desired outcome. Each method yields a different type of crust.
It's important to note that these times are guidelines and can be influenced by factors like the amount of yeast used, the ambient temperature, and the hydration of the dough. Experimentation is key to finding your preferred fermentation method for a great fermented pizza dough recipe.
Short Fermentation: A Quick and Easy Option
Short fermentation typically involves letting the dough rise at room temperature for a relatively brief period, often 2-4 hours. This method is fast and convenient if you need pizza dough ready quickly. It uses more yeast than longer methods to achieve a rapid rise.
While quick, dough fermented this way will have a less complex flavor profile compared to longer-fermented dough. The enzymes haven't had enough time to break down starches and proteins extensively, and the organic acids haven't developed. The crust might be slightly denser and less aromatic. It's a functional dough for a quick weeknight pizza, but it won't deliver the depth of flavor found in artisan pizzerias. Think of it as a good starting point, but not the pinnacle of fermented pizza dough.
Medium Fermentation: Balancing Time and Flavor
Medium fermentation strikes a balance between speed and flavor development. This could involve a longer room-temperature fermentation (e.g., 6-10 hours) or an overnight cold fermentation in the refrigerator (e.g., 12-24 hours). This method allows for more enzymatic activity and flavor production than a short ferment, without requiring the multi-day commitment of a long ferment.
An overnight cold ferment is a popular choice for home bakers. It fits easily into a schedule (mix dough one evening, bake the next) and significantly improves flavor and texture compared to a short room-temperature rise. The cold temperature slows the yeast enough to prevent over-proofing overnight, while still allowing flavor compounds to develop. This is a great step up towards making a really good fermented pizza dough.
Long Fermentation: The Secret to Exceptional Pizza Dough Flavor
Long fermentation, typically involving 24 to 72+ hours of cold fermentation in the refrigerator, is the method preferred by many professional pizzerias and serious home bakers for achieving the best possible flavor and texture. As discussed earlier, this extended cold period allows for maximum breakdown of starches and proteins, leading to a more digestible dough with a complex flavor profile and excellent crust structure.
The key is using a very small amount of yeast, as the long time provides all the leavening needed. While it requires planning ahead, the results are well worth the wait. A long-fermented pizza dough recipe yields a crust that is light, airy, crispy on the outside, chewy on the inside, and bursting with nuanced flavors that complement your toppings perfectly. This is where you truly master the art of fermented pizza dough.
Troubleshooting Your Fermented Pizza Dough: Common Issues and Solutions
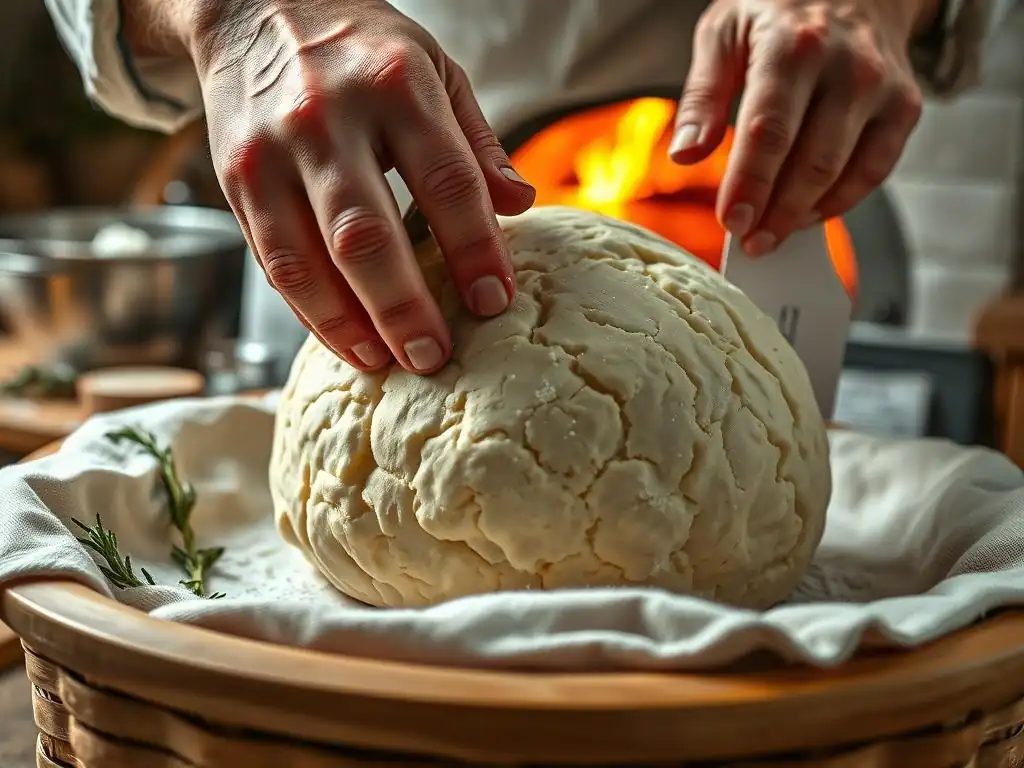
Even with a great fermented pizza dough recipe, baking can sometimes present challenges. Don't be discouraged if your dough doesn't behave exactly as expected. Understanding common issues and how to address them is part of the learning process. Most problems related to fermentation are linked to yeast activity and temperature.
Here are some frequent troubleshooting scenarios and practical solutions to help you get back on track towards perfect pizza.
Dough Not Rising: Identifying and Fixing the Problem
If your fermented pizza dough isn't rising, or the rise is very sluggish, several factors could be at play. The most common culprits are issues with the yeast itself, the temperature of the environment or ingredients, or incorrect ingredient measurements (especially salt).
- Inactive Yeast: Your yeast might be old or dead. Check the expiry date on the package. If using active dry yeast, always "proof" it first in warm water with a pinch of sugar. If it doesn't foam after 5-10 minutes, the yeast is likely dead, and you'll need a new batch.
- Water Temperature: Water that is too hot (above 130°F or 54°C) can kill yeast. Water that is too cold (below 70°F or 21°C) will slow down or inhibit yeast activity, especially with active dry yeast. Ensure your water is within the recommended range (90-100°F for active dry, room temp for instant, or cold for direct cold ferment).
- Ambient Temperature: Yeast is less active in cold environments. If your room is very cool, fermentation will be slow. Placing the dough in a slightly warmer spot (like inside a turned-off oven with the light on) can help, but be cautious not to overheat it.
- Too Much Salt: High concentrations of salt can inhibit yeast activity. Double-check your measurements to ensure you haven't added too much salt relative to the flour and yeast quantity. For a long ferment, the yeast amount is already very small, making it more sensitive to salt levels.
- Not Enough Time: Remember that long, cold fermentation is inherently slow. If your dough is in the fridge, it will rise very slowly. Be patient!
If your dough shows absolutely no signs of life after a reasonable time (e.g., several hours at room temp or 24 hours in the fridge), you might need to discard it and start over with fresh yeast.
Over-Fermented Dough: Recognizing and Recovering From Over-Proofing
Over-fermented dough, also known as over-proofed dough, occurs when the dough has fermented for too long, exhausting the yeast's food supply and weakening the gluten structure. You'll recognize over-proofed dough by several signs:
- Strong, Pungent Smell: It will have a very strong, sometimes overly alcoholic or sour smell.
- Collapsed or Deflated Appearance: The dough may have risen significantly and then started to sink back down in the center.
- Sticky and Gummy Texture: The dough will be very sticky, difficult to handle, and may tear easily.
- Lack of Tension: It won't hold its shape when you try to round it or stretch it.
Over-proofed dough won't give you good oven spring and will result in a dense, poor-textured crust.
- Recovery: While you can't completely fix over-proofed dough, you can sometimes salvage it. Gently punch it down once to redistribute gases and give it a very short rest (10-15 minutes). Then, try to shape and bake it immediately. It won't be ideal, but it might be usable.
- Prevention: The best way to avoid over-fermentation is to use the correct amount of yeast for your fermentation time and temperature. For long, cold fermentation, use very little yeast. Monitor your dough, especially if ambient temperatures are warmer than expected. If you see it rising faster than anticipated, move it to a cooler location or use it sooner than planned.
Sticky Dough: Techniques for Handling High-Hydration Dough
Sticky dough is often a sign of high hydration (a higher percentage of water relative to flour), which is common in recipes aiming for a very open crumb and crispy crust. While sticky dough can be challenging to handle, it's not necessarily a problem and can lead to excellent results if managed correctly.
- Use a Dough Scraper: A metal or plastic dough scraper is invaluable for moving and dividing sticky dough. It helps you lift the dough from surfaces without it sticking to your hands.
- Lightly Flour Your Hands and Surface: Use minimal flour on your hands and work surface when handling sticky dough. Too much flour will change the hydration ratio and can make the crust tough. Just enough to prevent excessive sticking is needed.
- Develop Gluten Properly: Sticky doughs often require good gluten development to become manageable. Ensure you've kneaded or folded the dough sufficiently, or allowed enough time for the long fermentation to strengthen the gluten network naturally. A well-developed gluten structure makes sticky dough more cohesive.
- Cold Dough is Easier to Handle: Dough straight from cold fermentation is usually easier to handle than dough that has warmed up too much at room temperature. If your dough is very sticky after warming, you can pop it back in the fridge for 15-30 minutes to firm up slightly before shaping.
- Practice: Handling sticky dough takes practice. Don't be afraid to get your hands a little messy. Over time, you'll develop a feel for working with high-hydration doughs.
Embracing the stickiness and using proper techniques will allow you to successfully work with high-hydration doughs for a superior fermented pizza dough crust.
Tips and Tricks for Perfect Fermented Pizza Dough Every Time
Achieving consistently great fermented pizza dough involves paying attention to a few key details beyond the basic recipe steps. These tips can help you optimize the fermentation process and ensure your dough is in peak condition for baking.
Implementing these subtle adjustments can make a significant difference in the final quality of your fermented pizza dough, leading to more successful and delicious pizzas.
Maintaining the Ideal Dough Temperature for Fermentation
Temperature is arguably the most critical factor controlling yeast activity and fermentation speed. Yeast is most active between 70-80°F (21-27°C). For a short, fast rise, you might aim for temperatures in this range. However, for long, cold fermentation, you want the dough to be consistently cool to slow activity.
- Room Temperature Fermentation: If doing a room temperature bulk ferment, aim for a stable environment away from drafts or direct sunlight. A temperature between 70-75°F (21-24°C) is often ideal for a steady rise.
- Cold Fermentation: Your refrigerator temperature should be consistently between 38-42°F (3-5°C). Temperatures much colder can almost halt fermentation, while warmer temperatures can lead to over-proofing too quickly. Placing the dough towards the back of the fridge, away from the door, often provides the most stable temperature.
Understanding how temperature affects your dough allows you to adjust fermentation times accordingly.
Using a Dough Thermometer for Accuracy
Taking the guesswork out of temperature is easy with a simple probe thermometer. While not strictly necessary, a dough thermometer provides valuable data, especially if you're troubleshooting or trying to replicate results precisely.
- Checking Water Temperature: Ensure your water is the correct temperature for activating yeast or mixing.
- Checking Dough Temperature: After mixing, the dough's internal temperature can tell you a lot. If it's too warm, fermentation will speed up; too cold, it will slow down. Aiming for a post-mix dough temperature in the low 70s°F (around 22-23°C) is a good starting point for a recipe involving an initial room temp phase before cold storage. If going straight into the fridge, the exact post-mix temperature is less critical as the cold will quickly take over.
Using a thermometer helps you understand how your ingredients and mixing process affect the dough's temperature, allowing for more consistent results with your fermented pizza dough recipe.
Adjusting Fermentation Time Based on Ambient Temperature
Since temperature significantly impacts fermentation, you'll need to be flexible with the suggested times in any fermented pizza dough recipe.
- Warmer Environment: If your kitchen is warmer than the recipe assumes (e.g., above 75°F/24°C), your dough will ferment faster. You might need to shorten the room-temperature bulk ferment or use slightly cooler water initially. Be extra vigilant about checking the dough if it's warm.
- Cooler Environment: If your kitchen is cooler (e.g., below 70°F/21°C), fermentation will be slower. You might need to extend the room-temperature bulk ferment time or find a slightly warmer spot for the dough.
Even during cold fermentation, fluctuations in fridge temperature (like from opening the door frequently) or the dough starting temperature can affect the process. Learn to read your dough – look at its volume increase and feel its texture – rather than relying solely on the clock. This adaptability is key to mastering any fermented pizza dough recipe.
Baking Your Fermented Pizza Dough: Achieving a Crispy Crust

The fermentation process develops the flavor and structure of your dough, but proper baking is essential to translate that potential into a perfect pizza crust – one that's airy and chewy on the inside with a wonderfully crispy exterior. High heat is the key to achieving the desired result quickly.
Getting your oven and tools ready before you even stretch the dough is crucial for success. A hot surface helps the dough set rapidly and encourages maximum oven spring.
Oven Temperature and Baking Time Recommendations
For the best results with fermented pizza dough, you need a very hot oven. Home ovens typically reach between 500°F and 550°F (260°C to 290°C). Aim for the highest temperature your oven can safely reach.
- Preheat: Preheat your oven, ideally with a pizza stone or steel inside, for at least 30-60 minutes. This allows the stone or steel to absorb enough heat to provide a burst of energy to the dough's base.
- Baking Time: At these high temperatures, pizza bakes very quickly, typically in 5-10 minutes, depending on the oven temperature, the thickness of the crust, and the amount of toppings. Keep a close eye on the pizza, as it can go from perfectly baked to burnt in a matter of seconds.
Baking at a lower temperature will result in a longer baking time, which can dry out the crust and prevent the rapid rise needed for a light texture. High heat is paramount for a crispy, airy crust from your fermented pizza dough.
Using a Pizza Stone or Baking Steel for Optimal Results
While you can bake pizza directly on an oven rack (using a baking sheet), a pizza stone or baking steel significantly improves the crust quality. These surfaces absorb and retain heat exceptionally well and transfer it directly to the base of the pizza.
- Pizza Stone: Made of ceramic or cordierite, a pizza stone absorbs moisture from the dough's base, helping to create a crispier crust. They need adequate preheating time (at least 30-60 minutes).
- Baking Steel: Made of steel, these are even more conductive than stones and store more heat. They provide an incredible amount of heat to the dough's base, resulting in fantastic oven spring and a super crispy bottom crust, often faster than a stone. Steels also require a good preheat.
Place the stone or steel on a rack in the upper third of your oven for best results. Using one of these tools is highly recommended for getting the most out of your carefully prepared fermented pizza dough.
Achieving the Perfect Crust Color and Texture
A well-baked fermented pizza crust should have a beautiful color gradient, from golden brown on the bottom to charred spots (known as leoparding) on the cornicione (the edge crust), which indicate excellent fermentation and high heat. The texture should be crispy on the outside and light and airy on the inside, with an open crumb structure.
- Visual Cues: Watch the pizza as it bakes. The cornicione should puff up rapidly and develop color. The cheese should be melted and bubbly, and any exposed dough on the bottom should be golden brown with darker spots.
- Listen: A perfectly baked crust often makes a slight crackling sound when removed from the oven, indicating its crispness.
- Don't Overload: Avoid using too many wet toppings, as they can steam the dough and prevent the bottom crust from getting crispy.
Practice is key here. The more you bake your fermented pizza dough, the better you'll become at recognizing the signs of a perfectly baked crust in your specific oven.
Serving and Storing Your Fermented Pizza: Maintaining Freshness
After all your patience and effort in creating a beautiful fermented pizza dough and baking it to perfection, you want to ensure you serve it at its best and handle any leftovers properly. The unique flavor developed through fermentation makes this pizza stand out, so choose toppings that complement it.
Knowing how to store leftover dough means you can enjoy delicious pizza even on busy nights, utilizing the benefits of your long-fermented pizza dough without starting from scratch every time.
Best Toppings for Fermented Pizza
A great fermented pizza dough crust is a star on its own, offering complex flavors and textures. Simple, high-quality toppings often work best to let the crust shine.
- Classic Margherita: San Marzano tomatoes, fresh mozzarella, fresh basil, a drizzle of olive oil. This simple combination highlights the crust's flavor.
- Marinara: Just tomato sauce (no cheese! ), garlic, oregano, and olive oil. This minimalist approach is surprisingly delicious on a flavorful crust.
- Prosciutto and Arugula: Add thinly sliced prosciutto and fresh arugula after baking for a fresh contrast against the warm, crispy crust.
- Mushroom and Fontina: Earthy mushrooms pair wonderfully with the slightly tangy notes of long-fermented dough. Fontina cheese melts beautifully.
Avoid overly wet or heavy toppings that can make the crust soggy. The goal is harmony between the flavorful crust and your chosen ingredients.
Storing Leftover Pizza Dough or Baked Pizza
If you have leftover fermented pizza dough or baked pizza, proper storage is essential to maintain quality.
- Storing Unbaked Dough: If you have extra dough balls after their cold fermentation, they can often be stored in the refrigerator for an additional 1-2 days, depending on how much yeast was used and how long they've already fermented. For longer storage, dough can be frozen. Wrap each dough ball tightly in plastic wrap, then place in a freezer bag or container. Thaw overnight in the refrigerator before bringing to room temperature and baking. Dough frozen and thawed might not have quite the same oven spring as fresh dough, but it's still excellent.
- Storing Baked Pizza: Leftover pizza is best stored in an airtight container in the refrigerator for 3-4 days. Reheat slices in a hot oven or on a stovetop in a skillet for the crispiest results, avoiding the microwave if possible, as it makes the crust soft.
Proper storage ensures you can enjoy the fruits of your labor later, whether it's another pizza night or a quick leftover lunch.
Conclusion: Enjoying the Rewards of Fermented Pizza Dough
You've now journeyed through the art and science of fermenting pizza dough, from understanding the role of yeast to mastering the techniques of long, cold fermentation and achieving a perfect bake. It requires patience and a little practice, but the payoff is immense. The difference in flavor, texture, and digestibility compared to a quick-rise dough is truly remarkable.
Making your own fermented pizza dough is a rewarding process that elevates your homemade pizza from good to extraordinary. It connects you to ancient baking traditions and allows you to create something truly special in your own kitchen.
Embrace the Art of Fermentation with BakeWithEase
At BakeWithEase, we encourage you to experiment and find what works best for you and your kitchen environment. Don't be afraid to try different fermentation times, hydration levels, or flour types. Each batch is a learning opportunity. This fermented pizza dough recipe is a solid foundation, but your personal touch and observation will lead you to your perfect pizza crust.
Remember that baking is a journey, and every attempt, successful or not, teaches you something new. Enjoy the process, and savor the incredible aroma and taste of freshly baked pizza made with your own hands using a well-fermented pizza dough.
One of the greatest joys of baking is sharing your creations. Gather friends and family and let them experience the difference that a properly fermented pizza dough makes. The airy crust, complex flavor, and satisfying chew are sure to impress.
Whether you stick to classic toppings or get creative, the foundation of a great fermented pizza dough will make your homemade pizza a memorable meal. So fire up your oven, stretch that beautiful dough, and share the delicious results of your patience and skill. Happy baking from all of us at BakeWithEase!
Frequently Asked Questions
What is the main benefit of fermenting pizza dough?
Fermenting pizza dough significantly improves the taste and texture of the crust. It allows for a deeper, more complex flavor to develop and creates a lighter, airier crumb due to carbon dioxide production.
How long should I ferment my pizza dough for the best results?
While times vary, a long, slow fermentation (24-72 hours in the refrigerator) generally yields the best flavor and texture. Shorter fermentations are possible, but the flavor will be less developed.
What type of flour is best for a fermented pizza dough recipe?
High-protein flour, like bread flour or 00 flour, is generally recommended. This provides the necessary gluten development for a strong, elastic dough that can hold its shape during fermentation.
How do I know if my pizza dough is properly fermented?
The dough should have doubled or tripled in size and have a slightly sour or tangy aroma. It should also be light and airy when you handle it, not dense and heavy.
Can I use active dry yeast or instant dry yeast for this recipe?
Yes, both active dry yeast and instant dry yeast can be used. However, active dry yeast requires proofing in warm water before being added to the dough, while instant dry yeast can be added directly to the dry ingredients.
Final Reflection: The Transformative Power of Patience in Pizza Making
The subtle art of fermenting pizza dough isn't just a culinary technique; it's a gateway to unlocking unparalleled flavor and texture in your pizzas. This process, often overlooked in the rush of modern cooking, offers a profound connection to the ancient traditions of bread making and elevates the humble pizza to new heights. The results – a lighter crust, deeper flavor, and improved digestibility – speak for themselves.
The journey of fermenting dough mirrors life itself; it requires patience, attention to detail, and a willingness to trust the process. The subtle changes, the gentle rise, the evolving aromas – these are all part of the magic. Patience is a virtue, and it's especially true in the kitchen.
This simple quote encapsulates the essence of successful fermentation, reminding us that the best things often take time. The impact of this technique extends beyond the individual pizza; it encourages a slower, more mindful approach to cooking, fostering a deeper appreciation for the ingredients and the craft itself.
Now, consider your own approach to cooking. Are you willing to embrace the slow burn of fermentation? I encourage you to experiment with this technique, to observe the transformation, and to savor the superior results. Don't be afraid to adjust the recipe to your own preferences and to learn from each batch. The journey of mastering fermented pizza dough is a rewarding one, filled with delicious discoveries and a newfound appreciation for the power of patience in the kitchen. Embrace the process, and enjoy the incredible pizza that awaits!
Unleash Your Inner Pizzaiolo: Elevate Your Dough Game!
Thanks for taking the time to explore the wonderful world of fermented pizza dough! You've now unlocked the secret to creating truly exceptional pies. Ready to put your new knowledge into practice?
- Craft your perfect sourdough pizza: Use the techniques you just learned to bake a delicious, flavourful pizza tonight! Experiment with different flours and fermentation times to discover your signature recipe.
- Share your pizza creations: Show off your amazing fermented dough creations on social media using #BakeWithEaseFerment and tag @BakeWithEase (imaginary social media handle). Let's inspire each other!
- Explore advanced fermentation techniques: Dive deeper into the world of sourdough starters and different fermentation methods. What other exciting flavor profiles can you unlock?
Ready to transform your pizza nights? What unique ingredient will you try in your next fermented pizza masterpiece?