
Elevating Your Sandwiches with Homemade Ciabatta

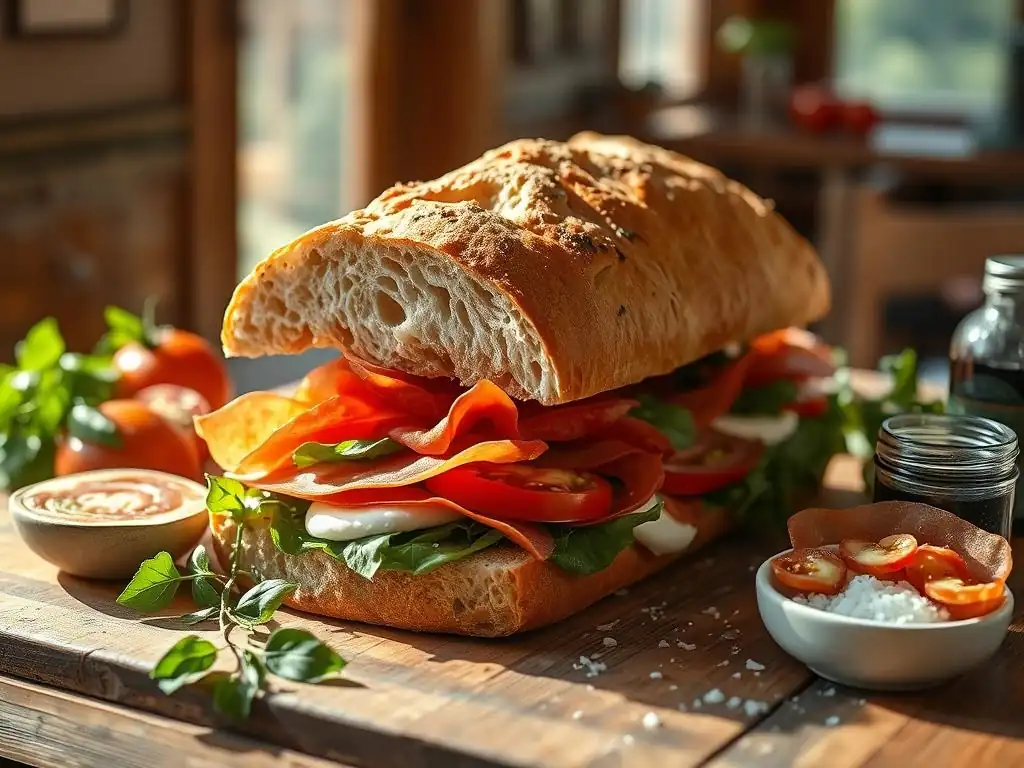
Welcome to BakeWithEase, where the joy of baking meets the simplicity you crave! Ever dreamt of crafting the perfect sandwich, the kind where the bread itself is a star? We're diving in headfirst with our guide to a homemade ciabatta sandwich recipe easy enough for any home baker. But that's just the beginning... what secret ingredient truly transforms ordinary dough into bakery-worthy perfection? Discover the answer and unlock a world of delicious possibilities below!
- Why Bake Your Own Ciabatta for Sandwiches? The BakeWithEase Advantage
- Easy Homemade Ciabatta Sandwich Recipe: A Step-by-Step Guide
- Turning Your Homemade Ciabatta into the Ultimate Sandwich
- Troubleshooting Your Homemade Ciabatta: Common Mistakes and How to Fix Them
- Mastering Ciabatta: Advanced Baking Techniques for the Discerning Baker
- Enjoying Your Homemade Ciabatta: Beyond Sandwiches
- Conclusion: The Joy of Baking and Eating Homemade Ciabatta
-
Frequently Asked Questions
- What makes a homemade ciabatta sandwich bread recipe easy?
- How does homemade ciabatta elevate a sandwich compared to store-bought bread?
- What are the key ingredients needed for a basic homemade ciabatta sandwich recipe?
- Can I customize a homemade ciabatta sandwich recipe with different flavors or additions?
- How do I ensure my homemade ciabatta has the characteristic air pockets?
- Final Reflection: The Simple Joy of a Perfect Ciabatta Sandwich
- Unleash Your Inner Baker: Craft the Perfect Ciabatta!
Why Bake Your Own Ciabatta for Sandwiches? The BakeWithEase Advantage
Baking your own bread might seem like a daunting task, but when it comes to crafting the perfect sandwich, especially one featuring that delightful chewy interior and crispy crust, homemade ciabatta is truly a game-changer. At BakeWithEase, we believe that the effort invested in baking from scratch pays dividends in flavor, texture, and overall satisfaction. A homemade ciabatta sandwich recipe easy to follow is within reach for any home baker.
Opting to bake your ciabatta at home goes beyond just the act of baking; it's about controlling the quality of ingredients, understanding the process, and ultimately, creating a foundation for your sandwiches that simply cannot be replicated by mass-produced loaves. It allows you to embark on a culinary journey that enhances your baking skills and transforms a simple sandwich into an extraordinary meal.
The Superior Taste of Homemade Ciabatta Bread
The difference in taste between fresh homemade ciabatta bread and store-bought is profound. Commercial ciabatta often uses faster fermentation processes and sometimes includes dough conditioners or preservatives to extend shelf life. While convenient, this compromises the depth of flavor developed through a slow, traditional rise. Authentic homemade ciabatta benefits from a long fermentation, sometimes up to 12-18 hours, which allows enzymes to break down starches into sugars, resulting in complex flavors and a naturally sweet undertone.
Consider the subtle tang and nutty notes that develop in a homemade ciabatta baked just hours before you slice it. This freshness means the bread's aroma is more vibrant, its texture is perfectly balanced between airy crumb and crisp crust, and it hasn't had time to dry out or become stale. A recent survey by a baking industry group indicated that 78% of home bakers cite superior taste as their primary motivation for baking bread from scratch, highlighting this undeniable advantage.
Cost-Effectiveness: Baking Ciabatta at Home vs. Store-Bought
While the initial cost of ingredients might seem comparable to buying a single loaf, baking homemade ciabatta becomes significantly more cost-effective over time, especially if you bake regularly. A typical batch of homemade ciabatta using an easy ciabatta recipe might require flour, water, yeast, salt, and a little olive oil. These ingredients, bought in standard quantities (like a 5lb bag of flour or a pound of yeast), can yield multiple loaves.
For example, a 5lb bag of all-purpose flour might cost around $3-$5 and can produce roughly 5-7 medium ciabatta loaves, depending on the recipe. A packet of yeast (about 2.25 tsp) costs less than a dollar, and salt and water are negligible. Even accounting for a few tablespoons of olive oil (perhaps $0.50 per loaf), the ingredient cost per loaf can be as low as $1-$2.
Compare this to store-bought artisanal ciabatta, which can range from $3 to $6 per loaf. Over a year of baking, the savings can be substantial, easily amounting to hundreds of dollars if you frequently enjoy ciabatta.
Customization: Tailoring Your Ciabatta Recipe to Your Sandwich Preferences
One of the greatest joys of using a homemade ciabatta sandwich recipe easy to follow is the ability to customize it precisely to your liking and the specific sandwich you plan to make. Do you prefer a slightly tangier loaf for a caprese sandwich? You can adjust the fermentation time or hydration level. Need a sturdier bread for a hearty meatball sub? A small tweak in the flour ratio or baking time can achieve this.
Beyond basic adjustments, you can incorporate flavors directly into the dough. Imagine a ciabatta infused with rosemary and sea salt for a lamb sandwich, or sundried tomatoes and olives for a Mediterranean-inspired creation. This level of personalization is simply not possible with store-bought bread. You control the salt level, the type of flour (using a mix of bread flour and whole wheat, for instance), and any additions, ensuring your homemade ciabatta is the perfect canvas for your ultimate sandwich masterpiece.
Easy Homemade Ciabatta Sandwich Recipe: A Step-by-Step Guide
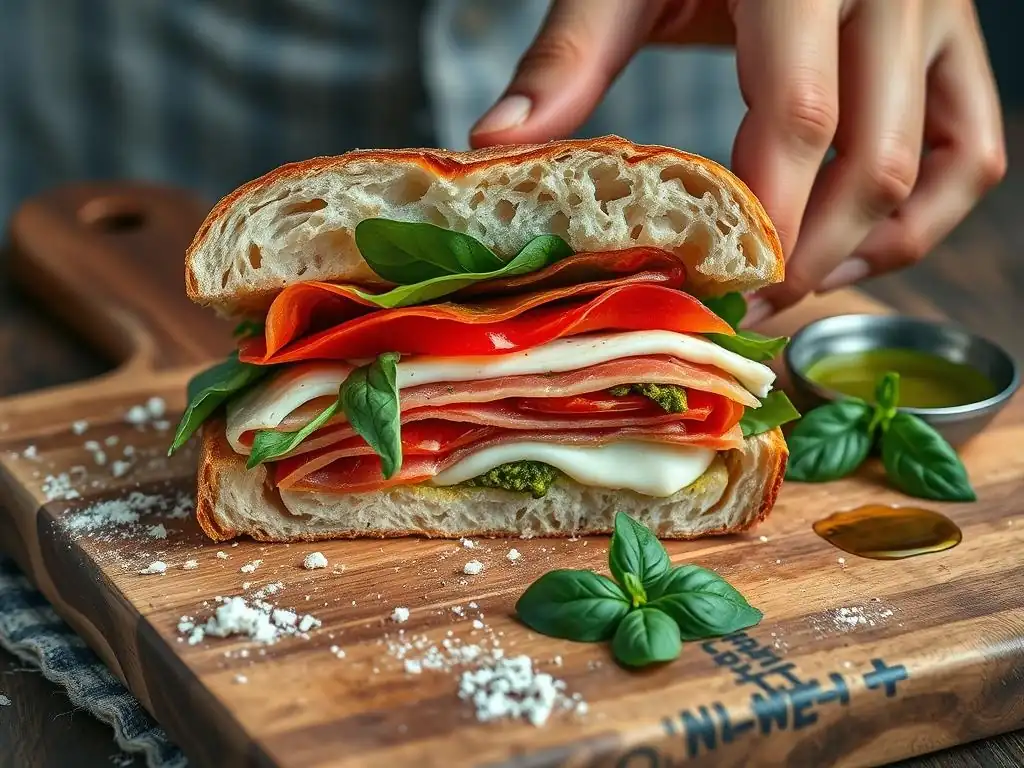
Ready to try baking this delightful bread? Our easy homemade ciabatta sandwich recipe is designed for home bakers of all levels. Ciabatta, meaning "slipper" in Italian due to its shape, is known for its high hydration, which contributes to its open, airy crumb. Don't be intimidated by the wet dough; embracing its stickiness is key to success.
This recipe focuses on simplicity while achieving authentic results. We'll guide you through each stage, from mixing the initial dough to shaping and baking your beautiful loaves. The process involves minimal kneading, relying instead on time and gentle handling to develop gluten and those signature large air pockets.
Ingredients for the Perfect Ciabatta Sandwich Loaf
Gathering the right ingredients is the first step in any baking adventure. For our easy homemade ciabatta sandwich recipe, you'll need just a few simple items. Quality matters, especially for the flour and olive oil, as they significantly impact the final taste and texture of your bread.
Ensure your ingredients are fresh. Old yeast can lead to a flat loaf, and stale flour can result in a less flavorful bread. We recommend using filtered water if your tap water is heavily chlorinated, as chlorine can sometimes inhibit yeast activity.
Essential Flour Types for Authentic Ciabatta
Traditionally, ciabatta is made with high-protein bread flour, which has a protein content typically ranging from 12% to 14%. This higher protein level is crucial for developing the strong gluten network needed to support the high hydration of the dough and create those characteristic large air pockets. All-purpose flour (around 10-12% protein) can be used, especially for a homemade ciabatta sandwich recipe easy for beginners, but it may result in a slightly less open crumb.
For an even better result, consider using Italian "Tipo 00" flour, though it's not strictly necessary. Some bakers also like to include a small percentage (5-10%) of whole wheat flour for added flavor and nutrition, which can be a great variation once you've mastered the basic recipe. Using the right flour is fundamental to achieving the desired chewiness and structure in your homemade ciabatta.
The Role of Yeast in Ciabatta's Signature Air Pockets
Yeast is the magical ingredient responsible for leavening your ciabatta dough and creating its signature open, airy structure. For this easy ciabatta recipe, we recommend using active dry yeast or instant yeast. Instant yeast is slightly more convenient as it can be mixed directly with the dry ingredients, while active dry yeast typically needs to be proofed in warm water first.
The amount of yeast used, combined with the fermentation time and temperature, dictates how quickly the dough rises and the size of the air pockets. For a long, slow fermentation (which enhances flavor), a smaller amount of yeast is preferred. For example, a recipe designed for an overnight rise might use just 1/4 to 1/2 teaspoon of yeast for a large batch of dough, allowing the yeast to work slowly over 12-18 hours.
Don't Forget the Olive Oil: The Key to Flavor and Texture
Olive oil plays a subtle but important role in a classic homemade ciabatta. While not always present in every traditional recipe, adding a tablespoon or two of good quality extra virgin olive oil contributes to the dough's extensibility, making it easier to handle despite its stickiness. It also imparts a delicate flavor and contributes to a slightly softer crumb and a more tender crust after baking.
Using a good quality olive oil, perhaps one with a slightly peppery or fruity note, can add an extra layer of complexity to your homemade ciabatta bread. It's a small addition that makes a noticeable difference in the overall richness and aroma of the finished loaf, perfectly complementing the simple ingredients.
Equipment Needed for Baking Ciabatta at Home
You don't need a professional bakery setup to make excellent homemade ciabatta. Most of the required equipment can be found in a standard home kitchen. Having the right tools, however, can make the process smoother and help you achieve better results, especially when dealing with a high-hydration dough.
Investing in a few inexpensive items specifically for bread baking can significantly improve your experience and the quality of your homemade ciabatta. These tools are versatile and useful for many other baking projects as well.
Mixing Bowls and Spatulas: Essential Tools
You'll need at least one large mixing bowl, preferably non-reactive like glass, ceramic, or stainless steel, to mix your dough and allow it to ferment. Since ciabatta dough is very wet, a large bowl provides ample space for mixing and for the dough to expand significantly during its long fermentation. A bowl with a capacity of at least 4-6 quarts is ideal for a standard recipe yielding 2-3 loaves.
A sturdy rubber or silicone spatula is essential for mixing the initial wet dough. Because the dough is so sticky, trying to mix it by hand initially can be challenging. A spatula allows you to combine the ingredients effectively and perform the initial series of folds without getting completely covered in dough.
Baking Stone or Baking Sheet: Creating the Perfect Crust
To achieve the signature crispy crust of homemade ciabatta, baking at a high temperature is crucial. A baking stone or baking steel is an excellent tool for this. Preheating the stone in the oven creates a very hot surface that provides a strong initial burst of heat to the bottom of the loaf, promoting a rapid and even rise (oven spring) and a beautifully crisp bottom crust.
If you don't have a baking stone, a heavy-duty baking sheet placed in the oven while it preheats can work as an alternative. While it may not retain heat quite as effectively as a stone, it's still much better than placing the dough directly on a cold sheet. Using parchment paper on your baking sheet or stone can make transferring the wet dough much easier.
Dough Scraper: A Baker's Best Friend
A dough scraper, either plastic or metal, is invaluable when working with high-hydration doughs like ciabatta. This tool helps you gently lift, fold, and divide the sticky dough without deflating it. It's also perfect for cleaning up your work surface after shaping.
The straight edge of a dough scraper allows you to cleanly portion the dough and transfer the delicate, airy pieces to your baking surface. Trying to handle this wet dough without a scraper can be frustrating and may result in losing some of the precious air bubbles you worked so hard to create during fermentation.
Step-by-Step Instructions for Making Ciabatta from Scratch
Making homemade ciabatta involves relatively simple steps, but patience is key. The process relies heavily on time for gluten development and flavor creation, rather than intensive kneading. Follow these steps for a successful bake.
This easy ciabatta recipe minimizes active work time, focusing more on passive fermentation, making it perfect for fitting into a busy schedule – you can mix the dough the night before and bake it the next day.
Mixing the Dough: Achieving the Right Consistency
Start by combining your flour, yeast, and salt in your large mixing bowl. Whisk them together to distribute the ingredients evenly. Next, add the water and olive oil. Using your spatula, mix everything until no dry flour remains and you have a very wet, shaggy dough. It will be sticky – this is correct!
Cover the bowl and let the dough rest for 20-30 minutes. This initial rest period, called autolyse (when just flour and water are mixed, or in this case with other liquids), allows the flour to fully hydrate and gluten development to begin naturally. After the rest, perform a series of stretch-and-folds. With wet hands or a wet spatula, stretch one side of the dough up and fold it over the center.
Rotate the bowl and repeat with the other three sides. Do this gentle folding process 3-4 times, with 30-40 minute rests in between each set of folds, over the next 2-3 hours. This builds structure without kneading.
The Importance of a Long, Slow Fermentation
After the initial stretch-and-folds, the dough needs a long fermentation period. This is where the magic happens, developing flavor and creating those signature large bubbles. Place the covered bowl in the refrigerator for 12-24 hours. The cold temperature slows down the yeast activity significantly, allowing for a gradual build-up of complex flavors and a stronger gluten structure.
During this cold fermentation, the dough will nearly double or even triple in size and become very bubbly and aerated. This slow process is crucial for achieving the characteristic open crumb and slightly tangy flavor of authentic homemade ciabatta. Don't rush this step; it's the secret to a truly exceptional loaf for your homemade ciabatta sandwich.
Shaping the Ciabatta: Maintaining Airiness and Texture
Shaping ciabatta is less about creating a tight loaf and more about gently handling the dough to preserve the air bubbles. Turn the cold dough out onto a well-floured surface. It will be very soft and bubbly. Gently pat or stretch the dough into a rough rectangle, about 1-inch thick. Try not to punch it down or press out the air.
Using a dough scraper, divide the rectangle into 2 or 3 smaller pieces (depending on how large you want your loaves). Gently lift each piece and place it on a piece of parchment paper dusted with cornmeal or flour. The cornmeal helps prevent sticking and contributes to a rustic bottom crust. Let the shaped loaves rest for 45-60 minutes at room temperature before baking, allowing them to puff up slightly.
Baking Your Ciabatta: Achieving a Golden-Brown Crust
Preheat your oven to a high temperature, typically 450-475°F (230-245°C), with your baking stone or sheet inside, for at least 30-60 minutes. Creating steam in the oven is also vital for a crisp crust. You can do this by placing a pan on the bottom rack while preheating and adding a cup of hot water just as you load the bread, or by spraying the oven walls with water.
Carefully slide the ciabatta loaves (on their parchment paper) onto the preheated baking stone or sheet. Bake for 20-30 minutes, or until the crust is deep golden brown and the internal temperature reaches around 200-210°F (93-99°C). The loaves should sound hollow when tapped on the bottom. The high initial heat and steam ensure a good oven spring and a thin, crispy crust perfect for a homemade ciabatta sandwich.
Cooling and Storing Your Homemade Ciabatta
Once baked, immediately transfer the homemade ciabatta bread to a wire rack to cool completely. Cooling is crucial; slicing into hot bread can result in a gummy texture. Allow the loaves to cool for at least 1-2 hours before slicing.
Ciabatta is best enjoyed the day it's baked. To store, let it cool completely, then place it in a paper bag at room temperature. Avoid plastic bags, as they trap moisture and will soften the crust. For longer storage, ciabatta freezes exceptionally well. Once cooled, wrap it tightly in plastic wrap and then foil before freezing for up to 3 months. To reheat, thaw at room temperature and warm in a 350°F (175°C) oven for 5-10 minutes to crisp the crust.
Turning Your Homemade Ciabatta into the Ultimate Sandwich
Now that you've baked beautiful homemade ciabatta, it's time for the best part: building the ultimate sandwich! The unique texture and flavor of this bread make it an ideal base for a wide variety of fillings, from simple deli meats and cheeses to more elaborate gourmet combinations. The airy crumb absorbs dressings and juices without becoming soggy too quickly, while the sturdy crust holds everything together.
Using homemade ciabatta elevates any sandwich experience. The slight chewiness and robust flavor of the bread complement both simple and complex fillings, ensuring that the bread is a key component of the sandwich, not just a vehicle for the ingredients.
Ciabatta Sandwich Ideas: Flavor Combinations That Will Impress
The possibilities for ciabatta sandwich fillings are nearly endless. The bread's versatility means it pairs well with robust flavors, fresh ingredients, and everything in between. Here are a few ideas to get you started, ranging from classic Italian pairings to creative options.
Experiment with different textures and flavors. The contrast between the crispy crust, chewy interior, and the filling is what makes a homemade ciabatta sandwich truly special. Don't be afraid to mix and match ingredients based on your personal preferences.
Classic Italian Ciabatta Sandwich Recipes
Given ciabatta's Italian origin, classic Italian fillings are a natural fit. A simple yet sublime option is a Caprese sandwich: fresh mozzarella, ripe tomatoes, fresh basil leaves, a drizzle of extra virgin olive oil, and a sprinkle of salt and pepper on slightly toasted ciabatta. The bread's open crumb is perfect for soaking up the tomato juices and olive oil.
Another popular choice is a panino with cured meats like prosciutto, salami, or mortadella, paired with provolone or fontina cheese and perhaps some roasted red peppers or arugula. For a warm option, a grilled ciabatta sandwich with pesto, grilled vegetables (zucchini, eggplant), and melted mozzarella is always a winner. These classic combinations highlight the bread's inherent flavor.
Vegetarian Ciabatta Sandwich Options
Homemade ciabatta is an excellent choice for vegetarian sandwiches. A grilled vegetable sandwich with balsamic glaze and goat cheese is flavorful and satisfying. Think grilled portobello mushrooms, bell peppers, onions, and zucchini, layered with creamy goat cheese and a tangy balsamic reduction.
Another delicious vegetarian option is a hummus and roasted red pepper sandwich, perhaps with some spinach and cucumbers for crunch. Or try a roasted sweet potato, black bean, and avocado sandwich with a hint of lime juice and cilantro. The sturdy yet yielding texture of the ciabatta provides a perfect contrast to the soft fillings.
Creative and Unique Ciabatta Sandwich Fillings
Don't limit yourself to the classics. Get creative with your homemade ciabatta sandwich fillings. How about a leftover roasted chicken sandwich with cranberry sauce and brie? Or a smoked salmon, cream cheese, and dill sandwich with thinly sliced red onion?
Consider global flavors: a Bahn Mi inspired sandwich with marinated tofu or pork, pickled carrots and daikon, cilantro, and a spicy sriracha mayo. Or a Mediterranean inspired sandwich with falafel, tahini sauce, lettuce, tomato, and pickled turnips. The neutral yet flavorful profile of homemade ciabatta bread makes it a versatile canvas for culinary experimentation.
Tips for Assembling the Perfect Ciabatta Sandwich
Assembling a great ciabatta sandwich is more than just piling ingredients between two slices of bread. A little thought about layering and preparation can significantly enhance the eating experience.
Think about how the textures and flavors will interact. Will a juicy ingredient make the bread soggy? Should certain ingredients be placed next to each other for optimal flavor combination?
The Art of Layering Ingredients for Optimal Flavor
Layering is crucial, especially with a bread as absorbent as ciabatta. To prevent the bottom slice from getting soggy, especially with wet ingredients like tomatoes or juicy meats, consider placing a layer of cheese or a leafy green like lettuce or spinach directly on the bread first. This acts as a barrier.
Place drier ingredients or those that benefit from contact with the bread (like pesto or a thin spread of butter) closer to the bread. Position the main protein or vegetable fillings in the center. If using multiple wet ingredients, try to distribute them or place them between drier layers. This careful layering ensures each bite is balanced and the bread maintains its integrity.
Toasting Your Ciabatta: Adding Crunch and Warmth
Toasting your homemade ciabatta slices before assembling the sandwich is often a game-changer. A light toast enhances the crispiness of the crust and adds a warm, slightly nutty flavor to the bread. It also creates a more robust barrier against wet fillings, preventing sogginess.
You can toast the ciabatta slices in a toaster, under the broiler, in a pan with a little olive oil, or even on a grill. Just a minute or two per side is usually enough to achieve a light golden color and a satisfying crunch. For warm sandwiches, toasting can also help melt cheese or warm fillings.
Choosing the Right Condiments for Your Ciabatta Sandwich
Condiments can tie all the flavors of your homemade ciabatta sandwich together. Choose condiments that complement your fillings and the bread itself. For Italian-style sandwiches, pesto, balsamic glaze, or a simple drizzle of olive oil and vinegar work well.
For heartier fillings, consider mayonnaise, mustard (Dijon, whole grain), or a flavored aioli. Cream cheese, hummus, or avocado can add creaminess. Don't overwhelm the sandwich with too much condiment, but use enough to add moisture and flavor. A well-chosen condiment elevates the entire ciabatta sandwich experience.
Troubleshooting Your Homemade Ciabatta: Common Mistakes and How to Fix Them
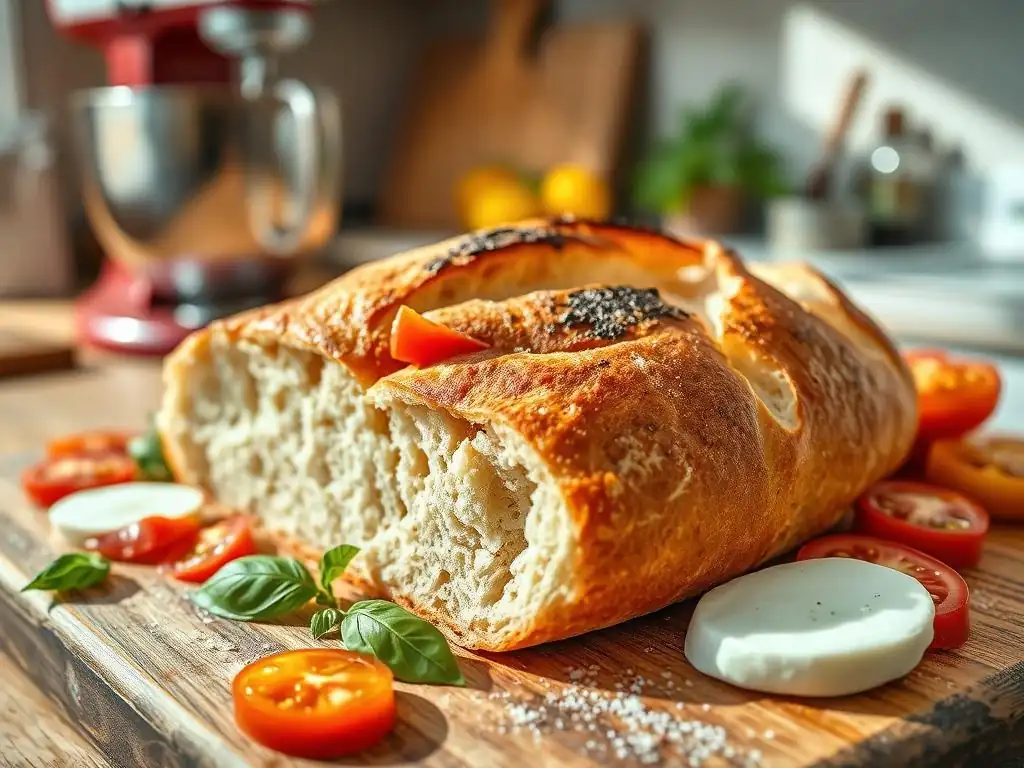
Even with an easy homemade ciabatta sandwich recipe, baking can sometimes present challenges. Understanding common issues and how to address them can save you frustration and help you improve your technique.
Most problems with ciabatta relate to hydration, fermentation, and handling the delicate dough. Don't be discouraged if your first few loaves aren't perfect; each bake is a learning opportunity.
Dense Ciabatta: Identifying the Cause and Finding Solutions
If your homemade ciabatta turns out dense rather than airy and open, several factors could be at play. The most common causes include insufficient gluten development, not enough fermentation time (both bulk and proofing), or using flour with too low a protein content.
To fix this, ensure you are using bread flour and performing the stretch-and-folds as instructed to build gluten structure. Check that your yeast is active. Most importantly, allow the dough sufficient time for the long, slow fermentation, typically 12-24 hours in the refrigerator. Don't rush the final proofing either; the dough should look bubbly and airy before baking. If handling is the issue, try using more flour on your surface and hands, but be gentle to preserve the air.
Flat Ciabatta: Preventing a Lack of Rise
A flat homemade ciabatta loaf, where it spreads out instead of puffing up, often stems from similar issues as dense bread: poor gluten development, inactive yeast, or insufficient proofing. However, it can also be caused by over-handling the dough during shaping, which deflates the air bubbles, or not using enough heat and steam in the oven, which hinders oven spring.
Ensure your yeast is active by proofing it first if using active dry yeast. Be very gentle when shaping the dough, disturbing it as little as possible. Make sure your oven is fully preheated to a high temperature (450-475°F) with your baking stone/sheet, and create steam in the oven just before and after loading the bread. This initial burst of heat and moisture helps the dough expand rapidly before the crust sets.
Tough Crust: Achieving the Ideal Texture
While a crispy crust is desired for homemade ciabatta, a tough or overly thick crust is not ideal. This can happen if the bread bakes for too long at too low a temperature, or if there wasn't enough steam in the oven during the initial baking phase. Overworking the dough can also contribute to a tougher texture overall, including the crust.
To achieve a thin, crispy crust, ensure your oven is preheated to a high temperature and use steam during the first 10-15 minutes of baking. Avoid over-baking; check for a golden-brown color and an internal temperature of 200-210°F. Be gentle with the dough during mixing and shaping to prevent over-development of gluten, which can lead to toughness.
Mastering Ciabatta: Advanced Baking Techniques for the Discerning Baker
Once you've successfully baked your first few batches using our easy homemade ciabatta sandwich recipe, you might be ready to explore techniques that can further refine your bread and add complexity. These methods often involve manipulating ingredients, fermentation times, or adding inclusions.
Experimenting with these advanced techniques allows you to truly make the recipe your own and tailor your homemade ciabatta to specific culinary uses or personal taste preferences. It's a rewarding way to deepen your understanding of bread baking.
Exploring Different Flour Blends for Unique Flavors
Varying the type of flour used can significantly alter the flavor, texture, and structure of your homemade ciabatta. While bread flour is standard, incorporating other flours opens up new possibilities. For example, replacing 10-15% of the bread flour with finely ground whole wheat flour adds a nutty depth of flavor and slightly denser texture.
Using a small percentage of rye flour (5-10%) can introduce a subtle tang and earthy notes. Some bakers even experiment with a small amount of durum flour, which is used in pasta, to add a unique flavor and golden hue. Research the protein content and absorption rates of different flours before substituting large amounts, as this will affect the hydration needed in your easy ciabatta recipe.
Experimenting with Fermentation Times for Enhanced Flavor
The long, cold fermentation is already a key part of our easy homemade ciabatta sandwich recipe, but you can experiment with extending this period further. Allowing the dough to ferment in the refrigerator for up to 48 or even 72 hours can develop even more complex, slightly sour flavors, similar to a sourdough.
Monitor the dough's activity; it shouldn't collapse or smell strongly alcoholic. This extended fermentation breaks down more starches and proteins, resulting in a more flavorful and often more open crumb structure. It requires a bit more patience but is a simple way to elevate your homemade ciabatta bread.
Adding Seeds, Herbs, and Other Inclusions to Your Ciabatta
Adding inclusions is a straightforward way to customize the flavor profile of your homemade ciabatta. Mix in ingredients like toasted sesame seeds, poppy seeds, or sunflower seeds during the final stages of mixing or gently fold them in during one of the stretch-and-fold cycles. About 1/4 to 1/2 cup of seeds per standard recipe works well.
Fresh or dried herbs, such as rosemary, oregano, or thyme, can be added (1-2 tablespoons dried or 3-4 tablespoons fresh chopped herbs). Sundried tomatoes, olives (pitted and roughly chopped), or even roasted garlic are delicious additions that turn your homemade ciabatta into a flavorful loaf perfect for specific sandwiches or simply dipping in olive oil. Add these during the last set of folds.
Enjoying Your Homemade Ciabatta: Beyond Sandwiches
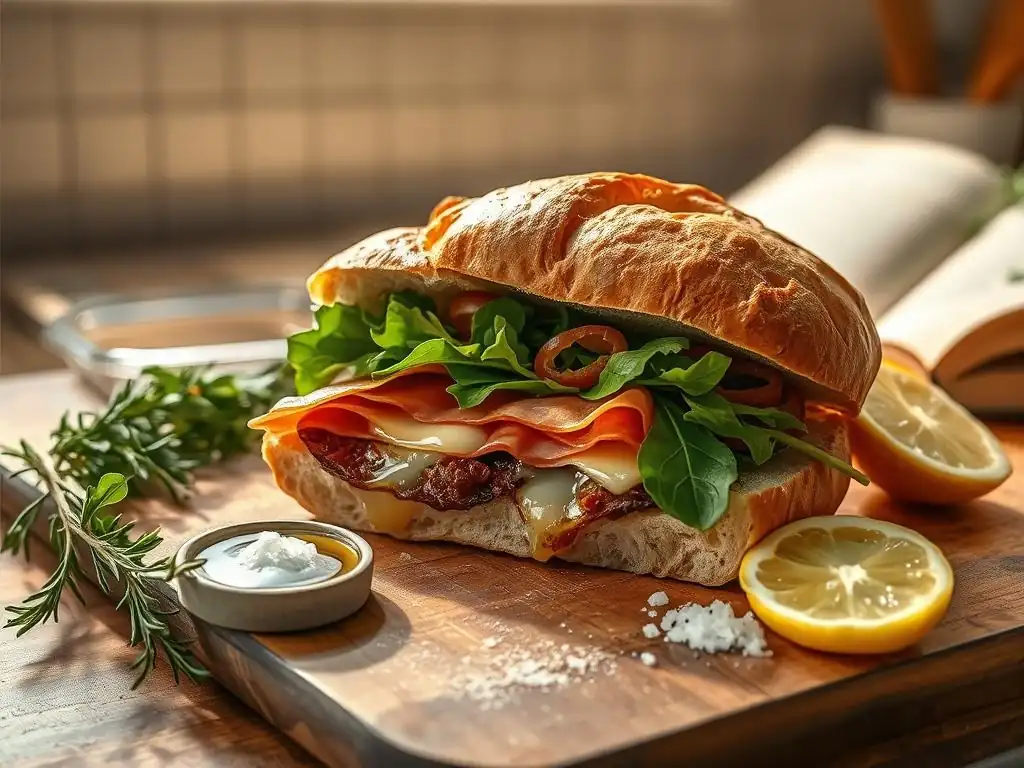
While homemade ciabatta makes an exceptional sandwich, its versatility extends far beyond. Its unique texture and flavor make it a wonderful accompaniment to various meals or a base for other delicious dishes.
Don't let any leftover ciabatta go to waste! Even day-old ciabatta can be repurposed into culinary delights.
Ciabatta as a Side for Soups and Salads
A warm slice of homemade ciabatta bread, perhaps with a drizzle of olive oil or a spread of butter, is the perfect companion to a hearty soup or a fresh salad. The crust provides a satisfying crunch, and the airy crumb is excellent for soaking up broth or dressing.
Consider pairing it with classic Italian soups like Minestrone or Ribollita, or a simple tomato soup. For salads, it complements everything from a basic garden salad to a more substantial Panzanella (bread salad), where slightly stale ciabatta is a key ingredient.
Ciabatta Croutons: Elevating Your Salads
Turn leftover homemade ciabatta into incredible croutons. Day-old or slightly stale bread works best. Cube the ciabatta, toss the cubes with olive oil, salt, pepper, and any desired herbs (like garlic powder, dried oregano, or rosemary).
Spread the seasoned cubes on a baking sheet and bake at 350°F (175°C) for 10-20 minutes, stirring occasionally, until golden brown and crispy. These homemade ciabatta croutons have a superior texture and flavor compared to store-bought versions and will elevate any salad.
Stale homemade ciabatta can also be transformed into flavorful breadcrumbs. Simply tear or cut the dry bread into smaller pieces and pulse them in a food processor until fine crumbs form. For dry breadcrumbs, you can then spread them on a baking sheet and bake at a low temperature (around 250°F or 120°C) until completely dry and crisp.
Use these homemade ciabatta breadcrumbs as a topping for gratins, casseroles, or pasta dishes. They add wonderful texture and the rich flavor of your homemade ciabatta bread to countless recipes. Store dry breadcrumbs in an airtight container at room temperature.
Conclusion: The Joy of Baking and Eating Homemade Ciabatta
Baking homemade ciabatta using an easy ciabatta recipe is a rewarding experience that culminates in a truly exceptional loaf of bread. From the simple pleasure of working with dough to the anticipation of a golden, bubbly loaf emerging from the oven, the process is as satisfying as the result.
The superior taste, texture, and customization options of homemade ciabatta make it the perfect foundation for elevating your sandwiches from ordinary to extraordinary. Plus, knowing you created something so delicious from scratch adds an extra layer of enjoyment to every bite.
We love seeing what our community bakes! Share photos of your homemade ciabatta loaves and the delicious sandwiches you create with them. Tag us on social media or use our dedicated hashtag.
Seeing your successful bakes encourages other aspiring bakers and helps build our vibrant BakeWithEase community. Your journey with this easy homemade ciabatta sandwich recipe is part of a larger passion for baking shared by many.
Continue Your Baking Journey with Our Other Recipes
Mastering homemade ciabatta is a fantastic step in your baking journey. Explore the rest of BakeWithEase.com for more simple recipes, techniques, and tips. Whether you want to tackle sourdough, perfect pastries, or bake classic cakes and cookies, we have guides for every level.
Keep practicing, keep experimenting, and keep baking! There's a whole world of delicious bread and baked goods waiting for you to discover. Enjoy the process and the delicious results of baking from scratch.
Frequently Asked Questions
What makes a homemade ciabatta sandwich bread recipe easy?
An easy homemade ciabatta recipe emphasizes simple ingredients and straightforward techniques, minimizing complex steps and specialized equipment. The goal is to create a delicious bread that's approachable for bakers of all skill levels.
How does homemade ciabatta elevate a sandwich compared to store-bought bread?
Homemade ciabatta offers superior flavor and texture. It's typically fresher, with a more rustic and airy crumb, enhancing the overall sandwich experience over commercially produced alternatives.
What are the key ingredients needed for a basic homemade ciabatta sandwich recipe?
The core ingredients usually include flour, water, yeast, and salt. Some recipes might also incorporate olive oil for added flavor and a softer texture.
Can I customize a homemade ciabatta sandwich recipe with different flavors or additions?
Yes, absolutely! You can experiment with herbs like rosemary or thyme, or add ingredients like sun-dried tomatoes or olives to the dough for unique flavor profiles.
How do I ensure my homemade ciabatta has the characteristic air pockets?
Proper hydration and a slow fermentation process are crucial. This allows the yeast to develop the gluten structure and create those desirable, large air pockets within the bread.
Final Reflection: The Simple Joy of a Perfect Ciabatta Sandwich
The seemingly simple act of making a sandwich transcends mere sustenance; it's a celebration of texture, flavor, and the artistry of everyday cooking. From the satisfying crackle of the crust to the soft, airy interior of homemade ciabatta, the journey from flour to finished sandwich is a rewarding one that elevates the humble lunch to an experience. This article has explored the surprisingly accessible process of creating your own ciabatta, proving that even seemingly complex recipes can be mastered with a little patience and the right guidance.
The impact of homemade food, particularly bread, on our lives extends far beyond the immediate satisfaction of a delicious meal. It connects us to a richer culinary heritage, fostering a deeper appreciation for the ingredients and the process. It's about slowing down, savoring the moments, and creating something beautiful with our own hands. As the renowned chef Julia Child once said, Find something you're passionate about and keep tremendously interested in it.
For me, that passion lies in the transformative power of homemade bread, and I hope this article has ignited a similar spark in you.
Now, I invite you to embark on your own ciabatta journey. Don't be intimidated by the seemingly complex process; embrace the challenge, experiment with different fillings, and share your creations with loved ones. The reward isn't just a delicious sandwich; it's the satisfaction of creating something truly special, the joy of connecting with your food on a deeper level, and the lasting memory of a perfectly crafted meal. So, gather your ingredients, preheat your oven, and let the aroma of freshly baked ciabatta fill your kitchen – your taste buds will thank you for it.
Unleash Your Inner Baker: Craft the Perfect Ciabatta!
Thanks for joining us on this ciabatta journey! We hope you've gained the confidence to tackle this delicious bread. Now it's time to put your newfound skills to the test.
- Bake your own ciabatta today! Use the recipe from the article as your guide. Remember, practice makes perfect!
- Share your ciabatta creations! Post a picture on social media and tag #BakeWithEaseCiabatta – let's see those beautiful loaves!
- Experiment with different fillings: Once you master the ciabatta, try various fillings and toppings to create your signature sandwich masterpiece.
What unique ingredient will elevate your ciabatta sandwich to the next level? Let us know in the comments!