
Making Cream Pie Filling Without Turning on the Stove


Welcome to BakeWithEase, your guide to simplifying the joys of baking! Ever crave a decadent cream pie but dread firing up the stove? This week, we're demystifying the process with our Nostove cream pie filling recipe. Discover how to achieve that perfect, creamy texture without the heat, and unlock a world of delicious possibilities. Intrigued? Let's get baking!
- Lemon Icebox Pie: A Refreshing No-Bake Dessert
- Introduction: Cool and Creamy Without the Oven
- Understanding No-Bake Pie Filling Techniques
- Our Foolproof No-Bake Lemon Icebox Pie Recipe: Step-by-Step
- Assembling Your No-Bake Lemon Icebox Pie
- Tips and Tricks for the Best No-Bake Lemon Icebox Pie
- No-Bake Lemon Icebox Pie: A Dessert Game Changer
-
Frequently Asked Questions
- How is it possible to make cream pie filling without a stove?
- What are the primary ingredients in a no-stove cream pie filling?
- Is no-stove cream pie filling as stable as a cooked cream pie filling?
- Can I customize the flavor of my no-stove cream pie filling?
- How long does it take to prepare a no-stove cream pie filling?
- Final Reflection: The Cool Comfort of No-Cook Cream Pie
- Unlock Effortless Cream Pie Perfection!
Lemon Icebox Pie: A Refreshing No-Bake Dessert
Introduction: Cool and Creamy Without the Oven
Craving Pie? Skip the Baking!
There's nothing quite like a creamy, tangy pie, but sometimes the thought of turning on a hot oven, especially on a warm day, is enough to deter even the most enthusiastic baker. Traditional cream pie fillings often require tempering eggs over a double boiler or carefully simmering a custard on the stovetop, processes that can be time-consuming and prone to error if not watched diligently. Many home bakers might shy away from making these classic desserts from scratch because of the perceived complexity and the heat involved.
However, the desire for that smooth, rich texture and bright flavor doesn't have to lead you back to the oven or the stovetop. The world of no-bake desserts offers a fantastic alternative, allowing you to achieve similar delicious results with significantly less fuss and absolutely no heat. This opens up possibilities for enjoying creamy pies year-round, without contributing to a hot kitchen environment. Finding a reliable Nostove cream pie filling method can truly revolutionize your dessert game.
Introducing Our No-Bake Lemon Icebox Pie Method
Our no-bake lemon icebox pie method is designed to be incredibly simple, relying on common pantry staples and a few key ingredients that work together beautifully to create a rich, smooth, and tangy filling without any cooking. This recipe leverages the magic of sweetened condensed milk and the acidic power of citrus juice, combined with other creamy elements, to achieve a set consistency purely through chilling. It’s a method that eliminates the need for traditional custard bases or gelatin in many cases.
This specific approach focuses on a bright, refreshing lemon flavor, perfect for those who love a zesty kick in their dessert. By following a few straightforward steps – primarily mixing and chilling – you can create a stunning pie that tastes like it took hours of effort. It’s a fantastic way to produce a delightful Nostove cream pie filling that everyone will love, proving that impressive results are possible without ever needing to heat a pan.
Perfect for Summer Celebrations
Summer is the ideal time to embrace no-bake desserts. As temperatures rise, minimizing the use of heat-generating appliances like ovens and stovetops becomes a priority for comfort. A chilled dessert like a lemon icebox pie is incredibly refreshing and provides a welcome contrast to warm weather. It’s the perfect finale for a backyard barbecue, a picnic in the park, or a casual gathering with friends.
Beyond just keeping your kitchen cool, the ease of preparation makes this no-bake pie a go-to for busy summer schedules. Instead of spending precious hours over a hot stove, you can whip up the filling in under 15-20 minutes, leaving plenty of time to enjoy the sunshine and company. A delicious, easy-to-make Nostove cream pie filling ensures that hosting or bringing a dessert to an event is stress-free and always a crowd-pleaser during the warmer months.
Understanding No-Bake Pie Filling Techniques
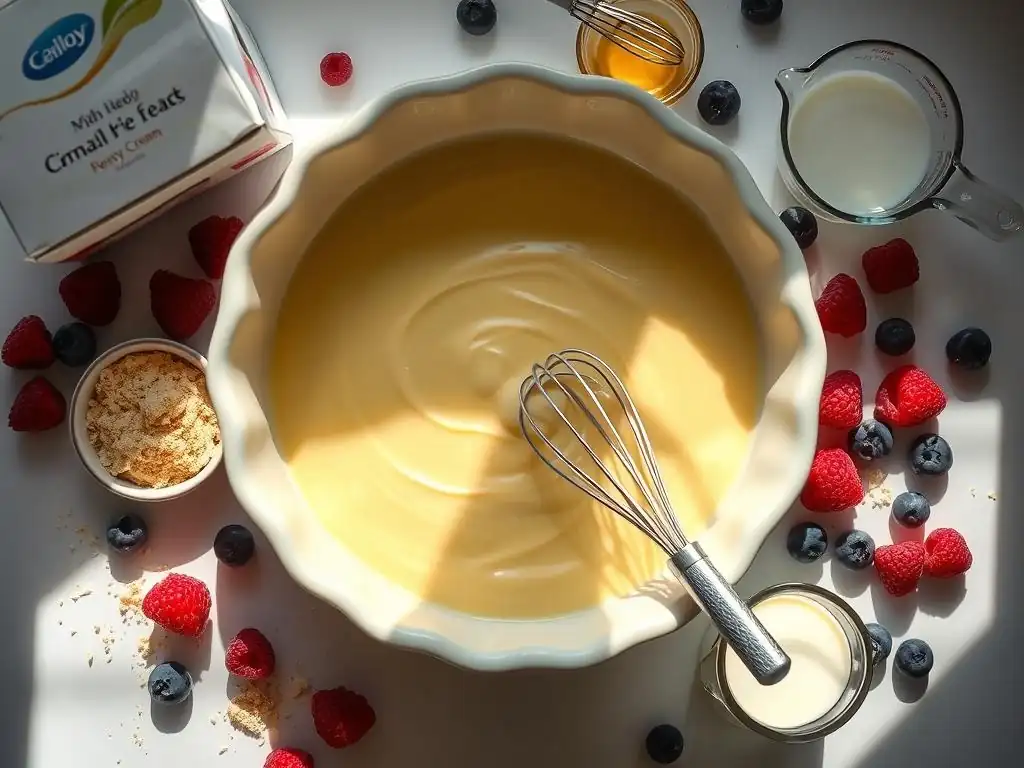
What Makes No-Bake Pie Filling Possible?
No-bake pie fillings achieve their set texture through various mechanisms that don't involve heating to activate thickening agents like egg proteins or starch. One common method relies on the interaction between acidic ingredients, like citrus juice, and dairy products, particularly sweetened condensed milk. The acid causes the proteins in the milk to thicken and coagulate slightly, creating a firm yet creamy consistency when chilled. Think of how acid curdles milk – in this controlled environment with the high sugar content of condensed milk, it results in a desirable texture rather than curdling.
Another technique involves incorporating ingredients that set firmly when cold, such as whipped cream or cream cheese. When these are folded into a base, they provide structure. Some no-bake fillings also use instant pudding mixes, which contain starches and gums that thicken simply by reacting with cold milk. For a Nostove cream pie filling, the key is selecting ingredients that naturally firm up when chilled or react with each other chemically at room temperature or below to create stability.
Key Ingredients for a Tangy and Creamy Filling (No Cooking Required!)
Several ingredients are fundamental to creating a delicious and stable no-bake lemon icebox pie filling. Sweetened condensed milk is often the star; its high sugar content contributes to sweetness, while its thick consistency and dairy proteins are crucial for setting when combined with acid. You'll typically need about 14-16 ounces (one standard can) for a single pie. The tang comes from fresh lemon juice – using juice from about 3-4 medium lemons (roughly 1/2 to 3/4 cup) provides that signature bright flavor and the necessary acidity to interact with the condensed milk.
To enhance the creaminess and structure, ingredients like cream cheese (about 8 ounces) or whipped cream (made from 1 to 1.5 cups of heavy cream) are often incorporated. Cream cheese adds richness and stability, resulting in a firmer set, while whipped cream provides a lighter, airy texture. A touch of lemon zest (from 1-2 lemons) is essential for boosting the aroma and intensity of the lemon flavor without adding extra liquid. These components work in harmony to create a luscious Nostove cream pie filling that requires no heat to achieve its delightful texture.
Our Foolproof No-Bake Lemon Icebox Pie Recipe: Step-by-Step
Ingredients for a Perfect No-Bake Lemon Icebox Pie
To make a standard 9-inch no-bake lemon icebox pie, you'll need just a few simple ingredients. Start with one 14-ounce can of sweetened condensed milk. You'll also need about 1/2 cup of fresh lemon juice, which typically requires juicing 3 to 4 medium-sized lemons. Don't forget the zest from at least one of those lemons, about 1-2 teaspoons, for extra flavor.
For creaminess, an 8-ounce block of full-fat cream cheese, softened to room temperature, works wonderfully. Finally, 1 teaspoon of vanilla extract adds a touch of warmth to balance the tartness. These ingredients combine easily to create a smooth, tangy, and delightful Nostove cream pie filling.
Using ingredients at the right temperature is key. Ensure your cream cheese is truly at room temperature; this makes it easy to beat until smooth, preventing lumps in your final filling. Freshly squeezed lemon juice is highly recommended over bottled for the best flavor and acidity level. While these are the core ingredients, some variations might include folding in whipped cream for a lighter texture, but this basic combination provides a reliably delicious result.
Step 1: Preparing Your Ingredients for the Easiest Pie
The first step in creating this simple Nostove cream pie filling is ensuring your ingredients are ready. As mentioned, softening your cream cheese is crucial. Take it out of the refrigerator at least an hour before you plan to start mixing, or gently warm it in a microwave for 10-15 second intervals until pliable but not melted. This step is perhaps the most important prep-wise, as cold cream cheese will result in a lumpy filling that won't set smoothly.
Next, juice your lemons. Aim for about 1/2 cup of fresh juice. You can use a citrus reamer or a fork to help extract the juice. Zest one or two of the lemons before juicing them, as it's much easier. Measure out your sweetened condensed milk and vanilla extract. Having all your ingredients measured and ready before you begin mixing ensures a smooth and quick process, which is the beauty of this no-bake method.
Step 2: Combining the Ingredients for a Smooth, No-Bake Filling
Now comes the simple part: combining everything. In a large bowl, use an electric mixer (handheld or stand mixer) or a whisk to beat the softened cream cheese until it is completely smooth and creamy. This should only take a minute or two if the cream cheese is properly softened. Scrape down the sides of the bowl to ensure no lumps remain.
Once the cream cheese is smooth, gradually add the sweetened condensed milk while continuing to beat on low speed. Mix until the two are just combined and the mixture is uniform. Then, slowly add the fresh lemon juice and lemon zest. As you add the lemon juice, you might notice the mixture starting to thicken almost immediately – this is the acid reacting with the condensed milk and cream cheese, working its magic to create your Nostove cream pie filling. Finally, mix in the vanilla extract until everything is thoroughly incorporated and smooth.
Step 3: Achieving the Perfect Consistency: Tips and Tricks
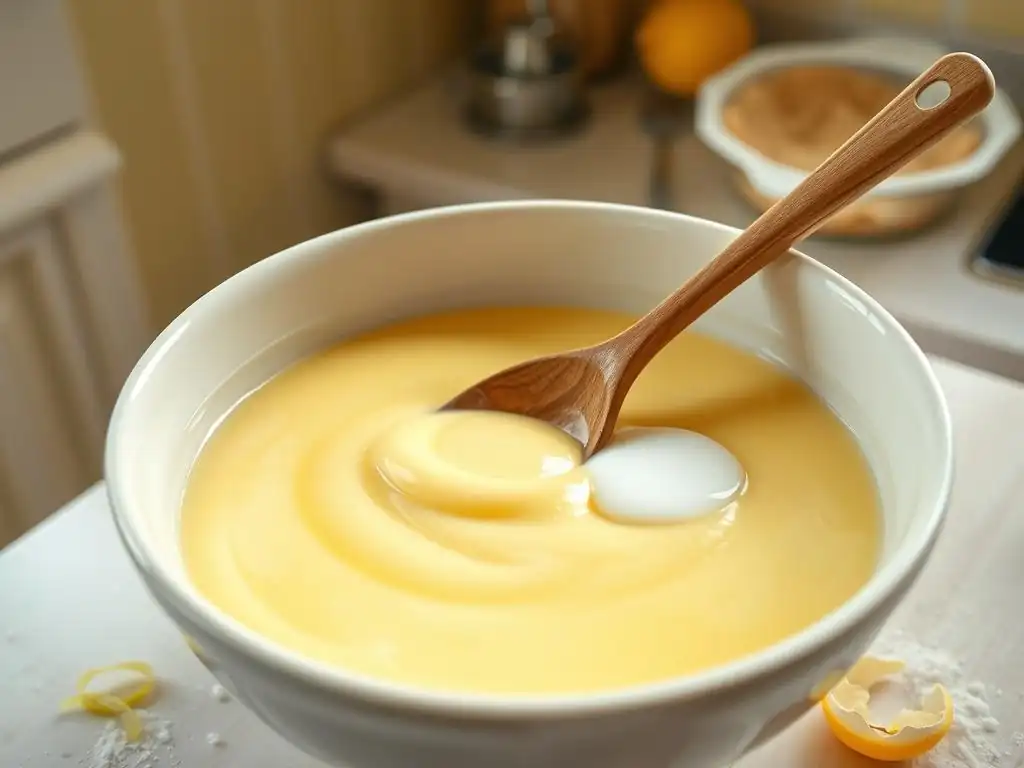
The mixture should visibly thicken as you add the lemon juice, but it will still be pourable. Don't expect it to be as thick as cooked pudding at this stage; the final set happens during chilling. If your filling seems too thin after adding all the lemon juice, double-check that your cream cheese was fully softened and that you used sweetened condensed milk, not evaporated milk. The ratio of acid to condensed milk is key for the setting reaction.
Sometimes, slight variations in lemon acidity or condensed milk thickness can affect the final consistency. If you are concerned it's too thin, you could try adding another tablespoon or two of lemon juice, but be cautious not to add too much, as it can make the filling overly tart or potentially cause it to separate slightly. Ensure you've mixed it thoroughly to encourage the reaction between ingredients. Trust the process; the magic happens in the fridge.
Step 4: Chilling for the Best Texture and Flavor
Chilling is the most crucial step for this Nostove cream pie filling to set properly and for the flavors to meld beautifully. Once your filling is assembled (see the next section), cover the pie loosely with plastic wrap, trying not to let the wrap touch the surface of the filling if possible to prevent condensation.
Place the pie in the refrigerator and let it chill for a minimum of 4-6 hours. For the absolute best texture and a firm set, chilling overnight (8 hours or more) is highly recommended. During this time, the proteins in the dairy will continue to firm up due to the acidity and the cold temperature, resulting in that classic dense, creamy, sliceable texture of an icebox pie. Patience is key here – don't rush the chilling process, or you'll end up with a runny pie.
Assembling Your No-Bake Lemon Icebox Pie
Choosing the Right Crust for Your No-Bake Pie
Since the filling requires no baking, your crust choice should also ideally be no-bake or pre-baked. The most classic and popular choice for a lemon icebox pie is a graham cracker crust. You can purchase a pre-made 9-inch graham cracker crust, which is incredibly convenient, or make your own by crushing about 10-12 full graham cracker sheets (yielding about 1.5 cups of crumbs), mixing them with 1/4 cup of granulated sugar and 6 tablespoons of melted butter, then pressing the mixture firmly into a pie plate and chilling for at least 30 minutes before adding the filling.
Other suitable crust options include crushed shortbread cookies mixed with butter, crushed vanilla wafers, or even crushed gingersnap cookies for a complementary spicy note. Whichever crust you choose, ensure it is well-chilled and firm before adding your Nostove cream pie filling to prevent a soggy bottom.
Filling the Crust with Your Homemade Lemon Filling
Once your crust is ready and chilled, retrieve your creamy lemon filling from Step 4. Give the filling a quick stir if it looks like it might have separated slightly, but it should be quite thick at this point. Carefully pour or spoon the entire filling mixture into your prepared pie crust.
Use an offset spatula or the back of a spoon to gently spread the filling evenly across the crust, making sure it fills the pie plate right up to the edges. Try to create a smooth, level surface. Avoid pressing down too hard, which could disturb your crust. Once the filling is smoothly distributed, your pie is ready for its final chill, as detailed in Step 4 of the previous section. The smooth, vibrant yellow of your Nostove cream pie filling against the golden crust is already a promise of deliciousness.
Topping Ideas: Meringue Kisses or Fresh Berries
While the chilled pie is delicious on its own, adding a topping elevates its presentation and flavor. A classic accompaniment to lemon pie is meringue. For a no-bake approach, you can make small meringue kisses or dollops using a Swiss or Italian meringue technique (which involves heating sugar syrup, not baking the meringue itself), or simply pipe whipped cream onto the chilled pie just before serving. About 1 to 1.5 cups of heavy cream whipped with 2-3 tablespoons of powdered sugar and a splash of vanilla makes a perfect topping.
Fresh berries, such as raspberries, blueberries, or sliced strawberries, offer a beautiful color contrast and a burst of fresh flavor that pairs wonderfully with the tangy lemon. Arrange them artfully over the top of the set filling just before slicing. A sprinkle of fresh lemon zest or a few thin lemon slices can also add a final touch of elegance and reinforce the lemon theme. These simple additions complete your delightful Nostove cream pie filling masterpiece.
Tips and Tricks for the Best No-Bake Lemon Icebox Pie

Troubleshooting Common Issues with No-Cook Fillings
One of the most common issues with no-bake cream fillings is a filling that doesn't set properly and remains too soft or even runny. This is often due to using ingredients that aren't at the correct temperature (especially cold cream cheese), using the wrong type of milk (evaporated instead of sweetened condensed), or not chilling the pie for long enough. Ensure your cream cheese is fully softened, you're using sweetened condensed milk, and you're allowing at least 6-8 hours of chilling time, preferably overnight.
Another issue can be a slightly grainy texture, which usually happens if the cream cheese wasn't beaten until completely smooth before adding other ingredients. Patience in that initial step is key. If your filling tastes too tart or not tart enough, adjust the amount of lemon juice slightly in future attempts, remembering that lemon acidity can vary. Getting the perfect Nostove cream pie filling texture relies heavily on the chemical reaction between the acid and the dairy, so ingredient quality and proper chilling are paramount.
Flavor Variations: Expanding Your No-Bake Pie Repertoire
Once you've mastered the basic no-bake lemon icebox pie, you can easily adapt the Nostove cream pie filling technique to create other delicious flavors. The most straightforward variation is a lime icebox pie, simply substituting fresh lime juice and lime zest for the lemon. The vibrant, slightly different tang of lime is equally refreshing. Use about 1/2 cup of fresh lime juice (from 5-7 limes) and zest from 2-3 limes.
You can also experiment with other citrus fruits, like orange or grapefruit, though you may need to adjust the amount of juice slightly based on their acidity and sweetness. For a non-citrus twist, consider incorporating melted white chocolate or peanut butter into the cream cheese/condensed milk base before chilling, though these might require slightly different ratios to achieve the correct set without the aid of citrus acid. Adding crushed cookies or candy pieces to the filling before chilling can also provide interesting texture and flavor combinations.
Storing Your No-Bake Lemon Icebox Pie for Optimal Freshness
Proper storage is essential to keep your no-bake lemon icebox pie fresh and maintain its perfect texture. Once the pie has fully set, cover it loosely but securely with plastic wrap or aluminum foil. If you've added a whipped cream topping, it's best to add that just before serving, as whipped cream can weep over time. If storing with a whipped cream topping, cover it carefully or store the topping separately and add it just before slicing.
The pie should always be stored in the refrigerator. It will keep well for 3-4 days. While the texture remains best in the first 2-3 days, it's generally safe to eat for up to 4 days if stored correctly. For longer storage, you can freeze the pie (without a whipped cream or fresh fruit topping) for up to 1-2 months. Wrap it tightly in plastic wrap and then foil before freezing. Thaw it in the refrigerator overnight before serving. This simple Nostove cream pie filling keeps beautifully, making it a great make-ahead dessert option.
No-Bake Lemon Icebox Pie: A Dessert Game Changer
Why Choose No-Bake Pie Filling?
Choosing a no-bake pie filling method offers numerous advantages that make it a true game changer for home bakers. Primarily, it eliminates the need for an oven or stovetop, saving energy and keeping your kitchen cool, which is especially valuable during warm weather. This also removes the complexities often associated with traditional cooked custards, such as tempering eggs, preventing scorching, or achieving the perfect simmer.
No-bake methods are often significantly faster in terms of active preparation time – mixing the filling for this lemon icebox pie takes less than 20 minutes. While chilling time is required, it's passive, allowing you to focus on other tasks. Furthermore, the ingredients are typically simple and readily available. For anyone looking for delicious, easy, and impressive desserts without the fuss of baking, mastering a Nostove cream pie filling technique is an invaluable skill.
Enjoy Delicious Pie Without the Heat!
The ability to create a rich, creamy, and flavorful pie without ever turning on the heat source is incredibly liberating for dessert enthusiasts. Imagine enjoying a vibrant lemon pie or a decadent chocolate cream pie even on the hottest summer day, knowing its creation didn't add a single degree to your kitchen temperature. This opens up opportunities for enjoying classic pie flavors year-round, regardless of the weather or your baking skill level.
The simplicity of this Nostove cream pie filling approach means less stress and more enjoyment. Less cleanup (fewer hot pans! ), less monitoring, and less chance of common baking failures like burnt crusts or curdled fillings. It's about achieving maximum flavor and texture with minimum effort and heat, making delicious pie accessible to everyone, anytime.
BakeWithEase: Your Guide to Easy Baking Solutions
At BakeWithEase.com, our mission is to demystify baking and dessert making, providing simple recipes and techniques that empower bakers of all levels. We believe that creating delicious treats should be enjoyable and accessible, not intimidating. Our focus is on clear instructions, achievable results, and helping you build confidence in the kitchen.
Whether you're just starting out or looking for easier ways to make your favorite desserts, like this delightful Nostove cream pie filling, BakeWithEase is here to guide you. We offer a wealth of resources, from basic techniques to creative variations, all designed to help you bake with ease and joy. Explore our site for more simple recipes and tips to make your baking adventures successful and delicious.
Frequently Asked Questions
How is it possible to make cream pie filling without a stove?
The no-stove cream pie filling relies on ingredients like instant pudding mix and whipped topping to create a creamy texture without the need for cooking or thickening over heat.
What are the primary ingredients in a no-stove cream pie filling?
Typically, this filling includes instant pudding mix, milk (or a milk alternative), and whipped topping. Some variations might add cream cheese for extra richness.
Is no-stove cream pie filling as stable as a cooked cream pie filling?
While convenient, no-stove fillings may not be as structurally stable as their cooked counterparts, particularly in warm weather. They are best served chilled and consumed relatively quickly.
Can I customize the flavor of my no-stove cream pie filling?
Absolutely! You can easily customize the flavor by using different flavors of instant pudding mix, adding extracts, or incorporating fresh fruit into the filling.
How long does it take to prepare a no-stove cream pie filling?
One of the biggest advantages is the speed. Preparing a no-stove cream pie filling usually takes only 10-15 minutes, making it a perfect choice for a quick and easy dessert.
Final Reflection: The Cool Comfort of No-Cook Cream Pie
The pursuit of creamy, dreamy pie filling without the heat of the stovetop is more than just a culinary shortcut; it's a testament to resourceful ingenuity in the kitchen. This article explored various methods for achieving that perfect, luscious filling without relying on the traditional stovetop approach, highlighting the ease, efficiency, and surprisingly delicious results. In a world increasingly focused on quick and convenient cooking, these techniques offer a refreshing alternative, proving that sometimes the simplest methods yield the most satisfying outcomes.
The impact of readily available, no-cook recipes extends beyond individual kitchens; it democratizes the art of pie-making. It allows those without access to reliable stovetops or those simply seeking a less labor-intensive approach to participate in the joy of creating and sharing homemade desserts. This accessibility fosters a sense of culinary empowerment, reminding us that deliciousness isn't always synonymous with complexity. The best things in life are simple,
a sentiment that rings especially true when considering the delightful simplicity of a no-cook cream pie.
Now, consider your own kitchen. Think about the possibilities unlocked by these no-cook methods. Will you embrace the convenience and create your own creamy masterpiece? Perhaps you'll experiment with different flavor combinations, or maybe you'll share this newfound knowledge with friends and family, spreading the joy of effortless pie-making. The possibilities are as endless as your imagination, so go forth and create your own cool, creamy, and unforgettable pie experience.
Unlock Effortless Cream Pie Perfection!
Thanks for joining us on this creamy journey! We hope you discovered the joy of no-cook pie filling. Ready to take your baking skills to the next level?
- Whip up your own masterpiece: Use our method to create a dreamy cream pie filling – customize it with your favorite extracts or flavors!
- Share your creation: Post a picture of your delicious pie on social media and tag us – let's inspire each other!
- Try a fun twist: Experiment with different flavor combinations – from classic vanilla to unexpected chocolate-orange!
What unique flavor profile will you create for your next no-cook cream pie?