
Bake a Beautiful Braided Whole Wheat Loaf

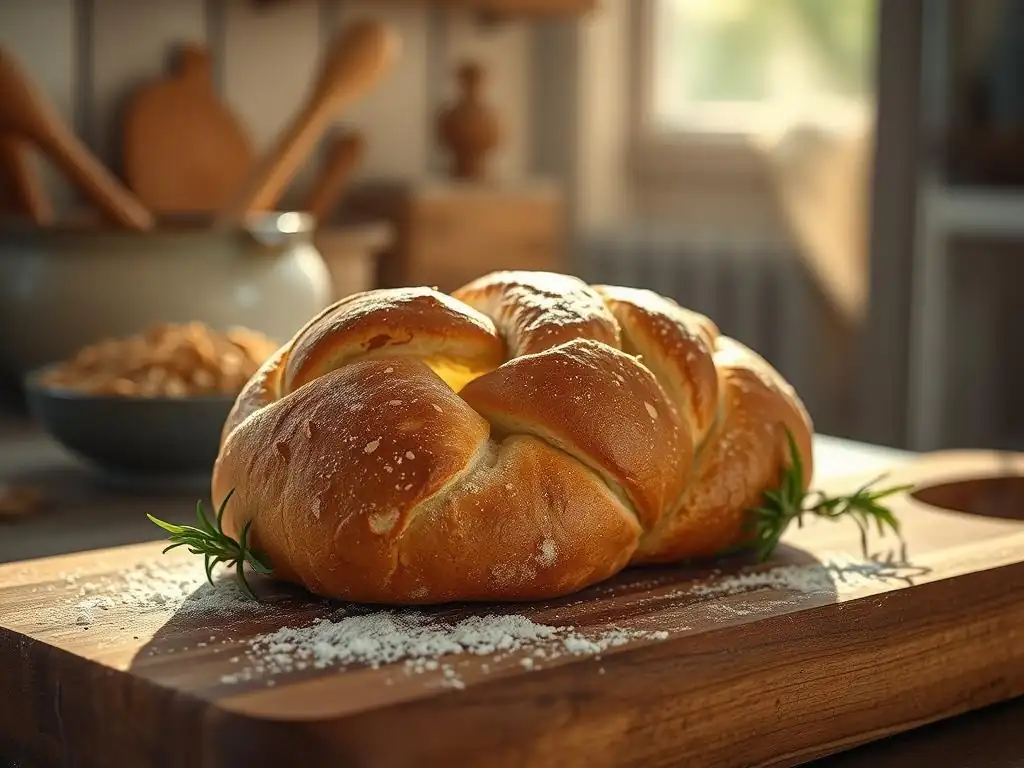
Welcome to BakeWithEase, your partner in creating delicious baked goods! Ever dreamt of presenting a show-stopping loaf you baked yourself? This week, we're demystifying the art of bread braiding with our guide to an Easy Braided Whole Wheat Loaf. Get ready to impress with a beautiful and wholesome bread – discover the secrets to a perfect braid and a tender crumb, and unlock a world of baking possibilities!
- Bake a Beautiful Braided Whole Wheat Loaf: An Easy Guide
- Introduction to Braided Whole Wheat Bread
- Gathering Your Ingredients for the Perfect Whole Wheat Braid
- Step-by-Step: Making the Braided Whole Wheat Dough
- Baking Your Braided Whole Wheat Loaf to Perfection
- Cooling and Serving Your Braided Whole Wheat Loaf
- Troubleshooting Your Braided Whole Wheat Bread
- Storing Your Homemade Whole Wheat Bread
- Mastering Whole Wheat Bread Baking: Tips and Tricks
- Enjoy Your Delicious Braided Whole Wheat Loaf!
- Frequently Asked Questions
- Final Reflection: The Humble Art of Braiding, and the Bread That Binds Us
- Unleash Your Inner Baker: Braid Your Way to Bread Bliss!
Bake a Beautiful Braided Whole Wheat Loaf: An Easy Guide
Introduction to Braided Whole Wheat Bread
Why Bake a Braided Whole Wheat Loaf? Taste and Texture
Baking your own bread is incredibly rewarding, and tackling an easy braided whole wheat loaf adds a beautiful visual element to the satisfaction. Whole wheat flour brings a nutty, rich flavor and a denser, more substantial texture compared to white flour. This isn't just about aesthetics; whole wheat retains the bran and germ of the wheat kernel, offering more fiber, vitamins (like B vitamins and vitamin E), and minerals (such as iron, magnesium, and zinc) than refined flour. Incorporating whole wheat into your baking is a simple step towards a more nutritious diet without sacrificing deliciousness.
Beyond the health benefits, the taste profile of a freshly baked whole wheat loaf is simply unmatched. The braiding technique, while looking impressive, also subtly affects the crumb structure, often resulting in a slightly more open and tender interior within that rustic, flavorful crust. An easy braided whole wheat loaf isn't just food; it's a centerpiece, a conversation starter, and a testament to the simple pleasure of creating something wonderful with your hands. It pairs beautifully with everything from hearty soups to simple butter and jam.
Our Simple Approach to Whole Wheat Bread Baking
We believe that baking a delicious and beautiful loaf of bread, even a braided whole wheat loaf, should be accessible to everyone. Our approach focuses on demystifying the process, breaking down each step into manageable parts, and providing clear guidance. We emphasize understanding the 'why' behind techniques like kneading or rising, which helps build confidence and leads to more consistent results. This recipe for an easy braided whole wheat loaf is designed with the home baker in mind, minimizing complexity while maximizing flavor and success.
Forget intimidating instructions or complex equipment. For this easy braided whole wheat loaf, you'll primarily need basic kitchen tools and a little patience. We'll guide you through selecting the right whole wheat flour, mixing and kneading the dough effectively, performing the simple yet elegant braid, and baking it to a golden-brown finish. Our goal is to make the journey from simple ingredients to a stunning loaf enjoyable and stress-free, proving that a beautiful and nutritious whole wheat braid is well within your reach.
Gathering Your Ingredients for the Perfect Whole Wheat Braid
Essential Ingredients for a Delicious Whole Wheat Loaf
Creating a wonderful easy braided whole wheat loaf starts with understanding the core ingredients and their roles. Flour, of course, is the foundation, providing structure. Yeast is the leavening agent that makes the bread rise, giving it a light texture. Water or milk hydrates the flour and activates the yeast.
Salt is crucial for flavor and also helps control the yeast's activity and strengthen the gluten structure. A little sweetener, like honey or molasses, not only adds subtle flavor but also provides food for the yeast, encouraging a good rise. Fat, such as oil or butter, contributes to tenderness and keeps the loaf moist.
For a truly delicious whole wheat loaf, the quality and type of each ingredient matter. Using fresh yeast is paramount for a good rise. The temperature of your liquid (water or milk) is also critical – typically warm but not hot, around 105°F to 115°F (approximately 40°C to 46°C), is ideal for activating active dry yeast. Instant yeast can often be mixed directly with the dry ingredients. Choosing a good quality whole wheat flour will significantly impact the flavor and texture of your final easy braided whole wheat loaf.
Understanding Whole Wheat Flour: Choosing the Right Type
Whole wheat flour is different from all-purpose white flour because it contains the entire wheat kernel – the bran, germ, and endosperm. This inclusion makes it more nutritious but also affects how it behaves in baking. The bran and germ can interfere with gluten development, often resulting in a denser loaf compared to bread made with white flour. However, modern milling techniques and specific wheat varieties have improved whole wheat flours significantly.
When choosing whole wheat flour for your easy braided whole wheat loaf, look for stone-ground or finely milled varieties if possible, as these can sometimes lead to a slightly less dense crumb. The protein content is also a key factor; flours with higher protein (around 13-15%) are generally better for bread baking as they can develop more gluten, providing better structure to support the rise. Don't be afraid to experiment with different brands or types of whole wheat flour to find the one you prefer for your braided loaves.
Ingredient List: Measurements and Specific Brands
(Note: Specific brand recommendations are omitted as per instructions. Use high-quality ingredients available to you.)
Here are the approximate measurements you'll need for an easy braided whole wheat loaf:
- Whole Wheat Flour: Approximately 3.5 to 4 cups (about 450-520 grams). Start with the lower amount and add more as needed during kneading.
- Warm Water or Milk: Approximately 1.5 cups (about 350 ml). Ensure it's warm, around
105°Fto115°F. - Yeast: 2.25 teaspoons (one standard packet) of active dry or instant yeast.
- Sweetener (Honey or Molasses): 2 tablespoons.
- Salt: 1.5 teaspoons.
- Oil or Melted Butter: 2 tablespoons.
It's important to measure your ingredients accurately, especially the flour and liquid. Using a kitchen scale for flour is highly recommended for consistency, as scooping flour can vary the amount significantly (a cup can range from 120g to 150g depending on how packed it is). Aim for the texture described in the dough preparation section rather than sticking rigidly to the exact flour amount, as humidity can affect how much flour is needed.
Step-by-Step: Making the Braided Whole Wheat Dough
Preparing the Dough: Mixing and Kneading for Success
Mixing the dough for your easy braided whole wheat loaf is where the magic begins. Start by activating your yeast if using active dry yeast: combine the warm water/milk, sweetener, and yeast in a large mixing bowl. Let it sit for 5-10 minutes until it becomes foamy, indicating the yeast is alive. If using instant yeast, you can skip this step and mix it directly with the dry ingredients. Add the salt and fat to the yeast mixture (or liquid).
Gradually add the whole wheat flour, mixing with a wooden spoon or dough whisk until a shaggy dough forms. At this point, turn the dough out onto a lightly floured surface. Knead the dough for about 8-10 minutes.
Kneading develops the gluten structure, which is essential for trapping the gases produced by the yeast, allowing the bread to rise and achieve a good texture. The dough should become smoother, more elastic, and less sticky as you knead. You can test for sufficient kneading by performing the "windowpane test": gently stretch a small piece of dough; if it can be stretched thin enough to see light through without tearing, it's ready.
The Importance of the First Rise: Achieving the Right Texture
The first rise, also known as bulk fermentation, is a critical phase for your easy braided whole wheat loaf. During this time, the yeast consumes the sugars in the dough and produces carbon dioxide gas, causing the dough to expand. This process also allows enzymes to break down starches into sugars, improving flavor, and gives the gluten structure time to relax and develop further, resulting in a more tender crumb. Skipping or shortening this rise will lead to a dense, heavy loaf.
After kneading, place the dough in a lightly oiled bowl, turning to coat. Cover the bowl tightly with plastic wrap or a damp cloth. Let the dough rise in a warm, draft-free place until it has roughly doubled in size. This typically takes 1 to 2 hours, depending on the room temperature. A good temperature is around 75°F to 80°F ( 24°C to 27°C). You can test if the rise is complete by gently pressing two fingers into the dough; if the indentation remains, the dough is ready.
Shaping the Dough: Creating the Braided Loaf
Once the dough has completed its first rise, gently punch it down to release the air. Turn the dough out onto a lightly floured surface and gently shape it into a rough rectangle. For an easy braided whole wheat loaf, the most common method is a three-strand braid. Divide the dough evenly into the number of strands you plan to braid (usually three, but you could do four or six for a more complex braid). Using a bench scraper or knife helps ensure even division.
Roll or stretch each piece of dough into a long, uniform rope. Aim for ropes that are roughly 12-15 inches long and of similar thickness from end to end. The goal is consistency, which will result in a more even and beautiful braid. Arrange the ropes side-by-side and firmly pinch one end together. This pinched end will be the top of your braid.
Dividing the Dough: Even Sections for Beautiful Braids
Precision in dividing the dough is key to a visually appealing easy braided whole wheat loaf. If the strands are uneven, the braid will look lopsided, and the dough may bake unevenly. For a standard three-strand braid from a typical loaf recipe (using about 3.5-4 cups of flour), you'll want three pieces of dough that weigh approximately 250-300 grams each. Using a kitchen scale is the most accurate way to ensure the pieces are exactly the same weight.
After weighing, briefly shape each piece into a ball before rolling it into a rope. This helps distribute the gluten evenly within each section. If you don't have a scale, try to eyeball it as best as possible, aiming for three equally sized portions. Remember, uniformity in thickness along the length of each rope is just as important as equal weight.
Braiding Technique: A Visual Guide to Perfect Braids
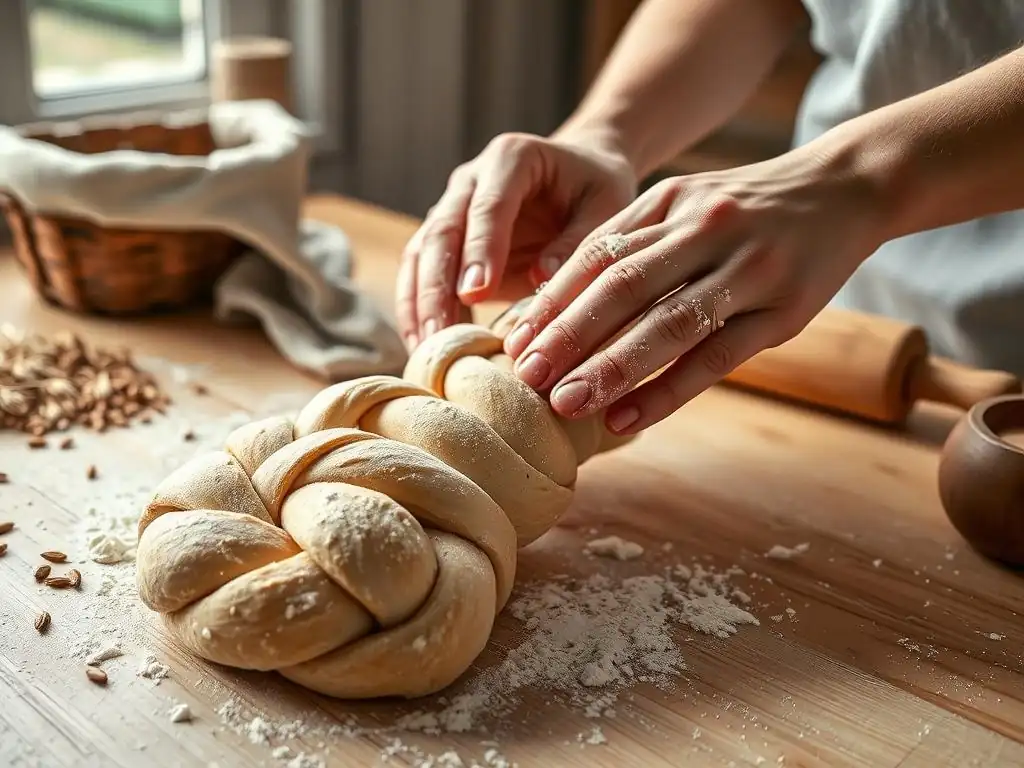
Braiding an easy braided whole wheat loaf is simpler than it looks! With your three ropes of dough laid side-by-side and the top ends pinched together, imagine the ropes are numbered 1, 2, and 3 from left to right. The basic three-strand braiding steps are:
- Take the right-most strand (strand 3) and cross it over the middle strand (strand 2). Strand 3 is now in the middle position.
- Take the left-most strand (strand 1) and cross it over the new middle strand (which was previously strand 3). Strand 1 is now in the middle position.
- Repeat this pattern: Right over middle, Left over middle.
Continue this pattern, keeping the ropes relatively loose as you braid, until you reach the end. Pinch the bottom ends of the ropes together firmly and tuck them under the loaf to create a neat finish. Carefully transfer the braided loaf to a baking sheet lined with parchment paper. Don't pull the braid too tightly as you work, as this can restrict the rise during proofing and baking. A slightly looser braid allows the loaf to expand gracefully.
The Second Rise: Ensuring a Light and Airy Loaf
The second rise, also known as proofing, is the final rise the dough undergoes before baking. For your easy braided whole wheat loaf, this step is crucial for achieving a light and airy texture. During proofing, the yeast continues to produce gas, causing the shaped loaf to expand again. This final expansion makes the crumb structure open up and contributes significantly to the loaf's overall volume and tenderness.
Cover the braided loaf loosely with plastic wrap or a light kitchen towel to prevent a skin from forming. Let it rise in a warm, draft-free place for about 30-60 minutes, or until it looks noticeably puffier and almost doubled in size. Be careful not to over-proof, especially with whole wheat dough, as the structure can weaken.
You can test if it's ready by gently poking the side of the loaf with a finger; the indentation should slowly spring back only halfway. If it springs back quickly, it needs more time. If it doesn't spring back at all and looks very puffy, it might be slightly over-proofed, but you can usually still bake it successfully.
Baking Your Braided Whole Wheat Loaf to Perfection
Oven Temperature and Baking Time: The Key to Golden-Brown Crust
Baking is the final transformation, turning your proofed dough into a delicious easy braided whole wheat loaf with a beautiful crust and tender interior. The correct oven temperature and baking time are critical for success. Baking bread at a relatively high initial temperature helps the loaf achieve maximum oven spring (the final burst of rising in the hot oven) and develops a good crust quickly.
For this easy braided whole wheat loaf, preheating your oven to 375°F to 400°F ( 190°C to 200°C) is a good starting point. The baking time will typically range from 30 to 40 minutes, depending on your oven and the size of the loaf. The goal is a loaf that is golden brown on the outside and fully cooked through the center. Baking too hot or too long can result in a dry loaf, while too cool or too short can leave you with a pale crust and a dense, doughy interior.
Preparing the Oven: Temperature and Rack Placement
Proper oven preparation sets the stage for a successful bake. Always preheat your oven thoroughly for at least 20-30 minutes after it reaches the set temperature. Ovens cycle on and off to maintain temperature, and a longer preheat ensures the oven walls and racks are fully heated, which radiates heat evenly and helps with oven spring. Using an oven thermometer is recommended to verify your oven's accuracy, as many home ovens can be off by 25°F or more.
Place the oven rack in the center position. This placement ensures that heat circulates evenly around the loaf, preventing the bottom from burning before the top is browned, or vice-versa. Placing the baking sheet directly in the center of the middle rack promotes uniform baking for your easy braided whole wheat loaf.
Baking Tips: Achieving a Crispy Crust and Soft Interior
Achieving that perfect balance between a crispy crust and a soft interior is the hallmark of great homemade bread. For your easy braided whole wheat loaf, incorporating steam into the oven during the initial part of baking can significantly improve the crust. Steam keeps the surface of the dough moist longer, allowing it to expand fully before the crust sets. This results in a thinner, crispier crust and allows for better oven spring.
There are several ways to create steam in a home oven:
- Place a cast iron pan or oven-safe dish on the bottom rack before preheating. Carefully pour about 1 cup of hot water into the hot pan just as you put the bread in the oven. Close the door quickly.
- Spray the sides of the oven with water using a clean spray bottle immediately after placing the bread inside. Repeat once or twice during the first 10 minutes of baking.
Removing the steam source (or opening the oven door briefly to let steam escape) after the first 10-15 minutes is also important to allow the crust to dry out and become crispy. Baking directly on a preheated baking stone or steel can also contribute to a better bottom crust and improved oven spring due to the intense, direct heat transfer.
Checking for Doneness: The Tap Test and Internal Temperature
Knowing when your easy braided whole wheat loaf is perfectly baked is key. The most reliable method is checking the internal temperature. A fully baked loaf of whole wheat bread should register between 190°F and 200°F ( 88°C to 93°C) in the center when measured with an instant-read thermometer. Insert the thermometer into the thickest part of the loaf from the bottom or side, avoiding the crust.
Another common test is the "tap test." Carefully remove the loaf from the oven (using oven mitts!) and gently tap the bottom crust. A properly baked loaf will sound hollow. If it sounds dull or heavy, it likely needs a few more minutes in the oven. These two methods, especially using a thermometer, will give you confidence that your easy braided whole wheat loaf is cooked through, preventing a gummy interior.
Cooling and Serving Your Braided Whole Wheat Loaf

Cooling Techniques: Preventing a Soggy Bottom
After the effort of baking, the cooling process is just as important for your easy braided whole wheat loaf. As the bread cools, residual heat continues to cook the interior slightly, and moisture redistributes throughout the loaf. Cutting into a hot loaf can result in a gummy texture because the starches haven't finished setting.
The most crucial step is to cool the loaf on a wire rack. This allows air to circulate around the entire loaf, preventing steam from condensing on the bottom crust. If you cool the bread directly on a solid surface, the bottom will become damp and potentially soggy. Let your braided whole wheat loaf cool completely on the rack before slicing, ideally for at least 1-2 hours. While the aroma is tempting, patience here is rewarded with the best texture.
Slicing and Serving Suggestions: Enjoying Your Homemade Bread
Once your easy braided whole wheat loaf has cooled completely, it's ready to be admired and enjoyed! Use a sharp serrated knife for the cleanest slices. A good quality bread knife makes a significant difference in cutting through the crust without squashing the soft interior.
The beauty of a homemade whole wheat loaf is its versatility. Enjoy a thick slice simply toasted with butter. It's fantastic for hearty sandwiches, especially with robust fillings. Serve it alongside soups or stews for dipping, or use it as the base for bruschetta or crostini. The slightly nutty flavor of the whole wheat pairs wonderfully with both savory and slightly sweet toppings.
Serving Suggestions: Enjoying with Soup, Salad, or Sandwiches
Your delicious easy braided whole wheat loaf is a perfect companion to many meals. For a comforting dinner, serve warm slices with a hearty lentil soup or a creamy tomato bisque. The sturdy texture holds up well for dipping and soaking up flavorful broths.
For lunch, this loaf makes exceptional sandwiches. Think classic deli meats and cheese, or perhaps a vegetarian delight with avocado, sprouts, and hummus. The whole wheat flavor complements a wide range of fillings. It's also wonderful served alongside a fresh green salad; a thick slice smeared with butter or a flavored spread adds substance and satisfaction to a lighter meal. Don't forget breakfast or brunch – toasted slices with jam, honey, or even a fried egg are simply divine.
Troubleshooting Your Braided Whole Wheat Bread
Common Baking Problems and Solutions
Even with an easy braided whole wheat loaf recipe, baking can sometimes present challenges. A common issue is a loaf that is too dense. This can often be attributed to insufficient kneading (poor gluten development) or insufficient rising time (yeast didn't produce enough gas). Another frequent problem is a dry loaf, which might happen if too much flour was added during mixing or kneading, or if the loaf was overbaked.
Crust issues are also prevalent. A pale crust might mean the oven temperature was too low, the baking time was too short, or there wasn't enough sugar/sweetener in the dough to aid browning. A crust that is too hard could be due to overbaking, too much dry heat without steam, or cooling the loaf too slowly. Understanding the potential causes helps you adjust your technique for your next easy braided whole wheat loaf.
Troubleshooting Table: Problem, Possible Cause, Solution
Here is a quick reference for some common issues you might encounter when baking an easy braided whole wheat loaf:
| Problem | Possible Cause(s) | Solution(s) |
|---|---|---|
| Dense, heavy loaf | Insufficient kneading; Insufficient first rise; Yeast inactive/dead; Too much flour | Knead longer (dough should be elastic); Allow dough to double in size; Check yeast freshness/water temp; Measure flour accurately (scale). |
| Loaf didn't rise much | Yeast inactive/dead; Liquid too hot/cold; Insufficient sugar; Cold room temp | Check yeast date/test for foam; Use liquid temp 105-115°F; Ensure sugar is added; Find a warmer spot for rising ( 75-80°F). |
| Dry loaf | Too much flour; Overbaked; Not enough fat in recipe | Measure flour accurately (use scale); Check for doneness with thermometer, don't overbake; Ensure recipe includes fat. |
| Crust is too pale | Oven temp too low; Baking time too short; Not enough sugar/sweetener | Increase oven temp slightly; Bake until golden brown/internal temp reached; Ensure sweetener is added as specified. |
| Crust is too hard/thick | Overbaked; Lack of steam during baking; Cooled on solid surface | Check doneness with thermometer; Use steam method during first 10-15 min of baking; Cool completely on wire rack. |
| Loaf collapsed after rising | Over-proofing; Weak gluten structure | Reduce second rise time (poke test); Ensure dough is kneaded sufficiently. |
Storing Your Homemade Whole Wheat Bread
Keeping Your Loaf Fresh: Storage Tips and Tricks
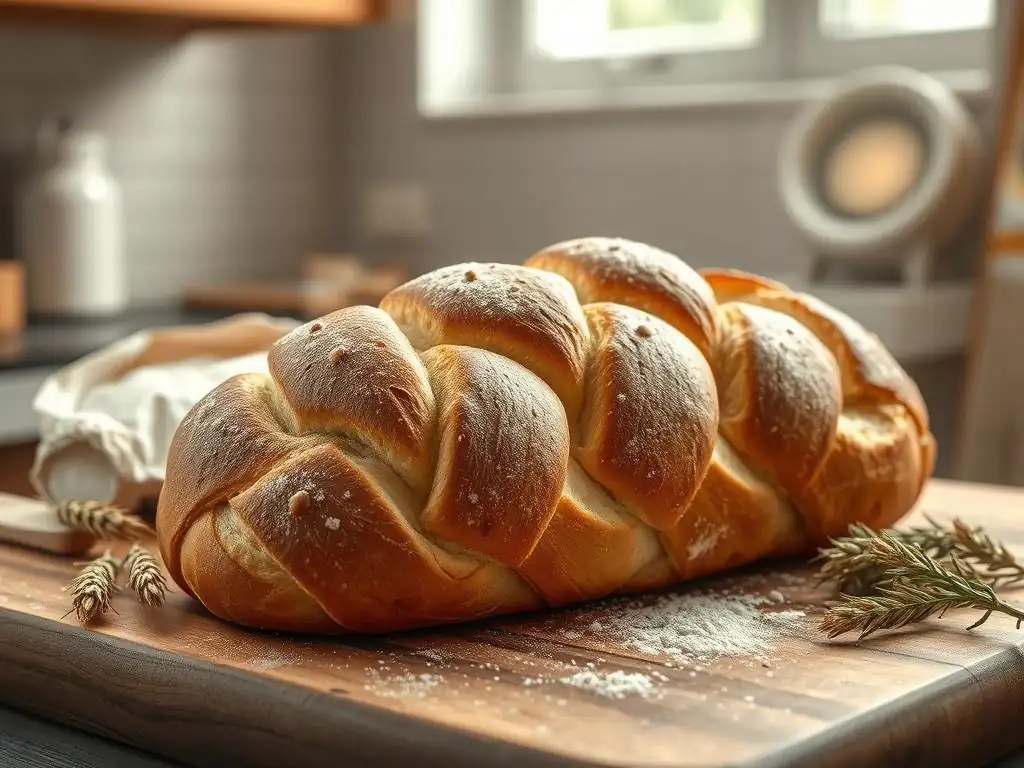
Once you've baked your beautiful easy braided whole wheat loaf, you'll want to keep it fresh for as long as possible. Because homemade bread lacks the preservatives found in commercial loaves, it tends to dry out or get stale faster. Storing it properly is key to enjoying its deliciousness for several days.
The best way to store bread at room temperature is usually in a bread box or a paper bag. A paper bag allows the crust to remain somewhat crisp while protecting the interior. Plastic bags or airtight containers can make the crust soft and potentially lead to mold if the bread is not completely cool before storing. Avoid refrigerating your bread, as this actually speeds up the staling process. A loaf stored at room temperature in a paper bag or bread box is typically best enjoyed within 2-3 days.
Freezing for Later: Preserving Your Braided Bread
If you won't finish your easy braided whole wheat loaf within a couple of days, freezing is an excellent way to preserve its freshness. It's best to freeze the bread as soon as it has cooled completely. You can freeze the entire loaf or slice it first, which makes it easy to grab just a few slices at a time.
To freeze, wrap the cooled loaf (or slices) tightly in plastic wrap, ensuring no air pockets. Then, wrap it again in aluminum foil or place it in a freezer-safe bag. This double layer of protection helps prevent freezer burn. Frozen bread can maintain its quality for up to 3-4 months. To thaw, simply remove from the freezer and let it sit at room temperature, either whole or sliced, until thawed. Slices can often be toasted directly from frozen.
Mastering Whole Wheat Bread Baking: Tips and Tricks
Advanced Techniques for Experienced Bakers
For those who have mastered the easy braided whole wheat loaf and want to explore further, there are several techniques to elevate your whole wheat bread baking. Using a pre-ferment like a poolish or a levain (sourdough starter) can add complexity and depth of flavor to whole wheat bread, while also potentially improving texture and keeping quality. These involve mixing a portion of the flour, water, and a tiny amount of yeast (or starter) hours or even a day before making the main dough.
Experimenting with different hydration levels (the ratio of water to flour) can also change the outcome. Higher hydration doughs are stickier and harder to handle but often result in a more open and airy crumb structure. Kneading methods, such as stretch and folds during the first rise instead of continuous kneading, can also develop gluten gently and effectively for a whole wheat dough.
Flavor Variations: Seeds, Herbs, and Sweeteners
Once you're comfortable with the basic easy braided whole wheat loaf, you can easily introduce variations to change the flavor profile. Seeds are a popular addition; try incorporating flaxseeds, sesame seeds, sunflower seeds, or poppy seeds into the dough during the mixing stage. A common ratio is adding about 1/4 to 1/2 cup of seeds per loaf. You can also sprinkle seeds on top before baking.
Fresh or dried herbs can add an aromatic twist; rosemary, thyme, or dill pair well with whole wheat. Add about 1-2 tablespoons of fresh chopped herbs or 1-2 teaspoons of dried herbs to the dry ingredients. For a sweeter loaf, increase the amount of sweetener slightly or add dried fruits like raisins or cranberries (around 1/2 cup). Spices like cinnamon or cardamom can also be lovely additions. Remember that adding extra ingredients might slightly affect the dough's hydration, so you may need minor adjustments to the liquid.
Enjoy Your Delicious Braided Whole Wheat Loaf!
Frequently Asked Questions
What is a braided whole wheat loaf?
A braided whole wheat loaf is a type of bread made from whole wheat flour, shaped into a braided form. It combines the nutritional benefits of whole grains with an appealing visual presentation.
How do I ensure my braided loaf turns out fluffy?
To achieve a fluffy texture, make sure to properly knead the dough and allow it to rise sufficiently. Using warm water and ensuring your yeast is active are also key steps.
Can I add ingredients to my whole wheat loaf?
Absolutely! You can enhance your braided whole wheat loaf by adding seeds, nuts, or even dried fruits. Just be mindful of the moisture content to maintain the right dough consistency.
How long does it take to bake a braided whole wheat loaf?
Typically, a braided whole wheat loaf requires about 30-40 minutes in the oven at 350°F (175°C). Always check for a golden-brown crust and a hollow sound when tapped.
What are some tips for braiding the dough?
For effective braiding, divide your dough into equal portions and roll each into a long strand. Pinch the ends together, then cross the strands over each other, following a simple braid pattern for a beautiful finish.
Final Reflection: The Humble Art of Braiding, and the Bread That Binds Us
The simple act of braiding a loaf of whole wheat bread speaks volumes about the enduring power of both culinary tradition and mindful creation. It's more than just a recipe; it's a connection to generations past, a testament to the satisfying simplicity of homemade goodness, and a surprisingly accessible way to bring a touch of artistry to your kitchen. In a world increasingly dominated by convenience, taking the time to knead, braid, and bake offers a powerful antidote to the fast-paced modern life.
The process of braiding, with its rhythmic repetition and the satisfying feel of the dough in your hands, is deeply meditative. It's a chance to slow down, to connect with the ingredients, and to appreciate the transformation from simple flour and water into something beautiful and nourishing. This echoes a sentiment expressed by the renowned baker, Jim Lahey, who once said: Baking bread is a metaphor for life. You put in the time, the effort, and the love, and you get something beautiful and rewarding in return.
This resonates deeply with the experience of making this braided loaf; the effort invested is repaid tenfold in the aroma and taste of the finished product.
Now, I invite you to consider your own relationship with food and creation. Will you embrace the challenge of this easy braided whole wheat loaf? Perhaps this recipe will inspire you to explore other simple, yet deeply satisfying, culinary projects. More importantly, may it remind you of the power of slowing down, connecting with your hands, and finding joy in the process of creation – whether it's baking bread, painting a picture, or simply spending time with loved ones. The beauty lies not just in the final result, but in the journey itself.
Unleash Your Inner Baker: Braid Your Way to Bread Bliss!
Thanks for joining us on this baking adventure! We hope you now feel confident and inspired to create your own beautiful, delicious whole wheat loaf. Ready to put your newfound skills to the test?
- Master the Braid: Try baking your own braided loaf today using the techniques we've outlined. Experiment with different fillings or flours – the possibilities are endless!
- Share Your Success: Post a picture of your masterpiece on social media and tag us #BakeWithEase – we'd love to see your creation!
- Dive Deeper into Baking: Explore more of our easy-to-follow recipes on BakeWithEase.com – we've got a whole world of deliciousness waiting for you!
What unique twist will you add to your next braided loaf? Let us know in the comments!