
Delicious Whole Wheat Rolls Made Easy


Welcome to BakeWithEase, where baking dreams become delicious realities! Ever wished you could effortlessly create bakery-worthy bread at home? Our mission is to demystify baking, one perfect recipe at a time. Today, unlock the secrets to our easy whole wheat roll recipe and discover how simple it can be to fill your kitchen with the warm, comforting aroma of freshly baked bread. Ready to experience the joy of homemade rolls that are both healthy and incredibly satisfying? Let's get baking!
- Homemade Sourdough Bread: A Beginner's Guide
- Introduction to Sourdough Baking
- Understanding Sourdough Starter
- The Sourdough Bread Recipe: A Simple Approach
- Tips for Perfect Sourdough Bread
- Serving and Storing Your Sourdough Bread
- The Ultimate Sourdough Bread Guide: Conclusion
-
Frequently Asked Questions
- What makes this whole wheat roll recipe "easy"?
- Can I substitute ingredients in this easy whole wheat roll recipe?
- How long does it take to make these delicious whole wheat rolls?
- What's the best way to store these whole wheat rolls to keep them fresh?
- Can I make this whole wheat roll recipe ahead of time?
- Final Reflection: The Simple Joy of Homemade Whole Wheat Rolls
- Unlock Your Inner Baker: Make These Rolls Today!
Homemade Sourdough Bread: A Beginner's Guide
Introduction to Sourdough Baking
Embarking on the journey of baking homemade sourdough bread can feel daunting, but it's a rewarding process that connects you to ancient baking traditions. Unlike commercial yeasts, sourdough relies on a living culture of wild yeasts and bacteria naturally present in flour and the environment. This culture ferments the dough slowly, breaking down starches and proteins, which not only creates a complex, tangy flavor but also improves the bread's digestibility. Mastering sourdough is a skill that builds with practice, transforming simple ingredients like flour, water, and salt into loaves with incredible crust and texture.
This guide is designed to demystify the sourdough process for beginners. We'll walk through the steps from cultivating your own starter, the heart of sourdough baking, to mixing, shaping, and baking your first loaf. While the process takes time, involving periods of fermentation and rising, the hands-on work is minimal. By understanding the science behind sourdough and following simple techniques, you'll be well on your way to baking delicious, naturally leavened bread right in your own kitchen. It's a journey of patience and observation, yielding loaves that are far superior to anything store-bought.
Understanding Sourdough Starter
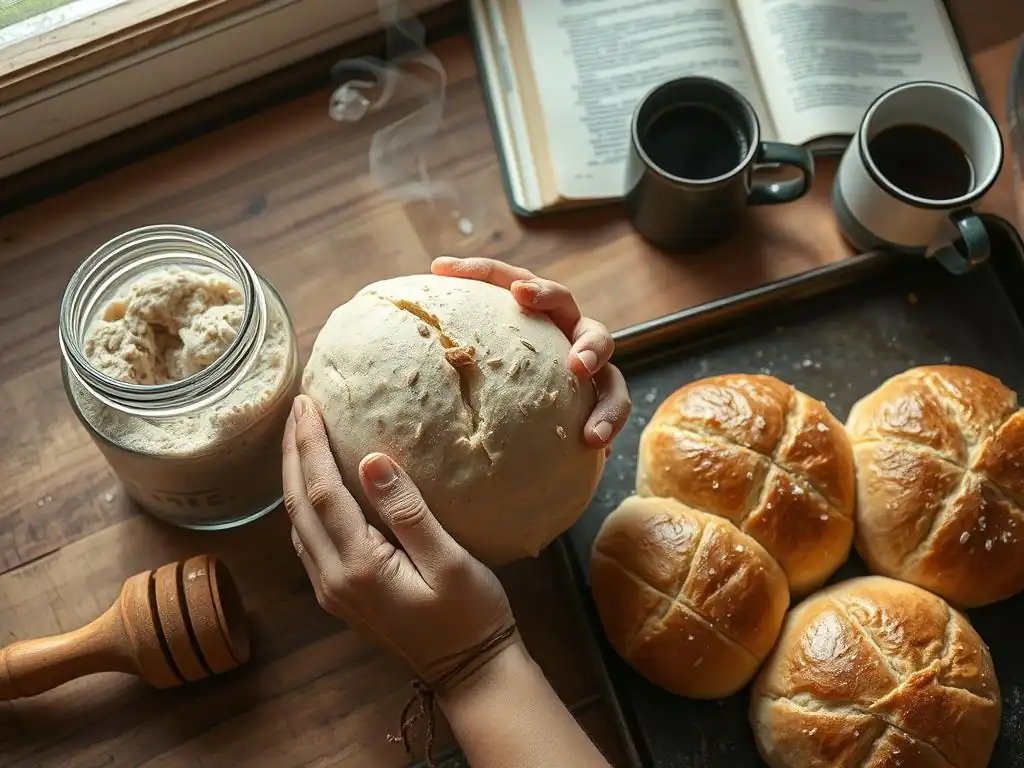
A sourdough starter is essentially a living ecosystem of wild yeasts and lactic acid bacteria, cultivated by mixing flour and water and allowing it to ferment. These microorganisms consume the sugars in the flour, producing carbon dioxide (which makes the bread rise) and various organic acids (which give sourdough its characteristic tangy flavor). Think of it as your own personal leavening agent, unique to your environment and the flours you use. Maintaining a healthy, active starter is the most crucial step in successful sourdough baking.
Creating and maintaining a sourdough starter requires consistency and attention, but it's a straightforward process once you get the hang of it. The health of your starter directly impacts the rise, flavor, and texture of your bread. A vigorous starter will double or triple in size after feeding, showing lots of bubbles and having a pleasant, slightly acidic aroma. Understanding the signs of a healthy starter is key to knowing when it's ready to bake with.
Creating Your Own Sourdough Starter
Cultivating a sourdough starter from scratch is a simple yet fascinating process, typically taking about 7 to 14 days. You begin with just two ingredients: flour and water. A common method is to start with equal weights of non-chlorinated water and flour, often around 50 grams of each.
Whole wheat or rye flour is often recommended for the initial stages because they contain more nutrients and wild yeasts, helping to kickstart fermentation quickly. For example, mixing 50g of organic whole wheat flour with 50g of lukewarm filtered water in a clean jar is a standard starting point. Cover loosely and let it sit at room temperature, ideally between 70-80°F (21-27°C).
For the first few days, you might see little activity, or perhaps some small bubbles and a faint smell. Around day 3 or 4, you should start seeing more significant bubbling and perhaps a thin layer of liquid (called "hooch") on top, which is a sign the microorganisms are active and consuming the flour. At this point, you begin a regular feeding schedule.
Discard most of the starter (leaving only about 50g) and feed it again with fresh flour and water, typically 50g of each. This daily feeding removes waste products and provides fresh food for the culture, encouraging the desired yeast and bacteria to thrive and outcompete undesirable microbes. By day 7-10, a healthy starter should be consistently doubling or tripling in size within 4-8 hours of feeding, indicating it's potent enough for baking.
Feeding and Maintaining a Healthy Starter
Once your starter is active and doubling reliably, maintaining it involves regular feeding to keep the microorganisms happy and vigorous. The standard maintenance ratio is 1:1:1 (starter:flour:water) by weight. For instance, if you keep 50g of starter, you would feed it with 50g of fresh flour (often a mix of whole wheat/rye and bread flour) and 50g of water. The frequency of feeding depends on how you store your starter.
If kept at room temperature, it needs daily feeding. This is ideal if you bake frequently, say 3-4 times a week. Room temperature starters are very active and ready to use shortly after peaking from a feed.
If you bake less often, storing your starter in the refrigerator is a great option. Refrigeration slows down microbial activity significantly, meaning you only need to feed it about once a week.
Before baking, you'll need to revive a refrigerated starter by taking it out, letting it warm up, and performing one or two daily feedings at room temperature until it consistently doubles within a few hours again. Signs of a healthy, ready-to-bake starter include doubling or tripling in volume after 4-8 hours post-feeding, a domed top after rising, numerous bubbles throughout, and a pleasant, slightly sour aroma – not overly pungent or alcoholic.
The Sourdough Bread Recipe: A Simple Approach
Baking sourdough bread doesn't have to be complicated. This simple approach focuses on fundamental techniques to produce a delicious loaf with minimal fuss. The key is understanding the stages of fermentation and how the dough behaves. While ratios can vary, a basic sourdough recipe typically uses around 20% starter relative to the total flour weight, and a hydration level (water as a percentage of flour) between 70% and 80%. For example, a recipe might call for 500g strong bread flour, 350g water (70% hydration), 100g active starter (20% of flour weight), and 10g salt (2% of flour weight).
This straightforward method breaks the process down into manageable steps, from initial mixing through baking. It emphasizes techniques like autolyse, bulk fermentation with periodic folds, and cold proofing, which help develop flavor and structure with less intensive kneading. By following these steps, beginners can achieve impressive results, yielding a loaf with a satisfying crust and an airy, open crumb. Remember, each batch of sourdough is a learning experience, and slight variations in temperature, flour type, and starter activity will influence the final outcome.
Ingredients for Classic Sourdough Bread
The beauty of classic sourdough bread lies in its simplicity, requiring only four core ingredients: active sourdough starter, flour, water, and salt. The type of flour significantly impacts the dough's structure and the final bread. Strong bread flour, with its high protein content (typically 12-14%), is ideal as it develops gluten effectively, providing the framework for the loaf's rise and structure.
Many bakers also incorporate a small percentage of whole wheat or rye flour (perhaps 10-20% of the total flour weight) for added flavor and nutritional value, though 100% bread flour works perfectly well for a beginner's loaf. For instance, a common recipe might use 450g of bread flour and 50g of whole wheat flour.
Water quality matters; non-chlorinated water is essential as chlorine can harm the beneficial microorganisms in your starter. Room temperature water is usually best for initial mixing. Salt is crucial not just for flavor but also for controlling fermentation speed and strengthening the gluten network. Fine sea salt or kosher salt are preferred.
The amount of salt is typically 1.8% to 2.2% of the total flour weight. For a recipe using 500g of flour, this translates to about 9-11g of salt. Ensure your starter is active and bubbly, having doubled in size after its last feed, as it's the sole leavening agent.
Step 1: Autolyse - Hydrating the Flour
Autolyse is a simple, yet powerful technique that significantly improves dough handling and structure. It involves mixing just the flour and water from your recipe and letting this mixture rest for a period, typically 20 minutes to an hour, sometimes even longer. For example, if your recipe calls for 500g flour and 350g water, you would simply combine these two ingredients until no dry flour remains. The mixture will look shaggy and unmixed initially.
During the autolyse rest, the flour absorbs the water fully, and enzymes naturally present in the flour begin to break down starches into sugars, which will later feed the yeast. More importantly, the gluten proteins start to hydrate and align themselves without any mechanical kneading. This process makes the dough less sticky, easier to handle, and kickstarts gluten development passively. When you later add the starter and salt, the dough will come together much more smoothly and require less intensive kneading to achieve a strong gluten network. A rest of 30 minutes is often sufficient to see these benefits.
Step 2: Mixing and Kneading the Sourdough Dough
After the autolyse period, it's time to incorporate the active sourdough starter and the salt into the dough. Add the starter first, squishing or folding it into the autolysed dough until it is mostly distributed. Then, add the salt. At this point, the dough will feel wet and sticky. The goal is to mix until the starter and salt are fully integrated and the gluten network begins to develop. This can be done by hand or with a stand mixer fitted with a dough hook.
If mixing by hand, techniques like the "stretch and fold" or "slap and fold" are effective. For stretch and folds, simply grab one side of the dough, stretch it up, and fold it over the rest of the dough. Rotate the bowl and repeat 3-4 times. Let the dough rest for 10-15 minutes, then repeat the set of folds.
Do this for several rounds over an hour or so. If using a stand mixer, mix on low speed for 5-10 minutes until the dough pulls away from the sides of the bowl and forms a smooth, elastic ball. A well-kneaded or folded dough should pass the "windowpane test" – you should be able to gently stretch a small piece of dough thin enough to see light through it without tearing.
Step 3: Bulk Fermentation - The First Rise
Bulk fermentation, also known as the first rise, is a critical stage where the dough develops flavor, rises significantly, and builds strength. This period typically lasts anywhere from 3 to 8 hours at room temperature (around 70-78°F or 21-25°C), depending on the temperature of your kitchen and the activity level of your starter. During this time, the yeast produces carbon dioxide, causing the dough to expand, while the bacteria produce organic acids, contributing to the signature sourdough tang. The dough should increase in volume by 30% to 60%, becoming visibly gassy and puffy.
To further develop the dough's structure during bulk fermentation, periodic "stretch and folds" are performed. Typically, 3-4 sets of stretch and folds are done during the first 2-3 hours of bulk fermentation, with 30-45 minutes rest between each set. For each set, gently stretch each side of the dough up and fold it over the center, effectively strengthening the gluten network. After the last set of folds, let the dough rest undisturbed until the end of the bulk fermentation period. The dough should feel alive and airy.
Step 4: Shaping the Sourdough Loaf
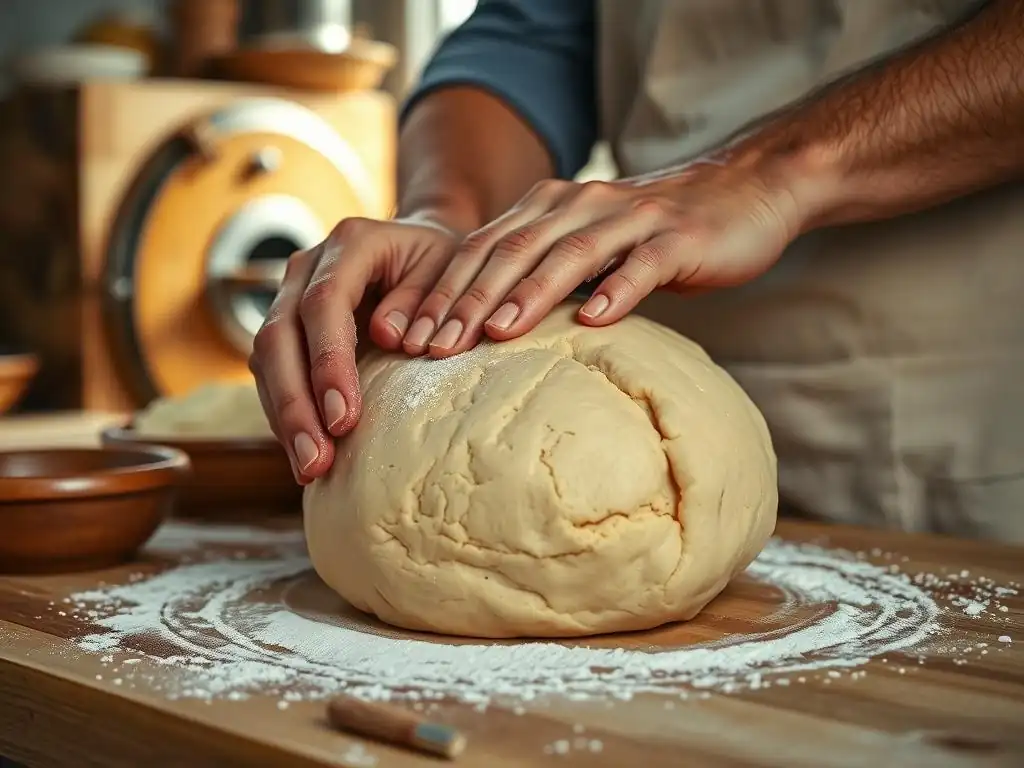
Once bulk fermentation is complete, the dough is ready for shaping. The goal of shaping is to create tension on the surface of the dough, which helps the loaf hold its shape during the final proof and baking, contributing to a good oven spring. Gently turn the dough out onto a lightly floured surface. Avoid using too much flour, as this can prevent the dough from gripping the surface and developing tension. You can shape the dough into a round (boule) or an oval (batard).
For a boule, gently pre-shape the dough into a rough ball by pulling the edges underneath. Let it rest for 15-20 minutes, covered. This allows the gluten to relax. Then, for the final shape, gently flatten the dough slightly, then pull the top edge towards the center, fold the sides in, and finally roll the dough from the top down, tucking the seam underneath.
Use the surface tension to tighten the ball by pulling it towards you with cupped hands. For a batard, fold the top third down, fold the sides in, then roll the dough from the top down into an oval shape, sealing the seam tightly. The shaped dough is then placed seam-side up into a floured proofing basket (banneton).
Step 5: Proofing - The Second Rise
Proofing, or the final rise, is the period after shaping where the dough rests before baking. This allows the yeast to produce a final burst of carbon dioxide, giving the loaf its ultimate volume and airy texture. While a short proof at room temperature is possible (1-2 hours), most sourdough recipes recommend a long, cold proof in the refrigerator, typically for 8 to 14 hours, or even up to 24 hours. Cold proofing significantly slows down fermentation, allowing the flavors to deepen and making the dough easier to score before baking because it firms up.
To cold proof, place the shaped dough in its floured banneton inside a plastic bag or cover it tightly to prevent a skin from forming, and refrigerate. The dough should increase in volume slightly in the fridge, but not double. You'll know it's properly proofed when it looks puffy and springs back slowly when gently poked with a floured finger. If it springs back immediately, it needs more time. If the indentation remains, it's likely over-proofed. A well-proofed dough is crucial for achieving good oven spring and an open crumb structure.
Step 6: Scoring and Baking Your Sourdough
Scoring the loaf just before baking is essential for controlling where the bread expands in the oven (oven spring) and for creating beautiful patterns on the crust. Using a sharp blade (like a razor blade or lame), quickly and confidently make cuts on the surface of the dough. Common patterns include a single long slash down the length of a batard or a geometric pattern on a boule.
The depth and angle of the cuts influence the final shape of the loaf. A common technique for a boule is a deep, curved slash to allow for a significant "ear" to form.
Sourdough is traditionally baked in a very hot oven, often preheated to 450-500°F (230-260°C). Baking in a Dutch oven or lidded pot is highly recommended for home bakers. Preheat the Dutch oven with the lid on for at least 30-60 minutes.
Carefully transfer the scored dough from the banneton into the hot Dutch oven. Bake with the lid on for the first 20-25 minutes; this traps steam released from the dough, keeping the crust soft initially and allowing the loaf to expand fully before the crust hardens. After this initial period, remove the lid and continue baking for another 20-25 minutes, or until the crust is a deep golden brown and the internal temperature reaches around 205-210°F (96-99°C).
Tips for Perfect Sourdough Bread
Baking sourdough involves nuances that can significantly impact the final loaf. Paying attention to details like dough temperature, starter activity, and fermentation times is key. For instance, maintaining a consistent dough temperature throughout bulk fermentation (ideally around 75-78°F or 24-26°C) can help ensure predictable results. Using a probe thermometer can be helpful here. Also, understanding that fermentation times are guidelines – you should learn to read the dough rather than strictly sticking to a clock, looking for signs of readiness like puffiness and increased volume.
Another critical tip is to use quality ingredients. High-protein bread flour provides the necessary structure, and using organic flour can sometimes contribute to a more vigorous starter and better flavor. Don't be afraid to experiment with small batches or even different flour types once you're comfortable with the basic process. For example, exploring an easy whole wheat roll recipe using your starter can be a fun way to apply your sourdough skills to different types of baked goods. Patience is perhaps the most important ingredient; sourdough baking is a slow process, and rushing it often leads to disappointing results.
Achieving a Crisp Crust and Open Crumb
Achieving a coveted crisp crust and an airy, open crumb is a hallmark of great sourdough. The crisp crust is primarily due to proper steam during baking. Baking in a preheated Dutch oven with the lid on for the first half of the bake traps the steam released by the dough, keeping the surface moist and allowing it to expand before the crust sets.
Removing the lid for the second half allows the crust to dry out and brown beautifully. For those without a Dutch oven, creating steam in the oven by placing a tray of hot water on the rack below the baking stone or steel can help, though it's less effective than the Dutch oven method.
The open crumb structure (large, irregular holes) is developed through a combination of factors: a strong, active starter, proper gluten development during mixing and folding, sufficient bulk fermentation, and careful shaping and proofing. Using a high-hydration dough (75%+) also contributes to a more open crumb, as there is more water to turn into steam during baking, creating larger pockets. However, high-hydration dough can be trickier to handle.
Ensuring the dough is not over-proofed is also vital; an over-proofed dough will collapse in the oven rather than springing up. Baking at a high temperature is essential for maximizing oven spring, which pushes the dough upwards and outwards, creating those desirable holes.
Troubleshooting Common Sourdough Problems
Even experienced bakers encounter issues with sourdough. One common problem is a flat loaf with poor oven spring. This can often be attributed to an inactive starter, insufficient gluten development (not enough mixing or folding), or over-proofing. If your starter isn't doubling predictably, it needs more consistent feeding at room temperature to build strength. If the dough doesn't feel elastic after mixing and folding, it needs more structural development time or additional folds during bulk fermentation. If the dough collapses when handled before baking, it's likely over-proofed; try a shorter proofing time next bake.
Another issue can be an overly sour taste. While a slight tang is characteristic, an intensely sour flavor usually means the dough fermented for too long, or your starter culture has developed an excess of acetic acid bacteria (which produce a sharper vinegar-like tang compared to the lactic acid bacteria's milder yogurt-like tang). Try shortening your bulk fermentation or proofing time.
Feeding your starter more frequently or keeping it at a slightly cooler room temperature can also help promote lactic acid bacteria over acetic acid. Conversely, if your bread lacks tang, try a longer bulk fermentation or a longer cold proof in the refrigerator.
Variations and Add-ins for Sourdough Bread
Once you've mastered the basic sourdough loaf, you can explore countless variations by experimenting with different flours and adding ingredients. Replacing a portion of the bread flour with whole wheat, rye, spelt, or even einkorn flour will dramatically change the flavor, texture, and nutritional profile of your bread. For example, substituting 20% of the bread flour with whole wheat flour creates a heartier loaf with a deeper flavor. Adjusting the hydration might be necessary, as different flours absorb water differently; whole grains typically require more water.
Incorporating add-ins allows for even more creativity. Common additions include seeds (like sesame, poppy, sunflower, or pumpkin seeds), nuts (walnuts or pecans), dried fruits (cranberries or raisins), cheese, herbs (rosemary or thyme), or even roasted garlic. These are typically mixed in during the final stages of kneading or during the first set of stretch and folds in bulk fermentation.
For seeds, toasting them first can enhance their flavor. You could also adapt your sourdough skills to make other items, like an easy whole wheat roll recipe, adding seeds or herbs to the dough for a different kind of delicious bake. Start by incorporating a small amount, perhaps 10-15% of the dough weight, and adjust in future bakes.
Serving and Storing Your Sourdough Bread
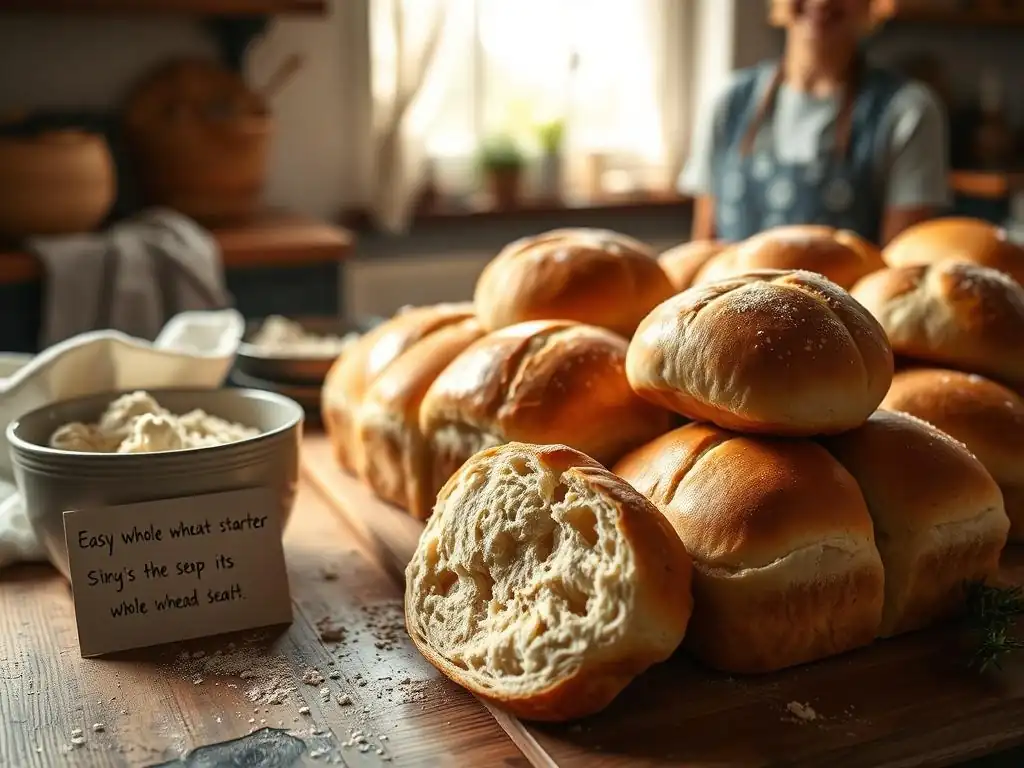
Enjoying a freshly baked sourdough loaf is one of the great pleasures of home baking. The aroma alone is incredible! It's best to let the bread cool completely on a wire rack before slicing, ideally for at least 1-2 hours. Slicing too early can result in a gummy texture because the internal structure is still setting. Once cooled, the crust will be at its crispiest, and the crumb will be perfectly set. This waiting period, though difficult, is crucial for the final quality.
Sourdough is incredibly versatile and pairs well with numerous dishes. Simple serving suggestions include slicing it thickly and serving with good quality butter, olive oil, or balsamic vinegar. It makes fantastic toast, perfect for avocado toast or topped with eggs. Use it for gourmet sandwiches or as an accompaniment to soups, stews, or salads. The slightly tangy flavor cuts through rich dishes beautifully. It can also be used in recipes like stratas, bread pudding, or even croutons.
Delicious Serving Suggestions
Freshly baked sourdough bread is a versatile culinary companion. One classic pairing is simply serving slices with high-quality butter; the contrast between the tangy bread and creamy butter is delightful. For a more Mediterranean flair, drizzle slices with extra virgin olive oil and a sprinkle of flaky sea salt, or serve with a small dish of balsamic vinegar for dipping. Consider making bruschetta by toasting slices and topping them with chopped tomatoes, basil, garlic, and olive oil – the sturdy crumb holds up well.
Sourdough makes exceptional sandwiches, adding a layer of complex flavor that elevates even simple fillings. Try a classic grilled cheese on sourdough for a crispy exterior and gooey interior. It's also the perfect base for open-faced sandwiches or tartines, topped with ingredients like smoked salmon and cream cheese, or roasted vegetables and goat cheese. Don't forget its role alongside meals; a basket of warm sourdough slices is wonderful served with hearty soups, stews, or chili, perfect for soaking up flavorful broths. The slightly chewy texture and robust flavor also make it a great accompaniment to cheese boards.
Proper Storage Techniques to Maintain Freshness
Properly storing your homemade sourdough is key to keeping that perfect crust and fresh crumb for as long as possible. The enemy of a crisp crust is moisture. Avoid refrigerating sourdough, as the cold environment can quickly dry it out and make the crust tough. The best short-term storage (1-2 days) is simply storing the loaf cut-side down on a cutting board, or loosely wrapped in a clean linen or cotton tea towel. This allows the crust to breathe while protecting the cut surface.
For longer storage, or if you've already sliced the loaf, an airtight bread box or a paper bag placed inside a plastic bag works well for a few days. The paper bag helps maintain the crust slightly, while the plastic bag prevents the crumb from drying out too fast. For storage beyond 3-4 days, or to preserve that fresh-baked quality for much longer, freezing is the best option.
Allow the bread to cool completely, then wrap it tightly in plastic wrap, followed by a layer of aluminum foil or place it in a freezer-safe bag. Frozen sourdough can last for several months. To enjoy, thaw it at room temperature, then reheat in a warm oven (around 350°F or 175°C) for 10-15 minutes to revive the crust.
The Ultimate Sourdough Bread Guide: Conclusion
Baking homemade sourdough bread is a rewarding process that connects you to the ancient art of fermentation. From nurturing your own lively starter to mastering the stages of mixing, rising, shaping, and baking, each step contributes to the creation of a truly unique and delicious loaf. While there's a learning curve, the fundamental techniques are accessible to beginners, and with practice, you'll develop an intuition for how the dough should feel and behave. Don't be discouraged by early experiments that don't turn out perfectly; every bake teaches you something new about managing your starter and understanding dough dynamics.
Embrace the journey of sourdough baking. It's a process that requires patience and attention but offers immense satisfaction as you pull a beautifully browned, crackling loaf from your oven. Share your creations with friends and family, and enjoy the incredible flavor and texture that only naturally leavened bread can provide.
As you gain confidence, feel free to explore variations, try different flours, or even adapt your skills to bake other delightful items like an easy whole wheat roll recipe using your active starter. With this guide as your foundation, you're well-equipped to enjoy baking homemade sourdough bread with confidence and creativity.
Frequently Asked Questions
What makes this whole wheat roll recipe "easy"?
This recipe prioritizes simple steps and readily available ingredients, making it accessible even for beginner bakers. We focus on clear instructions and avoid complex techniques.
Can I substitute ingredients in this easy whole wheat roll recipe?
While we recommend following the recipe for best results, you can make some substitutions. For example, you can use honey instead of maple syrup, but be mindful of how substitutions might affect the dough's consistency and final flavor.
How long does it take to make these delicious whole wheat rolls?
The total time, including prep, proofing, and baking, is approximately 2-3 hours. However, most of that time is passive proofing, allowing the dough to rise.
What's the best way to store these whole wheat rolls to keep them fresh?
Store the cooled rolls in an airtight container at room temperature for up to 2 days. For longer storage, freeze them in a freezer-safe bag for up to 2 months.
Can I make this whole wheat roll recipe ahead of time?
Yes, you can prepare the dough through the first proofing stage and then refrigerate it overnight. Allow the dough to come to room temperature before shaping and baking for best results.
Final Reflection: The Simple Joy of Homemade Whole Wheat Rolls
The ease of crafting delicious, wholesome bread shouldn't be a culinary mystery. This recipe proves that creating satisfying, homemade whole wheat rolls is entirely achievable, even for the busiest of bakers. The simplicity of the method, combined with the rewarding taste and aroma of freshly baked bread, makes this recipe a true kitchen staple.
The impact of homemade food, particularly bread, on our lives extends far beyond mere sustenance. It connects us to a simpler time, fostering a sense of accomplishment and nurturing a deeper appreciation for the ingredients that nourish us. Bread is the staff of life,
a simple phrase, yet it encapsulates the profound role bread plays in our cultures and personal histories. This recipe, in its accessibility, aims to empower more people to experience this connection, to reclaim the joy of baking, and to share the warmth of homemade bread with loved ones.
Now, I invite you to roll up your sleeves, gather your ingredients, and embark on this baking adventure. Don't be intimidated by the seemingly complex process; embrace the simplicity and allow yourself to be captivated by the fragrant journey from flour to finished roll. The satisfaction of biting into a warm, fluffy, homemade whole wheat roll is a reward in itself, a testament to the power of simple ingredients and a little bit of time dedicated to the art of baking. Let this recipe be your starting point for a lifelong love affair with homemade bread.
Unlock Your Inner Baker: Make These Rolls Today!
Thanks for joining us on this baking adventure! We hope you're feeling inspired and ready to create some delicious, homemade whole wheat rolls. You've learned a valuable new skill – now it's time to put it into action!
- Bake a batch of these rolls this week: Use the recipe as a starting point and let your creativity shine. Experiment with different herbs or seeds!
- Share your baking journey: Post a picture of your finished rolls on social media and tag us @BakeWithEase – we’d love to see your creations!
- Join our baking community: Head over to our forum (link would be here if it were allowed) to connect with other home bakers and share tips & recipes.
Ready to experience the joy of freshly baked bread? What's your favorite addition to homemade rolls?