
Unlocking Perfect Ratios: Advanced Baker's Percentages for Pizza Dough

Welcome to BakeWithEase, your partner in baking brilliance! Ever wondered how professional pizza chefs achieve that perfectly crisp crust and airy crumb? Unlocking Perfect Ratios: Advanced Baker's Percentages for Pizza Dough is your key. Dive in and discover the secrets behind mastering baker's percentages, and learn how these advanced pizza dough ratios can revolutionize your homemade pizza. Get ready to elevate your pizza game – the science of perfect dough awaits!
- Introduction to Pizza Dough and Baker's Percentages
- Key Ingredients and Their Roles
- Calculating Pizza Dough Ratios Using Baker's Percentage
- Hydration: High Hydration Dough
- Flour Types and Their Impact
- Sourdough Pizza Dough Ratios
- Optimizing Fermentation Time
- Troubleshooting Dough Problems
- Recipe Examples and Variations
- Conclusion: Perfecting Pizza with Dough Ratios
-
Frequently Asked Questions
- What is baker's percentage and why is it important for advanced pizza dough?
- How do I calculate baker's percentage for my pizza dough recipe?
- What are some typical baker's percentage ranges for advanced pizza dough hydration?
- What is the role of salt in advanced pizza dough ratios, and how does it affect the dough?
- Can I adjust baker's percentages to achieve different pizza crust characteristics?
- Final Reflection: The Alchemy of Perfect Pizza Dough
- Unlock Your Pizzaiolo Potential: Master the Dough!
Introduction to Pizza Dough and Baker's Percentages
Pizza dough seems simple – just flour, water, yeast, and salt. But mastering it, especially for truly exceptional pizza, involves understanding the precise relationship between these ingredients. This is where baker's percentages become invaluable. Moving beyond simple volume measurements unlocks a level of control and consistency that elevates your pizza from good to outstanding. For anyone serious about making restaurant-quality pizza at home, understanding these advanced pizza dough ratios is a fundamental step.
Baker's percentages provide a universal language for bakers. Instead of relying on cups or grams that can vary, this system expresses each ingredient's weight as a percentage of the flour's weight. Flour is always 100%. This allows you to scale recipes easily, compare different dough formulations side-by-side, and truly grasp how altering one ingredient impacts the entire dough structure and final bake. This is particularly crucial when exploring advanced pizza dough ratios, where small adjustments can yield significant textural and flavor differences.
Why Master Baker's Percentages for Pizza?
Mastering baker's percentages offers unparalleled precision and control in your pizza making. Unlike volume measurements which can be inconsistent due to factors like how densely flour is packed, weight measurements provide accuracy. When you work with percentages, you can reliably replicate successful recipes batch after batch, ensuring consistent results whether you're making two pizzas or twenty. This consistency is key to developing intuition about how different hydration levels or yeast amounts affect the dough's handling, rise, and crust characteristics.
Furthermore, understanding baker's percentages is essential for adapting recipes or creating your own unique formulations. If you find a recipe you love, but want to experiment – perhaps increase the hydration slightly for a crispier crust, or reduce the yeast for a longer, slower fermentation that develops more flavor – knowing the percentages makes these adjustments straightforward and predictable. It empowers you to truly understand the science behind your dough, moving beyond simply following instructions to becoming a dough architect capable of crafting advanced pizza dough ratios tailored to your specific needs and desired outcomes.
Understanding the Basics of Baker's Percentage in Pizza Dough
The fundamental principle of baker's percentage is that the weight of flour is always considered 100%. All other ingredients are then calculated as a percentage of that flour weight. For example, if a recipe uses 500 grams of flour (100%), and calls for 325 grams of water, the water percentage is (325 / 500) * 100% = 65%. Similarly, if it uses 10 grams of salt, the salt percentage is (10 / 500) * 100% = 2%. Yeast, oil, or sugar would be calculated the same way.
Let's look at a typical basic pizza dough formula in baker's percentage: Flour 100%, Water 60-65%, Yeast 0.5-1%, Salt 1.5-2%. Notice that the total percentage often exceeds 100% (e.g., 100 + 65 + 1 + 2 = 168%). This is normal because the percentages relate only to the flour weight, not the total dough weight.
This system makes comparing recipes incredibly easy. A "65% hydration dough" immediately tells you something about its potential texture and handling compared to a "70% hydration dough," regardless of the total batch size. Mastering these advanced pizza dough ratios starts with internalizing this simple, yet powerful, concept.
Key Ingredients and Their Roles
Every ingredient in pizza dough plays a specific and crucial role. Understanding these roles at a deeper level, especially when working with advanced pizza dough ratios, allows you to manipulate them strategically for desired outcomes. It's not just about mixing things together; it's about creating a complex biological and chemical reaction that results in a perfect crust.
From the structural integrity provided by gluten developed from flour and water, to the flavor and rise contributed by yeast, and the essential balance brought by salt, each component is vital. Even seemingly minor additions like a touch of olive oil or sugar can significantly alter the dough's texture, color, and keeping quality. A baker working with advanced pizza dough ratios must appreciate the nuanced impact of each ingredient.
Flour: The Foundation
Flour is the backbone of your pizza dough, providing the structure through its protein content, which develops into gluten when hydrated and kneaded. The type of flour used significantly impacts the dough's hydration capacity, elasticity, extensibility, and the final crust's texture. Flours vary in protein content (typically ranging from 8% for cake flour to 14% or more for strong bread flour) and how finely they are milled. A higher protein content generally means stronger gluten development, suitable for chewy crusts that can handle long fermentation, often preferred for advanced pizza dough ratios.
Consider a standard All-Purpose flour with around 10-12% protein versus a high-gluten Bread Flour at 12-14% or a finely milled Italian "00" flour with varying protein but specific milling characteristics. If you use a flour that absorbs less water, you'll need to adjust your hydration percentage downwards to achieve the desired dough consistency. Conversely, a very absorbent flour allows for higher hydration, leading to a more open crumb structure. Understanding these properties is fundamental when experimenting with advanced pizza dough ratios and different flour types.
Water: Hydration and Consistency
Water is arguably the second most critical ingredient, directly influencing the dough's consistency, gluten development, and the crust's final texture. The ratio of water to flour, expressed as hydration percentage in baker's math, dictates how wet or dry your dough will be.
Low hydration doughs (say, 55-60%) are easier to handle, resulting in a denser, often crispier crust. High hydration doughs (70% and above) are stickier and more challenging to work with but yield a more open, airy, and tender crumb, often with a crisp exterior – a hallmark of many advanced pizza dough ratios like those used for Neapolitan style.
Water also plays a vital role in activating the yeast and allowing enzymes in the flour to break down starches into sugars, which feed the yeast. The temperature of the water is crucial as well; warmer water speeds up yeast activity, while colder water slows it down, which is often desired for longer fermentation periods. Adjusting water temperature is a key technique when managing dough fermentation times, especially with advanced pizza dough ratios involving cold fermentation.
Yeast: Fermentation and Flavor
Yeast is the living organism responsible for leavening the dough, producing carbon dioxide gas that makes the dough rise, and contributing significantly to the flavor profile through fermentation byproducts. The amount of yeast used is critical and depends heavily on the desired fermentation time and temperature. A small amount of yeast combined with a long, cold fermentation (e.g., 0.1-0.5% active dry yeast for a 24-48 hour cold proof) develops complex flavors and aromas. A larger amount (e.g., 1-2%) facilitates a faster rise at room temperature, suitable for same-day doughs.
Different types of yeast behave slightly differently. Active dry yeast needs to be proofed in water, while instant dry yeast can be mixed directly with the dry ingredients. Fresh yeast is potent but has a shorter shelf life. Understanding the activity level and optimal conditions for your chosen yeast type is essential when formulating advanced pizza dough ratios, particularly when aiming for specific fermentation schedules like overnight or multi-day cold proofs. The yeast percentage is one of the primary levers for controlling the dough's fermentation trajectory.
Salt: Enhancing Flavor and Gluten
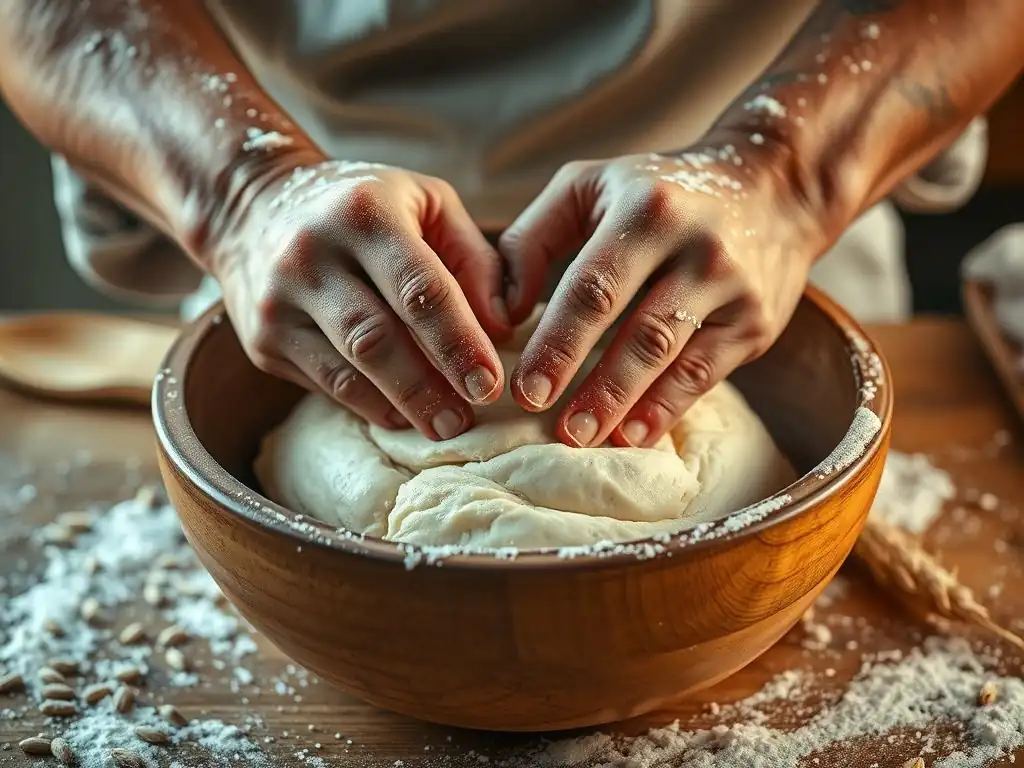
Salt does much more than just add flavor; it plays a critical role in dough structure and fermentation control. Salt tightens the gluten structure, making the dough stronger and more elastic, which is especially important in higher hydration doughs. Without salt, dough can be slack and difficult to handle. Typical salt percentages range from 1.5% to 2.5% of the flour weight. While 2% is a common starting point, adjusting the salt slightly can impact both flavor intensity and dough handling.
Beyond structure and taste, salt also regulates yeast activity. It slows down fermentation by drawing water out of the yeast cells through osmosis. This inhibitory effect is beneficial, preventing the dough from rising too quickly and allowing for better flavor development. However, too much salt can kill the yeast. When calculating advanced pizza dough ratios, particularly those with very long fermentation times, careful consideration of the salt percentage in relation to the yeast percentage and fermentation temperature is necessary for optimal results.
Oil and Sugar: Impact on Dough
Oil and sugar are optional ingredients in many traditional pizza doughs (like Neapolitan), but they are common in others (like New York or Detroit style) and can significantly alter the dough's characteristics. Oil, typically olive oil, tenderizes the dough, improves extensibility (making it easier to stretch), adds richness, and contributes to a softer crust with a slightly crispier exterior when baked. It also helps with browning. A common oil percentage might be 2-5% of the flour weight.
Sugar, whether added directly or produced through enzymatic action on starches, provides readily available food for the yeast, potentially speeding up the initial rise. It also aids in crust browning through caramelization and the Maillard reaction, contributing to a richer color and flavor. While small amounts (1-3%) are common, too much sugar can result in a crust that burns easily. When developing advanced pizza dough ratios for styles that include these ingredients, consider how they will interact with the other components and impact the final bake.
Calculating Pizza Dough Ratios Using Baker's Percentage
Working with baker's percentages makes scaling and adjusting recipes incredibly straightforward once you understand the simple math. It eliminates the guesswork associated with volume measurements and provides a precise framework for controlling your ingredients. This system is fundamental for anyone looking to move beyond basic recipes and explore advanced pizza dough ratios with confidence.
The key is always to start with the flour weight as your 100%. From there, you can determine the exact weight of every other ingredient based on its percentage. This not only simplifies calculation but also makes it easy to compare different formulas – a recipe with 68% hydration is immediately distinguishable from one with 62% hydration, and you can anticipate how the dough will behave before you even start mixing.
Converting Recipes
Converting a recipe that uses volume measurements (like cups and teaspoons) to baker's percentages requires weighing each ingredient. While you can use online conversion charts as a starting point, the most accurate method is to weigh the specific flour, water, etc., you are using. For example, 1 cup of All-Purpose flour might weigh approximately 120-130 grams depending on how it's scooped and leveled. 1 cup of water is reliably about 237 grams.
Once you have the weights for all ingredients in a recipe, you can calculate the percentages. Divide the weight of each ingredient by the weight of the flour, then multiply by 100. For instance, if your recipe uses 500g flour, 300g water, 10g salt, and 2.5g yeast:
- Flour: 500g / 500g * 100% = 100%
- Water: 300g / 500g * 100% = 60%
- Salt: 10g / 500g * 100% = 2%
- Yeast: 2.5g / 500g * 100% = 0.5%
The baker's percentage formula for this dough is 100% flour, 60% water, 2% salt, 0.5% yeast. This format allows you to easily scale this recipe up or down while maintaining the precise advanced pizza dough ratios.
The Baker's Percentage Formula
The core formula for calculating baker's percentage for any ingredient is:
(Weight of Ingredient / Weight of Flour) * 100% = Ingredient Percentage
Remember, the weight of flour is always the denominator and represents 100%. This formula is applied individually to each ingredient: water, salt, yeast, oil, sugar, etc. The sum of all ingredient percentages will always be greater than 100%, as they are relative to the flour, not the total dough weight.
To calculate the actual weight of an ingredient needed when scaling a recipe using baker's percentages, you reverse the formula:
(Ingredient Percentage / 100) * Weight of Flour = Weight of Ingredient
For example, if you want to make a 70% hydration dough using 1000g of flour: (70 / 100) * 1000g = 700g of water. If the salt is 2%: (2 / 100) * 1000g = 20g of salt. This simple math makes scaling and adjusting advanced pizza dough ratios incredibly accurate and efficient.
Example: Basic Pizza Dough in Baker's Percentage
Let's construct a common basic pizza dough formula using baker's percentages and then calculate the ingredient weights for a specific batch size. A standard, reliable formula might be:
- Flour: 100%
- Water: 62%
- Salt: 2%
- Instant Dry Yeast: 0.5%
Now, let's say you want to make enough dough for three medium pizzas, and you estimate you need about 250 grams of dough per pizza, totaling 750 grams of dough. To find the flour weight needed, you first sum the percentages: 100 + 62 + 2 + 0.5 = 164.5%. The total dough weight (750g) is 164.5% of the flour weight. So, the flour weight is 750g / 1.645 ≈ 456 grams.
Now, calculate the other ingredient weights based on 456g of flour:
- Water: (62 / 100) * 456g ≈ 283g
- Salt: (2 / 100) * 456g ≈ 9.1g
- Yeast: (0.5 / 100) * 456g ≈ 2.3g
So, for 750g of this basic dough, you would need approximately 456g flour, 283g water, 9.1g salt, and 2.3g instant dry yeast. This demonstration highlights the power and practicality of using baker's percentages for precise and scalable advanced pizza dough ratios.
Hydration: High Hydration Dough
Hydration is the percentage of water relative to flour and is one of the most significant factors influencing dough handling and the final crust structure. While lower hydration doughs (55-62%) are common and easier for beginners, exploring higher hydration levels (65%+) is key to achieving the airy, open crumb structures found in many artisanal pizzas. Working with high hydration dough requires specific techniques but offers rewarding results.
High hydration doughs are stickier and slacker, initially seeming difficult to manage. However, with proper mixing, resting periods (autolyse), and gentle handling techniques like stretch and folds, the gluten network develops strength to support the higher water content. Mastering high hydration is a significant step in working with advanced pizza dough ratios and expanding your pizza-making repertoire.
Understanding Hydration Levels
Hydration levels are typically categorized:
- Low Hydration (55-60%): Denser dough, easy to handle, crispier crust. Good for thin, crackery crusts or pan pizzas where structure is key.
- Medium Hydration (60-65%): Standard range for many home pizza recipes. Good balance of handling ease and potential for some airiness.
- High Hydration (65-75%): Stickier dough, requires more careful handling. Leads to an open, airy crumb structure and often a chewier interior with a crisp exterior. Common for Neapolitan or artisanal styles.
- Very High Hydration (75%+): Very wet, batter-like dough, requires advanced techniques like no-knead or intensive mixing. Results in extremely open, light structures (like focaccia or ciabatta, sometimes adapted for pan pizza).
The appropriate hydration level also depends on the flour type. A strong bread flour or high-gluten flour can typically handle higher hydration than an All-Purpose flour because of its higher protein content and ability to absorb more water. When developing advanced pizza dough ratios, always consider the flour's characteristics in relation to your target hydration.
Benefits of High Hydration
Working with high hydration doughs offers several benefits that contribute to superior pizza crust:
- Improved Crumb Structure: More water allows for greater steam production during baking, creating larger, more irregular air pockets (alveoli) in the crust, resulting in a lighter, airier texture. A hydration of 68-72% is often targeted for a classic Neapolitan-style open crumb.
- Enhanced Flavor Development: Higher hydration often facilitates longer, slower fermentation, which allows more complex flavors to develop through enzymatic activity and yeast byproduct production.
- Better Browning: The increased moisture content can contribute to better heat transfer and more even browning of the crust, leading to appealing color and flavor in the oven.
- Crispy Exterior: While the interior is airy and tender, high hydration doughs baked at high temperatures can develop a wonderfully crisp and delicate outer crust.
Achieving these benefits requires patience and technique, as high hydration doughs can be challenging to shape. However, the resulting crust quality makes mastering these advanced pizza dough ratios well worth the effort.
Adjusting Ratios for High Hydration
When increasing hydration, it's not always a simple matter of just adding more water while keeping other percentages constant. While you might start by simply increasing the water percentage (e.g., from 62% to 68%), you might find that the dough becomes too slack or sticky to handle effectively, even with proper technique.
Sometimes, a slight increase in salt (e.g., from 2% to 2.2%) can help tighten the gluten structure and make a higher hydration dough more manageable. Similarly, using a stronger flour with a higher protein content (e.g., switching from AP to bread flour or a high-gluten flour) is often necessary to support the increased water percentage.
If aiming for a very high hydration (75%+), you might also need to consider using a small amount of diastatic malt powder (0.5-1%) to provide more food for the yeast and aid in browning, as the high water content can sometimes inhibit enzymatic activity. Experimenting with small adjustments to these advanced pizza dough ratios is key to finding the perfect balance for your desired hydration level and flour type.
Flour Types and Their Impact
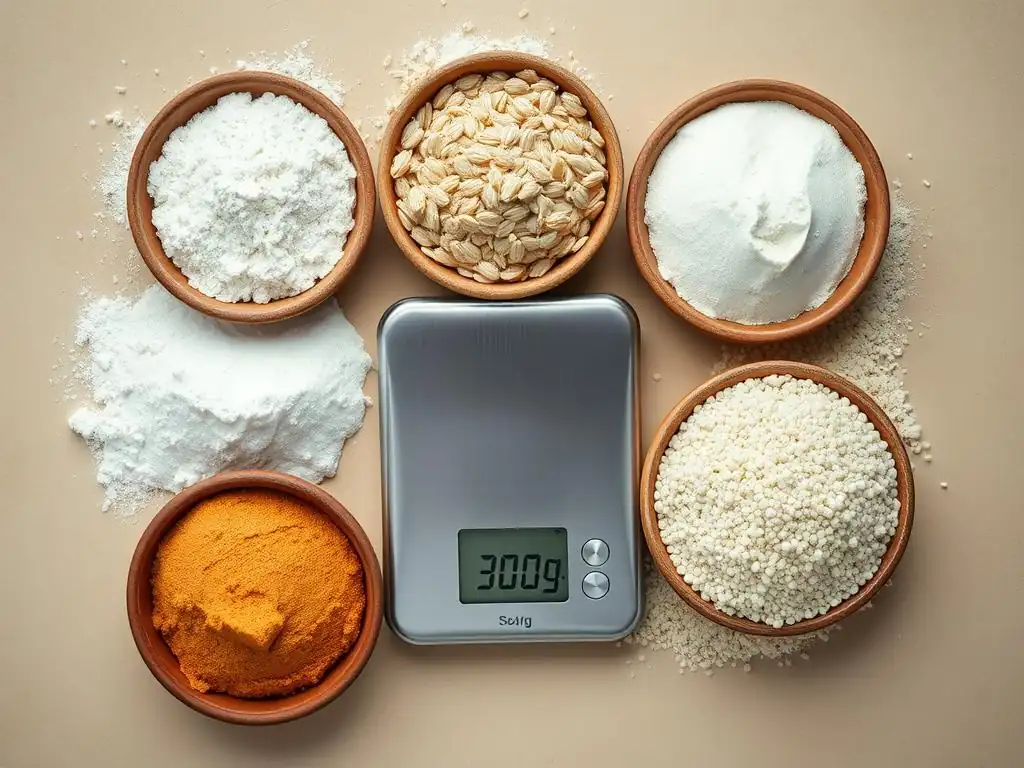
The type of flour you choose is fundamental to the nature of your pizza dough and the final crust. Different flours have varying protein contents, milling processes, and absorption rates, all of which dramatically influence how the dough behaves during mixing, fermentation, and baking. Understanding these differences is essential for selecting the right flour for your desired pizza style and accurately calculating advanced pizza dough ratios.
Using the wrong flour can lead to dough that is either too weak to support a good rise or too strong and elastic to stretch properly. For example, a delicate cake flour would yield a weak, unmanageable pizza dough, while a super-high gluten flour might result in a tough, rubbery crust if not handled correctly. Choosing the appropriate flour sets the stage for success when working with specific advanced pizza dough ratios.
Bread Flour vs. 00 Flour
Two common choices for serious pizza makers are Bread Flour and Italian "00" Flour.
- Bread Flour: Typically has a protein content of 12-14%. This higher protein level leads to strong gluten development, providing structure and chewiness. Bread flour is versatile and works well for many pizza styles, including New York-style, pan pizzas, and can support moderate to high hydration doughs (60-70%). Its strength makes it relatively forgiving during kneading and stretching.
- Italian "00" Flour: Refers to the fineness of the grind, not necessarily the protein content, though many popular pizza-specific "00" flours (like Antimo Caputo Chef's Flour) have a medium protein level (around 10-12.5%). The fine grind results in a very soft, silky dough that is incredibly extensible, perfect for achieving the thin, delicate crust of Neapolitan pizza. However, it can sometimes handle slightly lower hydration than strong bread flour and requires careful handling due to its delicate nature. Some specialized "00" flours designed for long fermentation (like Caputo Cuoco/Red) have higher protein (13-14%).
The choice between these depends on the desired crust texture and handling characteristics. For a chewy New York crust, bread flour is excellent. For a soft, airy Neapolitan crust with a prominent cornicione (edge), a quality "00" flour is often preferred, influencing the necessary advanced pizza dough ratios, particularly hydration.
Adjusting Water Ratios Based on Flour
Different flours absorb different amounts of water. This means that the same hydration percentage (e.g., 65%) calculated using baker's math can result in significantly different dough consistencies depending on the flour used. For instance, a strong bread flour might require more water to reach a desired consistency than an All-Purpose or a standard "00" flour.
If you are accustomed to a recipe using Bread Flour at 65% hydration, and you switch to a "00" flour with lower absorption characteristics, you might find that 65% hydration with the "00" flour yields a much wetter, stickier dough than you expected. You may need to reduce the hydration slightly (e.g., to 60-63%) to achieve a similar dough consistency and handling feel.
Conversely, if you switch from a weaker flour to a stronger, more absorbent one, you might be able to increase the hydration percentage to achieve a similar feel while leveraging the flour's strength for a more open crumb. Always be prepared to make small adjustments to your water percentage when trying a new flour, even if using established advanced pizza dough ratios.
Experimenting with Different Flours
Exploring different flours is a rewarding part of mastering advanced pizza dough ratios. Beyond standard bread and 00 flours, you can experiment with whole wheat flour (adding nutty flavor and fiber, typically requires higher hydration), rye flour (adds tang and density, used in smaller percentages), or even specialty pizza flours blended for specific ovens or fermentation times.
When introducing a new flour, especially one with different characteristics (like whole wheat), it's often best to substitute it gradually. For example, start by replacing 10-20% of your base flour with the new flour and adjust the hydration as needed. Keep detailed notes on how the dough feels and performs. Over time, you'll develop an intuition for how different flours behave and how to adapt your advanced pizza dough ratios to achieve desired results, whether it's a rustic whole wheat crust or a blend for unique flavor.
Sourdough Pizza Dough Ratios
Using a sourdough starter instead of commercial yeast adds incredible depth of flavor and complexity to pizza dough, along with unique textural qualities. Sourdough fermentation is slower and involves a mix of wild yeasts and lactic acid bacteria, producing organic acids that contribute a characteristic tang and improve the dough's keeping quality. Working with sourdough introduces new considerations when calculating advanced pizza dough ratios.
Unlike commercial yeast, a sourdough starter (often called levain or preferment) is a living culture composed of flour and water. When you add starter to your dough, you are adding flour and water as well as the leavening agents. This needs to be accounted for in your baker's percentage calculations to maintain the desired overall hydration and flour type balance.
Understanding Sourdough Starter
A sourdough starter is typically maintained at a specific hydration level, most commonly 100%. This means it consists of equal weights of flour and water (e.g., 100g flour + 100g water = 200g starter). When you use 200g of a 100% hydration starter in your dough, you are effectively adding 100g of flour and 100g of water to your main dough mix.
The activity level of your starter is paramount. It should be active and bubbly, ideally having been fed 4-12 hours before use when it's at its peak or just starting to fall. A sluggish starter will result in slow or insufficient leavening. The flavor profile of your starter also impacts the final dough; a very active, mature starter will impart a stronger tang than a young, less acidic one. Understanding your starter's health and characteristics is the first step in incorporating it into advanced pizza dough ratios.
Converting to Sourdough
To convert a commercial yeast recipe to sourdough using baker's percentages, you need to replace the commercial yeast and adjust the flour and water percentages to account for the starter. A common approach is to replace the yeast with an amount of starter that is typically 15-30% of the flour weight. For example, if your recipe has 1000g flour and 0.5% yeast, you might use 200g of 100% hydration starter (20% of the flour weight).
Here's how the calculation works if you use 200g of 100% hydration starter in a dough with a target of 1000g total flour at 65% hydration:
- Starter (200g): Contains 100g flour (200g / 2) and 100g water (200g / 2).
- Remaining Flour Needed: 1000g (total target) - 100g (from starter) = 900g
- Remaining Water Needed: (65% of 1000g total flour) - 100g (from starter) = 650g - 100g = 550g
- Salt: Calculate based on total flour weight (1000g). If 2% salt: (2 / 100) * 1000g = 20g.
So, for a 1000g flour, 65% hydration sourdough pizza dough using 20% starter, your formula would be: 900g flour, 550g water, 20g salt, and 200g active 100% hydration starter. Note how the baker's percentages (based on total flour) remain the same, but the ingredient weights are adjusted to account for the starter. This is crucial for calculating accurate advanced pizza dough ratios with sourdough.
Maintaining Starter Activity
Successful sourdough pizza relies heavily on a healthy, active starter. Maintaining consistent activity involves regular feeding with fresh flour and water. The ideal feeding ratio (starter:flour:water) and frequency depend on storage temperature. A starter stored at room temperature typically needs feeding every 12-24 hours using a 1:1:1 or 1:2:2 ratio by weight. A starter stored in the refrigerator needs feeding less often, perhaps once a week, using a higher ratio like 1:4:4 or 1:5:5 to provide enough food for the longer period.
Before using your starter for pizza dough, it's best to feed it 1-2 times at room temperature to ensure it's vigorous and active. This means discarding most of the old starter and feeding the remainder with fresh flour and water. For example, feed 20g starter with 100g flour and 100g water. This ensures you are adding a lively culture to your dough, crucial for achieving a good rise and flavor profile when working with advanced pizza dough ratios in sourdough.
Optimizing Fermentation Time
Fermentation is arguably the most critical stage in developing flavor and texture in pizza dough. It's a complex process driven by yeast (and bacteria in sourdough) and influenced by temperature, time, and the amount of leavening agent used. Optimizing fermentation means finding the right balance to achieve desired characteristics like flavor complexity, digestibility, and dough handling properties. This is where advanced pizza dough ratios, particularly the yeast percentage and hydration, become key levers.
Controlling fermentation allows you to dictate when your dough will be ready to use, offering flexibility in your baking schedule. Whether aiming for a quick same-day bake or a long, slow cold proof for maximum flavor development, understanding the interplay of yeast, time, and temperature is essential for successful pizza making.
Yeast, Time, and Temperature
These three factors are inextricably linked in fermentation.
- Yeast Amount: More yeast means faster fermentation; less yeast means slower fermentation.
- Temperature: Warmer temperatures speed up yeast activity; colder temperatures slow it down. Room temperature fermentation typically takes 4-8 hours, while cold fermentation in a refrigerator (around 3-4°C or 37-40°F) can take 24-72 hours or even longer.
- Time: The duration of fermentation impacts flavor. Longer fermentation allows enzymes more time to break down starches into sugars and proteins into amino acids, contributing to flavor and browning. It also allows lactic and acetic acids to develop in sourdough, adding tang.
To achieve a specific fermentation schedule, you adjust these factors. For example, for a same-day dough ready in 4-6 hours at room temperature (say, 22°C/72°F), you might use 0.8-1% instant dry yeast. For an overnight cold proof (24 hours at 4°C/39°F), you might reduce the yeast significantly to 0.1-0.3%. Mastering these adjustments is central to applying advanced pizza dough ratios effectively.
Adjusting Yeast for Cold Fermentation
Cold fermentation is a technique widely used for advanced pizza dough ratios, especially for styles like Neapolitan or New York, because it allows for significant flavor development and results in dough that is often easier to handle and stretch cold. To achieve a long cold proof (24-72 hours or more), you must dramatically reduce the amount of yeast compared to a room-temperature dough.
As a general guideline for a 24-hour cold proof in a refrigerator (approx. 4°C/39°F):
- Use about 0.1% to 0.3% instant dry yeast relative to the flour weight.
- For a 48-hour cold proof, you might reduce it further to 0.05% to 0.1%.
- For a 72-hour cold proof, even lower, potentially 0.02% to 0.05%.
These are starting points, and the exact amount will depend on your specific refrigerator temperature, the strength of your flour, and your desired level of rise. It's often helpful to include a short initial room temperature rest (1-2 hours) before refrigerating to kickstart fermentation, especially with very low yeast percentages. Monitoring the dough's activity over time is key to perfecting this technique and adjusting your advanced pizza dough ratios for future batches.
Bulk Fermentation vs. Proofing
Fermentation typically occurs in two stages: bulk fermentation and proofing.
- Bulk Fermentation: This is the initial rise of the entire mass of dough after mixing and before dividing and shaping. It's where the majority of flavor development occurs and the gluten network continues to strengthen. Bulk fermentation can happen at room temperature or in the refrigerator (cold bulk fermentation). During this stage, techniques like stretch and folds are often performed to build strength and even out temperature. The dough typically increases significantly in volume, maybe doubling or more depending on the desired outcome.
- Proofing: This is the final rise after the dough has been divided into individual balls and shaped. It allows the dough balls to relax, become airy, and develop surface tension needed for easy stretching. Proofing can also be done at room temperature or cold. For Neapolitan style, a long cold bulk followed by a shorter room temperature proof (3-6 hours) is common. For New York style, a cold bulk followed by cold proofing of individual balls is typical.
Understanding the purpose of each stage helps you control the dough's development and schedule. Adjusting the time and temperature of both bulk fermentation and proofing, in conjunction with your advanced pizza dough ratios (especially yeast and hydration), allows you to fine-tune the dough's characteristics for optimal baking performance.
Troubleshooting Dough Problems
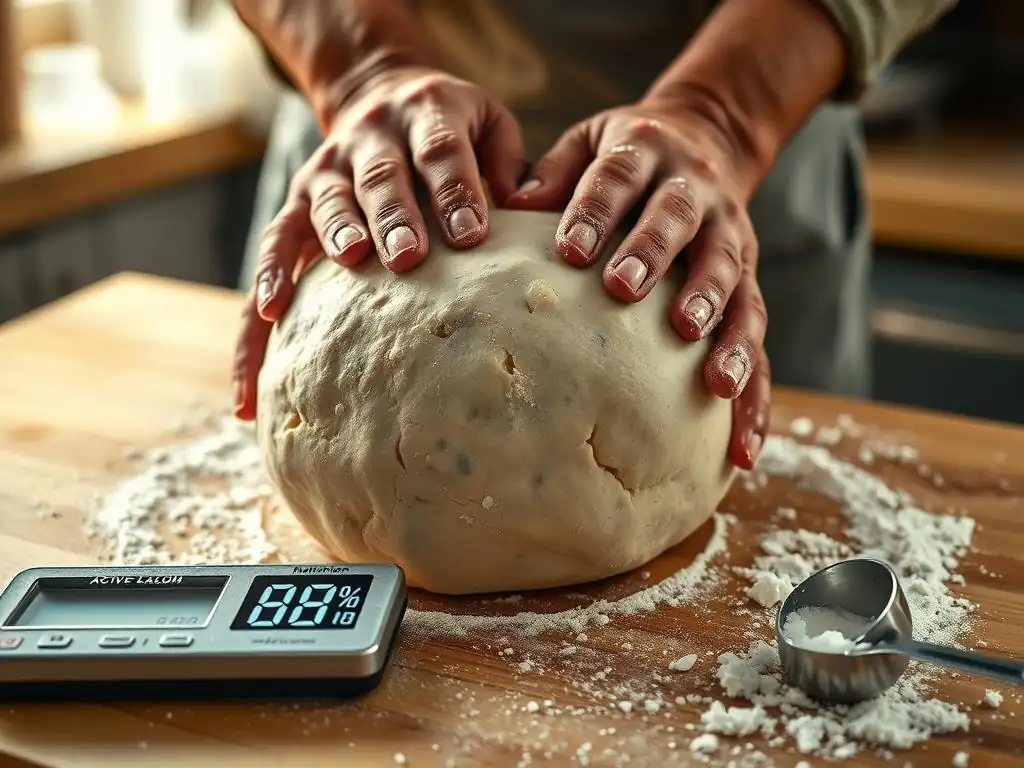
Even with perfect advanced pizza dough ratios, issues can arise. Understanding how to diagnose and fix common dough problems is a mark of an experienced baker. Most issues relate back to the balance of ingredients (hydration, yeast, salt) and the fermentation process (time, temperature). Don't get discouraged if your dough isn't perfect every time; troubleshooting is a natural part of the learning process.
Common problems include dough that is too sticky or too dry, dough that won't rise, or a final crust that is tough. By carefully observing your dough at each stage – mixing, kneading, fermentation, and shaping – you can often identify the root cause and make necessary adjustments, either in the current batch if possible or for future recipes utilizing advanced pizza dough ratios.
Dough Too Sticky: Adjusting Hydration
If your dough is excessively sticky and difficult to handle after mixing and initial kneading, even after proper gluten development, the most likely culprit is too high hydration for the type of flour used or your handling technique. While high hydration is desirable for some styles, there's a point where the water content exceeds the flour's ability to absorb it and the gluten's ability to contain it.
- Immediate Fix: If the dough is still in the early stages of mixing or kneading, you can gradually add small amounts of flour (a tablespoon at a time) while kneading until the desired consistency is reached. Note how much extra flour you added so you can adjust your advanced pizza dough ratios for the next batch.
- Future Adjustment: For your next batch with the same flour, reduce the hydration percentage by 2-5 percentage points. For example, if you used 70% hydration and it was too sticky, try 65-68% next time. Also, ensure you are using a flour with adequate protein content (12%+ for higher hydration). Ensure you are kneading or performing stretch and folds adequately to develop gluten strength, which helps manage stickiness.
Dough Too Dry: Adding Water
Dough that is too dry will feel stiff, dense, and may not come together properly during mixing. It will be difficult to knead, lack elasticity, and won't develop a smooth surface. This is usually a sign of insufficient hydration. Factors could include inaccurate measurement, using a very absorbent flour without adjusting water, or environmental conditions leading to rapid drying.
- Immediate Fix: If the dough is still in the mixing stage, gradually add small amounts of water (a teaspoon at a time) while mixing until the dough becomes more pliable and reaches the desired consistency. If the dough has already been kneaded, you can try wetting your hands and incorporating the water during subsequent stretch and folds. Note the extra water added for future adjustments.
- Future Adjustment: For your next batch, increase the hydration percentage by 2-5 percentage points. If your recipe called for 60% and the dough was too dry, try 62-65% next time. Also, ensure you are accurately weighing your water and flour. Consider if the flour you are using requires higher hydration than you initially assumed based on your advanced pizza dough ratios formula.
Dough Not Rising: Yeast Solutions
If your dough shows little to no activity after the expected fermentation time, the issue likely lies with the yeast. Possible causes include:
- Dead Yeast: Yeast was old, improperly stored, or killed by hot water or too much salt.
- Inactive Yeast: Water was too cold, or the fermentation environment was too cold.
- Insufficient Yeast: Too little yeast was used for the fermentation time and temperature (common with attempts at long cold fermentation without proper calculation).
- Too Much Salt/Sugar: High concentrations can inhibit or kill yeast.
- Immediate Fix: If you suspect the yeast is dead or inactive, you can try dissolving a small amount of new, proofed yeast in warm water and gently kneading it into the dough. This might be difficult with a fully developed dough. A better approach might be to accept the current batch will be dense and focus on fixing the next.
- Future Adjustment: Check the expiration date of your yeast. Ensure water temperature is appropriate (lukewarm, around 30-35°C / 85-95°F, for activating dry yeast; cooler for instant). Verify your scale is accurate for small yeast measurements. Review your advanced pizza dough ratios, specifically the yeast percentage relative to your fermentation time and temperature. Ensure salt is added slightly after mixing flour and water, not directly onto the yeast.
Tough Dough: Over-Mixing
While gluten development is essential, over-mixing dough, especially in a stand mixer at high speeds, can result in a tough, rubbery texture that resists stretching and leads to a dense, chewy crust. This is because the gluten strands become too tight and damaged.
- Immediate Fix: If you realize you've over-mixed early in the process, you can try letting the dough rest for an extended period (30-60 minutes or longer) at room temperature or in the refrigerator. This allows the gluten to relax slightly. Gentle handling during shaping is also crucial.
- Future Adjustment: Pay attention to the dough's appearance and feel during mixing. Stop mixing once the dough is smooth, elastic, and passes the windowpane test (you can stretch a small piece thin enough to see light through it without tearing). Reduce mixing time or speed. If using a stand mixer, consider incorporating a significant rest period (autolyse) before adding salt and yeast, and potentially finishing the gluten development with gentle stretch and folds by hand. Adjusting mixing technique is as important as advanced pizza dough ratios for avoiding toughness.
Recipe Examples and Variations
Applying the principles of baker's percentages and advanced pizza dough ratios allows you to tackle a wide range of pizza styles, each with its unique characteristics derived from specific ingredient proportions, fermentation methods, and baking techniques. Exploring these variations is key to expanding your pizza-making skills.
Let's look at how baker's percentages are used to define three distinct and popular pizza dough styles: Neapolitan, New York, and Detroit. While there are variations within each style, these examples provide a solid foundation for understanding how different ratios contribute to the final product.
Neapolitan Pizza Dough
Authentic Neapolitan pizza dough is governed by strict rules (VPN specification), though home bakers often adapt these slightly. Key characteristics are a very thin center, a soft, airy, and slightly charred "cornicione" (crust edge), and minimal ingredients. A typical advanced pizza dough ratio for Neapolitan style might be:
- Flour (Type 00): 100%
- Water: 60-65% (often on the lower end for strict VPN, but home bakers often go 63-68%)
- Salt: 2.5-3% (higher than many styles to tighten gluten and enhance flavor)
- Fresh Yeast: 0.1-0.5% OR Instant Dry Yeast: 0.05-0.25% (very low yeast for long fermentation)
Fermentation is typically a long, slow process, often involving a bulk fermentation at room temperature for several hours followed by dividing and a long cold proof (24-72 hours) of individual balls, or a long cold bulk fermentation (24-48 hours) followed by a room temperature proof (4-8 hours). No oil or sugar is traditionally used. The hydration is moderate to high, and the high salt percentage is notable.
New York Style Pizza Dough
New York style pizza dough is known for its balance of chewiness and crispness, allowing slices to be folded. It typically uses a higher protein bread flour and often includes a small amount of oil and sometimes sugar. A common advanced pizza dough ratio for New York style might be:
- Bread Flour: 100%
- Water: 60-65% (often in the middle of this range)
- Salt: 1.75-2%
- Instant Dry Yeast: 0.3-0.8% (more than Neapolitan for a faster rise, though still often cold-fermented)
- Olive Oil: 2-4%
- Sugar (optional): 0-1%
Fermentation usually involves a cold bulk fermentation (24-72 hours) followed by cold proofing of individual dough balls. The oil contributes to tenderness and extensibility, making the dough easy to stretch into large, thin rounds. The hydration is moderate, resulting in a dough that is relatively easy to handle compared to very high hydration types. The blend of ingredients and cold fermentation are key to its signature texture.
Detroit Style Pizza Dough
Detroit style pizza features a thick, airy, focaccia-like crust with a crispy, cheesy edge, baked in a rectangular pan. It typically uses a high-gluten flour and higher hydration. A representative advanced pizza dough ratio for Detroit style might be:
- High-Gluten Flour or Bread Flour: 100%
- Water: 70-75% (or even higher)
- Salt: 1.5-2%
- Instant Dry Yeast: 0.5-1% (can vary based on desired fermentation time)
- Olive Oil (in dough, optional): 2-5%
This dough is often mixed, given a few stretch and folds, and then placed directly into a heavily oiled pan for a long, slow proof (often 6-12 hours at room temperature or longer in the fridge). The high hydration and relatively high yeast percentage contribute to the very open, airy crumb structure. The generous amount of oil in the pan and sometimes in the dough itself is crucial for the characteristic crispy bottom and sides. These advanced pizza dough ratios highlight how significantly proportions can change for different pizza outcomes.
Conclusion: Perfecting Pizza with Dough Ratios
Mastering baker's percentages is a transformative step in your pizza-making journey. It moves you from simply following recipes to truly understanding the science and art behind creating exceptional dough. By working with advanced pizza dough ratios, you gain the precision and control needed to consistently achieve desired results, whether you're aiming for a light and airy Neapolitan crust, a perfectly foldable New York slice, or a thick and crispy Detroit-style base.
The ability to calculate, scale, and adjust formulas based on ingredient behavior, desired fermentation time, and environmental conditions empowers you to troubleshoot problems effectively and confidently experiment with new flours, hydration levels, and techniques. This isn't just about math; it's about developing a deeper connection with your ingredients and the process.
Experimentation and Fine-Tuning
The journey to perfecting your pizza dough using advanced pizza dough ratios is one of continuous experimentation. Start with established formulas for the styles you want to make, calculate the ingredient weights precisely using baker's percentages, and meticulously follow the fermentation schedule.
Keep detailed notes! Record the flour type, hydration, yeast/salt percentages, mixing method, fermentation temperatures and times, and how the dough felt and behaved at each stage. Note the final outcome – the crust texture, flavor, and handling. Did the dough seem too sticky?
Was the rise too fast or slow? Did the crust lack color or airiness? Use these observations to make small, incremental adjustments (e.g., changing hydration by 1-2%, adjusting yeast by 0.1%) in your next batch. Over time, this iterative process of baking, observing, and adjusting your advanced pizza dough ratios will lead you to your ideal dough.
Resources for Further Learning
To continue deepening your understanding of advanced pizza dough ratios and techniques, explore resources from experienced bakers and pizzaiolos. Seek out reputable baking books that delve into the science of bread and pizza. Online forums and communities dedicated to pizza making are invaluable for asking questions, sharing experiences, and learning from others' successes and challenges.
Many professional bakers and instructors offer online courses or videos that demonstrate specific techniques for high hydration doughs, sourdough, and managing fermentation. Look for resources that emphasize the 'why' behind the techniques and ratios, not just the 'how'. Understanding the interaction of ingredients and the impact of time and temperature will provide you with the knowledge base to adapt any recipe and truly master advanced pizza dough ratios.
Finally, the best part of mastering pizza dough is sharing your creations! Invite friends and family over to enjoy the fruits of your labor. Pay attention to their feedback on the crust texture and flavor, as outside perspectives can be helpful. Document your progress by taking photos of your dough and baked pizzas.
Sharing your journey and results, perhaps on social media or in baking communities, can also be a source of encouragement and learning. Discussing your advanced pizza dough ratios and experiences with others can provide new insights and ideas for future experiments. Celebrate your successes, learn from your challenges, and enjoy the delicious process of perfecting your pizza, one batch of dough at a time.
Frequently Asked Questions
What is baker's percentage and why is it important for advanced pizza dough?
Baker's percentage expresses each ingredient as a percentage of the flour weight. It allows for precise scaling and ensures consistent results even when batch sizes change.
How do I calculate baker's percentage for my pizza dough recipe?
Divide the weight of each ingredient by the weight of the flour, then multiply by 100. This gives you the percentage of that ingredient relative to the flour.
What are some typical baker's percentage ranges for advanced pizza dough hydration?
Advanced dough often utilizes higher hydration, typically ranging from 65% to 80%. This leads to a lighter and airier crust.
What is the role of salt in advanced pizza dough ratios, and how does it affect the dough?
Salt controls gluten development and fermentation. Its percentage typically ranges from 2% to 3%, impacting flavor and dough strength.
Can I adjust baker's percentages to achieve different pizza crust characteristics?
Yes, adjusting percentages allows for customized results. For example, increasing hydration yields a more open crumb, while decreasing it creates a crispier crust.
Final Reflection: The Alchemy of Perfect Pizza Dough
The pursuit of the perfect pizza dough is not merely a culinary quest; it's a journey into the precise science of baking. Understanding advanced baker's percentages allows us to move beyond simple recipes and unlock a world of flavor and texture customization, a world increasingly relevant in today's sophisticated food landscape where consumers demand both quality and control.
The impact of mastering these ratios extends far beyond the simple act of making pizza. It fosters a deeper appreciation for the interplay of ingredients and their impact on the final product. It's about understanding the "why" behind each step, not just the "how." This understanding empowers bakers to troubleshoot, innovate, and create truly unique pizzas tailored to their preferences. The best bakers are not just cooks, but scientists and artists.
This quote, while not directly about pizza dough, perfectly encapsulates the creative and precise nature of mastering advanced baking techniques.
Now, it's your turn. Don't just follow recipes; understand them. Experiment with different flour types, hydration levels, and fermentation times. Embrace the challenge of unlocking the perfect ratio for your ideal pizza dough. The journey may be demanding, but the reward – a pizza that perfectly reflects your vision – is immeasurable. The alchemy of perfect pizza dough awaits your touch.
Unlock Your Pizzaiolo Potential: Master the Dough!
Thanks for diving into the world of perfect pizza dough! You've just learned the secrets to achieving that incredible texture and flavor through advanced baker's percentages. Now it's time to put your knowledge to the test.
- Bake Your Masterpiece: Use the formulas and techniques you just learned to create your own perfect pizza dough. Experiment with different flours and toppings – the possibilities are endless! This is your chance to show off your new skills!
- Share Your Success: Snap a picture of your amazing pizza creation and share it on social media using #BakeWithEasePizzaPerfection. Let's inspire other bakers!
- Join the BakeWithEase Community: Head over to our forum to share your experiences, ask questions, and connect with fellow baking enthusiasts. We'd love to see your results and hear your feedback.
What innovative pizza topping combinations will you create with your newfound dough mastery?