
Troubleshooting Your Fruit Pie: Fix Common Baking Issues

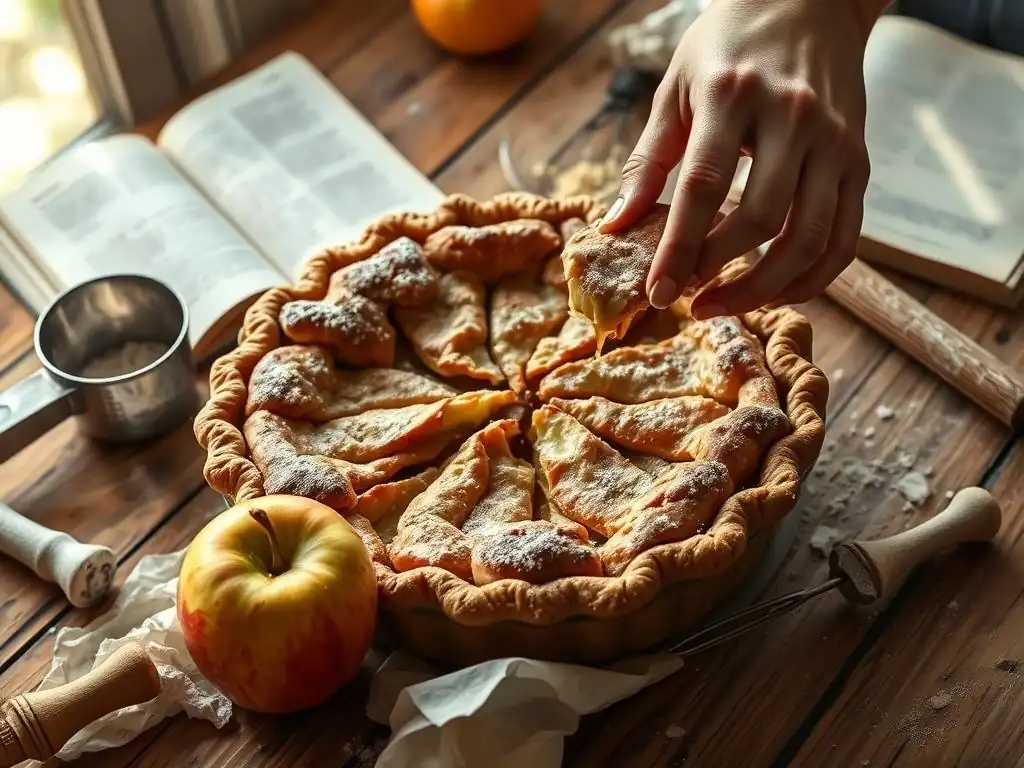
Welcome to BakeWithEase, your trusted companion in the baking journey! Ever wondered why your fruit pie is weeping, soggy, or burnt? Dive into our guide, " Troubleshooting Your Fruit Pie: Fix Common Baking Issues," and unlock the secrets to achieving pie perfection. Discover the answers to your fruit pie baking problems and turn those kitchen mishaps into sweet successes. Let's get baking!
- Introduction to Fruit Pie Baking Problems
- Fruit Pie Crust Problems and Solutions
- Fruit Filling Issues in Pies
- Fruit Pie Baking Time and Temperature Issues
- Specific Fruit Pie Problems and Solutions
- Tips for Perfecting Your Fruit Pie Baking
- Conclusion: Mastering the Art of Fruit Pie Baking
-
Frequently Asked Questions
- What causes my fruit pie filling to be too runny after baking?
- Why is my pie crust soggy on the bottom?
- How can I prevent my pie crust from burning around the edges?
- My fruit pie crust is tough and difficult to cut. What went wrong?
- How do I get my fruit pie filling to have a glossy, appealing look?
- Final Reflection: The Sweet Science of Pie Perfection
- Unlock Your Perfect Pie: Take the Next Step!
Introduction to Fruit Pie Baking Problems
Common Challenges in Baking Fruit Pies
Baking a fruit pie can be a deeply satisfying experience, filling your home with wonderful aromas and culminating in a delicious dessert. However, it's also true that numerous fruit pie baking problems can arise, turning anticipation into frustration. Bakers, from novice to experienced, frequently encounter issues ranging from a dreaded soggy bottom crust to a runny filling or a pie that bakes unevenly. These challenges are a normal part of the process, often stemming from subtle variations in ingredients, oven temperatures, or technique.
Understanding these common fruit pie baking problems is the first step towards fixing them. Whether your crust is shrinking, cracking, or just not getting that perfect golden hue, or your filling is either too firm or bubbling over excessively, there are specific reasons why these things happen and practical steps you can take to prevent or solve them. This guide aims to equip you with the knowledge to tackle these hurdles head-on, transforming potential baking disasters into successful, delicious fruit pies.
Why Fruit Pies Can Be Tricky: Understanding the Basics
Fruit pies present a unique set of challenges because they combine two distinct elements: the pastry crust and the fruit filling. Each component has its own requirements for successful baking. The crust needs precise handling, temperature control, and sufficient baking time to become flaky and golden, while the filling requires careful balancing of fruit, sugar, and thickeners to achieve the right consistency and flavor without becoming watery or dry.
The interaction between the moist fruit filling and the delicate pastry is often the source of fruit pie baking problems. As the fruit bakes, it releases juices, which can steam the bottom crust, leading to sogginess. The sugar in the filling can caramelize and bubble over, creating a sticky mess. Furthermore, variations in fruit moisture content depending on ripeness and type (e.g., fresh vs. frozen berries) can significantly impact the outcome, requiring adjustments to the recipe. Mastering fruit pie baking involves understanding these dynamics and learning how to manage them effectively.
Fruit Pie Crust Problems and Solutions
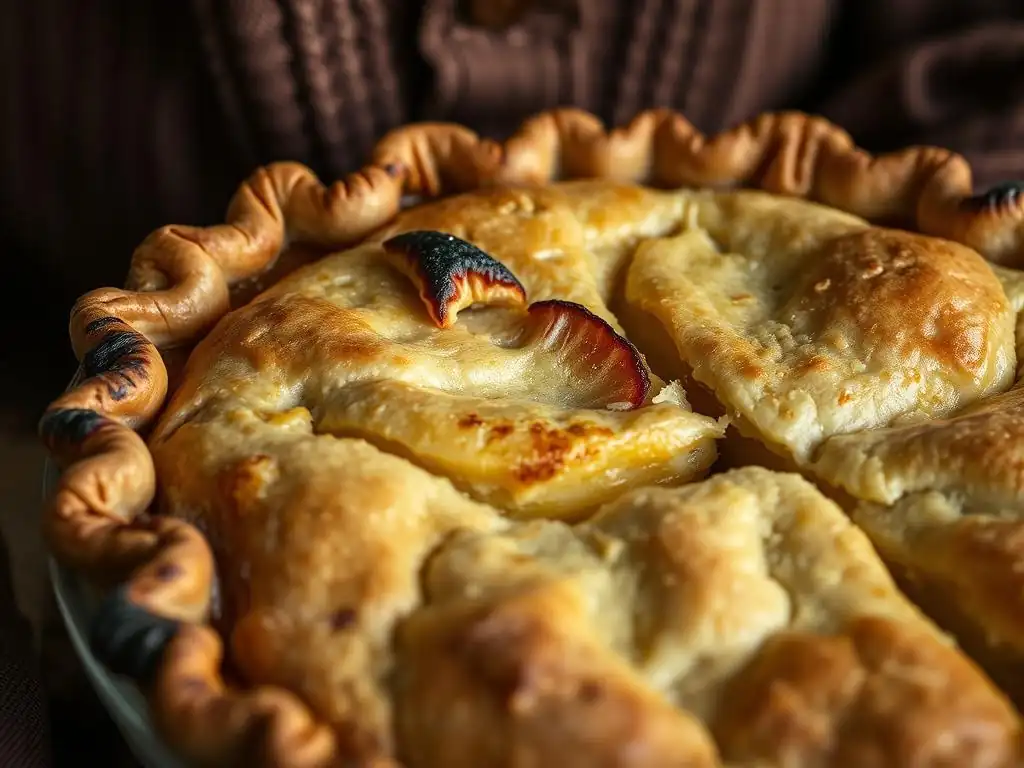
Soggy Bottom Crust: Causes and Fixes
A soggy bottom crust is perhaps one of the most common and disheartening fruit pie baking problems. It occurs when moisture from the fruit filling steams the bottom pastry before it has a chance to bake through and crisp up. This moisture can come directly from the fruit juices released during baking or from condensation trapped between the filling and the crust. Factors like a too-wet filling, insufficient pre-baking of the bottom crust, or baking at too low a temperature contribute significantly to this issue.
To combat a soggy bottom, several strategies can be employed. Ensuring your fruit filling isn't excessively watery is crucial; draining fruit juices or reducing them on the stovetop before adding them to the pie can help. Using an appropriate thickener in the filling is also key. Furthermore, protecting the bottom crust and giving it a head start in the oven is highly effective. This often involves techniques like blind baking or applying a moisture barrier before adding the filling.
Preventing a Soggy Fruit Pie Crust
Preventing a soggy bottom starts before the pie goes into the oven. One effective method is blind baking, where the bottom crust is partially baked before the filling is added. This gives the pastry a chance to set and develop structure. Typically, you would line the pie shell with parchment paper, fill it with pie weights or dried beans, and bake it at a relatively high temperature, like 375°F to 400°F (190°C to 200°C), for about 15-20 minutes until the edges are lightly golden.
Another preventative measure is creating a moisture barrier on the bottom crust. A thin layer of egg wash brushed over the bottom before adding the filling, or a light dusting of fine dry breadcrumbs or crushed cookies (like graham crackers or vanilla wafers) on the bottom crust, can help absorb excess moisture released by the fruit. These simple steps can significantly reduce the likelihood of a soggy bottom, addressing one of the most frequent fruit pie baking problems.
Baking Techniques for a Crispy Pie Bottom
Beyond preparation, specific baking techniques can promote a crispy bottom crust. Baking the pie on the lowest rack of your oven allows the bottom crust to be closer to the heat source, facilitating quicker browning and crisping. Some bakers also recommend baking the pie on a preheated baking sheet or pizza stone placed on the bottom rack. This provides a burst of heat to the bottom of the pie plate, enhancing crust crisping.
Starting the bake at a higher temperature, such as 400°F to 425°F (200°C to 220°C), for the first 15-20 minutes can also help set the bottom crust quickly before reducing the temperature to finish baking. Just be sure to monitor the top crust to prevent it from browning too quickly; you may need to loosely tent the pie with foil. Combining these techniques gives the bottom crust the best possible chance to bake through and achieve that desired flaky, golden texture, effectively solving this common fruit pie baking problem.
Tough or Dry Pie Crust: Troubleshooting Tips
A tough or dry pie crust is another common frustration among fruit pie baking problems. Instead of a tender, flaky texture that melts in your mouth, you end up with a hard, sometimes crumbly, and less enjoyable pastry. This issue is typically related to how the dough was mixed and hydrated, specifically concerning gluten development and the distribution of fat.
The primary culprits behind a tough or dry crust are overmixing the dough and improper hydration. Overmixing develops gluten, which is desirable in bread but makes pastry tough. Insufficient or improperly incorporated liquid can result in a dry, crumbly dough that's difficult to work with and bakes up hard. Understanding the science behind these issues is key to avoiding them.
Overmixing Dough: The Culprit
Overmixing pie dough is the most frequent cause of toughness. Flour contains proteins that, when combined with liquid and agitated, form gluten. While some gluten is needed to hold the crust together, too much makes it elastic and tough. When making pie dough, the goal is to minimize gluten development. This is why recipes emphasize using cold ingredients, working quickly, and mixing the dough only until it barely comes together.
When you overmix, you're essentially developing a strong gluten network, similar to kneading bread dough. This results in a crust that shrinks excessively during baking and has a chewy, tough texture rather than a tender, flaky one. The key takeaway is to handle the dough as little as possible and stop mixing as soon as the ingredients are just combined into a shaggy mass.
Hydration Issues in Pie Dough
Proper hydration is critical for a tender, flaky crust. The liquid (usually ice water) helps bring the dough together and activates a minimal amount of gluten, providing structure. However, adding too little liquid results in a dry, crumbly dough that's hard to roll and prone to cracking. Conversely, adding too much liquid makes the dough sticky and also contributes to toughness because the excess water promotes more gluten development.
The fat (butter, shortening, or a combination) also plays a crucial role in hydration and tenderness. Cold, solid pieces of fat are cut into the flour; as the crust bakes, these fat pieces melt, creating steam that puffs up layers of pastry, resulting in flakiness. If the fat isn't properly incorporated (either too small or too large pieces) or if the dough isn't adequately hydrated, the flaky structure won't develop correctly, leading to a dry or tough result. Aim for pea-sized pieces of fat distributed throughout the flour mixture before adding the liquid.
Shrinking Pie Crust: How to Prevent It
A pie crust that shrinks significantly during baking is another common fruit pie baking problem, often leaving a gap between the crust and the filling or making the pie look uneven. Shrinking is primarily caused by the dough being too warm, overworked, or not adequately rested before baking. Gluten, which develops when flour is mixed with water, is elastic. If the dough is stretched or handled roughly while warm, the gluten network is active and will contract when heated in the oven.
Preventing shrinkage involves managing dough temperature and handling. Keeping all ingredients, especially the fat and liquid, very cold is essential. This keeps the fat solid and prevents premature gluten development. Proper chilling of the dough before rolling and after placing it in the pie plate is also critical.
Proper Dough Handling Techniques
Gentle handling is paramount when making and shaping pie dough. Avoid overmixing, as discussed earlier, to minimize gluten development. When rolling the dough, try to do so evenly and avoid stretching it. If the dough resists rolling, let it rest for 5-10 minutes to allow the gluten to relax.
Once the dough is transferred to the pie plate, gently ease it into the contours without stretching. Trim the excess dough, leaving about a 1-inch overhang, and then crimp or flute the edges. This overhang provides a little buffer against shrinkage. Handling the dough lightly and efficiently reduces stress on the gluten structure, making it less likely to contract during baking.
Pre-Baking Methods to Avoid Shrinkage
Chilling the shaped pie crust before baking is a non-negotiable step to prevent shrinkage. After placing the dough in the pie plate and crimping the edges, refrigerate it for at least 30 minutes, or ideally, freeze it for 15-20 minutes. This chills the fat and allows the gluten to relax completely. Cold dough holds its shape better when it hits the hot oven.
For blind baking (partially baking the crust before filling), chilling is even more important. After chilling, line the crust with parchment paper and fill with pie weights right up to the edges. This physical weight helps hold the crust in place and prevents the sides from slumping or shrinking down the pan walls during the initial bake. Removing the weights for the last few minutes of blind baking allows the bottom to crisp up without weight.
Cracked Pie Crust: Solutions and Prevention
Cracked pie crusts, whether they appear during rolling, shaping, or baking, are another frustrating aspect of fruit pie baking problems. Cracks can compromise the pie's appearance and potentially lead to filling leaks during baking. Cracking is often a sign that the dough is too dry, too cold, or has been overworked.
Preventing cracks starts with making the dough correctly – ensuring proper hydration and avoiding overmixing. However, even with a well-made dough, cracks can still appear during the process. Knowing how to handle them, both before and after baking, is useful.
Temperature Fluctuations During Baking
While dough temperature before baking is crucial for preventing cracks during shaping, temperature fluctuations during baking can sometimes cause issues. Extreme temperature changes, such as placing a very cold pie into a relatively cool oven, can cause the crust to expand and contract unevenly, potentially leading to stress cracks, especially around the edges or vents. Ensuring your oven is fully preheated to the correct temperature before placing the pie inside helps promote even baking and reduces the risk of thermal shock to the crust.
Also, if you need to rotate the pie during baking, do so gently and try not to expose it to cold drafts if possible. Significant drops in oven temperature from opening the door too long can affect the crust's structure.
Dealing with a Cracked Crust Post-Bake
If your crust develops small cracks during baking, don't despair! For aesthetic purposes, small cracks can sometimes be "glued" together immediately after removing the pie from the oven using a bit of egg wash or a dab of butter. Brush the substance onto the crack and gently press the edges together.
If a crack is large and causing filling to bubble out, it's best to address it during baking if you catch it. You can try to gently patch the crack with a small piece of reserved pie dough or foil, though this is tricky. Post-bake, if filling has leaked and solidified, you might need to carefully chip it away once cool. Ultimately, minor cracks that don't compromise the pie's structure or cause leaks are often just cosmetic and part of the charm of a homemade pie.
Fruit Filling Issues in Pies
Runny Fruit Pie Filling: Solving the Problem
A runny fruit pie filling is perhaps the second most common of all fruit pie baking problems, right after a soggy bottom. You cut into your beautiful pie expecting a luscious, slightly thickened filling, only to have a watery mess spill out. This happens when the natural juices released by the fruit during baking are not adequately thickened by the starch or other agents added to the filling. The amount of juice released varies greatly depending on the type of fruit, its ripeness, and whether it's fresh or frozen.
Solving a runny filling issue requires understanding how thickeners work and using the right amount for the specific fruit you are using. High-moisture fruits like berries, cherries, and peaches typically require more thickener than apples. Frozen fruits, which release more liquid as they thaw and bake, also demand increased thickening power.
Thickening Agents for Fruit Pies: A Comparison
Several different thickeners can be used in fruit pies, each with its own properties. The most common are flour, cornstarch, tapioca (instant or pearl), and sometimes pectin or arrowroot. Choosing the right one depends on the fruit, desired texture, and whether the pie will be served hot or cold.
Flour is the least potent thickener and can sometimes give the filling a slightly cloudy appearance or pasty texture if too much is used. Cornstarch is more powerful than flour and creates a clear, glossy filling, but it can break down if overcooked or frozen and thawed. Tapioca (especially instant tapioca) is excellent for thickening berry pies, resulting in a clear, slightly gel-like consistency that holds up well to freezing.
Pearl tapioca needs to be soaked first. Pectin is naturally present in some fruits and can be added to others to aid thickening. Arrowroot is similar to cornstarch but is effective at lower temperatures and doesn't break down with acidity.
Using Cornstarch vs. Tapioca vs. Flour
For many classic fruit pies, cornstarch is a popular choice for its thickening power and ability to create a glossy filling. A general guideline is to use about 2 to 3 tablespoons of cornstarch per 4 cups of fruit for moderately juicy fruits like apples or peaches. For very juicy fruits like berries or cherries, you might need 3 to 4 tablespoons. Mix the cornstarch thoroughly with the sugar and other dry ingredients before combining with the fruit to prevent lumps.
Instant tapioca is often preferred for high-moisture fruits like blueberries, raspberries, and cherries because it absorbs a lot of liquid and doesn't make the filling cloudy. It also holds up well to the acidity of these fruits. A common ratio is 2 to 4 tablespoons of instant tapioca per 4 cups of fruit, depending on how juicy the fruit is. It needs about 15-20 minutes to soften and start absorbing juices before the pie is baked. Flour is the weakest thickener, typically requiring 3 to 5 tablespoons per 4 cups of fruit for a moderate thickness. It's often used in apple pies but can sometimes result in a less clear filling than cornstarch or tapioca. Experimenting with different thickeners is key to finding your preference and solving fruit pie baking problems related to filling consistency.
Adjusting Fruit Pie Filling Consistency
Getting the right consistency for your fruit pie filling is crucial. If your filling is too runny after baking, it likely needed more thickener. While you can't easily fix a runny filling after the pie is baked, you can learn for next time. Always consider the fruit's moisture level. Fresh, ripe summer berries are much juicier than firm, crisp apples.
If you're unsure, err slightly on the side of caution with thickener, especially with very juicy fruits. You can also pre-cook juicy fruit fillings briefly on the stovetop (simmering for 5-10 minutes) to allow some of the excess liquid to evaporate before pouring the mixture into the pie shell. This step also gives the thickener a head start in gelatinizing.
Remember that fillings continue to thicken as the pie cools, so always let the pie cool completely (often for several hours) before slicing to allow the thickeners to fully set. Cutting into a hot fruit pie almost guarantees a runny mess.
Filling Too Sweet or Too Tart: Balancing Flavors
Achieving the perfect balance between sweetness and tartness is key to a delicious fruit pie. If your filling is too sweet, it can taste cloying and mask the natural fruit flavor. If it's too tart, it can be unpleasantly sharp. This balance depends on the natural sweetness and acidity of the fruit you're using, as well as the amount of added sugar and any acidic components like lemon juice.
Fixing this requires tasting and adjusting before the filling goes into the pie shell. It's much harder to correct fruit pie baking problems related to flavor after the pie is baked. Always taste your fruit and adjust the sugar and acid accordingly.
Adjusting Sugar Levels in Fruit Pies
The amount of sugar needed in a fruit pie filling varies significantly based on the fruit's ripeness and natural sweetness. Very ripe fruit requires less sugar than firm, less ripe fruit. For example, a blueberry pie might need anywhere from 1/2 cup to 1 cup of sugar per 4-5 cups of berries, depending on how sweet the berries are and personal preference. Apple pies typically require 1/4 cup to 3/4 cup sugar per 6-8 cups of sliced apples.
Always taste a piece of the fruit you plan to use. Is it very sweet or quite tart? Start with the lower end of the sugar range in your recipe and taste the fruit mixture (before adding any raw thickener like cornstarch directly) to see if it tastes balanced. Remember that some sweetness is needed to balance the acidity and help the fruit release juices, but you don't want to overwhelm the fruit's natural flavor.
Adding Acidity to Sweet Fillings
If your fruit is very sweet and the filling tastes flat or too sweet, adding a touch of acidity can brighten the flavors and create balance. Lemon juice is the most common addition. A tablespoon or two of fresh lemon juice can cut through the sweetness and enhance the fruit's natural tartness, making the overall flavor more vibrant.
Other options include a splash of apple cider vinegar (especially in apple pies), a pinch of citric acid, or even a bit of zest from a citrus fruit. These acidic components help balance the sweetness and bring out the best in the fruit. Taste and add small amounts until the flavor is just right. This simple step can elevate a good fruit pie to a great one and solve fruit pie baking problems related to flavor imbalance.
Fruit Pie Filling Bubbling Over: Prevention Strategies
A pie filling that bubbles over the edges during baking is a messy fruit pie baking problem that can also lead to a burnt crust or a lack of sufficient filling inside the pie. Bubbling over occurs when the filling heats up, expands, and the steam and juices have no easy way to escape the confines of the crust. Overfilling the pie or not providing adequate vents are common causes.
Preventing boil-overs involves giving the filling room to expand and providing pathways for steam to escape. This protects your oven and ensures your beautiful crimped edges aren't ruined by overflowing filling.
Venting the Pie Crust Properly
Proper venting is crucial for any double-crust pie. Vents are openings in the top crust that allow steam to escape as the fruit filling heats and bubbles. Without adequate vents, pressure builds up inside the pie, forcing the filling out through the weakest points, usually the edges.
Cut several generous slits or shapes (like stars or leaves) in the top crust before placing it over the filling. Aim for at least 4-6 substantial vents spaced evenly across the top. If you're using a lattice top, the gaps between the lattice strips usually provide sufficient venting, though larger gaps are better for very juicy fillings. Ensure the vents go all the way through the crust.
Managing Oven Temperature
Baking temperature also plays a role in boil-overs. Baking at too high a temperature can cause the filling to heat and bubble too rapidly before the crust has fully set, leading to overflow. While starting at a higher temperature can help set the bottom crust, you generally reduce the temperature for the majority of the baking time (often to 350°F - 375°F / 175°C - 190°C).
If you notice your pie is starting to bubble over excessively early in the baking process, you can try reducing the oven temperature slightly. Placing a baking sheet or aluminum foil on the rack below the pie is also a smart preventative measure to catch any drips and make cleanup easier, even with proper venting.
Fruit Pie Baking Time and Temperature Issues
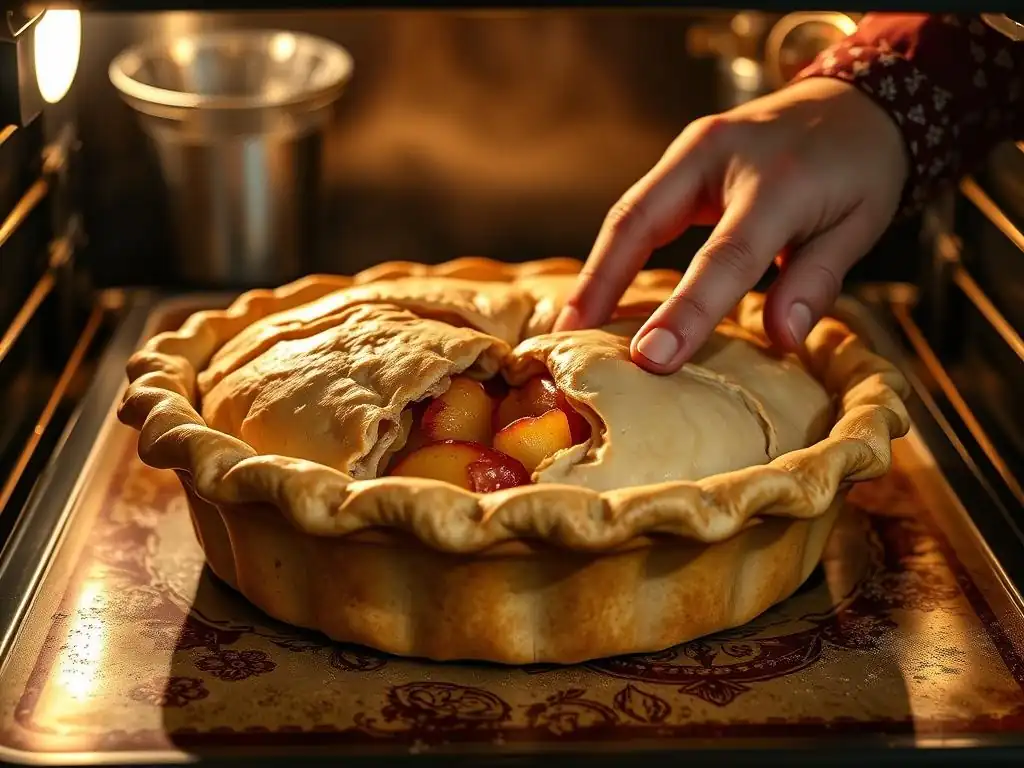
Underbaked Fruit Pie: Ensuring Doneness
An underbaked fruit pie is one of the most disappointing fruit pie baking problems. The crust might be pale or doughy, and the filling might not be fully thickened or the fruit not tender. This usually happens because the pie didn't spend enough time in the oven or the oven temperature wasn't accurate.
Ensuring your fruit pie is properly baked requires paying attention to visual cues and sometimes using a probe thermometer. Baking time is always an estimate; the true indicator of doneness is how the pie looks and acts.
Determining When Your Fruit Pie Is Done
A properly baked fruit pie should have a golden brown crust, not just on the top, but also visible on the bottom and edges (if using a glass pie plate). For double-crust pies, look for the filling to be visibly bubbling through the vents, especially in the center of the pie. The bubbles should appear thick and syrupy, not watery.
A more precise method, especially for pies with less visible vents, is to use an instant-read thermometer. Carefully insert the thermometer into the center of the filling through a vent. The filling should register at least 200°F (93°C) to indicate that the thickeners have fully activated and the fruit is hot enough. This temperature check is a reliable way to confirm doneness and avoid fruit pie baking problems like undercooked filling.
Adjusting Baking Time for Different Fruits
Different fruits require different baking times because they vary in firmness and moisture content. Apples, especially firmer varieties like Granny Smith or Honeycrisp, take longer to soften than softer fruits like berries or peaches. A standard apple pie might bake for 50-70 minutes at 375°F (190°C), while a berry pie might be done in 45-60 minutes.
If your recipe specifies a time range, always check for doneness towards the lower end of the range and add time as needed. If the top crust is browning too quickly while the rest of the pie still needs time, loosely tent the pie with aluminum foil. Using the thermometer check is particularly helpful when baking with fruits you haven't used before or when adjusting recipes.
Overbaked Fruit Pie: Avoiding Dryness
While underbaking is a common fruit pie baking problem, overbaking can also occur, resulting in a dry, sometimes tough crust and a filling that has reduced too much, becoming jammy or even burnt around the edges. Overbaking usually happens when the pie is left in the oven too long or baked at too high a temperature without adequate monitoring.
Avoiding overbaking requires vigilance during the latter part of the baking time and being prepared to adjust temperature or cover the pie if needed.
Monitoring Crust Color and Filling Consistency
Keep a close eye on your pie, especially after the initial 30-40 minutes of baking. The top crust should be a rich, golden brown, not a pale yellow or a dark, almost burnt color. If the edges of the crust are browning too quickly, you can cover them with pie crust shields or strips of aluminum foil.
Observe the filling bubbling through the vents. While you want it to bubble vigorously, you don't want it to reduce so much that it looks like hard candy or appears dry. If the filling seems to be drying out or the crust is getting too dark but the filling hasn't reached the target temperature (200°F/93°C), it might indicate that the oven temperature is too high or the fruit was naturally less juicy.
Reducing Oven Temperature Midway Through Baking
Many fruit pie recipes call for starting the bake at a higher temperature (e.g., 400°F-425°F / 200°C-220°C) for the first 15-20 minutes to help set the crust, particularly the bottom, and then reducing the temperature to a moderate level (e.g., 350°F-375°F / 175°C-190°C) for the remainder of the baking time. This two-stage approach helps ensure the crust bakes through without the top getting too dark too quickly.
If your recipe only calls for one temperature and you find your pie is browning too fast before the filling is done, try reducing the oven temperature by 25°F (15°C) and continue baking, loosely tenting with foil if necessary. This adjustment can slow down the crust browning while allowing the filling to finish cooking, helping prevent fruit pie baking problems related to overbaking.
Specific Fruit Pie Problems and Solutions
Apple Pie Problems and Solutions
Apple pies are a classic, but they come with their own set of potential fruit pie baking problems. The main challenge with apples is ensuring they soften adequately without releasing so much juice that the filling becomes runny or the bottom crust gets soggy. The type of apple used significantly impacts the outcome; some varieties, like McIntosh or Cortland, break down easily and release a lot of liquid, while others, like Granny Smith or Honeycrisp, hold their shape better but take longer to soften.
To combat these issues, choose a mix of apple varieties – some for flavor/softness and some for structure. Pre-cooking the apple filling briefly on the stovetop (simmering for 5-10 minutes) is an excellent way to soften the apples slightly, allow excess moisture to evaporate, and give the thickener a head start. This also helps prevent the "gap" between the filling and the top crust that sometimes occurs as uncooked apples shrink during baking.
Ensure you use enough thickener (flour, cornstarch, or tapioca work well) for the volume and type of apples. A typical ratio is 1/4 to 1/2 cup flour or 2-3 tablespoons cornstarch/tapioca per 6-8 cups of sliced apples.
Berry Pie Problems and Solutions
Berry pies are notorious for fruit pie baking problems related to excessive moisture, often resulting in a very runny filling and a soggy bottom crust. Berries, especially when ripe or frozen, release a large amount of juice as they bake. This high moisture content requires careful handling and effective thickening.
Using adequate thickener is paramount for berry pies. Instant tapioca is often favored because it absorbs moisture well and creates a clear, gel-like filling that doesn't break down. Use 3 to 4 tablespoons of instant tapioca per 4 cups of berries for a reliably set filling.
Let the berry-tapioca-sugar mixture sit for 15-20 minutes before filling the pie shell to allow the tapioca to begin absorbing juices. Additionally, blind baking the bottom crust is highly recommended for berry pies to give the pastry a head start against the influx of moisture. Baking on a hot baking sheet on the lowest oven rack also helps ensure the bottom crust gets sufficient heat.
Cherry pies, like berry pies, often present fruit pie baking problems related to excessive juice. Pitted cherries release a significant amount of liquid when heated. Getting the filling to set properly while ensuring the cherries are tender but not mushy can be tricky.
Similar to berry pies, using the right thickener is essential. Cornstarch or tapioca are good choices for cherry pie. A common ratio is 3 to 4 tablespoons of cornstarch or tapioca per 4 cups of pitted cherries.
Combining the cherries with sugar and thickener and letting it sit for 15-20 minutes allows some juice to be released and the thickener to begin its work. Some bakers even drain a portion of the released juice and reduce it on the stovetop before adding it back to the filling mixture to concentrate the flavor and reduce excess liquid. Blind baking the bottom crust is also highly recommended for cherry pies to combat sogginess.
Tips for Perfecting Your Fruit Pie Baking
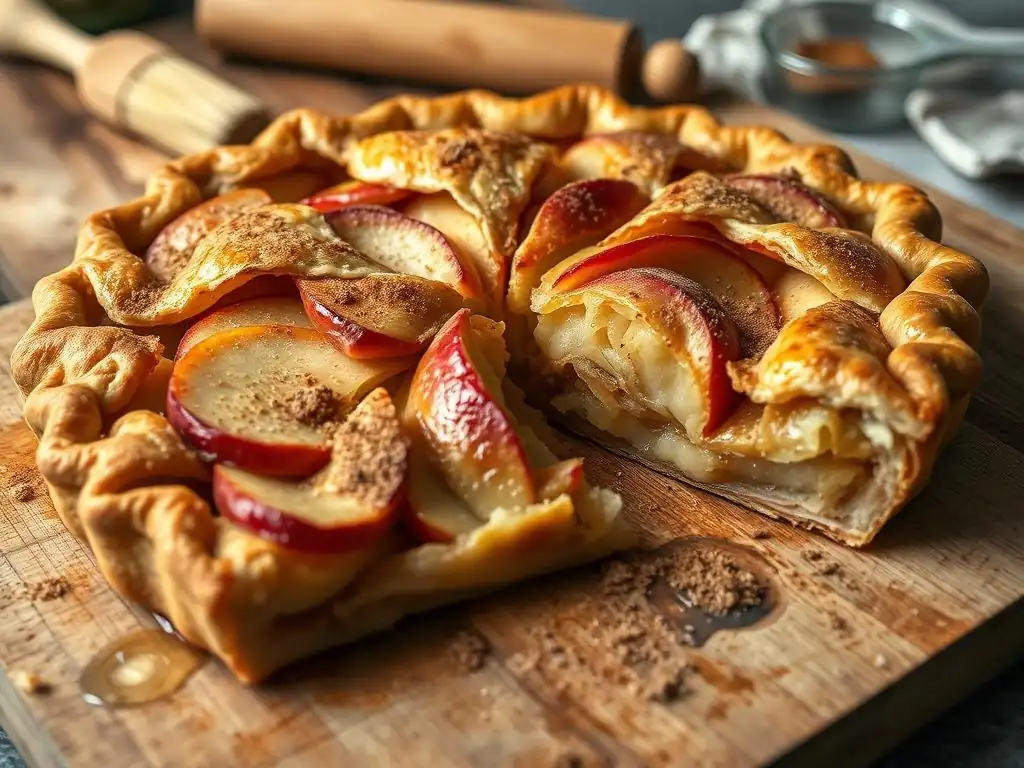
Best Practices for Fruit Pie Baking
Overcoming fruit pie baking problems and achieving consistent success comes down to adopting a few best practices. Firstly, use cold ingredients for your pastry – cold butter, cold shortening, and ice water. This is fundamental for a flaky crust. Secondly, measure your ingredients accurately, especially flour and thickeners; using a kitchen scale is ideal for flour. Thirdly, don't overwork your dough; mix only until it comes together and handle it gently.
Fourthly, always chill your pie dough adequately before rolling and after shaping in the pie plate. This relaxes the gluten and solidifies the fat, preventing shrinkage and promoting flakiness. Fifthly, understand your oven; oven temperatures can vary, so using an oven thermometer is helpful. Finally, be patient – allow the baked pie to cool completely before slicing (often 3-4 hours for fruit pies) to allow the filling to finish setting.
Essential Tools for Baking Fruit Pies
Having the right tools can make a significant difference in tackling fruit pie baking problems. A good quality pie plate (glass or ceramic is often preferred for even heating, though metal can help with crisping the bottom) is essential. A pastry blender or food processor helps cut the fat into the flour efficiently without overworking the dough.
Other useful tools include a rolling pin, a pastry mat (often with measurements), pie weights for blind baking, a pastry brush for egg washes, and a sharp knife or pastry wheel for trimming and venting. An oven thermometer ensures accurate baking temperatures, and an instant-read thermometer can help verify the filling is done. Pie crust shields or foil strips are invaluable for protecting the edges from overbrowning.
Storing Fruit Pies for Optimal Freshness
Proper storage ensures your hard work results in a delicious pie even days later. Most fruit pies, especially those made with starch thickeners like cornstarch or flour, can be stored at room temperature for up to 24 hours after cooling. However, for longer storage or in warm, humid conditions, refrigeration is recommended to prevent spoilage and maintain filling consistency, which can sometimes loosen at room temperature over time.
To store, cool the pie completely on a wire rack. Once cool, cover it loosely with plastic wrap or foil, or place it in a pie carrier. Refrigerated fruit pies are typically best consumed within 3-4 days. For longer storage, many fruit pies freeze well. Wrap cooled pie tightly in plastic wrap and then in foil before freezing for up to 3-4 months. Thaw overnight in the refrigerator before serving, and you can reheat slices gently in the oven (around 300°F/150°C) to crisp the crust.
Conclusion: Mastering the Art of Fruit Pie Baking
Frequently Asked Questions
What causes my fruit pie filling to be too runny after baking?
Runny pie filling is often caused by insufficient thickener or not allowing the pie to cool completely. Ensure you use enough cornstarch, tapioca, or flour, and let the pie rest for several hours after baking.
Why is my pie crust soggy on the bottom?
A soggy bottom crust can result from insufficient pre-baking or a filling that's too wet. Try blind-baking the crust or using a metal pie pan for better heat conduction.
How can I prevent my pie crust from burning around the edges?
To avoid burnt edges, use pie shields or loosely cover the edges with foil during the last part of the baking time. This helps to regulate the heat and prevents over-browning.
My fruit pie crust is tough and difficult to cut. What went wrong?
A tough crust is often due to overworked dough or too much water. Handle the dough gently and use only enough water to bring it together.
How do I get my fruit pie filling to have a glossy, appealing look?
Achieving a glossy filling involves using the right amount of sugar and thickener. A light glaze of melted butter or apricot jam after baking can also enhance the shine.
Final Reflection: The Sweet Science of Pie Perfection
The seemingly simple act of baking a fruit pie reveals a surprising complexity, a delicate dance between ingredients, temperature, and technique. A perfectly baked pie, bursting with juicy fruit and encased in a flawlessly golden crust, is a testament to patience and precision. But even the most experienced bakers encounter challenges; understanding these challenges is the key to unlocking consistent success.
This exploration into common fruit pie baking problems has highlighted not just the technical aspects, but also the deeply personal connection we have with this classic dessert. The frustration of a soggy bottom or a cracked crust is often mirrored by the joy of a perfectly executed pie, a symbol of comfort, tradition, and shared experiences. Baking is at once child's play and adult joy. And cooking is all about caring.
- Alma Flor Ada. This quote perfectly encapsulates the emotional investment we make in our baking endeavors, particularly when it comes to something as beloved as fruit pie.
So, the next time you find yourself facing a less-than-perfect pie, remember the lessons learned here. Don't be discouraged! Instead, view each challenge as an opportunity to refine your skills, to understand the subtle nuances of baking, and to ultimately create a pie that is not only delicious but also deeply satisfying. Embrace the process, experiment with different techniques, and most importantly, enjoy the journey of transforming simple ingredients into a masterpiece. Your perfect pie awaits.
Unlock Your Perfect Pie: Take the Next Step!
Thanks for taking the time to explore common fruit pie problems and their solutions! We hope you've gained some valuable insights to help you bake the perfect pie. Now it's time to put that knowledge to the test.
- Bake your dream pie! Use what you've learned to tackle your next pie-baking adventure. Experiment with different fillings and crusts, and don't be afraid to get creative.
- Share your baking journey! Tell us about your experiences, successes, and even your failures – we love to hear from our community!
- Discover more pie tips and recipes on our website for even more baking inspiration.
Ready to create your masterpiece? What unique twist will you add to your next fruit pie?