
Troubleshooting Laminated Doughs: Fix Your Flaky Fails


Welcome to BakeWithEase, your trusted companion in the delightful world of baking! Ever dreamt of perfectly flaky croissants or melt-in-your-mouth puff pastry? Dive in and unlock the secrets to mastering laminated dough. Don't let common pitfalls ruin your baking dreams! Read on to discover expert solutions and turn your flaky fails into stunning successes, no matter your skill level. Ready to troubleshoot your dough and achieve baking perfection?
- Mastering Laminated Doughs
- Common Laminated Dough Problems & Solutions
- Problem 1: Tough Dough
- Problem 2: Butter Leakage
- Problem 3: Uneven Layers
- Problem 4: Dough Shrinkage
- Problem 5: Lack of Flakiness
- Problem 6: Sticky Dough
- Problem 7: Dough Tearing
- Advanced Troubleshooting
- Achieving Flaky Perfection
-
Frequently Asked Questions
- What is laminated dough and why is it so challenging to work with?
- My butter is melting during lamination. What am I doing wrong?
- My dough is tearing when I'm rolling it out. How can I prevent this?
- My pastries aren't rising properly in the oven. What could be the problem?
- What are some easy laminated dough recipes for beginners?
- Final Reflection: Mastering the Art of Flaky Perfection
- Unlock Your Laminated Dough Mastery!
Mastering Laminated Doughs
Creating beautiful, flaky laminated doughs like croissants, pain au chocolat, and puff pastry can feel like a delicate dance between dough and butter. Success hinges on a few key principles: maintaining cold temperatures, developing sufficient but not excessive gluten, and executing precise folding techniques. When these elements align, the magic happens in the oven as the layers of butter melt and create steam, separating the thin sheets of dough into that coveted airy, flaky structure.
Understanding the process is the first step to solving common laminated dough problems. Each fold and roll contributes to the final layer count – for instance, three single folds on a basic dough block with a single butter block results in 27 layers (3^3). The quality of these layers, their evenness, and the integrity of the butter within them are paramount for achieving that perfect crisp exterior and tender, layered interior. Mastering this technique is incredibly rewarding, transforming simple ingredients into stunning pastries.
Common Laminated Dough Problems & Solutions
Understanding the Science of Lamination
Lamination is fundamentally about creating alternating layers of dough and fat. When baked, the water in the butter turns to steam, pushing the dough layers apart and creating pockets of air. This process relies on the dough having enough structure to hold its shape but also being extensible enough to be rolled thinly without tearing. The fat, typically butter, needs to remain solid and distinct from the dough until it melts in the oven, preventing the layers from merging prematurely.
The temperature plays a critical role throughout the lamination process. The butter must be cold enough to stay solid and form distinct layers, yet warm enough to be pliable and roll out with the dough without cracking or breaking. The dough itself needs to be kept cool to prevent the butter from melting and to control gluten development. This delicate temperature balance, often requiring refrigeration between steps, is key to resolving many laminated dough problems solved by bakers.
Diagnosing Laminated Dough Issues
Identifying the specific issue you're facing is crucial for effective troubleshooting. Is your dough shrinking back excessively after rolling? Are you seeing butter leaking out during proofing or baking? Is the final product dense and bready instead of light and flaky? Each symptom points to a different part of the process that may have gone awry, from initial mixing and resting to folding, proofing, and baking.
Observing the dough at each stage provides vital clues. Feel its elasticity, check its temperature, and examine the layers after a fold. For example, if the dough feels tight and resistant to rolling, it likely needs more rest. If butter is squeezing out, the butter might be too warm or the edges weren't sealed properly. A systematic approach to identifying these signs is the most effective way to tackle laminated dough problems solved through targeted adjustments.
Problem 1: Tough Dough

Overdeveloped Gluten
Overmixing the initial dough can lead to excessively strong and elastic gluten development, making the dough tough and resistant to rolling. While some gluten structure is necessary, too much makes it difficult to roll the dough thinly without it springing back or tearing. This results in thicker, less distinct layers and a final product that is chewy rather than tender and flaky.
For instance, mixing a standard croissant dough in a stand mixer beyond the point where the dough just comes together and is relatively smooth (often 5-8 minutes on low speed after incorporation) can overwork the gluten. The ideal dough should be extensible enough to stretch without tearing but still have some structure. Overdevelopment makes it feel tight and difficult to manipulate during the crucial lamination steps, creating laminated dough problems solved by careful initial mixing.
Solution: Gentle Mixing
To avoid overdeveloped gluten, mix the dough only until the ingredients are just combined and a smooth, pliable dough forms. Avoid prolonged kneading, especially with high-protein flours. The gluten will continue to develop naturally during the resting periods in the refrigerator.
Using a stand mixer with a dough hook on a low speed (like setting 2 or 3) is recommended. Stop mixing as soon as the dough pulls away from the sides of the bowl and looks relatively smooth, typically within 5-8 minutes depending on the mixer and ingredients. Resist the urge to knead it extensively by hand afterward. This gentle approach is key to preventing laminated dough problems solved by controlling gluten.
Solution: Adequate Resting
Proper resting periods are essential for allowing gluten to relax. After the initial mixing and before lamination begins, the dough should rest in the refrigerator for several hours, often overnight (8-12 hours). This slow, cold rest allows the gluten network to relax significantly.
Furthermore, resting the dough for 30-60 minutes in the refrigerator between each fold is critical. This allows the gluten to relax after the stress of rolling, making the dough more pliable for the next fold and reducing shrinkage. Skipping or shortening these rests is a common cause of tough dough and laminated dough problems solved by patience.
Problem 2: Butter Leakage
Incorrect Butter Temperature
Butter that is too soft or too warm will melt and ooze out of the dough layers during rolling, folding, or even proofing. If the butter is too cold and hard, it will crack and break into pieces during rolling, creating uneven layers or pockets where butter is missing. The butter's temperature is perhaps the most critical factor in preventing butter leakage.
The ideal butter temperature for lamination is typically between 40°F and 50°F (4°C to 10°C). At this temperature, the butter block should be pliable and bend slightly without breaking, similar in consistency to the dough. Butter that is warmer than this range is prone to melting under the pressure of rolling or the warmth of your hands.
Solution: Temperature Control
Maintain strict temperature control throughout the entire process. Keep your workspace cool, and chill the dough and butter whenever they feel warm or soft. Use a thermometer to check the temperature of your butter block before enclosing it in the dough.
If the butter feels too hard, let it sit at room temperature for just a few minutes, or gently tap it with a rolling pin to make it more pliable. If it feels too soft, place it back in the refrigerator for 10-15 minutes. Always rest the dough in the refrigerator for at least 30 minutes between folds to keep both the dough and butter cold and firm. This vigilance helps prevent laminated dough problems solved by managing temperature.
Solution: Proper Sealing
Ensuring the butter block is fully enclosed and sealed within the dough before the first fold is crucial. Any gaps or weak points can become escape routes for the butter during subsequent rolling and folding.
When enclosing the butter, overlap the dough edges slightly and pinch them firmly to create a tight seal. During rolling, pay attention to the edges; if butter starts to show through, gently patch the area with a bit of excess dough or flour and try to avoid rolling directly over that spot with excessive pressure. A well-sealed butter packet is fundamental to avoiding laminated dough problems solved by careful technique.
Problem 3: Uneven Layers
Inconsistent Folding and Rolling
Uneven layers result from not folding the dough squarely or applying uneven pressure during rolling. If one side is rolled thinner than the other, or if the folds are not aligned neatly, the layers will be thicker in some areas and thinner in others, leading to an inconsistent rise and texture in the final product.
For example, during a letter fold (or single fold), if the dough isn't folded into perfect thirds, or if the edges aren't squared off, the resulting layers will be irregular. Similarly, if you press down harder on one side of the dough than the other while rolling, you'll compress the layers unevenly, creating laminated dough problems solved by attention to detail.
Solution: Precise Folding
Always aim for square corners and even dimensions when rolling out the dough before each fold. Before folding, gently brush off any excess flour that could prevent the layers from sticking together. For a letter fold, visualize dividing the dough rectangle into three equal sections and fold one end just past the center, then fold the other end over it, like folding a letter.
For a book fold (or double fold), visualize dividing the dough into quarters, fold the two outer edges towards the center line, and then fold the dough in half along that center line. Use a bench scraper to help keep the edges straight and the folds neat. Precision in folding is key to achieving perfectly even laminated dough problems solved by careful execution.
Solution: Even Rolling Pressure
Apply consistent, even pressure with your rolling pin across the entire surface of the dough. Start rolling from the center and work your way outwards, turning the dough frequently (90 degrees) to ensure it expands evenly in all directions and doesn't stick to the surface.
Avoid pressing down too hard, which can tear the dough or squeeze out the butter. If the dough is resisting, stop and let it rest in the refrigerator for 10-15 minutes before continuing. Using a heavy, smooth rolling pin can help distribute pressure more evenly. Patience and consistent technique are vital for preventing laminated dough problems solved by careful rolling.
Problem 4: Dough Shrinkage
Insufficient Gluten Relaxation
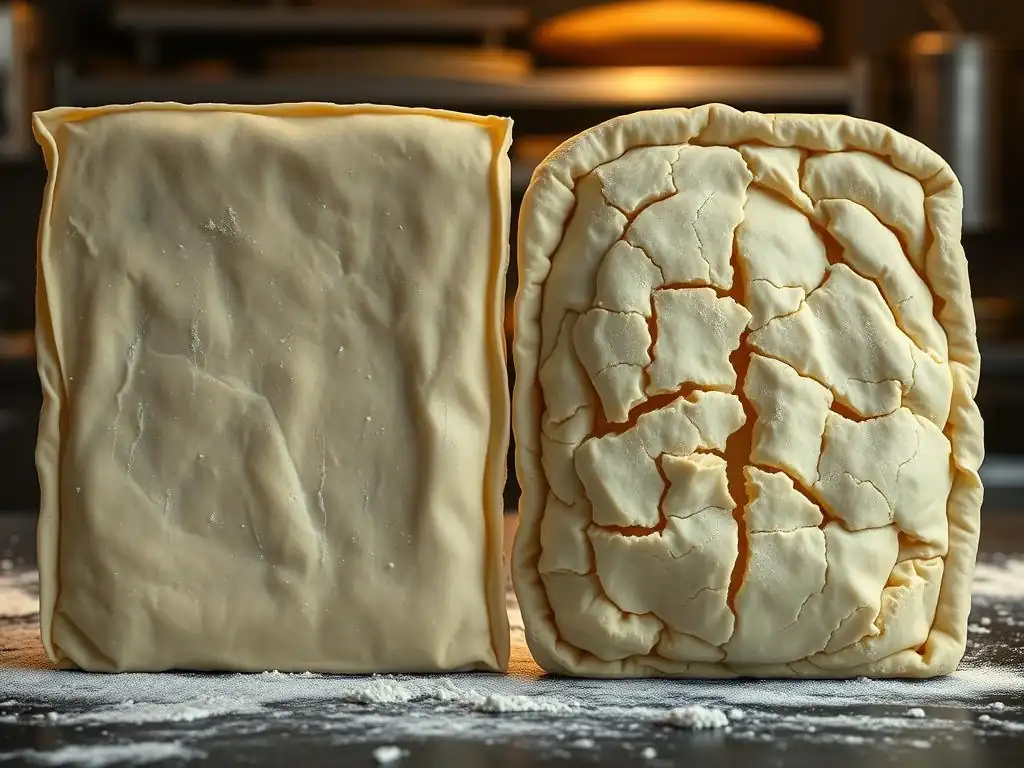
Dough shrinkage during rolling or proofing is a clear sign that the gluten network is too tense and hasn't had sufficient time to relax. When dough is rolled out, the gluten strands are stretched. If they don't get adequate rest, they will naturally contract, pulling the dough back to its original shape or smaller.
This tension can be caused by insufficient resting periods between folds, rolling the dough when it's too cold, or overworking the dough initially. A dough that constantly springs back as you roll it is exhibiting this issue. This resistance makes it difficult to achieve the desired thinness and shape, leading to laminated dough problems solved by proper rest.
Solution: Proper Resting and Proofing
The most effective solution for shrinkage is to allow the dough ample rest time, especially in the refrigerator. As mentioned earlier, 30-60 minutes between folds is crucial for gluten relaxation. If the dough feels tight while rolling, stop, cover it, and refrigerate it for another 15-30 minutes before attempting to roll again.
During proofing, allow the shaped pastries to proof in a warm, humid environment (around 75-80°F or 24-27°C) until they are visibly puffy and jiggly, but not so warm that the butter melts. Proper proofing allows the dough layers to expand gently, further relaxing the gluten before baking.
Solution: Optimized Baking Temperature
While primarily a proofing issue, baking temperature can also influence shrinkage post-shaping. Baking at a too-low temperature can cause the butter to melt and leak before the dough structure is set, potentially leading to some collapse or shrinkage.
Ensure your oven is preheated accurately to the specified temperature (often starting high, around 400-425°F or 200-220°C, then sometimes lowered). A hot oven helps set the dough structure quickly, trapping the steam from the melting butter and minimizing the chance for significant shrinkage during the initial phase of baking.
Problem 5: Lack of Flakiness
Poor Butter Distribution
The hallmark of laminated dough is its flakiness, which comes from distinct layers of dough separated by melted butter that creates steam. If the butter is not evenly distributed throughout the layers – perhaps due to cracking during rolling, leakage, or uneven folding – you will end up with areas that are dense and bready and others that might be greasy, lacking that uniform flaky texture.
Using butter that is too hard or too soft, not sealing the butter correctly, or not rolling the dough evenly can all contribute to poor butter distribution. For example, if a hard butter block cracks into several pieces inside the dough, you'll have pockets of butter and large areas with none, preventing proper lamination.
Solution: Even Butter Layers
Ensure the butter block is pliable and uniform before enclosing it in the dough. Roll the dough and butter together with consistent pressure, ensuring the butter extends to the edges (while maintaining the seal). Be meticulous with your folds, making sure they are neat and square so that the butter layers are stacked evenly.
If you notice the butter cracking during rolling, stop, cover the dough, and let it rest in the refrigerator for 10-15 minutes to allow the butter to soften slightly before continuing gently. This attention to detail during the lamination process is key to achieving even layers and preventing laminated dough problems solved by careful handling.
Solution: Steam and Baking Techniques
A hot oven is essential for generating steam from the butter, which creates the lift and separation needed for flakiness. Baking at too low a temperature or in an oven that isn't fully preheated will result in the butter melting and potentially being absorbed by the dough before it has a chance to create steam and lift the layers.
Many recipes call for starting the bake at a high temperature (e.g., 425°F/220°C for 10-15 minutes) to create a strong steam push and set the layers, then lowering the temperature (e.g., to 375°F/190°C) to finish baking and achieve a golden-brown color without burning. Ensuring adequate humidity in the oven (sometimes achieved by placing a tray of water at the bottom) can also help promote steam production, addressing laminated dough problems solved by oven environment.
Problem 6: Sticky Dough
High Hydration Levels
A dough with a high hydration level (a high ratio of water or liquid to flour) can be inherently sticky and challenging to work with, especially during lamination. While hydration is necessary for dough development and texture, excessive liquid makes the dough prone to sticking to surfaces and the rolling pin, making clean folds difficult and potentially incorporating too much flour during rolling.
For instance, a brioche dough used for lamination might have a higher hydration than a standard croissant dough due to the addition of eggs and milk. While this enriches the dough, it also increases stickiness. Working with such dough requires specific techniques to manage its tackiness, tackling laminated dough problems solved by handling wet dough.
Solution: Adjusting Liquid Ratio
If you consistently struggle with sticky dough using a particular recipe, consider slightly reducing the amount of liquid (water or milk) by a small percentage (e.g., 1-2%) in future attempts. This can make the dough more manageable without drastically affecting the final texture.
However, be cautious not to reduce the liquid too much, as this can result in a dry, tough dough lacking extensibility. Finding the right hydration balance for your flour and environment is key. Small adjustments based on observation are better than drastic changes.
Solution: Working with Sticky Dough
When working with sticky dough, resist the urge to add excessive amounts of flour to your work surface or rolling pin. While a light dusting is necessary, too much flour can get incorporated into the layers, creating dry streaks and hindering proper lamination.
Instead, rely on keeping the dough and your hands cold. Work quickly, and if the dough becomes too sticky, place it back in the refrigerator for 15-20 minutes to chill down. Using a non-stick surface or a large silicone mat can also be helpful. Some bakers lightly oil their hands or the rolling pin instead of using flour. These techniques help manage laminated dough problems solved by strategic handling.
Problem 7: Dough Tearing
Weak Gluten Structure
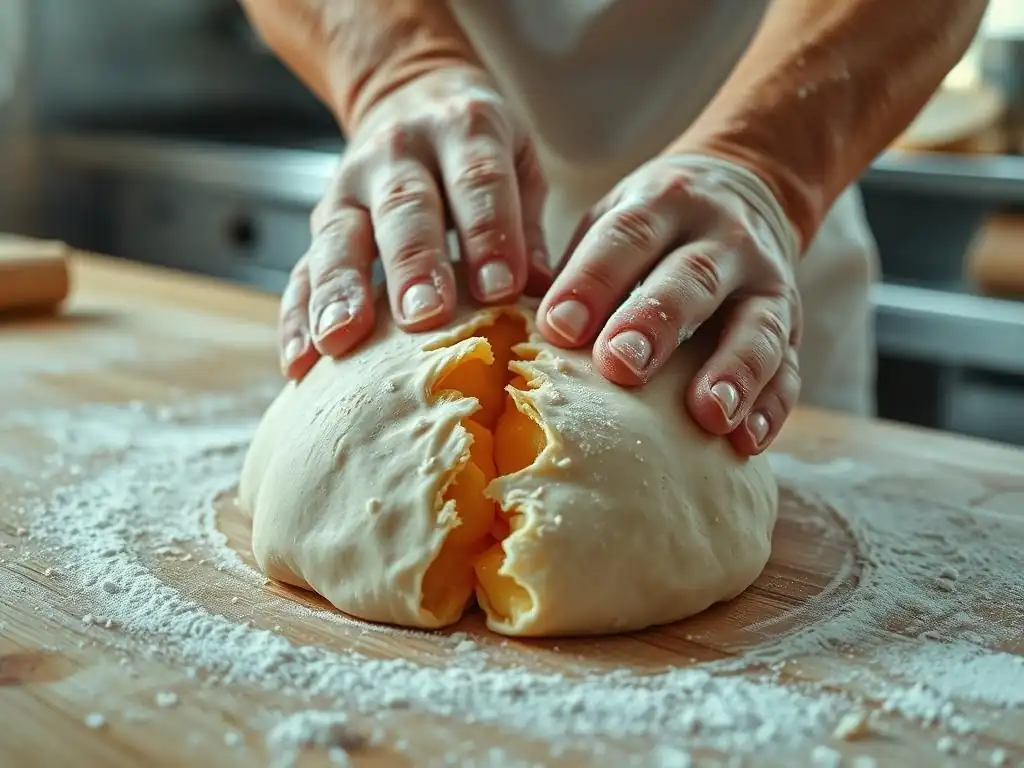
Dough tearing during rolling indicates a weak gluten structure that cannot withstand the stretching required for lamination. This can happen if the initial dough was under-mixed, used a low-protein flour, or if the dough was handled too roughly when cold and brittle. Tears disrupt the layers and can lead to butter leakage during baking.
For example, using a pastry flour with a protein content of 8-10% instead of a bread flour (12-14%) or all-purpose flour (10-12%) might result in a dough that lacks the necessary strength for repeated rolling and folding, causing it to tear easily and creating laminated dough problems solved by flour choice.
Solution: Improving Dough Strength
Ensure you are using a flour with adequate protein content for the type of laminated dough you are making. Croissants and puff pastry typically benefit from a medium to high protein flour (11-13%) to build a sufficiently strong but still extensible gluten network.
Also, ensure the initial dough is mixed until the gluten is developed to a moderate level – it should be smooth and pass the windowpane test (stretching a small piece thinly enough to see light through it without tearing). Allowing sufficient rest time also helps strengthen the gluten structure by allowing the proteins to hydrate fully.
Solution: Gentle Handling
Always handle the dough gently, especially when rolling. Use smooth, even strokes with the rolling pin and avoid sudden, forceful pressure. If the dough feels resistant or starts to tear, stop immediately.
Cover the dough and place it back in the refrigerator for at least 30 minutes. The cold rest allows the gluten to relax and the dough to become more pliable, reducing the risk of tearing when you resume rolling. Working with a slightly warmer dough (but still cold enough to keep the butter solid) can also make it more extensible and less prone to tearing, addressing laminated dough problems solved by patience and care.
Advanced Troubleshooting
Troubleshooting Croissants
Croissants present unique laminated dough problems solved by understanding their specific needs. Beyond general lamination issues, croissant-specific problems include poor shaping (uneven crescents), butter leaking during proofing (indicating over-proofing or too warm conditions), or a dense crumb structure instead of an open, airy one.
For example, if croissants collapse during baking, it often means they were over-proofed, and the gluten structure weakened too much to hold the steam. If they are dense, they might have been under-proofed or the butter melted prematurely. Achieving the perfect honeycomb interior relies heavily on precise shaping, adequate proofing in a controlled environment (around 75-80°F with humidity), and a hot oven spring.
Adjusting for Different Flours and Butters
Not all flours and butters are created equal, and adjusting your technique based on their properties is key to solving laminated dough problems solved by ingredient selection. Flours vary in protein content and absorption. A higher protein flour may require slightly more liquid and potentially longer resting times to relax the stronger gluten.
Butter also varies, particularly in its fat content and pliability at different temperatures. European-style butters typically have a higher fat content (around 82-84%) compared to American-style butter (around 80%), which can affect flakiness and ease of lamination. Adjusting your chilling times and rolling pressure based on the specific butter you are using is often necessary for success.
Achieving Flaky Perfection
Mastering laminated dough takes practice, patience, and a willingness to learn from mistakes. By understanding the science behind lamination and systematically diagnosing and addressing common laminated dough problems, you can significantly improve your results. Remember that temperature control, proper resting, gentle handling, and precise technique are your best tools.
Don't be discouraged by initial failures. Every attempt provides valuable insights into what works and what doesn't with your specific ingredients and environment. With persistence and attention to detail, you'll be well on your way to achieving consistently flaky, beautiful laminated pastries that are truly a joy to bake and eat.
Frequently Asked Questions
What is laminated dough and why is it so challenging to work with?
Laminated dough is a pastry dough that contains many alternating layers of dough and fat, typically butter. It's challenging because maintaining the integrity of these layers during lamination and baking requires precise temperature control and technique.
My butter is melting during lamination. What am I doing wrong?
Melting butter is a common issue! You're likely not keeping the dough cold enough. Chill the dough and butter well before starting, and work in a cool environment if possible.
My dough is tearing when I'm rolling it out. How can I prevent this?
Tearing usually indicates the dough is not relaxed enough. Allow the dough to rest in the refrigerator between turns. This will help the gluten relax and prevent tearing.
My pastries aren't rising properly in the oven. What could be the problem?
Insufficient proofing or damaged lamination are common culprits. Ensure you give the pastries enough time to proof fully before baking, and be gentle during lamination.
What are some easy laminated dough recipes for beginners?
While all laminated doughs require some practice, consider starting with a rough puff pastry. It's more forgiving than croissants or danishes and offers a great introduction to the lamination process.
Final Reflection: Mastering the Art of Flaky Perfection
The pursuit of the perfect flaky pastry, whether it's a croissant, a pain au chocolat, or a delicate puff pastry, remains a culinary challenge for many home bakers. The seemingly simple process of layering butter and dough hides a world of subtle techniques and potential pitfalls, easily leading to dense, tough, or otherwise disappointing results. This article has explored those pitfalls, offering solutions to common laminated dough problems and empowering bakers to achieve consistently impressive results.
The frustration of a failed laminated dough is a familiar one, a testament to the delicate balance required in this technique. It's a journey of learning, requiring patience, precision, and a willingness to adapt. The most important thing is to have a good time, and to not be afraid to fail.
This quote, while not specifically about baking, perfectly encapsulates the spirit of tackling the complexities of laminated dough. The process itself, with its repeated folding and chilling, mirrors a larger life lesson: that achieving mastery often requires iterative refinement and a resilience in the face of setbacks.
Now, armed with a deeper understanding of the science and technique behind laminated doughs, I invite you to embrace the challenge. Don't be discouraged by initial failures; instead, view them as opportunities for learning and growth. Experiment with different flours, butter types, and folding techniques.
Most importantly, remember the joy of the process – the feel of the cool dough in your hands, the satisfying sound of the layers separating, and the ultimate reward of a perfectly flaky, golden-brown pastry. The journey to mastering laminated dough is a rewarding one; embark on it with confidence and a spirit of culinary adventure.
Unlock Your Laminated Dough Mastery!
Thanks for taking the time to explore the world of laminated doughs with us! We hope you gained valuable insights into troubleshooting those frustrating flaky fails. Now it's time to put your newfound knowledge into action.
- Bake your dream pastries: Choose your favorite laminated dough recipe (croissants, pain au chocolat, etc.) and give it another try, focusing on the techniques we discussed. Remember those crucial steps for success!
- Share your baking journey: Snap a photo of your delicious creation and post it on social media, tagging #BakeWithEase and sharing your experience (both triumphs and challenges!). Let's inspire each other!
- Dive deeper into the details: Explore our other articles on BakeWithEase.com for more baking tips, tricks, and recipes to perfect your skills. (While we don't have specific links here, you can find them easily on the site!)
Ready to transform your baking game and create stunning laminated delights? What unique challenge will you tackle with your newly acquired knowledge?