
Mastering the Stretch and Fold Technique for Pizza Dough

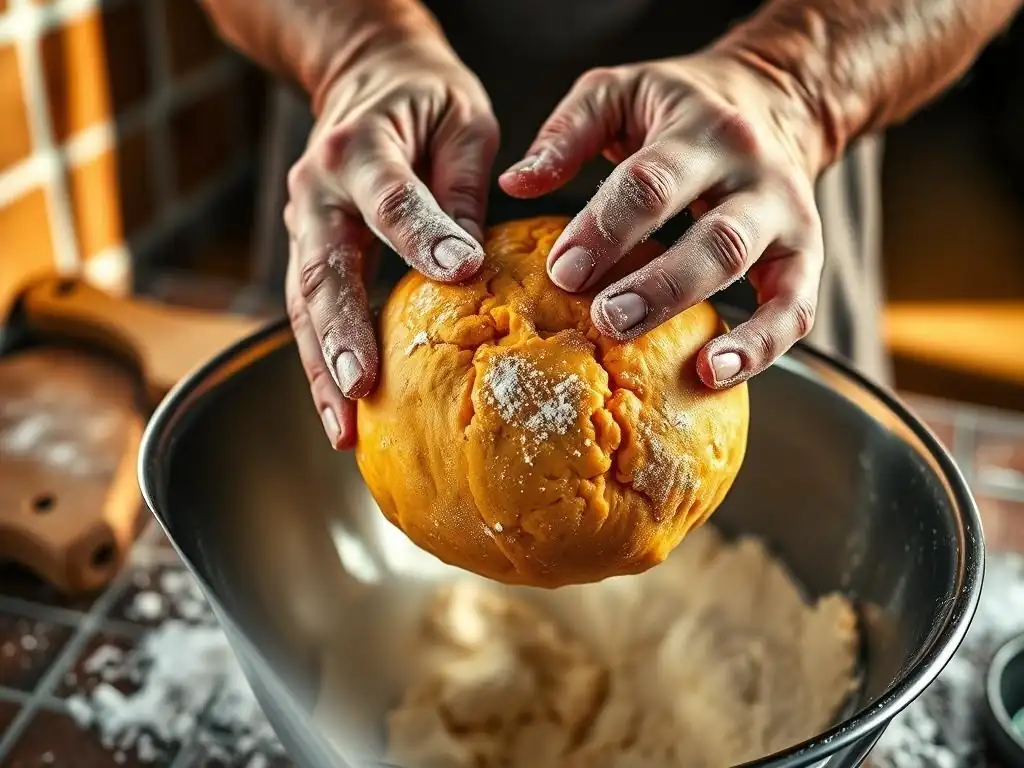
Welcome to BakeWithEase, where baking becomes a joy, not a chore! Are you ready to unlock the secret to incredibly airy and flavorful pizza crust? This guide delves into the stretch and fold technique, a game-changer for achieving professional-quality dough at home. But what makes this method so effective, and how can you master it? Dive in and discover the surprising simplicity behind this intermediate baking essential!
- Introduction to Stretch and Fold in Pizza Dough Making
- Understanding the Science Behind Stretch and Fold
- Step-by-Step Guide to Stretch and Fold for Pizza Dough
- Tips and Tricks for Perfect Stretch and Fold Pizza Dough
- Stretch and Fold Pizza Dough Recipe: A Practical Example
- Advanced Stretch and Fold Techniques for Pizza Dough
- Benefits of Using Stretch and Fold Method for Pizza Dough
- Common Mistakes to Avoid When Stretching and Folding Pizza Dough
- Conclusion: Elevate Your Pizza Making with Stretch and Fold
-
Frequently Asked Questions
- What is the stretch and fold technique and why is it important for pizza dough?
- How often should I perform the stretch and fold during the dough's bulk fermentation?
- Can I over-stretch and fold pizza dough? What are the signs?
- What are the benefits of using stretch and fold compared to traditional kneading?
- What type of flour works best with the stretch and fold technique for pizza dough?
- Final Reflection: The Transformative Power of the Stretch and Fold
- Unleash Your Inner Pizzaiolo: Take Your Dough to the Next Level!
Introduction to Stretch and Fold in Pizza Dough Making
Creating delicious homemade pizza starts with exceptional dough. While kneading is a classic method, the stretch and fold technique offers a gentler, yet incredibly effective way to develop gluten and build structure in your pizza dough. This method involves periodically stretching and folding the dough over itself during a relaxed fermentation period, rather than continuous vigorous kneading.
It's particularly favored for higher hydration doughs, which can be sticky and challenging to knead traditionally. By allowing time and gravity to assist, the stretch and fold approach builds a robust gluten network, essential for that perfect chewy crust with a light, airy interior.
The stretch and fold technique is a cornerstone for many artisanal bread and pizza makers. It minimizes handling while maximizing dough development, leading to superior texture and often improved flavor. This method is especially beneficial for home bakers who might not have a stand mixer or prefer a less strenuous dough development process. By understanding and applying the principles of stretch and fold, you can significantly elevate the quality of your homemade pizza dough, achieving results comparable to your favorite pizzeria. It's a simple yet powerful technique that every aspiring pizza artisan should master.
Why Stretch and Fold is Essential for Pizza Dough Development
The primary purpose of the stretch and fold technique in pizza dough is to strengthen the gluten network. Gluten, formed when wheat flour proteins (glutenin and gliadin) combine with water and are worked, provides the dough with its elasticity and structure. A strong gluten network is crucial for pizza dough because it traps the gases produced by yeast during fermentation, allowing the dough to rise and create those desirable air pockets in the crust. Without sufficient gluten development, the dough would be weak, difficult to stretch thinly without tearing, and result in a dense, flat crust.
Furthermore, the stretch and fold method gently realigns the gluten strands, creating a more organized and robust structure. This process is less disruptive than intense kneading, which can sometimes tear the delicate gluten matrix, especially in wetter doughs. For instance, a typical Neapolitan-style pizza dough might have a hydration level between 60% and 65%.
Doughs with 70% hydration or higher, often used for lighter, airier crusts, benefit immensely from stretch and fold as they are too wet to handle easily with traditional kneading. The periodic folds build strength over time, resulting in dough that is both extensible (can be stretched) and elastic (springs back slightly), the ideal balance for a perfect pizza base.
Stretch and Fold vs. Traditional Kneading for Pizza: A Comparison
Traditional kneading involves vigorously working the dough by pushing, pulling, and folding it, typically for 8-15 minutes, until it becomes smooth and elastic. This continuous motion rapidly develops gluten. It's very effective for lower hydration doughs (below 60%) and can be done by hand or with a stand mixer. Kneading provides immediate feedback; you can feel the dough change texture as gluten develops.
Stretch and fold, on the other hand, is a more passive approach spread over a longer period, often 1-3 hours or even longer depending on the recipe and environment. Instead of continuous work, the dough rests for 30-60 minutes between short folding sessions (usually 3-5 sessions in total). This method relies on time, hydration, and periodic gentle manipulation to build strength.
It's particularly advantageous for wetter doughs where handling is difficult. While traditional kneading can be faster for initial gluten development, stretch and fold allows for concurrent fermentation and gluten maturation, often leading to more complex flavors and a more relaxed dough structure that's easier to stretch later. For many pizza dough recipes, a combination of a short initial mix or knead followed by stretch and folds yields the best results.
Understanding the Science Behind Stretch and Fold
Gluten Development and its Importance in Pizza Dough
Gluten development is the cornerstone of successful pizza dough structure. When flour and water are combined, two proteins, glutenin and gliadin, absorb the water and begin to bond, forming gluten. Mechanical action – whether kneading or stretching and folding – helps these proteins link together and form long, elastic chains, creating a complex network throughout the dough. This network is what gives dough its ability to be stretched thinly without tearing, a crucial property for forming a pizza base.
The strength and extensibility of the gluten network directly impact the final crust. A well-developed gluten structure allows the dough to trap carbon dioxide gas produced by the yeast during fermentation. This gas inflates the dough, creating volume and the characteristic airy pockets (cornicione) in the crust when baked at high temperatures. Without sufficient gluten development, the gas would escape, resulting in a dense, heavy crust. Using the stretch and fold technique effectively builds this robust network, ensuring your pizza dough has the necessary strength and elasticity for a perfect bake.
How Stretch and Fold Improves Dough Strength and Elasticity
The stretch and fold technique improves dough strength by physically aligning the randomly oriented gluten strands into a more organized, parallel structure. Each fold layers the dough upon itself, effectively reinforcing the gluten network. Imagine stacking layers of fabric; the stack becomes stronger and more cohesive than a single sheet. Similarly, folding the dough strengthens its internal structure.
Elasticity, the ability of the dough to return to its original shape after being stretched, is also enhanced. As the gluten network becomes stronger and more organized through repeated stretching and folding, it gains resilience. This balance of strength and elasticity is vital.
Dough that is too elastic will snap back when you try to stretch it for a pizza base, making it difficult to work with. Dough that is too extensible but not elastic enough will tear easily. Stretch and fold helps achieve the optimal balance, creating a dough that is strong enough to hold its shape and trap gas, yet extensible enough to be stretched into a thin disc without resistance or tearing.
The Impact of Hydration on Stretch and Fold Effectiveness
Hydration, the ratio of water to flour by weight, plays a significant role in how the stretch and fold technique performs. Higher hydration doughs (typically 65% water or more relative to flour weight) are often too wet and sticky for traditional vigorous kneading. The abundance of water allows the gluten proteins to hydrate more fully and form a more extensive, albeit initially weaker and more chaotic, network.
This is where stretch and fold shines. The higher water content facilitates the movement and bonding of gluten proteins even with minimal handling. The periodic rests between folds allow the gluten to relax and realign itself in the presence of ample water, a process sometimes referred to as autolysis or passive gluten development.
The subsequent folds then gently organize this hydrated network, building strength incrementally. Conversely, very low hydration doughs (below 55%) have less free water for gluten development and are often too stiff for effective stretching and folding; traditional kneading is usually more suitable for these drier doughs. Thus, stretch and fold is particularly effective for the medium to high hydration levels common in many popular pizza dough recipes.
Step-by-Step Guide to Stretch and Fold for Pizza Dough
Preparing Your Pizza Dough for Stretch and Fold
Before you begin the stretch and fold process for your pizza dough, you'll typically mix your ingredients – flour, water, yeast, and salt – until just combined. This initial mixing doesn't need to fully develop the gluten; its purpose is simply to bring everything together into a shaggy mass. You might mix by hand with a spoon or in a stand mixer on low speed for 1-2 minutes.
Some recipes recommend a short initial rest period of 20-30 minutes after mixing before the first fold. This rest, often called the autolyse phase (if salt is excluded initially), allows the flour to fully hydrate and enzymatic activity to begin breaking down proteins, making the dough more pliable and easier to stretch in the subsequent steps.
Once your shaggy dough has rested (if required by the recipe), transfer it to a lightly oiled container or bowl large enough to allow it to double or triple in size. Oiling the container prevents the dough from sticking and makes the folding process much easier. Ensure your hands are also slightly wet or oiled to prevent sticking. The dough should be at room temperature, ideally around 70-75°F (21-24°C), as temperature significantly affects yeast activity and gluten development speed.
The First Stretch and Fold: Technique and Timing
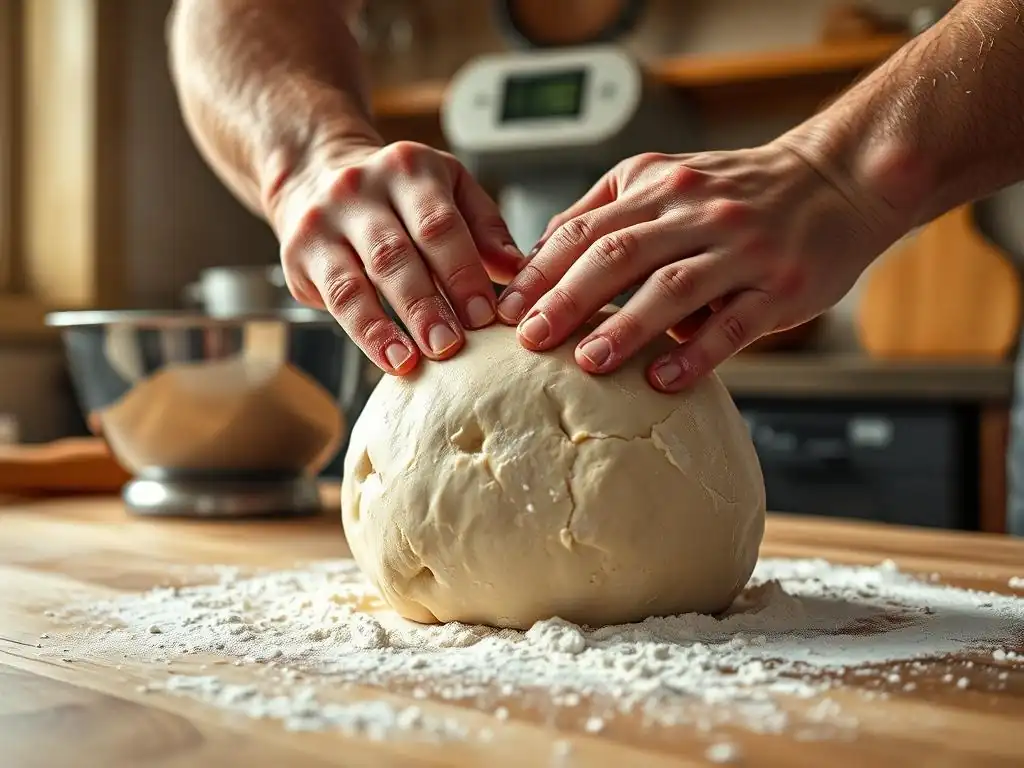
The first stretch and fold is usually performed 20-60 minutes after the initial mix or rest period, depending on the recipe and room temperature. To perform a stretch and fold, wet or oil your hand slightly. Gently slide your hand under one side of the dough mass. Lift that section of the dough, stretching it upwards as far as it will comfortably go without tearing.
Once stretched, fold this section back over the rest of the dough mass. Rotate the container 90 degrees and repeat the process: stretch the next side up and fold it over. Continue rotating and folding until you have stretched and folded the dough from all four sides (or sometimes 6-8 times depending on the baker's preference).
After the first set of folds, the dough will likely still look shaggy and feel relatively weak, but you should already notice a slight increase in tension. Cover the container and let the dough rest again. The duration of the rest period between folds is crucial – typically 30 to 60 minutes. This rest allows the gluten network to relax and rearrange itself after the stress of stretching, preparing it for the next round of strengthening. Performing the folds too frequently without sufficient rest can tear the developing gluten structure.
Subsequent Stretch and Fold Sessions: Maximizing Dough Strength
Subsequent stretch and fold sessions build upon the strength developed in the previous rounds. You will repeat the same technique: gently stretching a section of the dough upwards and folding it over, rotating the bowl, and repeating until all sides are folded. As you progress through the sessions, you will notice a significant change in the dough's texture and feel. It will become progressively smoother, more elastic, and hold its shape better.
Typically, pizza dough benefits from 3 to 5 stretch and fold sessions, spaced 30-60 minutes apart. By the third or fourth session, the dough should feel noticeably stronger, smoother, and more cohesive. It should resist stretching slightly and demonstrate good elasticity.
When you stretch a portion, you should see a thin membrane forming before it tears (the "windowpane test" becomes more possible). The exact number of folds and resting times can vary based on flour type, hydration level, and ambient temperature, but the goal remains the same: to build sufficient gluten strength and elasticity for a workable and structurally sound pizza dough.
Tips and Tricks for Perfect Stretch and Fold Pizza Dough
Recognizing the Signs of Properly Developed Dough
Knowing when your stretch and fold pizza dough is sufficiently developed is key to a great crust. After several folding sessions and adequate rest time, look for these signs:
- Smooth Surface: The dough should lose its initial shagginess and have a relatively smooth, taut surface.
- Increased Tension: When you try to stretch it, the dough should resist slightly and want to spring back (elasticity).
- Windowpane Test: While not always perfectly achievable with very high hydration doughs, you should be able to gently stretch a small piece of dough between your fingers into a thin membrane that light can pass through without tearing immediately.
- Cohesion: The dough should feel like a cohesive mass, not loose or easily pulled apart.
- Volume Increase: Depending on the fermentation stage, the dough should show signs of rising due to trapped gas.
A dough that is properly developed through the stretch and fold technique will be much easier to handle and shape into a pizza base without tearing. It will also hold its structure better during baking, contributing to a light and airy crust.
Troubleshooting Common Stretch and Fold Problems
Even with the stretch and fold method, you might encounter issues. If your dough is tearing excessively during stretching, it could be under-rested between folds, or the gluten is not yet strong enough. Try increasing the rest time to 45-60 minutes between sessions. If the dough feels very slack and doesn't gain tension after multiple folds, it might be under-hydrated (not enough water for good gluten development) or the flour protein content is too low. Ensure you are using a flour suitable for bread or pizza (typically 11-14% protein).
Another common issue is stickiness. While stretch and fold is great for wet doughs, excessive stickiness can be managed by lightly wetting or oiling your hands and the work surface (or bowl). Avoid adding too much extra flour, as this changes the hydration ratio. If the dough is developing very slowly or rapidly, check your water temperature and ambient temperature. Yeast is most active around 75-80°F (24-27°C). Adjust resting times based on your environment – warmer temperatures require shorter rests and fewer folds.
Optimizing your Stretch and Fold Technique for Different Flour Types
The type of flour you use significantly impacts how you perform the stretch and fold technique. High-protein bread flour (around 12-14% protein) develops gluten more readily and creates a stronger network. With these flours, you might need fewer folds (perhaps 3-4) compared to lower-protein all-purpose flour (around 10-12% protein). All-purpose flour will require more stretch and fold sessions (4-5 or even more) to achieve comparable strength, and the dough will generally be less elastic.
Italian Tipo 00 flour, often used for Neapolitan pizza, typically has moderate protein (11-12.5%) but is milled very finely. This fine milling allows for excellent water absorption and creates a smooth, extensible dough. Stretch and fold works beautifully with Tipo 00, helping to build just enough structure for a light, airy crust without making it overly tough.
Whole wheat flour, with its bran and germ content, can interfere with gluten development. When using whole wheat, hydration levels often need to be higher, and more gentle, frequent stretch and folds might be necessary to coax the gluten into forming a network around the bran particles.
Adjusting Stretch and Fold Based on Ambient Temperature and Humidity
Ambient temperature and humidity have a significant impact on dough fermentation speed and consistency, which in turn affects the timing and feel of your stretch and fold sessions. In warmer environments (above 75°F or 24°C), yeast is more active, and fermentation proceeds faster. The dough will rise more quickly, and the gluten will develop more rapidly. This means you might need shorter rest periods between folds (e.g., 30 minutes) and potentially fewer overall folding sessions (e.g., 3 instead of 4 or 5) to prevent over-fermentation or over-handling of the rapidly developing gluten.
Conversely, in cooler environments (below 70°F or 21°C), fermentation is slower. Rest periods between folds might need to be extended (e.g., 45-60 minutes), and you might need more folding sessions to achieve the desired dough strength within a reasonable timeframe. High humidity can make dough feel stickier, requiring slightly more water on your hands or a light oiling. Low humidity can dry out the dough surface; ensure your container is well-covered during rests. Being mindful of your kitchen's climate allows you to adjust your stretch and fold timing for optimal results.
Stretch and Fold Pizza Dough Recipe: A Practical Example
Ingredients for the Perfect Stretch and Fold Pizza Dough
Here are the ingredients for a classic stretch and fold pizza dough, yielding two medium pizzas (about 12-14 inches each):
- 500 grams strong bread flour (about 4 cups) or Tipo 00 flour
- 325-350 grams lukewarm water (about 1 1/3 to 1 1/2 cups, depending on flour absorption) - this gives a hydration of 65-70%
- 10 grams fine sea salt (about 1.5 teaspoons)
- 2-3 grams instant dry yeast (about 0.5 - 0.75 teaspoons)
Using a quality flour with sufficient protein content is crucial for developing a strong gluten network via the stretch and fold method. The hydration level (65-70%) is ideal for this technique, making the dough initially sticky but ultimately light and airy. The small amount of yeast, combined with a longer fermentation time facilitated by the stretch and fold process, contributes significantly to flavor development.
Detailed Instructions: Combining Stretch and Fold with Neapolitan Pizza Dough
- Initial Mix: In a large bowl, whisk together the flour, yeast, and salt. Add the water and mix with a spoon or your hand until no dry flour remains and a shaggy dough forms. It will be sticky.
- First Rest (Autolyse - Optional but Recommended): Cover the bowl and let the dough rest for 20-30 minutes. This allows the flour to hydrate.
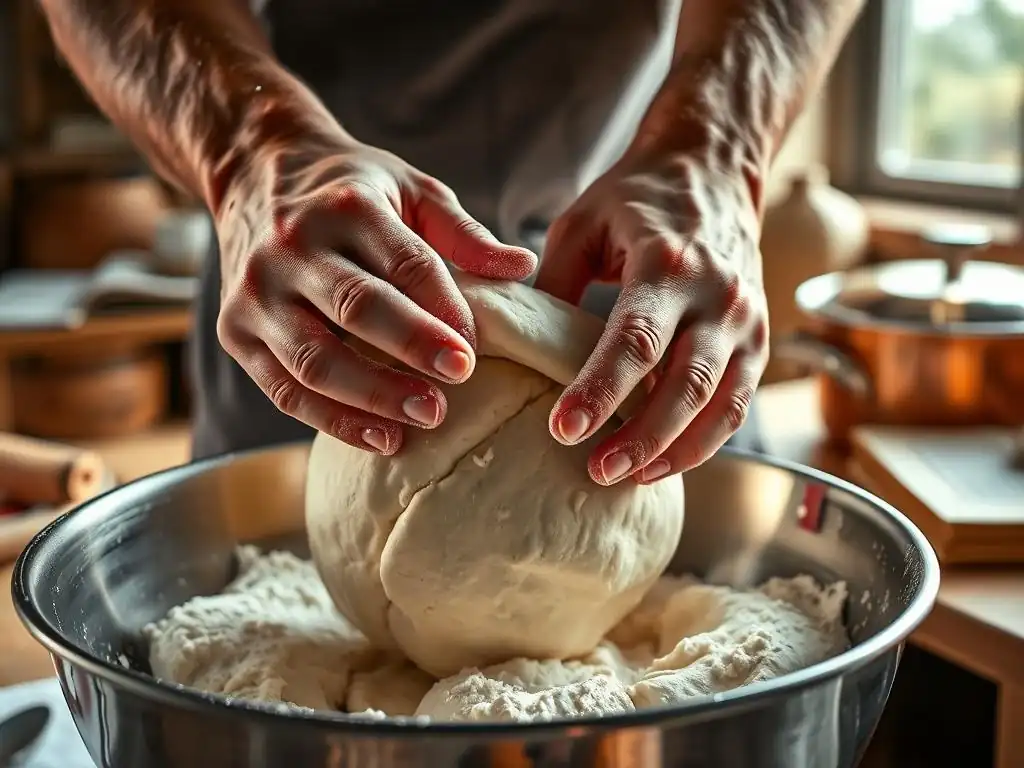
- First Stretch and Fold: Lightly wet your hands. Perform the first set of stretch and folds directly in the bowl. Grab one side of the dough, stretch it up, and fold it over the center. Rotate the bowl 90 degrees and repeat. Do this 4-6 times. Cover the bowl.
- Subsequent Folds: Let the dough rest for 45-60 minutes. Repeat the stretch and fold process (4-6 folds). The dough will feel smoother and stronger.
- Repeat: Perform 2-3 more stretch and fold sessions, spaced 45-60 minutes apart. By the final session, the dough should be smooth, elastic, and show good tension.
- Bulk Fermentation: After the last fold, cover the bowl and let the dough ferment at room temperature for 1-2 hours, or until it has increased in volume by about 50-75%.
- Divide and Shape: Gently turn the dough out onto a lightly floured surface. Divide into two equal portions. Gently shape each portion into a ball by tucking the edges underneath.
- Second Rest/Proof: Place the dough balls into lightly floured or oiled containers. Cover and let proof at room temperature for another 1-2 hours, or refrigerate for a slow cold fermentation (highly recommended for flavor).
This stretch and fold pizza dough process, particularly when combined with a cold fermentation, results in a highly manageable dough with excellent flavor and a perfect texture for baking.
Baking Your Stretch and Fold Pizza Dough: Achieving the Perfect Crust
Baking stretch and fold pizza dough at high temperatures is key to achieving that classic airy and slightly charred crust (cornicione). Preheat your oven as high as it will go, ideally 500°F (260°C) or higher. If you have a pizza stone or steel, place it on a rack in the upper third of your oven while it preheats, allowing it to heat up for at least 45-60 minutes. A pizza steel typically reaches higher temperatures and transfers heat more efficiently than a stone, often resulting in a crispier bottom crust and better oven spring.
When you're ready to bake, gently shape your proofed dough ball into a pizza skin, being careful not to deflate the precious air pockets created by the stretch and fold method and fermentation. Transfer the shaped dough to a lightly floured pizza peel (or parchment paper on a peel). Quickly add your sauce, cheese, and toppings.
Slide the pizza onto the preheated stone or steel. Bake for 6-10 minutes, or until the crust is puffed, golden brown, and the cheese is melted and bubbly. The high heat causes the water in the dough to rapidly turn to steam, creating oven spring and a light, airy texture within the strong gluten network developed by the stretch and fold.
Advanced Stretch and Fold Techniques for Pizza Dough
Autolyse and its Benefits for Stretch and Fold
Autolyse is a simple technique where you mix just the flour and water for your dough and let it rest for 20 minutes to several hours before adding the salt and yeast and beginning the stretch and fold process. This initial rest period allows the flour to fully hydrate and activates proteases, enzymes naturally present in flour that begin to break down proteins. This enzymatic action makes the dough more extensible and easier to handle, significantly reducing the amount of work needed to develop gluten later.
Incorporating an autolyse phase into your stretch and fold pizza dough routine offers several benefits. It jumpstarts gluten development in a relaxed state, meaning fewer stretch and fold sessions might be needed to achieve desired strength. It also makes the dough incredibly smooth and pliable from the outset, making the subsequent stretching and folding easier and less likely to tear the dough. Furthermore, some bakers believe autolyse enhances the dough's ability to absorb water, potentially allowing for slightly higher hydration levels, which can lead to an even lighter and airier crust.
Incorporating Whole Wheat Flour with Stretch and Fold
Working with whole wheat flour presents unique challenges for gluten development due to the presence of bran and germ particles, which can cut through gluten strands. However, the stretch and fold technique is well-suited for developing whole wheat pizza dough. Whole wheat flour typically requires higher hydration (often 70-80% or more) because the bran absorbs a lot of water. The stretch and fold method handles this wetter dough much better than traditional kneading.
When using whole wheat flour, you might need more frequent or slightly more vigorous stretch and fold sessions initially to help the gluten network form around the bran particles. Rest periods might be slightly shorter if the dough is very wet.
A common approach is to use a blend, for example, 70% bread flour and 30% whole wheat flour, which combines the strength of white flour with the flavor and nutrition of whole wheat. The stretch and fold technique helps create a surprisingly light texture even with a significant portion of whole wheat, preventing the dense result often associated with 100% whole wheat dough kneaded traditionally.
Cold Fermentation and Stretch and Fold: A Powerful Combination
Combining the stretch and fold technique with cold fermentation (retarding the dough in the refrigerator) is a highly effective method for producing exceptional pizza dough with complex flavor and excellent handling properties. After performing the initial stretch and fold sessions at room temperature until the dough shows some strength and has increased slightly in volume (the bulk fermentation stage), you transfer the dough to the refrigerator for a slow, cool fermentation period, typically 24-72 hours.
During cold fermentation, yeast activity slows down dramatically, but enzymatic activity continues. This slow process breaks down complex carbohydrates into simpler sugars, resulting in a more flavorful dough. The cold environment also allows the gluten network, built during the stretch and fold sessions, to relax and mature slowly. This maturation makes the dough incredibly extensible and easy to stretch directly from the fridge without needing a long warm-up period. The resulting pizza dough baked after cold fermentation using the stretch and fold method yields a crust with superior flavor, texture, and those coveted large air pockets.
Benefits of Using Stretch and Fold Method for Pizza Dough
Enhanced Dough Strength and Structure
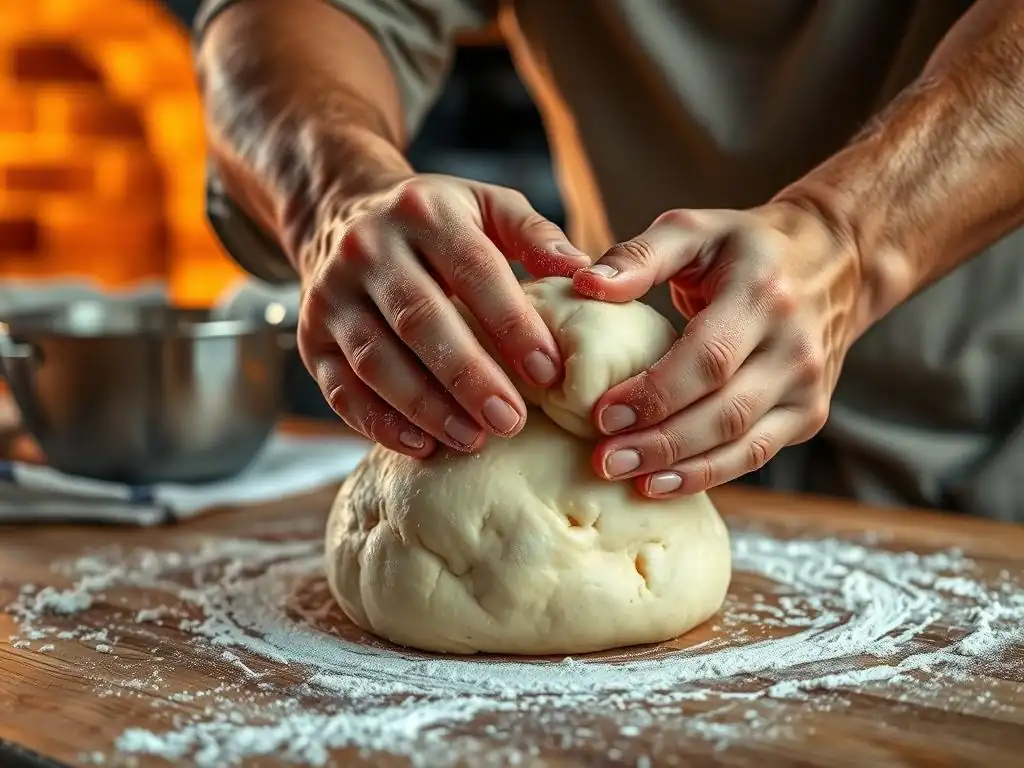
One of the most significant benefits of using the stretch and fold technique for pizza dough is the superior strength and structure it imparts. Unlike aggressive kneading, which can sometimes tear delicate gluten strands, the gentle, periodic stretching and folding aligns the gluten network more effectively and less disruptively. This builds a robust framework capable of trapping a large amount of gas produced during fermentation and the rapid steam expansion during high-temperature baking.
This enhanced strength is crucial for thin-crust pizzas, like Neapolitan style, where the dough needs to be stretched very thinly without tearing while still providing structure for the toppings and developing a puffy, airy edge (cornicione). The well-developed gluten network ensures the dough maintains its integrity throughout the shaping and baking process, preventing soggy centers and producing a crust with excellent chew and structure that holds up to toppings.
Improved Flavor Development in Pizza Dough
The stretch and fold method often involves longer fermentation periods, either at room temperature or, ideally, through cold fermentation in the refrigerator. This extended fermentation time is a key factor in developing complex flavors in your pizza dough. During long fermentation, yeast and enzymes have more time to work on the dough's starches and proteins, producing a wider range of aromatic compounds.
While the stretch and fold technique itself doesn't directly create flavor compounds, it supports the conditions under which superior flavor develops. By building dough strength efficiently with minimal handling, it allows for longer fermentation times without the dough becoming overly proofed or collapsing. Combining the structural benefits of stretch and fold with the flavor benefits of slow, cold fermentation is a common practice among artisan bakers to achieve pizza dough that is not only structurally perfect but also rich in nuanced flavors.
Better Air Retention for a Lighter Crust
A major advantage of using the stretch and fold technique for pizza dough is its ability to promote better air retention, leading to a lighter, more open crumb structure and a puffier crust. The strong, elastic gluten network created by repeated gentle folding acts like a balloon, effectively trapping the carbon dioxide gas produced by the yeast.
When this well-aerated dough hits the high heat of a pizza oven, the trapped gas and rapidly expanding steam cause the dough to inflate dramatically, creating significant oven spring and resulting in a crust filled with irregular, open air pockets. This contrasts with dough that has insufficient gluten development, which might rise less, produce a denser crumb, and result in a flatter crust because it cannot effectively hold onto the fermentation gases. The stretch and fold method is particularly effective at creating the kind of open, airy structure desired in many popular pizza styles.
Common Mistakes to Avoid When Stretching and Folding Pizza Dough
Over-Stretching the Dough
While the goal is to stretch the dough to develop gluten, over-stretching during the stretch and fold process can be detrimental. Stretching the dough too aggressively or too far beyond its elastic limit will tear the developing gluten strands, weakening the dough rather than strengthening it. You should stretch the dough only until you feel significant resistance. If it starts to tear readily, you're stretching too much or the dough hasn't rested long enough since the last fold.
Recognize that the dough will gain strength and elasticity with each subsequent fold and rest. The first couple of folds might not allow for much stretch before resistance is met, and that's perfectly fine. As the dough develops, you'll be able to stretch it further. Pay attention to the dough's feel and stop stretching when it signals resistance, folding it back over at that point. Patience and observation are key to avoiding over-stretching and ensuring proper gluten development with the stretch and fold pizza dough method.
Incorrect Timing of Stretch and Folds
The timing between stretch and fold sessions is crucial for optimal gluten development. Performing folds too frequently without sufficient rest periods (e.g., less than 20-30 minutes) doesn't give the gluten strands enough time to relax and realign after being manipulated. This can lead to a dough that feels tight, resistant, and difficult to stretch in subsequent rounds, potentially resulting in tearing.
Conversely, waiting too long between folds (e.g., several hours without any folds) can allow the dough to over-ferment before adequate structure is built, especially in warm conditions. This can result in a weak, gassy dough that collapses easily. The recommended rest period of 30-60 minutes between folds provides a good balance, allowing the gluten to relax and the dough to slightly rise, preparing it for the next strengthening session. Adjust this timing based on your room temperature and the dough's behavior.
Insufficient Resting Time Between Folds
As mentioned, adequate resting time between stretch and fold sessions is vital. Each stretch and fold session puts stress on the gluten network. The rest period allows the gluten strands to relax, making the dough more extensible and easier to work with in the next round of folds. Without sufficient rest, the dough remains tight and resistant.
Imagine trying to stretch a rubber band repeatedly without letting it relax; it becomes harder to stretch and eventually snaps. Dough behaves similarly. A minimum rest of 30 minutes is generally recommended, but 45-60 minutes is often better, especially for doughs with moderate hydration or in cooler environments. Observing the dough is key – it should show some signs of relaxation and slight increase in volume before the next fold. Insufficient resting time is a common pitfall that prevents the stretch and fold technique from achieving its full potential in developing supple, strong pizza dough.
Conclusion: Elevate Your Pizza Making with Stretch and Fold
Recap of Key Stretch and Fold Principles
Mastering the stretch and fold technique is a transformative step in making exceptional homemade pizza dough. This method gently builds a strong, elastic gluten network through periodic manipulation and rest, resulting in dough that is easy to handle, rises beautifully, and bakes into a crust with desirable chew and airiness. We've explored how stretch and fold efficiently develops gluten, contrasts with traditional kneading, and interacts with hydration and flour types.
Remember the core principles: mix ingredients until shaggy, rest the dough, and then perform several rounds of gentle stretching and folding from all sides, allowing adequate rest (30-60 minutes) between sessions. Look for signs of proper development – a smooth, cohesive, and elastic dough that passes the windowpane test. Avoid common mistakes like over-stretching or insufficient rest. By consistently applying these principles, your stretch and fold pizza dough will improve dramatically, leading to truly outstanding homemade pizzas.
Further Resources for Improving Your Pizza Dough Skills
To further refine your stretch and fold pizza dough skills, consider experimenting with different variables. Try adjusting the hydration slightly (e.g., 65% vs. 70%) to see how it affects the dough's feel and the final crust. Explore the impact of using different flours, such as a high-protein bread flour versus Italian Tipo 00, and observe how the dough develops with the stretch and fold technique.
Experimenting with cold fermentation is highly recommended; refrigerating your dough for 24-72 hours after the initial room temperature stretch and folds will significantly enhance flavor and handling. Reading detailed guides on dough hydration, flour types, and fermentation science can provide deeper insights. Practice is key – the more you make stretch and fold pizza dough, the better you'll become at reading the dough's signals and adjusting your technique accordingly. With dedication and practice, you'll be consistently making pizza dough that rivals your favorite pizzerias.
Frequently Asked Questions
What is the stretch and fold technique and why is it important for pizza dough?
The stretch and fold technique is a method of developing gluten in dough without kneading. It's important because it creates a stronger, more elastic dough, leading to better texture and rise in your pizza.
How often should I perform the stretch and fold during the dough's bulk fermentation?
Typically, you should perform the stretch and fold every 30-60 minutes during the first 2-3 hours of bulk fermentation. This helps to strengthen the dough structure gradually.
Can I over-stretch and fold pizza dough? What are the signs?
Yes, you can overdo it. Signs include a dough that becomes too slack and loses its shape easily. Aim for a dough that's strong but still slightly tacky and pliable.
What are the benefits of using stretch and fold compared to traditional kneading?
Stretch and fold allows for a gentler development of gluten, which can be beneficial for high-hydration doughs. It also requires less effort than traditional kneading.
What type of flour works best with the stretch and fold technique for pizza dough?
Strong bread flour with a high protein content (around 12-14%) is recommended. This type of flour provides the necessary gluten structure to benefit most from the stretch and fold technique.
Final Reflection: The Transformative Power of the Stretch and Fold
Mastering the stretch and fold technique isn't just about making better pizza; it's about understanding the fundamental principles of dough development and unlocking a world of culinary possibilities. The seemingly simple act of gently stretching and folding dough reveals a profound connection between patience, precision, and the transformative power of time. This technique, easily overlooked, is the key to unlocking a truly exceptional crust – one that's both airy and chewy, with a satisfying crispness.
The impact of this simple technique extends far beyond the pizza itself. It represents a mindful approach to cooking, a celebration of the slow process, and a testament to the rewards of patience. The best things in life are worth waiting for,
a sentiment perfectly embodied in the slow, deliberate movements of the stretch and fold. This mindful engagement with the dough mirrors a broader cultural shift towards appreciating artisanal craftsmanship and the beauty of simple, well-executed techniques. It's a reminder that true mastery comes not from speed, but from understanding and respect for the process.
Now, consider your own approach to cooking, to your craft, to any endeavor that requires patience and precision. What seemingly small techniques could you refine to elevate your results?
I encourage you to embrace the spirit of the stretch and fold – to approach your tasks with intention, to find joy in the process, and to appreciate the transformative power of mindful engagement. The next time you knead dough, whether it's pizza dough or something else entirely, remember the lessons learned here, and let the gentle stretch and fold guide you towards a deeper understanding of your craft and yourself.
Unleash Your Inner Pizzaiolo: Take Your Dough to the Next Level!
Thanks for taking the time to learn about the stretch and fold technique! You've now got the skills to create truly amazing pizza dough. Ready to put your newfound knowledge into action?
- Master the Fold: Practice the stretch and fold method with your next batch of dough. Notice the difference in texture and rise! This is where the real magic happens.
- Share Your Success: Post a picture of your perfectly stretched pizza on social media and tag us @BakeWithEase – we'd love to see your creations!
- Explore Beyond Pizza: Try this technique with other doughs, like focaccia or even bread! You might be surprised at the results.
What unique flavor combination will you create with your perfectly crafted dough?