
Artisan Flours 101: A Beginner's Path to Better Bread Texture

Welcome to BakeWithEase, your haven for unlocking baking secrets! Ever wondered how to achieve that perfect, airy crumb in your artisan bread? This guide dives deep into the world of artisan flours, offering practical artisan bread texture tips that will transform your baking. Discover the power of premium ingredients and elevate your loaves from ordinary to extraordinary. Intrigued? Let's explore!
- Understanding Artisan Flour: Your Key to Improved Bread Texture
- Choosing the Right Artisan Flour for Your Bread: A Step-by-Step Guide
- How to Use Artisan Flour for Optimal Bread Texture: A Practical Guide
- Troubleshooting Common Issues with Artisan Flour and Bread Texture
- Level Up Your Baking: Recommended Tools and Resources for Artisan Flour Mastery
- Conclusion: Embrace the Art of Artisan Flour for Unforgettable Bread Texture.
-
Frequently Asked Questions
- What are some common artisan flours used to improve bread texture?
- How does the type of flour affect the crumb structure of artisan bread?
- What are some beginner-friendly tips for achieving a better texture in artisan bread?
- Can I mix different types of flour to achieve a specific artisan bread texture?
- How does proper kneading contribute to the desired texture of artisan bread?
- Final Reflection: The Transformative Power of Artisan Flour
- Unleash Your Inner Baker: Craft Extraordinary Bread Today!
Understanding Artisan Flour: Your Key to Improved Bread Texture
What Makes Artisan Flour Different? Exploring the Impact on Breadmaking
Artisan flour is distinct from standard supermarket flours primarily due to its composition, milling process, and often, the specific wheat varieties used. While conventional flours are typically milled from a blend of wheats to achieve consistency, artisan flours often highlight single varieties or regional grains, preserving unique characteristics. This can include ancient grains like spelt or rye, or specific hard red or white wheats known for their baking qualities.
The milling process itself can also differ; some artisan millers use traditional stone mills, which can leave more of the bran and germ in the flour, contributing to flavor, nutrition, and the flour's interaction with water. This difference in composition directly impacts how the flour absorbs liquid and develops gluten, fundamentally altering the dough's behavior and the final bread's structure and flavor.
The impact of these differences on breadmaking is profound, especially when aiming for a specific artisan bread texture. Flours with higher bran content, for example, can interfere with gluten development, requiring adjustments in hydration or kneading. Conversely, flours milled from strong, high-protein wheat varieties promote robust gluten networks, essential for loaves with an open, airy crumb structure and a chewy bite.
Understanding these nuances is the first step in manipulating your ingredients to achieve desired outcomes, whether it's a light, crisp baguette or a dense, hearty rye loaf. The quality and type of artisan flour you choose lay the groundwork for the dough's elasticity, extensibility, and fermentation, all critical factors influencing the final artisan bread texture.
Decoding Flour Labels: Protein Content and its Role in Artisan Bread Texture
Navigating flour labels can seem daunting at first, but understanding protein content is one of the most crucial artisan bread texture tips you can learn. Protein, specifically gluten-forming proteins like gliadin and glutenin, dictates the flour's strength and its ability to form an elastic network when hydrated and kneaded. Flour labels typically list protein content as a percentage.
A higher percentage, say 12-14%, indicates a "strong" flour, ideal for breads that require significant structure and chewiness, like sourdoughs or crusty loaves. A lower percentage, around 10-11%, signifies a "softer" flour, better suited for pastries, cakes, or softer sandwich breads where a delicate crumb is desired.
The percentage of protein directly correlates to the potential for gluten development. When water is added to flour, these proteins link together to form gluten. Kneading or folding the dough encourages these links to strengthen, creating a stretchy, elastic network that traps the carbon dioxide produced by yeast or sourdough starter during fermentation.
This trapped gas causes the dough to rise and creates the internal structure of the bread. For achieving a desirable artisan bread texture, such as a rustic loaf with large, irregular holes (an open crumb), a flour with sufficient protein content is essential to build a strong gluten network capable of holding its shape and trapping a significant amount of gas. Conversely, using a flour with too high protein for a soft roll might result in a tough texture.
Choosing the Right Artisan Flour for Your Bread: A Step-by-Step Guide
Step 1: Identifying Your Baking Goals: What Texture Are You Aiming For?
Before you even look at a bag of flour, consider the type of bread you want to bake and the texture you envision. Are you dreaming of a classic French baguette with a crisp crust and airy interior, a hearty German rye bread with a dense crumb, or a soft, pillowy challah?
Each of these breads requires a different approach to ingredients, and the flour choice is paramount in achieving the desired outcome and mastering artisan bread texture tips. A light, open crumb demands flour with high protein content for strong gluten development, while a dense, moist crumb might benefit from flours with lower protein or the inclusion of whole grains.
Think about the characteristics you value most in your bread. Do you prioritize a robust, chewy crust, or a tender, soft one? Is an open, irregular crumb essential, or do you prefer a finer, more uniform texture? Your answers will guide your selection of artisan flour.
For instance, baking a high-hydration sourdough boule to achieve that coveted open artisan bread texture requires a strong bread flour. On the other hand, if your goal is a quick soda bread, which relies on baking soda rather than yeast for leavening and minimal gluten development, a softer flour might be more appropriate. Defining your desired end result is the critical first step in choosing the right flour.
Step 2: Exploring Different Artisan Flour Types and Their Characteristics
Once you know the texture you're aiming for, you can explore the diverse world of artisan flours. Each type brings unique properties to your dough, influencing everything from flavor and color to structure and the final artisan bread texture. Understanding these characteristics will help you make informed choices and even experiment with blends.
- Bread Flour: Typically milled from hard wheat varieties, bread flour boasts a high protein content (often 12-14%). This high protein means excellent gluten development potential, leading to elastic doughs that can capture a lot of gas during fermentation. Using bread flour is a fundamental artisan bread texture tip for achieving loaves with good volume, a chewy crumb, and a satisfying crust. It's a staple for many rustic loaves, sourdoughs, and baguettes.
- Whole Wheat Flour: Milled from the entire wheat berry (including the bran, germ, and endosperm), whole wheat flour adds a nutty, earthy flavor and increased nutritional value. The presence of bran and germ can, however, impede gluten development, often resulting in a denser loaf compared to white flour. Achieving a lighter artisan bread texture with whole wheat often involves blending it with white bread flour or adjusting hydration and kneading techniques. It's perfect for hearty sandwich loaves or adding depth to sourdoughs.
- Rye Flour: Known for its distinctive tangy flavor and dense texture, rye flour has a different protein structure than wheat flour; its proteins do not form gluten in the same way. Rye doughs are typically stickier and less elastic. Rye breads often have a close, moist crumb. The amount of rye flour used significantly impacts the final artisan bread texture, from light rye (small percentage of rye) to dense pumpernickel (often 100% rye). It's a key ingredient in many traditional European breads.
- Spelt Flour: An ancient grain, spelt offers a slightly sweeter, nuttier flavor profile than modern wheat. While it contains gluten, it's often more fragile and water-soluble than the gluten in modern wheat, meaning spelt doughs can become sticky or lose structure if over-kneaded or over-proofed. Spelt flour can produce loaves with a tender crumb and a pleasant chew. It's a good alternative for those seeking a flavorful, somewhat less dense loaf than whole wheat, contributing unique qualities to artisan bread texture.
Choosing the right type, or blend of types, depends on your desired outcome. For a classic chewy, open crumb, a strong bread flour is often the base. For a denser, more flavorful loaf, incorporating whole wheat or rye is key. Experimenting with blends allows you to combine the strengths of different flours, tailoring the dough's behavior and the final bread's artisan texture to your specific preferences.
Step 3: Understanding Gluten Development and Artisan Flour's Role
Gluten development is the backbone of most bread structures, and artisan flour plays a crucial role in this process. As mentioned, gluten is formed when the proteins gliadin and glutenin in wheat flour combine with water and are worked (through mixing, kneading, or folding). Artisan flours, particularly those milled from hard wheat varieties or labeled as "bread flour," are chosen specifically for their higher protein content, which translates to a greater potential for forming a strong, elastic gluten network. This network is what gives dough its structure, allowing it to stretch and hold the gases produced during fermentation.
Different artisan flours influence gluten development in unique ways. Strong bread flour facilitates rapid and robust gluten formation, essential for achieving that sought-after open artisan bread texture in loaves like ciabatta or sourdough. Whole wheat flour, with its bran particles, can physically cut through gluten strands, hindering development and potentially leading to a denser loaf unless techniques like autolyse or extended fermentation are employed.
Rye flour's proteins form a different kind of network, resulting in doughs that are less elastic but still hold shape. Understanding how your chosen artisan flour type behaves regarding gluten development is vital for adapting your mixing and kneading techniques to build the optimal structure for your desired bread texture.
How to Use Artisan Flour for Optimal Bread Texture: A Practical Guide
Mastering the Autolyse Technique with Artisan Flour
The autolyse technique is a simple yet powerful method for improving artisan bread texture, especially when working with higher protein or whole grain artisan flours. It involves mixing just the flour and water from your recipe and letting the mixture rest for 20 minutes to several hours before adding the salt and leavening. This resting period allows the flour to fully hydrate and enzymes naturally present in the flour to begin breaking down proteins. This process kickstarts gluten development without any mechanical effort like kneading.
Using autolyse with artisan flour has several benefits. Firstly, it significantly improves dough extensibility, making it easier to handle and shape later on. Secondly, it promotes a more efficient and complete hydration of the flour, leading to a smoother dough and potentially a more open crumb structure. For whole grain artisan flours, autolyse helps soften the bran, reducing its interference with gluten development and contributing to a less dense final artisan bread texture. It's a technique that requires minimal effort but yields noticeable improvements in dough handling and the final loaf's characteristics.
Hydration Levels and Artisan Flour: Achieving the Perfect Dough Consistency
Hydration, the ratio of water to flour in your dough, is one of the most impactful variables affecting artisan bread texture, and it interacts closely with the type of artisan flour you use. Higher hydration doughs (those with a greater percentage of water relative to flour, perhaps 75% or more) tend to produce loaves with a more open, airy crumb and a crispier crust.
However, these doughs can be trickier for beginners to handle as they are stickier and less structured. Lower hydration doughs (60-70%) are easier to manage and typically result in a finer, more uniform crumb, suitable for sandwich breads or rolls.
The ideal hydration level is heavily dependent on the artisan flour's absorption capabilities. Stronger flours with higher protein content can absorb more water than softer flours. Whole wheat and rye flours, despite their lower gluten potential, often require more water because the bran and fiber absorb a significant amount.
Experimenting with hydration is key to mastering artisan bread texture tips; start with a recipe's recommended hydration and adjust based on the specific flour's feel. A dough that is too dry will be stiff and difficult to develop gluten properly, leading to a dense crumb. A dough that is too wet might spread excessively and be hard to shape, though it can yield a very open crumb if handled correctly.
Kneading Techniques for Superior Bread Texture with Artisan Flour
Kneading is the process of developing the gluten network in your dough, and the technique you use significantly impacts the final artisan bread texture. For doughs made with strong artisan bread flour, vigorous kneading (either by hand or machine) is effective at aligning the gluten strands, creating a strong, elastic structure. This is essential for trapping gas and achieving a lofty rise and open crumb. Aim for a dough that passes the "windowpane test," where a small piece can be stretched thinly enough to see light through it without tearing.
However, not all artisan flours benefit from intensive kneading. Doughs made with weaker flours or those containing a high percentage of whole grains or rye may require gentler handling. Techniques like stretch and fold, where the dough is stretched and folded onto itself at intervals during a long fermentation, are excellent for developing gluten slowly and gently.
This method is particularly effective for high-hydration doughs, promoting a very open artisan bread texture. Understanding the gluten potential of your chosen artisan flour will guide you to the most effective kneading or folding technique to build the necessary structure without damaging the delicate network.
Troubleshooting Common Issues with Artisan Flour and Bread Texture
Baking with artisan flour can sometimes present challenges, but understanding common issues and their solutions is part of the journey to perfecting artisan bread texture.
Problem 1: Dense and Heavy Bread
A dense or heavy crumb is a common frustration, especially when aiming for a light and airy loaf. This often indicates that the gluten network didn't develop sufficiently to support the rise, or the dough didn't proof correctly.
- Possible Cause: Inadequate gluten development.
- Solution: Increase kneading time or use a higher protein artisan flour. If using a stand mixer, ensure you're kneading for long enough – often 8-10 minutes for a strong dough. If kneading by hand, it might take 15-20 minutes. For future bakes, consider switching to an artisan bread flour with a higher protein percentage (e.g., 13% or more) to provide a stronger foundation for gluten development, which is key to improving dense artisan bread texture.
Another contributing factor to dense bread can be insufficient fermentation or proofing. If the yeast or starter isn't active enough, or the dough isn't allowed enough time to rise, it won't produce sufficient carbon dioxide to inflate the gluten network. Ensuring your starter is vigorous or your yeast is fresh and giving the dough adequate time to ferment in a warm environment, allowing it to roughly double in size during the bulk fermentation, are crucial steps in preventing dense artisan bread texture.
Problem 2: Flat and Spreading Dough
Dough that spreads out flat during proofing or baking, lacking height and structure, is often a sign of either over-proofing or insufficient dough strength.
- Possible Cause: Over-proofing or low protein flour.
- Solution: Reduce proofing time or use a bread flour blend with higher protein content. Over-proofing occurs when the yeast exhausts its food supply and the gluten structure begins to collapse, unable to hold the accumulated gas. Watch your dough closely during the final proof; it should be significantly increased in volume but still have some resistance when gently poked. Reducing the proofing time in the future can help.
Alternatively, if your dough consistently spreads despite correct proofing times, the issue might lie with the flour's protein content being too low for the desired loaf type (e.g., using all-purpose flour for a high-hydration boule). Using a dedicated artisan bread flour with a protein content of 12% or higher provides the necessary structure and elasticity to help the dough hold its shape and achieve better height, directly impacting the final artisan bread texture. Blending a weaker flour with a strong bread flour can also improve dough strength.
Problem 3: Tough and Rubbery Crust
While a certain amount of chew is desirable in artisan bread, a crust that is excessively tough or rubbery can detract from the experience.
- Possible Cause: Overbaking or too much gluten development.
- Solution: Reduce baking time or use a lower protein artisan flour. Overbaking can dry out the crust excessively, making it hard and tough. Ensure you're baking for the correct duration at the right temperature. Using a probe thermometer to check the internal temperature (typically 205-210°F or 96-99°C for lean bread) is a reliable way to determine doneness without overbaking.
Excessive gluten development can also contribute to a tough texture, not just in the crust but potentially the crumb too. If you're using a very high protein flour and aiming for a softer crumb or crust, you might consider blending it with a slightly lower protein flour (like all-purpose or a softer artisan flour). Additionally, being mindful of kneading time – stopping once the dough reaches the desired development rather than continuing excessively – can help prevent an overly tough artisan bread texture.
Level Up Your Baking: Recommended Tools and Resources for Artisan Flour Mastery
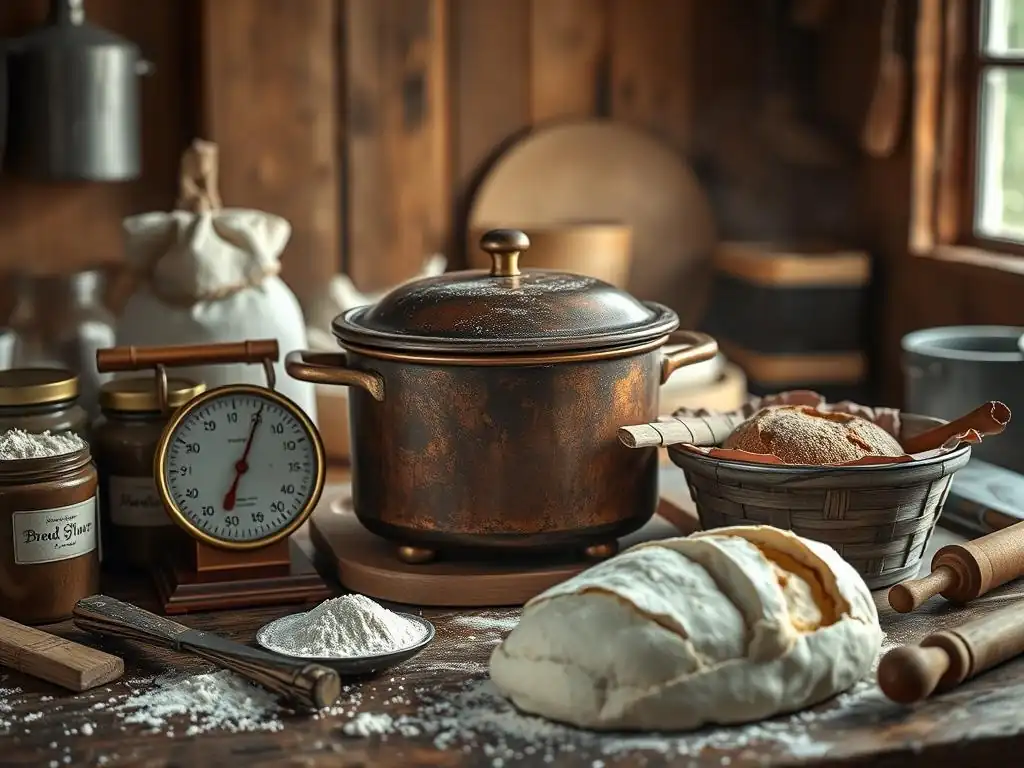
To truly master baking with artisan flour and consistently achieve fantastic bread texture, having the right tools and resources can make a significant difference.
Must-Have Baking Tools for Artisan Bread Making
Having a few key pieces of equipment can greatly simplify the process and improve your results when working with artisan flours. These tools are designed to support the unique needs of artisan bread dough.
- Banneton Proofing Basket: For shaping and proofing dough. Using a banneton helps the dough maintain its shape during the final rise, especially for higher hydration doughs that might otherwise spread. The basket also imparts a lovely spiral pattern on the crust, enhancing the visual appeal of your artisan bread texture.
- Dutch Oven: For baking with steam and achieving a crispy crust. Baking in a preheated Dutch oven traps the steam released by the dough in the initial phase of baking. This moist environment allows the crust to expand fully before setting, resulting in better oven spring and a thinner, crispier crust – a hallmark of excellent artisan bread texture.
- Digital Kitchen Scale: Precise measurements are crucial. Baking is a science, and measuring ingredients by weight rather than volume is far more accurate. This consistency is essential when working with different artisan flours, as their density can vary. Accurate weighing ensures your hydration is spot on, which is critical for managing dough consistency and achieving the desired artisan bread texture.
Investing in these tools can elevate your baking from good to great, providing the control and environment needed for artisan flours to perform their best. They support critical stages like proofing and baking, directly contributing to the final structure and texture of your loaves.
Recommended Books and Online Courses for Artisan Bread Bakers
Education is a continuous journey in baking, and exploring resources specifically focused on artisan bread can deepen your understanding and improve your skills.
- Book Title: [Look for renowned books by authors like Ken Forkish or Chad Robertson] - Learn advanced techniques. Many classic and contemporary books delve into the science and art of baking with different flour types, explaining how they behave and how to manipulate them for desired outcomes. They often provide detailed formulas and techniques, like managing sourdough starters or handling high-hydration doughs, which are invaluable for mastering artisan bread texture tips.
- Online Course: [Search platforms like King Arthur Baking, Bread Bakers Guild of America, or independent bakers] - Step-by-step tutorials. Online courses offer visual demonstrations of techniques, which can be incredibly helpful for beginners learning to handle sticky doughs or shape loaves. They often provide structured learning paths covering everything from foundational concepts to advanced methods for working with specific artisan flours and achieving perfect artisan bread texture.
These resources offer a wealth of knowledge, covering topics from the biology of fermentation to the specifics of working with various grains. They can provide troubleshooting advice, inspire new recipes, and teach you the nuances that turn good bread into truly exceptional bread.
Conclusion: Embrace the Art of Artisan Flour for Unforgettable Bread Texture.
Embarking on the journey with artisan flours opens up a world of flavor and texture possibilities in your bread baking. By understanding what makes these flours unique – from their milling process to their protein content – you gain the ability to influence the dough's behavior and, ultimately, the final artisan bread texture. Choosing the right flour based on your baking goals, mastering techniques like autolyse and proper hydration, and learning to troubleshoot common issues are all essential steps on this path.
With practice and a willingness to experiment, you'll become adept at predicting how different artisan flours will perform and how to coax the best out of them. The result will be loaves with complex flavors, beautiful crusts, and the satisfying crumb structure you've always dreamed of. So, grab a bag of artisan flour, apply these tips, and enjoy the rewarding process of creating truly unforgettable bread with superior artisan bread texture right in your own kitchen.
Frequently Asked Questions
What are some common artisan flours used to improve bread texture?
Many artisan bakers use flours like bread flour for its high gluten content, whole wheat flour for a nutty flavor and denser crumb, and rye flour for a distinctive taste and texture. These flours contribute to the overall bread texture.
How does the type of flour affect the crumb structure of artisan bread?
Different flours have varying protein levels, which directly impact gluten development. High-protein flours create a chewier crumb, while lower-protein flours result in a softer, more delicate crumb.
What are some beginner-friendly tips for achieving a better texture in artisan bread?
Start with high-quality flour, accurately measure your ingredients, and use the correct hydration level. Also, avoid over-kneading the dough, as this can lead to a tough texture.
Can I mix different types of flour to achieve a specific artisan bread texture?
Yes, experimenting with flour blends is a great way to customize your bread's texture. For example, combining bread flour with a small amount of whole wheat or rye flour can add complexity and improve the crumb structure.
How does proper kneading contribute to the desired texture of artisan bread?
Kneading develops gluten, which provides structure and elasticity to the dough. Adequate kneading ensures a well-risen loaf with a desirable chewy texture, but over-kneading can result in a tough bread.
Final Reflection: The Transformative Power of Artisan Flour
The pursuit of perfect bread texture is more than just a culinary quest; it's a journey of understanding the fundamental building blocks of flavor and mouthfeel. This exploration into artisan flours has revealed the profound impact that seemingly small ingredient choices can have on the final product. From the subtle nuttiness of freshly milled whole wheat to the airy lightness achieved with high-protein bread flour, the possibilities are vast and endlessly rewarding.
The shift towards appreciating the nuances of different flours has significantly altered my own baking practice, and I believe it's impacting the broader culinary landscape as well. We're moving beyond mass-produced, homogenized ingredients towards a greater appreciation for the unique characteristics of locally sourced and carefully crafted flours. This resonates with a growing desire for authenticity and connection to the source of our food. Bread is the staff of life,
they say, and choosing the right flour is choosing to elevate that staff from simple sustenance to a truly enriching experience.
Now, it's your turn. Consider the flours you currently use. Are you ready to experiment? To explore the subtle differences between types and discover the unique textures they can create? Don't be afraid to venture beyond your comfort zone; the rewards of understanding artisan flours and their impact on your bread baking are immeasurable. Embrace the journey, and you'll find yourself crafting loaves that are not just delicious, but deeply satisfying.
Unleash Your Inner Baker: Craft Extraordinary Bread Today!
Thanks for joining us on this flour-powered journey! You've now unlocked the secrets to achieving amazing bread texture using artisan flours. Ready to put your new knowledge into practice?
- Bake a test loaf: Choose your favorite artisan flour (from the list we provided!) and try a simple recipe. Notice the difference in texture! This is your first step to baking mastery.
- Share your baking experience: Tell us about your first artisan bread creation on our BakeWithEase community forum—we'd love to see your results!
- Explore further: Dive deeper into the world of artisan flours by checking out our comprehensive guide on advanced techniques (available on our website).
What unique texture are you hoping to achieve with your next artisan loaf? Let's discuss in the comments below!