
Tempering Small Batches of Chocolate for Home Baking.

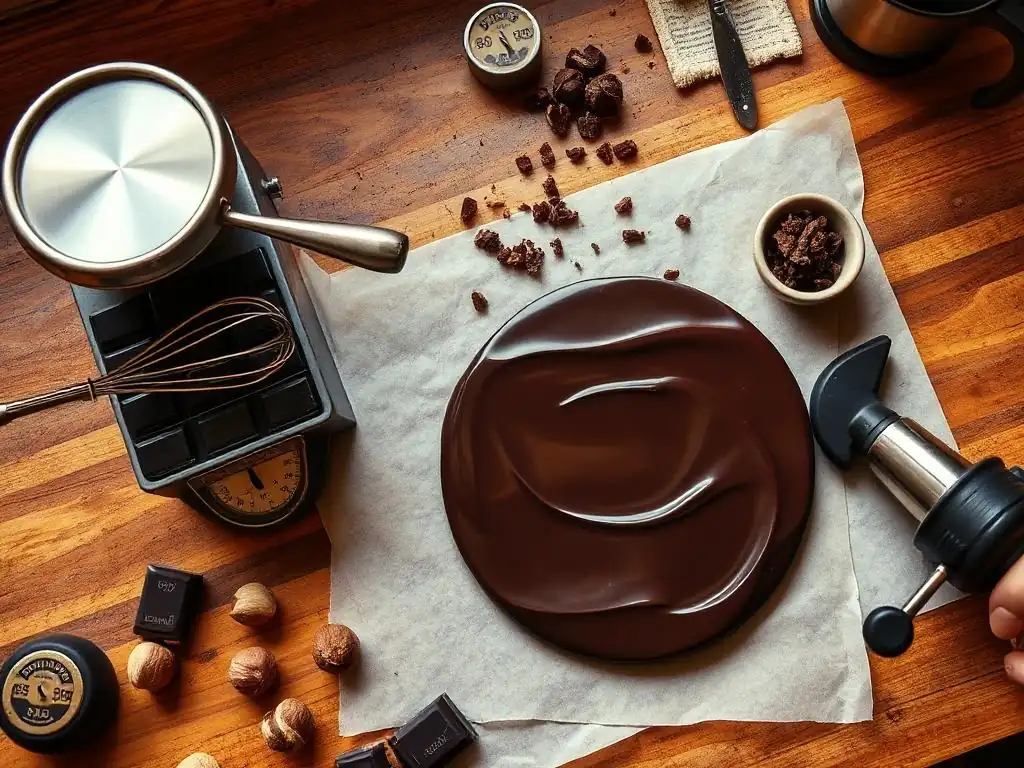
Welcome to BakeWithEase, where even the most intricate baking techniques become accessible! Are you ready to unlock the secrets to perfectly smooth and glossy chocolate, even in small quantities? Dive in as we demystify the art of chocolate tempering small batch, an essential skill for elevating your home baking from good to gourmet. Intrigued? Discover our step-by-step guide below and prepare to transform your desserts!
- Tempering Small Batches of Chocolate for Home Baking: A BakeWithEase Guide
- Introduction to Chocolate Tempering at Home
- Essential Equipment for Small Batch Chocolate Tempering
- Step-by-Step Guide to Tempering Small Batches of Chocolate
- Troubleshooting Common Tempering Issues in Small Batches
- Recipes Using Perfectly Tempered Small Batch Chocolate
- Tips and Tricks for Consistent Chocolate Tempering
- Storing and Using Tempered Chocolate
- Conclusion: Mastering Chocolate Tempering for Home Baking Success
-
Frequently Asked Questions
- How small is a "small batch" of chocolate when it comes to tempering?
- Why is tempering important, especially for small batches of chocolate?
- What are some common methods for tempering small batches of chocolate at home?
- What temperature ranges are crucial to monitor when tempering chocolate in small batches?
- What are some signs that my small batch of chocolate is not properly tempered?
- Final Reflection: The Art and Science of Small-Batch Chocolate Tempering
- Unlock Your Inner Chocolatier: Mastering the Art of Tempering
Tempering Small Batches of Chocolate for Home Baking: A BakeWithEase Guide
Introduction to Chocolate Tempering at Home
Why Tempering Chocolate Matters for Small Batch Baking
Achieving a perfect finish on your chocolate creations is often the difference between a good dessert and a truly professional-looking one. When you're working with chocolate tempering small batch sizes for home projects, like dipping cookies or making a few elegant decorations, proper tempering is absolutely key. Untempered chocolate will cool with a dull, streaky appearance (often called 'bloom'), a soft or crumbly texture, and it won't release easily from molds. More importantly, it lacks that satisfying snap when broken and has a lower melting point, meaning it gets messy quickly.
Tempering, at its core, is about controlling the crystallization of cocoa butter within the chocolate. By melting, cooling, and reheating the chocolate to specific temperatures, you stabilize the cocoa butter crystals into a particular form (specifically, Form V beta crystals) that gives chocolate its desired characteristics: gloss, snap, smooth texture, and resistance to melting at room temperature. For chocolate tempering small batch quantities, this process is often less forgiving than with larger volumes because the temperature can change rapidly, but the principles remain the same and are entirely achievable with practice.
Understanding Chocolate Composition for Perfect Temper
Chocolate is primarily composed of cocoa solids, sugar, and cocoa butter. It's the cocoa butter, a fat with multiple crystalline forms, that dictates whether your chocolate is in or out of temper. When chocolate is melted above a certain temperature (typically around 45-50°C for dark chocolate), all the cocoa butter crystals break down. As it cools, these crystals begin to reform in various unstable structures. Tempering involves guiding the cocoa butter to crystallize predominantly into the stable beta (Form V) crystal structure by cooling it to a specific working temperature range while agitating it.
Different types of chocolate have varying compositions, which means their tempering temperatures differ slightly. Dark chocolate, with a higher percentage of cocoa solids and often less sugar and no milk solids, typically requires melting to a higher temperature and cooling to a lower working temperature than milk or white chocolate.
Milk chocolate contains milk solids and often more sugar, while white chocolate contains only cocoa butter, sugar, and milk solids (no cocoa solids). Understanding these basic differences helps explain why the temperature ranges provided for tempering dark, milk, and white chocolate are distinct – knowledge crucial for successful chocolate tempering small batch attempts with different chocolate types.
Common Chocolate Tempering Challenges in Small Batches
Working with chocolate tempering small batch sizes presents unique hurdles compared to tempering larger volumes. One primary challenge is rapid temperature fluctuations. Small amounts of chocolate heat up and cool down much faster, making precise temperature control difficult without careful monitoring. Overheating even slightly past the working temperature can ruin the temper, requiring you to start the process over. Conversely, cooling too quickly can prevent the stable crystals from forming properly.
Another common issue is moisture contamination. Even a single drop of water or steam can cause chocolate to seize, turning it into a thick, grainy paste unsuitable for tempering or coating. This is particularly risky with double boiler methods if steam escapes. Furthermore, ensuring consistent agitation, which is necessary to promote even crystal formation, can feel awkward with very small quantities. However, by being mindful of these challenges and using the right techniques and tools tailored for chocolate tempering small batch sizes, you can mitigate these risks and achieve beautifully tempered chocolate.
Essential Equipment for Small Batch Chocolate Tempering
The Double Boiler Method: A Classic Approach
The double boiler, or bain-marie, is a time-tested method for melting and tempering chocolate, and it works well for chocolate tempering small batch quantities if executed carefully. This method uses indirect heat from simmering water to gently melt the chocolate placed in a bowl set over the pot of water. The key is to ensure the bottom of the bowl does not touch the water, and that no steam or water gets into the chocolate, as this will cause it to seize.
For chocolate tempering small batch sizes using a double boiler, you'll need a small saucepan and a heatproof bowl that fits snugly over the pan without touching the water. A glass or stainless steel bowl works well. You'll also need a reliable thermometer, ideally a digital instant-read thermometer or a chocolate thermometer, to accurately track the temperature changes, which are critical for successful tempering. A rubber spatula is essential for stirring the chocolate smoothly.
Microwave Tempering: A Quick and Easy Option
Microwave tempering is arguably one of the simplest and fastest methods for chocolate tempering small batch quantities, provided you use caution and work in short intervals. This method relies on melting the chocolate gradually using low power and stirring frequently to distribute the heat evenly. It's particularly convenient when you only need a few ounces of tempered chocolate for dipping or decorating.
To temper chocolate in the microwave, you'll need a microwave-safe bowl (glass or ceramic is best) and a reliable thermometer. The process involves heating the chocolate in very short bursts (e.g., 15-30 seconds initially, then reducing to 10-15 seconds as it melts), stirring thoroughly after each interval. The goal is to melt most of the chocolate while leaving a few solid pieces, which act as 'seeds' to encourage the formation of stable crystals as the chocolate cools slightly while stirring. Precise temperature monitoring is still vital, especially as the chocolate approaches its target working temperature.
Using a Seed Chocolate Method for Small Batches
The seed method is a highly reliable way to temper chocolate, and it adapts beautifully to chocolate tempering small batch sizes. This technique involves melting a portion of the chocolate completely and then adding finely chopped solid chocolate (the "seed") to the melted chocolate while stirring. The solid chocolate helps cool the melted chocolate down and introduces stable cocoa butter crystals, prompting the rest of the chocolate to crystallize in the desired form.
For this method, you'll need a heatproof bowl (used over a double boiler or in a microwave to melt the initial chocolate), a spatula for stirring, and a thermometer. The ratio is flexible, but a common approach is to melt about two-thirds of your total chocolate amount and reserve the remaining one-third as seed.
It's crucial that the seed chocolate is well-tempered itself; using untempered chocolate as seed won't work. Finely chopping the seed chocolate increases its surface area, helping it melt smoothly into the mixture and speeding up the seeding process, which is beneficial when dealing with chocolate tempering small batch volumes.
Using a Sous Vide for Precise Temperature Control
While perhaps less common for everyday home use, a sous vide immersion circulator offers exceptional temperature control, making it an excellent tool for chocolate tempering small batch sizes, especially for beginners struggling with temperature fluctuations. This method involves placing chocolate in a sealed bag and immersing it in a precisely heated water bath.
To use a sous vide for tempering, you'll need a sous vide device, a pot or container for the water bath, and a vacuum seal bag or a high-quality zip-top bag that can be fully submerged without leaking. Chop your chocolate and place it in the bag, then seal it, removing as much air as possible. Set the sous vide to the appropriate temperature for your chocolate type (e.g., around 46-48°C to fully melt dark chocolate, then lowered to 31-32°C for tempering).
Submerge the bag, ensuring the chocolate is fully immersed, and allow it to melt and temper according to the temperature cycle you set. This method provides unparalleled stability, reducing the risk of overheating or cooling too fast, which are common pitfalls in chocolate tempering small batch quantities.
Step-by-Step Guide to Tempering Small Batches of Chocolate
Preparing Your Chocolate: Chopping and Melting
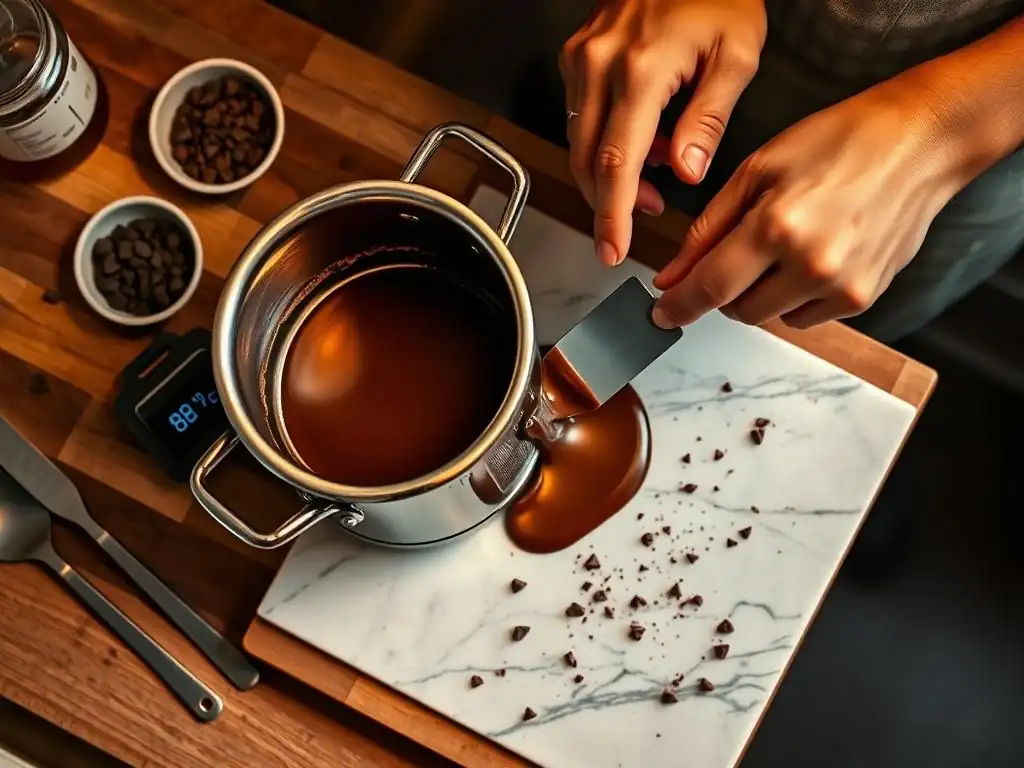
The first step in successful chocolate tempering small batch quantities is proper preparation. Start with high-quality chocolate; couverture chocolate, specifically formulated with a higher percentage of cocoa butter, is ideal for tempering due to its fluidity, but good quality bar chocolate can also work. Avoid chocolate chips, as they contain stabilizers that prevent them from melting smoothly for tempering. Accurately weigh the amount of chocolate you need for your project, whether it's 100 grams for dipping pretzels or 250 grams for making bark.
Finely chop the chocolate into small, uniform pieces. This is crucial because smaller pieces melt more evenly and quickly, reducing the risk of scorching and making the melting process more controllable, which is particularly important when you are doing chocolate tempering small batch amounts. If using the seed method, chop about two-thirds of the chocolate very finely and set aside the remaining one-third as seed, also finely chopped. Ensure your workspace and all equipment are completely dry before you begin.
Double Boiler Method: Detailed Instructions
To temper chocolate tempering small batch sizes using a double boiler, fill a small saucepan with about an inch or two of water and bring it to a gentle simmer – do not let it boil vigorously. Place the heatproof bowl containing your finely chopped chocolate over the saucepan, ensuring the bottom of the bowl does not touch the water. Stir the chocolate constantly with a dry rubber spatula as it melts.
Monitor the temperature carefully. For dark chocolate, heat until it reaches approximately 45-50°C (113-122°F) and is completely melted. Remove the bowl from the heat and the saucepan. Dry the bottom of the bowl thoroughly to prevent any water from mixing with the chocolate.
Now, you need to cool it down while stirring. If using the seeding method with a double boiler, add your finely chopped seed chocolate (about one-third of the original amount) to the melted chocolate and stir continuously. The solid chocolate will help cool the mixture and introduce stable crystals. Continue stirring until the chocolate cools to its working temperature (around 31-32°C or 88-90°F for dark chocolate) and the seed chocolate is fully melted.
If not using the seed method, stir the melted chocolate over an ice bath (being extremely careful not to get any water in it) until it reaches the working temperature, then remove from the ice bath and continue stirring for a few more minutes to ensure even cooling and crystal formation. Test the temper using the snap test (explained later). If needed, you can gently warm the chocolate back up slightly over the very low simmering water for just a few seconds, stirring constantly, if it cools too much and thickens before you're finished using it, but do not exceed the working temperature.
Microwave Tempering: Precise Temperature Control
Microwave tempering for chocolate tempering small batch quantities requires patience and low power. Place your finely chopped chocolate in a microwave-safe bowl. Heat on 50% power for 30 seconds. Remove and stir thoroughly, scraping down the sides. The chocolate won't look melted yet. Repeat this process, reducing the time to 15-20 seconds as the chocolate begins to melt, stirring well after each interval. Continue until the chocolate is about 75-80% melted, with some small solid pieces remaining.
Remove the bowl from the microwave and stir continuously. The residual heat in the bowl and the melted chocolate will continue to melt the remaining solid pieces. Stir until the chocolate is completely smooth and reaches the correct working temperature (around 31-32°C or 88-90°F for dark, 29-30°C or 84-86°F for milk, 28-29°C or 82-84°F for white chocolate). The solid pieces you left in help to "seed" the chocolate with stable crystals.
If it gets too cool and thick before all pieces melt, you can give it one very short burst (5-10 seconds) in the microwave on low power, then stir vigorously. Test the temper. If it cools and thickens while you're working, use short bursts (5-10 seconds) on low power, stirring well, to maintain the working temperature without exceeding it.
Seed Chocolate Method: Achieving the Right Crystal Structure
The seed method is highly effective for chocolate tempering small batch amounts because it directly introduces stable beta crystals into the melted chocolate. Start by melting two-thirds of your finely chopped chocolate using either the double boiler or microwave method until it reaches the initial melting temperature (e.g., 45-50°C for dark chocolate) and is completely smooth, ensuring no solid pieces remain at this stage.
Remove the melted chocolate from the heat source. Immediately add the remaining one-third of your finely chopped, solid chocolate (the seed chocolate) to the bowl. Stir continuously and vigorously with a spatula. The heat from the melted chocolate will cause the seed chocolate to melt gradually.
As it melts, the stable crystals within the seed chocolate will encourage the melted chocolate to form the same stable structure as it cools down. Continue stirring until the chocolate reaches its working temperature (around 31-32°C for dark chocolate, check ranges for milk/white) and is completely smooth with no solid seed pieces visible. This consistent stirring is vital for even cooling and crystal distribution when you are aiming for perfect chocolate tempering small batch results. Once the desired temperature is reached and all seed is melted, your chocolate should be in temper.
Sous Vide Method: Maintaining Stable Temperature
Using a sous vide for chocolate tempering small batch quantities offers unparalleled temperature control, making it a very reliable method. Chop your chocolate finely and place it in a high-quality, sealed bag. Submerge the bag in a water bath preheated by your sous vide immersion circulator. For dark chocolate, set the temperature to approximately 46-48°C (115-118°F) to fully melt the chocolate. Allow it to melt completely, which usually takes 15-20 minutes depending on the amount.
Once fully melted, lower the sous vide temperature to the working temperature for your chocolate type (e.g., 31-32°C or 88-90°F for dark chocolate; adjust for milk/white). Leave the bag in the water bath at this temperature for another 10-15 minutes, gently massaging the bag occasionally to ensure even temperature distribution and crystal formation. The precise temperature maintained by the sous vide allows the stable beta crystals to form correctly without the risk of overheating or rapid cooling.
When you're ready to use the chocolate, simply remove the bag from the water bath, dry it thoroughly, and snip a corner to pipe or pour the perfectly tempered chocolate. You can keep the bag in the water bath at the working temperature to keep the chocolate tempered while you work.
Troubleshooting Common Tempering Issues in Small Batches
Chocolate Seizing: Prevention and Solutions
Chocolate seizing is one of the most frustrating issues when working with chocolate tempering small batch or large quantities. It occurs when even a tiny amount of water or steam comes into contact with melted chocolate. The sugar particles in the chocolate, normally suspended in the cocoa butter fat, clump together when they absorb moisture, turning the smooth liquid chocolate into a thick, grainy, unworkable paste almost instantly. This is why ensuring all equipment is bone dry and being vigilant about steam from a double boiler is critical.
If your chocolate seizes, there are limited options, especially with small quantities. Sometimes, you can attempt to rescue it by stirring in a very small amount of hot, not boiling, liquid fat – like melted cocoa butter, clarified butter, or a neutral oil like vegetable oil (about 1 teaspoon per 100g of seized chocolate). Stir vigorously until it becomes a smooth, albeit much thinner, ganache-like consistency.
While this might make it usable in baked goods (like brownies or cakes) where the added fat and liquid won't matter, it will not be in temper and cannot be used for dipping or molding where a snap and gloss are desired. The best solution is prevention: be meticulous about keeping moisture away from your chocolate.
Bloom: Identifying and Avoiding Fat Bloom
Bloom appears as a dull, grayish, or streaky surface on chocolate and is a clear sign that the chocolate is out of temper. There are two types: sugar bloom, caused by moisture drawing sugar to the surface, and fat bloom, caused by unstable cocoa butter crystals melting and recrystallizing on the surface. When you improperly temper chocolate, or if tempered chocolate is stored incorrectly (in fluctuating temperatures), the unstable cocoa butter crystals (Forms I-IV) melt at room temperature and then reform into larger, visible Form VI crystals on the surface, resulting in fat bloom.
Avoiding fat bloom when doing chocolate tempering small batch projects requires achieving and maintaining the correct temper. This means melting to the proper initial temperature, cooling to the correct working temperature while stirring, and then allowing it to set properly at a stable, cool room temperature. Rapid cooling, like placing items in a cold refrigerator immediately after dipping, can sometimes encourage bloom. Ensure your workspace is not too warm (ideally below 22°C or 72°F) and that your tempered chocolate items set undisturbed at room temperature or in a cool, dry place until fully hardened before storing.
Ensuring Proper Temper: The Snap Test Explained
The snap test is the classic, hands-on way to check if your chocolate tempering small batch was successful. Once you believe your chocolate is tempered and at the correct working temperature, spread a very thin layer (about the size of a credit card) onto a piece of parchment paper, the back of a metal spoon, or a knife blade.
Allow this test piece to set undisturbed at room temperature. A thin smear of properly tempered dark chocolate should harden within 3-5 minutes at a comfortable room temperature (around 20-22°C or 68-72°F). Once hardened, it should be glossy, smooth, and break with a distinct, clean snap.
If the chocolate is dull, streaky, or bends and is soft rather than snapping cleanly, it is likely out of temper, and you'll need to reheat and repeat the tempering process. This quick test is invaluable for confirming your chocolate tempering small batch efforts have paid off before you commit your entire batch to your project.
Uneven Cooling: Addressing Small Batch Specific Issues
Uneven cooling can be a particular challenge when tempering small amounts of chocolate. Because the volume is small, the chocolate cools very rapidly, and if it's not stirred consistently or if the environment is too cold or drafty, parts of the chocolate can cool and set too quickly while other parts are still liquid. This can lead to an inconsistent temper throughout the batch, resulting in some areas of your finished product having bloom or a poor texture while others are fine.
To address uneven cooling during chocolate tempering small batch processes, maintain constant, smooth stirring as the chocolate cools to its working temperature, especially when using the double boiler or seed method. This ensures heat is distributed evenly and encourages uniform crystal formation. When the chocolate is ready to use, work efficiently.
If it starts to thicken in the bowl before you're finished, gently warm it back up just to the working temperature using a very brief dip over warm water or a few seconds in the microwave on low power, stirring constantly. Avoid placing setting items in a refrigerator that is too cold or humid, as this can also promote uneven setting and potential bloom; a cool pantry or countertop is often better for the initial set.
Recipes Using Perfectly Tempered Small Batch Chocolate
Chocolate-Covered Strawberries: A Classic Treat
Dipping fresh strawberries is a perfect application for chocolate tempering small batch quantities. You typically only need 100-200 grams (about 3.5-7 ounces) of chocolate to cover a dozen medium-sized strawberries. Using properly tempered chocolate ensures a thin, even, glossy coating that sets firm to the touch in minutes and has a satisfying bite.
To make them, wash and thoroughly dry your strawberries – any moisture will cause the chocolate to seize. Prepare your small batch tempered chocolate using your preferred method (microwave or seed method are great for this amount). Hold each strawberry by the stem or hull, dip it into the tempered chocolate, rotating to coat completely or partially. Lift and let excess chocolate drip back into the bowl, using a spatula or the edge of the bowl to wipe away any drips.
Place the dipped strawberries onto a parchment-lined baking sheet to set. At room temperature (around 20-22°C), they should set within 10-15 minutes. Once set, the chocolate should be hard and shiny.
Homemade Chocolate Bark: Customizable and Delicious
Chocolate bark is incredibly easy to make and showcases the beautiful gloss and snap of properly tempered chocolate. It's also ideal for using chocolate tempering small batch amounts, as you can easily adapt the quantity of chocolate to fit a small baking sheet or even just a dinner plate lined with parchment paper. A small batch of 200-300 grams (about 7-10.5 ounces) of tempered chocolate is perfect for a modest sheet of bark.
Temper your chosen chocolate (dark, milk, or white works well) using a small batch method. While the chocolate is still liquid and in temper, pour it onto a parchment-lined surface (like a baking sheet or cutting board). Spread it into a thin, even layer, about 3-5mm thick, using an offset spatula. Immediately sprinkle your desired toppings over the surface.
Popular additions include chopped nuts (like pistachios or almonds), dried fruit (cranberries, cherries), pretzels, crushed cookies, sea salt, or sprinkles. Let the bark set completely at room temperature or in a cool pantry until firm and snappy, which should take 30-60 minutes depending on the thickness and temperature. Once set, break the bark into irregular pieces.
Chocolate Decorations for Cakes and Cupcakes
Creating elegant chocolate decorations is a fantastic way to utilize chocolate tempering small batch amounts. From simple chocolate curls and shards to piped shapes and molded figures, tempered chocolate holds its shape and provides a professional finish that untempered chocolate cannot. You might only need 50-100 grams (about 1.7-3.5 ounces) for a few decorations.
Temper a very small batch of chocolate. While it's in temper, you can pour or pipe it onto parchment paper to create shapes – anything from abstract swooshes to geometric patterns or even letters. For chocolate curls, spread a thin layer onto a cool surface (like the back of a baking sheet) and scrape with a metal spatula once partially set.
For molded decorations, pour the tempered chocolate into clean, dry polycarbonate or silicone molds, tapping gently to remove air bubbles, and let them set. The key to clean release and sharp details in molds or crisp edges on piped shapes is using chocolate that is perfectly in temper and allowing it to set fully.
Chocolate Truffles: A Decadent Indulgence
While the truffle filling (ganache) doesn't require tempered chocolate, coating truffles in a crisp, snappy layer of tempered chocolate elevates them significantly. This process is perfect for chocolate tempering small batch quantities, as you'll dip the rolled ganache centers a few at a time. Depending on how many truffles you make, you might need 200-400 grams (about 7-14 ounces) of tempered chocolate for coating.
Prepare your truffle centers and ensure they are chilled and firm. Temper your coating chocolate using your preferred small batch method. Have a parchment-lined baking sheet ready. Drop a truffle center into the tempered chocolate, using a fork or dipping tool to roll it around until coated.
Lift the truffle out, tap the tool gently against the edge of the bowl to remove excess chocolate, and slide it onto the parchment paper. Work relatively quickly, as the tempered chocolate will start to set. If the chocolate in your bowl begins to cool and thicken too much, gently warm it back up just to the working temperature as described in the troubleshooting section. Once all truffles are dipped, let them set fully at room temperature until the chocolate is hard and glossy.
Tips and Tricks for Consistent Chocolate Tempering
Maintaining the Correct Temperature
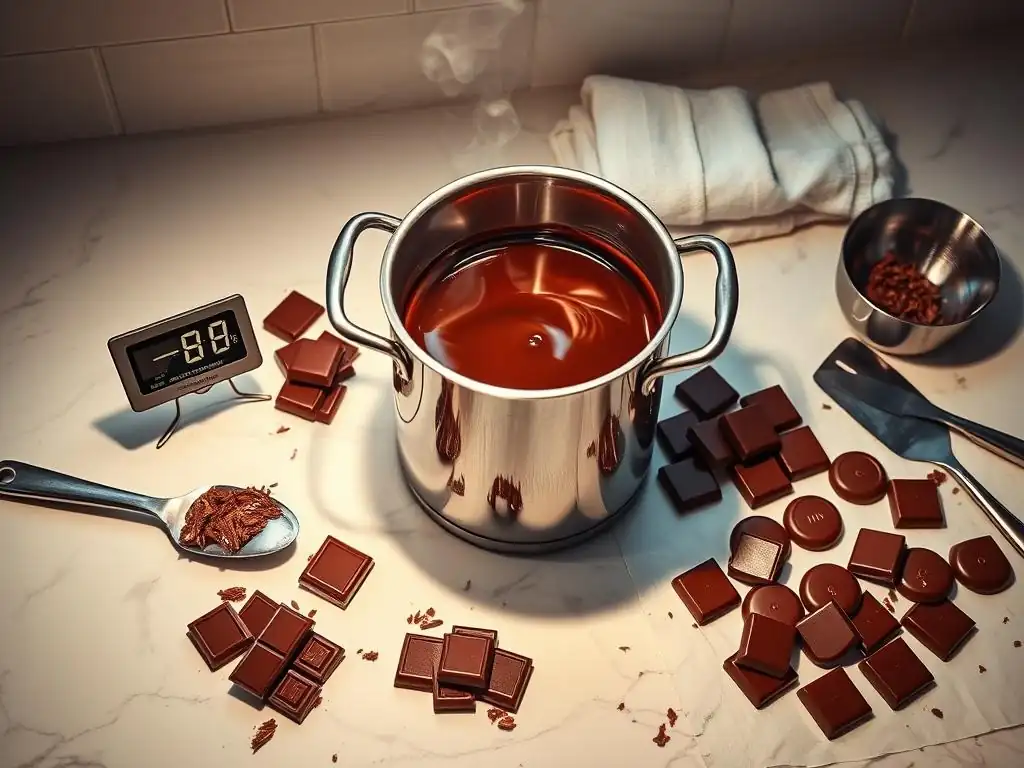
Maintaining the precise temperature is the single most critical factor in successful chocolate tempering small batch volumes. Because small quantities lose heat quickly, you must constantly monitor the temperature with an accurate thermometer. The target working temperature range is quite narrow – typically only a degree or two. For dark chocolate, this is usually 31-32°C (88-90°F). For milk chocolate, it's slightly lower, around 29-30°C (84-86°F), and for white chocolate, it's the lowest at 28-29°C (82-84°F).
Once your chocolate reaches the correct working temperature after cooling and seeding, it's ready to use. However, as you work, the chocolate will continue to cool and may thicken. If it drops below the minimum working temperature, the stable crystals can over-crystallize, making the chocolate too thick to work with and potentially taking it out of temper. To prevent this, you may need to gently rewarm it slightly.
Use a hairdryer on a low setting waved over the bowl, a quick 5-10 second burst in the microwave on low power, or place the bowl back over very gently simmering water for just a few seconds, stirring continuously. The goal is to bring it back just into the working range without exceeding the maximum temperature. This careful temperature maintenance is paramount for achieving a perfect chocolate tempering small batch result over the entire working time.
Stirring Techniques for Optimal Temper
Consistent and proper stirring is vital throughout the chocolate tempering small batch process, especially during the cooling phase. Stirring helps to evenly distribute the heat (or cold) throughout the chocolate, preventing hot or cool spots. More importantly, stirring promotes the formation and distribution of the desired stable beta crystals. As the chocolate cools and these crystals begin to form, stirring helps them spread throughout the liquid chocolate, encouraging more stable crystals to form and preventing the unstable ones from taking hold.
When melting chocolate, stir gently but consistently to ensure even melting and prevent scorching. During the cooling and seeding phase, stir more vigorously and continuously. Use a rubber spatula to scrape down the sides and bottom of the bowl frequently, ensuring all the chocolate is incorporated and cooled evenly. The friction from stirring also helps refine the crystal structure.
For chocolate tempering small batch quantities, ensure your spatula reaches all areas of the bowl. Don't just stir in the center; actively move the chocolate from the edges to the center and back again to ensure uniformity. This continuous movement is key to developing a stable temper.
Working with Different Types of Chocolate: Dark, Milk, and White
While the fundamental principles of chocolate tempering small batch quantities remain the same across dark, milk, and white chocolate, the specific temperature ranges differ due to their varying compositions, particularly the percentage of cocoa butter and the presence of milk solids. Dark chocolate, with its higher cocoa butter content and lack of milk solids, has the highest melting and working temperatures. Milk chocolate, containing milk solids and often less cocoa butter, requires slightly lower temperatures. White chocolate, composed only of cocoa butter, sugar, and milk solids, has the lowest tempering temperatures.
It's crucial to know the correct temperature ranges for the specific type of chocolate you are tempering. As a general guide:
- Dark Chocolate: Melt to 45-50°C (113-122°F), cool to 31-32°C (88-90°F) working temperature.
- Milk Chocolate: Melt to 40-45°C (104-113°F), cool to 29-30°C (84-86°F) working temperature.
- White Chocolate: Melt to 40-45°C (104-113°F), cool to 28-29°C (82-84°F) working temperature.
Always use a reliable thermometer and aim for the middle of these ranges. Remember that these are general guidelines, and specific chocolate brands or types (like those with very high cocoa percentages) might have slightly different recommended temperatures, so checking the manufacturer's instructions if available is always a good practice when you are doing chocolate tempering small batch projects with unfamiliar chocolate.
Optimizing Cooling Time for Small Batches
Optimizing the cooling time is a delicate balance when performing chocolate tempering small batch work. You need the chocolate to cool down from its melting temperature to its working temperature relatively quickly but not so fast that it cools unevenly or sets before the stable crystals can form properly. The stirring process itself helps manage the cooling rate.
If the chocolate is cooling too slowly, particularly during the seed method, ensure your seed chocolate is finely chopped and that you are stirring continuously to help it melt and cool the bulk chocolate. If using a double boiler, removing it from the heat and drying the bowl bottom promptly is essential.
If using the table method (less common for very small amounts but possible), spreading it thinly helps cool it rapidly. If it's cooling too quickly and getting thick before reaching the target temperature or before all seed chocolate is melted, you might need to gently apply a tiny bit of heat while stirring vigorously, just enough to keep it fluid and allow it to reach the correct temperature smoothly.
A slightly cooler room temperature (around 20-22°C) also helps facilitate controlled cooling compared to a very warm kitchen. Patience and constant temperature monitoring are key to managing the cooling phase effectively for successful chocolate tempering small batch results.
Storing and Using Tempered Chocolate
Best Practices for Storing Tempered Chocolate
Once you have successfully tempered your chocolate and used it to create your desired items (dipped fruit, molded shapes, bark, etc. ), proper storage is essential to maintain the temper and prevent bloom. Tempered chocolate products are best stored in a cool, dry place with a relatively stable temperature. An ideal storage temperature is typically between 15-18°C (59-64°F). Avoid significant temperature fluctuations, as this is a primary cause of fat bloom.
Store finished chocolate items in an airtight container to protect them from moisture, odors, and temperature swings. Layer items with parchment paper to prevent sticking. While it might seem intuitive, the refrigerator is often not the best place to store tempered chocolate unless your home is very warm and humid.
Refrigerators are typically too cold and, more importantly, too humid. Condensation can form on the surface of the chocolate when you take it out, leading to sugar bloom. If refrigeration is necessary, place the airtight container in the warmest part of the fridge (often the top shelf or door) and allow it to come to room temperature slowly inside the container before opening it to minimize condensation.
Reheating Tempered Chocolate: Maintaining the Temper
Sometimes, when working with chocolate tempering small batch quantities, you might have leftover tempered chocolate, or the chocolate in your bowl might cool and thicken while you are still using it. You can gently reheat tempered chocolate and maintain its temper, provided you do not overheat it. The goal is to bring it back just to the working temperature range (e.g., 31-32°C for dark).
The safest ways to reheat small amounts of tempered chocolate are using very short bursts in the microwave on low power (5-10 seconds at a time, stirring well after each), placing the bowl briefly over very gently simmering water (off the heat source, stirring constantly), or using a hairdryer on a low setting waved over the chocolate while stirring. Use your thermometer to check the temperature frequently.
As soon as it is back within the working range and fluid enough to use, stop heating. Do not exceed the maximum working temperature for your chocolate type, or you will break the temper and have to start the tempering process over.
Shelf Life of Tempered Chocolate Products
The shelf life of products made with tempered chocolate depends on the chocolate quality and any added ingredients. High-quality tempered chocolate itself, stored correctly in a cool, dry place, can last for many months, often up to a year or more, though it's best used within a few months for optimal flavor. The tempering process stabilizes the cocoa butter, making the chocolate less prone to bloom and giving it a longer shelf life compared to untempered chocolate.
However, the shelf life of your final product will be limited by the perishability of the ingredients you combined the tempered chocolate with. For instance, chocolate-covered fresh strawberries should be consumed within 1-2 days and stored in the refrigerator (accepting the risk of some minor bloom). Chocolate bark with dried fruit and nuts will last much longer, perhaps 2-3 months if stored properly in an airtight container at room temperature.
Chocolate truffles (ganache centers) typically last 1-2 weeks in the refrigerator or longer frozen. Always consider the most perishable component when determining the shelf life of your delicious creations made with chocolate tempering small batch efforts.
Conclusion: Mastering Chocolate Tempering for Home Baking Success
Mastering chocolate tempering small batch techniques is a valuable skill for any home baker looking to elevate their confections. While it requires precision and attention to detail, especially with temperature control, the results – glossy, snappy, professional-looking chocolate – are incredibly rewarding. We've explored why tempering is essential, the role of chocolate composition, common challenges unique to small batches, and the equipment and step-by-step methods (double boiler, microwave, seed, sous vide) tailored for working with smaller quantities.
Remember that practice makes perfect. Don't be discouraged if your first attempt at chocolate tempering small batch isn't flawless. Pay close attention to temperature, stir consistently, use high-quality chocolate, and be patient during the cooling and setting phases. By understanding the science behind tempering and applying these techniques and troubleshooting tips, you'll be well on your way to confidently creating beautiful, delicious chocolate treats right in your own kitchen, transforming simple ingredients into stunning edible art.
Frequently Asked Questions
How small is a "small batch" of chocolate when it comes to tempering?
A "small batch" typically refers to quantities between 4 and 8 ounces (115-230 grams). This amount is manageable for home bakers and reduces waste.
Why is tempering important, especially for small batches of chocolate?
Tempering ensures the chocolate has a smooth, glossy finish and a satisfying "snap". Untempered chocolate can be dull, streaky, and melt easily, even in small quantities.
What are some common methods for tempering small batches of chocolate at home?
Popular methods include the seeding method, the tablier method (spreading on marble), and using a double boiler with precise temperature control.
What temperature ranges are crucial to monitor when tempering chocolate in small batches?
The specific temperatures depend on the type of chocolate, but generally, you'll need to melt it to around 115-120°F (46-49°C) for dark chocolate, then cool it to 88-90°F (31-32°C) before using.
What are some signs that my small batch of chocolate is not properly tempered?
Signs include a dull or streaky appearance, a soft texture that doesn't snap, and the formation of white "bloom" on the surface.
Final Reflection: The Art and Science of Small-Batch Chocolate Tempering
The pursuit of perfectly tempered chocolate, even in small quantities, remains a rewarding challenge for home bakers. Achieving that signature snap and glossy sheen elevates homemade treats from good to extraordinary, transforming a simple confection into a truly memorable experience. This is more than just a technical skill; it's a testament to the dedication and passion that goes into crafting something beautiful and delicious.
The journey of mastering chocolate tempering, for me, has been a fascinating blend of scientific precision and artistic intuition. It's a process that demands patience and attention to detail, but the results are undeniably worth the effort. The subtle nuances of temperature, the visual cues of the chocolate's bloom, and the satisfying snap of a perfectly tempered piece – these are the moments that make the process so compelling. The best things in life are worth waiting for,
and this certainly applies to the art of chocolate tempering. The anticipation, the careful execution, and the final reward create a deeply satisfying experience.
Now, it's your turn. Don't be intimidated by the process. Experiment with the techniques outlined in this article, embrace the learning curve, and savor the journey. Remember, even small imperfections can add to the charm of your homemade creations. The most important ingredient isn't just the chocolate itself, but the love and care you put into each step. So, gather your ingredients, embrace the challenge, and unlock the magic of perfectly tempered chocolate in your own kitchen. The delicious results await!
Unlock Your Inner Chocolatier: Mastering the Art of Tempering
Thanks for joining us on this chocolatey adventure! We hope you now feel confident in tackling tempering – a skill that elevates your baking to the next level. Ready to put your new knowledge into practice?
- Tempt your taste buds: Try tempering a small batch of your favorite chocolate today. Experiment with different techniques and recipes to find what works best for you. This is where the real fun begins!
- Share your creations: Post a picture of your perfectly tempered chocolate treats on social media and tag us – we'd love to see your beautiful work! Use #BakeWithEaseTempering.
- Dive deeper: Explore more advanced chocolate techniques on our website (bakewithease.com) – we have a wealth of resources waiting for you!
What delicious chocolate masterpiece will you create first?