
Beyond Jello: Creative and Advanced Uses for Gelatin in Baking

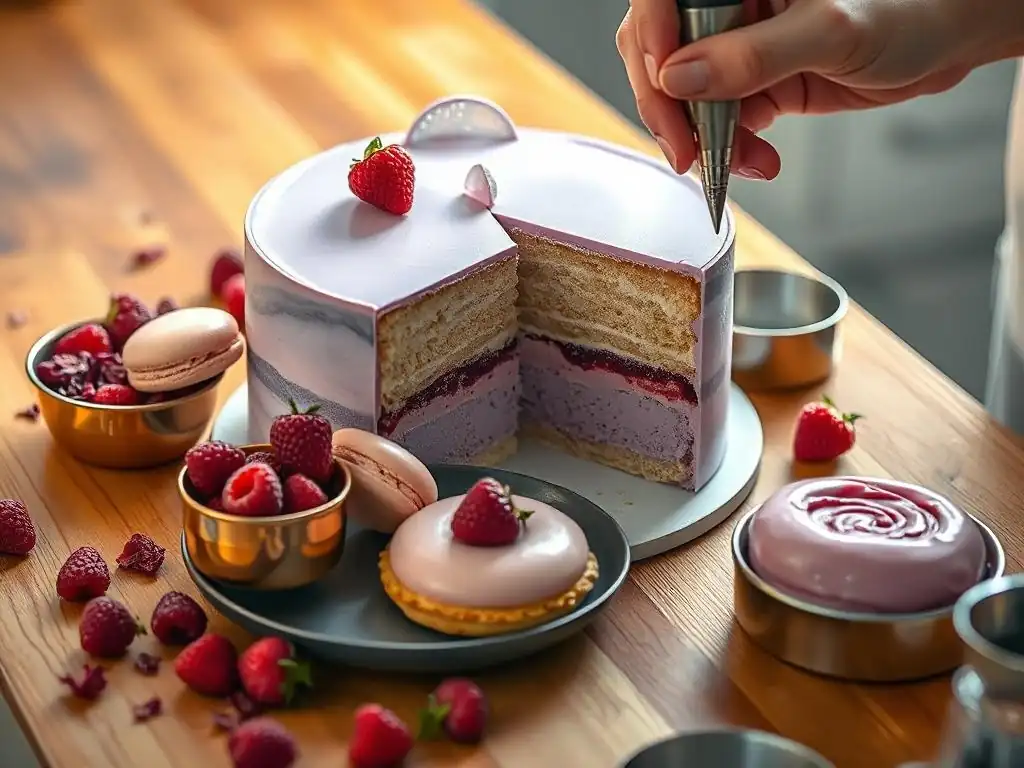
Welcome to BakeWithEase, where we unlock the secrets to baking brilliance! Are you ready to elevate your baking beyond the basics? Dive into the world of gelatin baking recipes and discover advanced techniques that will transform your desserts into stunning works of art. Prepare to be amazed by the unexpected versatility of this humble ingredient and unlock a whole new level of creative possibilities. Curious to see how gelatin can revolutionize your baking? Let's begin!
- Introduction to Gelatin in Advanced Baking
- Mastering Gelatin Techniques for Baking Excellence
- Innovative Gelatin Baking Recipes: Elevating Your Creations
- Advanced Gelatin Applications in Bread Baking
- Troubleshooting Common Gelatin Baking Problems
- Gelatin Baking Recipes Advanced Techniques: Tips and Tricks from the Pros
- Conclusion: Unleash Your Baking Potential with Gelatin
-
Frequently Asked Questions
- How does gelatin contribute to the structure of advanced baking recipes?
- What are some advanced techniques for incorporating gelatin into baking?
- Why is gelatin important for achieving specific textures in pastry creams and custards?
- Can gelatin be used to create unique and innovative desserts beyond traditional jellies?
- How does the type of gelatin (sheet vs. powdered) affect the final result in gelatin baking recipes?
- Final Reflection: Unlocking Gelatin's Untapped Potential in Baking
- Unleash Your Inner Gelatin Artist!
Introduction to Gelatin in Advanced Baking
Understanding Gelatin: More Than Just Dessert
Gelatin, often associated with colorful, wobbly desserts, is a versatile protein derived from collagen. In the world of advanced baking, it's a fundamental ingredient used to create structure, texture, and stability in a wide array of confections. Far from being a simple setting agent, gelatin's unique properties allow bakers to achieve results that are otherwise impossible, from gravity-defying mousse layers to exquisitely shiny glazes. Its ability to form a thermoreversible gel – meaning it melts when heated and sets when cooled – is key to many sophisticated baking techniques.
Historically, gelatin has been used in cooking for centuries, but its application in refined pastry work really blossomed with the development of techniques allowing for consistent purity and strength. Modern bakers utilize different forms of gelatin, each with specific characteristics suited to various applications. Understanding its chemical properties, such as its bloom strength (a measure of gelling power), is crucial for consistent results in complex gelatin baking recipes and advanced techniques. For instance, a higher bloom strength means less gelatin is needed to achieve the same set, which can impact the final texture and clarity of a dessert.
Why Use Gelatin in Baking? Exploring the Benefits
Gelatin offers several significant advantages when incorporated into baking recipes, particularly for advanced applications. Its primary benefit is its ability to provide structure and stability without adding significant flavor or cloudiness (when used correctly). This is vital for creating delicate mousses that hold their shape, setting fruit jellies that slice cleanly, or stabilizing creams and fillings so they don't weep or collapse. For example, a classic French mousse often relies on gelatin to maintain its airy structure, allowing for elegant layering in complex entremets.
Beyond stability, gelatin contributes to desirable textures. It can create a smooth, melt-in-your-mouth quality in puddings and custards, or provide the perfect wobble in panna cotta. In glazes, it delivers a signature mirror-like sheen that is highly prized in professional patisserie. Furthermore, gelatin helps extend the shelf life of certain baked goods by retaining moisture and preventing syneresis (liquid separation) in fillings. Mastering gelatin baking recipes advanced techniques unlocks a new level of control over texture and presentation in your baked creations.
Mastering Gelatin Techniques for Baking Excellence
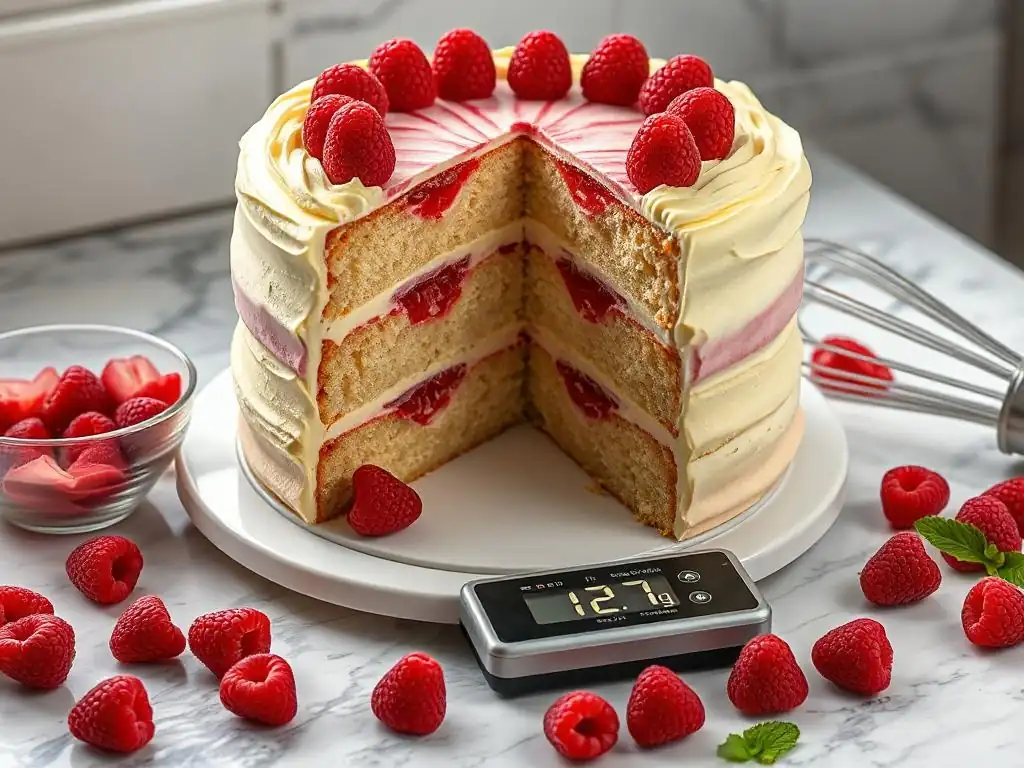
Activating Gelatin Correctly: A Step-by-Step Guide
Proper activation, often called "blooming," is the critical first step when working with gelatin. This process involves hydrating the dry gelatin in a cold liquid, typically water or juice, before it's heated and dissolved. Blooming allows the gelatin granules or sheets to absorb moisture evenly, ensuring they dissolve smoothly without lumps when warmed. Skipping this step or using hot liquid initially can result in a grainy texture or uneven setting in your final product, ruining the desired outcome of your gelatin baking recipes advanced techniques.
Here is a standard process for blooming gelatin:
- Measure the required amount of cold liquid into a small bowl. Use the amount specified in your recipe, typically 3-4 tablespoons of cold water per teaspoon of gelatin powder, or enough to fully submerge gelatin sheets.
- Sprinkle gelatin powder evenly over the surface of the cold liquid. Do not dump it in a pile, as this can cause clumping. If using sheets, gently slide them into the liquid one by one.
- Let the gelatin stand undisturbed for 5-10 minutes. During this time, the gelatin will absorb the liquid and swell, becoming translucent and jelly-like (for powder) or very soft and pliable (for sheets).
- Once bloomed, the gelatin is ready to be gently heated and dissolved into your recipe's warm liquid component.
Different Types of Gelatin and Their Baking Applications
Gelatin is primarily available in two forms: powder and sheets. While both perform the same basic function, they differ in handling and measurement, which is important for precise gelatin baking recipes advanced techniques. Gelatin powder is the most common form found in many home kitchens. It's typically sold in boxes containing small envelopes, each holding about 1/4 ounce (around 2.5 teaspoons), which is often standardized to set about 2 cups of liquid. Powdered gelatin requires blooming in cold liquid before being heated.
Gelatin sheets, also known as leaf gelatin, are preferred by many professional bakers for their ease of use and the clarity they lend to finished products. Sheets come in different "grades" or bloom strengths, commonly silver, gold, platinum, and titanium, with platinum being the strongest. Recipes using sheets will specify the number of sheets and their grade.
Sheets are bloomed by soaking them in a generous amount of cold water until soft, then squeezing out excess water before dissolving. Using sheets allows for more precise control over the gelatin amount compared to pre-measured envelopes of powder, which is crucial for fine-tuning textures in advanced applications.
Gelatin Powder: Uses and Considerations
Gelatin powder is widely available and relatively inexpensive, making it a popular choice for many home baking projects. It's measured by volume (teaspoons or tablespoons) or weight. When using powder, it's crucial to use the correct ratio of cold liquid for blooming, typically 3-4 parts liquid to 1 part powder by volume, or simply ensuring the powder is fully submerged. A standard ratio often cited is 1 tablespoon of gelatin powder to 1 cup of liquid for a firm set, or 1 teaspoon per cup for a soft set, but this can vary depending on the brand's bloom strength.
One consideration with gelatin powder is ensuring it dissolves completely after blooming. After blooming, the swollen gelatin needs to be gently heated, usually by stirring it into a warm liquid component of the recipe (like a heated cream or fruit puree) or by melting it over a double boiler or in a microwave on low heat until it becomes a clear liquid.
Overheating should be avoided as it can weaken the gelatin's setting power. Gelatin powder is excellent for stabilizing whipped cream, thickening custards, or creating simple fruit jellies, forming the basis for many entry-level gelatin baking recipes advanced techniques.
Gelatin Sheets (Leaves): A Baker's Guide
Gelatin sheets are favored by professional bakers for their consistent bloom strength and the resulting clarity and smooth texture they impart. Unlike powder, sheets are typically measured by count and grade (e.g., 3 silver sheets). The weight of sheets can vary slightly between manufacturers, but the grade indicates their relative strength. For example, 1 sheet of platinum gelatin might have the same gelling power as 3-4 sheets of bronze gelatin. This consistency makes them easier to work with for precise formulations in advanced baking.
To use gelatin sheets, soak the required number of sheets in a large bowl of cold water for 5-10 minutes until they are completely softened and pliable. Use plenty of water to ensure they don't stick together. Once soft, lift the sheets from the water and gently squeeze out all excess moisture.
The bloomed sheets can then be stirred directly into a warm liquid mixture (off the heat) until fully dissolved. Because they are pre-portioned and their strength is graded, sheets offer a more reliable way to achieve specific textures, which is invaluable when executing complex gelatin baking recipes advanced techniques like mirror glazes or intricate mousse structures.
Achieving the Perfect Gelatin Bloom for Optimal Results
Achieving the perfect bloom is non-negotiable for successful gelatin use in advanced baking. The goal is to fully hydrate the gelatin uniformly without dissolving it prematurely. For powder, this means sprinkling it over the surface of the cold liquid and letting it sit undisturbed. If you stir it immediately or dump it in a pile, you risk creating a gummy mass with dry pockets that won't dissolve properly later. A typical bloom time for powder is 5-10 minutes, during which it will swell significantly.
For gelatin sheets, the process is similar: soak them fully submerged in cold water. The key is using enough water so the sheets can hydrate freely and not clump together. Again, 5-10 minutes is usually sufficient for sheets to become soft and jelly-like. Once bloomed, remember to gently squeeze out the excess water before dissolving. The perfect bloom results in fully hydrated gelatin that dissolves easily and completely when warmed, leading to a smooth, clear, and evenly set final product, essential for mastering gelatin baking recipes advanced techniques.
Innovative Gelatin Baking Recipes: Elevating Your Creations
Gelatin for Cake Decoration: Creating Stunning Effects
Gelatin is a secret weapon in the advanced cake decorator's arsenal, enabling effects that are difficult or impossible with other ingredients. Its ability to create clear, stable gels and flexible, durable films makes it ideal for everything from creating vibrant, transparent glazes to crafting delicate, edible decorations. Unlike frosting or fondant, gelatin can provide a glassy finish or a translucent structure, adding a unique visual dimension to cakes.
One popular application is the creation of edible gelatin "glass" or "windows" for gingerbread houses or novelty cakes. By dissolving gelatin in water, adding sugar and food coloring, and letting it set in a thin layer, you can create brittle, candy-like sheets that mimic stained glass. Another creative use involves making flexible gelatin sheets that can be shaped into flowers, ribbons, or other decorative elements, offering a lighter and more delicate alternative to gum paste or fondant decorations. These techniques showcase the versatility of gelatin baking recipes advanced techniques beyond simple setting.
Gelatin-Based Cake Glazes: Mirror Glaze and More
Mirror glaze, or glaçage miroir, is a hallmark of professional patisserie, providing a stunning, high-gloss finish to mousse cakes and entremets. Gelatin is the key ingredient that gives mirror glaze its characteristic shine and smooth, pourable consistency when warm, which sets into a firm, reflective coating when chilled. A typical mirror glaze recipe involves heating sweetened condensed milk or white chocolate with water or glucose syrup, then incorporating bloomed gelatin, and finally adding food coloring or cocoa powder before emulsifying the mixture.
The success of a mirror glaze depends heavily on the correct amount and type of gelatin used, as well as pouring temperature. Too little gelatin, and the glaze will be runny; too much, and it will be too thick and rubbery. Using high-quality gelatin sheets (like silver or gold) often yields the clearest and most stable glaze.
The ideal pouring temperature is usually between 85°F and 95°F (29°C-35°C); pouring too hot will melt the cake's surface, while pouring too cold will result in an uneven, dull finish. Mastering this specific application is a prime example of advanced gelatin baking recipes advanced techniques.
Gelatin Flowers and Decorations: A Step-by-Step Tutorial
Creating flexible, edible gelatin decorations opens up a world of artistic possibilities for cakes. These decorations are lighter than traditional sugar paste and can have a beautiful translucency. The basic process involves making a gelatin mixture, coloring it, and then forming shapes.
- Prepare a flexible gelatin mix: Dissolve 1 tablespoon of gelatin powder in 1/4 cup cold water. Let bloom for 5 minutes. Gently heat until dissolved. Stir in 1/4 cup glucose syrup and 1/4 cup boiling water. Add food coloring as desired.
- Pour thin layers onto a silicone mat or non-stick surface. Aim for a thickness of about 1-2 mm.
- Allow the gelatin to partially set until it's pliable but not sticky, about 30-60 minutes depending on humidity.
- Use cutters or scissors to shape the gelatin. For flowers, cut out petal shapes and mold them using formers or crumpled foil while the gelatin is still slightly warm and flexible.
- Let the shapes dry completely for several hours or overnight until firm but still slightly flexible.
- Attach decorations to cakes using a little edible glue or royal icing.
This technique requires practice but allows for incredibly realistic and delicate edible art, a prime example of creative gelatin baking recipes advanced techniques.
Gelatin in Pastry Cream: Enhancing Texture and Stability
Pastry cream ( crème pâtissière) is a fundamental component in many desserts, used in tarts, éclairs, and cakes. While traditional pastry cream is thickened with egg yolks and starch, adding gelatin significantly improves its stability and texture, especially for fillings that need to hold their shape when sliced or piped. Gelatin prevents the cream from weeping (syneresis) and gives it a smoother, more luxurious mouthfeel.
Incorporating gelatin is particularly useful when pastry cream is used as a filling for tarts that will be cut into portions, or as a layer in multi-layered cakes. The gelatin provides enough structure to hold sharp edges. For instance, a standard recipe for stabilizing 2 cups of pastry cream might call for 1 teaspoon of gelatin powder (bloomed in 2 tablespoons of cold water and dissolved) stirred into the warm, finished pastry cream. As the cream cools, the gelatin sets, creating a more stable and sliceable filling compared to using starch alone.
Stabilizing Pastry Cream with Gelatin: Recipe and Tips
Here’s a basic approach to stabilizing approximately 2 cups of pastry cream:
- Prepare your standard pastry cream recipe. Ensure it is cooked thoroughly to activate the starch thickeners.
- While the pastry cream is still hot (immediately after cooking), stir in 1 teaspoon of bloomed and dissolved gelatin powder (bloomed in 2 tablespoons cold water, then gently heated until liquid) or 1-2 bloomed and squeezed gelatin sheets (depending on grade, equivalent to 1 tsp powder). Stir vigorously until the gelatin is completely incorporated and no streaks remain.
- Pour the pastry cream into a clean container, press plastic wrap directly onto the surface to prevent a skin from forming, and chill completely in the refrigerator for at least 4 hours, or until fully set.
- Before using, whisk the chilled, set pastry cream vigorously until it is smooth and pipeable. The gelatin helps it hold its shape even after whisking.
Tips for success include ensuring the pastry cream is hot enough to fully dissolve the gelatin but not boiling vigorously, which could damage the gelatin's structure. Make sure the gelatin is fully dissolved before chilling. This stabilized pastry cream is ideal for filling delicate tart shells or layering in cakes, demonstrating practical gelatin baking recipes advanced techniques.
Gelatin in Mousse Cakes: Achieving Lightness and Structure
Mousse cakes rely on a delicate balance between aeration and structure. Gelatin is essential for providing the necessary stability to mousses made with whipped cream or meringue, allowing them to hold their shape when unmolded or sliced, while retaining a light and airy texture. Without gelatin, many mousses would simply collapse. The key is using just enough gelatin to set the mousse without making it rubbery or dense.
Gelatin is typically dissolved in a small amount of warm liquid (like fruit puree, chocolate ganache base, or a sugar syrup) and then carefully folded into the aerated component (whipped cream or meringue). The ratio of gelatin to the total volume of the mousse is critical and varies depending on the desired firmness.
For a soft, airy mousse, a smaller amount of gelatin is used (e.g., equivalent to 1 teaspoon powder per 2-3 cups of mousse base). For a firmer mousse needed for structural layers in an entremet, slightly more might be required (e.g., equivalent to 1.5 teaspoons powder per 2 cups).
Creating a Perfect Mousse Layer with Gelatin: The Secret Ingredient
Creating distinct, stable mousse layers within a cake or dessert ring requires precise use of gelatin. The mousse must be firm enough to support subsequent layers but still light and smooth.
- Prepare your mousse base (e.g., fruit puree, chocolate mixture).
- Bloom and dissolve the appropriate amount of gelatin for the volume of your base and desired set. For a standard chocolate mousse using 1 cup of chocolate ganache base, you might use 1.5 teaspoons of bloomed and dissolved gelatin powder.
- Temper a small amount of the mousse base into the dissolved gelatin, then whisk the gelatin mixture back into the main base to ensure even distribution.
- Allow the base to cool slightly until it is lukewarm but not set.
- Gently fold in the aerated component (e.g., 2 cups of softly whipped cream or Italian meringue) in stages until just combined. Do not overmix, which can deflate the mousse.
- Pour the mousse into your prepared mold or cake ring over a chilled cake layer.
- Chill thoroughly, ideally for 4-6 hours or overnight, until the mousse is completely set before adding the next layer or unmolding. The gelatin provides the structure needed for clean layers, showcasing advanced gelatin baking recipes advanced techniques.
Gelatin in Fruit Desserts: Setting and Enhancing Flavors
Gelatin is invaluable for setting fruit-based desserts, from classic jellies and terrines to stabilizing fruit purees in tarts and mousses. It provides structure without masking the fresh, vibrant flavors of the fruit. When working with fresh fruits, it's important to note that some (like pineapple, papaya, kiwi, and figs) contain enzymes (proteases) that can break down gelatin, preventing it from setting. Cooking these fruits first deactivates the enzymes, allowing the gelatin to work correctly.
Using gelatin in fruit desserts allows for beautiful presentations, such as clear fruit jellies suspended within a mousse or layered fruit terrines. It also ensures that fruit fillings in tarts remain stable and don't seep into the crust. For instance, a simple fruit jelly layer for a tart might involve heating 1 cup of fruit juice, dissolving 1 teaspoon of bloomed gelatin powder into it, and then chilling until set. This creates a firm yet delicate layer that complements fresh fruit topping.
Using Gelatin for Fruit Tarts and Jellies: Baking with Fresh Fruit
Gelatin is perfect for creating glossy, stable fruit layers or standalone fruit jellies. For fruit tarts, a thin layer of gelatin-set fruit puree or juice can be applied over the baked crust before adding fresh fruit, preventing the crust from becoming soggy. A clearer jelly made with fruit juice can also be poured over fresh fruit arranged in a tart shell to create a shiny, protective, and visually appealing layer.
- For a fruit jelly layer in a tart: Heat 1 cup of fruit juice (ensure it's from cooked fruit if using enzyme-rich varieties).
- Bloom 1 teaspoon of gelatin powder in 2 tablespoons of cold water for 5 minutes.
- Stir the bloomed gelatin into the warm juice until fully dissolved.
- Allow the mixture to cool slightly but not set. Pour a thin layer (about 1/8 to 1/4 inch) into a blind-baked tart shell. Chill until just set.
- Arrange fresh fruit on top of the set jelly layer.
- Optionally, prepare another batch of cooled, dissolved gelatin mixture (perhaps slightly less concentrated) and gently spoon or brush it over the fresh fruit to create a glossy finish and help hold the fruit in place. Chill until completely set.
This application demonstrates how gelatin baking recipes advanced techniques can enhance both the structure and appearance of fruit desserts.
Advanced Gelatin Applications in Bread Baking
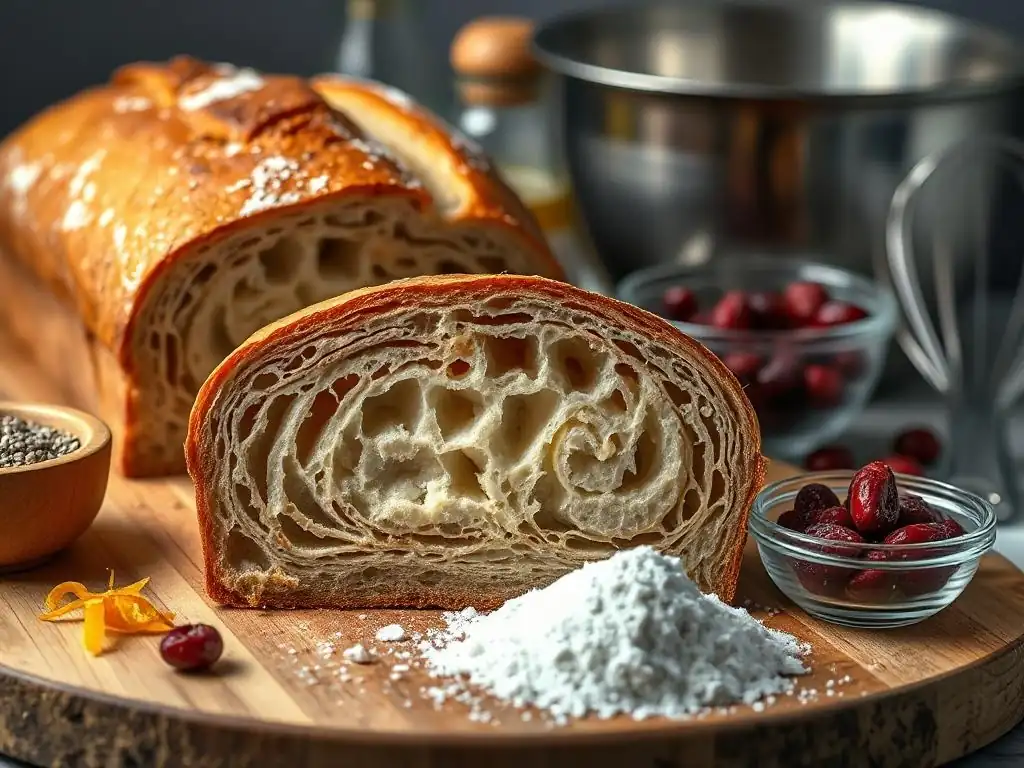
While less common than in pastry, gelatin can also find its place in advanced bread baking techniques, primarily to influence texture and crust characteristics. Its protein structure can interact with gluten and starches in subtle ways, offering potential benefits for crumb structure and shelf life. This is an area where gelatin baking recipes advanced techniques are less documented but offer interesting possibilities for experimentation.
Gelatin in Bread Dough: Improving Texture and Shelf Life
Adding a small amount of gelatin to bread dough can potentially impact the crumb texture, making it softer and more tender. Gelatin can contribute to moisture retention, which in turn can help extend the bread's shelf life by slowing down the staling process. The effect is not as dramatic as using commercial dough conditioners, but it can offer a subtle improvement, particularly in enriched doughs like brioche or challah.
Incorporating gelatin into bread dough typically involves dissolving a small amount of bloomed gelatin (perhaps 0.5% to 1% of the flour weight) in the warm liquid component of the recipe before adding it to the dry ingredients. For example, in a recipe using 500g of flour, you might dissolve 2.5g to 5g of bloomed gelatin in the warm milk or water. The gelatin integrates with the dough structure during mixing and baking.
While research is limited, some bakers report a slightly softer crumb and improved moisture retention over a few days compared to bread made without gelatin. This is a niche application within gelatin baking recipes advanced techniques.
Using Gelatin to Create a Softer Crumb in Bread
To experiment with gelatin for a softer bread crumb, consider this approach:
- For a recipe using 500g flour, measure 3g of gelatin powder.
- Bloom the gelatin in 2 tablespoons of cold water for 5 minutes.
- Gently heat the bloomed gelatin until fully dissolved.
- Add the dissolved gelatin to the warm liquid specified in your bread recipe (e.g., milk or water), ensuring the liquid is not too hot (below 140°F/60°C).
- Proceed with your standard bread making process, adding the gelatin-infused liquid to the dry ingredients.
- Knead, proof, shape, and bake as usual.
Observe the difference in crumb texture and how the bread ages over 2-3 days compared to a control loaf made without gelatin. The effect is subtle, aiming for a more tender crumb rather than a structural change. This highlights the experimental nature of some gelatin baking recipes advanced techniques in less traditional applications.
Gelatin as a Bread Glaze: Achieving a Shiny Crust
While egg washes or milk washes are common for adding shine to bread crusts, a gelatin wash can also be used, particularly for enriched breads or rolls where a high gloss is desired. A thin layer of gelatin applied to the crust before or immediately after baking can create a beautiful, durable shine that is different from that achieved with other glazes.
A simple gelatin glaze can be made by dissolving a very small amount of gelatin (e.g., 1/2 teaspoon bloomed gelatin powder) in 1/2 cup of warm water. This creates a very weak gelatin solution. It can be brushed onto the bread dough just before baking for a subtle sheen, or brushed onto the hot bread immediately after it comes out of the oven for a more pronounced gloss. The heat of the bread helps set the thin gelatin layer quickly. This is a specific aesthetic application within gelatin baking recipes advanced techniques.
Troubleshooting Common Gelatin Baking Problems
Working with gelatin isn't without its potential pitfalls. Common issues include lumpy gelatin, improper setting, or adjusting quantities for different recipes. Understanding how to troubleshoot these problems is key to mastering gelatin baking recipes advanced techniques and ensuring consistent results in your advanced creations.
Dealing with Lumpy Gelatin: Prevention and Solutions
Lumpy gelatin is usually a result of improper blooming or insufficient heating during the dissolving phase. Prevention is the best strategy: always bloom gelatin powder by sprinkling it evenly over cold liquid and letting it stand undisturbed, and ensure gelatin sheets are fully separated and submerged in cold water. Use the correct ratio of liquid for blooming.
If you find you have lumps after dissolving the gelatin into your warm mixture, there are a couple of potential solutions, depending on the situation. If the lumps are small and few, you might try gently warming the mixture further while stirring constantly to encourage them to dissolve, being careful not to overheat.
For more significant lumpiness or if the mixture contains components sensitive to heat (like whipped cream), carefully straining the mixture through a fine-mesh sieve before chilling can remove the undissolved gelatin lumps. This might result in slightly less gelling power, so it's best avoided by ensuring proper blooming and dissolving from the start when working on complex gelatin baking recipes advanced techniques.
Adjusting Gelatin Levels for Different Recipes
One of the challenges in advanced baking is adapting recipes or creating your own, which requires knowing how to adjust gelatin quantities. The amount of gelatin needed depends on several factors: the total volume of liquid to be set, the desired firmness (soft set vs. firm set), the temperature at which the final product will be served, and the acidity of the ingredients (acidic ingredients weaken gelatin).
A general guideline is that 1 teaspoon of gelatin powder (or its equivalent in sheets, roughly 2-3 silver sheets depending on brand) will set about 1 cup of liquid to a soft gel, and 1 tablespoon (or equivalent sheets, roughly 6-8 silver sheets) will set about 2 cups to a firm gel. However, these are just starting points. Richer mixtures containing cream, sugar, or chocolate require slightly less gelatin for a similar set compared to water-based mixtures. High acidity requires more gelatin. Experimentation and careful note-taking are crucial when developing new gelatin baking recipes advanced techniques.
Understanding Gelatin Set Times and Temperature
Gelatin requires chilling to set, and the time it takes can vary based on the concentration of gelatin, the volume of the mixture, and the temperature of your refrigerator. Generally, a soft set can begin within 1-2 hours, while a firm set for something like a mousse cake layer or panna cotta usually requires at least 4 hours, and often overnight chilling is recommended for optimal stability, particularly when creating gelatin baking recipes advanced techniques that involve multiple layers or delicate structures.
The ideal temperature for setting gelatin is typically between 35°F and 40°F (1°C-4°C), the standard range for a refrigerator. Freezing will set gelatin, but thawing can negatively impact the texture, making it rubbery or watery due to syneresis. Gelatin sets faster in a wider, shallower container than in a narrow, deep one because more surface area is exposed to the cold. Understanding these factors helps in planning your baking timeline and ensuring components are properly set before assembly.
Gelatin Baking Recipes Advanced Techniques: Tips and Tricks from the Pros
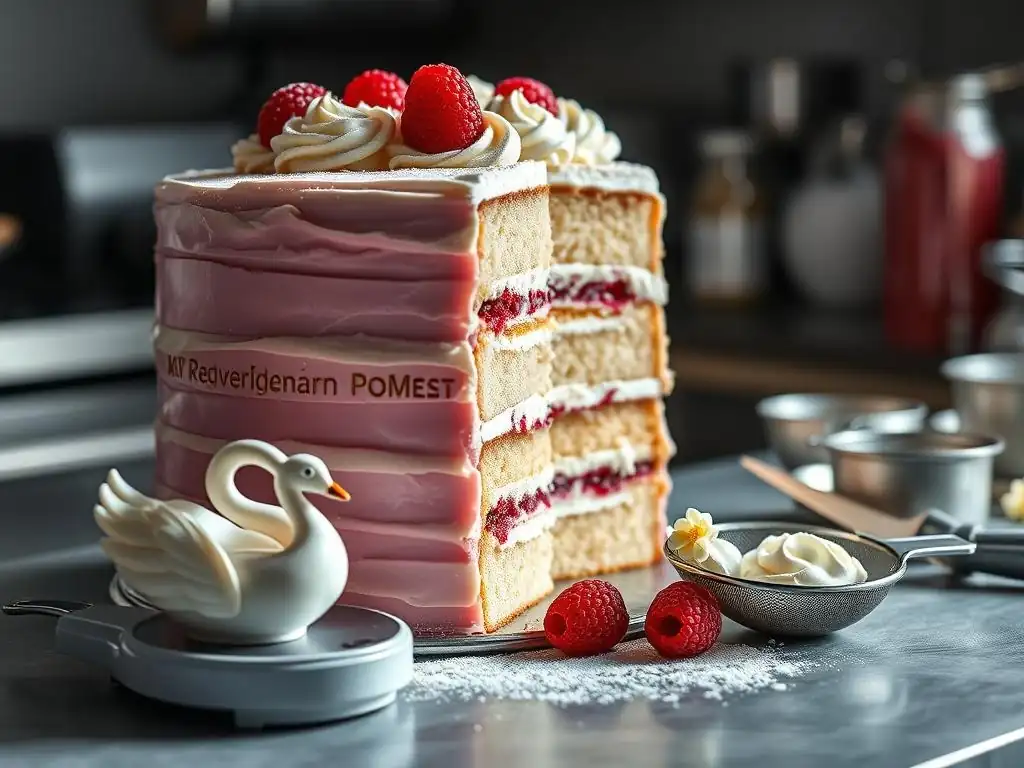
Mastering gelatin in advanced baking goes beyond just following a recipe; it involves understanding the nuances of the ingredient and employing professional techniques for flawless results. These insights are gathered from years of practice in demanding patisserie environments, focusing on precision and consistency, which are key to successful gelatin baking recipes advanced techniques.
Professional Baker's Secrets for Working with Gelatin
Professional bakers often use gelatin sheets for their reliability and clarity, preferring them over powder for delicate applications like mirror glazes or clear jellies. They weigh gelatin precisely, rather than relying solely on volume measurements, especially when scaling recipes. Another key secret is controlling temperature meticulously: ensuring gelatin is dissolved into a liquid that is warm enough but not boiling, and allowing mixtures containing gelatin to cool to the correct temperature before combining with temperature-sensitive components like whipped cream or egg whites.
- Always bloom gelatin in sufficient cold liquid.
- Dissolve bloomed gelatin gently over low heat or by stirring into a warm base; avoid boiling.
- When incorporating into a larger mixture, temper the gelatin mixture by stirring a small amount of the main base into the dissolved gelatin first.
- Allow gelatin mixtures to cool to the correct temperature (often lukewarm) before folding in aerated components like whipped cream to prevent melting.
- Chill desserts containing gelatin thoroughly until completely set before attempting to unmold or slice – impatience leads to disaster.
- For mirror glazes, use a stick blender to emulsify, keeping the blade submerged to avoid introducing air bubbles.
Experimenting with Gelatin: Creative Baking Ideas to Try at Home
Once you're comfortable with the basic advanced uses of gelatin, start experimenting! Gelatin baking recipes advanced techniques can be adapted and combined in countless ways. Try creating layered jellies with contrasting colors and flavors, perhaps suspending fresh fruit or edible flowers within clear layers. Experiment with different types of gelatin (like fish gelatin for dietary reasons) and observe how they behave differently.
Consider using gelatin to stabilize fruit purees for elegant dessert sauces that hold their shape slightly when plated. Explore creating edible "glass" elements for decorative purposes. Combine gelatin with agar-agar (a plant-based gelling agent) for unique textures that are firmer and set at room temperature. Don't be afraid to adjust gelatin quantities slightly in familiar recipes to achieve your preferred level of set, whether you desire a very delicate wobble or a firm, sliceable structure. Document your experiments, noting gelatin amounts, bloom times, and results to refine your own gelatin baking recipes advanced techniques.
Conclusion: Unleash Your Baking Potential with Gelatin
Frequently Asked Questions
How does gelatin contribute to the structure of advanced baking recipes?
Gelatin's unique protein structure allows it to create stable gels that provide essential support and texture to baked goods. This is especially helpful in mousses, bavarians, and delicate desserts.
What are some advanced techniques for incorporating gelatin into baking?
Advanced techniques include blooming the gelatin properly, adjusting the amount based on acidity, and understanding its interaction with other ingredients to achieve the desired texture and stability.
Why is gelatin important for achieving specific textures in pastry creams and custards?
Gelatin helps prevent weeping and ensures a smooth, creamy texture in pastry creams and custards. It provides structure that prevents them from becoming watery or separating.
Can gelatin be used to create unique and innovative desserts beyond traditional jellies?
Absolutely! Gelatin can be used in many modern desserts to create light and airy mousses, stable fruit purees, and even edible films for decoration, expanding beyond simple jelly molds.
How does the type of gelatin (sheet vs. powdered) affect the final result in gelatin baking recipes?
Sheet gelatin often produces a clearer and smoother result, while powdered gelatin is more readily available. The choice depends on the recipe's specific requirements and desired texture.
Final Reflection: Unlocking Gelatin's Untapped Potential in Baking
The culinary world is ripe for reinvention, and gelatin, far from being a mere jiggly dessert base, offers a treasure trove of advanced baking techniques waiting to be explored. Its unique properties, when understood and applied creatively, can elevate even the simplest recipes to new heights of texture and flavor. This isn't just about novelty; it's about expanding the possibilities of what's possible in the kitchen.
The journey through this article has highlighted not only the versatility of gelatin but also the enduring power of culinary innovation. We've moved beyond the expected, delving into techniques that transform cakes, mousses, and even bread. The subtle textural shifts, the enhanced moisture retention, and the surprising stability gelatin provides are all testaments to its potential. As renowned pastry chef, Pierre Hermé, once said, Baking is a science, but it's also an art. It's about understanding the ingredients and letting your creativity flow.
This sentiment perfectly encapsulates the spirit of exploring advanced gelatin techniques.
Now, it's your turn. Don't be afraid to experiment, to push boundaries, and to discover your own unique applications for this versatile ingredient. Consider the textures you want to achieve, the flavors you wish to enhance, and let your imagination guide you. The world of advanced gelatin baking awaits – embrace the challenge, and unlock the delicious possibilities that lie within.
Unleash Your Inner Gelatin Artist!
Thanks for exploring the surprising versatility of gelatin in baking! You've now unlocked a world of texture and creativity beyond the jiggly dessert. Ready to put your newfound knowledge to the test?
- Master the art of gelatin-enhanced cakes and mousses: Experiment with different ratios and types of gelatin to achieve your perfect texture – lighter than air or richly decadent, it's your choice! This is your chance to impress!
- Share your gelatin creations and inspire others! Post photos of your culinary masterpieces on social media with #GelatinBakingGenius.
- Explore the endless possibilities: What other baking applications can you imagine for gelatin? Let us know in the comments below!
Ready to elevate your baking game? What unexpected texture will you create today?