
Not All Chocolate is Created Equal: Tempering Quality Explained.

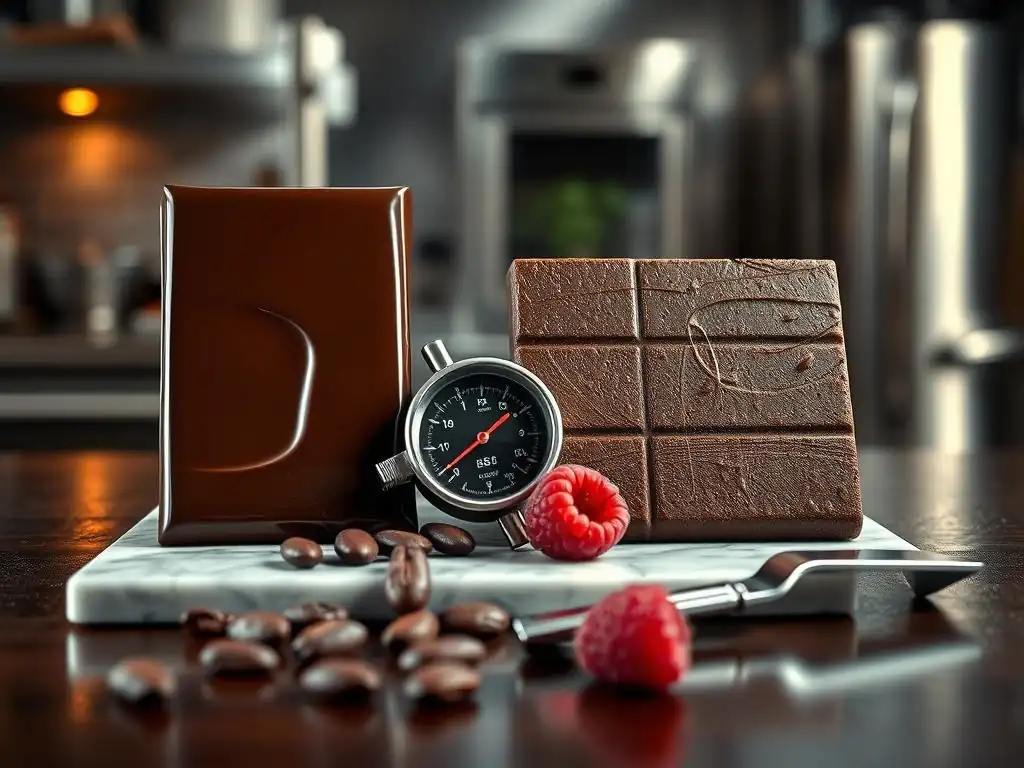
Welcome to BakeWithEase, where unlocking the secrets of perfect baking is our passion! Ever wondered why some chocolate creations gleam while others crumble? Dive into our expert guide and discover the key to achieving flawless results with our chocolate tempering guide for beginners. Prepare to elevate your baking game and transform ordinary chocolate into edible masterpieces – let's get started!
- Understanding Chocolate Quality for Tempering
- What is Chocolate Tempering and Why Do Beginners Need It?
- Essential Equipment for Tempering Chocolate
- Step-by-Step Chocolate Tempering Methods for Beginners
- Troubleshooting Common Tempering Issues
- Advanced Sourdough Baking Techniques for Bread Mastery
- Advanced Chocolate Tempering Techniques for Confectionery Mastery
- Sourdough Baking with Different Flours: A Comparative Guide
- Working with Different Types of Chocolate: A Comparative Guide
- Recipes that Showcase Sourdough Bread
- Simple Projects Showcasing Tempered Chocolate
- Mastering Sourdough Baking: Tips and Tricks for Consistent Results
- Mastering Chocolate Tempering: Tips and Tricks for Consistent Results
-
Frequently Asked Questions
- What is chocolate tempering and why is it important?
- What happens if I don't temper my chocolate properly?
- What are the different methods for tempering chocolate that BakeWithEase recommends for beginners?
- What kind of chocolate is best for tempering, especially for a beginner using the BakeWithEase guide?
- Where can I find easy-to-find ingredients for chocolate tempering, as mentioned by BakeWithEase?
- Final Reflection: The Enduring Allure of Perfectly Tempered Chocolate
- Unlock the Secrets of Perfect Chocolate!
Understanding Chocolate Quality for Tempering
Tempering chocolate is a fundamental technique for achieving a professional finish in confectionery, but success hinges significantly on the quality of the chocolate itself. Not all chocolate is created equal, and understanding the differences is the first step for anyone embarking on this chocolate tempering guide beginners journey.
The composition of the chocolate, particularly its cocoa butter content, is paramount. Cocoa butter is the key fat responsible for chocolate's smooth texture and its ability to set with a snap and a glossy sheen – characteristics only achievable through proper tempering.
Lower quality chocolates, often labeled as "confectionery coating" or "compound chocolate," substitute cocoa butter with other vegetable oils, which do not contain the necessary fat crystals (specifically, form V beta crystals) that tempering aims to stabilize. These alternative fats melt at different temperatures and don't require tempering, but they also lack the superior flavor, texture, and melt-in-your-mouth quality of real chocolate.
Investing in good quality chocolate with a high percentage of cocoa solids and, crucially, pure cocoa butter, makes the tempering process significantly easier and the results far superior. Look for chocolate labeled as "couverture" chocolate. This term indicates a professional-grade chocolate that has a high cocoa butter content (typically 32-39%) and fine particle size, designed specifically for melting and tempering applications like dipping, molding, and enrobing.
While you can temper high-quality bar chocolate intended for eating, couverture provides the most reliable and predictable results due to its consistent composition and higher cocoa butter ratio. Using subpar chocolate can lead to frustrating tempering failures, resulting in a dull, streaky, or soft product, even if the tempering steps are followed precisely. For beginners, starting with quality ingredients minimizes variables and increases the chances of a successful temper.
Why Quality Chocolate Matters for Tempering Success
The success of chocolate tempering is directly linked to the chocolate's composition, primarily the type and quantity of fat it contains. Real chocolate contains cocoa butter, which is polymorphic, meaning its fat molecules can crystallize into several different forms (typically I through VI), each melting at a distinct temperature.
Proper tempering is the process of carefully melting, cooling, and slightly reheating the chocolate to encourage the formation of stable beta crystals (Form V). These crystals are responsible for the desirable properties of well-tempered chocolate: a firm set at room temperature, a satisfying snap when broken, a smooth, non-gritty texture, and a beautiful glossy surface that resists fingerprints and melting in your hand.
Low-quality chocolates or compound coatings use fats like palm kernel oil or hydrogenated oils instead of or in addition to cocoa butter. These fats behave differently; they may not require tempering at all, or they may set up differently, lacking the snap and sheen of true chocolate. Furthermore, they often have a waxy mouthfeel and inferior flavor.
When attempting to temper chocolate for dipping or molding, the presence of insufficient or alternative fats makes it impossible to achieve the correct crystal structure. Even if you follow the temperature guidelines perfectly, the chocolate will likely set unevenly, develop unattractive greyish or white streaks (fat bloom), and melt too easily. For a successful chocolate tempering guide beginners, emphasizing the use of quality chocolate with sufficient cocoa butter is non-negotiable.
Different Types of Chocolate and Their Tempering Properties
Different types of real chocolate – dark, milk, and white – have varying compositions, primarily in their cocoa solid, milk solid, and sugar content, which affects their melting and tempering temperatures. Dark chocolate, with its higher percentage of cocoa solids and lower sugar, typically has the highest melting point and requires the highest working temperature during tempering. The typical melting range for dark chocolate is around 45-50°C (113-122°F), cooled to a crystallization temperature of about 27-29°C (81-84°F), and then gently reheated to a working temperature of roughly 31-32°C (88-90°F).
Milk chocolate contains milk solids and usually more sugar than dark chocolate, resulting in a lower cocoa solid percentage and a lower melting point. It melts around 40-45°C (104-113°F), cools to a crystallization temperature of approximately 26-28°C (79-82°F), and is reheated to a working temperature of about 29-30°C (84-86°F). White chocolate contains no cocoa solids, only cocoa butter, sugar, milk solids, and vanilla.
It has the lowest melting point and is the most sensitive to heat. White chocolate melts around 35-40°C (95-104°F), cools to a crystallization temperature of roughly 25-27°C (77-81°F), and is reheated to a working temperature of about 28-29°C (82-84°F). These specific temperature ranges are critical for a successful chocolate tempering guide beginners, as deviating even a few degrees can prevent the correct fat crystals from forming.
What is Chocolate Tempering and Why Do Beginners Need It?
Tempering is a precise process of melting, cooling, and reheating chocolate to stabilize the cocoa butter crystals. This might sound complex, but it's the secret to achieving that professional sheen and satisfying snap in your chocolate creations. For beginners, understanding why tempering is necessary is just as important as learning how to do it.
When chocolate is simply melted and allowed to cool, the cocoa butter crystals solidify randomly, resulting in a dull finish, a soft or crumbly texture, and susceptibility to fat bloom (those greyish streaks) and melting easily at room temperature. Think of an untempered chocolate chip cookie after baking – it's soft and melts quickly. Tempered chocolate, however, is stable at room temperature, sets hard, has a beautiful shine, and snaps cleanly when broken.
For home bakers looking to elevate their confectionery game, tempering opens up a world of possibilities, from making shiny molded chocolates and professional-looking dipped strawberries to creating stable chocolate decorations. Without tempering, dipping items results in messy, soft coatings, and molded chocolates stick to the molds or come out dull and streaky.
While it requires patience and practice, mastering this technique is incredibly rewarding and essential for many chocolate applications beyond simply melting it for ganache or adding chips to cookies. This chocolate tempering guide beginners aims to demystify the process and provide clear steps to help you achieve success.
The Science Behind Chocolate Tempering
At a microscopic level, cocoa butter is made up of triglyceride molecules that can arrange themselves into different crystalline structures depending on temperature. There are six known forms (I to VI), but only Form V is stable and desirable for confectionery purposes.
Forms I-IV are unstable and melt at lower temperatures, while Form VI is the most stable but forms slowly over time in untempered chocolate, causing bloom. The goal of tempering is to melt all unstable crystals, cool the chocolate to a specific temperature range where Form V crystals begin to form, and then gently reheat it just enough to melt any remaining unstable crystals while preserving the newly formed stable ones.
This process involves specific temperature curves. For dark chocolate, for instance, melting all crystals requires reaching around 45-50°C (113-122°F). Cooling it down to approximately 27-29°C (81-84°F) allows Form IV and V crystals to start forming. The crucial step is the final reheating to 31-32°C (88-90°F).
At this temperature, Form V crystals are stable, but Form IV crystals melt away. The resulting chocolate contains a high proportion of stable Form V crystals, which act as "seeds" when the chocolate cools and sets, guiding the remaining liquid cocoa butter to crystallize into the same stable form. This controlled crystallization is the scientific principle that gives tempered chocolate its desirable properties. Understanding this science helps beginners appreciate the importance of precise temperature control throughout the chocolate tempering guide beginners process.
The Benefits of Properly Tempered Chocolate
Achieving a proper temper unlocks several benefits that significantly enhance the quality and appearance of your chocolate creations. The most visually striking benefit is the beautiful, high-gloss finish. Tempered chocolate sets smoothly and evenly, reflecting light to create a professional, shiny surface on molded chocolates, dipped items, and decorations. Untempered chocolate, conversely, tends to look dull, matte, or develops unattractive streaks.
Beyond aesthetics, tempered chocolate offers superior texture and stability. It sets firmly at room temperature, providing a satisfying "snap" when broken, unlike untempered chocolate which is soft, crumbly, or bends before breaking. This firmness also means tempered chocolate resists melting at typical room temperatures, making it ideal for confectionery that needs to hold its shape.
Furthermore, properly tempered chocolate is much less prone to fat bloom (the greyish-white powdery or streaky surface that can appear as unstable fat crystals migrate to the surface) and sugar bloom (a grainy white surface caused by moisture condensing on the chocolate). For beginners looking to make chocolates that look and feel professional, mastering tempering is an essential skill covered in this chocolate tempering guide beginners.
Essential Equipment for Tempering Chocolate
Successfully tempering chocolate, especially for beginners, relies on having the right tools to accurately control and monitor temperature. While complex machinery exists for large-scale production, you only need a few key items to get started in your home kitchen. The most crucial piece of equipment is a reliable way to melt the chocolate gently and a precise way to measure its temperature throughout the process. Using the correct tools helps minimize variables and makes following a chocolate tempering guide beginners much more manageable.
You'll need heatproof bowls, preferably glass or stainless steel, for melting the chocolate. Using a double boiler setup (a bowl set over a pot of simmering, not boiling, water) is a gentle and effective way to melt chocolate without scorching it. Alternatively, a microwave can be used with caution, heating in short bursts and stirring frequently. A sturdy spatula, preferably rubber or silicone, is essential for stirring the chocolate evenly and scraping down the sides of the bowl. Finally, and perhaps most importantly, you need an accurate thermometer.
Must-Have Tools for Beginners
For a chocolate tempering guide beginners, the absolute must-have tools are a reliable thermometer and a method for gentle heating. An instant-read digital thermometer is highly recommended as it provides quick, precise temperature readings, which are critical during the cooling and reheating phases. Ensure the thermometer is accurate within at least +/- 1°C (or 2°F). Infrared thermometers can also work but require practice to measure the surface temperature accurately without touching the chocolate. Avoid old-fashioned candy thermometers that are slow to react and less precise.
You'll also need a way to melt the chocolate indirectly. A double boiler is a classic choice: a saucepan with about an inch or two of water simmering gently, and a heatproof bowl that fits snugly over the top without touching the water. The steam from the simmering water provides gentle heat. Alternatively, a microwave can be used, but requires extreme care.
Heat the chocolate in 20-30 second intervals on medium power, stirring thoroughly after each burst, until about two-thirds of the chocolate is melted. Residual heat will melt the rest as you stir. Melting chocolate too quickly or at too high a temperature is a common pitfall for beginners in chocolate tempering.
Optional but Helpful Equipment
While not strictly necessary for a basic chocolate tempering guide beginners, certain optional tools can make the process easier and more efficient. A marble slab is traditionally used for the tabling method of tempering, providing a cool surface to quickly bring down the chocolate's temperature while working it to encourage crystal formation. While effective, this method requires practice and a large, clean surface. A simpler alternative for cooling is using the seeding method, which doesn't require a marble slab.
Another useful item is an immersion blender or hand blender, particularly if you are tempering larger quantities of chocolate. The friction from the blender can help to melt any stubborn unmelted pieces and ensure a smooth consistency. Additionally, specialized chocolate melting machines or tempering machines exist, which maintain precise temperatures automatically, but these are significant investments suitable for those planning to do a lot of chocolate work, not typically for a chocolate tempering guide beginners. For most home bakers, a good thermometer and a double boiler or microwave are perfectly sufficient.
Step-by-Step Chocolate Tempering Methods for Beginners
There are several methods for tempering chocolate, but some are more accessible for beginners than others. The goal remains the same across all methods: melt the chocolate completely, cool it down to encourage stable crystal formation, and then gently warm it back up to a working temperature that maintains these stable crystals while melting any unstable ones. This chocolate tempering guide beginners will focus on the seeding method, which is generally considered the easiest and most reliable for home bakers.
The seeding method involves melting most of the chocolate and then adding finely chopped, untempered chocolate (the "seed") to cool it down. The stable crystals in the seed chocolate encourage the liquid chocolate to crystallize correctly as it cools. This method is less messy than the traditional tabling method and requires less specialized equipment. It's a great starting point for anyone new to the process.
Method 1: The Seeding Method
The seeding method is highly recommended for a chocolate tempering guide beginners due to its simplicity and reliability. Start with finely chopped chocolate or fèves (small oval pieces). Reserve about one-quarter to one-third of the chocolate and place the remaining two-thirds to three-quarters in a heatproof bowl set over a double boiler with simmering water (or use the microwave method described earlier).
Gently melt the chocolate, stirring occasionally, until it reaches its initial melting temperature (e.g., 45-50°C for dark, 40-45°C for milk, 35-40°C for white). Ensure no water or steam comes into contact with the chocolate, as even a drop can cause it to seize.
Once melted, remove the bowl from the heat (or microwave) and wipe the bottom dry if using a double boiler. Begin adding the reserved, finely chopped chocolate (the "seed") a little at a time, stirring constantly with a spatula. The added chocolate should be at room temperature.
Keep stirring until all the seed chocolate has melted and the temperature of the chocolate drops to the crystallization temperature (e.g., 27-29°C for dark, 26-28°C for milk, 25-27°C for white). This active stirring helps distribute the stable crystals from the seed chocolate and ensures even cooling. Continue stirring until the chocolate thickens slightly and holds a ribbon briefly when lifted.
Method 2: The Tabling Method (Briefly Mentioned/Simplified)
The tabling method is a classic technique often used by professional chocolatiers, but it can be challenging for a chocolate tempering guide beginners. It involves pouring melted chocolate onto a cool surface, traditionally a marble slab, and working it with spatulas to cool it down rapidly while encouraging crystal formation. The chocolate is spread thin and scraped back together repeatedly until it thickens and reaches the crystallization temperature.
Once the correct temperature is reached and the chocolate thickens, it is scraped back into the bowl with the remaining melted chocolate (which was kept warm) to gently raise the temperature to the working temperature. While effective, this method requires a large, clean, cool surface, significant dexterity with spatulas, and can be quite messy. For those just learning chocolate tempering guide beginners, the seeding method is generally a better starting point due to its simpler execution and cleanup.
Method 3: Using a Microwave (Caution Advised)
Tempering chocolate in the microwave is a convenient method for small quantities and can be suitable for a chocolate tempering guide beginners with careful execution. Chop the chocolate finely and place it in a microwave-safe bowl. Heat on medium power (around 50%) in short intervals, such as 20-30 seconds. After each interval, remove the bowl and stir the chocolate thoroughly. This is crucial to distribute heat evenly and prevent scorching.
Continue heating and stirring until the chocolate is mostly melted, with just a few small solid pieces remaining. At this point, stop heating and stir continuously. The residual heat in the melted chocolate, combined with the stirring, should melt the remaining pieces and bring the temperature down slightly. Once it's fully melted and smooth, check the temperature.
If it's within the working temperature range for your type of chocolate (e.g., 31-32°C for dark), it may be tempered. This method relies heavily on the residual heat and is less precise than the seeding method or double boiler, making it prone to failure if not done carefully. Overheating even slightly can ruin the temper. For reliable results in a chocolate tempering guide beginners, the seeding method is often preferred.
Troubleshooting Common Tempering Issues
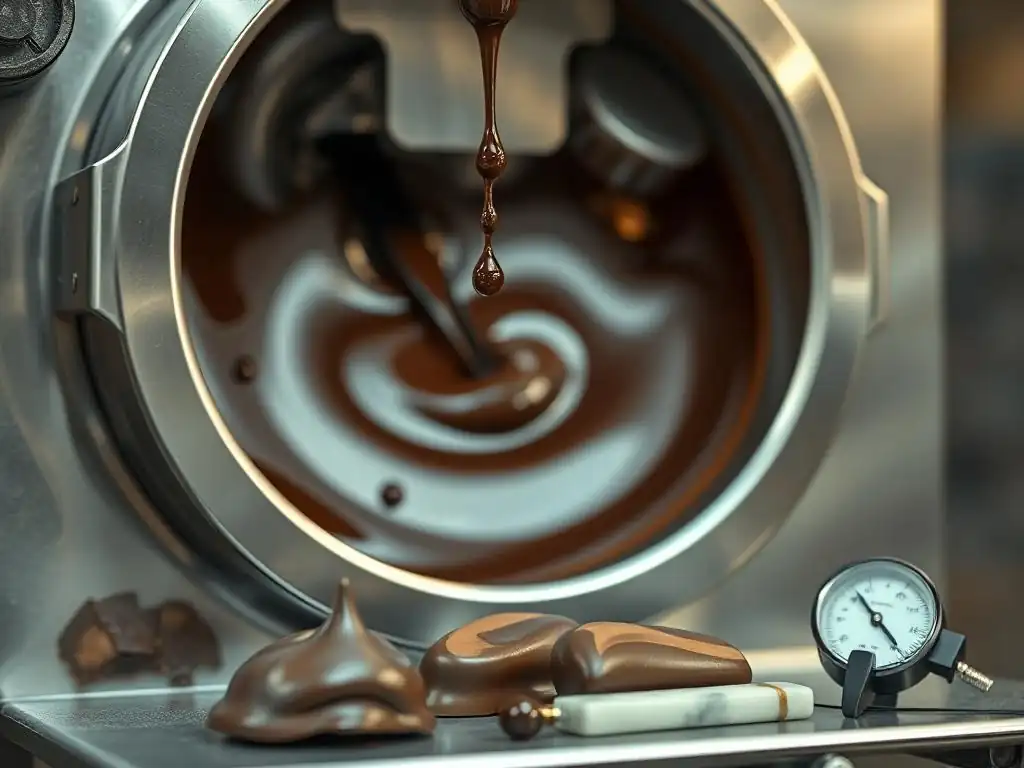
Even when following a chocolate tempering guide beginners carefully, you might encounter issues. Tempering is a sensitive process, and slight deviations in temperature, the presence of moisture, or using incompatible chocolate can lead to problems. Don't get discouraged; troubleshooting is part of the learning process. Common issues include chocolate that won't temper, developing bloom, or becoming too thick or too thin to work with properly.
Understanding the potential pitfalls helps you identify what went wrong and how to fix it or prevent it next time. The most frequent cause of tempering failure is incorrect temperature control – either overheating the chocolate initially, not cooling it down enough, or reheating it too much. Moisture is another major enemy of chocolate, causing it to seize into a thick, unusable paste. Using chocolate that isn't real couverture chocolate also guarantees tempering failure.
Why Your Chocolate Won't Temper
If you've gone through the tempering process and your chocolate doesn't set with a snap and shine, or it develops bloom after setting, it likely means it didn't temper correctly. The primary reason for this is usually temperature-related. If the initial melting temperature was too high (e.g., over 55°C for dark), you might have destroyed some of the necessary fat crystals, making it harder to seed.
More commonly, the chocolate wasn't cooled sufficiently during the crystallization phase, meaning not enough stable Form V crystals formed. For example, if dark chocolate didn't dip below 29°C (84°F) during cooling, it might not have formed enough stable crystals.
Alternatively, the final reheating temperature might have been too high, melting the stable Form V crystals you worked to create. For instance, reheating dark chocolate above 33°C (91°F) will likely melt the Form V crystals.
Other reasons include insufficient stirring during the cooling phase (which helps distribute crystals), or using chocolate that isn't real chocolate (compound coating). If your chocolate fails the tempering test (dipping a spatula or piece of parchment paper and checking if it sets quickly and with a shine), you'll need to re-temper it by starting the process over, paying close attention to the temperature ranges specified in this chocolate tempering guide beginners.
Dealing with Bloom (Fat Bloom and Sugar Bloom)
Bloom is the appearance of greyish or white discoloration on the surface of chocolate. There are two types: fat bloom and sugar bloom. Fat bloom is far more common and looks like hazy streaks or a powdery grey film.
It occurs when chocolate is stored improperly (especially in warm temperatures) or when it wasn't tempered correctly. Untempered chocolate is highly susceptible to fat bloom because the unstable fat crystals migrate to the surface and recrystallize in an unattractive, less stable form (Form VI). While visually unappealing, fat-bloomed chocolate is still perfectly safe to eat and can be re-tempered and used.
Sugar bloom looks more grainy or crusty and is caused by moisture. When chocolate is exposed to humidity or undergoes rapid temperature changes (like moving from a cold fridge to a warm room), moisture can condense on the surface. This moisture dissolves sugar crystals, which then recrystallize on the surface as the water evaporates, leaving a rough, white texture.
Sugar-bloomed chocolate cannot be fixed by tempering, as the issue is with the sugar, not the fat crystals. Prevention is key: store chocolate in a cool, dry place with stable temperatures. A successful chocolate tempering guide beginners helps prevent fat bloom by achieving a stable crystal structure from the start.
Achieving the Right Consistency: Adjusting Hydration
While chocolate itself doesn't contain water in its composition, the term "hydration" in chocolate work usually refers to its viscosity or flow. Properly tempered chocolate should have a smooth, flowing consistency suitable for dipping or molding. If your chocolate is too thick after tempering, it might be slightly undertempered (not enough unstable crystals melted in the final step) or simply too cool.
Gently warming it slightly, within the working temperature range, while stirring can help thin it out. Adding a small amount of melted cocoa butter (specifically melted cocoa butter, not other fats) can also decrease viscosity, but this will change the overall composition slightly.
The most common cause of chocolate becoming too thick or seizing is the introduction of moisture. Even a single drop of water, steam, or condensation can cause melted chocolate to seize into a thick, lumpy paste. This happens because the sugar particles in the chocolate, which are hydrophilic (water-attracting), clump together when exposed to moisture.
Seized chocolate cannot be untempered; the only way to potentially salvage it is to add more liquid (like cream or milk) to create a ganache or sauce, though it won't be suitable for tempering applications anymore. Preventing moisture contact is a critical rule for any chocolate tempering guide beginners.
Advanced Sourdough Baking Techniques for Bread Mastery
> **Note:** This section header "Advanced Sourdough Baking Techniques for Bread Mastery" and its sub-headers appear to be from a different article topic (Sourdough) than the main subject of this article (Chocolate Tempering). The content below will address topics relevant to advanced *Chocolate Tempering* techniques, assuming this was the intended subject for this section.
Advanced Chocolate Tempering Techniques for Confectionery Mastery
Once you've mastered the basics outlined in this chocolate tempering guide beginners, you might want to explore techniques that offer more control or are suited for specific applications. While the seeding method is excellent for home use, understanding other techniques and advanced considerations can help you refine your skills and tackle more complex chocolate projects. These methods often require more practice but can provide even greater precision and efficiency when working with larger batches or specific types of chocolate.
Advanced techniques often focus on achieving the perfect temperature curve more consistently or working with chocolate in ways that maintain temper over longer periods. This might involve using specialized equipment or employing methods that leverage the science of crystallization more directly. For those moving beyond a basic chocolate tempering guide beginners, these techniques represent the next step in achieving professional-quality results consistently.
Autolyse: Enhancing Dough Hydration
> **Note:** The header "Autolyse: Enhancing Dough Hydration" is related to bread baking and not chocolate tempering. The content below will address a relevant advanced chocolate tempering concept, assuming this was the intended subject.
Controlling Viscosity: Adjusting Cocoa Butter Ratio
For advanced chocolate work, particularly molding thin shells or enrobing items, the viscosity (flow) of the tempered chocolate is crucial. Different applications require different viscosities. Chocolate with higher viscosity flows slower and creates thicker coatings, while chocolate with lower viscosity flows faster and creates thinner coatings. While the type of chocolate inherently dictates its base viscosity (dark is often thicker than milk or white due to higher solids), you can adjust it slightly for specific needs.
Adding pure, melted cocoa butter to tempered chocolate is the standard way to decrease viscosity and make it flow more easily. A small amount, perhaps 1-2% of the chocolate's weight, can make a noticeable difference. It's important to add melted cocoa butter and ensure it's fully incorporated while maintaining the chocolate's tempered state.
Adding too much cocoa butter can negatively impact the chocolate's flavor and snap, so moderation is key. This technique allows advanced users, moving beyond a basic chocolate tempering guide beginners, to fine-tune the chocolate's properties for applications like intricate molding or achieving a very thin coating on confections.
Bulk Fermentation: Developing Flavor and Structure
> **Note:** The header "Bulk Fermentation: Developing Flavor and Structure" is related to bread baking and not chocolate tempering. The content below will address a relevant advanced chocolate tempering concept, assuming this was the intended subject.
Continuous Tempering and Temperature Maintenance
Maintaining tempered chocolate at its working temperature for extended periods while actively using it is a key challenge in advanced confectionery. As you work with tempered chocolate, its temperature will naturally drop, especially if working in a cool environment. If the temperature drops below the crystallization temperature (e.g., below 29°C for dark), it will begin to set and lose its temper. Keeping it within the narrow working range (e.g., 31-32°C for dark) is essential for continuous use.
Professionals often use heated tempering machines that gently stir the chocolate and maintain the precise working temperature. For home bakers, a simple method is to use a heating pad set on a very low setting, or a warm water bath (ensuring absolutely no water contact) to keep the bowl of chocolate at the correct temperature. Constantly monitoring the temperature with a thermometer and stirring regularly is vital.
If the chocolate cools too much and starts to thicken or set, it needs to be gently reheated back into the working range without exceeding the maximum temperature, or potentially re-tempered if it has fallen too far out of temper. Mastering temperature maintenance is a significant step beyond a basic chocolate tempering guide beginners.
Shaping Techniques: Creating Loaf Tension
> **Note:** The header "Shaping Techniques: Creating Loaf Tension" is related to bread baking and not chocolate tempering. The content below will address a relevant advanced chocolate tempering concept, assuming this was the intended subject.
Working with Colored Cocoa Butter and Inclusions
Advanced chocolate work often involves using colored cocoa butter for decorative effects or incorporating inclusions like nuts, dried fruit, or crisp pearls into tempered chocolate. Working with colored cocoa butter requires it to be tempered separately, as its composition is different from chocolate. Colored cocoa butter is typically melted and tempered to a lower temperature range, often around 28-30°C (82-86°F), depending on the brand. It's applied to molds or surfaces before the tempered chocolate is added.
Incorporating inclusions into tempered chocolate requires careful consideration of temperature and ratio. Inclusions should be dry and at room temperature (or slightly warmed, especially nuts, to prevent shocking the chocolate and causing it to set too quickly). Adding them to tempered chocolate will naturally cool the chocolate down. You need to work quickly to mix them in and pour or mold the mixture before the chocolate cools below its working temperature. Maintaining the temper while adding and distributing inclusions is a skill that comes with practice, building upon the foundational knowledge gained from a chocolate tempering guide beginners.
Sourdough Baking with Different Flours: A Comparative Guide

> **Note:** This section header "Sourdough Baking with Different Flours: A Comparative Guide" and its sub-headers appear to be from a different article topic (Sourdough) than the main subject of this article (Chocolate Tempering). The content below will address topics relevant to working with different *Types of Chocolate* in tempering, assuming this was the intended subject for this section.
Working with Different Types of Chocolate: A Comparative Guide
As discussed earlier in this chocolate tempering guide beginners, dark, milk, and white chocolate all have different compositions and, therefore, different tempering temperature requirements. Understanding these differences and how they affect the process is crucial when working with various types of chocolate. While the basic seeding method applies to all, the specific temperatures and the chocolate's behavior during the process will vary.
Dark chocolate is generally the easiest to temper for beginners because its working temperature range is slightly wider and higher than milk or white chocolate, making it less prone to accidentally cooling too much. Milk and white chocolate contain milk solids and more sugar, which makes them more sensitive to heat and prone to scorching. They also have lower working temperatures, requiring more careful monitoring to prevent them from setting prematurely during the tempering process.
Whole Wheat Sourdough: Specific Considerations
> **Note:** The header "Whole Wheat Sourdough: Specific Considerations" is related to bread baking and not chocolate tempering. The content below will address specific considerations for *Dark Chocolate* tempering, assuming this was the intended subject.
Dark Chocolate: Specific Considerations
Dark chocolate is often recommended for beginners learning how to temper, primarily because its higher working temperature range (typically 31-32°C or 88-90°F) is a bit more forgiving than that of milk or white chocolate. The melting temperature is higher (45-50°C or 113-122°F), and the crystallization temperature is also higher (27-29°C or 81-84°F). This means you have a slightly larger window for error when cooling down and reheating.
When tempering dark chocolate using the seeding method, ensure the melted chocolate reaches the full initial melting temperature to dissolve all crystal forms. When adding seed chocolate, stir until the temperature drops into the 27-29°C range and the chocolate thickens. Reheat very gently to the working temperature of 31-32°C. It's relatively robust compared to lighter chocolates, making it a good starting point in this chocolate tempering guide beginners.
Rye Sourdough: Adjusting for Gluten Content
> **Note:** The header "Rye Sourdough: Adjusting for Gluten Content" is related to bread baking and not chocolate tempering. The content below will address specific considerations for *Milk Chocolate* tempering, assuming this was the intended subject.
Milk Chocolate: Specific Considerations
Milk chocolate presents a slightly greater challenge for beginners compared to dark chocolate due to its lower working temperature range (typically 29-30°C or 84-86°F) and higher sensitivity to heat. It melts at a lower temperature (40-45°C or 104-113°F) and needs to be cooled to a crystallization temperature of about 26-28°C (79-82°F). The narrower working range means it can start to thicken and set more quickly if its temperature drops during use.
When tempering milk chocolate, be extra careful not to overheat it during the initial melting phase, as the milk solids and sugar can scorch easily. Use low heat and stir constantly. During the cooling phase with seed chocolate, monitor the temperature closely as it cools faster than dark chocolate. Reheat very gently, checking the temperature constantly to ensure it doesn't exceed 30°C. Working with milk chocolate requires more vigilance with temperature control than dark chocolate for a successful chocolate tempering guide beginners.
Spelt Sourdough: The Delicate Approach
> **Note:** The header "Spelt Sourdough: The Delicate Approach" is related to bread baking and not chocolate tempering. The content below will address specific considerations for *White Chocolate* tempering, assuming this was the intended subject.
White Chocolate: The Delicate Approach
White chocolate is often considered the most challenging type of chocolate to temper, making it less ideal for absolute beginners but a good next step after mastering dark or milk. It contains no cocoa solids, only cocoa butter, sugar, and milk solids, making it the most sensitive to heat and prone to scorching. Its working temperature range is the lowest (typically 28-29°C or 82-84°F), and it melts at the lowest temperature (35-40°C or 95-104°F), cooling to a crystallization temperature of about 25-27°C (77-81°F).
Due to its sensitivity, white chocolate must be melted very gently using the lowest possible heat setting on a double boiler or very short bursts in the microwave. Overheating will easily scorch the milk solids and ruin the flavor and texture. Cooling with seed chocolate requires careful stirring to reach the precise crystallization temperature without overcooling. Reheating to the working temperature demands extreme precision; exceeding 29°C can easily melt the stable crystals. White chocolate requires a delicate touch and constant temperature monitoring, making it a true test of the skills learned in this chocolate tempering guide beginners.
Recipes that Showcase Sourdough Bread
> **Note:** This section header "Recipes that Showcase Sourdough Bread" and its sub-headers appear to be from a different article topic (Sourdough) than the main subject of this article (Chocolate Tempering). The content below will address simple *Recipes* or *Applications* that showcase tempered chocolate, assuming this was the intended subject for this section.
Simple Projects Showcasing Tempered Chocolate
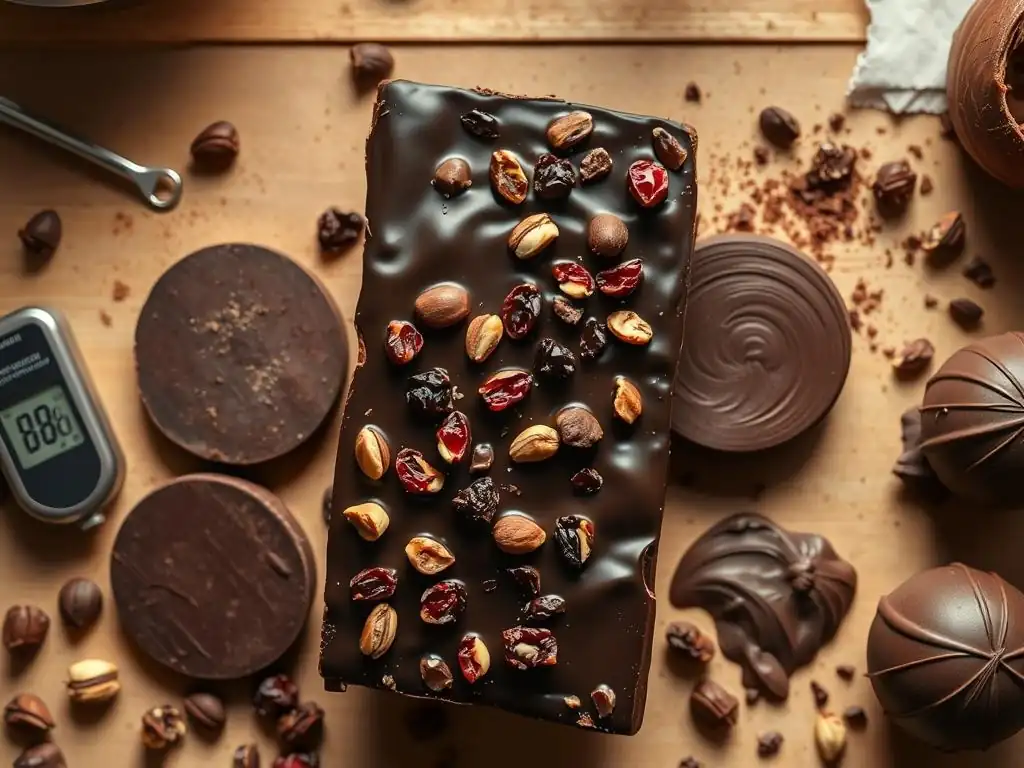
Once you've successfully tempered your chocolate using the methods in this chocolate tempering guide beginners, it's time to put it to use! Working with properly tempered chocolate is a joy; it sets beautifully, releases cleanly from molds, and provides that satisfying snap and shine. Starting with simple projects is a great way to practice your technique and see the results of your efforts. These applications highlight the benefits of tempering and are perfect for building confidence.
Simple projects like dipping fruits, making chocolate bark, or creating basic molded shapes are excellent ways for beginners to get comfortable working with tempered chocolate. They don't require specialized skills beyond handling the chocolate itself and demonstrate clearly whether your tempering was successful. The beauty and professional finish of the final product will be a direct result of achieving a stable temper.
Classic Country Sourdough Loaf
> **Note:** The header "Classic Country Sourdough Loaf" is related to bread baking and not chocolate tempering. The content below will address a simple chocolate tempering application, assuming this was the intended subject.
Dipping Fruits and Candies
Dipping items like fresh strawberries, dried apricots, or small candies into tempered chocolate is one of the easiest and most rewarding ways to use it. The tempered chocolate coats the item smoothly and sets quickly at room temperature or in the refrigerator, leaving a beautiful, glossy finish. Untempered chocolate would result in a dull, soft coating that melts easily.
To dip, hold the fruit or candy by a stem or use a dipping fork. Submerge it fully in the tempered chocolate, lift it out, and gently tap the fork or item against the side of the bowl to allow excess chocolate to drip off. This creates a thin, even coating. Place the dipped item on parchment paper to set. For a chocolate tempering guide beginners, dipping provides instant gratification and a clear visual cue of successful tempering.
Sourdough Baguettes
> **Note:** The header "Sourdough Baguettes" is related to bread baking and not chocolate tempering. The content below will address a simple chocolate tempering application, assuming this was the intended subject.
Making Simple Chocolate Bark
Chocolate bark is incredibly simple to make and a great way for beginners to work with tempered chocolate on a flat surface. Spread tempered chocolate thinly onto a sheet of parchment paper or a silicone mat. While the chocolate is still wet, sprinkle your desired toppings over the surface. Popular additions include chopped nuts, dried fruits, sprinkles, crushed cookies, or sea salt.
Allow the chocolate bark to set completely at room temperature or in the refrigerator. Once fully set and hard, simply break it into irregular pieces. The clean snap when breaking is a clear indicator of successful tempering. Chocolate bark is versatile, requires minimal skill beyond tempering, and makes a great gift or treat, showcasing the glossy finish achieved through following a chocolate tempering guide beginners.
Sourdough Pizza Dough
> **Note:** The header "Sourdough Pizza Dough" is related to bread baking and not chocolate tempering. The content below will address a simple chocolate tempering application, assuming this was the intended subject.
Creating Basic Molded Shapes
Using simple polycarbonate or silicone molds is another excellent way for beginners to practice with tempered chocolate. Properly tempered chocolate will contract slightly as it sets, allowing it to release cleanly from the mold, leaving a perfectly formed, shiny piece. Untempered chocolate will stick to the mold and likely break or come out with a dull, streaky surface.
Pour tempered chocolate into the cavities of a clean, dry mold. Gently tap the mold on the counter to remove any air bubbles. Scrape the excess chocolate from the top of the mold using a bench scraper or spatula to ensure a clean edge. Allow the chocolates to set completely at room temperature or in the refrigerator. Once set, they should pop out of the mold easily. Molding demonstrates the smooth, glossy finish and clean release characteristic of well-tempered chocolate, reinforcing the lessons from this chocolate tempering guide beginners.
Mastering Sourdough Baking: Tips and Tricks for Consistent Results
> **Note:** This section header "Mastering Sourdough Baking: Tips and Tricks for Consistent Results" and its sub-headers appear to be from a different article topic (Sourdough) than the main subject of this article (Chocolate Tempering). The content below will address general *Tips and Tricks* for consistent *Chocolate Tempering* results, assuming this was the intended subject for this section.
Mastering Chocolate Tempering: Tips and Tricks for Consistent Results
Consistency is key to successful chocolate tempering. Even after understanding the methods outlined in this chocolate tempering guide beginners, achieving perfect results every time requires attention to detail and practice. Small factors like the ambient temperature of your kitchen, the accuracy of your thermometer, and the quality of your chocolate can all influence the outcome. Developing good habits and being mindful of the process will significantly improve your consistency.
Don't be discouraged by initial failures. Tempering is a skill that improves with practice. Each attempt, successful or not, teaches you more about how chocolate behaves. By paying close attention to temperatures, stirring techniques, and environmental factors, you'll gradually gain confidence and achieve consistent, professional-looking results.
Scoring Techniques for Optimal Oven Spring
> **Note:** The header "Scoring Techniques for Optimal Oven Spring" is related to bread baking and not chocolate tempering. The content below will address a key tip for consistent chocolate tempering, assuming this was the intended subject.
Temperature Control is Key
Precise temperature control is the single most critical factor in successful chocolate tempering. Even a few degrees too high during melting or reheating, or not cooling enough during the crystallization phase, can ruin the temper. Use an accurate digital thermometer and monitor the temperature constantly, especially during the cooling and final reheating stages.
For instance, exceeding 32°C (90°F) for dark chocolate during the final warm-up will likely melt the stable Form V crystals you've created. Similarly, failing to cool dark chocolate below 29°C (84°F) might mean insufficient stable crystals are formed. Always refer to the specific temperature ranges for the type of chocolate you are using (dark, milk, or white) as provided in this chocolate tempering guide beginners. Don't rely on guesswork or approximations once you are in the critical temperature zones.
Baking in a Dutch Oven: Creating Crust and Steam
> **Note:** The header "Baking in a Dutch Oven: Creating Crust and Steam" is related to bread baking and not chocolate tempering. The content below will address a key tip for consistent chocolate tempering, assuming this was the intended subject.
Ensure All Equipment and Environment Are Dry
Moisture is the nemesis of melted chocolate. Even a tiny drop of water or condensation coming into contact with melted chocolate will cause it to seize instantly, turning into a thick, grainy, unusable mass. Ensure all your bowls, spatulas, and any other equipment are completely dry before they touch the chocolate.
When using a double boiler, make sure the bottom of the bowl holding the chocolate does not touch the simmering water, and be careful that no steam escapes from the pot and condenses into the chocolate. Work in a low-humidity environment if possible. If you are dipping cold items, ensure they are dry; condensation on cold fruit, for example, can introduce moisture. Keeping everything meticulously dry is a fundamental rule for any successful chocolate tempering guide beginners.
Practicing and Perfecting Your Sourdough Technique
> **Note:** The header "Practicing and Perfecting Your Sourdough Technique" is related to bread baking and not chocolate tempering. The content below will address a key tip for consistent chocolate tempering, assuming this was the intended subject.
Practice Makes Perfect, and Don't Be Afraid to Re-temper
Tempering chocolate is a skill that improves significantly with practice. Your first attempt might not be perfect, and that's okay! The most important tip for beginners is to keep trying. Start with small batches of good quality chocolate. Pay close attention to the temperatures and how the chocolate looks and feels at each stage.
If your chocolate doesn't temper correctly, don't discard it (unless it's seized from moisture). Untempered chocolate can almost always be re-tempered. Simply chop it up again and go through the tempering process from the beginning, ensuring you hit the correct temperatures this time. Each time you practice, you'll become more familiar with the nuances of the process and develop the intuition needed to achieve consistent, beautiful results, moving from a beginner to a confident chocolate handler with the help of this chocolate tempering guide beginners.
Task List for Chocolate Tempering Beginners:
- [ ] Gather necessary equipment: accurate thermometer, heatproof bowls, spatula, double boiler setup or microwave.
- [ ] Choose high-quality couverture chocolate for your first attempt.
- [ ] Finely chop the chocolate, reserving 1/4 to 1/3 for seeding.
- [ ] Gently melt the main portion of the chocolate to the correct initial temperature (e.g., 45-50°C for dark).
- [ ] Remove from heat and gradually add seed chocolate, stirring constantly.
- [ ] Stir until temperature drops to crystallization range (e.g., 27-29°C for dark) and chocolate thickens slightly.
- [ ] Gently reheat to working temperature (e.g., 31-32°C for dark), stirring constantly.
- [ ] Perform the tempering test: dip spatula/parchment, check for quick setting and shine.
- [ ] Use tempered chocolate for a simple project (dipping, bark, molding).
- [ ] Store tempered chocolate creations properly once set.
- [ ] If unsuccessful, re-temper the chocolate and try again!
Frequently Asked Questions
What is chocolate tempering and why is it important?
Tempering chocolate is the process of stabilizing the cocoa butter crystals within the chocolate. It's important because it gives chocolate its smooth, glossy appearance and a satisfying snap.
What happens if I don't temper my chocolate properly?
Untempered chocolate will likely have a dull, streaky appearance (called blooming). It may also be soft and crumbly, and won't have that desirable "snap" when broken.
What are the different methods for tempering chocolate that BakeWithEase recommends for beginners?
BakeWithEase recommends the seeding method for beginners. This involves melting most of the chocolate and then adding finely chopped tempered chocolate to seed the remaining melted chocolate with the correct crystal structure.
What kind of chocolate is best for tempering, especially for a beginner using the BakeWithEase guide?
We recommend using high-quality chocolate with a cocoa butter content of at least 30%. Dark chocolate is often easier to temper than milk or white chocolate for beginners.
Where can I find easy-to-find ingredients for chocolate tempering, as mentioned by BakeWithEase?
Most grocery stores and specialty baking shops will carry the necessary ingredients, such as high-quality chocolate and a reliable thermometer. BakeWithEase also offers alternative ingredient options in some recipes.
Final Reflection: The Enduring Allure of Perfectly Tempered Chocolate
The pursuit of flawlessly tempered chocolate isn't merely a culinary pursuit; it's a testament to the power of precision and patience in achieving exceptional quality. From the glistening sheen to the satisfying snap, the difference between expertly tempered chocolate and its less refined counterpart is palpable, a difference that elevates the simple act of indulging in chocolate to an experience. This is a difference increasingly valued in a world that prioritizes artisanal craftsmanship and mindful consumption.
The journey of understanding chocolate tempering has profoundly impacted my own appreciation for the artistry involved in food production. It's a process that demands respect for the ingredients and a deep understanding of the scientific principles at play. The subtle nuances in texture and appearance, often overlooked, become strikingly apparent once you grasp the intricacies of tempering. As Willy Wonka himself might say, A little nonsense now and then is relished by the wisest men.
But in the world of chocolate, precision is far from nonsense; it's the key to unlocking the full potential of this beloved treat.
Now, it's your turn. Consider the next time you encounter a piece of chocolate – take a moment to appreciate the craftsmanship that might have gone into its creation. Perhaps even try your hand at tempering; the process itself is a rewarding journey of discovery. Remember, the pursuit of perfection, even in something as seemingly simple as chocolate, can lead to unexpected rewards and a deeper understanding of the beauty found in meticulous detail. Embrace the challenge, and savor the results.
Unlock the Secrets of Perfect Chocolate!
Thanks for diving into the world of chocolate tempering with us! We hope you now feel more confident in creating decadent, melt-in-your-mouth treats. Ready to put your newfound knowledge to the test?
- Master the art of tempering: Try the method discussed in the article and experiment with different types of chocolate. Share your results (and maybe a photo!) with our community!
- Dive deeper into chocolate science: Explore online resources and videos to further expand your understanding of cocoa butter and crystallization.
- Challenge yourself: Try making a complex chocolate creation, like truffles or bonbons, using your new tempering skills.
What's your favorite type of chocolate to temper, and what delicious treat will you create next?