
Achieving a Flawless Finish with Ganache Glaze: Smooth & Shiny

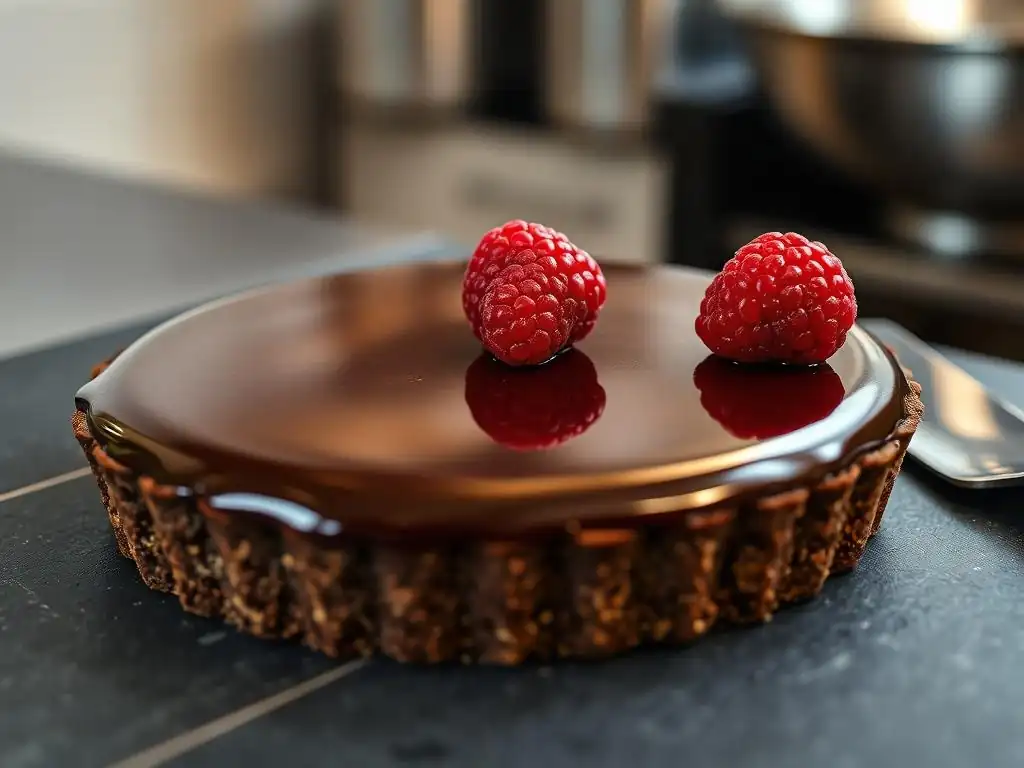
Welcome to BakeWithEase, your partner in crafting delightful treats! Are you ready to elevate your baking game? This week, we're diving deep into the world of decadent finishes, and chances are, you're here because you're after that perfect, mirror-like ganache glaze shine. But how do you achieve it? Unlock the secrets to a truly flawless finish, and discover the techniques that will transform your desserts from simply delicious to absolutely breathtaking. Let's begin this journey to ganache perfection...
- Introduction to Perfecting Ganache Glaze Shine for a Professional Finish
- Understanding Ganache: The Foundation for a Mirror Glaze
- Mastering the Art of Smooth Ganache: Step-by-Step Guide
- Techniques for Achieving a High-Shine Ganache Glaze
- Applying Ganache for a Flawless, Glossy Surface
- Troubleshooting Common Ganache Problems and Solutions
- Tips and Tricks for Enhancing Ganache Glaze Shine
- Ganache Glaze Variations: Exploring Different Flavors and Textures
- Advanced Techniques for Ganache Decoration
- Storing and Handling Ganache Glaze for Optimal Results
- Conclusion: Enjoy Your Perfectly Shiny Ganache Glaze!
- Frequently Asked Questions
- Final Reflection: The Enduring Allure of a Perfect Ganache Glaze
- Unlock Your Inner Pastry Chef: Master the Ganache Glaze!
Introduction to Perfecting Ganache Glaze Shine for a Professional Finish
Achieving a truly flawless, smooth, and shiny ganache glaze is a hallmark of professional baking. It's the kind of finish that elevates a simple cake or pastry into a stunning centerpiece. While ganache itself is a relatively simple mixture of chocolate and cream, perfecting the ganache glaze shine requires attention to detail, understanding the science behind the ingredients, and mastering specific techniques. This guide will walk you through the essential steps, from selecting the right chocolate to applying the glaze, ensuring your creations boast that coveted mirror-like finish.
Perfecting ganache glaze shine isn't just about aesthetics; it's also about texture and flavor. A well-executed ganache glaze is smooth on the tongue, melts beautifully, and provides a rich, complementary layer to your baked goods. Whether you're glazing a decadent chocolate cake, delicate éclairs, or mini tarts, mastering the art of a glossy ganache will significantly enhance the overall quality and appeal of your desserts. It's a skill that, once learned, will become an invaluable part of your baking repertoire, impressing everyone who takes a bite.
Understanding Ganache: The Foundation for a Mirror Glaze
What is Ganache and Why is it Essential for Baking?
Ganache is a classic confectionary component made from a simple mixture of chocolate and heated cream. Its versatility is one of its greatest strengths in baking. Depending on the ratio of chocolate to cream, ganache can range from a thin, pourable glaze perfect for achieving a shiny finish, to a thick, scoopable filling, or even a firm truffle base.
It's essential because it provides a rich, chocolatey flavor and a smooth texture that complements a wide variety of desserts. Think of the glossy coating on a classic French pastry or the filling in a chocolate tart – that's often ganache at work.
Beyond its flavor and texture, ganache is crucial for creating visually stunning desserts. A properly made ganache glaze creates a smooth, even surface that catches the light beautifully. This makes it ideal for applications where a professional, polished look is desired, such as drip cakes, glazed tarts, or layered cakes. Understanding the fundamentals of ganache preparation is the absolute first step towards perfecting ganache glaze shine and achieving that professional touch in your home baking.
The Science Behind Ganache: Chocolate to Cream Ratio Explained
The magic of ganache lies in the emulsion created when the fat from the melted chocolate and the fat in the cream are combined and vigorously mixed. The ratio of chocolate to cream dictates the final consistency and, importantly, the potential for shine. A higher proportion of chocolate results in a firmer ganache, while more cream yields a thinner, more liquid consistency suitable for glazing.
For a pourable ganache glaze intended for a high-shine finish, a common ratio is typically around 1 part chocolate to 1 part heavy cream by weight (e.g., 200g chocolate to 200g cream). However, this can vary slightly depending on the type of chocolate used.
Using different ratios allows for various applications. For instance, a 2:1 ratio of chocolate to cream (e.g., 400g chocolate to 200g cream) creates a much firmer ganache, ideal for truffles or fillings that need to hold their shape. Conversely, a 1:1.5 or 1:2 ratio might be used for a very thin glaze or a sauce.
For perfecting ganache glaze shine, the 1:1 ratio is a popular starting point, providing a good balance between pourability and opacity, allowing for a smooth, even coating that sets with a lovely gloss. The science of emulsification is key; properly whisking the mixture helps create a stable bond between the fat and water components, preventing separation and contributing to a smooth, glossy texture.
Choosing the Right Chocolate for a Glossy Ganache Glaze
The type and quality of chocolate you use are paramount when aiming for a high-shine ganache glaze. High-quality chocolate, particularly couverture chocolate, which has a higher percentage of cocoa butter (often 30-39% or more in dark chocolate), is ideal. Cocoa butter is the key to a glossy finish; its crystalline structure contributes significantly to the shine once the ganache sets. Compound chocolate, which uses vegetable fats instead of cocoa butter, will not yield the same level of gloss and often results in a duller finish.
Dark chocolate generally produces the shiniest ganache because it typically contains a higher proportion of cocoa butter than milk or white chocolate. A dark chocolate with 60-70% cocoa solids is a great choice for both flavor and shine.
Milk and white chocolate ganaches can be made, but they inherently have less cocoa butter and require slightly different ratios (often more chocolate relative to cream) and techniques to maximize their potential for shine. Regardless of the type, using finely chopped chocolate or chocolate pistoles (callets) will help it melt more evenly and quickly, contributing to a smoother emulsion and a better chance of perfecting ganache glaze shine.
Mastering the Art of Smooth Ganache: Step-by-Step Guide
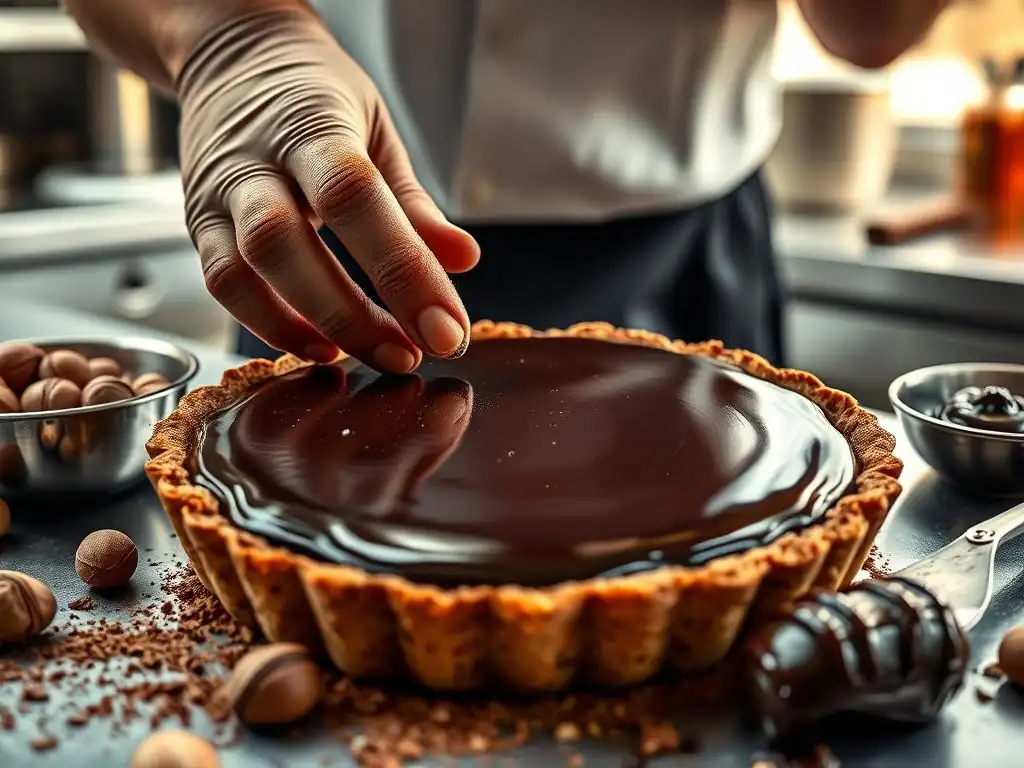
Step 1: Gathering Your Ingredients for a Shiny Ganache
Before you begin, ensure you have all your ingredients measured out and ready. For a classic shiny ganache glaze, you will typically need high-quality chocolate (finely chopped or pistoles) and heavy cream (also known as double cream in some regions). The ratio will depend on the desired consistency, but a 1:1 ratio by weight (e.g., 200g chocolate, 200g cream) is a good starting point for a pourable glaze. Use a kitchen scale for accuracy, as volume measurements for chocolate can be inconsistent.
You will also need heatproof bowls, a small saucepan, a whisk (preferably a balloon whisk), and potentially a rubber spatula. Some recipes might call for a touch of glucose syrup or butter, which can enhance shine and smoothness, but for a basic, beautiful gloss, just chocolate and cream are sufficient. Having everything prepped minimizes interruptions and helps ensure smooth execution, which is vital for perfecting ganache glaze shine.
Step 2: Melting the Chocolate for a Silky Smooth Texture
The goal when melting chocolate for ganache is to achieve a smooth, lump-free base without burning it. The best method is often to place your finely chopped chocolate or pistoles in a heatproof bowl. Heat the heavy cream in a small saucepan over medium heat just until it reaches a simmer – you'll see small bubbles forming around the edges, but it shouldn't come to a rolling boil. Once simmering, immediately remove the cream from the heat.
Pour the hot cream directly over the chopped chocolate in the bowl. Do not stir immediately. Let the hot cream sit on the chocolate for 2-5 minutes. This allows the residual heat from the cream to begin melting the chocolate gently and evenly. This passive melting step is crucial for starting the emulsion process smoothly and preventing the chocolate from seizing, which can lead to a grainy or dull ganache, hindering your efforts in perfecting ganache glaze shine.
Step 3: Combining Chocolate and Cream for a Perfect Emulsion
After letting the chocolate sit in the hot cream, it's time to create the emulsion. Start stirring gently from the center of the bowl with your whisk or spatula. Work in small circles in the center, gradually expanding outwards. As you stir, you'll see the mixture transform from separated chocolate and cream into a unified, glossy liquid. Continue stirring smoothly and consistently until all the chocolate is completely melted and the mixture is homogenous, with no streaks of cream or solid chocolate pieces remaining.
The mixture should look smooth and shiny at this stage. Over-whisking can incorporate too much air, leading to tiny bubbles that mar the surface of your glaze. Gentle, consistent stirring is key. If you encounter any stubborn unmelted pieces, you can place the bowl over a very gently simmering water bath (bain-marie) for just a moment, stirring continuously, but be careful not to overheat the mixture, as this can break the emulsion. A successful emulsion is the foundation for perfecting ganache glaze shine.
Step 4: Achieving the Right Ganache Consistency for Glazing
Once the ganache is emulsified and smooth, it needs to cool to the correct temperature and consistency for glazing. The ideal temperature for pouring a shiny ganache glaze is typically between 85°F and 95°F (approx. 30°C to 35°C). At this temperature, the ganache is liquid enough to pour and spread smoothly but cool enough to set relatively quickly on the cake, creating a thick, even coating without running off completely. Cooling also allows the cocoa butter crystals to begin forming in a way that promotes shine.
To cool the ganache, leave it at room temperature, stirring occasionally to ensure even cooling and prevent a skin from forming. For faster cooling, you can place the bowl over an ice bath, stirring constantly, but be very careful not to let it get too cold and thick. The goal is a consistency that flows like warm honey.
If it's too warm, it will be too thin and won't coat properly; if it's too cool, it will be too thick and difficult to pour smoothly, both of which will hinder perfecting ganache glaze shine. A thermometer is highly recommended here for precision.
Techniques for Achieving a High-Shine Ganache Glaze
Temperature Control: The Key to a Shiny Ganache Finish
Temperature control is arguably the single most critical factor in perfecting ganache glaze shine. As discussed, the temperature of the ganache when it's poured onto the cake directly impacts its flow, how evenly it coats, and ultimately, how shiny it sets. Pouring ganache that is too hot (above 100°F/38°C) will result in a thin, translucent coating that may run off the cake and will likely set with a dull finish. The cocoa butter structure won't set correctly for maximum gloss.
Conversely, pouring ganache that is too cool (below 80°F/27°C) will make it too thick to pour smoothly, leading to an uneven, bumpy surface and a lack of shine. The ideal range of 85-95°F (30-35°C) allows the ganache to flow beautifully, creating a smooth, even layer while promoting the correct crystallization of cocoa butter for maximum reflectivity. Monitoring the temperature with a reliable thermometer is essential for consistent results and for truly perfecting ganache glaze shine.
Stirring Techniques: Preventing Air Bubbles in Your Glaze
Air bubbles are the enemy of a smooth, shiny ganache glaze. They create small imperfections on the surface that break up the light reflection, resulting in a less glossy finish. To prevent air bubbles during the emulsification stage, use a whisk or spatula and stir gently from the center outwards in a smooth, continuous motion, rather than vigorously beating the mixture. Avoid lifting the whisk or spatula out of the ganache unnecessarily.
Once the ganache is made and cooling, stir it occasionally, but again, do so gently. If you notice bubbles, gently tap the bowl on the counter or run a torch lightly over the surface (be very careful not to burn it) to encourage them to pop. For the absolute smoothest glaze before pouring, you can carefully pour the ganache through a fine-mesh sieve. This step removes any tiny lumps or bubbles, ensuring a perfectly smooth liquid ready for achieving a high-shine finish. Proper technique here is vital for perfecting ganache glaze shine.
Using a Thermometer for Precise Ganache Preparation
Precision is key in baking, and a thermometer is an invaluable tool when making ganache for glazing. While experienced bakers might be able to judge the correct temperature by feel, a digital thermometer provides accuracy that ensures consistent results every time. As mentioned, the ideal pouring temperature for a shiny glaze is typically between 85°F and 95°F (30°C to 35°C). Using a thermometer allows you to hit this narrow window precisely.
Monitor the temperature as the ganache cools. If it cools too much, you can gently warm it slightly over a very low heat or a warm water bath, stirring constantly, until it reaches the target range. If it's still too hot, continue stirring gently or use an ice bath carefully until it cools down. Relying on a thermometer eliminates guesswork and significantly increases your chances of achieving a flawless, high-shine ganache glaze, making it an indispensable tool for perfecting ganache glaze shine.
Applying Ganache for a Flawless, Glossy Surface
Preparing Your Cake or Pastry for Glazing
Proper preparation of the item to be glazed is just as important as the ganache itself for achieving a flawless finish. The cake or pastry should be well-chilled and placed on a wire rack set over a baking sheet or tray to catch the excess ganache. Chilling the item helps the warm ganache set quickly upon contact, creating a thicker, more even coating. Ensure the surface is smooth and free of crumbs; any bumps or imperfections will show through the glaze.
For cakes, it's often beneficial to apply a thin crumb coat of buttercream or ganache first, chill it until firm, and then proceed with the final ganache glaze. This seals in crumbs and provides a perfectly smooth base. Ensure the top surface is level. For pastries like éclairs or choux buns, they should also be completely cooled. A well-prepared, cold surface is essential for the ganache to flow correctly and set with maximum shine, contributing significantly to perfecting ganache glaze shine.
Pouring Techniques: Achieving an Even Ganache Coating
When your ganache is at the perfect pouring temperature (85-95°F or 30-35°C), it's time to glaze. Place your chilled cake on a wire rack over a tray. Start pouring the ganache generously over the center of the cake, allowing it to flow outwards towards the edges. Don't hesitate – a continuous, confident pour is better than stopping and starting. Ensure the entire top surface is covered, then let the excess ganache drip down the sides naturally.
For a complete coating on the sides, you can use an offset spatula to gently guide the ganache down or pour more ganache directly onto the sides, working quickly. The goal is to cover the entire surface in one smooth motion as much as possible. Avoid scraping the ganache from the tray underneath and re-using it for the primary glaze layer, as this ganache will contain crumbs and bubbles. Pouring technique is crucial for an even, glossy surface, vital for perfecting ganache glaze shine.
Using a Palette Knife for Smooth Application and Sharp Edges
While pouring is the primary method for coating, a palette knife or offset spatula is useful for guiding the ganache and achieving sharp edges, particularly on the top of a cake. Once the ganache has been poured and has started to drip, you can use a large offset spatula held parallel to the top surface of the cake to gently smooth the top or remove excess ganache from the edge, creating a clean, sharp line as it drips.
Work quickly and with a light touch, as the ganache will begin to set. For the sides, you can use the spatula to encourage even coverage, but avoid overworking it, as this can introduce air bubbles or create streaks. The goal is minimal touching once the ganache is poured. For achieving sharp edges on the top, once the drips have formed, you can carefully run a warm, clean palette knife along the top edge to smooth it out before the ganache fully sets. Proper use of tools enhances the professional look when perfecting ganache glaze shine.
Dealing with Imperfections: Smoothing and Correcting Ganache Glaze
Even with careful technique, minor imperfections can occur. Small bubbles might appear; these can sometimes be gently popped with a pin or the tip of a sharp knife before the ganache sets. If there are slight irregularities in the pour, you can try to gently smooth them with a warm offset spatula, but do this immediately after pouring before it starts to set. Once ganache begins to set, attempting to smooth it will likely create more problems and dull the shine.
If the ganache hasn't coated the sides evenly, you can carefully pour a little more ganache onto the bare spots while it's still wet. If the ganache has already set and you have significant imperfections, sometimes the best approach is to let it set completely, then gently warm the surface with a heat gun (from a distance and moving constantly) to re-melt the very top layer for a few seconds, allowing it to smooth.
However, this requires practice and can easily go wrong. For the best results in perfecting ganache glaze shine, focus on getting it right during the initial pour and cooling stages.
Troubleshooting Common Ganache Problems and Solutions
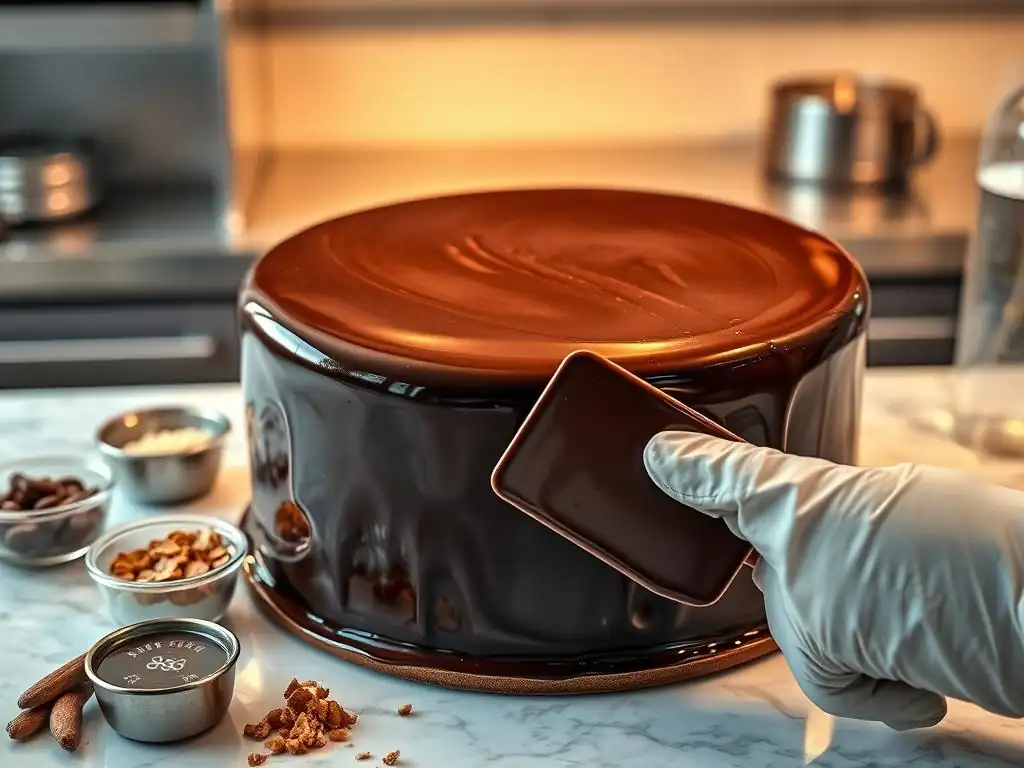
Ganache is Too Thick: How to Thin Your Glaze
If your ganache has cooled too much and become too thick to pour smoothly, don't despair! The easiest way to thin it is to gently warm it up. Place the bowl of ganache over a very gently simmering water bath (bain-marie), ensuring the bottom of the bowl doesn't touch the water. Stir the ganache constantly and gently until it reaches the desired pouring consistency and temperature (85-95°F / 30-35°C). Be careful not to overheat it.
Alternatively, you can heat a small amount of extra heavy cream until simmering and whisk it into the thick ganache, a tablespoon at a time, until it loosens up to the correct consistency. This method might slightly alter your original ratio, but it's effective for thinning. Always add liquid gradually to avoid making it too thin. Getting the consistency right is crucial for perfecting ganache glaze shine.
If your ganache is too thin, likely because it's too warm or the ratio of cream to chocolate was too high, you need to cool it down. Place the bowl of ganache over an ice bath and stir gently but consistently. Monitor the consistency closely. As it cools, it will thicken. Remove it from the ice bath when it reaches the desired pouring consistency (like warm honey).
If cooling alone isn't sufficient (e.g., the ratio is truly off), you can gently melt a small amount of additional chocolate and whisk it into the ganache off the heat. Add the melted chocolate gradually, whisking continuously until the desired thickness is achieved. Remember that the ganache will thicken further as it cools to the pouring temperature, so don't over-thicken it while warm. Achieving the right viscosity is key to perfecting ganache glaze shine.
Ganache is Grainy: Preventing and Fixing Grainy Texture
Grainy ganache is often caused by overheating the chocolate, using poor quality chocolate, or the emulsion breaking. Overheating can cause the cocoa solids to separate from the cocoa butter. If your ganache looks grainy or oily, the emulsion may have broken. To attempt to fix a broken or grainy ganache, gently warm it over a very low heat or a warm water bath, stirring constantly.
Once it's warm and slightly more liquid, try whisking in a tablespoon of warm milk or cream, or even a tiny amount of room temperature softened butter, very vigorously from the center outwards, as if starting the emulsion again. Sometimes, re-emulsifying with a little extra liquid or fat can bring it back together. Prevention is easier: use good quality chocolate, melt it gently, and ensure the cream isn't boiling when added. A smooth texture is fundamental for perfecting ganache glaze shine.
Ganache is Dull: Enhancing Shine and Gloss
A dull ganache finish can result from several factors: using chocolate with low cocoa butter content, incorrect pouring temperature (too hot or too cold), overworking the ganache and incorporating too much air, or insufficient cooling time for the glaze to set and allow the cocoa butter crystals to form properly. If your set ganache is dull, there's not much you can do to add shine to that specific layer without re-melting or applying a new layer.
To enhance shine in future batches, use high-quality chocolate (especially dark chocolate with high cocoa butter), ensure the ganache is poured at the ideal temperature (85-95°F / 30-35°C), stir gently to avoid bubbles, and allow the glazed item to set completely, preferably in a cool place or refrigerator, for at least 30-60 minutes. Adding a touch of glucose syrup or butter during preparation can also significantly boost gloss. Mastering these techniques is essential for perfecting ganache glaze shine.
Tips and Tricks for Enhancing Ganache Glaze Shine
Adding Glucose Syrup for Extra Shine
Incorporating a small amount of glucose syrup (also known as corn syrup in the US) into your ganache mixture is a professional trick for achieving an extra-high shine. Glucose syrup is an invert sugar that helps prevent sugar crystallization in the ganache as it cools and sets. This results in a smoother texture and a more reflective surface.
Add glucose syrup to the heavy cream before heating it. A typical amount is about 1-2 tablespoons per cup (approx. 240g) of heavy cream. Whisk it into the cream as it heats. Proceed with making the ganache as usual by pouring the hot cream mixture over the chocolate. The addition of glucose creates a slightly stickier ganache but significantly enhances the glossiness of the finished glaze, contributing beautifully to perfecting ganache glaze shine.
Using a Neutral Glaze to Amplify the Gloss
For the absolute ultimate mirror finish, particularly on fruit tarts or mousses, professional patisseries often use a neutral glaze (like apricot glaze or a specific mirror glaze recipe) over the ganache. While ganache itself can be very shiny, a clear, highly reflective neutral glaze applied on top amplifies the gloss to a mirror-like level and also protects the ganache layer.
To use this technique, apply and set your ganache glaze as usual. Once it's fully set and chilled, gently warm a high-quality neutral glaze until it is pourable (often around 100-110°F / 38-43°C). Pour or brush the warm neutral glaze thinly over the chilled ganache surface. The neutral glaze sets clear and extremely shiny, creating a perfect, reflective surface that makes your dessert look truly professional. This is an advanced technique for perfecting ganache glaze shine beyond the ganache itself.
Polishing Techniques for a Mirror-Like Finish
While ganache doesn't lend itself to traditional polishing like solid chocolate, the 'polishing' happens during the cooling and setting phase. The key is to allow the cocoa butter crystals to align correctly. This is achieved by using the right chocolate, perfect emulsification, and cooling the ganache to the precise pouring temperature (85-95°F / 30-35°C).
Once the ganache is poured onto the chilled cake, resist the urge to touch or spread it excessively. Let it flow naturally and set undisturbed. The cooling process allows the cocoa butter to crystallize in a stable beta form, which is responsible for hardness and shine. Allowing the glazed item to set fully in a cool, draft-free place (or the refrigerator) for at least 30-60 minutes without disturbing it is the best "polishing" technique for perfecting ganache glaze shine. The undisturbed setting process is crucial for the cocoa butter to develop its glossy structure.
Ganache Glaze Variations: Exploring Different Flavors and Textures
Dark Chocolate Ganache: Rich and Intense Flavor
Dark chocolate ganache is the classic choice for glazing, prized for its intense chocolate flavor and its ability to achieve the highest level of shine due to its typically higher cocoa butter content. Using dark chocolate with 60-70% cocoa solids provides a rich, slightly bitter contrast to the sweetness of the cake or pastry.
The ratio for a pourable dark chocolate glaze is often 1:1 (chocolate to cream by weight). However, if using a very high percentage dark chocolate (70%+), you might need slightly more cream (e.g., 1:1.1 or 1:1.2) as higher cocoa content means less sugar and more cocoa solids and butter, which can make the ganache firmer. Adjusting the ratio is key to getting the right consistency for a smooth, shiny pour when perfecting ganache glaze shine with dark chocolate.
Milk Chocolate Ganache: Creamy and Sweet Indulgence
Milk chocolate ganache offers a creamier, sweeter flavor profile compared to dark chocolate. It's a popular choice for those who prefer a milder chocolate taste. However, milk chocolate contains less cocoa butter and more sugar and milk solids than dark chocolate, which affects its consistency and potential for shine.
To achieve a pourable ganache glaze with milk chocolate, you typically need a higher ratio of chocolate to cream, often around 1.5:1 or 2:1 (milk chocolate to cream by weight). This higher chocolate content compensates for the lower cocoa butter percentage, helping the ganache set properly and achieve a decent level of gloss, although it will generally be less shiny than dark chocolate ganache. Perfecting ganache glaze shine with milk chocolate requires these ratio adjustments.
White Chocolate Ganache: Delicate and Versatile
White chocolate ganache is the sweetest and most delicate of the three main types. It's made from cocoa butter, sugar, and milk solids, containing no cocoa solids. White chocolate ganache is incredibly versatile and can be easily flavored and colored. However, it is the most challenging to make into a super shiny glaze because white chocolate has less cocoa butter than dark chocolate and is more prone to seizing or becoming greasy if overheated.
Similar to milk chocolate, white chocolate ganache requires a higher ratio of chocolate to cream for a pourable glaze, often 2:1 or even 2.5:1 (white chocolate to cream by weight). Use high-quality white chocolate with a good cocoa butter content (look for 30% or higher). Melt it very gently, and ensure the cream is hot but not boiling. While it may not achieve the mirror finish of dark chocolate, focusing on proper emulsion and temperature control can still yield a lovely, smooth, and reasonably glossy glaze when perfecting ganache glaze shine with white chocolate.
Adding Extracts and Liqueurs to Enhance Ganache Flavor
Beyond the chocolate type, you can infuse your ganache glaze with additional flavors to complement your dessert. Extracts like vanilla, almond, or mint can be stirred into the finished ganache once it has cooled slightly. Use high-quality extracts for the best flavor without adding too much liquid.
Liqueurs such as Grand Marnier, Kahlúa, rum, or raspberry liqueur can also add wonderful depth of flavor. Add liqueurs after the ganache has emulsified and cooled slightly, whisking gently to incorporate. Be mindful that adding too much liquid, especially alcohol, can thin the ganache and potentially affect its setting consistency and shine. Start with a small amount (e.g., a tablespoon or two per batch) and adjust to taste. Flavor variations add another dimension to perfecting ganache glaze shine and overall dessert appeal.
Advanced Techniques for Ganache Decoration
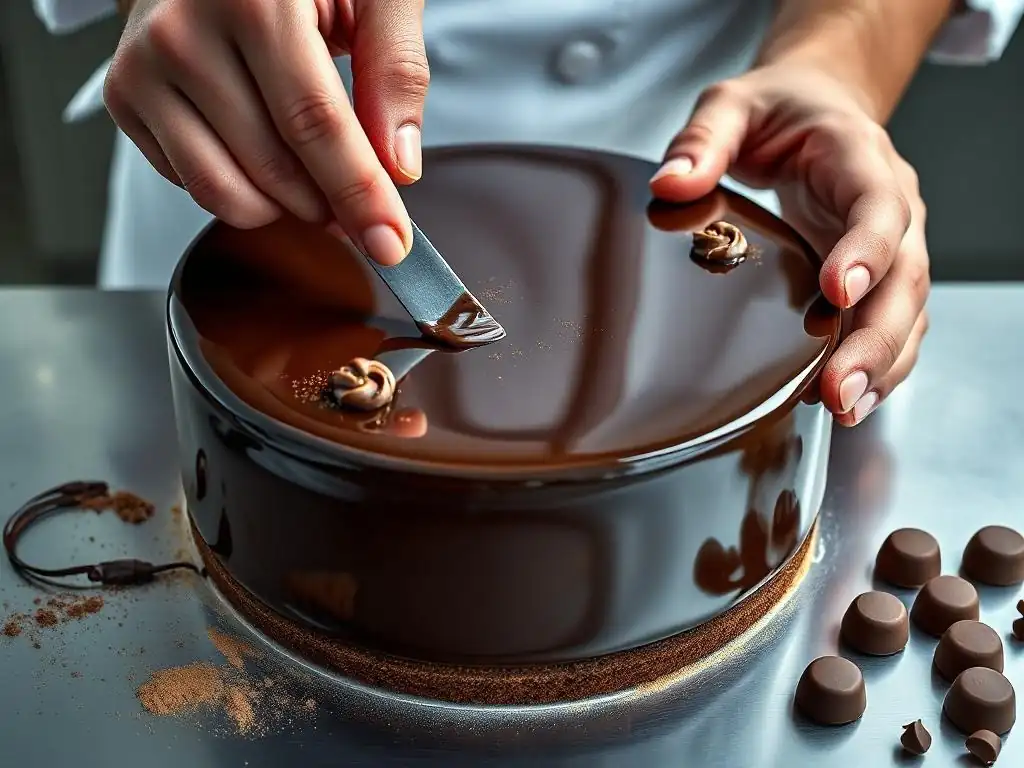
Creating Ganache Drip Cakes
Ganache is the go-to for creating the popular drip cake effect. This technique involves letting slightly thicker ganache (often a 2:1 or 1.5:1 ratio of chocolate to cream, cooled slightly more than for a full glaze) flow down the sides of a chilled, often buttercream-frosted cake. The key is getting the ganache consistency and temperature just right so it drips beautifully without running all the way down or stopping too short.
To create drips, fill a piping bag with the ganache (no tip needed, just a small snip off the end) or use a spoon. Start piping or spooning the ganache just over the edge of the cake, letting gravity pull it down. Vary the amount you apply at different points to create drips of different lengths.
Once the edges are done, you can flood the top of the cake with the remaining ganache and smooth it out. The contrast between the matte buttercream and the shiny ganache drips is stunning, a key element in perfecting ganache glaze shine for decorative purposes.
Using Ganache for Piping and Modeling
With a higher chocolate-to-cream ratio (e.g., 2:1 or 2.5:1 for dark chocolate, 3:1 or more for milk/white), ganache can be whipped or allowed to set to a firmer consistency perfect for piping borders, swirls, or even modeling simple shapes. Whipped ganache is made by letting the ganache cool completely until firm (several hours at room temperature or in the fridge), then whipping it with an electric mixer until light and fluffy.
This whipped ganache is excellent for frosting cakes or piping decorations that hold their shape. For modeling, the ganache needs to be even firmer. It can be kneaded slightly once cooled to a pliable consistency. While this firm ganache isn't about shine, mastering different ganache consistencies expands its use beyond glazing, showcasing its versatility in baking decorations.
Marbling and Swirling Ganache Glazes
For a visually dynamic finish, you can marble or swirl two different colored ganache glazes together. This often involves using dark or milk chocolate ganache and white chocolate ganache (which can be colored). Make both ganaches separately, ensuring they are at the correct pouring temperature.
Pour the base ganache over the cake as usual. While it's still wet, drizzle lines or dollops of the contrasting colored ganache over the top. Then, using a skewer or toothpick, gently swirl the colors together without overmixing. Work quickly before the ganache starts to set. This technique creates beautiful patterns, adding an artistic touch to your glazed desserts while still aiming for a smooth, albeit swirled, finish. The key is to ensure both ganaches are the right consistency and temperature for harmonious swirling, contributing to the visual aspect of perfecting ganache glaze shine.
Storing and Handling Ganache Glaze for Optimal Results
How to Store Leftover Ganache
Proper storage is essential to maintain the quality and usability of leftover ganache. Once you've finished glazing, allow any excess ganache collected on the tray to cool slightly. Transfer the leftover ganache to an airtight container. Press a piece of plastic wrap directly onto the surface of the ganache to prevent a skin from forming.
Store the airtight container in the refrigerator. Properly stored ganache can last for up to two weeks in the fridge. When stored, it will firm up considerably, especially if it had a higher chocolate ratio. Label the container with the date and type of ganache for easy identification. This prevents waste and ensures you have ganache ready for future baking projects or touch-ups.
Reheating and Re-Emulsifying Ganache
If you need to use stored ganache, it will likely be too firm to pour or spread. To reheat it, the best method is to place the ganache in a heatproof bowl over a gently simmering water bath (bain-marie), stirring gently but constantly. Heat only until it becomes liquid and reaches the desired consistency and temperature for use (e.g., 85-95°F / 30-35°C for pouring glaze). Avoid microwaving large quantities, as it can easily overheat and break the emulsion.
If the ganache appears separated or slightly grainy after reheating, it might need to be re-emulsified. This can often be done by whisking it vigorously for a moment once it's warm, or by whisking in a tiny amount (a teaspoon) of warm cream or milk from the center outwards. Gentle reheating and smooth re-emulsification are key to restoring its texture and potential for shine, maintaining your goal of perfecting ganache glaze shine even with leftovers.
Shelf Life and Best Practices for Ganache Storage
The shelf life of ganache depends primarily on the cream used. Since heavy cream is a dairy product, ganache should be treated similarly to other dairy-based fillings. As mentioned, when stored in an airtight container in the refrigerator, ganache typically remains good for consumption for up to two weeks. Always smell and examine stored ganache; discard it if it develops any off odors or visible mold.
For longer storage, ganache can be frozen for up to a month. Thaw frozen ganache slowly in the refrigerator overnight. Once thawed, it may appear separated or grainy. Reheat it gently over a water bath and whisk to re-emulsify before use. Freezing and thawing can sometimes slightly affect the texture and ultimate shine, but it's a viable option for extending shelf life. Always practice good food safety when storing and handling ganache to ensure quality and safety.
Conclusion: Enjoy Your Perfectly Shiny Ganache Glaze!
Mastering the art of ganache glazing is a rewarding skill that significantly elevates the visual appeal of your baked creations. By understanding the fundamental ratio of chocolate to cream, selecting quality ingredients, controlling temperature precisely, and employing careful techniques during mixing and pouring, you are well on your way to perfecting ganache glaze shine.
Remember that practice makes perfect. Don't be discouraged if your first attempt isn't flawlessly shiny. Pay attention to the details – the temperature of your cream, the method of melting chocolate, the gentleness of your stirring, and the crucial pouring temperature. With these steps, you'll consistently achieve that beautiful, smooth, and glossy finish that makes your cakes and pastries look as incredible as they taste. Enjoy the process of perfecting the ganache shine and delight in the stunning results!
Frequently Asked Questions
How do I achieve a perfectly smooth ganache glaze?
To achieve a smooth ganache glaze, ensure your chocolate is finely chopped and the cream is heated evenly. Stir gently from the center outwards, avoiding incorporating air, and strain the ganache for the smoothest result.
What's the secret to a shiny ganache glaze?
The key to a shiny ganache glaze lies in the ratio of chocolate to cream. Using a higher ratio of chocolate will result in a duller finish, while a balanced ratio (often 1:1 or 2:1 depending on the chocolate type) creates a beautiful sheen.
Can I use different types of chocolate for ganache glaze?
Yes, you can! However, the type of chocolate will affect the taste and shine. Dark chocolate generally produces the shiniest results, while milk chocolate requires adjustments to the cream ratio for optimal consistency and gloss.
How do I prevent air bubbles in my ganache glaze?
Prevent air bubbles by stirring your ganache very slowly and deliberately. Avoid whisking or vigorous mixing. Gently tapping the bowl on the counter can also help to release trapped air before pouring.
What temperature should my ganache glaze be before pouring it over a cake?
The ideal temperature for pouring ganache glaze is slightly warm and fluid, around 88-92°F (31-33°C). This allows it to flow smoothly and evenly over the cake, creating a flawless finish.
Final Reflection: The Enduring Allure of a Perfect Ganache Glaze
The pursuit of a flawlessly shiny ganache glaze is more than just a culinary quest; it's a reflection of our desire for perfection in a world that often feels imperfect. A perfectly smooth, glossy surface speaks to precision, artistry, and the satisfying culmination of careful technique. This isn't just about aesthetics; it's about the pride in creating something beautiful and delicious.
The impact of a visually stunning dessert, like one finished with a mirror-like ganache, extends far beyond the immediate enjoyment. It's a testament to the power of attention to detail and the transformative effect of skilled craftsmanship. The simple act of achieving that perfect shine can evoke a sense of accomplishment and joy, both for the baker and the recipient. The details are not the details. They make the design.
– Charles Eames. This quote perfectly encapsulates the importance of mastering the seemingly small details, like achieving a flawless ganache glaze, to elevate the overall experience.
Now, consider your own pursuits. What seemingly small details in your life, your work, or your passions, are you striving to perfect? I encourage you to apply the principles outlined in this article – patience, precision, and a keen eye for detail – to any area where you seek excellence. Embrace the process, learn from any imperfections, and savor the satisfaction of achieving that perfect shine, whether it's on a ganache glaze or in any other aspect of your life. The journey towards perfection, however elusive, is often the most rewarding part.
Unlock Your Inner Pastry Chef: Master the Ganache Glaze!
Thanks for taking the time to explore the art of ganache glazes with us! We hope you gained valuable insights into creating that perfect, mirror-like shine. Now it's time to put your newfound knowledge into practice.
- Try your hand at a new ganache recipe: Experiment with different chocolate types and cream ratios to discover your signature glaze. Challenge yourself to achieve that flawless finish!
- Share your ganache creations: Show off your beautiful creations on social media using #BakeWithEaseGanache – we'd love to see your results!
- Join our baking community: Connect with fellow baking enthusiasts in our comments section below and share your tips and tricks for ganache success. Let’s learn from each other!
What unique flavor combination will you try first in your ganache adventure?