
Fixing Gelatin Fails: Salvaging Runny or OverSet Desserts

Welcome to BakeWithEase, your baking sanctuary! Ever faced the jiggly frustration of a gelatin dessert gone wrong? Fixing Gelatin Fails: Salvaging Runny or OverSet Desserts is your ultimate guide to rescuing those wobbly mishaps. Discover our expert gelatin dessert troubleshooting tips and turn potential disasters into delicious triumphs. Intrigued? Let's dive in and conquer the art of perfect gelatin creations!
- Introduction to Gelatin Dessert Troubleshooting
- Understanding Why Gelatin Desserts Fail
- Runny Gelatin Desserts: Causes and Solutions
- OverSet Gelatin Desserts: Causes and Solutions
- Preventing Gelatin Dessert Problems
- Advanced Gelatin Techniques
- Troubleshooting Specific Gelatin Dessert Recipes
- Conclusion: Mastering Gelatin for Baking
-
Frequently Asked Questions
- What causes gelatin desserts to be runny and not set properly?
- How can I fix a gelatin dessert that is too firm or rubbery (overset)?
- What types of fruit should I avoid adding to gelatin desserts?
- How long should I chill my gelatin dessert to ensure it sets properly?
- Can I use different types of gelatin interchangeably in recipes?
- Final Reflection: The Sweet Science of Second Chances
- Rediscover Your Dessert Confidence!
Introduction to Gelatin Dessert Troubleshooting
Working with gelatin can sometimes feel like a delicate dance. One moment you're anticipating a perfectly set, shimmering dessert, and the next you're faced with a disappointing puddle or a rubbery solid. Mastering gelatin is a key skill in many baking techniques, from classic jellies and panna cotta to complex mousses and Bavarian creams. Fortunately, many common gelatin dessert issues are fixable, and understanding the 'why' behind a fail is the first step to successful gelatin dessert troubleshooting.
This guide offers practical gelatin dessert troubleshooting tips to help you rescue those culinary creations that didn't quite go according to plan. We'll explore the common pitfalls, the science behind gelatin's setting process, and provide actionable solutions for both runny and overset desserts. By the end, you'll feel more confident tackling any gelatin challenge that comes your way, turning potential failures into delicious successes.
Achieving the Perfect Gelatin Dessert: A Guide
Creating a gelatin dessert with the ideal texture – firm enough to hold its shape but soft enough to melt delightfully in your mouth – requires precision and attention to detail. The process typically involves blooming the gelatin in a cold liquid, dissolving it in a warm liquid, and then chilling the mixture until it sets. Each step is critical, and skipping or altering them can lead to undesirable results.
The perfect set is a balance. Too little gelatin, or improper handling, results in a soft, unset, or "runny" texture, while too much, or over-chilling, can make the dessert overly firm, rubbery, or bouncy. Understanding this balance is fundamental to effective gelatin dessert troubleshooting tips and ensures your panna cotta has that signature wobble, or your jelly is perfectly sliceable.
Common Gelatin Dessert Problems and Solutions
Bakers often encounter a few recurring issues when working with gelatin. The most frequent complaints include desserts that simply won't set, mixtures that become grainy or lumpy, or desserts that are far too stiff. These problems usually stem from errors in measurement, temperature control, or interactions with other ingredients.
Addressing these challenges requires understanding the specific cause. For a runny dessert, the solution might involve adding more gelatin, while an overset dessert might need gentle re-melting and dilution. This article will walk you through the most common scenarios and provide specific gelatin dessert troubleshooting tips tailored to each situation, helping you salvage your creation.
Understanding Why Gelatin Desserts Fail
Gelatin's ability to form a gel is a fascinating chemical process, and interrupting or mishandling this process is the primary reason for dessert failures. It's a protein derived from collagen, and it needs specific conditions to hydrate, dissolve, and then form a stable matrix as it cools. Understanding these conditions is key to preventing issues before they even start and forms the foundation for effective gelatin dessert troubleshooting tips.
Factors like the ratio of gelatin to liquid, the temperature at which the gelatin is handled, and the presence of certain ingredients like acids or enzymes can all significantly impact the final set. Ignoring any of these variables is a common path to a failed dessert.
Incorrect Gelatin to Liquid Ratio: A Frequent Cause
One of the most prevalent reasons for a gelatin dessert fail is using the wrong proportion of gelatin to the amount of liquid in the recipe. If there isn't enough gelatin relative to the volume of liquid, the protein network won't be strong enough to trap the liquid effectively as it cools, resulting in a dessert that remains stubbornly liquid or is excessively soft and runny.
Conversely, using too much gelatin creates a dense, overly firm texture that lacks the desired delicate consistency. A standard guideline often suggests about 1 packet (around 7 grams or 1/4 ounce) of gelatin powder per 2 cups (approximately 475ml) of liquid for a moderately firm set, like a standard jelly. However, recipes for softer sets, like panna cotta, might use half that amount per 2 cups, highlighting the importance of precise measurement based on the desired outcome. Mastering these ratios is a core gelatin dessert troubleshooting tip.
Blooming and Dissolving Gelatin Properly
Blooming is the process of hydrating dry gelatin in a cold liquid before dissolving it. This allows the gelatin granules to absorb water and swell, ensuring they dissolve smoothly and evenly when heated. Skipping this crucial step, or blooming in hot liquid, can lead to uneven hydration, resulting in undissolved gelatin granules or a lumpy texture in the final dessert.
After blooming, the gelatin must be fully dissolved, typically in a warm liquid. The temperature is critical here; the liquid should be warm enough to melt the gelatin crystals (around 100-120°F or 40-50°C is often sufficient), but not boiling hot. Boiling can damage the gelatin protein structure, weakening its gelling ability and potentially leading to a runny dessert. Ensuring complete dissolution without overheating is vital for successful gelatin dessert troubleshooting tips.
Temperature's Impact on Gelatin Setting
Temperature plays a dual role in working with gelatin: dissolving it and setting it. As mentioned, warm temperatures are needed to dissolve the bloomed gelatin, but excessive heat can degrade it. Once dissolved, the mixture needs to be cooled to allow the protein strands to form the gel matrix.
Gelatin typically begins to set as it cools below approximately 60°F (15°C) and achieves a firm set when fully chilled, usually below 40°F (4°C), like in a refrigerator. Chilling time is also important; rushing the process or not chilling long enough will result in a soft or unset dessert. Conversely, chilling for too long, especially with excess gelatin, can make the dessert overly rigid. Proper temperature management is a cornerstone of effective gelatin dessert troubleshooting tips.
Acidic Ingredients and Their Effect on Gelatin
Highly acidic ingredients, such as citrus juices (lemon, lime, pineapple) or vinegar, can weaken gelatin's gelling strength. The acids can break down the protein structure, preventing it from forming a stable gel network. This is why recipes containing large amounts of acidic fruit juice often require a slightly higher amount of gelatin to compensate.
Certain fruits, like fresh pineapple, papaya, kiwi, and figs, contain enzymes (like bromelain in pineapple) that actively break down gelatin proteins. Heating these fruits (like canning or cooking) deactivates these enzymes, which is why canned pineapple works in gelatin desserts while fresh often does not. Being aware of these interactions is a crucial gelatin dessert troubleshooting tip when incorporating fruit into your recipes.
Runny Gelatin Desserts: Causes and Solutions
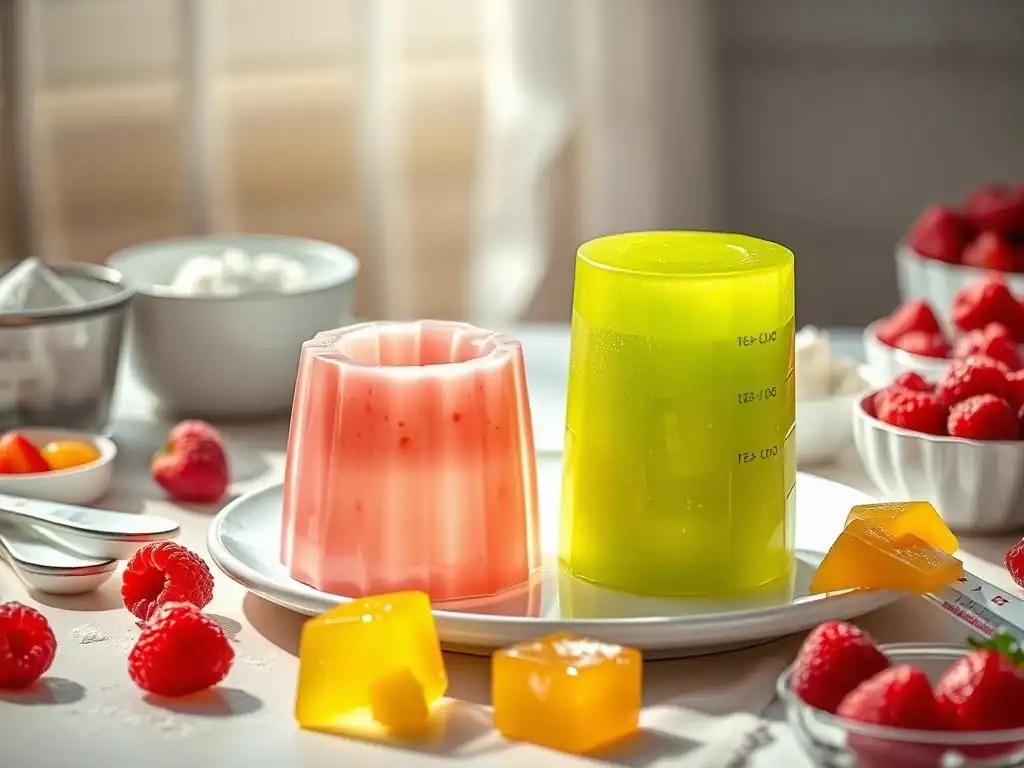
A runny or overly soft gelatin dessert is perhaps the most common and frustrating problem bakers face. Instead of a wobbly, self-supporting structure, you get a liquid or semi-liquid mess that refuses to hold its shape, especially when unmolded. This can be particularly disheartening when you've followed a recipe diligently.
The primary culprits for a runny set are usually insufficient gelatin, improper blooming or dissolving (leaving some gelatin undissolved), or the presence of ingredients that inhibit gelling, such as high acid levels or active enzymes from fresh fruits. Identifying which factor, or combination of factors, is at play is the first step in applying the right gelatin dessert troubleshooting tips.
Identifying the Causes of Soft Gelatin Desserts
A soft or runny gelatin dessert typically indicates that the gel matrix either didn't form correctly or isn't strong enough for the amount of liquid present. Did you use the correct amount of gelatin? A common error is accidentally using teaspoons instead of tablespoons, or mismeasuring the liquid. Was the gelatin properly bloomed in cold liquid and then fully dissolved in warm liquid without boiling? Undissolved gelatin won't contribute to the set.
Consider the other ingredients. Were there significant amounts of acidic juices or fresh tropical fruits? If so, these might have degraded the gelatin. Finally, was the dessert chilled for long enough at a sufficiently cold temperature? Gelatin needs time and cold to set fully. Reviewing these steps helps pinpoint the issue for effective gelatin dessert troubleshooting tips.
Solution 1: Re-blooming and Adding More Gelatin
If you suspect the issue is simply not enough gelatin, or some of it didn't dissolve, you can often salvage the dessert by adding more. This involves gently re-melting the existing mixture and incorporating additional properly prepared gelatin. This method works best for simple gelatin mixtures without delicate components like whipped cream or egg whites that could be compromised by reheating.
The process requires carefully warming the failed dessert just enough to liquefy it, typically over very low heat or in a warm water bath, being careful not to boil. While that's happening, you prepare a small amount of additional gelatin, bloom it, dissolve it, and then whisk it into the warmed, liquefied dessert mixture. This is a direct application of gelatin dessert troubleshooting tips for under-gelled mixtures.
Re-blooming Gelatin: A Step-by-Step Guide
To re-bloom gelatin for a fix, you'll need a small amount of cold liquid (usually water) and the additional gelatin powder or sheets. For powder, measure the desired amount (start small, maybe 1/2 to 1 teaspoon for 2-3 cups of liquid mixture), sprinkle it evenly over 2-3 tablespoons of cold water in a small bowl, and let it sit undisturbed for 5-10 minutes until it swells and becomes spongy.
For gelatin sheets, soak the required number of sheets in a bowl of cold water for 5-10 minutes until pliable, then squeeze out excess water. Once bloomed (either powder or sheets), gently heat the bloomed gelatin in a microwave for a few seconds or over a warm water bath until it is completely dissolved into a clear liquid, ensuring it doesn't boil. This properly prepared gelatin is now ready to be incorporated into your failed dessert mixture.
Adjusting Gelatin Ratio for Firmer Texture
When adding more gelatin to a runny dessert, the goal is to achieve the desired firmness without making it rubbery. A good starting point for adding extra gelatin to a failed set is to calculate how much more is needed based on the total liquid volume. If your original recipe used, say, 1 packet per 4 cups and it was runny, you might aim for the standard 1 packet per 2 cups ratio for a firmer set, meaning you'd need to add another packet's worth of gelatin.
However, it's often safer to add gelatin incrementally. You could start by adding an amount equivalent to 1/4 to 1/2 a packet (around 1.75 to 3.5 grams) per 2 cups of your total mixture volume. After dissolving the extra gelatin and incorporating it into the gently warmed, liquefied dessert, chill a very small sample (a tablespoon or two) in the freezer for 10-15 minutes to quickly check the set before committing the entire batch to chilling. This iterative approach is a smart gelatin dessert troubleshooting tip.
Solution 2: Gently Heating and Re-setting the Mixture
Sometimes, a runny set isn't due to insufficient gelatin but improper dissolution initially. Gently reheating the entire mixture can help fully dissolve any stubborn gelatin granules that didn't melt the first time, allowing the gel network to form correctly upon re-chilling. This method is effective when you see tiny undissolved gelatin bits or suspect the mixture wasn't warm enough initially to fully melt the bloomed gelatin.
The key is gentle heating. Use a double boiler or a bowl set over a pot of simmering water (a bain-marie). Stir the mixture constantly until it is just liquid and any visible granules disappear. Avoid direct high heat or boiling, as this can further degrade the gelatin. Once liquefied and smooth, strain it if necessary to remove any remaining solids, then chill it thoroughly until set. This is a simple yet effective gelatin dessert troubleshooting tip for dissolution issues.
Optimal Temperature for Re-melting Gelatin
When gently heating a runny gelatin dessert to re-set it, the optimal temperature is just warm enough to liquefy the mixture and ensure any undissolved gelatin melts, typically in the range of 100°F to 120°F (40°C to 50°C). This is below the temperature where gelatin starts to degrade significantly, which is generally above 140°F (60°C), and well below boiling (212°F or 100°C), which should be strictly avoided.
Heating slowly and gently, stirring continuously, helps distribute the heat evenly and prevents scorching or overheating localized areas. You should see the mixture become consistently liquid and smooth. Once it reaches this state, remove it from the heat immediately. Monitoring the temperature, perhaps with an instant-read thermometer if you're precise, can help ensure you stay within the safe range for gelatin dessert troubleshooting tips.
Preventing Overheating and Gelatin Damage
Overheating gelatin is counterproductive when trying to fix a runny dessert, as it weakens the very protein structure you're relying on to set. Boiling gelatin solutions can permanently damage the protein chains, rendering them unable to form a proper gel upon cooling. Even prolonged exposure to high heat below boiling can diminish gelling strength over time.
To prevent overheating, always use indirect heat, such as a double boiler or a bowl over simmering water. Keep the heat source low to medium and stir the mixture constantly. Heat only until the mixture is liquid and smooth, then remove it from the heat source promptly. Don't leave it sitting over heat once liquefied. Rapidly cool the mixture slightly before chilling fully to minimize the time it spends at temperatures where degradation can occur, enhancing your gelatin dessert troubleshooting tips.
Solution 3: Stabilizing with Agar-Agar
If you're dealing with a dessert that contains ingredients incompatible with gelatin (like fresh pineapple enzymes) or you've repeatedly failed to get a gelatin set, stabilizing the mixture with agar-agar is a viable alternative. Agar-agar is a plant-based gelling agent derived from seaweed. It creates a firmer, less wobbly set than gelatin and is not affected by the enzymes in fresh fruits that break down gelatin.
Using agar-agar requires slightly different handling than gelatin. It needs to be boiled for a minute or two to fully dissolve and activate its gelling properties, whereas gelatin should never boil. Once dissolved by boiling, it sets relatively quickly at room temperature, faster than gelatin. This makes it a powerful tool in gelatin dessert troubleshooting tips, especially for fruit-heavy recipes.
Using Agar-Agar as a Gelatin Alternative
To use agar-agar to fix a runny gelatin dessert, you'll need to gently re-melt the failed gelatin mixture completely. While that's liquefying, prepare the agar-agar separately. Measure the appropriate amount of agar-agar powder (typically about 1/4 to 1/2 the amount of gelatin called for in the original recipe, but check specific package instructions as potency varies) and whisk it into a small amount of cold liquid.
Add this agar-agar slurry to a small saucepan and bring it to a rolling boil, simmering for 1-2 minutes while whisking constantly to ensure it's fully dissolved. Then, whisk this hot agar-agar solution into your gently warmed, liquefied gelatin mixture. Combine thoroughly, strain if desired, and chill. The agar-agar will provide the necessary structure where the gelatin failed, offering a robust gelatin dessert troubleshooting tip.
Gelatin to Agar-Agar Conversion Ratios
Converting from gelatin to agar-agar isn't a precise science as their gelling strengths and textures differ, but a common guideline is to use about 1/4 to 1/2 teaspoon of agar-agar powder for every 1 teaspoon of gelatin powder called for in a recipe. For gelatin sheets, which vary in strength (bloom strength), a general rule might be 1/4 to 1/2 teaspoon of agar-agar powder per 2-3 sheets of typical gelatin.
It's crucial to remember that agar-agar sets much firmer and less "melty" than gelatin and requires boiling to activate. Always refer to the specific agar-agar product's instructions, as recommended ratios can vary significantly between brands. Testing a small amount first is always a wise gelatin dessert troubleshooting tip when substituting gelling agents.
OverSet Gelatin Desserts: Causes and Solutions
While a runny dessert is disappointing, an overset or rubbery gelatin dessert can be equally unappealing. Instead of a delicate wobble, you get a firm, bouncy, sometimes even tough texture that feels more like solid rubber than a smooth dessert. This problem is usually easier to fix than a runny set, as you're dealing with too much structure rather than not enough.
The primary cause of an overset dessert is almost always using too much gelatin relative to the liquid volume. This could be a measurement error or simply following a recipe where the gelatin quantity was too high for the desired texture. Over-chilling, while contributing to firmness, typically doesn't cause a rubbery texture unless excess gelatin was used initially.
Recognizing Overly Firm Gelatin Desserts
You'll know your gelatin dessert is overset if it feels excessively firm and resistant when you try to spoon into it, or if it bounces significantly when gently jiggled. Unmolded, it might stand rigidly without any sign of a delicate wobble. The texture in the mouth will likely feel dense and chewy rather than smooth and melt-away.
This rubbery texture is a clear indicator that the protein network formed by the gelatin is too dense and strong for the amount of liquid it contains. Unlike a perfectly set dessert that yields easily, an overset one requires effort to break through. Recognizing this distinct texture is the first step in applying the correct gelatin dessert troubleshooting tips for too-firm results.
Solution 1: Gently Melting and Adding More Liquid
The most straightforward way to fix an overset gelatin dessert is to gently re-melt it and dilute the gelatin concentration by adding more liquid. This effectively increases the liquid-to-gelatin ratio, resulting in a softer set upon re-chilling. This method works well for simple gelatin mixtures like jellies or panna cotta bases.
Carefully heat the overset dessert using indirect heat, such as a double boiler or a bowl over simmering water, stirring until it is just liquefied. Once melted, whisk in additional liquid – this could be water, milk, juice, or whatever liquid base is appropriate for your dessert. Start by adding maybe 1/4 to 1/2 cup of liquid per 2 cups of the original mixture, then chill a small sample to test the new consistency before chilling the entire batch.
Gentle Heating: Preventing Graininess
When re-melting an overset gelatin dessert, gentle heating is crucial to prevent the mixture from becoming grainy. Gelatin itself doesn't usually cause graininess upon re-melting, but if your dessert contains dairy or other ingredients that can curdle or separate under high heat (like a panna cotta made with cream), rapid or direct heating can ruin the smooth texture.
Using a double boiler or a bowl set over simmering water provides controlled, even heat that melts the gelatin without exposing sensitive ingredients to scorching temperatures. Stir the mixture constantly as it melts to ensure even heating and prevent hot spots. Heat only until the mixture is fully liquid and smooth; prolonged heating is unnecessary and can potentially impact flavor or texture. This careful approach is a key gelatin dessert troubleshooting tip.
Adjusting Liquid Ratio for Softer Texture
The amount of liquid you add to an overset dessert depends on how rubbery it is and how soft you want it to be. If it's only slightly too firm, a small addition of liquid might suffice. If it's very rubbery, you may need to add a more significant amount. A safe starting point is to add about 1/4 cup (approx. 60ml) of liquid for every 1 cup (approx. 240ml) of the original overset dessert volume.
Whisk the additional liquid thoroughly into the gently melted mixture. Taste and adjust if necessary, considering that adding plain water will dilute the flavor. Once combined, chill a small test portion in the freezer for 10-15 minutes to check the revised set. If it's still too firm, you can gently warm the batch again and add a bit more liquid, repeating the test. This iterative adjustment is an effective gelatin dessert troubleshooting tip.
Solution 2: Blending for a Smoother Texture
For overset gelatin desserts that don't contain delicate whipped elements, blending can be an alternative solution, particularly if you don't want to add more liquid or if the texture is slightly grainy as well as firm. Blending breaks down the rigid gel structure into smaller pieces, resulting in a smoother, almost mousse-like consistency.
This method works best for homogeneous mixtures like simple jellies or panna cotta. It's not suitable for layered desserts or those incorporating whipped cream or meringue after the initial gel sets, as blending would destroy those textures. While it won't recreate the clean wobble of a perfectly set jelly, it can transform an unpleasantly firm dessert into something edible and even enjoyable, offering a different kind of gelatin dessert troubleshooting tip.
When Blending Works for OverSet Gelatin
Blending is an effective fix for overset desserts that are uniform throughout, such as a plain fruit jelly, a coffee jelly, or a simple panna cotta base before any final layers or toppings are added. If your overset dessert is a single, solid mass of gelatinized liquid, blending can break apart the overly dense protein matrix.
The process involves transferring the overset dessert to a blender or using an immersion blender. Blend until the mixture is completely smooth and uniform. The result will be a thicker, pourable liquid that will re-set into a softer, more homogenous (but not clear) texture. This is a good option if the texture is only slightly too firm or if adding more liquid would dilute the flavor too much.
Avoiding Air Bubbles During Blending
Blending can incorporate a lot of air into the mixture, resulting in an unappealing foamy or bubbly texture upon re-setting. To minimize air bubbles when blending an overset gelatin dessert, blend on the lowest speed necessary to achieve smoothness. Avoid over-blending.
Once blended, tap the blender carafe gently on the counter to help surface bubbles rise. If using an immersion blender, keep the blade fully submerged and tilt the container to avoid whipping air from the surface. You can also let the blended mixture sit for 10-15 minutes before pouring it into molds or serving dishes; this allows some of the trapped air to dissipate naturally. Skimming any remaining foam from the surface before chilling is another helpful gelatin dessert troubleshooting tip.
Solution 3: Layering with a Softer Gelatin Mixture
If your overset dessert is in a mold or serving dish and you can't easily re-melt or blend it (perhaps it's part of a multi-component dessert), a creative solution is to add a new layer made with a softer gelatin mixture on top. This doesn't fix the overset layer itself, but it introduces a contrasting texture that makes the overall dessert more palatable and visually interesting.
This approach requires making a fresh batch of the same or a complementary flavor, but using significantly less gelatin than the original recipe called for – aiming for a very soft set, perhaps even just barely set. Once the original overset layer is fully chilled and firm, gently pour the new, softer mixture over it and chill until the new layer is set. This turns a problem into an opportunity for a layered dessert, a clever gelatin dessert troubleshooting tip.
Creating Two-Layer Desserts for Texture Balance
To create a balanced two-layer dessert from an overset base, first ensure the original layer is completely set and ideally well-chilled. Then, prepare a new batch of your dessert liquid. Use considerably less gelatin this time. If the original used 1 packet per 2 cups and was rubbery, aim for maybe 1/2 packet per 2 cups for the new layer, or even less, depending on how soft you want the top layer.
Carefully bloom and dissolve the smaller amount of gelatin in the new liquid. Let the new mixture cool slightly towards room temperature; pouring hot liquid onto a cold, firm layer can sometimes cause issues. Gently pour the cooled, but still liquid, new mixture over the overset layer in its mold or dish. Chill thoroughly until the new, softer layer is fully set.
Ensuring Layer Adhesion
Getting the new, softer layer to adhere properly to the original overset layer is important for a clean dessert. Ensure the surface of the overset layer is clean and free of any condensation or grease before pouring the new mixture. If the surface is very smooth and firm, you can gently score it lightly with a fork; this creates small grooves that the new liquid can settle into, helping the layers bond.
Make sure the new liquid mixture isn't too hot when poured over the cold, firm layer, as extreme temperature differences can sometimes create a weak bond or even partially melt the surface of the bottom layer. Pour gently and evenly. Allow ample chilling time for the new layer to set firmly onto the old one. This attention to detail ensures your gelatin dessert troubleshooting tips result in a cohesive dessert.
Preventing Gelatin Dessert Problems
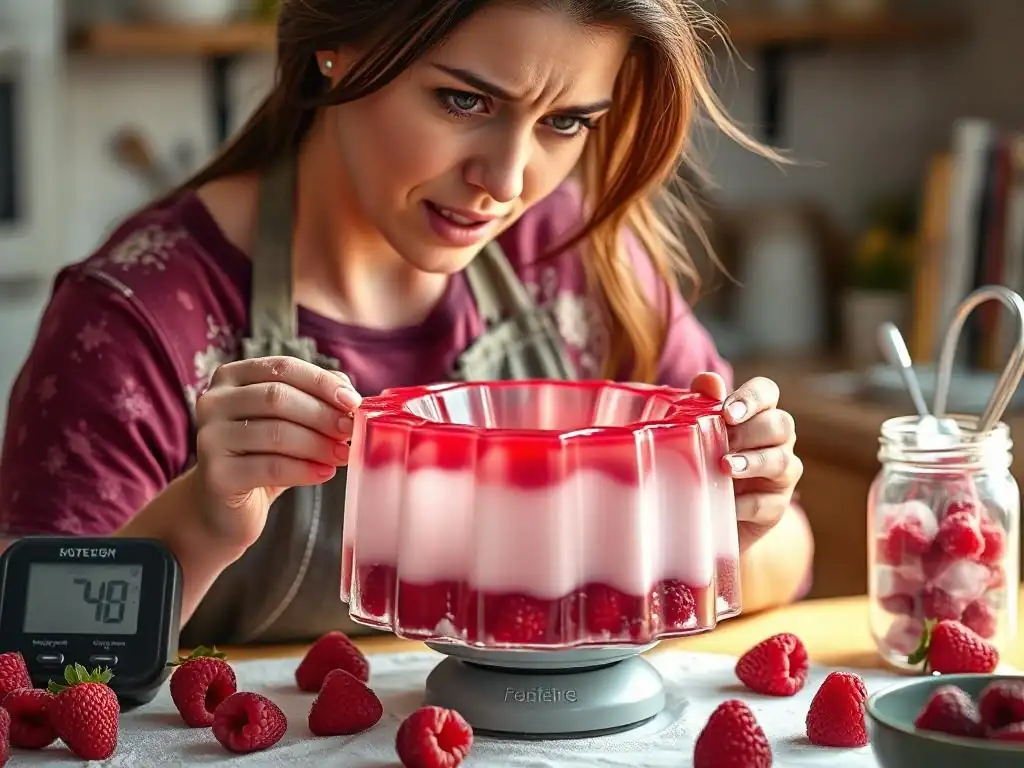
While gelatin dessert troubleshooting tips are invaluable for salvaging fails, preventing problems in the first place is the ideal scenario. Most issues stem from preventable errors in measurement, handling, or understanding the interaction of ingredients. Developing good habits when working with gelatin will significantly increase your success rate.
Accuracy, patience, and attention to temperature are your best allies. By focusing on these key areas during preparation, you can avoid the common pitfalls that lead to runny or overset desserts and consistently achieve that desired perfect texture.
Accurate Gelatin Measurement for Consistent Results
Precise measurement of both gelatin and liquid is fundamental to achieving consistent results. Gelatin's gelling power is concentrated, so even small errors can significantly impact the final set. Always use proper measuring spoons or a digital scale for gelatin powder. A standard packet of gelatin powder typically weighs about 7 grams (or 1/4 ounce), which is often equated to 2 1/4 to 2 1/2 teaspoons, but weighing is more accurate if your recipe gives a weight measurement.
Measure liquids accurately using liquid measuring cups placed on a flat surface at eye level. Don't guess or estimate. Following the recipe's specified quantities exactly is the single most important step in preventing most gelatin dessert failures and reduces the need for gelatin dessert troubleshooting tips.
Proper Blooming and Dissolving Techniques
Always bloom gelatin powder or sheets in the specified amount of cold liquid for the recommended time (usually 5-10 minutes). This allows for proper hydration. Using hot liquid for blooming can cause the outside of the granules to swell and form a barrier, preventing the inside from hydrating, leading to undissolved clumps.
When dissolving the bloomed gelatin, use a warm liquid (around 100-120°F or 40-50°C) and stir until completely dissolved. There should be no visible granules or streaks. Avoid boiling the mixture, as high heat degrades gelatin. If incorporating into a cold mixture, dissolve the bloomed gelatin in a small amount of warm liquid first, then temper it by whisking a little of the cold mixture into the warm gelatin solution before combining everything. This ensures even distribution and prevents the gelatin from seizing.
Temperature Control During Setting
Temperature control is vital throughout the process, especially during the setting phase. Gelatin needs to be sufficiently chilled to form a stable gel. Most gelatin desserts require chilling in the refrigerator (typically 35-40°F or 1-4°C) for several hours, often 4-8 hours or even overnight, depending on the size and volume of the dessert.
Avoid chilling at room temperature for too long, especially in warm environments, as this can lead to bacterial growth and may not provide sufficient cold for a firm set. Ensure your refrigerator is at the correct temperature. Don't attempt to unmold or serve the dessert before it is fully set; impatience is a common cause of perceived failure. If a recipe calls for a specific chilling time, err on the side of chilling longer if necessary.
Choosing the Right Gelatin Type
Recipes usually specify whether to use gelatin powder or sheets. While they are generally interchangeable, their handling differs slightly, and their gelling strength can vary. Gelatin powder is measured by volume or weight and bloomed in cold liquid. Gelatin sheets are counted by number and also bloomed in cold water, with excess water squeezed out before dissolving.
If substituting, be aware that different brands and types of gelatin sheets have different "bloom" strengths (e.g., Bronze, Silver, Gold, Platinum), which affects how many sheets are equivalent to a given amount of powder. A common conversion is 1 standard gelatin packet (7g powder) equals about 4-5 Bronze sheets, 3 Silver sheets, 2 Gold sheets, or 1.5 Platinum sheets, but checking the package instructions is best. Using the type specified in the recipe or understanding the correct conversion is key to avoiding gelatin dessert troubleshooting tips related to strength.
Advanced Gelatin Techniques
Once you've mastered the basics of working with gelatin and are comfortable with gelatin dessert troubleshooting tips, you can explore more advanced applications. Gelatin is a versatile ingredient used to create a variety of textures, from the delicate structure of a mousse to the clear firmness of a consommé jelly or the intricate shapes of molded desserts.
These techniques often involve combining gelatin with whipped elements, adjusting set times for layering, or using molds. Success in these areas relies heavily on a solid understanding of gelatin's properties and how it interacts with other ingredients and temperatures.
Working with Gelatin Sheets vs. Powder
Gelatin sheets, often favored by professional chefs, offer a potentially cleaner, clearer result than powder and are sometimes easier to measure consistently if using a scale. They are typically bloomed by soaking in a generous amount of cold water until pliable (about 5-10 minutes), then squeezing out all the excess water before dissolving.
Gelatin powder is more commonly available and is bloomed by sprinkling it over a smaller, measured amount of cold liquid (usually 3-4 tablespoons per packet) and letting it sit to absorb the liquid. The choice between sheets and powder often comes down to preference, availability, and the specific requirements of a recipe. Understanding how to properly handle both forms is part of advanced gelatin dessert troubleshooting tips.
Using Gelatin in Mousse and Bavarian Creams
Gelatin is essential for providing structure and stability to airy desserts like mousses and Bavarian creams, which incorporate whipped cream or whipped egg whites. The gelatin network helps suspend the air bubbles, preventing the dessert from collapsing. The amount of gelatin used is typically less than for a firm jelly, aiming for a delicate set that holds its shape but remains light and creamy.
The key challenge here is incorporating the dissolved gelatin mixture into the airy base without deflating it. The gelatin mixture should be cooled to near room temperature but still liquid before being gently folded into the whipped components. If the gelatin mixture is too warm, it can melt the whipped cream/whites; if too cold, it can start to set instantly, creating streaks or lumps. Achieving the right temperature balance is critical.
Creating Layered and Molded Gelatin Desserts
Creating layered gelatin desserts requires careful timing and temperature control. Each layer must be partially set before the next, potentially warm, layer is poured on top. The first layer needs to be firm enough to support the weight of the next layer without breaking through but not so firm that the layers won't adhere. Often, chilling the first layer until it's just firm to the touch (partially set) is ideal before adding the next layer, which should be cooled slightly.
Molded desserts require sufficient chilling time for a very firm set, especially if they are complex shapes. Unmolding techniques, such as briefly dipping the mold in warm water, are crucial. Ensuring adequate gelatin for the volume and shape of the mold prevents the dessert from collapsing upon unmolding, a common issue that requires specific gelatin dessert troubleshooting tips.
Troubleshooting Specific Gelatin Dessert Recipes
Applying general gelatin dessert troubleshooting tips is helpful, but some common desserts present unique challenges. Panna cotta, jelly, and desserts made at high altitudes are examples where specific considerations come into play. Tailoring your troubleshooting approach to the particular recipe and conditions is often necessary for success.
Understanding the typical issues associated with these specific desserts allows for more targeted solutions, saving time and frustration.
Fixing a Runny Panna Cotta
A runny panna cotta is almost always due to insufficient gelatin or improper dissolution. Panna cotta uses a relatively small amount of gelatin for a very delicate set, making precise measurement critical. If yours is liquid or too soft after adequate chilling, gently re-warm it over low heat or in a double boiler until just liquid, stirring constantly.
While it's warming, bloom and dissolve a small amount of additional gelatin (perhaps 1/4 to 1/2 teaspoon per 2 cups of mixture) in a tablespoon or two of warm liquid from the panna cotta base. Whisk this dissolved gelatin back into the gently warmed panna cotta mixture until fully combined. Strain if necessary, then chill thoroughly again until set. This is a classic application of gelatin dessert troubleshooting tips for this creamy dessert.
Saving an OverSet Jelly
If your fruit jelly is too firm and rubbery, the most effective fix is to gently re-melt it and add more liquid. Transfer the overset jelly to a saucepan and heat gently over low heat or in a double boiler, stirring until completely liquid. Do not boil.
Once liquid, whisk in additional water, fruit juice, or other appropriate liquid. Start by adding about 1/4 cup (60ml) of liquid for every cup (240ml) of the original jelly volume. Stir well to combine. You can test the new consistency by chilling a small sample in the freezer. If still too firm, gently re-warm and add a little more liquid. Once satisfied, chill the entire batch until set. This simple dilution is a key gelatin dessert troubleshooting tip for overly firm jellies.
Adjusting Gelatin Desserts for High Altitude
Baking at high altitudes presents unique challenges due to lower atmospheric pressure, which causes liquids to boil at lower temperatures and evaporate faster. While gelatin itself doesn't typically boil, the liquid it's dissolved in does, and faster evaporation can subtly concentrate ingredients. More significantly, the lower pressure can affect the structure of gels.
At very high altitudes (above 3,000-4,000 feet), you may find that recipes require a slight increase in gelatin to achieve the same firmness as at sea level. Start by adding just a little extra gelatin, perhaps 10-15% more than the recipe calls for, and test the set. Additionally, be mindful that liquids might cool slightly faster. High-altitude adjustments are a nuanced aspect of gelatin dessert troubleshooting tips.
Conclusion: Mastering Gelatin for Baking
Working with gelatin can be intimidating at first, but armed with the right knowledge and gelatin dessert troubleshooting tips, you can confidently tackle any recipe. Understanding the science behind gelatin's behavior – how it blooms, dissolves, and sets – is the most powerful tool you have in your baking arsenal.
Remember that most gelatin fails are fixable. Whether your dessert is too runny or too firm, gentle heating, careful adjustments to the gelatin or liquid ratio, and proper chilling can often bring it back from the brink. Practice and patience are key; don't be discouraged by initial setbacks.
Key Takeaways for Perfect Gelatin Desserts
Here are the essential gelatin dessert troubleshooting tips to remember:
- Measure Accurately: Precision in measuring both gelatin and liquid is paramount.
- Bloom Properly: Always hydrate dry gelatin in cold liquid before dissolving.
- Dissolve Gently: Dissolve bloomed gelatin in warm liquid, avoiding boiling temperatures.
- Control Temperature: Chill thoroughly for setting, and use gentle heat for troubleshooting.
- Be Aware of Ingredients: Acidic ingredients and certain fresh fruits can weaken gelatin.
- Runny? Add More Gelatin: Gently re-melt, add bloomed and dissolved gelatin, and re-chill.
- OverSet? Add More Liquid: Gently re-melt, whisk in additional liquid, and re-chill.
- Test Small Batches: When adjusting, test a small amount in the freezer before committing the whole batch.
[ ] Practice blooming gelatin powder correctly.
[ ] Practice blooming gelatin sheets correctly.
[ ] Experiment with different gelatin-to-liquid ratios to see the texture difference.
[ ] Attempt to fix a purposefully under-set jelly.
[ ] Attempt to fix a purposefully over-set panna cotta.
Resources for Further Gelatin Exploration
To deepen your understanding of gelatin and advanced techniques, explore reputable baking cookbooks focusing on patisserie and desserts. Culinary science resources can provide more detail on the chemical interactions of gelatin with other ingredients. Online baking communities and forums can also offer valuable insights and peer gelatin dessert troubleshooting tips based on shared experiences. Continuously learning and practicing are the best ways to master this versatile ingredient.
Frequently Asked Questions
What causes gelatin desserts to be runny and not set properly?
Runny gelatin often results from too much liquid relative to the gelatin powder or sheets. It can also be caused by adding certain fresh fruits containing enzymes that break down gelatin. Improper chilling or not allowing enough time for the gelatin to fully set are other common reasons.
How can I fix a gelatin dessert that is too firm or rubbery (overset)?
An overset gelatin dessert is usually due to using too much gelatin. You can try gently reheating it with a bit more liquid (water or juice) to dilute the gelatin concentration, then letting it re-set.
What types of fruit should I avoid adding to gelatin desserts?
Avoid adding fresh pineapple, kiwi, mango, papaya, and figs directly to gelatin, as they contain enzymes (like bromelain and actinidin) that prevent proper setting. Canned versions are usually okay because the canning process destroys these enzymes.
How long should I chill my gelatin dessert to ensure it sets properly?
Generally, gelatin desserts need at least 4 hours of chilling in the refrigerator to fully set. For larger or more complex desserts, allowing them to chill overnight is recommended for the best results.
Can I use different types of gelatin interchangeably in recipes?
Yes, but you need to adjust the amount. Gelatin comes in sheets or powder, and the bloom strength (a measure of its gelling power) varies. Always consult the packaging for specific instructions and consider adjusting the recipe accordingly.
Final Reflection: The Sweet Science of Second Chances
The art of gelatin desserts, while seemingly simple, often presents unexpected challenges. A wobbly panna cotta or a rock-hard mousse can be incredibly frustrating, but this article has shown that even seemingly ruined creations can be salvaged with a little know-how and a dash of patience. These aren't just recipes; they're opportunities to learn and refine your skills in the kitchen.
The enduring appeal of gelatin desserts lies not just in their delicate textures and vibrant flavors, but in the sense of accomplishment they bring. Successfully navigating the sometimes-tricky process of gelatin sets reinforces the importance of precision and attention to detail in cooking. As Julia Child famously said, If you're afraid of butter, use cream.
Similarly, don't be afraid to experiment and learn from your mistakes – even a "failed" dessert can teach you valuable lessons about the science behind gelatin and its interactions with other ingredients.
Now, it's your turn. Take what you've learned here and apply it to your next gelatin creation. Don't be discouraged by a slightly runny texture or an overly firm set. Instead, embrace the opportunity to troubleshoot, to experiment, and to discover the joy of transforming a culinary mishap into a delicious success. Remember, the sweetest victories often come from overcoming challenges – and the most delicious desserts are often the ones born from a little bit of happy accident and a whole lot of ingenuity.
Rediscover Your Dessert Confidence!
Thanks for taking the time to explore the world of gelatin with us! We hope you gained valuable insights into rescuing those not-so-perfect desserts. Now it's time to put your newfound knowledge into action.
- Master your next gelatin creation: Try out one of the techniques discussed – you'll be amazed at how easily you can transform a gelatin mishap into a delicious success. This time, aim for perfection!
- Share your success (or even your fails!): Let’s build a community of bakers who learn from each other. Share your experience in the comments below – we'd love to hear your story.
- Challenge yourself: Experiment with different flavors and techniques to create your own unique gelatin dessert masterpiece.
What unexpected flavor combination will you try next to conquer the world of gelatin?