
Foolproof Macaron Recipe Using the Swiss Meringue Method

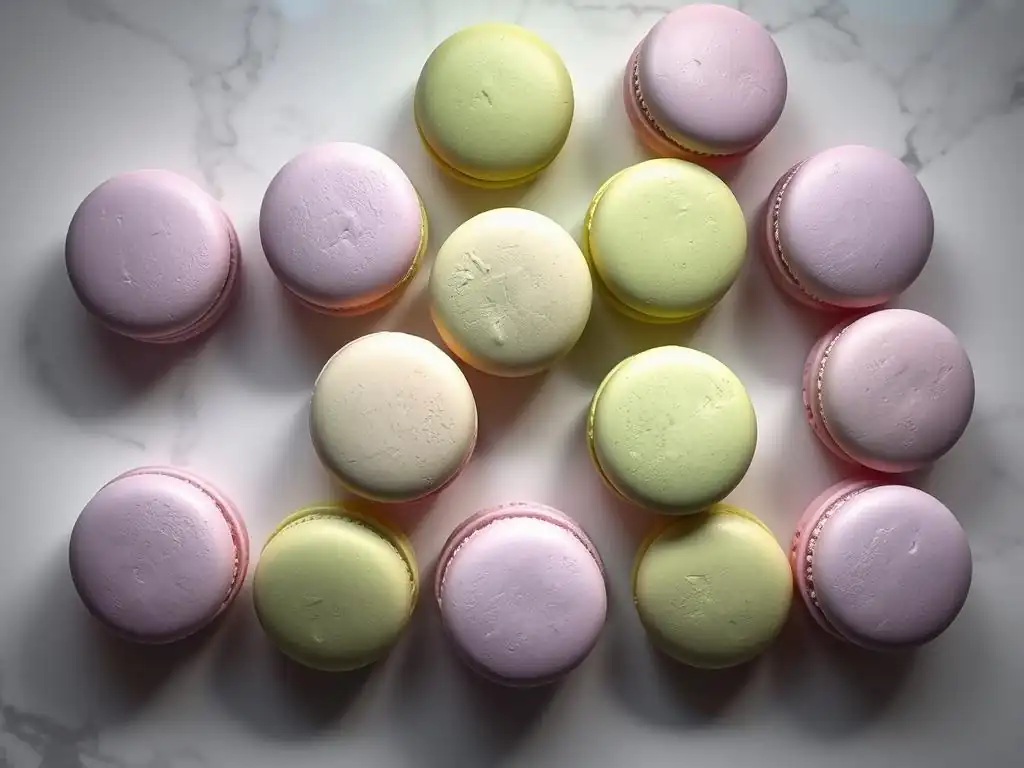
Welcome to BakeWithEase, your ultimate guide to baking bliss! Ever dreamt of creating those delicate, perfectly smooth macarons but felt intimidated? Fear no more! We're diving deep into a foolproof Swiss meringue macaron recipe, demystifying the process and giving you the confidence to bake these exquisite treats at home. Intrigued? Let's unlock the secrets to macaron mastery together...
- Mastering Macarons: A Swiss Meringue Method Guide
- Why Choose the Swiss Meringue Macaron Method?
- Ingredients for Swiss Meringue Macarons
- Equipment Needed for Swiss Meringue Macaron Success
-
Step-by-Step Guide to Making Swiss Meringue Macarons
- Preparing Your Ingredients and Equipment
- Step 1: Combining Egg Whites and Sugar
- Step 2: Heating the Egg White and Sugar Mixture
- Step 3: Whipping the Meringue to Stiff Peaks
- Step 4: Macaronage: The Delicate Art of Folding
- Step 5: Piping the Macaron Shells
- Step 6: Resting the Macaron Shells
- Step 7: Baking the Macaron Shells
- Step 8: Cooling the Macaron Shells
- Creating Delicious Macaron Fillings: Flavor Combinations
- Assembling Your Swiss Meringue Macarons
- Troubleshooting Common Macaron Problems
- Tips for Macaron Success
- Enjoy Your Homemade Swiss Meringue Macarons!
-
Frequently Asked Questions
- What makes this macaron recipe "foolproof"?
- Why use the Swiss meringue method instead of other meringue methods?
- What are the most common mistakes people make when baking macarons?
- What ingredients are essential for a successful macaron batch?
- Can I adapt this recipe for different flavors or fillings?
- Final Reflection: Mastering the Delicate Art of the Macaron
- Unleash Your Inner Pâtissier: Master the Macaron!
Mastering Macarons: A Swiss Meringue Method Guide
Why Choose the Swiss Meringue Macaron Method?
Understanding the Swiss Meringue Advantage
The Swiss meringue method for making macarons stands out as a particularly reliable technique, making it an excellent choice for those seeking a more foolproof Swiss meringue macaron recipe. Unlike the French method, where dry sugar is whipped directly into egg whites, the Swiss method involves gently heating egg whites and sugar together over a water bath before whipping. This process dissolves the sugar completely and stabilizes the egg whites, creating a much more robust and stable meringue. This stability is crucial for achieving consistent macaron shells with smooth tops and the desired "feet."
This pre-heating step typically brings the egg white and sugar mixture up to a temperature between 130°F and 140°F (around 54°C to 60°C). Heating the mixture not only ensures the sugar is fully dissolved, preventing grainy shells, but also partially cooks the egg whites, making the resulting meringue less fragile and more forgiving during the macaronage process. This inherent stability is a key reason why many bakers find the Swiss method leads to a more reliable Swiss meringue macaron recipe compared to other techniques, especially in humid environments where meringue can be finicky.
Key Benefits of Swiss Meringue
Opting for the Swiss meringue method offers several distinct advantages that contribute to a higher success rate when making macarons. Firstly, the increased stability of the meringue makes the crucial "macaronage" step – the folding of the dry ingredients into the meringue – less daunting. You have a slightly larger margin for error before the meringue deflates, which is a common pitfall for beginners. This extra resilience helps in achieving the perfect batter consistency needed for smooth, glossy shells.
Secondly, the Swiss method tends to produce macaron shells that are consistently smooth on top and less prone to cracking. The stable meringue contributes to a more uniform rise during baking, resulting in that coveted smooth surface. Furthermore, the dissolved sugar in the meringue helps create a stronger structure, which is vital for developing the characteristic ruffled "feet" at the base of the macaron shell. For anyone aiming for a truly foolproof Swiss meringue macaron recipe, these benefits significantly reduce the variables that can lead to common macaron failures.
Ingredients for Swiss Meringue Macarons
Essential Macaron Ingredients
Crafting beautiful and delicious Swiss meringue macarons requires a few key ingredients, each playing a specific role in the structure and texture of the shells. The foundation typically consists of almond flour, powdered sugar, egg whites, and granulated sugar. While the quantities are critical and must be measured precisely, understanding the function of each ingredient is equally important.
For a standard batch yielding roughly 30-40 shells (15-20 assembled macarons), you might use approximately 120-150 grams of almond flour, 120-150 grams of powdered sugar, around 90-110 grams of aged egg whites, and 90-110 grams of granulated sugar. Precision is paramount in this foolproof Swiss meringue macaron recipe.
Beyond the core four, ingredients like food coloring (gel or powder recommended) are often used to give the shells their vibrant appearance. A pinch of salt can sometimes be added to the meringue to help stabilize it further. The quality and preparation of these ingredients directly impact the final outcome. For instance, using finely ground, high-quality almond flour is essential for smooth shells, while correctly preparing the egg whites is fundamental to creating a stable Swiss meringue.
High-Quality Almond Flour
High-quality almond flour is arguably the most critical dry ingredient in any macaron recipe, including a foolproof Swiss meringue macaron recipe. It forms the bulk of the shell's structure and contributes significantly to its delicate texture. Look for blanched, finely ground almond flour, often labeled as "superfine." Standard almond meal, which includes the skins and is more coarsely ground, will result in rough, bumpy shells instead of the desired smooth surface.
Before using, it's highly recommended to sift your almond flour, often along with the powdered sugar. Even superfine almond flour can contain small clumps or larger pieces that won't incorporate smoothly into the batter. Sifting ensures a uniform particle size, leading to consistently smooth macaron tops. Some bakers even pulse their almond flour and powdered sugar together briefly in a food processor before sifting to achieve an even finer blend, though care must be taken not to over-process and create an oily paste.
Egg Whites: Achieving the Perfect Meringue
Egg whites are the heart of the Swiss meringue method. For the best results in a foolproof Swiss meringue macaron recipe, use aged egg whites. This means separating the eggs a day or two in advance and letting the whites sit covered loosely (to allow moisture evaporation) in the refrigerator. Aging helps to break down the proteins slightly, resulting in egg whites that whip up to a more stable and voluminous meringue. Ensure the egg whites are at room temperature before you begin the heating step; cold whites won't whip properly.
The quantity of egg whites is precise and must be measured by weight, not volume. A typical large egg white weighs around 30-35 grams. Using too little or too much can throw off the delicate balance of the batter consistency required for successful macaronage and proper shell formation. The Swiss method's advantage here is that the initial heating step helps ensure protein denaturation necessary for a strong meringue structure, regardless of slight variations in aging time, contributing to the foolproof aspect.
Granulated Sugar: The Key to Stability
Granulated sugar plays a dual role in the Swiss meringue: it provides sweetness and, more importantly, stabilizes the whipped egg whites. In the Swiss method, the granulated sugar is heated with the egg whites, causing the sugar crystals to dissolve completely. This dissolved sugar then forms a syrup that binds to the egg white proteins, creating a strong, glossy, and stable meringue structure that can hold its shape well during piping and baking.
Using fine granulated sugar can sometimes help it dissolve faster during the heating process, but standard granulated sugar works perfectly fine as long as the mixture reaches the correct temperature to ensure full dissolution. It is crucial not to substitute granulated sugar with powdered sugar in this step, as powdered sugar contains cornstarch, which would interfere with the meringue formation and stability needed for this foolproof Swiss meringue macaron recipe. The ratio of sugar to egg white is also critical; too little sugar can result in a weak meringue that deflates easily.
Powdered Sugar: Ensuring a Smooth Shell
Powdered sugar, also known as confectioners' sugar or icing sugar, is one of the two primary dry ingredients in the macaron batter (the other being almond flour). Its main purpose is to provide sweetness and contribute to the smooth, delicate texture of the macaron shell. Like almond flour, powdered sugar should be sifted, often together with the almond flour, to remove any lumps and ensure a fine, consistent powder.
Powdered sugar typically contains a small amount of cornstarch (often around 3%) as an anti-caking agent. While this is generally fine for macarons, using a brand with excessive cornstarch could potentially affect the texture. Sifting is key to incorporating it smoothly into the meringue during the macaronage step. This dry mixture, often called the "tant pour tant" (meaning "equal parts"), must be folded into the meringue carefully to achieve the correct batter consistency, which is vital for smooth, footed shells in a foolproof Swiss meringue macaron recipe.
Food Coloring (Optional): Adding Vibrant Colors
While not strictly necessary for the structure or flavor of the macaron shell itself, food coloring is essential if you desire vibrant, visually appealing macarons. The type of food coloring used is very important; liquid food colorings, commonly found in supermarkets, contain water, which can disrupt the delicate balance of the macaron batter and lead to failed shells (e.g., cracks, hollows, or lack of feet).
For best results with a foolproof Swiss meringue macaron recipe, use gel or powder food coloring. Gel colors are concentrated and add minimal moisture. Powdered colors are even more concentrated and add no moisture at all, making them ideal for achieving deep, rich hues without affecting the batter consistency. Add the coloring to the whipped meringue after it has reached stiff peaks but before adding the dry ingredients. Remember that the color will often deepen slightly during baking, so start with a shade slightly lighter than your desired final color.
Equipment Needed for Swiss Meringue Macaron Success
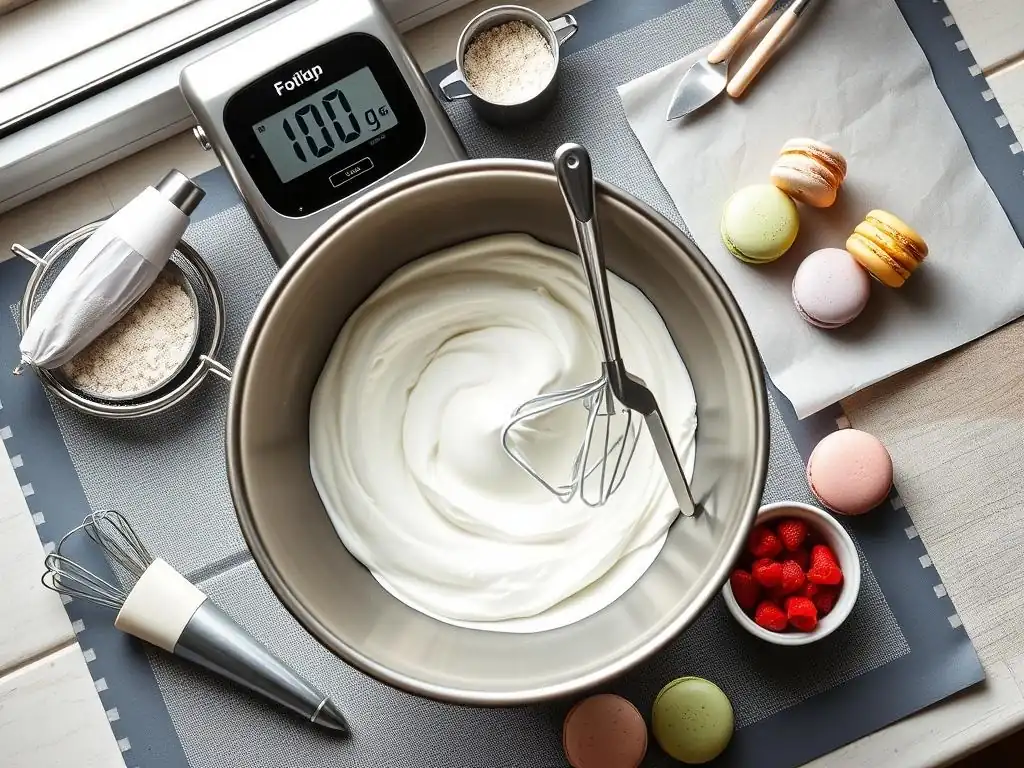
Essential Macaron Baking Tools
Having the right tools is just as important as having the right ingredients when attempting a foolproof Swiss meringue macaron recipe. Precision and consistency are key at every stage, and specific equipment helps achieve this. While some steps can be done manually, certain tools significantly simplify the process and improve the chances of success, especially for newcomers to macaron making.
The essential toolkit includes items for measuring ingredients accurately, mixing the meringue, shaping the shells, and baking them evenly. Investing in quality versions of these tools can make a noticeable difference in your results. For instance, a reliable kitchen scale is non-negotiable, as macaron recipes are based on weight for accuracy. Similarly, specialized baking mats designed for macarons can help ensure uniform size and shape.
Stand Mixer or Hand Mixer
A powerful mixer is indispensable for creating the stable Swiss meringue required for this recipe. While it is technically possible to whip meringue by hand, achieving and maintaining the stiff peaks needed for macarons is extremely challenging and physically demanding without mechanical assistance. A stand mixer is highly recommended as it allows the meringue to be whipped for the necessary duration (often 10-15 minutes or more) without tiring, freeing you up to prepare other ingredients.
If a stand mixer isn't available, a robust hand mixer can work, but be prepared for a longer whipping time and potentially needing breaks. Ensure your mixer has sufficient power to handle the thick, glossy meringue as it develops. The whisk attachment is used for whipping the egg white and sugar mixture after it's been heated, transforming it into a stiff, glossy meringue capable of supporting the weight of the almond flour and powdered sugar.
Piping Bags and Tips
Piping the macaron batter onto baking sheets requires piping bags and tips to create uniformly sized and shaped shells. Disposable or reusable piping bags work well. For the tip, a round tip is standard for macarons. A tip size of around 1A (Wilton) or similar (approximately 1/2 inch or 1.2 cm diameter opening) is commonly used to create shells roughly 1.5 to 2 inches in diameter.
Using the correct tip size helps control the flow of the batter and ensures each shell is similar in size, which is crucial for pairing later. Piping bags allow for controlled dispensing of the batter, resulting in neater, rounder shells compared to attempting to spoon the batter. Piping is a skill that improves with practice, but having the right tools makes the learning curve much smoother when following a foolproof Swiss meringue macaron recipe.
Silicone Baking Mat or Parchment Paper
To prevent macaron shells from sticking and to ensure even baking, you need to pipe them onto either silicone baking mats (like Silpat) or good-quality parchment paper. Silicone mats are often preferred as they provide excellent non-stick properties and can help distribute heat evenly. Many silicone mats designed for macarons even have printed circles as guides for piping, which is incredibly helpful for maintaining consistent size.
If using parchment paper, ensure it lies flat on the baking sheet. You can secure the corners with a tiny dab of macaron batter underneath if needed. Avoid using wax paper, as it is not suitable for the higher temperatures used for baking macarons and can melt or smoke. Whichever you choose, make sure your baking sheets are flat and do not warp in the oven, as this can cause uneven baking and misshapen shells.
Kitchen Scale
Accuracy in measuring ingredients is perhaps the single most important factor for success in a foolproof Swiss meringue macaron recipe. Unlike many baking recipes that rely on volume measurements (cups, tablespoons), macaron recipes are highly sensitive to the ratios of wet to dry ingredients and sugar to egg white. Even a slight variation can significantly impact the batter consistency and the final shell outcome.
Therefore, a digital kitchen scale is absolutely essential. Weighing ingredients ensures you are using the exact amounts specified in the recipe, which minimizes variables and increases your chances of success. For example, the weight of an egg white can vary, so measuring it by grams is far more accurate than assuming a certain volume. This precision is fundamental to achieving consistent results batch after batch.
Thermometer
A thermometer is required for the initial step of the Swiss meringue method: heating the egg whites and sugar over a water bath. You need to heat the mixture to a specific temperature range, typically between 130°F and 140°F (54°C to 60°C), to ensure the sugar is fully dissolved and the egg whites are slightly cooked for stability. An instant-read thermometer is ideal for quickly and accurately checking the temperature of the mixture while whisking it over the heat.
Heating the mixture to the correct temperature is crucial. Heating it too little means the sugar may not dissolve completely, leading to grainy shells, and the meringue won't be as stable. Heating it too much could scramble the egg whites. A reliable thermometer takes the guesswork out of this critical step, contributing significantly to the foolproof nature of the Swiss meringue macaron recipe.
Step-by-Step Guide to Making Swiss Meringue Macarons
Preparing Your Ingredients and Equipment
Before you even think about mixing, ensure all your ingredients are measured precisely using a kitchen scale. Separate your egg whites a day or two in advance and let them come to room temperature (this can take 30-60 minutes). Sift your almond flour and powdered sugar together into a bowl and set aside. Have your granulated sugar ready.
Prepare your baking sheets by lining them with silicone mats or parchment paper. Fit your piping bag with the chosen round tip and place it in a tall glass or container, folding the top edge over the rim to make it easier to fill. Preheat your oven to the specified temperature, usually between 290°F and 325°F (140°C to 160°C), depending on your oven.
Having everything prepped and ready before you start mixing is vital for a smooth process. Once the meringue is ready and the dry ingredients are incorporated, the batter is time-sensitive. You don't want to be searching for equipment or sifting flour while your batter sits. This organized approach is a key step in following a foolproof Swiss meringue macaron recipe and minimizing potential errors under pressure.
Step 1: Combining Egg Whites and Sugar
Begin the Swiss meringue process by combining your room-temperature egg whites and granulated sugar in a heatproof bowl. A metal or glass bowl is preferable for heating over a water bath. Whisk them together gently just until combined. At this stage, the mixture will look liquidy and slightly cloudy.
Place this bowl over a saucepan containing a couple of inches of simmering water. Ensure the bottom of the bowl does not touch the water. This creates a double boiler setup.
Step 2: Heating the Egg White and Sugar Mixture
While the bowl sits over the simmering water, continuously whisk the egg white and sugar mixture. You are gently heating the mixture to dissolve the sugar crystals and slightly warm the egg whites. Keep whisking constantly to prevent the egg whites from cooking unevenly or scrambling on the bottom of the bowl.
Use your thermometer to monitor the temperature of the mixture. Continue whisking and heating until the mixture reaches the target temperature, typically 130°F to 140°F (54°C to 60°C). You can also test a small amount between your fingers; it should feel perfectly smooth with no graininess from the sugar. Once the temperature is reached, immediately remove the bowl from the heat.
Step 3: Whipping the Meringue to Stiff Peaks
Transfer the heated egg white and sugar mixture to the bowl of your stand mixer (or use your hand mixer). Begin whipping the mixture on medium speed. The mixture will start foamy and gradually become opaque and thicken.
Increase the speed to medium-high or high. Continue whipping until the meringue is very thick, glossy, and reaches stiff peaks. Stiff peaks mean that when you lift the whisk, the meringue stands straight up without drooping. This can take anywhere from 8 to 15 minutes, depending on your mixer.
The bowl should feel cool to the touch by the time the meringue is ready, indicating it has cooled sufficiently from the heating step. This robust meringue is the backbone of a foolproof Swiss meringue macaron recipe. If adding gel or powder food coloring, gently mix it in during the last minute or two of whipping.
Step 4: Macaronage: The Delicate Art of Folding
Macaronage is the most crucial and arguably the trickiest step. It involves folding the sifted almond flour and powdered sugar mixture into the stiff Swiss meringue. Add about half of the dry ingredients to the meringue. Using a rubber spatula, begin folding. The technique involves cutting through the center of the mixture, then scraping the spatula around the side of the bowl and lifting to fold the mixture over onto itself.
Add the remaining dry ingredients and continue folding gently but efficiently. You are aiming for a specific batter consistency, often described as "lava-like" or like "slow-moving ribbon." When you lift the spatula, the batter should flow off in a continuous ribbon that folds back onto itself and slowly disappears into the mass within 10-15 seconds.
Do not overmix, as this will deflate the meringue and result in flat, footless shells. Undermixing will result in shells with peaks that don't settle and potentially cracked tops. Practice is key here, but the stability of the Swiss meringue gives you a bit more time than the French method.
Step 5: Piping the Macaron Shells
Carefully transfer the macaron batter into your prepared piping bag. Hold the piping bag vertically, directly above the baking sheet, and apply even pressure to pipe rounds of batter onto the silicone mat or parchment paper. Aim for consistent size, using guides on a mat if available. Stop squeezing and flick the bag tip quickly to the side to break off the flow cleanly.
Leave sufficient space between each piped shell, as they will spread slightly. A typical size is about 1.5 inches (3.8 cm) in diameter. Once piped, firmly tap the baking sheet on the counter several times (4-6 times) to release any air bubbles trapped in the batter. This is essential for preventing cracked shells. Pop any visible air bubbles on the surface using a toothpick or scribe tool.
Step 6: Resting the Macaron Shells
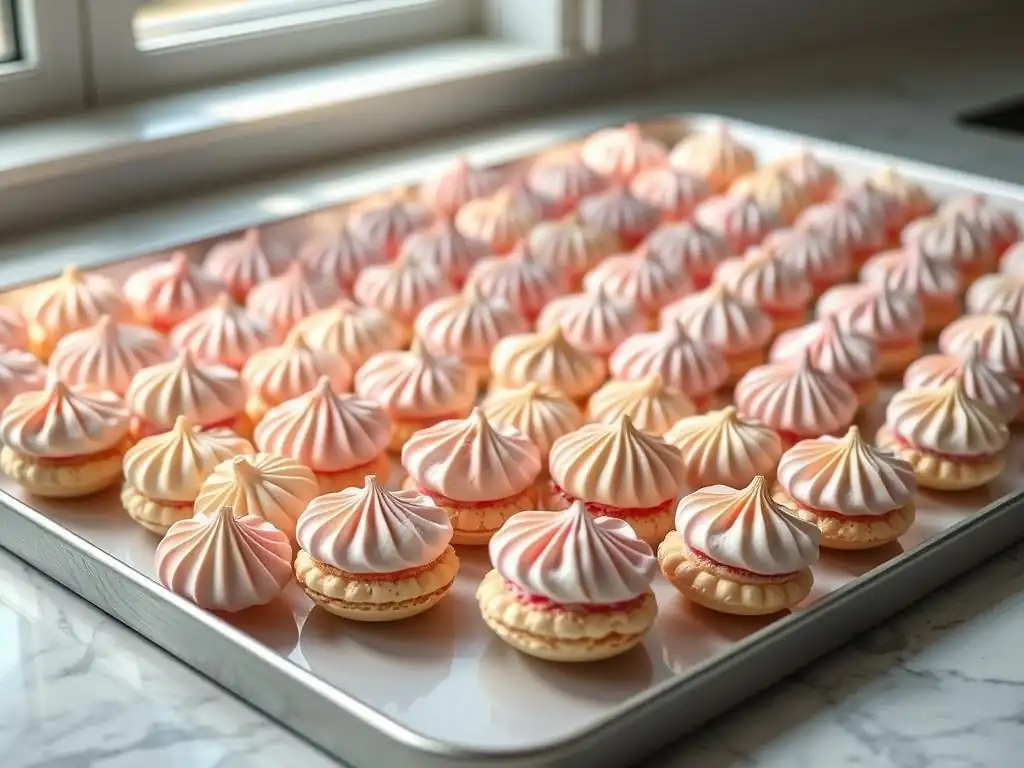
After piping and tapping, the macaron shells need to rest at room temperature. This resting period, often called "crusting," allows a thin skin to form on the surface of the shells. This skin is vital; during baking, it holds the shape of the shell while the feet rise from the base.
The resting time can vary greatly depending on the humidity of your environment, typically ranging from 30 minutes to 2 hours. The shells are ready to bake when you can gently touch the surface and it doesn't stick to your finger. In humid conditions, resting might take longer, or it might be more challenging to form a skin. Ensure your oven is fully preheated during this time.
Step 7: Baking the Macaron Shells
Bake the rested macaron shells in your preheated oven. The temperature is critical and can vary between ovens, but a common range for Swiss meringue macarons is 290°F to 325°F (140°C to 160°C). A slightly lower temperature for a longer time (e.g., 290°F for 16-18 minutes) can sometimes be more forgiving and help prevent browning or cracking.
Bake one sheet at a time in the center of the oven for the most even heat distribution. The shells are done when they have developed their "feet," look matte and not glossy on top, and do not wiggle loosely on the mat when gently nudged. This usually takes between 12 and 18 minutes. If they still wiggle, bake for another 1-2 minutes.
Step 8: Cooling the Macaron Shells
Once baked, immediately remove the baking sheet from the oven. Do not try to remove the shells from the mat or paper yet. Let the shells cool completely on the baking sheet set on a wire rack. Attempting to lift them too soon will result in shells sticking to the mat or paper, tearing the delicate base.
Cooling can take 20-30 minutes or longer. Once fully cooled, the shells should peel off the silicone mat or parchment paper cleanly with minimal effort, leaving behind a smooth, slightly chewy interior surface. This clean release is a good sign of properly baked shells from your foolproof Swiss meringue macaron recipe.
Creating Delicious Macaron Fillings: Flavor Combinations
Classic Macaron Filling Ideas
While the macaron shell provides the iconic texture, the filling brings the primary flavor punch. Classic fillings are often simple yet elegant, designed to complement the delicate sweetness of the shell without overpowering it. The filling also serves the practical purpose of adhering the two shells together and adding moisture to the assembled macaron, which is essential for the "maturing" process.
Popular classic fillings include chocolate ganache, various types of buttercream (like French, Swiss, or American), fruit curds, and caramel-based fillings. The consistency of the filling is important; it should be firm enough to hold its shape when piped but soft enough to allow the macaron to be bitten into easily without the filling squirting out. Aim for a consistency similar to thick frosting or peanut butter.
Chocolate Ganache
Chocolate ganache is a simple yet incredibly versatile macaron filling. It typically consists of just two ingredients: chocolate and heavy cream. The ratio of chocolate to cream dictates the consistency; a higher ratio of chocolate results in a firmer ganache, suitable for piping, while more cream yields a softer, pourable ganache (not ideal for macarons). A common ratio for a pipeable ganache is 1:1 or 1.5:1 (chocolate to cream by weight).
To make it, finely chop your chocolate (high quality is recommended for best flavor). Heat the heavy cream just to a simmer, then pour it over the chopped chocolate. Let it sit for a few minutes to allow the heat to melt the chocolate, then whisk gently from the center outwards until smooth and emulsified. Allow the ganache to cool and thicken at room temperature or in the refrigerator until it reaches a pipeable consistency. Flavors can be added by infusing the cream (e.g., with tea leaves or herbs) or stirring in extracts, liqueurs, or spices once cooled.
Buttercream
Buttercream is another staple macaron filling, offering a wide range of flavor possibilities. Different types of buttercream exist, including American (butter and powdered sugar), Swiss meringue (butter creamed into a Swiss meringue base), Italian meringue (butter creamed into an Italian meringue base), and French (butter creamed into a cooked egg yolk mixture). Swiss meringue buttercream is particularly popular for macarons due to its silky texture and less cloying sweetness compared to American buttercream.
Making Swiss meringue buttercream involves whipping a Swiss meringue (similar to the macaron shell meringue, but often with a higher sugar ratio) and then gradually whipping in softened butter until a light and fluffy frosting forms. Flavorings like vanilla extract, cocoa powder, fruit purees, or coffee can be incorporated. The key is to ensure the butter is at the correct temperature (soft but not melted) for a smooth, emulsified buttercream.
Fruit Curds
Bright and tangy fruit curds offer a lovely contrast to the sweet macaron shells. Lemon curd is a classic choice, but lime, passion fruit, raspberry, or orange curds also work wonderfully. Fruit curds are typically made with fruit juice/puree, sugar, eggs, and butter, cooked gently until thickened.
While delicious, fruit curds can sometimes be too soft on their own for a macaron filling, potentially making the assembled macaron unstable or overly moist. Many bakers combine fruit curd with white chocolate ganache or a stable buttercream to create a filling that has both the bright fruit flavor and the necessary structure for piping and holding the shells together. For example, a raspberry buttercream swirled with raspberry curd makes a delightful filling.
Salted Caramel Filling
Salted caramel provides a rich, complex flavor that pairs beautifully with macaron shells. A good salted caramel filling can be a simple thick caramel sauce combined with butter and cream, or a caramel-flavored buttercream or ganache. Making caramel involves heating sugar until it melts and caramelizes to an amber color, then carefully whisking in warm cream and butter, and finally adding salt.
For macarons, the caramel needs to be thick enough to hold its shape. This can be achieved by cooking the caramel to a slightly higher temperature or incorporating it into a base like buttercream or ganache. A popular method is making a caramel buttercream by adding cooled, thick salted caramel sauce to a standard buttercream base. The balance of sweet caramel and flaky sea salt is key to this decadent filling.
Assembling Your Swiss Meringue Macarons
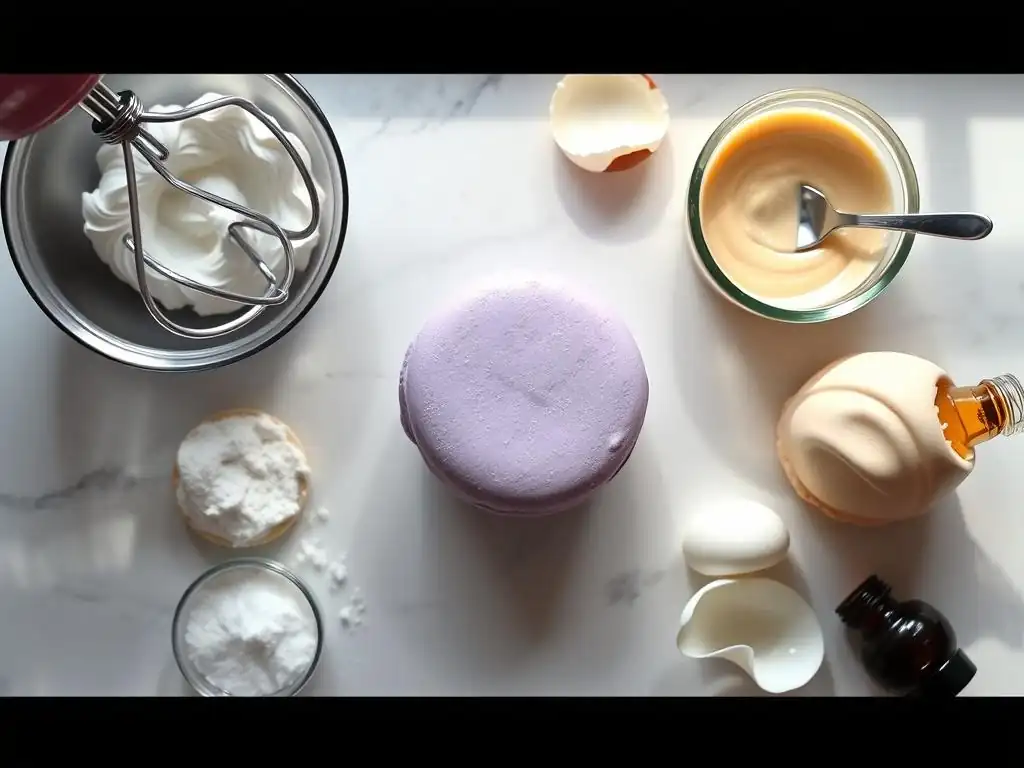
Pairing Shells and Filling
Once your macaron shells are completely cooled and your filling is ready, it's time to assemble! Start by pairing up shells of similar size and shape. Lay them out flat, with the smooth top side down, exposing the flat bottom where the filling will go.
Using a piping bag fitted with a round tip (often smaller than the one used for shells, maybe size 10 or 12), pipe a dollop or ring of filling onto the flat side of one shell from each pair. The amount of filling should be generous but not so much that it will squish out excessively when topped with the second shell. A ring of filling around the edge with a soft center (like jam or curd) is also a popular technique.
Achieving the Ideal Macaron "Feet"
The "feet" (or pieds in French) are the ruffled base of the macaron shell that lifts slightly during baking. They are a hallmark of a successful macaron and indicate that the meringue was stable, the macaronage was correct, and the shells were properly rested and baked. In a foolproof Swiss meringue macaron recipe, the stable meringue contributes significantly to the reliable development of feet.
The feet form because the outer shell forms a skin during resting, while the inside remains moist. As the macaron bakes, the moisture inside turns to steam and rises. The skin prevents the steam from escaping through the top, forcing it out through the base, lifting the shell and creating the characteristic ruffled edge. Lack of feet usually points to issues like undermixing the batter, insufficient resting time (no skin formed), or baking at too low a temperature.
Maturing the Macarons
Assembling the macarons is often just the penultimate step. For optimal texture and flavor, macarons benefit greatly from a process called "maturing" or "aging." This involves placing the assembled macarons in an airtight container and refrigerating them for at least 12-24 hours, or even longer (up to 2-3 days).
During maturation, the moisture from the filling slowly migrates into the macaron shell, softening it slightly and creating that desirable chewy-in-the-center texture that contrasts with the crisp shell. The flavors also meld together. Macarons eaten immediately after assembly will often have a crispier, more brittle shell texture compared to those that have matured. This aging process is essential for achieving the classic macaron experience.
Troubleshooting Common Macaron Problems
Why are My Macarons Cracked?
Cracked macaron shells are a common frustration, but often point to specific issues that can be corrected when using a foolproof Swiss meringue macaron recipe. The most frequent causes are:
- Insufficient Resting Time: If a proper skin doesn't form on the shells before baking, the steam created inside has no way to escape except by cracking the surface.
- Trapped Air Bubbles: Not tapping the trays firmly after piping can leave large air bubbles in the batter, which expand and crack the shell during baking.
- Oven Temperature Too High: Excessive heat can cause the shells to rise too quickly before the skin has fully set, leading to cracks.
- Overmixing: While less common with the stable Swiss method, severely overmixing can weaken the batter structure, making it prone to cracking.
Ensure you rest your shells until a skin forms (they are dry to the touch), tap aggressively, and check your oven temperature calibration if cracks persist.
Why are My Macarons Hollow?
Hollow macaron shells mean there's a gap between the top crust and the bottom foot. This is another common issue. Possible reasons include:
- Overwhipped Meringue: Whipping the meringue past stiff peaks can incorporate too much air, causing the shell to rise too rapidly and collapse slightly from the inside.
- Oven Temperature: Baking at a temperature that is too high can cause the shell to set too quickly on the outside before the inside structure is fully formed, leading to a hollow center.
- Undermixing: If the batter is not mixed enough during macaronage, it can retain too much air from the meringue, resulting in hollows. The batter needs to be deflated just enough.
- Cooling Too Quickly: Sometimes, rapid cooling can cause the internal structure to contract, pulling away from the outer shell.
Adjusting your whipping time, oven temperature, and macaronage technique are key to minimizing hollows. A foolproof Swiss meringue macaron recipe aims to provide the stability needed to reduce the likelihood of this.
Why Don't My Macarons Have Feet?
Lack of feet is a clear sign that something went wrong in the process, as the feet are a direct result of the shell rising correctly during baking. Common culprits include:
- Insufficient Resting Time: Without a skin, the steam escapes through the top, and the base doesn't lift. This is perhaps the most frequent cause.
- Undermixing: If the batter is too stiff (undermixed), it won't spread properly, and the feet won't develop as the batter can't flow outwards.
- Oven Temperature Too Low: The oven might not be hot enough to create the steam necessary to lift the shell and form the feet.
- Greasy Equipment/Ingredients: Any trace of fat (from egg yolks, unwashed bowls, etc.) can prevent the meringue from whipping properly, leading to a weak batter that won't form feet.
Revisit your resting time, macaronage consistency, oven temperature, and ensure all your equipment is scrupulously clean and free of grease.
Macarons are Sticky
Sticky macaron shells, either on the surface or when peeling from the mat, indicate issues related to moisture or baking time.
- Undercooked: The most common reason for sticky shells is simply not baking them long enough. The internal structure hasn't fully dried out and set.
- Oven Temperature Too Low: If the temperature is too low, the shells might not bake through properly, remaining sticky inside.
- Humidity: High humidity can make it difficult for the shells to form a proper skin during resting and can also affect the drying process during baking, resulting in stickiness.
- Overmixing (less common cause): Overmixed batter can sometimes lead to a denser, stickier shell texture.
Try increasing the baking time by a few minutes, ensuring your oven temperature is accurate, and consider using a dehumidifier if baking in a very humid environment. If they stick to the mat, they were removed too early before cooling completely.
Tips for Macaron Success
Measuring Ingredients Accurately
As stressed throughout this guide to a foolproof Swiss meringue macaron recipe, precision in measurement is non-negotiable. Using a digital scale to weigh all your ingredients, especially the almond flour, powdered sugar, egg whites, and granulated sugar, is the single most important step you can take to ensure consistent results. Volume measurements (cups) are simply not accurate enough for the delicate balance required for macarons.
Even small variations, like an extra tablespoon of powdered sugar or a few grams difference in egg white weight, can alter the batter consistency enough to cause problems like hollows, cracks, or poor feet development. Invest in a good quality kitchen scale and get into the habit of using it for all macaron ingredients.
Achieving the Correct Macaronage Consistency
Mastering the "macaronage" – the process of folding the dry ingredients into the meringue – is perhaps the most challenging skill to learn, but it is absolutely vital. The goal is to deflate the meringue just enough to create a batter that flows like "slow-moving lava" or a "thick ribbon."
Undermixing leaves the batter too stiff; it won't spread properly when piped, resulting in shells with peaks that don't subside and potentially no feet. Overmixing deflates the meringue too much, leading to thin, flat shells that might spread too much and lack feet. Practice and observation are key. Scrape down the sides of the bowl frequently and test the consistency by lifting your spatula and watching how the batter flows off. It should flow smoothly and continuously, and the ribbon should slowly reincorporate into the mass within 10-15 seconds.
Baking at the Right Temperature
Oven temperature is another critical factor that can make or break your macarons. Ovens are notorious for temperature inaccuracies, often being hotter or cooler than the dial indicates, or having hot spots. Baking macarons at the wrong temperature can cause cracking, hollows, lack of feet, browning, or undercooked interiors.
Using an oven thermometer to verify your oven's actual temperature is highly recommended. Macarons typically bake at lower temperatures than many other cookies, often between 290°F and 325°F (140°C to 160°C). It's often better to bake at a slightly lower temperature for a longer time (e.g., 16-18 minutes) than at a higher temperature for a shorter time, as this allows the shells to dry out properly without browning or cracking. Experimenting with your specific oven is necessary to find the optimal temperature and time for your foolproof Swiss meringue macaron recipe.
Storing Macarons Properly
Proper storage is key to maintaining the texture and freshness of your assembled Swiss meringue macarons. After they have matured for the recommended time (at least 12-24 hours in the refrigerator), they are best stored in an airtight container in the refrigerator for up to 3-5 days.
For longer storage, macarons freeze exceptionally well. Place assembled macarons in a single layer in an airtight container, separating layers with parchment paper if stacking. They can be frozen for up to 1-2 months. To thaw, move them to the refrigerator overnight or let them sit at room temperature for 30-60 minutes before serving. Freezing and thawing can sometimes even improve the texture by further aiding the maturation process.
Enjoy Your Homemade Swiss Meringue Macarons!
You've successfully navigated the steps of this foolproof Swiss meringue macaron recipe! From creating the stable meringue to achieving perfectly baked shells and assembling them with delicious fillings, you've crafted these delicate French pastries right in your own kitchen. Take a moment to appreciate your beautiful, footed, smooth-topped creations.
Making macarons is a journey, and even with a reliable method like Swiss meringue, practice makes perfect. Don't be discouraged by imperfections in your first few batches. Each attempt is a learning opportunity that brings you closer to consistently perfect macarons. Enjoy the process and the delicious rewards!
One of the greatest joys of baking is sharing your treats. Your homemade Swiss meringue macarons are perfect for gifting, bringing to parties, or simply enjoying with friends and family. Their delicate nature and vibrant colors make them a show-stopping dessert.
Consider packaging them in small boxes or cellophane bags for a lovely presentation. Explaining that you made them using a foolproof Swiss meringue macaron recipe might even inspire others to try their hand at this rewarding baking challenge! Celebrate your success and spread the macaron love.
Frequently Asked Questions
What makes this macaron recipe "foolproof"?
This recipe utilizes the Swiss meringue method, known for its stability and ease, and provides detailed, step-by-step instructions to minimize common macaron-making errors. We also emphasize accurate measurements for consistent results.
Why use the Swiss meringue method instead of other meringue methods?
The Swiss meringue method involves heating the egg whites and sugar together, which dissolves the sugar completely and creates a more stable meringue. This results in a smoother, glossier macaron shell with less risk of cracking.
What are the most common mistakes people make when baking macarons?
Common mistakes include over-mixing the batter (macaronage), inaccurate oven temperatures, and insufficient resting time before baking. Our recipe provides specific guidance to avoid these pitfalls.
What ingredients are essential for a successful macaron batch?
The key ingredients are almond flour, powdered sugar, granulated sugar, egg whites, and food coloring (optional). Using high-quality almond flour and precisely measured ingredients is crucial for success.
Can I adapt this recipe for different flavors or fillings?
Yes! This recipe provides a solid base for experimentation. You can easily add extracts, zest, or different food colorings to the shells. The possibilities for creative fillings are endless, from buttercream to ganache to fruit curds.
Final Reflection: Mastering the Delicate Art of the Macaron
The pursuit of the perfect macaron, once a daunting culinary challenge, is now within reach for even the most novice baker. This foolproof Swiss meringue method, detailed throughout this article, demystifies the process, offering a pathway to consistent success and the joy of creating these exquisite little confections. The seemingly fragile nature of the macaron belies the power of precise technique and understanding, a lesson applicable far beyond the kitchen.
The journey of mastering the macaron is a microcosm of life itself – requiring patience, precision, and a willingness to learn from both successes and failures. The delicate balance of ingredients, the precise timing of whipping, and the careful attention to detail all contribute to the final result. This meticulous process mirrors many aspects of life where dedication and attention to detail yield remarkable results. The difference between ordinary and extraordinary is that little extra.
This quote resonates deeply with the macaron-making process, highlighting the importance of those seemingly small, yet crucial steps.
Now, armed with this foolproof method, I invite you to embark on your own macaron adventure. Don't be afraid to experiment, to adjust the flavors to your liking, and to revel in the satisfaction of creating something beautiful and delicious. The journey of mastering the macaron is not just about the final product; it's about the process, the learning, and the joy of creation. So, gather your ingredients, embrace the challenge, and experience the sweet reward of a perfectly crafted macaron – a testament to your dedication and skill.
Unleash Your Inner Pâtissier: Master the Macaron!
Thanks for joining us on this delicious journey into the world of macarons! We hope you've gained the confidence to tackle this seemingly tricky treat. Now it's time to put your newfound skills to the test.
- Bake your perfect macarons: Don't just read about it – do it! Grab your ingredients and follow the recipe again. Even better, try experimenting with different flavor combinations!
- Share your creations: We'd love to see your beautiful macarons! Post a picture on social media and tag us – let's celebrate your success together! Use #BakeWithEaseMacarons
- Explore our other recipes: Ready for a new baking challenge? Check out our extensive recipe library for more delicious inspiration.
Ready to wow your friends and family with stunning, perfectly-shelled macarons? What flavor combination will you master first?