
Starter Consistency: What It Should Look Like at Each Stage

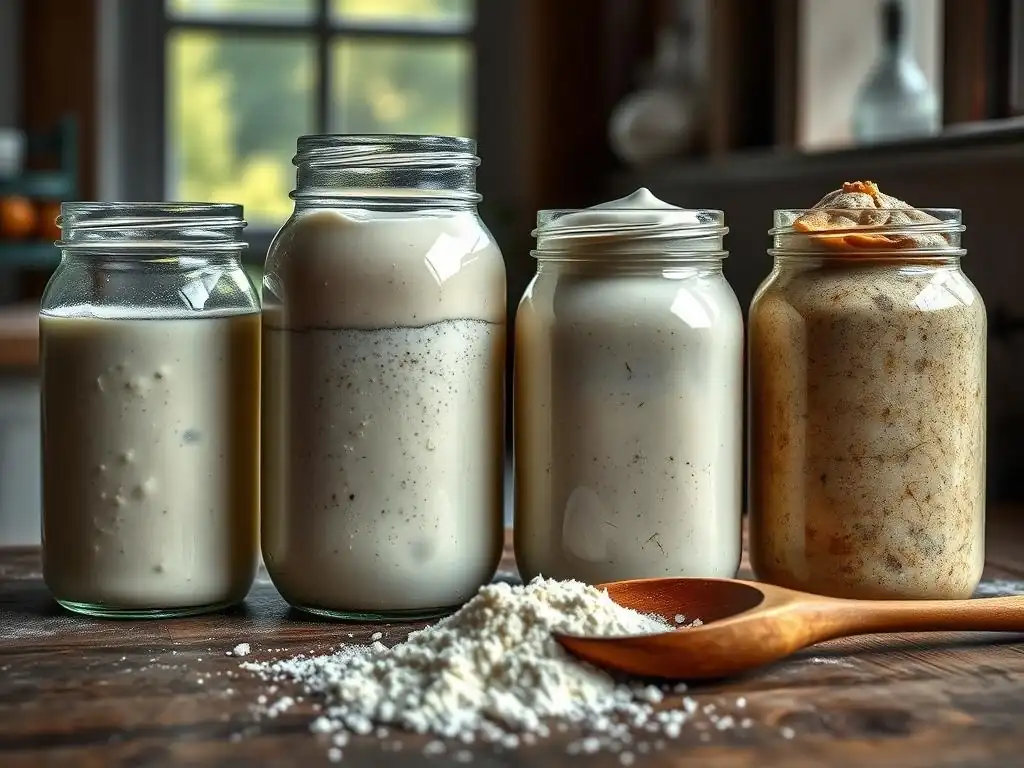
Welcome to BakeWithEase, where effortless baking becomes a reality! Ever wondered if your sourdough starter is truly ready to rise to the occasion? This guide delves deep into the crucial stages of sourdough starter consistency, revealing exactly what it should look like at each point in its development. Discover the secrets to achieving the perfect bake – let's unlock the mystery together and ensure your next loaf is your best yet!
- Sourdough Starter Consistency: A Visual Guide for Baking Success
- Understanding Starter Consistency: Impact on Bread Quality
- Sourdough Starter Stages: Consistency Breakdown
- Troubleshooting Starter Consistency Problems
- Maintaining Optimal Starter Consistency for Baking
- Achieving Baking Success: Consistency is Crucial
-
Frequently Asked Questions
- What is the ideal consistency of a sourdough starter immediately after feeding?
- How can I tell if my sourdough starter is at its peak consistency?
- What does a sourdough starter look like when it's too watery or "thin"?
- What should I do if my sourdough starter is too thick?
- What are the different consistency stages and how do they relate to my baking schedule?
- Final Reflection: The Ever-Evolving Dance of Your Sourdough Starter
- Unlock Your Sourdough Success: Master the Perfect Starter Consistency!
Sourdough Starter Consistency: A Visual Guide for Baking Success
Understanding Starter Consistency: Impact on Bread Quality
How Hydration Affects Sourdough Bread Structure
The hydration level of your sourdough starter, typically expressed as a percentage of water to flour by weight, fundamentally influences its texture and activity. A starter with 100% hydration (equal parts flour and water) is the most common and results in a consistency often described as thick batter. This hydration impacts the starter's ability to rise and fall predictably, crucial for knowing when it's ready to leaven bread. A lower hydration starter, say 60%, will be much stiffer, more like a dough, and will rise slower but can offer different flavor profiles and handling characteristics in the final dough.
The hydration of your starter also plays a direct role in the overall hydration of your final bread dough. Using a 100% hydration starter in a dough recipe formulated for 70% hydration means you're contributing a specific amount of both water and flour from the starter. This affects the dough's handling, extensibility, and the resulting crumb structure of the baked loaf. Understanding how your starter's consistency, driven by its hydration, integrates into your recipe is key to controlling the outcome, from crust development to the openness of the crumb.
Visual Indicators of a Healthy and Active Starter
A healthy, active sourdough starter exhibits several visual cues that indicate it's thriving and ready for baking. The most obvious is volume increase; a well-fed starter will typically double or even triple in size within a few hours after feeding, depending on temperature and flour type. You should see numerous bubbles throughout the starter, not just on the surface, indicating active carbon dioxide production by the yeast and bacteria.
Another key indicator is the texture. A healthy 100% hydration starter, when active, should have a light, airy, almost spongy consistency. The surface should be slightly domed at its peak and may show small bubbles popping. As it starts to decline, the surface might flatten or even dip slightly, and larger bubbles might appear and burst, leaving craters. These visual signs are critical for interpreting the sourdough starter consistency stages and knowing when your starter is at its peak for baking.
Sourdough Starter Stages: Consistency Breakdown
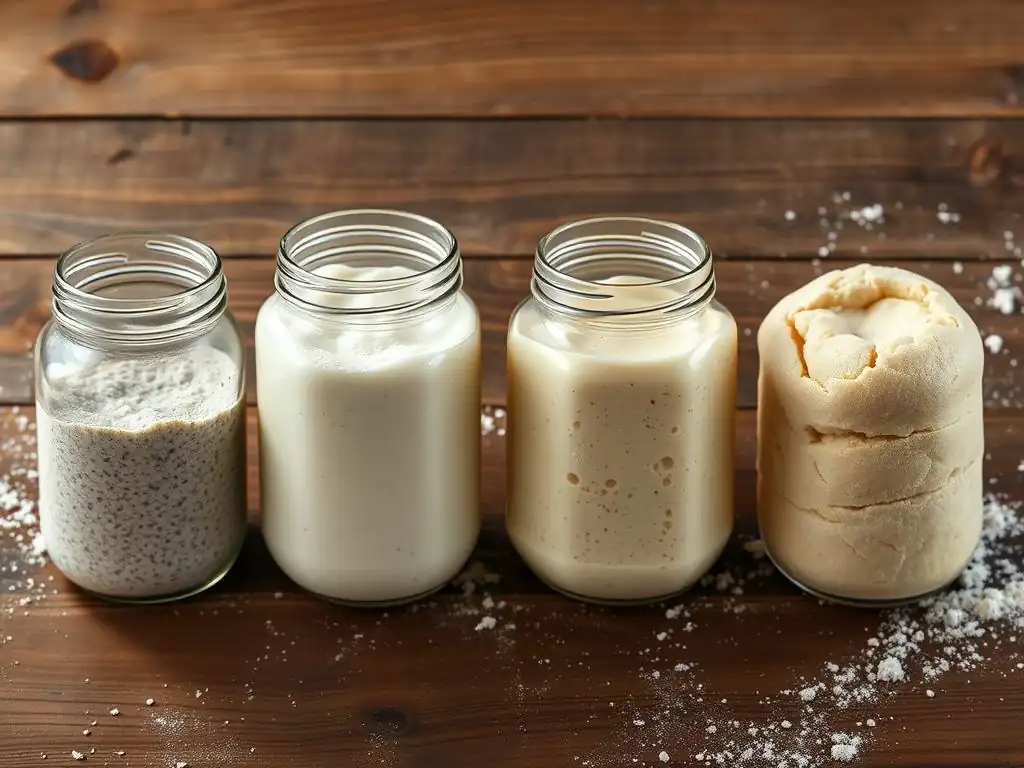
Stage 1: Initial Mix - Target Hydration (1:1)
The very first step in creating a sourdough starter involves mixing equal parts flour and water by weight. For instance, you might start with 50 grams of flour and 50 grams of water. This 1:1 ratio yields a 100% hydration starter, which is a widely recommended starting point due to its manageable consistency and predictable behavior for beginners learning the sourdough starter consistency stages. The goal at this stage is simply to combine the ingredients thoroughly.
At this initial stage, the consistency should resemble a thick, somewhat lumpy paste or batter, similar to a thick pancake mix before any leavening takes effect. The texture will depend slightly on the type of flour used – whole wheat or rye will absorb water differently than white bread flour. The key is to ensure all the dry flour is fully hydrated and incorporated into the mix, leaving no dry pockets.
Achieving a Smooth, Lump-Free Initial Consistency
To achieve a smooth, lump-free initial consistency when starting your sourdough culture, vigorous mixing is important. Using a fork or a whisk can help break up any flour clumps effectively. Stirring for a minute or two, ensuring you scrape down the sides of the jar, helps to fully hydrate the flour particles and begin the process of gluten development, even at this early stage.
Starting with lukewarm water (around 75-80°F or 24-27°C) can also aid in achieving a smoother consistency and kickstart microbial activity. While not strictly necessary, slightly warmer water helps the flour absorb moisture more readily. A smooth initial mix sets a good foundation, preventing dry pockets that could harbor unwanted mold later on and ensuring a uniform environment for the wild yeast and bacteria to begin colonizing.
Stage 2: Early Fermentation - Texture Changes and Bubble Formation
In the early days of your sourdough starter's life (roughly days 2-4), you'll start to observe subtle changes in consistency and the first signs of fermentation. After feeding, the starter might initially look similar to the initial mix, but over the next 12-24 hours, you might notice a slight thinning of the mixture as enzymatic activity begins to break down the flour. The texture might become slightly more fluid.
Crucially, you'll start to see small bubbles appearing, often around the edges of the container or just beneath the surface. These are early indicators of microbial activity – likely various bacteria initially, before the wild yeast population establishes itself. The volume might increase slightly, but significant doubling is usually not observed during these first few days as the microbial community is still developing and stabilizing.
Recognizing CO2 Production: Bubbles and Slight Expansion
The appearance of bubbles is the primary visual cue for CO2 production during early fermentation. These bubbles are the byproduct of microbial metabolism, primarily heterofermentative bacteria at this stage, breaking down sugars in the flour. While small and sometimes sparse, their presence confirms that microbial life is active within your mix, moving through the initial sourdough starter consistency stages.
Beyond bubbles, you might notice a very modest increase in the starter's volume, perhaps a 10-20% rise before it settles back down. This early expansion is directly linked to the trapped carbon dioxide. The smell might also start to change, moving from a simple flour-and-water aroma to something slightly more acidic or even cheesy in these early, sometimes volatile, stages.
Troubleshooting: Adjusting Hydration for Optimal Rise
If your starter seems too thick or too thin in these early stages, a slight hydration adjustment might be helpful, though consistency is less critical than activity initially. A starter that's too thick (e.g., like dough) might impede bubble formation and movement, while one that's too runny (like milk) might not hold onto CO2 effectively, making it hard to see volume changes.
For a starter that seems too thick, adding just a few extra grams of water during a feeding can help loosen it up. If it's too runny, slightly reducing the water added during a feeding will thicken it. Aiming for that thick batter consistency (100% hydration if that's your goal) is generally best for observing activity and tracking progress through the sourdough starter consistency stages. Consistency becomes more critical as the starter matures.
Stage 3: Peak Activity - Desired Starter Consistency
A mature, healthy sourdough starter at its peak activity will exhibit a consistency that is light, airy, and significantly expanded. If maintained at 100% hydration, its texture should resemble a very bubbly, almost frothy pancake batter. When you stir it, it should feel light and spongy, offering some resistance due to the trapped gases, unlike the dense paste of the initial mix.
At peak activity, the starter should have roughly doubled or tripled in volume since its last feeding, typically within 4-8 hours depending on the ambient temperature (ideally around 75-80°F or 24-27°C). The surface will often be domed or flat with numerous visible bubbles, and the aroma will be pleasantly tangy, yeasty, and slightly acidic, a hallmark of the desired sourdough starter consistency stages for baking.
The 'Pancake Batter' Analogy: Flow and Aeration
The "pancake batter" analogy is widely used to describe the desired flow and aeration of a peak, 100% hydration sourdough starter. When you scoop some out with a spoon, it should flow slowly and thickly, not pour like water. The texture should be visibly full of tiny bubbles, giving it a light and airy appearance throughout, not just on the surface.
This consistency indicates that the wild yeast and lactic acid bacteria are working synergistically, producing both carbon dioxide (for rise) and organic acids (for flavor). The balance of these activities results in a starter that is potent enough to leaven bread effectively. Achieving this specific consistency is a key milestone in managing your sourdough starter consistency stages.
The Float Test: Assessing Readiness Based on Buoyancy
A common test to assess if your starter is at its peak and ready for baking is the float test. Gently take a small spoonful of starter and drop it into a glass of room-temperature water. If the starter is active and full of sufficient trapped CO2, it will float on the surface of the water.
This test is a good indicator that the starter has enough internal structure and gas production to provide lift to your bread dough. If it sinks immediately, it likely hasn't reached its peak yet, or it has passed its peak and the gas has dissipated. While not foolproof, the float test, combined with visual cues like doubling in volume and the bubbly consistency, is a reliable way to judge the sourdough starter consistency stages for baking readiness.
Stage 4: Post-Peak - Recognizing Signs of Decline
Once a sourdough starter passes its peak activity (typically 8-12 hours after feeding at room temperature), it begins to show signs of decline. The most noticeable visual change is a reduction in volume; the starter will start to deflate as the trapped carbon dioxide escapes and the gluten structure that held it up weakens. The surface may become concave or dip in the center.
The texture will also change, becoming thinner and more liquidy as the enzymes continue to break down the flour components. You might see a layer of liquid forming on the surface or throughout the starter – this is called "hooch" and is a sign that the microbes have consumed most of the available food (sugars) and are producing alcohol and acids. The smell will become more strongly acidic or vinegary. Recognizing these signs is part of understanding the full cycle of sourdough starter consistency stages.
Understanding Volume Reduction and Increased Acidity
The volume reduction in a post-peak starter is a direct result of diminishing microbial activity and the subsequent release of CO2. The yeast population's peak has passed, and gas production slows down. The structure built by the gluten and gas bubbles can no longer be maintained, leading to the collapse.
Simultaneously, the acidity of the starter increases significantly. Lactic acid bacteria continue to produce organic acids even as yeast activity wanes, and the concentration of these acids rises as the starter depletes its food source. This increased acidity contributes to the thinning consistency and the pungent, vinegary smell. While a post-peak starter isn't 'dead', it's not ideal for leavening dough that requires strong, immediate lift. It might need a refresh feeding or two to return to peak performance.
Adjusting Feeding Based on Environmental Conditions
The rate at which a starter moves through the sourdough starter consistency stages, including reaching and passing peak, is heavily influenced by environmental temperature. In warmer conditions (above 80°F or 27°C), a starter will ferment much faster, potentially peaking and declining within 4-6 hours. In cooler conditions (65-70°F or 18-21°C), this process can take 8-12 hours or even longer.
Adjusting your feeding schedule based on these conditions is crucial for maintaining an active starter. If your kitchen is warm, you might need to feed your starter more frequently (e.g., every 12 hours) if keeping it at room temperature, or consider refrigerating it to slow activity down. If your kitchen is cool, a once-a-day feeding might suffice. Observing how quickly your starter moves through the visual stages of consistency and volume change is the best guide for adapting your feeding routine.
Troubleshooting Starter Consistency Problems

Dealing with a Runny Starter
A runny or overly liquidy sourdough starter is a common issue, deviating from the desired sourdough starter consistency stages. This usually means the starter isn't holding onto gas effectively, leading to poor rise in bread. Visually, it will lack the thick, bubbly structure of a peak starter and pour easily.
Causes: Over-Hydration, High Temperatures, and Solutions
The primary cause of a runny starter is often over-hydration, meaning there's too much water relative to flour. This weakens the gluten structure necessary to trap CO2 bubbles. High ambient temperatures can also contribute by speeding up enzymatic breakdown of flour, thinning the starter prematurely.
Solutions include slightly decreasing the amount of water used in your feeding ratio (e.g., feeding 50g flour with 45g water instead of 50g) or increasing the flour slightly (e.g., 55g flour to 50g water) to achieve a thicker mix. Using a flour with a higher protein content (like bread flour) can also help build a stronger structure.
Another cause can be feeding too infrequently, allowing the starter to become overly acidic and break down. Increasing feeding frequency can help. If high temperature is the issue, moving the starter to a cooler spot or refrigerating it between feedings will slow activity and help maintain a thicker consistency when active. Regularly observing the sourdough starter consistency stages after feeding helps identify this problem early.
Correcting a Thick Starter
Conversely, a starter that is consistently too thick will be difficult to mix, might show less vigorous bubble formation, and can be harder to incorporate smoothly into dough. It might resemble a stiff dough rather than a thick batter. This indicates insufficient hydration for the typical 100% hydration model.
Hydration Adjustments: Adding Water Gradually
The solution for a thick starter is to increase its hydration. During feeding, simply add a little more water than you currently are. If you're aiming for 100% hydration and it's too thick, ensure your water measurement is accurate – sometimes scales can be slightly off, or volume measurements (which are less precise) can lead to errors. If using weights, try increasing the water by 5-10 grams relative to your standard flour amount (e.g., 50g flour with 55-60g water) in the next few feedings until you reach the desired consistency.
Make adjustments gradually over a couple of feedings rather than adding a lot of water at once, which could overshoot and make it too runny. Observe how the starter behaves after the adjusted feeding – does it become easier to mix? Does it show more bubbles? Continue adjusting until you consistently achieve the thick, bubbly batter consistency at peak, which is characteristic of the optimal sourdough starter consistency stages for baking.
Addressing Inconsistent Texture
Sometimes a starter might have pockets of different textures – perhaps thick clumps mixed with runny areas. This can be frustrating and indicates that the starter isn't developing uniformly.
The Role of Gluten Development and Mixing
Inconsistent texture often stems from inadequate mixing during feeding. If the flour isn't fully incorporated and hydrated, dry clumps can remain, while other parts of the starter become overly hydrated as water settles. Thoroughly mixing the starter until it is smooth and uniform is crucial. Using a whisk or fork and scraping down the sides of the container ensures all ingredients are fully combined.
The type of flour also plays a role. Using a mix of flours (like rye and white) or flour with varying protein levels can affect hydration and texture. Ensuring consistent mixing technique and potentially sticking to one type of flour until you achieve stable sourdough starter consistency stages can help resolve this issue. Allowing adequate time after mixing for the water to fully absorb into the flour before fermentation kicks off is also beneficial.
Maintaining Optimal Starter Consistency for Baking
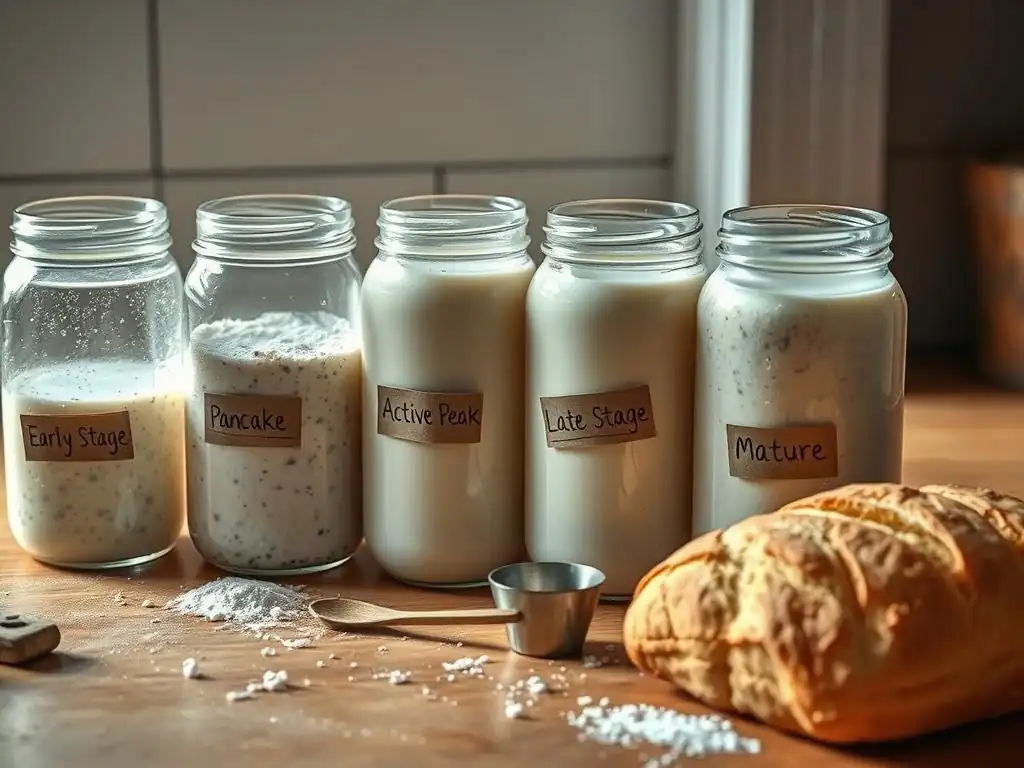
Feeding Ratios: Influence on Acidity and Rise
The ratio of existing starter to fresh flour and water you use during feeding significantly impacts the starter's consistency and activity. A common ratio is 1:1:1 (starter:flour:water by weight), for example, feeding 25g of starter with 25g of fresh flour and 25g of water. This ratio allows the fresh food to be consumed relatively quickly, leading to a predictable peak.
Using a lower inoculation ratio, such as 1:5:5 (20g starter to 100g flour and 100g water), means the microbes have a much larger food supply relative to their population. This slows down fermentation, resulting in a longer time to peak and a less acidic starter at its peak, potentially producing a milder tang in your bread. Higher ratios (like 1:1:1) lead to faster fermentation and potentially more acidity. The ratio influences how quickly the starter moves through the sourdough starter consistency stages and how long it stays at peak.
Regular Feeding: Establishing a Consistent Schedule
Establishing a regular feeding schedule is paramount for maintaining a healthy, predictable starter at the desired consistency. For a starter kept at room temperature, daily feeding (or even twice daily in warm conditions) is often necessary to keep it active and prevent it from becoming overly acidic and runny.
Consistency in timing helps you learn your starter's natural rhythm and predict when it will be at its peak consistency for baking. For instance, if you feed it every morning around 8 AM, you'll learn whether it peaks at 2 PM or 6 PM in your kitchen environment. This predictability is key to successful sourdough baking and mastering the management of sourdough starter consistency stages.
Storing Starter: Impact of Temperature on Activity
Where and at what temperature you store your starter drastically affects its activity level and, consequently, its consistency over time. Storing a starter at room temperature (68-80°F or 20-27°C) keeps it active and requires regular, often daily, feeding to maintain peak consistency.
Refrigerating your starter (around 35-40°F or 2-4°C) significantly slows down microbial activity. A refrigerated starter only needs to be fed about once a week. When taken out of the fridge, it will be less active and might be quite liquidy or have hooch. It requires one or more "refresh" feedings at room temperature to regain its peak activity and the desired bubbly, airy consistency before being ready to bake with. Understanding the impact of storage temperature helps manage the different sourdough starter consistency stages based on your baking frequency.
Achieving Baking Success: Consistency is Crucial
Adapting Recipes Based on Starter Hydration
Knowing the hydration of your sourdough starter and maintaining its consistency are vital for successful baking. Most sourdough bread recipes are developed assuming a 100% hydration starter. If your starter has a different hydration (e.g., 80% or 120%), you need to adjust the amount of flour and water added to your final dough recipe to achieve the target overall dough hydration.
For example, if a recipe calls for 100g of 100% hydration starter (50g flour, 50g water) and your starter is 80% hydration (55.6g flour, 44.4g water for 100g total), you'd need to add an extra 5.6g of water and subtract 5.6g of flour from the main dough ingredients to compensate and reach the recipe's intended hydration. Paying attention to the sourdough starter consistency stages and its specific hydration is the final step in ensuring your starter contributes correctly to your bread's structure and texture.
Frequently Asked Questions
What is the ideal consistency of a sourdough starter immediately after feeding?
Immediately after feeding, a sourdough starter should have a thick, pancake batter consistency. This ensures the yeast and bacteria have enough food and moisture.
How can I tell if my sourdough starter is at its peak consistency?
A peak starter has a frothy, bubbly appearance and almost doubled in size. This indicates maximum activity and readiness for baking.
What does a sourdough starter look like when it's too watery or "thin"?
A watery starter often indicates over-fermentation or an imbalance of ingredients. It lacks the necessary structure for effective leavening.
What should I do if my sourdough starter is too thick?
If your starter is too thick, it likely needs more hydration. Try adding a small amount of water during the next feeding.
What are the different consistency stages and how do they relate to my baking schedule?
The starter progresses from dormant, to active, to peaking, then to declining. Understanding these stages helps you time your baking for optimal results.
Final Reflection: The Ever-Evolving Dance of Your Sourdough Starter
Understanding the nuances of sourdough starter consistency is not merely a technical skill; it's the key to unlocking the magic within your own little ecosystem. A thriving starter, correctly nurtured through each stage, is a testament to patience, observation, and a deep respect for the natural processes at play. This journey, from the initial bubbly excitement to the mature, robust starter ready for baking, is a rewarding one.
The journey of a sourdough starter mirrors the journey of life itself – a constant evolution, requiring both nurturing and adaptation. It's a humbling experience, reminding us that even the smallest of organisms can hold immense power and potential. Patience is a virtue, and in sourdough baking, it's the most important ingredient.
This quote, while not directly about consistency, perfectly captures the essence of the long-term commitment required to cultivate a healthy starter. The subtle shifts in texture and activity, the occasional setbacks and triumphs, all contribute to a deeper understanding of the delicate balance needed for success.
Now, consider your own journey. What parallels can you draw between the careful observation and nurturing of your starter and other aspects of your life? Take a moment to reflect on the areas where patience and consistent effort are crucial for growth and success. Perhaps it's a personal project, a relationship, or even a skill you're developing. Embrace the process, learn from the setbacks, and celebrate the small victories along the way. Just like your starter, you too are capable of incredible transformation with the right care and attention.
Here's a Call to Action (CTA) tailored for the article "Starter Consistency: What It Should Look Like at Each Stage" on BakeWithEase.com:
Unlock Your Sourdough Success: Master the Perfect Starter Consistency!
Thanks for diving into the world of sourdough starters with us! You've now got a clearer understanding of the crucial role consistency plays in your baking journey. Ready to put this knowledge into practice and watch your bread rise to new heights?
- Embrace the Daily Ritual: Practice monitoring your starter's consistency to master those subtle changes at each stage. Regular observation is key!:
- Share your sourdough starter journey! Post a picture of your perfectly consistent starter on social media using #BakeWithEaseStarter.
- Explore our other sourdough resources – discover tips, tricks, and recipes to elevate your baking skills.
So, tell us: What's your biggest hurdle when it comes to maintaining the ideal consistency in your sourdough starter? Let's discuss in the comments below!