
Bake Basic White Bread in Any Home Oven

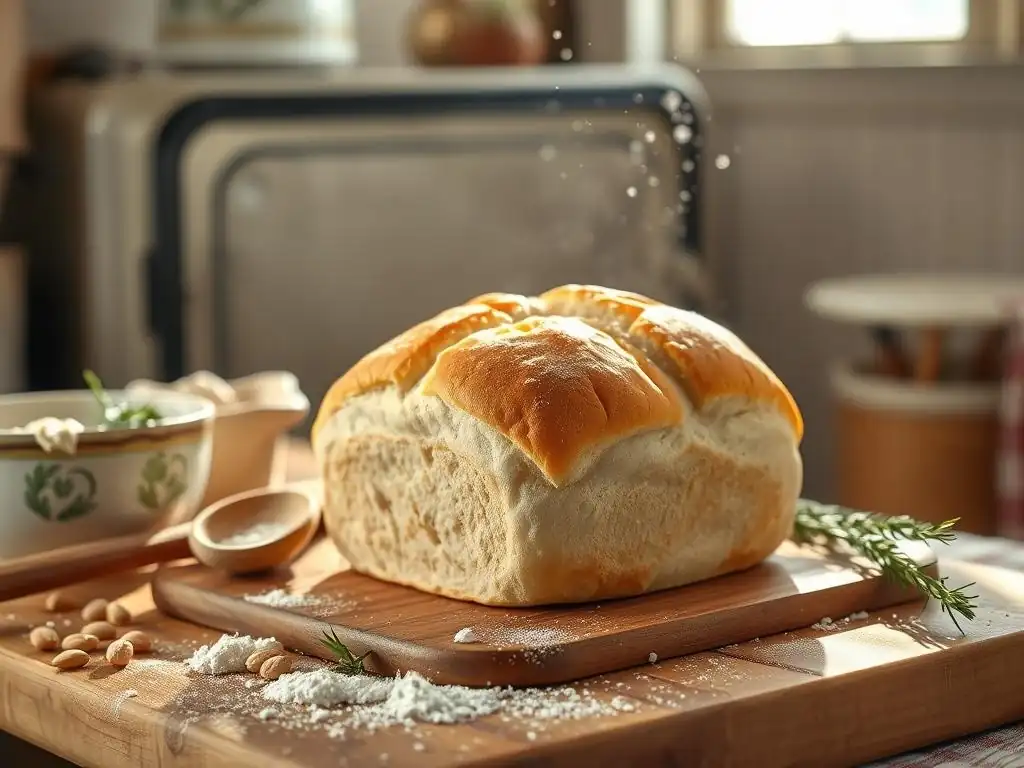
Welcome to BakeWithEase, your kitchen companion on a delectable journey through the world of baking! Ever dreamt of pulling a perfectly golden loaf from your own oven? Our easy white bread recipe is the perfect starting point. Dive in and discover how simple it is to achieve bakery-quality results, and unlock a universe of baking possibilities beyond!
- Bake Basic White Bread in Any Home Oven: An Easy White Bread Recipe
- Introduction to Baking Easy White Bread at Home
- Essential Ingredients for Your Homemade White Bread
- Step-by-Step Guide to Baking Basic White Bread
- Troubleshooting Common White Bread Baking Issues
- Tips and Tricks for the Best White Bread
- Variations on the Easy White Bread Recipe
- Conclusion: Enjoying Your Homemade White Bread
- Frequently Asked Questions
- Final Reflection: The Humble Loaf and the Joy of Baking
- Unleash Your Inner Baker: Perfect Loaves Await!
Bake Basic White Bread in Any Home Oven: An Easy White Bread Recipe
Introduction to Baking Easy White Bread at Home
Baking your own bread at home might seem daunting at first, conjuring images of complicated techniques and specialized equipment. However, mastering a basic white bread recipe is surprisingly achievable and incredibly rewarding. There's a unique satisfaction that comes from transforming simple ingredients into a warm, fragrant loaf right in your own kitchen. This guide is designed to demystify the process, showing you that a truly delicious and easy white bread recipe is within reach for any home baker, regardless of experience level.
At BakeWithEase, we believe that everyone can bake. Our approach to baking, especially when it comes to foundational recipes like this easy white bread recipe, focuses on clarity, simplicity, and understanding the 'why' behind each step. By breaking down the process, explaining the role of each ingredient, and providing clear instructions, we aim to empower you to create beautiful, tasty bread with confidence. Forget the fear; let's bake some wonderful white bread together!
Why Bake Your Own White Bread? A Beginner's Guide
Baking your own white bread offers numerous benefits beyond just the incredible taste and aroma. It allows you complete control over the ingredients, meaning you can avoid preservatives and additives often found in commercial loaves. For many, it's a therapeutic and mindful activity, a chance to connect with a timeless craft and create something nourishing with your hands. Plus, the cost of ingredients for an easy white bread recipe is typically much lower than buying artisan bread, making it an economical choice for families.
Furthermore, knowing how to bake a basic white bread means you have a versatile foundation. This easy white bread recipe can be the starting point for sandwiches, toast, croutons, or even bread crumbs. It's a fundamental skill that opens the door to exploring more complex bread types later on. The sense of accomplishment you'll feel pulling a golden-brown loaf from your oven is unparalleled, making the effort well worth it.
BakeWithEase's Simple White Bread Recipe Philosophy
Our philosophy at BakeWithEase centers around making baking accessible and enjoyable for everyone. We strip away unnecessary complexity, focusing on reliable techniques and clear instructions. This easy white bread recipe embodies that philosophy. We don't require fancy mixers or specialized proofing boxes; instead, we teach you how to work with your hands and use standard kitchen equipment effectively. Our goal is to build your confidence with fundamental skills.
We believe that understanding the basic science behind baking, like how yeast works or the importance of kneading, is key to consistent success. This guide will explain these concepts simply, ensuring you not only follow the steps but also understand why you're doing them. This knowledge empowers you to adapt, troubleshoot, and eventually experiment. By starting with this easy white bread recipe, you're building a solid foundation for a lifetime of baking adventures.
Essential Ingredients for Your Homemade White Bread
Making a wonderful loaf of white bread requires only a few basic ingredients. The magic lies in their quality and how they interact. For this easy white bread recipe, you'll need flour, yeast, water, salt, and often a touch of sugar or fat. Each component plays a vital role in the final texture, flavor, and appearance of your bread. Using fresh, good-quality ingredients is the first step towards baking success.
While the list is short, understanding the function of each ingredient is crucial. For instance, the type of flour significantly impacts the dough's structure, and the water temperature can make or break your yeast's activity. We'll delve into each essential ingredient, explaining its purpose and how to choose the best options for your easy white bread recipe.
High-Quality Flour: The Foundation of Great White Bread
Flour is the backbone of your easy white bread recipe. For classic white bread, all-purpose flour or bread flour is typically used. All-purpose flour is widely available and works well, providing a good balance of protein content, usually around 10-12%. Bread flour, on the other hand, has a higher protein content (often 12-14%), specifically gluten-forming proteins. This higher protein level allows the dough to develop more gluten during kneading, resulting in a chewier texture and better structure, which helps the loaf rise higher.
Choosing a quality unbleached flour is recommended. Bleached flour is chemically treated, which can sometimes weaken the gluten structure. Look for reputable brands and ideally, use flour that hasn't been sitting in your pantry for too long, as its performance can degrade over time. While you can start with standard all-purpose for an easy white bread recipe, experimenting with bread flour will show you the difference in crumb structure and chewiness.
Yeast: Understanding and Activating for Perfect Rise
Yeast is a living organism, a type of fungus, that is essential for leavening (making bread rise) in this easy white bread recipe. As yeast consumes sugars in the dough, it produces carbon dioxide gas and alcohol. The gas gets trapped by the gluten network developed during kneading, causing the dough to expand. The alcohol contributes to the bread's flavor during baking. The most common types for home baking are active dry yeast and instant yeast.
Active dry yeast typically needs to be "proofed" or activated in warm water (around 105-115°F or 40-46°C) with a pinch of sugar before being added to the dry ingredients. You'll know it's active if it becomes foamy and bubbly within 5-10 minutes. Instant yeast, often labeled "rapid rise" or "quick-rise," has smaller granules and can usually be mixed directly with the dry ingredients, as it activates more quickly. Using fresh yeast is vital; check the expiration date, as old yeast may be dead or inactive, leading to a flat loaf.
Water Temperature: Crucial for Yeast Activity in Bread Making
The temperature of the water used in your easy white bread recipe is critical because it directly impacts the yeast. Yeast is a living organism that thrives within a specific temperature range. Water that is too cold (below 70°F or 21°C) will slow down the yeast activity significantly, leading to a very slow or non-existent rise. Conversely, water that is too hot (above 130°F or 54°C) can kill the yeast, preventing any rise at all.
For active dry yeast, the ideal water temperature for proofing is typically between 105°F and 115°F (40-46°C). This range is warm enough to wake up the yeast quickly without harming it. When using instant yeast, which is often mixed directly with dry ingredients, the water can be slightly warmer, around 120-130°F (49-54°C), as the dry ingredients help buffer the temperature. Using a thermometer is the most accurate way to ensure your water is in the correct range for optimal yeast activity in your easy white bread recipe.
Sugar and Salt: Balancing Flavors and Controlling Yeast
Sugar and salt might seem like minor additions to an easy white bread recipe, but they play crucial roles beyond just flavor. Sugar, even a small amount, serves as food for the yeast, giving it a quick energy source to start the fermentation process. It also contributes to the browning of the crust during baking and adds a subtle sweetness that balances the other flavors. Too much sugar, however, can actually inhibit yeast activity.
Salt is vital for flavor development and also acts as a regulator for yeast activity, slowing it down slightly. This control is important because it allows the gluten structure to develop properly alongside the fermentation. Without salt, the yeast would work too fast, potentially overproofing the dough before the gluten is strong enough to support the rise, resulting in a poor structure. Salt also tightens the gluten network, contributing to a better texture. Finding the right balance of sugar and salt is key to a delicious easy white bread recipe.
Step-by-Step Guide to Baking Basic White Bread
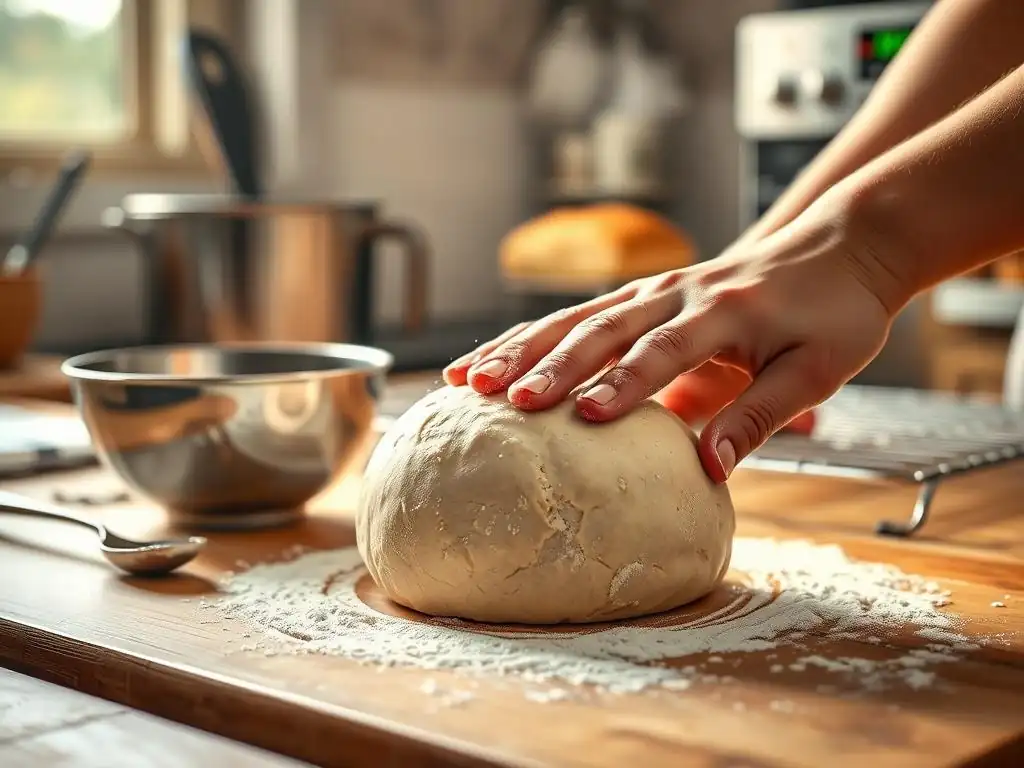
Baking a basic white bread loaf from scratch involves several distinct stages, each building upon the last. Following these steps carefully is key to success with this easy white bread recipe. We'll guide you through everything from mixing the initial ingredients to cooling the finished loaf. Taking your time and paying attention to the details at each stage will yield the best results.
This section breaks down the entire process into manageable steps. We'll explain the purpose of each action and provide tips to ensure you're on the right track. Remember, baking is a process, and practice makes perfect. Don't be discouraged if your first loaf isn't absolutely flawless; every bake is a learning opportunity. Let's get started on your easy white bread recipe journey.
Step 1: Preparing the Dough - Mixing and Kneading
The first step in making your easy white bread recipe is combining the ingredients to form a cohesive dough and then developing the gluten structure through kneading. This stage is fundamental as it lays the groundwork for the bread's texture and rise. Accurate measurement of ingredients is important here – consider using a kitchen scale for dry ingredients like flour for greater precision, as a cup of flour can vary in weight depending on how it's scooped.
Mixing brings everything together, while kneading transforms the sticky mass into a smooth, elastic dough. This process develops the gluten network, which is like a web that traps the carbon dioxide produced by the yeast, allowing the bread to rise. Insufficient kneading can lead to a dense loaf, while over-kneading is less common by hand but can result in a tough texture.
Mixing the Ingredients: Achieving the Right Consistency
Start by activating your yeast if using active dry yeast. Combine the warm water (105-115°F or 40-46°C), yeast, and a pinch of sugar in a large mixing bowl. Let it sit for 5-10 minutes until foamy. If using instant yeast, you can mix it directly with your dry ingredients. In a separate bowl, whisk together the flour and salt. Once the yeast is active, add the flour mixture gradually to the wet ingredients, stirring with a wooden spoon or spatula until a shaggy dough forms.
At this point, the dough will likely be sticky. The goal is to incorporate enough flour to make the dough manageable for kneading without making it too stiff. Add flour a tablespoon at a time if needed, mixing until most of the dough pulls away from the sides of the bowl. The consistency should be moist but not excessively sticky. This is the perfect starting point before transferring the dough to a surface for kneading for your easy white bread recipe.
Kneading Techniques: Developing Gluten for a Chewy Texture
Kneading is the process of working the dough to develop the gluten strands. You can knead by hand or using a stand mixer with a dough hook. By hand, turn the shaggy dough out onto a lightly floured surface. Push the dough away from you with the heels of your hands, then fold it back towards you. Rotate the dough slightly and repeat this push-fold-rotate motion. Continue kneading for about 8-10 minutes by hand, or 6-8 minutes in a stand mixer on medium speed.
The dough is properly kneaded when it becomes smooth, elastic, and no longer sticky. You should be able to stretch a small piece of dough thinly enough to see light through it without it tearing easily – this is called the "windowpane test." For an easy white bread recipe, sufficient kneading ensures a light, airy texture rather than a dense, heavy one. A well-kneaded dough will also feel alive and bouncy.
Step 2: First Rise - Bulk Fermentation for Flavor
After kneading, the dough needs time to rise, a process called bulk fermentation or the first rise. This is where the yeast really gets to work, producing carbon dioxide and alcohol, which contributes significantly to the bread's flavor and texture. This rise is crucial for developing the open crumb structure characteristic of good white bread. The duration of this rise depends heavily on the ambient temperature.
During the first rise, the dough should roughly double in size. This process typically takes anywhere from 1 to 2 hours at room temperature (around 70-75°F or 21-24°C). Warmer temperatures will speed up the rise, while cooler temperatures will slow it down. A slower, cooler rise often results in more complex flavors developing in the bread, but for an easy white bread recipe, a standard room temperature rise is perfectly adequate.
Creating the Ideal Environment for Dough Rising
To create an ideal environment for your dough's first rise, place the kneaded dough in a lightly oiled bowl. Turn the dough once to coat it evenly with oil, which prevents it from sticking to the bowl as it expands. Cover the bowl tightly with plastic wrap or a clean kitchen towel to prevent the surface of the dough from drying out and forming a skin, which can restrict the rise.
Place the covered bowl in a warm, draft-free spot. This could be inside a turned-off oven with the light on (the light generates a little warmth), on top of the refrigerator, or simply on your kitchen counter if the room is warm enough. Aim for a consistent temperature. Avoid cold windowsills or drafty areas. The warmth helps the yeast remain active, ensuring your easy white bread recipe gets the lift it needs during this crucial stage.
Knowing When Your Dough Is Ready for Shaping
Determining when your dough has finished its first rise is important. The primary indicator is its size: it should have approximately doubled from its original volume. Visually, the dough will appear puffy and airy. To be certain, you can perform the "poke test." Gently press two fingers about half an inch deep into the dough. If the indentations remain and do not spring back immediately, the dough is ready for shaping.
If the indentations spring back quickly, the dough needs more time to rise. If it collapses when poked, it might be slightly overproofed, but it's usually still salvageable for an easy white bread recipe; just proceed quickly to the next steps. Overproofing can lead to a less flavorful bread with a poorer structure, but it's less common with a standard first rise time. Trust the poke test as your most reliable guide.
Step 3: Shaping the White Bread Loaf
Once the dough has completed its first rise, it's time to shape it into a loaf. Shaping helps redistribute the gas produced during fermentation, creates surface tension which contributes to a good oven spring (the final burst of rising in the oven), and gives the bread its final form. While there are many ways to shape bread, we'll focus on a simple technique suitable for a standard loaf pan, perfect for an easy white bread recipe.
Shaping isn't just about making the dough look pretty; it's a functional step that prepares the dough for the second rise and baking. A well-shaped loaf will rise more evenly and have a better internal structure. Don't worry about achieving bakery-perfect shapes initially; focus on creating a relatively uniform shape with some surface tension.
Different Shaping Techniques for White Bread
For a standard sandwich loaf baked in a rectangular pan, a common shaping method involves gently deflating the dough after the first rise. Turn the dough out onto a lightly floured surface. Gently press or pat it into a rectangle. Then, fold the dough in thirds like a letter, bringing one side over to the center and the other side over that. Flatten it slightly again. Finally, roll the dough tightly from one of the short ends into a log shape. Pinch the seam closed along the bottom.
Another simple technique is to pat the dough into a rough rectangle, then fold the two long sides into the center, slightly overlapping, to create a seam. Then, roll the dough from one end towards the other, creating a log. Again, pinch the seam closed. The goal is to create a taut surface on the top of the loaf while sealing the seam securely on the bottom to prevent it from splitting during baking. Choose the technique that feels most comfortable for your easy white bread recipe.
Preparing Your Baking Pan for a Perfect Loaf
Properly preparing your baking pan is essential to prevent your beautifully shaped white bread loaf from sticking. For a standard metal loaf pan (typically 9x5 inches or 23x13 cm), greasing is usually sufficient. You can use butter, shortening, or cooking spray to coat the inside surfaces of the pan thoroughly. Ensure you get into the corners and up the sides.
For extra insurance, especially if you've had sticking issues in the past, you can grease the pan and then lightly flour it, tapping out any excess flour. Some bakers also like to line the bottom of the pan with parchment paper, allowing the paper to extend up the sides, which makes lifting the baked loaf out much easier. Whichever method you choose, make sure the pan is ready before you shape the dough for your easy white bread recipe, so you can transfer the shaped loaf directly into it without delay.
Step 4: Second Rise - Proofing the Shaped Dough
After shaping, the dough needs a second rise, also known as proofing. This rise is typically shorter than the first but is equally important. During proofing, the yeast continues to produce gas, causing the shaped loaf to expand and become light and airy. This step is crucial for achieving the desired volume and texture in your easy white bread recipe.
Proofing allows the gluten network to relax slightly after the tension of shaping, and the final pockets of gas are created which will expand rapidly in the hot oven (oven spring). Just like the first rise, the environment and duration of the second rise are key to success.
Ensuring Proper Proofing for a Light and Airy Bread
Place the shaped loaf in the prepared baking pan, seam-side down. Cover the pan loosely with plastic wrap or a light kitchen towel. You want to protect the dough from drying out but allow it room to expand. Place the pan in a warm, draft-free spot, similar to the first rise.
The second rise typically takes 30-60 minutes, but again, this depends on the temperature. The loaf is ready when it has increased significantly in size (it might not quite double, but it should look puffy and fill the pan nicely) and feels very light for its size. It's important not to overproof at this stage, as this can cause the loaf to collapse in the oven.
The Poke Test: Determining Readiness for Baking
The poke test is the most reliable way to tell if your shaped loaf is perfectly proofed and ready for the oven. Gently and quickly poke the side of the loaf with a lightly floured finger. Don't press too hard or deep, just a gentle indentation. Observe how the dough responds.
If the indentation springs back immediately and completely, the dough needs more proofing time. If the indentation slowly springs back only partially, leaving a visible dimple, the dough is perfectly proofed and ready to bake. If the indentation remains completely and the dough feels very fragile and might even start to deflate slightly, it is likely overproofed. Master this simple test for consistent results with your easy white bread recipe.
Step 5: Baking Your White Bread to Golden Perfection
Baking is the magical stage where your proofed dough transforms into a golden-brown loaf of bread. The heat of the oven causes the yeast to produce one last burst of gas (oven spring) before dying, sets the gluten structure, and develops the crust and internal crumb. Getting the oven temperature and timing right is key to a successful bake for your easy white bread recipe.
Preheating your oven properly is non-negotiable. A well-preheated oven ensures that the loaf begins to rise immediately upon entering, maximizing oven spring. It also helps in developing a good crust. Don't rush this step; give your oven ample time to reach and stabilize at the correct temperature.
Oven Temperature and Baking Time for White Bread
For most easy white bread recipes baked in a standard loaf pan, a common oven temperature is around 375°F to 400°F (190°C to 200°C). A slightly higher initial temperature can help with oven spring, sometimes starting at 400°F for the first 10-15 minutes and then reducing to 375°F for the remainder of the baking time.
Baking time typically ranges from 30 to 45 minutes for a standard loaf. The most accurate way to tell if the bread is done is by its internal temperature. A fully baked white bread loaf should have an internal temperature of 190-200°F (88-93°C) when measured with an instant-read thermometer inserted into the center of the loaf. The crust should also be a deep golden brown.
Achieving a Golden-Brown Crust: Tips and Tricks
A beautiful, golden-brown crust is a hallmark of well-baked bread. Several factors contribute to crust development. The temperature of the oven is crucial; higher temperatures promote better browning through the Maillard reaction. The presence of a small amount of sugar in the dough also aids in caramelization and browning.
For an even richer color and a slightly softer crust on your easy white bread recipe, you can brush the top of the loaf with a little milk or melted butter before baking. To achieve a slightly crispier crust, you can create steam in your oven by placing a pan of hot water on the rack below the baking bread during the first part of the bake. Ensure the loaf is baked long enough to reach the correct internal temperature; under-baked bread will have a pale, soft crust and a gummy interior.
Step 6: Cooling and Slicing Your Freshly Baked Bread
Once your easy white bread recipe loaf emerges from the oven, golden and fragrant, resist the urge to slice into it immediately! Proper cooling is a critical final step that impacts the texture and quality of the crumb. Cutting into hot bread can result in a gummy, dense interior because the internal structure is still setting and the moisture is still redistributing.
Allowing the bread to cool completely on a wire rack lets steam escape, prevents the bottom crust from becoming soggy, and allows the starches in the crumb to set properly. This process makes the bread easier to slice cleanly and ensures the best possible texture.
Proper Cooling Techniques to Prevent Soggy Bread
Immediately after taking the bread out of the oven, remove it from the loaf pan. Leaving it in the hot pan can trap steam, leading to a soggy bottom crust. Carefully turn the pan over and let the loaf slide out onto a wire cooling rack. The wire rack allows air to circulate freely around the entire loaf, facilitating even cooling and preventing condensation from making the crust soft.
Let the loaf cool completely on the rack before slicing. For a standard-sized loaf of white bread, this usually takes at least 1 to 2 hours at room temperature. It might feel like a long wait, especially with the tempting aroma filling your kitchen, but this step is essential for achieving the intended texture of your easy white bread recipe. Patience here is rewarded with a perfect slice!
Slicing Tips for a Perfect Loaf of White Bread
Once your bread is completely cool, it's ready to be sliced and enjoyed. Using the right tool makes a big difference. A serrated bread knife is the best choice for slicing bread, as the teeth grip the crust and cut through the crumb cleanly without crushing the loaf. Avoid using a straight-edged knife, which can compress the bread.
Place the loaf on a cutting board. Hold the loaf steady with one hand and use a gentle sawing motion with the serrated knife. Let the knife do the work; avoid pressing down hard, which can flatten the slice. For even slices, you can use a bread slicing guide if you have one, though it's not necessary for enjoying your homemade easy white bread recipe. Slice only what you need to keep the rest of the loaf fresh.
Troubleshooting Common White Bread Baking Issues
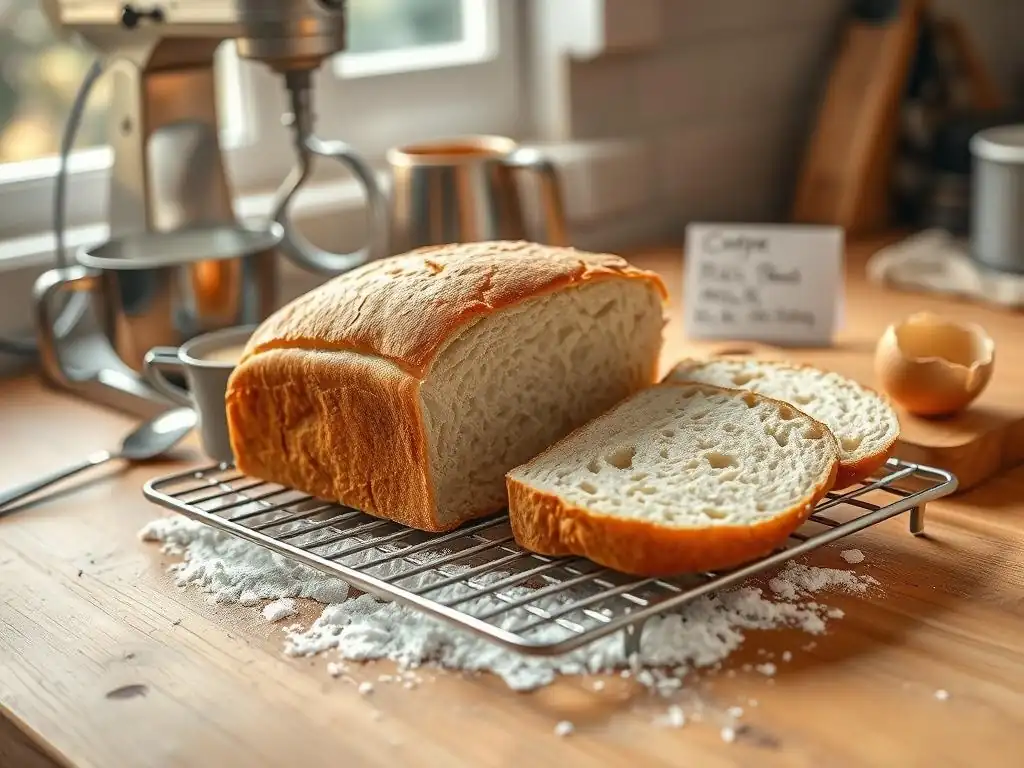
Even with an easy white bread recipe, sometimes things don't go exactly as planned. Baking involves variables like yeast activity, flour absorption, and oven quirks. Knowing how to identify and address common issues can help you learn from each bake and improve your results over time. Don't be discouraged by a less-than-perfect loaf; it's all part of the baking journey!
Here, we'll cover some frequent problems home bakers encounter when making white bread and offer practical solutions. Understanding the potential causes behind issues like poor rise or a dense texture will empower you to adjust your technique or ingredients for your next attempt at this easy white bread recipe.
Dough Not Rising? Understanding Yeast Problems
If your dough didn't rise during the first or second proofing stages, the most likely culprit is inactive or dead yeast. This can happen if the yeast is old (check the expiration date! ), if the water used was too hot and killed the yeast (above 130°F/54°C), or if the water was too cold (below 70°F/21°C), causing the yeast to be sluggish. Insufficient sugar to feed the yeast, or too much salt mixed directly with the yeast can also inhibit activity.
- Check Yeast Freshness: Before starting, proof a small amount of yeast in warm water with sugar. If it doesn't foam, get new yeast.
- Verify Water Temperature: Always use a thermometer to ensure water is in the correct temperature range (105-115°F for active dry, 120-130°F for instant).
- Ensure Warm Environment: Place the dough in a warm, draft-free spot for rising. If your kitchen is cold (below 70°F), consider using a slightly warmer spot or extending the rise time.
- Don't Mix Salt Directly with Yeast: If using active dry yeast, proof it separately. If using instant yeast mixed with dry ingredients, ensure the salt isn't piled directly on top of the yeast before mixing.
Dense or Heavy Bread? Addressing Gluten Development
A dense or heavy texture in your easy white bread recipe often points to issues with gluten development or proofing. Insufficient kneading is a common cause; if the gluten network isn't properly formed, it can't trap the gas produced by the yeast, resulting in a tight, dense crumb. Underproofing (not allowing the dough enough time to rise sufficiently in either stage) will also lead to a heavy loaf because the yeast hasn't produced enough gas to lighten the dough.
- Knead Properly: Ensure you knead the dough for the full recommended time until it passes the windowpane test. Develop that elastic gluten structure.
- Allow Sufficient Rise Time: Don't rush the first or second rise. Use the poke test to confirm readiness. If your kitchen is cool, be prepared for the rise to take longer than the recipe states.
- Check Yeast Activity: As mentioned above, ensure your yeast is active. Inactive yeast means no gas production, regardless of kneading or proofing time, leading to a dense loaf.
- Use Correct Flour: Using flour with too low a protein content (like cake flour) will make it difficult to develop a strong gluten network needed for a light white bread. Stick to all-purpose or bread flour.
Uneven Baking or Burning? Mastering Oven Temperature
Uneven baking, where one part of the loaf is darker than another, or burning, particularly on the bottom crust, is usually related to your oven. Oven temperatures can fluctuate significantly, and many home ovens have hot spots. Baking on a dark metal pan can also contribute to a darker bottom crust than desired.
- Use an Oven Thermometer: Don't just rely on your oven's dial. An inexpensive oven thermometer placed inside will show you the true temperature and reveal any discrepancies. Adjust your oven setting accordingly.
- Rotate the Loaf: Halfway through the baking time, carefully rotate the pan 180 degrees. This helps ensure even exposure to heat.
- Adjust Rack Position: If the bottom crust is burning, try moving the baking rack up a notch. If the top is browning too quickly, you can loosely tent the loaf with aluminum foil partway through baking.
- Consider Baking Surface: A lighter colored metal pan will absorb less heat and result in a less dark bottom crust than a dark pan. Using parchment paper can also provide a small buffer.
Crust Too Hard or Too Soft? Adjusting Baking Conditions
The desired crust texture in an easy white bread recipe can vary – some prefer a soft crust, while others like it a bit chewier. If your crust is unexpectedly hard or soft, it often relates to moisture and baking time. A crust that is too hard might be due to over-baking or insufficient moisture in the oven. A crust that is too soft might be under-baked or have cooled improperly.
- For a Softer Crust: Brush the top of the loaf with milk or melted butter before baking. Immediately after baking, you can brush it again with butter. Ensure you don't over-bake; bake until the internal temperature is just right (190-200°F).
- For a Harder/Chewier Crust: Avoid brushing with milk or butter. Consider using a steam method during the first part of baking (e.g., a pan of hot water on the rack below). Ensure the loaf bakes long enough to develop a good color and reach the correct internal temperature.
- Cooling: Always cool the bread on a wire rack. Cooling in the pan or on a flat surface traps steam and softens the bottom crust.
- Storage: Storing hot bread leads to a soft crust. Ensure it's fully cooled before storing in an airtight container or bag, which will soften the crust over time. For a crisper crust, store uncovered at room temperature once fully cooled, but note it will stale faster.
Tips and Tricks for the Best White Bread
Beyond the basic steps of your easy white bread recipe, there are several little things you can do to elevate your loaf from good to great. These tips involve slight modifications to ingredients, techniques, or handling that can significantly impact the final flavor, texture, and appearance of your homemade white bread.
Experimenting with these tips is part of the fun of baking. Once you've mastered the fundamental easy white bread recipe, try incorporating one or two of these suggestions in your next bake to see how they change the outcome. Small adjustments can lead to surprising and delicious results.
Enhancing Flavor: Adding Herbs, Seeds, or Spices
While a basic white bread recipe is delicious on its own, you can easily add extra flavor dimension. Incorporating herbs, seeds, or spices into the dough or on the crust can transform a simple loaf. For a savory twist, you could add 1-2 tablespoons of dried herbs like rosemary, thyme, or dill to the dry ingredients. About 1/4 cup of seeds such as poppy, sesame, or sunflower seeds can be mixed into the dough during kneading or sprinkled on top before baking.
Consider adding a pinch of garlic powder or onion powder for a subtle savory note. For a slightly different flavor profile, a teaspoon of dried milk powder added to the dry ingredients can yield a softer crumb and a richer crust color due to the added sugars and proteins. These additions not only enhance flavor but can also add visual appeal and texture to your easy white bread recipe.
Experimenting with Different Flour Types for Unique Textures
While all-purpose or bread flour is standard for a basic white bread recipe, you can experiment by substituting a portion of the white flour with other types to alter the texture and nutritional profile. For instance, substituting 1/4 to 1/2 cup of white flour with whole wheat flour will add fiber and a nuttier flavor, resulting in a slightly denser loaf. Similarly, replacing a small amount with rye flour can introduce a tangier note.
Using a small percentage (around 5-10%) of potato flour or vital wheat gluten (about 1-2 tablespoons per cup of flour) can help create an even softer crumb and better structure, respectively. When substituting flours, especially those with lower gluten content or higher absorption rates, you may need to slightly adjust the amount of liquid in your easy white bread recipe. Start with small substitutions to see how they affect the outcome.
Storing Your Homemade White Bread for Freshness
Proper storage is key to keeping your homemade easy white bread recipe loaf fresh and delicious for as long as possible. Once the bread is completely cooled, store it at room temperature. An airtight bread box is ideal, as it allows some air circulation while preventing the bread from drying out too quickly. Alternatively, you can store the loaf in a clean plastic bag or wrap it tightly in plastic wrap.
Avoid storing bread in the refrigerator, as this actually accelerates staling. If you won't eat the entire loaf within 2-3 days, consider freezing it. Slice the cooled loaf first, then wrap the slices tightly in plastic wrap and place them in a freezer-safe bag. Frozen bread can last for several months. You can then take out just the slices you need and thaw them at room temperature or toast them directly from frozen.
Variations on the Easy White Bread Recipe
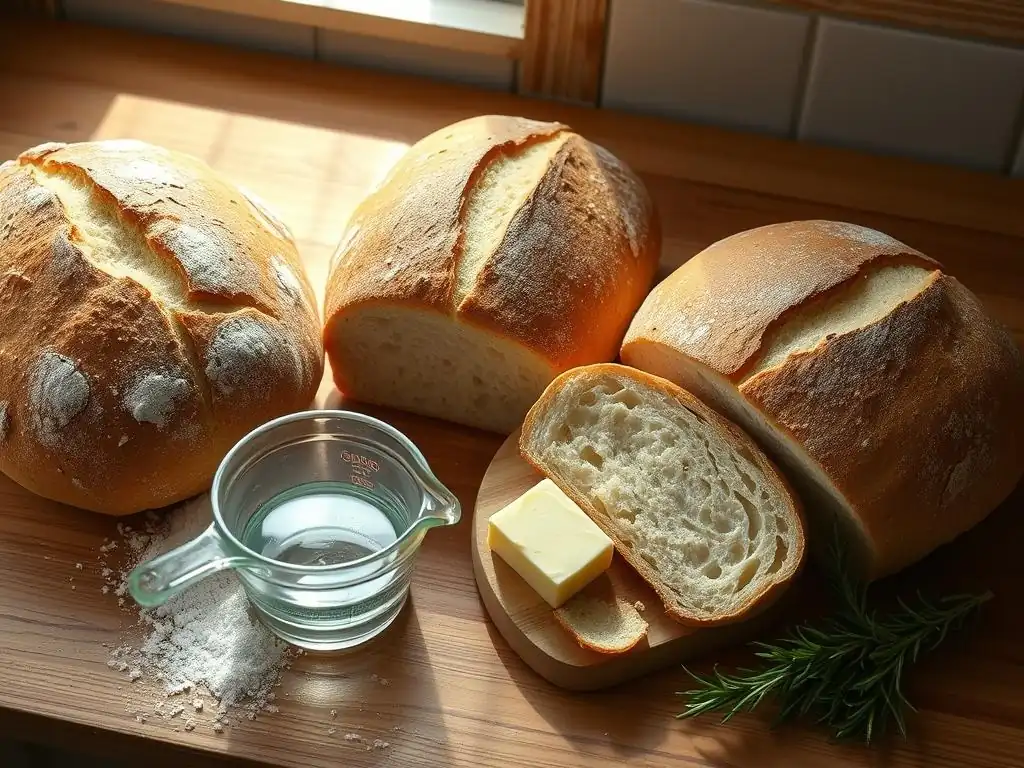
Once you've mastered the basic easy white bread recipe, you have a fantastic foundation for exploring simple variations. By making minor adjustments to ingredients, you can significantly change the character of the loaf. These variations offer ways to tailor your homemade bread to different tastes and uses, proving just how versatile a simple white bread dough can be.
Experimenting with these variations is a great way to expand your baking repertoire without tackling completely new recipes. You'll build confidence by working with a familiar dough base while discovering new textures and flavors. Let's look at a few popular ways to modify your basic white bread recipe.
Whole Wheat White Bread: A Healthier Alternative
To make a "whole wheat white bread" (often referring to a blend) or simply incorporate more whole grains, you can substitute a portion of the white flour with whole wheat flour. Start by replacing 1/4 to 1/2 of the all-purpose or bread flour with whole wheat flour in your easy white bread recipe. For example, if your recipe calls for 3 cups of white flour, try using 2 cups white flour and 1 cup whole wheat flour.
Whole wheat flour absorbs more liquid than white flour, so you might need to add an extra tablespoon or two of water during mixing to achieve the right dough consistency. The dough will also feel slightly heavier and might not rise quite as high as a loaf made with 100% white flour, but it will offer increased fiber (around 3 grams per slice vs. 1-2 grams in white) and a richer, nuttier flavor.
Sweet White Bread: Adding a Touch of Sweetness
For a slightly richer and sweeter easy white bread recipe, ideal for things like French toast or simply enjoying with butter and jam, you can increase the amount of sugar and potentially add a little fat like butter or oil. A typical basic white bread might use 1-2 tablespoons of sugar. You could increase this to 1/4 cup (4 tablespoons).
Adding 2-3 tablespoons of softened butter or vegetable oil to the dough during the mixing stage will also contribute to a softer crumb and a richer flavor. These additions will make the dough slightly stickier to work with initially, but the resulting loaf will have a tender texture and a pleasant sweetness that pairs wonderfully with both sweet and savory toppings.
Crusty White Bread: Achieving a Chewy Crust
If you prefer a white bread with a chewier, more substantial crust rather than a soft one, you can modify the baking environment to create steam. Steam in the oven helps keep the surface of the dough moist during the initial phase of baking, allowing the loaf to expand fully before the crust hardens. This results in a thinner, crisper, and chewier crust.
One way to create steam is to place a baking pan (an old broiler pan or cast iron skillet works well) on the bottom rack of your oven while it preheats. Just before you put your shaped loaf in the oven, carefully pour about 1 cup of hot water into the preheated pan. Close the oven door quickly to trap the steam. Bake your easy white bread recipe as usual. The steam dissipates after 15-20 minutes, allowing the crust to dry out and crisp up. Be cautious when adding water to a hot pan to avoid burns.
Conclusion: Enjoying Your Homemade White Bread
You've done it! You've taken simple ingredients and transformed them into a warm, fragrant loaf of homemade white bread using an easy white bread recipe. The journey from flour and yeast to a perfectly baked loaf is incredibly rewarding, and the taste of fresh, homemade bread is simply unparalleled. Take a moment to appreciate the work you've put in and the delicious result you've achieved.
Baking bread is a skill that improves with practice. Each loaf you bake will teach you something new about the process, your ingredients, and your oven. Don't be afraid to experiment or try the variations suggested. This easy white bread recipe is just the beginning of your bread baking adventure.
Celebrate Your Baking Success!
Pulling that golden loaf from the oven is a moment of pure baking joy. The aroma alone is worth the effort. Slice into your perfectly cooled loaf and admire the crumb structure you've created. Enjoy your first slice however you like it best – perhaps simply with butter, or as the base for your favorite sandwich. Share it with friends and family; there's something special about sharing homemade bread.
Remember the steps you followed, the challenges you overcame, and the techniques you mastered. Every successful bake, especially when starting with an easy white bread recipe, builds confidence and encourages you to keep baking. Celebrate this achievement; you are now a bread baker!
BakeWithEase: Your Partner in Bread Baking Mastery
At BakeWithEase, our mission is to make baking accessible and enjoyable for everyone. This easy white bread recipe is just one example of how we break down complex processes into simple, achievable steps. We provide the guidance, tips, and troubleshooting advice you need to bake with confidence.
Whether you're just starting out or looking to refine your skills, BakeWithEase is here to support your baking journey. Explore our other recipes, guides, and tips to continue mastering the art of baking. From simple cookies to challenging pastries, we're your go-to resource for baking with ease. Happy Baking!
Frequently Asked Questions
What is the easiest way to bake white bread at home?
The easiest way to bake white bread at home is by following a simple step-by-step recipe that includes easily accessible ingredients, ensuring even beginners can succeed.
Do I need any special equipment to make white bread?
No special equipment is needed! You can bake basic white bread using a regular home oven and standard kitchen tools like a mixing bowl, loaf pan, and measuring cups.
How long does it take to bake white bread?
The total time to bake white bread typically ranges from 2 to 3 hours, which includes preparation, rising time, and baking, making it a manageable baking project.
Can I use all-purpose flour for white bread?
Yes, using all-purpose flour is suitable for making white bread, but for the best texture, consider using bread flour for a higher protein content and improved rise.
What should I do if my bread doesn't rise?
If your bread doesn't rise, it could be due to inactive yeast or improper temperature. Ensure your yeast is fresh and that you’re allowing the dough to rise in a warm, draft-free environment.
Final Reflection: The Humble Loaf and the Joy of Baking
The simple act of baking a loaf of white bread remains surprisingly relevant today, offering a potent antidote to the fast-paced, processed food culture that surrounds us. More than just a recipe, it's a gateway to mindful creation, a connection to culinary heritage, and a source of immense satisfaction. The ease of this recipe, specifically designed for home ovens, democratizes this fundamental skill, making it accessible to everyone.
The enduring appeal of homemade bread lies not just in its taste, but in the process itself. The rhythmic kneading, the comforting aroma filling the kitchen, the warm, crusty loaf emerging from the oven – these are experiences that transcend mere sustenance. They connect us to a simpler time, a time when food preparation was a more deliberate and engaging act. As the poet Mary Oliver so eloquently put it: What is it you plan to do with your one wild and precious life?
Baking this bread, in its simplicity, is a small but powerful answer to that question.
Now, consider your own kitchen. Imagine the warmth of the oven, the scent of yeast, and the pride of presenting a perfectly risen loaf to your family or friends. This isn't just about following a recipe; it's about embracing a process, learning a skill, and connecting with something deeply human. Take the time, gather the ingredients, and bake your own loaf. You might be surprised by the joy it brings.
Unleash Your Inner Baker: Perfect Loaves Await!
Thanks for joining us on this bread-baking adventure! You've just unlocked the secrets to crafting delicious, homemade white bread – even in a regular oven. Now it's time to put those skills to the test!
- Bake your first perfect loaf: Grab your ingredients and follow the recipe again – this time, experiment with adding your own twist! Maybe some herbs, or different types of flour?
- Share your baking journey: Post a picture of your masterpiece on social media and tag us – we’d love to see your creations!
- Join our baking community: Head over to our forum (link removed per instructions) to share tips, ask questions, and connect with fellow bread enthusiasts. We’re always eager to hear from you!
What unique ingredient will you add to your next loaf to elevate your baking game?