
How to Whip DairyFree Heavy Cream Alternatives Successfully

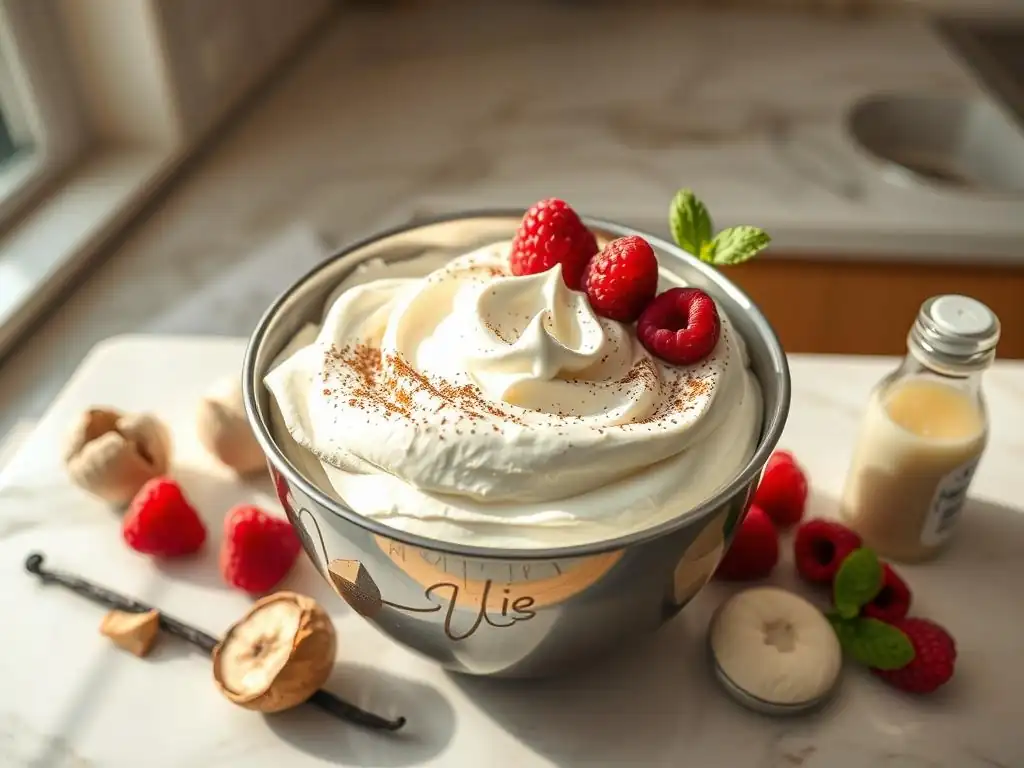
Welcome to BakeWithEase, your culinary companion on a delicious journey! Are you ready to unlock the secrets to delightful, dairy-free baking? It's easier than you think! This article dives deep into the world of dairy-free heavy cream substitutes, offering practical tips and tricks to achieve that perfect whipped texture and rich flavor. Curious about how to whip those alternatives successfully? Read on to discover everything you need to know!
- Mastering Dairy-Free Whipped Cream: A Guide to Success
- Introduction: Exploring Dairy-Free Whipping Alternatives
- Selecting the Ideal Dairy-Free Cream for Whipping
- Step-by-Step Guide to Perfect Dairy-Free Whipped Cream
- Troubleshooting Common Dairy-Free Whipping Problems
- Dairy-Free Whipped Cream Recipes and Uses
- Tips for Extending the Life of Dairy-Free Whipped Cream
- Conclusion: Enjoying Delicious and Stable Dairy-Free Whipped Cream
-
Frequently Asked Questions
- How do I choose the right dairy-free heavy cream substitute for whipping?
- What are some common pitfalls when whipping dairy-free heavy cream alternatives?
- Can I sweeten dairy-free heavy cream alternatives?
- How long will whipped dairy-free heavy cream last?
- What dishes can I use whipped dairy-free heavy cream in?
- Final Reflection: Mastering the Art of Dairy-Free Whipping
- Unlock the Secrets to Dairy-Free Whipping Success!
Mastering Dairy-Free Whipped Cream: A Guide to Success
Introduction: Exploring Dairy-Free Whipping Alternatives
Welcome to the wonderful world of dairy-free baking! Whether you're navigating dietary restrictions, managing allergies, or simply exploring plant-based options, finding reliable dairy-free heavy cream substitutes is key to recreating beloved desserts and toppings. Traditional whipped cream relies on the fat content and protein structure of dairy to create that light, airy texture we all adore. Substituting this requires understanding the properties of plant-based ingredients and how to coax them into a similar state. Fortunately, the market and home kitchens offer several excellent options for crafting delicious, whip-able creams without a drop of dairy.
This guide will walk you through selecting, preparing, and whipping various popular dairyfree heavy cream substitutes. We'll explore the unique characteristics of coconut cream, cashew cream, soy cream, and oat cream, offering practical tips and techniques to help you achieve stable, delightful results every time. From understanding the science behind whipping to troubleshooting common issues, you'll gain the confidence to master dairy-free whipped cream for all your baking and dessert needs.
Reasons for Choosing Dairy-Free Cream
There are numerous compelling reasons why bakers and dessert lovers turn to dairyfree heavy cream substitutes. For many, it's a necessity driven by lactose intolerance or a dairy allergy, which can cause uncomfortable or severe reactions. According to estimates, a significant portion of the global population experiences some degree of lactose intolerance, making dairy-free options essential for inclusive baking. Additionally, ethical considerations regarding animal welfare and environmental concerns associated with dairy farming lead many consumers to seek plant-based alternatives.
Beyond necessity and ethics, some individuals simply prefer the taste or digestive feel of dairy-free options. Athletes and health-conscious individuals might choose alternatives perceived as "lighter" or those offering different nutritional profiles, such as the healthy fats found in coconut or cashews. The increasing availability and improved quality of dairyfree heavy cream substitutes mean that choosing plant-based no longer means sacrificing taste or texture in your favorite whipped applications.
Overcoming the Challenges of Dairy-Free Whipping
Whipping dairyfree heavy cream substitutes presents unique challenges compared to traditional dairy cream. Cow's milk cream contains specific proteins and fats that, when agitated, trap air effectively and form a stable structure. Plant-based alternatives often lack these exact components, particularly the protein structure needed for lasting stability. For instance, coconut cream relies heavily on its high-fat content (ideally 20-25% or more) to build structure, while cashew cream uses emulsified fats and proteins.
Another hurdle is achieving sufficient thickness without the mixture becoming grainy or separating. Temperature plays a critical role; dairy-free options generally need to be much colder than dairy cream to whip properly. Stabilizers, both natural (like starch or gums present in some store-bought options) and added (like cornstarch or cream of tartar), are often necessary to help maintain the whipped structure and prevent weeping. Mastering dairy-free whipping involves understanding these material differences and applying specific techniques to compensate.
Selecting the Ideal Dairy-Free Cream for Whipping
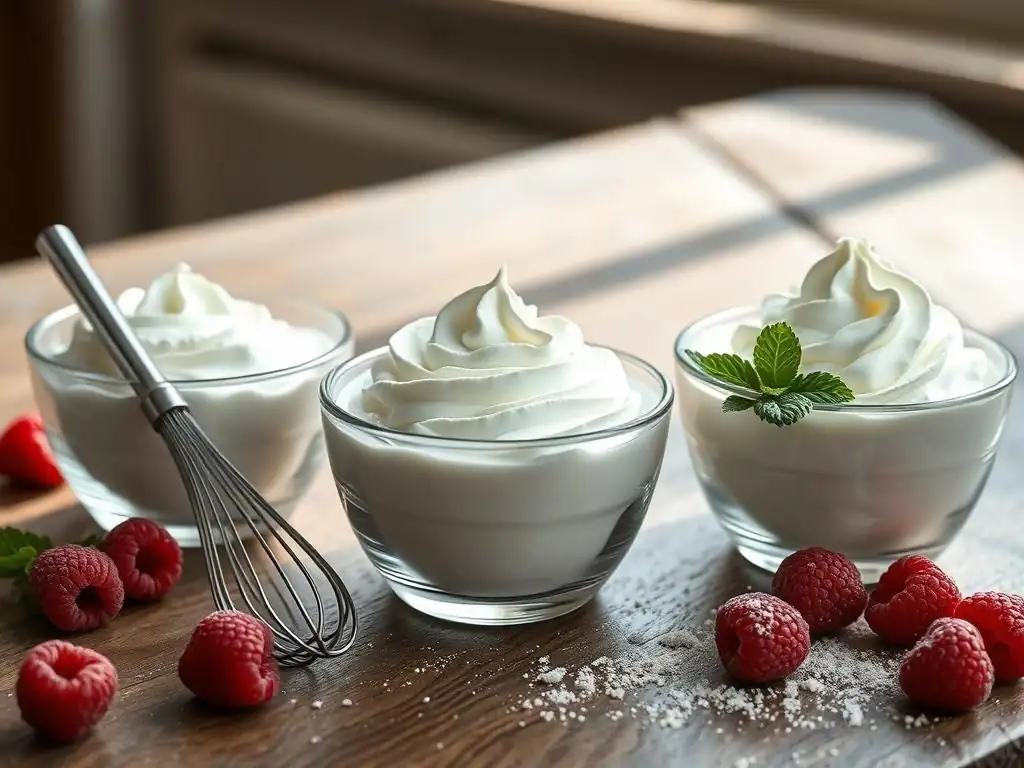
Choosing the right dairyfree heavy cream substitutes is the first crucial step to successful whipping. Not all plant-based creams are created equal when it comes to achieving that light, airy texture. Factors like fat content, protein structure, and the presence of stabilizers significantly impact the outcome. The most popular and generally reliable options include coconut cream, cashew cream, soy cream, and increasingly, oat cream. Each offers a unique flavor profile and requires specific handling for optimal whipping results.
Consider the intended use and desired flavor when making your selection. Coconut cream provides a rich, tropical note that pairs beautifully with fruits and chocolate but might be too distinct for delicate flavors. Cashew cream is incredibly neutral and smooth, making it versatile, but requires preparation. Soy and oat creams offer more neutral flavors and can be easier to find, but their whipping success often depends heavily on the specific brand and formulation due to varying fat and protein levels. Experimenting with different dairyfree heavy cream substitutes will help you find your favorite.
Coconut Cream: The Rich and Dependable Choice
Coconut cream is arguably one of the most popular and reliable dairyfree heavy cream substitutes for whipping, primarily due to its high fat content. When chilled properly, the fat solids in coconut cream firm up significantly, allowing them to trap air much like dairy fat does. Look for full-fat coconut cream or the solid part skimmed from the top of full-fat coconut milk (often called 'cream of coconut' by bakers, distinct from the sweetened cocktail mixer).
A product with at least 20-25% fat is ideal for whipping stiff peaks. Some brands specifically market "whipping coconut cream," which may contain added stabilizers for better performance.
To ensure success with coconut cream, chilling is paramount. An unopened can or carton should be refrigerated for at least 24 hours, and preferably 48 hours, before whipping. This allows the fat to separate and solidify at the top, making it easy to scoop out the thick cream and leave the liquid behind. Using this solid cream ensures you have enough fat for whipping. For best results, also chill your mixing bowl and whisk for at least 15-20 minutes beforehand.
Selecting Quality Coconut Cream
The quality and type of coconut cream you choose significantly impact your whipping success. Not all coconut creams are created equal; fat content varies widely between brands. To identify a good candidate for whipping, check the nutritional label for the fat percentage or look for products specifically labeled as "full-fat coconut milk" or "coconut cream." Avoid "light" versions, as they simply don't have enough fat to whip properly. Some premium brands list around 20-25g of fat per 100g serving, which is a strong indicator of whip-ability.
Packaging also matters. Canned coconut milk or cream is often preferred because the fat naturally separates and solidifies when chilled, making it easy to scoop the thick cream off the top. Carton versions may be more homogenized and less likely to separate effectively, although some brands specifically formulated for whipping in cartons are becoming available. Reading reviews or experimenting with a few brands is often necessary to find a reliable option for your dairyfree heavy cream substitutes.
Preparing Coconut Cream for Best Results
Proper preparation is crucial for whipping coconut cream successfully. Start by refrigerating the can or carton upside down for at least 24-48 hours. This helps the thick cream solidify at the bottom (which will be the top when you open it right-side up). When ready to whip, open the chilled can/carton carefully. Scoop out the thick, solid cream from the top, leaving the clear liquid (coconut water) behind. You can save this liquid for smoothies or other recipes.
Place the solid coconut cream into a very cold mixing bowl. Using a chilled bowl and whisk attachment (for a stand mixer) or cold beaters (for a hand mixer) is essential, as warmth can quickly melt the fat and prevent whipping. Add any desired sweetener or flavorings before you begin whipping. Start on a low speed to break up any clumps, then gradually increase to medium-high. Whip until stiff peaks form, being careful not to over-whip, which can cause the cream to become grainy or separate.
Cashew Cream: A Silky and Adaptable Option
Cashew cream is another fantastic dairyfree heavy cream substitute, prized for its incredibly smooth texture and neutral flavor, which makes it highly adaptable for various desserts. Unlike coconut cream, which relies purely on fat separation, cashew cream's whip-ability comes from blending soaked cashews into a rich, thick base. This emulsified mixture of fats, proteins, and carbohydrates creates a creamy consistency that can be whipped to soft or medium peaks, though it rarely achieves the stiff peaks of dairy or coconut cream without added stabilizers. Its neutral profile makes it an excellent canvas for vanilla, chocolate, or other flavorings.
One of the advantages of cashew cream is that you can control its thickness by adjusting the amount of liquid used during blending. A ratio of about 1 cup of soaked cashews to 1/4 to 1/2 cup of water or plant-based milk typically yields a thick cream suitable for whipping. For the best results, use raw cashews, as roasted cashews can impart a stronger flavor. Ensuring the cashews are thoroughly soaked and blended until absolutely smooth is key to avoiding a grainy texture in your final whipped product.
Homemade Cashew Cream Recipe for Whipping
Making your own cashew cream for whipping is straightforward and allows for customization. You'll need:
- 1 cup raw cashews
- Water for soaking
- 1/4 - 1/2 cup cold water or unsweetened plant-based milk (like almond or soy milk)
- 1-2 tablespoons sweetener (maple syrup, agave, or powdered sugar)
- 1/2 teaspoon vanilla extract (optional)
Instructions:
- Soak the cashews: Place cashews in a bowl and cover with hot water. Let stand for at least 1 hour, or soak in cold water for 4-6 hours (or overnight) in the refrigerator. Draining and rinsing the cashews helps improve texture and digestibility.
- Blend: Drain the soaked cashews and place them in a high-powered blender. Add 1/4 cup of cold water/plant milk, sweetener, and vanilla (if using).
- Blend until perfectly smooth: Start blending on low, then increase speed. You may need to stop and scrape down the sides multiple times. Add more liquid, one tablespoon at a time, only if absolutely necessary to achieve a thick, smooth, paste-like consistency. Avoid adding too much liquid, as this will prevent whipping. Blending can take 2-5 minutes depending on your blender.
- Chill: Transfer the thick cashew cream to an airtight container and refrigerate for at least 4-6 hours, or until very cold. It will thicken further as it chills.
Achieving Optimal Cashew Cream Consistency
The key to whip-able cashew cream lies in achieving the correct initial consistency and ensuring it is thoroughly chilled. After blending, the cream should be very thick, almost like a paste or thick pudding. If it's too thin, it simply won't whip. Using a high-powered blender is highly recommended, as it breaks down the cashew particles more effectively, resulting in a smoother cream free from graininess. Even with a good blender, prolonged blending (several minutes) is often needed to reach ultimate smoothness.
Once blended, chilling is vital. The cold temperature helps the fats solidify slightly and the overall mixture firm up, making it more receptive to whipping. Whip the chilled cashew cream using cold equipment (bowl and whisk/beaters) just like with coconut cream. Cashew cream typically whips up to a fluffy, soft-peak stage. For slightly more stability and body, you can whisk in a pinch of cream of tartar or a tiny amount of a commercial thickener like xanthan gum (use sparingly, perhaps 1/8 - 1/4 teaspoon per cup of cream).
Soy Cream: An Affordable Alternative
Soy cream, derived from soybeans, is another widely available and often more affordable dairyfree heavy cream substitute. It can be found in liquid form, similar to dairy whipping cream, or as a thicker, sour cream-like product (though the latter is not typically used for whipping). For whipping, you need a liquid soy cream alternative specifically formulated for this purpose. These products usually have a fat content ranging from 18% to 25%, similar to light or standard dairy whipping cream. Soy cream generally has a relatively neutral flavor, though some people detect a slight "beany" undertone depending on the brand.
Soy cream whips up fairly well, often achieving soft to medium peaks. It can be less stable than coconut cream and may require added stabilizers, which are sometimes included in commercial formulations. One advantage is that it doesn't require the fat separation step needed for canned coconut cream; you simply chill and whip the liquid. Checking the ingredient list for stabilizers like carrageenan, guar gum, or xanthan gum can give you an idea of how well a specific brand might perform.
Preparing Soy Cream for Whipping
Preparing liquid soy cream alternative for whipping is straightforward: it primarily requires chilling. Ensure the carton of soy cream is well-refrigerated for at least 12-24 hours before you plan to whip it. Like other dairyfree heavy cream substitutes, using very cold cream is essential for successful whipping. The colder the cream, the better the fat molecules can cluster and trap air.
Pour the chilled soy cream into a very cold mixing bowl. Add any desired sweetener or flavorings at this stage. Begin whipping on low speed to incorporate air gradually, then increase the speed to medium-high. Whip until soft or medium peaks form. Soy cream can sometimes be prone to over-whipping and separating if beaten too vigorously or for too long after reaching the desired consistency, so keep a close eye on it.
Important Considerations for Soy Cream
When working with soy cream, it's important to manage expectations regarding stability and flavor. While it whips up nicely for immediate use, it may not hold its structure as long as dairy or well-stabilized coconut cream, potentially weeping or deflating over time, especially in warmer conditions. This makes it best suited for applications where it will be consumed relatively quickly after whipping, such as dolloped onto hot desserts or beverages.
Flavor can also be a consideration. Some individuals are sensitive to the natural flavor of soy. Using vanilla extract, a pinch of salt, or combining it with other flavors like cocoa powder can help mask any undesirable notes. Also, be aware that some soy creams contain added sugars or flavorings, so check the label if you're aiming for a specific sweetness level or a completely neutral base for your dairyfree heavy cream substitutes.
Oat Cream: A Neutral-Flavored Option
Oat cream, a newer player in the dairy-free market, is gaining popularity as a dairyfree heavy cream substitute, particularly among those avoiding soy or nuts. It's made from blended oats and water, often with added oil (like rapeseed or sunflower oil) to increase fat content, and sometimes stabilizers and emulsifiers. Oat cream typically offers a very neutral, slightly sweet flavor that doesn't overpower other ingredients, making it versatile for various dessert applications. However, its whipping performance can vary significantly depending on the brand and its formulation.
Look for oat cream products specifically marketed as "culinary" or "whipping" cream, as these are more likely to have the necessary fat content (often 15-25%) and stabilizers (like gellan gum or carrageenan) to whip successfully. Standard oat milk, even the "extra creamy" versions, usually does not contain enough fat or the right structure to whip into a stable topping. When you find a suitable oat cream, it generally whips to soft peaks and provides a lovely, light texture.
Preparing Oat Cream for Whipping
Similar to soy cream, preparing oat cream alternative for whipping is straightforward: just ensure it is thoroughly chilled. Refrigerate the carton for at least 12-24 hours before you plan to whip. The colder the oat cream is, the better its chances of whipping up successfully. A chilled bowl and whisk/beaters will further aid the process by keeping the cream cold while you work.
Pour the cold oat cream into your chilled mixing bowl. Add any desired sweetener or flavorings, such as powdered sugar and vanilla extract. Start whipping on a low speed to begin incorporating air, then gradually increase to medium-high. Whip until soft peaks form. Oat cream can sometimes take longer to whip than dairy or coconut cream and may not achieve very stiff peaks. Watch it carefully as you whip to avoid over-agitating, which can sometimes lead to a thinner consistency if stabilizers break down.
Tips for Stabilizing Oat Cream
While some commercial oat creams formulated for whipping contain stabilizers, you may find that adding your own can improve the texture and longevity. A common method is to dissolve a small amount of cornstarch or arrowroot powder in a little cold oat cream, gently heat it until thickened (like a slurry), let it cool completely, and then whisk it into the main batch of cold oat cream before whipping. For instance, you might use 1-2 teaspoons of cornstarch per cup of oat cream.
Alternatively, a pinch of cream of tartar (about 1/4 teaspoon per cup) added before whipping can help acidify the cream slightly and improve peak formation. Commercial dairy-free stabilizers like a tiny amount of xanthan gum (less than 1/4 teaspoon per cup, used very carefully as too much can make it gummy) or a product like Whip It (a vegan whipping stabilizer) can also be effective. Experimentation with a specific brand of oat cream and these stabilization techniques will help you find the best approach for your dairyfree heavy cream substitutes.
Step-by-Step Guide to Perfect Dairy-Free Whipped Cream
Achieving perfect dairy-free whipped cream, regardless of the alternative you choose, boils down to a few key principles: temperature, equipment, and technique. While each type of dairyfree heavy cream substitute has its nuances, following a general process significantly increases your chances of success. This section outlines the fundamental steps to take you from liquid alternative to fluffy, whip-able topping.
The Importance of Chilling
Chilling is arguably the most critical step when whipping dairyfree heavy cream substitutes. Cold temperatures cause the fats within the cream alternative to firm up. When agitated, these firm fat particles are better able to trap air bubbles, which is the mechanism by which cream becomes whipped and voluminous. Warm cream, whether dairy or dairy-free, simply won't hold air effectively and will remain liquid or only achieve very soft, unstable peaks.
For coconut cream, this means refrigerating the can/carton for 24-48 hours to allow the fat to solidify. For liquid alternatives like soy or oat cream, at least 12-24 hours of refrigeration is necessary. Even homemade cashew cream needs several hours in the fridge to firm up after blending. Furthermore, using a mixing bowl and whisk/beaters that have been chilled in the freezer for 15-20 minutes before use is highly recommended. This prevents the equipment from transferring warmth to the cream as you whip.
Essential Equipment: Bowls and Whisks/Mixers
Having the right equipment, and ensuring it's cold, is crucial for successful dairy-free whipping. You'll need:
- Mixing Bowl: A medium to large-sized bowl made of metal or glass is ideal because these materials hold a cold temperature well. Plastic bowls can sometimes retain grease residue which might hinder whipping. Chill the bowl in the freezer for 15-20 minutes before starting.
- Whisk or Mixer:
- Hand Whisk: Suitable for small batches and provides good control, but requires significant arm power and time (potentially 10-15 minutes or more depending on the cream and batch size).
- Hand Mixer: Faster and less strenuous than hand whipping. Use the whisk attachments.
- Stand Mixer: Best for larger batches or when you need hands-free operation. Use the whisk attachment.
Whisk attachments for mixers should also be chilled along with the bowl. Cleanliness is important – ensure all equipment is free of any grease or oil residue, as fat can prevent the cream from whipping properly.
Mastering Whipping Techniques for Stiff Peaks
Once your dairyfree heavy cream substitute is well-chilled and your equipment is cold, it's time to whip! The technique is similar to whipping dairy cream, but patience and observation are key, as some alternatives whip slower or behave slightly differently.
Start whipping on a low speed for about 30 seconds to a minute to break up any clumps and begin incorporating air gently. Then, increase the speed to medium-high. As you whip, the cream will first become foamy, then thicken. You'll see lines form in the cream as the whisk passes through it. Continue whipping until the cream reaches your desired consistency:
- Soft Peaks: When you lift the whisk, the peaks curl over gently.
- Medium Peaks: Peaks hold their shape but the very tip curls slightly.
- Stiff Peaks: Peaks stand straight up when the whisk is lifted. This is often the goal for piping or stable toppings, though not all dairyfree heavy cream substitutes can achieve true stiff peaks without added stabilizers.
Add any powdered sugar or flavorings once the cream has started to thicken but before it reaches stiff peaks. This allows them to incorporate fully without deflating the structure you've built.
Hand Whipping vs. Electric Mixer Techniques
Choosing between hand whipping and using an electric mixer depends on the volume of cream and your preference for speed and effort.
- Hand Whipping: Place the chilled cream in a chilled bowl. Hold the bowl steady and use a balloon whisk with rapid, circular motions, incorporating air by lifting the whisk slightly with each stroke. This method gives you excellent control and allows you to feel the cream's resistance change as it thickens. It's great for small amounts (like 1/2 to 1 cup) but can be tiring for larger quantities. Expect it to take significantly longer than using a mixer – potentially 10-20 minutes to reach medium peaks.
- Electric Mixer (Hand or Stand): Pour the chilled cream into the chilled bowl. Start on low speed, then increase to medium-high. Move the hand mixer beaters around the bowl to ensure all the cream is being whipped. With a stand mixer, simply let it run. This method is much faster, typically taking 3-7 minutes to reach desired peaks depending on the cream type and mixer power. The risk here is over-whipping, which can happen quickly once the cream starts to thicken, so monitor closely.
Preventing Over-Whipping
Over-whipping is a common pitfall with both dairy and dairy-free creams. While dairy cream separates into butter and liquid when over-whipped, dairyfree heavy cream substitutes can become grainy, curdle, or simply lose their structure and turn thin again. This happens because the fat structure built during whipping breaks down from excessive agitation.
To prevent over-whipping, pay close attention as the cream thickens. Once it starts leaving trails from the whisk or beaters, reduce the speed to medium or medium-low and watch constantly. Stop whipping as soon as the desired peak consistency is reached. It's better to under-whip slightly and finish by hand whisking for a few seconds than to over-whip. If you accidentally over-whip coconut cream, sometimes adding a tablespoon or two of the reserved coconut water or another liquid and gently whisking by hand can help smooth it out slightly, but it's hard to fully recover.
Troubleshooting Common Dairy-Free Whipping Problems
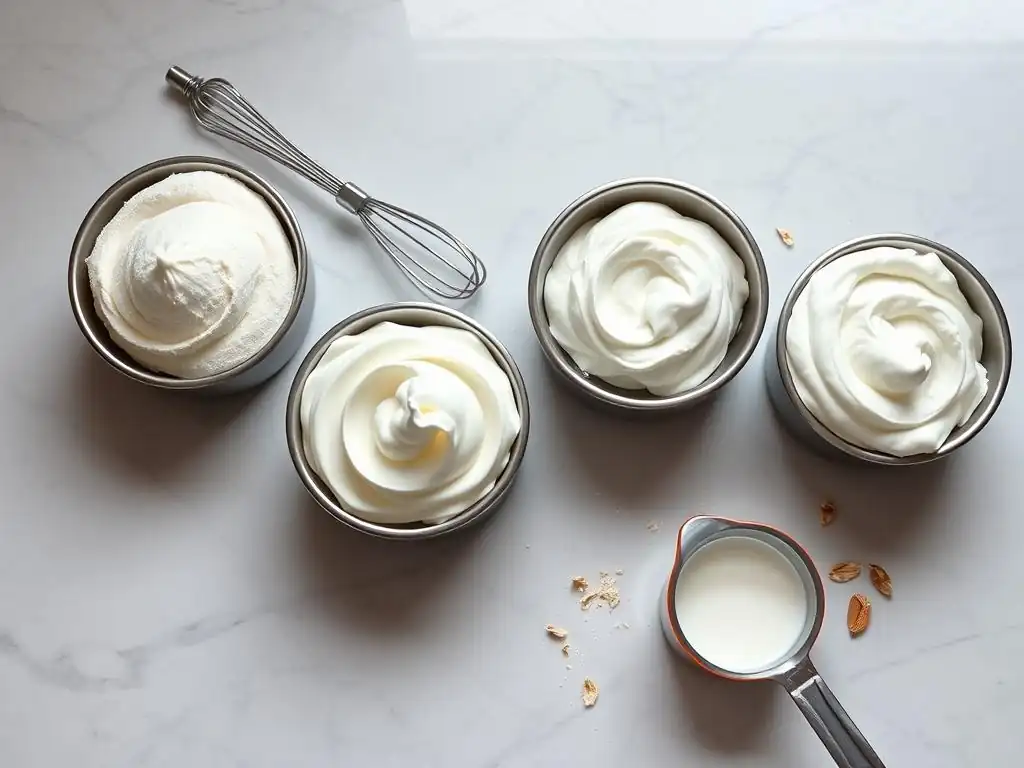
Even with the best preparation, you might encounter issues when whipping dairyfree heavy cream substitutes. Don't despair! Many common problems can be addressed with simple adjustments. Understanding why a problem occurs is the first step to fixing it or preventing it next time. The most frequent issues include the cream not thickening, developing a grainy texture, or the flavor not being quite right.
Addressing Lack of Thickening
If your dairy-free cream alternative just isn't whipping up and remains liquid or only slightly foamy, several factors could be at play:
- Not Cold Enough: This is the most common reason. Is the cream straight from the back of the fridge, or has it been sitting out? Are your bowl and whisk/beaters thoroughly chilled? Try putting everything back in the freezer for 20-30 minutes and try again.
- Insufficient Fat Content: Especially true for coconut cream. Did you use the solid cream from the top, or did you accidentally include too much liquid? Was the brand you used high in fat? If using cashew, was your cream thick enough after blending? If the base cream simply lacks enough fat or the right structure (common in lower-fat or non-whipping formulations), it might never whip properly. You might need to add a stabilizer (see below) or accept that it will only reach soft peaks.
- Over-Whipping (or Past the Point): While counter-intuitive, sometimes creams that started to thicken but then went thin again were over-whipped. The structure collapsed. Unfortunately, it's hard to fix this state.
- Presence of Oil/Grease: Even a tiny amount of oil residue on your equipment can prevent whipping. Ensure everything is scrupulously clean.
- Adding Liquid Sweeteners Too Early: Liquid sweeteners like maple syrup added at the beginning can sometimes hinder whipping, especially if added in large amounts. Add them after the cream has started to thicken.
If the cream is cold and clean equipment is used, and it's still not thickening, adding a stabilizer is often the best solution. Whisk in a small amount of powdered sugar (which contains cornstarch) or a pinch of cream of tartar, or try one of the stabilizer methods mentioned previously (cornstarch slurry, xanthan gum).
Resolving Grainy Texture Issues
A grainy or gritty texture is most often a problem with cashew cream, but can occasionally occur with over-whipped coconut cream or if stabilizers aren't fully dissolved in other types.
- Cashew Cream: Graininess almost always means the cashews weren't blended long enough or effectively enough. Even with a high-powered blender, achieving perfect smoothness takes time and potentially scraping down the sides multiple times. Using pre-soaked cashews (especially hot-water soaked) helps soften them for easier blending. Unfortunately, it's difficult to fix graininess after whipping. You might try re-blending the whipped cream (which will deflate it) with a tiny bit more liquid to try and smooth it out, then re-chill and try whipping again, but results may vary. Prevention is key here: blend until absolutely smooth initially.
- Coconut Cream: Over-whipping can sometimes cause the solidified fat particles to clump together, resulting in a slightly grainy or curdled appearance, similar to how dairy cream separates. Stop whipping as soon as stiff peaks are reached.
- Stabilizers: If using powdered stabilizers like cornstarch or xanthan gum and they aren't fully dissolved or incorporated, they can create a gritty texture. Ensure they are mixed thoroughly into a small amount of cream first or added gradually while whipping.
Adjusting Flavor and Sweetness
The base flavor of dairyfree heavy cream substitutes varies (coconut is distinct, cashew/oat/soy are milder but can have subtle notes). Adjusting flavor and sweetness is easy once the cream has started to thicken but before stiff peaks form.
- Sweetness: Powdered sugar (confectioners' sugar) is generally preferred over granulated sugar because it dissolves easily and often contains a small amount of cornstarch, which can help stabilize the cream. Add it gradually while whipping to your taste. Liquid sweeteners like maple syrup or agave can be used, but add them cautiously and preferably after the cream has thickened slightly, as too much liquid can hinder whipping. Use about 1-3 tablespoons of sweetener per cup of cream as a starting point, adjusting as needed.
- Flavor: Vanilla extract is a classic addition. Use pure vanilla extract for the best flavor. Other popular additions include:
- Cocoa powder or melted, cooled dairy-free chocolate for chocolate whipped cream.
- Espresso powder or cooled, strong coffee/espresso for coffee flavor.
- Citrus zest (lemon, orange).
- Spices like cinnamon or cardamom.
- A pinch of salt can enhance sweetness and overall flavor.
Add flavorings while whipping once the cream is visibly thickening. Taste and adjust as you go.
Dairy-Free Whipped Cream Recipes and Uses
Now that you know how to select, prepare, and whip dairyfree heavy cream substitutes, let's explore some delicious ways to use them! From a simple classic recipe to exciting variations, dairy-free whipped cream can elevate countless desserts and beverages.
Basic Dairy-Free Whipped Cream Recipe
This recipe is adaptable for chilled coconut cream (solid part only), chilled liquid soy cream alternative, or chilled liquid oat cream alternative formulated for whipping.
Yields: Approx. 2-3 cups Prep time: 5 minutes (plus chilling) Whipping time: 3-10 minutes
Ingredients:
- 1 can (13.5-15 oz) full-fat coconut milk/cream, well-chilled for 24-48 hours (OR 1.5 cups chilled liquid soy/oat whipping cream alternative)
- 2-4 tablespoons powdered sugar (or other sweetener to taste)
- 1 teaspoon pure vanilla extract
- Optional: 1/4 teaspoon cream of tartar or 1/8 teaspoon xanthan gum for stability
Equipment:
- Medium mixing bowl, chilled
- Whisk or electric mixer with whisk attachment/beaters, chilled
Instructions:
- If using coconut cream, open the chilled can carefully and scoop out the thick, solid cream from the top, leaving the liquid behind. Place the solid cream in the chilled mixing bowl. If using liquid soy/oat cream, pour the chilled liquid into the chilled bowl.
- Add the powdered sugar, vanilla extract, and optional stabilizer (if using) to the bowl.
- Begin whipping on low speed to combine ingredients. Increase speed to medium-high.
- Whip until the cream becomes thick and reaches your desired consistency (soft, medium, or stiff peaks). This can take 3-7 minutes with an electric mixer, longer by hand. Watch carefully to avoid over-whipping.
- Taste and adjust sweetness or flavorings if needed, whipping briefly to incorporate.
- Use immediately or store (see storage tips below).
Flavor Variations: Vanilla Bean, Chocolate Ganache, Espresso
Once you've mastered the basic dairyfree heavy cream substitutes recipe, you can easily create exciting flavor variations:
- Vanilla Bean: Add the seeds scraped from half a vanilla bean along with the vanilla extract. The tiny black specks add beautiful visual appeal and intense vanilla flavor.
- Chocolate Ganache Whipped Cream: Gently melt 1/2 cup dairy-free chocolate chips with 1/4 cup warm (not hot) dairy-free milk or reserved coconut liquid until smooth. Let cool completely to room temperature (or slightly cooler) and thicken slightly. Whip the basic dairy-free cream until soft peaks form, then gradually drizzle in the cooled chocolate ganache while continuing to whip until combined and thickened.
- Espresso Whipped Cream: Dissolve 1-2 teaspoons of instant espresso powder in 1 tablespoon of hot water, then let cool completely. Add the cooled espresso mixture and 1-2 tablespoons of extra powdered sugar (to balance the bitterness) to the cream once it starts to thicken, whipping until combined and desired peaks are reached.
These variations work well with most dairyfree heavy cream substitutes, though the base flavor of coconut cream will influence the final taste.
Incorporating Dairy-Free Whipped Cream: Pies, Cakes, Beverages
Dairy-free whipped cream is incredibly versatile and can be used anywhere you'd use traditional whipped cream:
- Pies: Top fruit pies, chocolate pies, or pumpkin pies. A stable coconut or well-stabilized alternative works best for piping decorative swirls.
- Cakes and Cupcakes: Use as a light frosting or filling, or pipe dollops on top.
- Hot Beverages: Dollop onto hot chocolate, coffee, or lattes. Cashew or oat cream's neutral flavor is often preferred here.
- Cold Beverages: Blend into milkshakes or smoothies, or top iced coffees.
- Fresh Fruit: A simple bowl of berries with dairy-free whipped cream is a classic, light dessert.
- Waffles and Pancakes: A delicious alternative to syrup or butter.
- Mousses and Puddings: Fold gently into dairy-free mousse or pudding recipes to lighten them and add airiness.
The key is to consider the texture and stability needed for the application. For piping or lasting structure, a firmer, more stable dairyfree heavy cream substitute (like well-chilled coconut cream or a stabilized alternative) is best. For simple dolloping or folding, softer peaks from cashew or soy cream might be perfectly adequate.
Tips for Extending the Life of Dairy-Free Whipped Cream
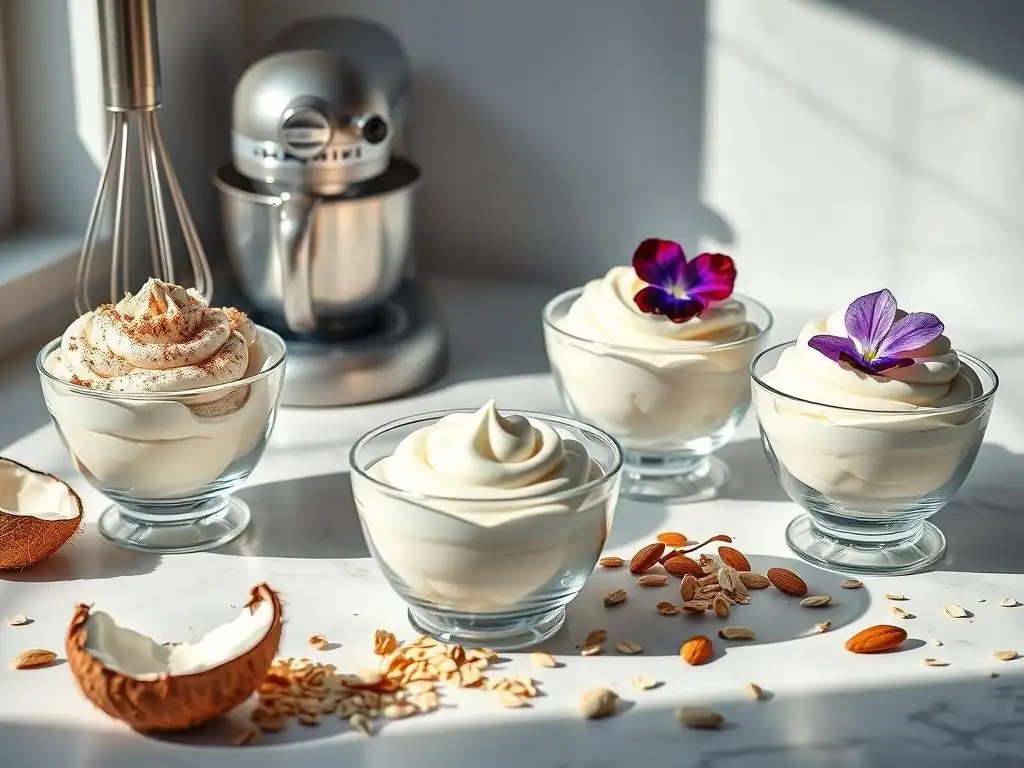
Unlike dairy whipped cream, which can hold its shape for a while, some dairyfree heavy cream substitutes can be prone to deflating or weeping (releasing liquid) over time, especially in warmer conditions. If you need your whipped cream to hold up for more than an hour or two, particularly for decorating or desserts that will sit out, using stabilization techniques and proper storage is essential.
Stabilizing Techniques for Longevity
Adding a stabilizer significantly improves the structure and shelf-life of dairy-free whipped cream. Here are common methods:
- Powdered Sugar: As mentioned, powdered sugar contains cornstarch, which acts as a mild stabilizer. Using it instead of granulated sugar offers a small boost in stability.
- Cornstarch or Arrowroot Powder Slurry: For more significant stabilization, dissolve 1-2 teaspoons of cornstarch or arrowroot powder in 2 tablespoons of the cold liquid cream alternative. Heat this mixture gently in a small saucepan, stirring constantly, until it thickens into a paste-like consistency. Let it cool completely (this is crucial!) before whisking it into the main batch of cold cream alternative before you start whipping.
- Cream of Tartar: Adding 1/4 teaspoon of cream of tartar per cup of cream alternative before whipping can help stabilize the protein structure and improve peak formation, especially with soy or cashew creams.
- Xanthan Gum: A powerful gum that provides significant stability even in tiny amounts. Use very sparingly, typically 1/8 to 1/4 teaspoon per cup of cream alternative. Too much can result in a gummy or slimy texture. Whisk it into the powdered sugar before adding to the cream to help disperse it evenly and prevent clumps.
- Commercial Vegan Stabilizers: Products like "Whip It" or similar vegan whipping aids are specifically designed to help plant-based creams hold their shape. Follow the package directions. These often contain modified starches or gums.
Choose the stabilization method based on the cream type and desired firmness. Coconut cream often needs less stabilization than cashew, soy, or oat creams if it's high in fat and well-chilled.
Proper Storage Methods
Once whipped, dairy-free whipped cream is best stored in an airtight container in the refrigerator. Exposure to air can cause it to dry out or absorb odors. While it's generally best used within 24-48 hours for optimal texture, it can often be kept for up to 3-4 days, though it may lose some volume and might require a gentle whisking by hand to refresh before serving.
Do not store dairy-free whipped cream at room temperature for extended periods, as it will quickly lose its structure and potentially spoil. If using it for decorating a dessert that will be served later, keep the entire dessert refrigerated until just before serving. Freezing whipped dairy-free cream is possible, but the texture can change upon thawing, often becoming less airy and potentially grainy or watery.
It's usually better to whip it fresh when needed. If you do freeze it, it's best used in applications where texture is less critical, like stirring into hot beverages or incorporating into a frozen dessert base.
Conclusion: Enjoying Delicious and Stable Dairy-Free Whipped Cream
Mastering dairy-free heavy cream substitutes for whipping opens up a world of delicious possibilities for those following dairy-free or plant-based diets. While they require a bit more attention to temperature, technique, and sometimes stabilization compared to their dairy counterparts, the results are incredibly rewarding. From the rich decadence of coconut cream to the smooth neutrality of cashew cream and the convenience of soy and oat alternatives, there's a dairyfree heavy cream substitute perfect for almost every dessert and occasion.
By understanding the unique properties of each option, ensuring your ingredients and equipment are properly chilled, and employing the right whipping techniques, you can confidently create stable, flavorful whipped toppings. Don't be afraid to experiment with different brands and stabilizers to find what works best for you. With the tips and guidance provided here, you're well on your way to enjoying delightful, homemade dairy-free whipped cream that rivals the traditional version in taste and texture. Happy baking and whipping!
Frequently Asked Questions
How do I choose the right dairy-free heavy cream substitute for whipping?
When selecting a substitute, look for options with a high fat content, such as coconut cream or cashew cream. Ensure the product is chilled thoroughly before whipping for best results.
What are some common pitfalls when whipping dairy-free heavy cream alternatives?
Over-whipping is a common issue, leading to a grainy texture. Also, not chilling the substitute enough can prevent it from whipping properly and holding its shape.
Can I sweeten dairy-free heavy cream alternatives?
Yes, you can sweeten them! Use powdered sugar or liquid sweeteners like maple syrup to avoid adding unwanted texture or graininess to the whipped cream.
How long will whipped dairy-free heavy cream last?
Whipped dairy-free heavy cream typically lasts for 1-2 days in the refrigerator. It's best to use it as soon as possible for optimal texture and flavor.
What dishes can I use whipped dairy-free heavy cream in?
You can use it as a topping for desserts like pies, cakes, and fruit. It's also great in coffee, hot chocolate, or as a dairy-free alternative in recipes that call for whipped cream.
Final Reflection: Mastering the Art of Dairy-Free Whipping
The quest for the perfect dairy-free whipped topping is far from over, but the journey itself has revealed a surprising amount about culinary innovation and the power of plant-based alternatives. We've explored the nuances of different plant-based milks, the impact of stabilizers, and the crucial role of chilling in achieving that coveted fluffy texture. This isn't just about finding a substitute; it's about understanding the science behind a classic culinary technique and adapting it to a new, increasingly important, dietary landscape.
The pursuit of dairy-free alternatives reflects a broader cultural shift towards inclusivity and mindful consumption. We're not simply replacing dairy; we're expanding our culinary horizons and embracing a wider range of ingredients and techniques. This exploration has personally highlighted the creativity and resourcefulness of home cooks and chefs alike, constantly pushing boundaries to create delicious and accessible food for everyone. The best way to find yourself is to lose yourself in the service of others.
- Mahatma Gandhi. This quote resonates deeply, as the drive to create delicious dairy-free options is ultimately about serving a growing community with dietary needs.
Now, it's your turn. Don't be intimidated by the seemingly complex world of dairy-free whipping. Experiment! Try different plant-based milks, explore various stabilizers, and most importantly, don't be afraid to fail. Each attempt brings you closer to mastering the art of creating light, airy, and delicious dairy-free whipped cream. Embrace the challenge, celebrate your successes, and share your discoveries with others. The world of plant-based cuisine is waiting for your unique contribution.
Unlock the Secrets to Dairy-Free Whipping Success!
Thanks for taking the time to explore the world of dairy-free whipping! You've just learned how to achieve creamy perfection without dairy, opening up a whole new world of baking possibilities. Ready to put your new skills to the test?
- Whip up your first dairy-free masterpiece: Choose your favorite recipe (from our site, of course! ), and try substituting the dairy cream with your newfound knowledge. We're confident you’ll be amazed!
- Share your creations: Show off your dairy-free whipped delights on social media and tag us – we'd love to see what you bake!
- Challenge yourself: Experiment with different dairy-free cream alternatives – which one becomes your new favorite?
What unexpected flavor combination will you create with your perfectly whipped dairy-free cream?