
Troubleshooting White Bread: Why Your Loaf Isn't Perfect (Yet!)

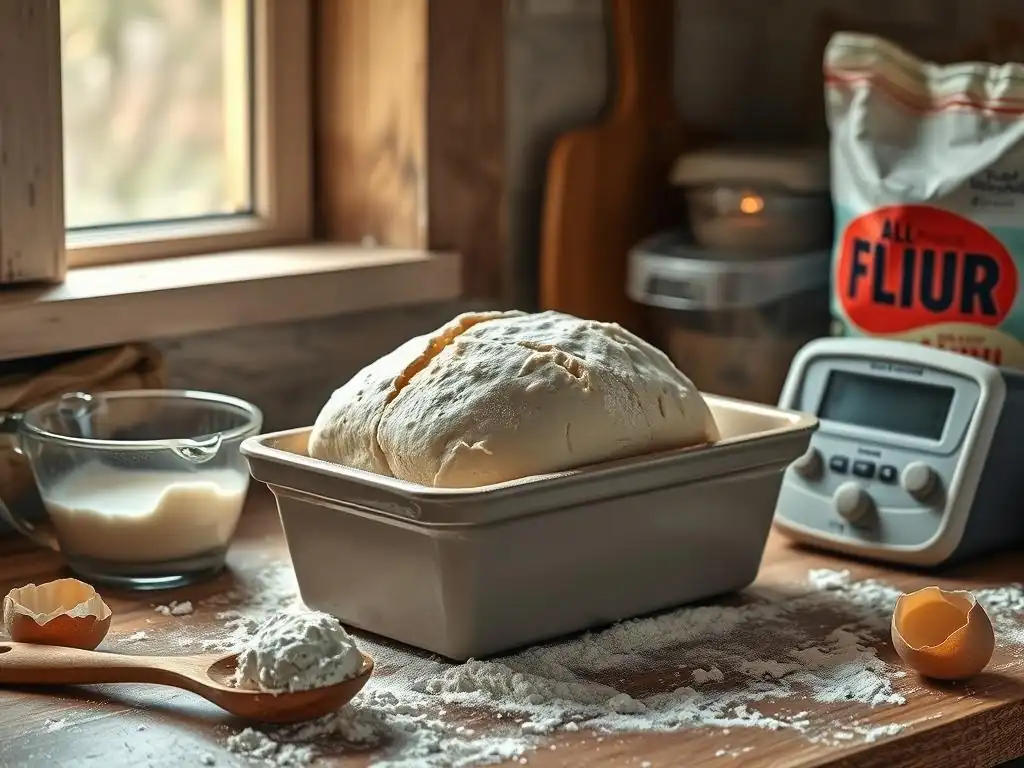
Welcome to BakeWithEase, your haven for all things baking! Ever wondered why your white bread isn't rising the way it should? You're not alone! Uncover the secrets to achieving that perfect, airy loaf with our expert troubleshooting guide. Let's dive into the science and solutions, turning your baking frustrations into delicious triumphs. Get ready to elevate your bread baking game!
- Troubleshooting Homemade Bread: Achieving Baking Perfection
- Introduction: Achieving Baking Perfection with Bread
- Understanding the Fundamentals of Bread Baking
- Common Problems When Baking Bread: Identifying the Issues
-
Diagnosing Why Your Bread is Not Rising: Possible Causes
- Inactive or Expired Yeast: Testing and Troubleshooting
- Incorrect Water Temperature: Impact on Yeast Activity
- Insufficient Kneading: Gluten Development Issues
- Improper Proofing Environment: Temperature and Humidity Control
- Over-Proofing: Recognizing and Preventing Collapse
- Incorrect Flour to Water Ratio: Dough Consistency Issues
-
Solutions and Troubleshooting for Bread Baking Issues
- Revitalizing Inactive Yeast: Techniques and Alternatives
- Achieving the Ideal Dough Temperature for Yeast Activation
- Mastering the Art of Kneading: Techniques and Tips
- Creating the Perfect Proofing Environment: A Step-by-Step Guide
- Preventing Over-Proofing: Visual Cues and Timing
- Adjusting Flour and Water for Optimal Dough Consistency
- Advanced Techniques for Baking the Perfect Bread
- Bread Troubleshooting Checklist: A Quick Reference Guide
- Conclusion: Mastering Bread Baking with Practice and Patience
- Frequently Asked Questions
- Final Reflection: The Humble Rise of the Perfect Loaf
- Unleash Your Inner Baker: Perfect White Bread Awaits!
Troubleshooting Homemade Bread: Achieving Baking Perfection
Introduction: Achieving Baking Perfection with Bread
Welcome to the rewarding world of homemade bread! There's little quite as satisfying as pulling a warm, fragrant loaf from your oven. However, the journey to baking perfection can sometimes have its bumps, and encountering issues like your white bread not rising as expected is a common hurdle for many bakers, whether you're just starting out or have a few loaves under your belt. Don't worry – these challenges are simply part of the learning process!
This guide is designed to help you troubleshoot the most frequent problems encountered when baking bread, with a special focus on diagnosing why your white loaf might not be achieving that beautiful, airy rise you're aiming for. We'll break down the science behind successful bread baking, explore common pitfalls, and provide practical solutions based on real baking principles. By understanding the fundamentals and learning to identify the signs your dough is giving you, you'll be well on your way to consistently baking perfect, well-risen loaves. Let's get started on perfecting your homemade bread!
Understanding the Fundamentals of Bread Baking
Essential Ingredients for a Perfect Loaf
At its core, a perfect loaf of bread relies on just four fundamental ingredients: flour, water, yeast, and salt. Each plays a critical and distinct role in the transformation from simple components to a complex, risen structure. Flour provides the structure, primarily through its protein content which forms gluten. For classic white bread, all-purpose or bread flour is typically used; bread flour, with its higher protein content (often 12-14% compared to all-purpose at 10-12%), is generally preferred for its ability to develop strong gluten networks, which are essential for trapping the gases that make bread rise.
Water is the medium that activates the yeast and allows gluten development to occur. The amount and temperature of water are crucial. Too little water results in a dry, dense dough, while too much can make the dough difficult to handle and potentially compromise structure. Salt, while often underestimated, is vital for flavor, controlling yeast activity (slowing it down slightly for a more controlled rise), and strengthening the gluten structure. Using too much or too little salt can impact both the taste and the texture of your finished loaf.
The Role of Gluten Development in Bread
Gluten is a protein network formed when two proteins found in wheat flour, gliadin and glutenin, combine in the presence of water and are worked through kneading. Think of gluten as the elastic framework of your bread dough. As you knead, these proteins link together, creating stretchy strands that can trap the carbon dioxide gas produced by the yeast during fermentation. This trapped gas is what causes the dough to expand and rise.
Sufficient gluten development is non-negotiable for a well-risen loaf. Dough that hasn't been kneaded enough will lack the strength and elasticity to hold the gas, resulting in a dense, flat loaf – a common reason why white bread is not rising properly. The goal of kneading is to develop this network to a point where the dough is smooth, elastic, and passes the "windowpane test," meaning you can stretch a small piece thin enough to see light through it without it tearing.
Importance of Yeast Activation and Proofing
Yeast is the living organism responsible for leavening your bread. When activated by warm liquid and fed by sugars (naturally present in flour or added), yeast undergoes fermentation. This process consumes sugars and produces carbon dioxide gas and alcohol, both of which contribute to the bread's rise and flavor development. Using yeast that is alive and active is the first step towards a successful rise.
Proofing, also known as fermentation, is the period(s) during which the yeast works its magic, causing the dough to rise. There's usually a first rise (bulk fermentation) after kneading and a second rise (proofing) after shaping. These periods allow the gluten structure to stretch and trap gas, increasing the dough's volume significantly. Proper proofing, at the right temperature and for the correct duration, is essential for achieving a light, airy texture. Insufficient proofing means the dough hasn't expanded enough, while over-proofing can lead to collapse or a poor rise in the oven.
Common Problems When Baking Bread: Identifying the Issues
Bread Not Rising: The Primary Culprit
One of the most frustrating issues for any home baker is finding their white bread not rising or rising very little. This is perhaps the most common sign that something went wrong during the initial stages of the baking process. A loaf that fails to rise properly will inevitably be dense, heavy, and lack the appealing texture characteristic of good homemade bread. Identifying the root cause is crucial, as several factors, often related to the yeast or dough development, can contribute to this problem.
When your white bread fails to achieve significant volume, it often points back to a fundamental issue with the leavening process. This could mean the yeast wasn't active, the environment wasn't suitable for yeast activity, or the dough structure wasn't strong enough to support the rise. Understanding the potential culprits behind a flat loaf allows you to systematically troubleshoot and refine your technique for future baking attempts, turning a frustrating experience into a valuable learning opportunity.
Dense and Heavy Bread Texture
A dense and heavy texture is a direct consequence of insufficient leavening or poor gluten development. If your bread feels like a brick rather than having a light, airy crumb, it's likely that the dough didn't rise enough during proofing or didn't get adequate oven spring (the final burst of rising in the hot oven). This lack of expansion leaves the internal structure compressed, resulting in a tight, unappealing crumb.
Common causes for this dense texture include using inactive yeast, insufficient kneading to develop gluten, incorrect flour-to-water ratios leading to a stiff dough, or proofing the dough in an environment that was too cold. For example, a dough made with too much flour relative to water will be very stiff, making it hard for the yeast to produce enough gas to lift it, leading to a dense final product.
Similarly, if your proofing area is significantly below the ideal 75-85°F (24-30°C), the yeast activity will be sluggish, and the dough won't double in size as needed, resulting in a heavy loaf.
Bread Crumbly and Dry
Bread that is crumbly and dry often indicates issues with hydration or baking time/temperature. If your loaf falls apart easily when sliced and feels dry in your mouth, it usually means there wasn't enough moisture in the dough to begin with, or too much moisture was lost during baking. This can happen if you accidentally added too much flour during mixing or kneading, or if the humidity in your kitchen was particularly low, causing the flour to absorb less liquid initially.
Over-baking is another significant contributor to a dry crumb. Baking the bread for too long or at too high a temperature can evaporate excessive moisture from the interior of the loaf. While a crispy crust is desirable, the inside should remain moist and tender. Using a thermometer to check the internal temperature (typically 200-210°F or 93-99°C for white bread) is a reliable way to ensure it's baked through without drying out.
Bread Collapsing After Baking
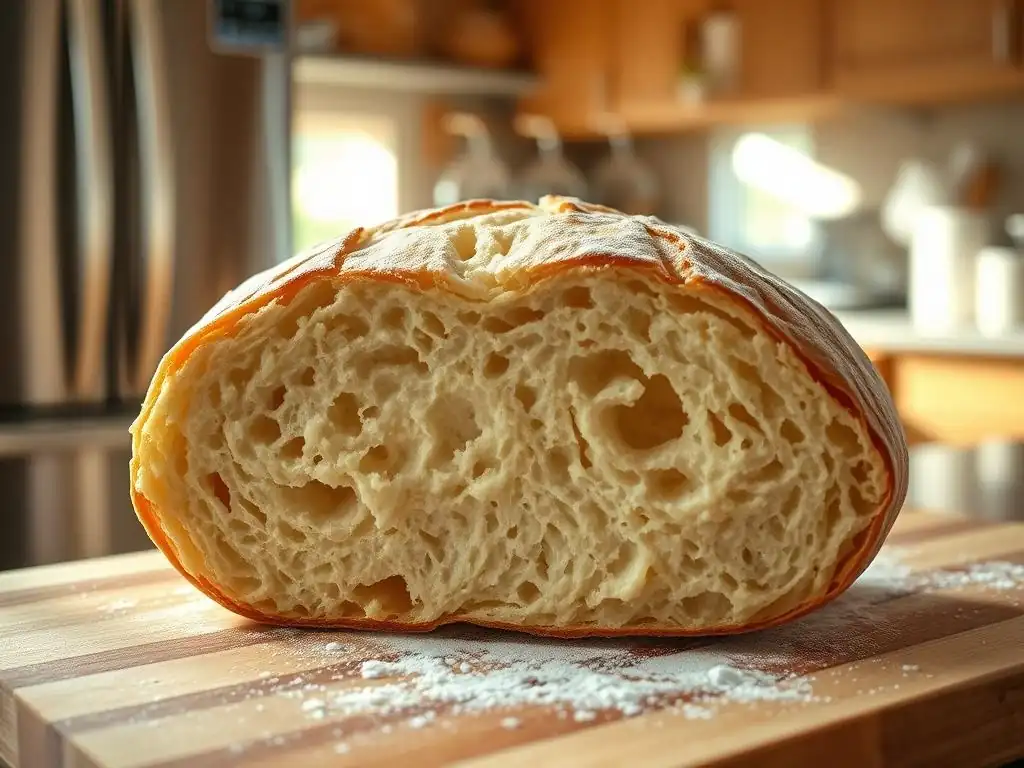
Witnessing your beautifully risen loaf deflate either during baking or shortly after being removed from the oven is disheartening. This collapse is typically a sign of over-proofing or under-baking. Over-proofing occurs when the dough has risen for too long; the yeast consumes all available sugars, and the gluten structure becomes overly stretched and weakened, unable to support the accumulated gas when subjected to oven heat or cooling.
Under-baking means the internal structure hasn't set properly. The starches haven't gelatinized fully, and the gluten hasn't become firm enough to hold the loaf's shape. When removed from the oven, the steam inside condenses, and the weak structure cannot bear the weight, leading to collapse. Ensuring your oven is accurately calibrated and using an internal thermometer are key steps to prevent under-baking.
Uneven Baking and Crust Formation in Bread
Uneven baking, resulting in some parts of the loaf being darker or drier than others, or a crust that is too thick, thin, or inconsistent, can be frustrating. This is often related to oven performance or dough handling. Hot spots in your oven, where the temperature is significantly higher in one area, can cause parts of the bread to brown much faster than others. Rotating the loaf halfway through baking can help mitigate this.
Improper shaping or placing the dough too close to a heat source can also lead to uneven crust formation. For instance, if one side of the loaf is touching the oven wall, it will likely burn.
A lack of steam in the oven during the initial phase of baking can result in a thick, tough crust because the surface dries out too quickly, preventing maximum oven spring. Techniques like using a baking stone or steel with a water pan, or baking in a Dutch oven, are often employed to create a steamy environment that promotes a thinner, crispier crust and better overall rise and color.
Diagnosing Why Your Bread is Not Rising: Possible Causes
Inactive or Expired Yeast: Testing and Troubleshooting
One of the most frequent reasons your white bread is not rising is inactive or dead yeast. Yeast is a living organism, and like all living things, it has a shelf life and specific environmental needs. If your yeast is old, has been stored improperly (e.g., exposed to heat or air), or is past its expiration date, it may no longer be viable enough to produce the necessary carbon dioxide gas for leavening.
A packet of active dry yeast typically has a shelf life of around 1-2 years when stored properly in a cool, dry place, but once opened, it's best used within 4-6 months if refrigerated. Instant yeast lasts longer once opened, often 6-12 months refrigerated or even longer frozen.
To test if your yeast is active, perform a simple proofing test. In a small bowl, combine 1 teaspoon of sugar with 1/4 cup of warm water (around 105-115°F or 40-46°C, which is warm to the touch but not hot). Sprinkle 2 1/4 teaspoons (one standard packet) of active dry yeast over the water and sugar. Do not stir initially.
Let it sit for 5-10 minutes. If the yeast is active, it will dissolve, and a foamy layer will develop on the surface, indicating that the yeast is feeding on the sugar and producing gas. If nothing happens or you only see a few bubbles, your yeast is likely dead or inactive, and you'll need to purchase fresh yeast.
Incorrect Water Temperature: Impact on Yeast Activity
The temperature of the liquid you use to activate the yeast or mix the dough is critically important for yeast activity. Yeast thrives in warm, but not hot, conditions. If the water is too cold (below 75°F or 24°C), the yeast will be sluggish and fermentation will proceed very slowly, resulting in a significantly reduced rise or your white bread not rising at all within the expected timeframe.
Conversely, if the water is too hot, you risk killing the yeast. Temperatures above 120°F (49°C) can start to damage yeast cells, and temperatures above 140°F (60°C) will kill them instantly. For active dry yeast, which usually requires proofing in liquid before mixing with flour, the ideal water temperature is typically between 105-115°F (40-46°C).
For instant yeast, which can often be mixed directly with the dry ingredients, the water can be slightly warmer, around 120-130°F (49-54°C), as the flour provides some insulation. Using a kitchen thermometer to check your water temperature takes the guesswork out and is a crucial step in ensuring proper yeast activation.
Insufficient Kneading: Gluten Development Issues
Even with active yeast, your white bread might not rise well if the gluten hasn't been properly developed through kneading. As discussed earlier, the gluten network is the framework that traps the gases produced by the yeast. If this network is weak or underdeveloped, it simply cannot hold onto the carbon dioxide, and the dough will not expand effectively during proofing or baking. Insufficient kneading is a common issue, especially for beginner bakers who may be hesitant to handle sticky dough or are unsure how long to knead.
The goal of kneading is to transform a shaggy, sticky mass into a smooth, elastic, and cohesive dough. Whether kneading by hand or with a stand mixer, it requires mechanical action to align the gluten proteins and build strength. Kneading times vary depending on the method and hydration level, but typically range from 10-15 minutes by hand or 6-8 minutes in a stand mixer on medium speed. A well-kneaded dough will be smooth, pliable, and pass the windowpane test. If your dough tears easily when stretched thinly, it needs more kneading.
Improper Proofing Environment: Temperature and Humidity Control
Yeast activity is highly dependent on temperature. An improper proofing environment is a frequent cause of white bread not rising adequately. Yeast is most active in a warm, draft-free environment, ideally between 75-85°F (24-30°C). If your kitchen is cold, especially during winter months, the yeast will work much slower, leading to a significantly longer rise time or a poor rise overall. Conversely, a very hot environment can cause the dough to rise too quickly, potentially leading to over-proofing.
Humidity also plays a role during proofing. If the dough's surface dries out, it forms a skin that restricts expansion. This can prevent the dough from achieving its full volume. Covering your dough loosely with plastic wrap, a damp cloth, or placing it in a lightly oiled bowl in a humid environment (like a turned-off oven with a pan of hot water) helps maintain the necessary moisture level around the dough, allowing for an even and unrestricted rise.
Over-Proofing: Recognizing and Preventing Collapse
While under-proofing leads to a dense loaf because the dough hasn't risen enough, over-proofing can also cause problems, sometimes resulting in a loaf that rises dramatically and then collapses, either in the proofing stage or in the oven. Over-proofing happens when the dough has fermented for too long or in too warm an environment. The yeast consumes most of the available sugars, and the gluten structure, initially strengthened by kneading, becomes overstretched and weakened by the excessive gas production.
An over-proofed dough may look very large and airy, but it often feels fragile and may deflate slightly when touched. A simple test is the "poke test": gently press your finger into the dough about half an inch deep. If the indentation springs back immediately, the dough is likely under-proofed.
If it springs back slowly, leaving a small indentation, it's perfectly proofed. If the indentation remains completely or the dough deflates, it is likely over-proofed. Baking over-proofed dough can result in a loaf that collapses in the oven because the weakened structure cannot withstand the heat and steam, or it may have a poor texture and flavor due to excessive fermentation.
Incorrect Flour to Water Ratio: Dough Consistency Issues
The ratio of flour to water, often referred to as hydration, significantly impacts dough consistency and, consequently, how well your white bread rises. Each recipe specifies a certain amount of liquid, but factors like the type of flour used, humidity, and even how accurately you measure can affect the final dough consistency. Using too much flour relative to the water results in a very stiff, dry dough. This type of dough is difficult to knead, and the dense structure makes it hard for the yeast to expand it effectively, leading to a poor rise and a dense final loaf.
Conversely, a dough with too much water will be very wet and sticky. While high hydration doughs can produce loaves with wonderful open crumbs, they require more advanced handling techniques and very strong gluten development to maintain structure.
For a standard white bread recipe, the dough should be slightly sticky but manageable after kneading – it should pull away from the sides of the bowl but still stick to the bottom slightly if using a mixer, or be tacky but not glued to your hands if kneading manually. Adjusting the flour or water slightly during the initial mixing or kneading phase based on the feel of the dough is a common practice to achieve the optimal consistency for a good rise.
Solutions and Troubleshooting for Bread Baking Issues
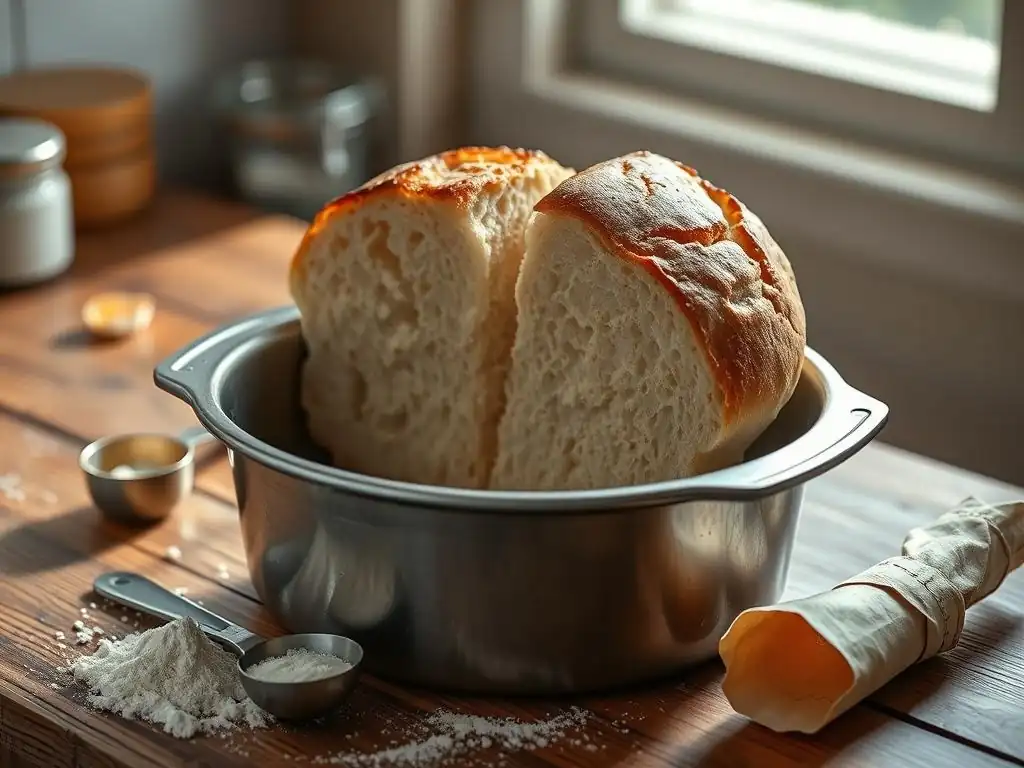
Revitalizing Inactive Yeast: Techniques and Alternatives
If your yeast test indicates inactivity, the most straightforward solution is to simply get fresh yeast. Purchase a new packet or jar and store it properly (sealed, in the refrigerator or freezer) to maintain its viability. Always check the expiration date before purchasing. Using fresh, active yeast is the single most important factor for a successful rise in your white bread.
If you find yourself mid-recipe with inactive yeast and no fresh supply, you might look for alternatives if possible, although this requires recipe adjustments. Sourdough starter is a natural leavening agent, but substituting it for commercial yeast requires significant changes to the recipe's timing and hydration. For a quick fix in a pinch, baking powder or baking soda can provide some leavening, but they work chemically rather than biologically and will produce a different texture and flavor profile, not the classic risen white bread crumb. The best practice is to always start with verified active yeast.
Achieving the Ideal Dough Temperature for Yeast Activation
Controlling dough temperature is key to managing yeast activity. Start by ensuring your liquid (water or milk) is within the recommended temperature range for your type of yeast – 105-115°F (40-46°C) for active dry yeast proofed separately, or 120-130°F (49-54°C) when mixed directly with flour for instant yeast. Using a digital thermometer is highly recommended for accuracy.
Consider the temperature of your other ingredients as well. Cold flour or cold kitchen temperatures can lower the overall dough temperature, slowing fermentation. Allowing ingredients to come to room temperature before starting can help. The friction generated during kneading also adds heat to the dough. If your dough feels cold after mixing and kneading, placing it in a slightly warmer proofing environment will be necessary to encourage the yeast. Aim for a final dough temperature around 75-80°F (24-27°C) after kneading for optimal yeast activity.
Mastering the Art of Kneading: Techniques and Tips
Proper kneading develops the gluten structure necessary for your white bread to rise. If kneading by hand, use techniques like the stretch-and-fold method: grab the far edge of the dough, stretch it up and over towards you, press it down, rotate the bowl a quarter turn, and repeat. Continue this for 10-15 minutes until the dough is smooth and elastic. It will become less sticky over time.
Using a stand mixer with a dough hook is less labor-intensive. Knead on low to medium speed for 6-8 minutes, stopping occasionally to scrape down the sides. The dough should eventually pull away cleanly from the sides of the bowl and cling only slightly to the bottom.
Regardless of the method, perform the windowpane test: pinch off a small piece of dough, gently stretch it outwards. If you can stretch it thinly enough to see light through the center without it tearing, the gluten is well-developed. If it tears easily, continue kneading for a few more minutes and test again.
Creating the Perfect Proofing Environment: A Step-by-Step Guide
A warm, draft-free environment is essential for proper proofing and ensuring your white bread rises. The ideal temperature range is 75-85°F (24-30°C). If your kitchen is cooler, here are a few ways to create a suitable spot:
- Turn off the oven light: Place the covered bowl of dough in your oven with just the light on. The light generates enough gentle heat to create a warm microclimate.
- Oven with hot water: Place the covered bowl of dough in your turned-off oven alongside a pan of boiling water on the rack below. Close the door. The steam and heat from the water will create a warm, humid environment.
- Microwave: Place the covered bowl of dough in your microwave (turned off) with a mug of hot water. Close the door.
- Proofing box: If you bake frequently, consider investing in a dedicated proofing box that offers precise temperature and humidity control.
Always cover the dough loosely with plastic wrap (greased to prevent sticking), a damp clean kitchen towel, or place it in a lidded container to prevent the surface from drying out and forming a skin, which would inhibit the rise.
Preventing Over-Proofing: Visual Cues and Timing
Preventing over-proofing is a matter of observation and sometimes timing. Don't rely solely on the time specified in a recipe, as actual proofing time is heavily influenced by dough temperature, ambient temperature, and yeast activity. Instead, pay close attention to the dough's volume and feel. For the first rise (bulk fermentation), the dough should typically double in size. For the second rise (proofing the shaped loaf), it usually needs to increase by about 50-80%, depending on the desired crumb structure.
Use the poke test as your primary guide. Gently press a finger into the dough; if the indentation springs back slowly, leaving a slight mark, it's ready to bake. If it springs back immediately, it needs more time.
If the indentation remains completely or the dough starts to deflate, it's over-proofed. If you suspect over-proofing, you can sometimes gently reshape the dough (which will knock out some gas) and give it a shorter second proof, but this is not always successful, especially if the gluten structure is already too weakened. It's often better to slightly under-proof than significantly over-proof, as the dough will get a final boost of rising in the hot oven (oven spring).
Adjusting Flour and Water for Optimal Dough Consistency
Accurate ingredient measurement is fundamental to controlling the flour-to-water ratio and achieving the correct dough consistency. Weighing your ingredients using a kitchen scale is far more accurate than using volume measurements (cups), as the amount of flour in a cup can vary significantly depending on how it's scooped. Aim for consistency by weighing, especially flour.
Even with weighing, you may need slight adjustments based on flour type or environmental humidity. During the initial mixing, if the dough seems too dry and shaggy, add water a tablespoon at a time until it just comes together.
If it's too wet and sticky, add flour a tablespoon at a time during the initial kneading phase until the dough reaches the desired consistency – tacky but not sticking excessively to your hands or the bowl. A properly hydrated dough is easier to knead, develops gluten better, and allows the yeast to work more efficiently, helping your white bread rise to its full potential.
Advanced Techniques for Baking the Perfect Bread
Autolyse: Enhancing Gluten Development
Autolyse is a simple yet powerful technique that can significantly improve gluten development and make kneading easier, leading to a better rise and crumb structure in your bread, including white loaves. The process involves mixing just the flour and water from the recipe and letting the mixture rest for a period, typically 20 to 60 minutes, before adding the yeast and salt and beginning to knead.
During this resting period, the flour absorbs the water more fully, and enzymes naturally present in the flour begin to break down proteins, facilitating the formation of gluten networks without any mechanical effort. This preliminary gluten development means you'll need less kneading time to achieve the desired elasticity and strength. The dough becomes smoother, more extensible, and easier to handle, ultimately contributing to a lighter texture and improved volume, addressing potential issues that might lead to white bread not rising as well.
Bulk Fermentation: Improving Flavor and Texture
Bulk fermentation, also known as the first rise, is the period after mixing and initial kneading where the entire mass of dough is allowed to ferment before being divided and shaped. This phase is crucial for more than just increasing volume; it's where significant flavor development occurs as yeast and other microorganisms (if present, like in sourdough) produce organic acids and alcohol.
During bulk fermentation, it's often beneficial to perform "folds" or "stretch-and-folds" every 30-60 minutes for the first portion of the rise. This involves gently stretching and folding the dough over itself multiple times within the bowl. These folds help to strengthen the gluten network, redistribute the yeast and gases, and equalize the dough temperature. Performing a few sets of folds during bulk fermentation builds tension and structure in the dough, which helps it hold its shape and rise better during the second proof and in the oven.
Shaping Techniques for a Uniform Loaf
Proper shaping is more than just making the dough look pretty; it's a critical step in creating surface tension and a uniform structure that supports a good rise and prevents your loaf from spreading outwards instead of upwards in the oven. Different shapes (like a boule or round loaf, a batard or oval loaf, or shaping for a loaf pan) require specific techniques to create a taut outer skin.
For a pan loaf, the goal is to create a cylinder shape that fits snugly in the pan, with a smooth top surface. This involves degassing the dough slightly, folding it into thirds, and then rolling it up tightly before placing it seam-side down in the greased pan.
For freeform loaves like boules or batards, techniques like folding the edges into the center and then using the surface of your work counter to create tension by pulling the dough towards you help to build a strong, smooth exterior. A well-shaped loaf holds its form during the second proof and achieves better oven spring.
Scoring the Loaf: Controlling Expansion and Preventing Cracking
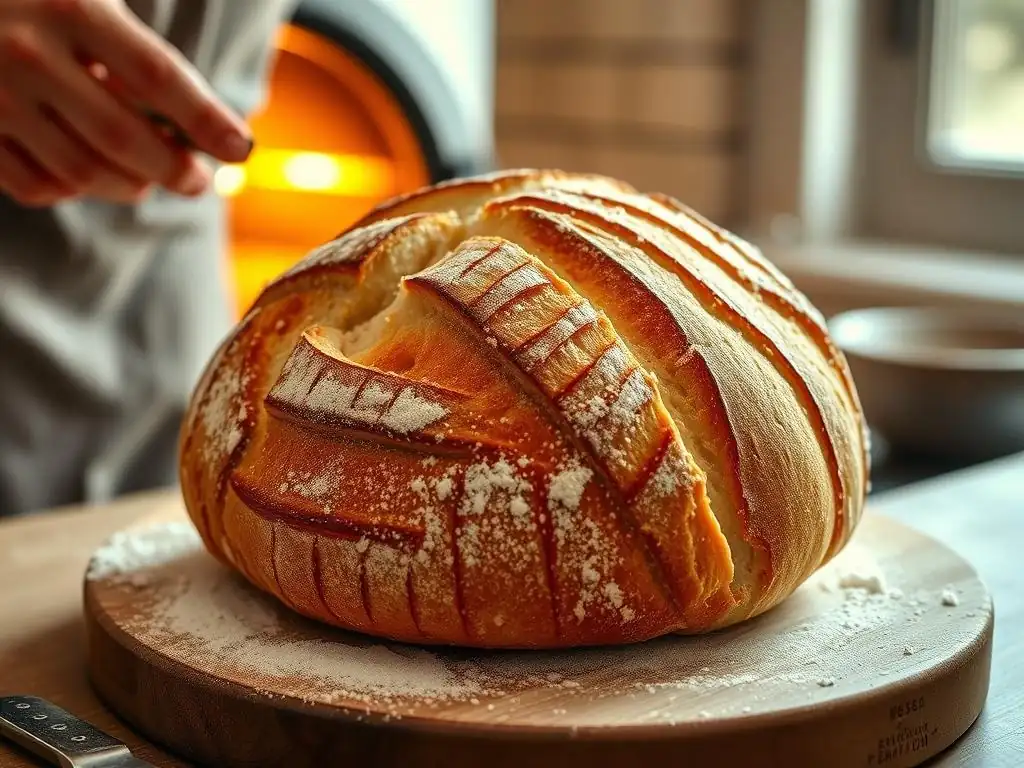
Scoring, or making intentional cuts on the surface of the shaped dough just before baking, serves several important purposes. Primarily, it allows the baker to control where the loaf expands during oven spring. As the dough rapidly expands in the hot oven, the cuts provide weak points in the crust where the dough can burst outwards, rather than cracking unpredictably elsewhere on the surface.
Scoring also affects the final appearance of the loaf and can contribute to the development of an 'ear' or a crispy flap of crust along the cut, which is often desired in artisanal breads. The depth and pattern of the scores influence the final shape and crumb structure. A deep, single score down the length of a batard will encourage it to open up significantly, while multiple shallow cuts can create a more decorative pattern. Using a sharp blade, like a baker's lame or a razor blade, is essential for clean cuts that open up properly during baking.
Baking with Steam: Creating a Crispy Crust
Achieving a beautiful, crispy crust while ensuring a soft interior is a hallmark of great bread, especially white bread. Steam in the oven during the initial phase of baking is key to this. When the dough is first placed in a hot oven, the surface quickly heats up and begins to form a crust. If the air is dry, this crust hardens prematurely, restricting the dough's ability to expand fully during oven spring.
Steam keeps the surface of the dough moist and pliable for the first 10-15 minutes of baking, allowing the loaf to achieve maximum expansion before the crust sets. Once the crust sets, the steam is no longer needed and can be vented. Methods for creating steam include placing a pan of hot water or ice cubes on the bottom rack of the oven, spraying the oven walls with water (use caution!
), or baking the bread in a Dutch oven or covered baker, which traps the moisture released by the dough itself. Using a baking stone or steel also helps by providing a burst of heat from below, contributing to good oven spring and crust development.
Bread Troubleshooting Checklist: A Quick Reference Guide
Here's a quick checklist to help you diagnose issues like your white bread not rising or other common problems during your next bake:
- [ ] Yeast Check: Did you verify your yeast is active using the proofing test? Was the water temperature correct?
- [ ] Ingredient Measurement: Did you weigh your flour and other ingredients for accuracy? Was the flour-to-water ratio appropriate for the recipe and flour type?
- [ ] Kneading: Was the dough kneaded sufficiently to develop a strong, elastic gluten network? Did it pass the windowpane test?
- [ ] Proofing Environment: Was the proofing environment warm and draft-free (ideally 75-85°F or 24-30°C)? Was the dough covered to prevent a dry skin from forming?
- [ ] Proofing Duration: Did you proof the dough for the correct amount of time based on visual cues and the poke test, not just the clock? Did you avoid over-proofing?
- [ ] Shaping: Was the dough shaped properly to create surface tension and a uniform loaf?
- [ ] Oven Temperature: Is your oven calibrated and reaching the correct temperature? Did you preheat it sufficiently?
- [ ] Baking Time/Internal Temp: Did you bake the loaf for the correct duration? Did you check the internal temperature (200-210°F or 93-99°C) to ensure it's fully baked?
- [ ] Steam (for crust): Did you use a method to create steam in the oven during the initial baking phase if a crispy crust is desired?
- [ ] Cooling: Did you let the bread cool completely on a wire rack before slicing?
Checklist: Yeast, Kneading, Proofing, Baking, Flour Type
Using this checklist can provide a systematic way to review your process whenever a loaf doesn't turn out as expected. Start at the beginning: confirm your yeast is active and your measurements are accurate. These are foundational steps.
Then, consider the dough development phases – kneading and proofing. Did you knead long enough? Was the proofing environment conducive to yeast activity? Finally, look at the baking stage itself – oven temperature, bake time, and steam. By methodically going through these points, you can often pinpoint the specific step where things went awry, whether it was insufficient proofing contributing to dense bread or inactive yeast causing your white bread not rising at all.
Conclusion: Mastering Bread Baking with Practice and Patience
Baking beautiful, well-risen bread is a skill that develops with practice and patience. Encountering issues like your white bread not rising is a normal part of the journey for every baker. Rather than feeling discouraged, view these moments as opportunities to learn and refine your technique. Each loaf, whether perfect or not, teaches you something valuable about the process, the ingredients, and how they interact.
By understanding the fundamental roles of yeast, gluten, and proper technique – from accurate measuring and sufficient kneading to creating the right proofing environment and baking correctly – you gain the knowledge to troubleshoot common problems effectively. Use the checklist as a guide, pay attention to the feel and look of your dough, and don't be afraid to experiment slightly with timing or technique based on your kitchen's unique conditions. With dedication and a willingness to learn from each bake, you will undoubtedly master the art of baking delicious, perfectly risen homemade bread. Happy baking!
Frequently Asked Questions
Why is my white bread not rising properly?
There are several reasons! It could be due to inactive yeast, incorrect temperature, or improper gluten development. Make sure your yeast is fresh and your dough is warm enough.
How do I know if my yeast is still active?
You can test your yeast by mixing it with warm water and sugar. If it foams or bubbles within 5-10 minutes, it's active. If not, you'll need to use fresh yeast.
What is the ideal temperature for my white bread dough to rise?
Ideally, you want a warm but not hot environment, around 75-80°F (24-27°C). Too cold, and the yeast will be sluggish. Too hot, and you risk killing the yeast.
Could my flour be the problem if my white bread isn't rising?
Yes, the type of flour matters. Use bread flour which has a higher protein content than all-purpose. This extra protein helps develop gluten, crucial for structure and rise.
How important is kneading for white bread that rises well?
Kneading is extremely important. It develops the gluten network necessary for trapping the gases produced by the yeast. Inadequate kneading leads to a dense, flat loaf.
Final Reflection: The Humble Rise of the Perfect Loaf
The quest for the perfect white bread loaf is more than just a culinary pursuit; it's a microcosm of patience, precision, and the rewarding triumph of mastering a fundamental skill. Many home bakers face the frustrating reality of a dough that refuses to rise, leaving behind a dense, disappointing result. This article explored the common pitfalls – from incorrect ingredient measurements to inconsistent temperatures – highlighting the crucial role each factor plays in achieving that airy, light texture we all crave.
The journey of baking, particularly with something as seemingly simple as white bread, mirrors life's own challenges. It teaches us the importance of attention to detail, the value of perseverance in the face of setbacks, and the profound satisfaction of witnessing something grow and flourish under our care. The best bread is made with love and patience.
– This anonymous quote perfectly encapsulates the essence of this baking endeavor, reminding us that the process itself is as valuable as the final product.
Now, consider your own "dough." What aspects of your life require the same meticulous attention to detail and unwavering patience that perfect bread demands? Perhaps it's a project at work, a personal goal, or even a relationship. Remember the lessons learned here – the importance of precise measurements, the impact of consistent effort, and the beauty of watching something rise to its full potential. Embrace the process, learn from the failures, and savor the sweet taste of success, whether it's a perfectly risen loaf or a personal triumph.
Unleash Your Inner Baker: Perfect White Bread Awaits!
Thanks for taking the time to explore the world of perfect white bread with us! We hope you gained valuable insights and discovered some helpful tips to improve your baking game. Now it's time to put your new knowledge into action!
- Bake your best loaf yet: Use the techniques we discussed to create the perfect white bread – and don't forget to take photos of your masterpiece!
- Share your success (or challenges!): Let's build a supportive community! Post your baking adventures on social media using #BakeWithEaseWhiteBread and tag us!
- Experiment with different flours or techniques: Try substituting a portion of the all-purpose flour with whole wheat or rye. Challenge yourself!
Ready to transform your bread baking? What unique ingredient or technique are you most excited to try next?