
Master 100% Whole Wheat Bread Baking with Ease


Welcome to BakeWithEase, your trusted guide to becoming a confident baker! Are you ready to unlock the secrets to creating delicious and healthy baked goods? Dive into our world of simple recipes and proven techniques, where even the most ambitious baking projects become achievable. Today, we're excited to share our easy whole wheat bread recipe – a surprisingly simple way to bake a loaf that's both wholesome and incredibly satisfying. Intrigued? Let's get started and discover how to bake perfect 100% whole wheat bread with ease!
- Introduction to Easy Whole Wheat Bread Baking
-
The Easy Whole Wheat Bread Recipe: Step-by-Step Guide
- Gathering Your Ingredients for 100% Whole Wheat Bread
- Mixing the Dough: Achieving the Right Consistency
- First Proofing: Allowing the Dough to Rise
- Shaping Your Whole Wheat Loaf
- Second Proofing: Preparing for the Oven
- Baking Your 100% Whole Wheat Bread to Perfection
- Cooling and Slicing Your Homemade Whole Wheat Bread
- Troubleshooting Common Whole Wheat Bread Baking Problems
- Variations and Additions to Your Easy Whole Wheat Bread Recipe
- Advanced Whole Wheat Bread Baking Techniques
- Enjoying Your Homemade 100% Whole Wheat Bread
- Conclusion: Bake With Ease and Enjoy Delicious, Healthy Bread
-
Frequently Asked Questions
- What makes this whole wheat bread recipe "easy"?
- Why choose whole wheat flour over white flour for bread baking?
- What are some common challenges when baking with whole wheat flour, and how does this recipe address them?
- Can I substitute any ingredients in this recipe?
- How do I know when my whole wheat bread is fully baked?
- Final Reflection: The Enduring Power of Simple, Whole Wheat Bread
- Unlock Your Inner Baker: Rise to the Challenge of Perfect Whole Wheat!
Introduction to Easy Whole Wheat Bread Baking
Baking your own bread can feel like a daunting task, especially when working with whole wheat flour, which behaves differently than refined white flour. However, mastering an easy whole wheat bread recipe is entirely achievable with the right guidance and a bit of practice. This guide is designed to demystify the process, offering simple, step-by-step instructions to help you create delicious, hearty loaves right in your own kitchen. Forget complicated techniques; we focus on making whole wheat baking accessible and enjoyable for everyone.
Embarking on your journey to bake whole wheat bread opens up a world of flavor and satisfaction. The aroma filling your home as a loaf bakes is unparalleled, and the taste of freshly baked bread is simply divine. Moreover, baking it yourself gives you complete control over the ingredients, ensuring you're using high-quality components for the healthiest possible result. Whether you're new to baking or looking to perfect your whole wheat technique, this easy whole wheat bread recipe is your starting point for consistent success.
Why Bake 100% Whole Wheat Bread? Health Benefits and Flavor
Choosing to bake with 100% whole wheat flour offers significant health advantages compared to using refined white flour. Whole wheat flour retains the bran, germ, and endosperm of the wheat kernel, which are rich in fiber, vitamins, and minerals. For instance, a standard slice of 100% whole wheat bread can contain roughly 2-3 grams of dietary fiber, while a similar slice of white bread might have less than 1 gram. This higher fiber content aids digestion, helps regulate blood sugar levels, and contributes to a feeling of fullness, which can support weight management.
Beyond the health benefits, whole wheat flour imparts a distinct, nutty, and robust flavor that many find more satisfying than white bread. The presence of the germ and bran adds layers of complexity to the taste profile. While some find 100% whole wheat bread dense, a well-executed easy whole wheat bread recipe can yield a loaf that is both flavorful and surprisingly light and tender. The natural sweetness and earthy notes of the whole grain truly shine, especially when paired with simple ingredients like butter or cheese.
BakeWithEase: Your Guide to Simple Bread Baking
At BakeWithEase, our mission is to make baking accessible and enjoyable for everyone, regardless of their experience level. We understand that diving into the world of bread, particularly whole wheat, can seem intimidating. That's why we break down complex processes into simple, manageable steps. Our easy whole wheat bread recipe is a prime example of this philosophy, designed to guide you smoothly from gathering ingredients to pulling a golden-brown loaf from your oven.
We believe that baking should be a source of joy, not stress. Our resources, including this detailed guide, are crafted to provide clear instructions, helpful tips, and troubleshooting advice to ensure your success. We focus on techniques that yield reliable results without requiring specialized equipment or advanced skills. Let BakeWithEase be your trusted companion in the kitchen as you master this easy whole wheat bread recipe and discover the immense satisfaction of baking your own delicious, healthy bread.
The Easy Whole Wheat Bread Recipe: Step-by-Step Guide
Baking a delicious 100% whole wheat loaf doesn't require years of experience. This easy whole wheat bread recipe simplifies the process, focusing on fundamental techniques that guarantee success. We'll walk through each stage, from selecting the right ingredients to achieving that perfect crust, ensuring you feel confident and capable throughout the baking journey.
Follow these steps carefully, and you'll soon be enjoying warm, homemade whole wheat bread. Remember, baking is also an art, so don't be afraid to learn from each batch and adjust slightly as you gain experience. This easy whole wheat bread recipe is designed to be forgiving and adaptable, making it ideal for beginners.
Gathering Your Ingredients for 100% Whole Wheat Bread
Success in baking starts with the right ingredients. For your easy whole wheat bread recipe, selecting quality components is crucial. You'll need 100% whole wheat flour, water, yeast, salt, and a touch of sweetener like molasses or honey. Having everything measured and ready before you begin mixing will make the process much smoother and help prevent mistakes.
Using fresh ingredients, especially yeast, is key to a successful rise. Check the expiration date on your yeast packet or jar. Storing yeast properly, usually in the refrigerator or freezer, helps prolong its potency. For best results with this easy whole wheat bread recipe, ensure your water is at the correct temperature range specified in the instructions, typically between 105°F and 115°F (40°C and 46°C) for active dry yeast.
Essential Whole Wheat Flour Characteristics for Best Results
Not all whole wheat flours are created equal, and understanding their characteristics is important for an easy whole wheat bread recipe. Look for flour labeled "100% whole wheat." Some flours are stone-ground, which can have a slightly coarser texture and retain more of the germ and bran, potentially absorbing more liquid. Others are roller-milled, resulting in a finer texture. Generally, an all-purpose whole wheat flour works well for beginners.
The protein content of the flour also matters for bread baking, as protein develops gluten, which gives bread its structure. Whole wheat flours typically have a protein content ranging from 13% to 16%. A higher protein content generally means stronger gluten development, leading to a loaf with better structure and rise. While you don't need to obsess over the exact percentage for an easy whole wheat bread recipe, choosing a reputable brand known for bread flour quality is a good starting point.
Other Key Ingredients: Yeast, Water, Salt, and Molasses
Yeast is the leavening agent that makes your bread rise. For this easy whole wheat bread recipe, we'll likely use active dry yeast or instant yeast. Active dry yeast needs to be proofed in warm water before mixing, while instant yeast can often be mixed directly with the dry ingredients. A typical recipe for a standard loaf might use around 2.25 teaspoons (or one packet) of yeast.
Water is essential for activating the yeast and developing gluten. The temperature is critical – too cold and the yeast won't activate; too hot and you'll kill it. As mentioned, 105-115°F (40-46°C) is ideal for active dry yeast. Salt is crucial for flavor and also helps control the yeast's activity and strengthens the gluten structure. Don't skip it! Finally, a small amount of molasses (or honey, maple syrup) adds a touch of sweetness, enhances the whole wheat flavor, and contributes to a beautiful crust color. About 1-2 tablespoons is usually sufficient for an easy whole wheat bread recipe.
Mixing the Dough: Achieving the Right Consistency
Mixing the dough is where the magic begins. The goal is to hydrate the flour, distribute the ingredients evenly, and start developing the gluten structure. Whole wheat dough can feel different from white dough – often a bit stickier or tackier due to the bran absorbing moisture differently. Don't be tempted to add too much extra flour right away; hydration is key for a tender loaf.
The ideal consistency for an easy whole wheat bread recipe dough is one that is shaggy but comes together, pulling away from the sides of the bowl (if using a mixer) or your hands (if mixing by hand). It should be slightly sticky to the touch but manageable. Over-mixing can result in a tough loaf, while under-mixing won't develop enough gluten for a good rise. Pay attention to how the dough feels and looks as you mix.
Hand Mixing vs. Stand Mixer: Which Method is Best for You?
Both hand mixing and using a stand mixer are effective ways to prepare the dough for your easy whole wheat bread recipe. Hand mixing is a great workout and allows you to truly feel the dough's development, which can be very intuitive. It typically involves mixing the ingredients in a bowl with a spoon or spatula until they form a shaggy mass, then turning it out onto a lightly floured surface to knead. Kneading by hand usually takes about 10-15 minutes to develop sufficient gluten.
Using a stand mixer with a dough hook attachment is faster and requires less physical effort. It's particularly helpful when working with larger batches or stickier doughs. For an easy whole wheat bread recipe, mixing in a stand mixer usually takes about 6-8 minutes on medium speed after the ingredients are combined. Watch the dough; it should gather around the hook and clean the sides of the bowl, though it may still stick slightly to the bottom.
Autolyse: The Secret to a Softer Whole Wheat Bread
Autolyse is a simple, optional technique that can significantly improve the texture of 100% whole wheat bread, making it softer and easier to handle. It involves mixing just the flour and water from your easy whole wheat bread recipe and letting it rest for 20-60 minutes before adding the yeast, salt, and other ingredients. During this rest period, the flour absorbs the water more fully, and enzymatic activity begins to break down proteins, starting gluten development without any kneading.
Implementing autolyse can lead to a dough that requires less kneading, is less sticky, and is more extensible (stretchy). For whole wheat flour, which can be challenging to hydrate fully, autolyse is particularly beneficial. It allows the bran to soften, reducing its tendency to cut the gluten strands during mixing and kneading. Try incorporating a 30-minute autolyse into your easy whole wheat bread recipe routine and notice the difference in dough texture and the final loaf.
First Proofing: Allowing the Dough to Rise
The first proof, also known as bulk fermentation, is a critical stage where the yeast produces carbon dioxide, causing the dough to rise and develop flavor. This step typically takes 1 to 2 hours for an easy whole wheat bread recipe, depending on the ambient temperature and the activity of your yeast. The dough should roughly double in size during this time.
Proper proofing allows the gluten structure to relax and expand, creating a light and airy crumb. Don't rush this stage. Under-proofed dough will result in a dense loaf, while over-proofed dough can collapse during baking. Learning to recognize when your dough is perfectly proofed is key to successful bread baking.
Understanding the Importance of Proper Proofing Time
Proper proofing time is essential for the texture and flavor of your easy whole wheat bread recipe. Yeast activity is influenced by temperature; warmer temperatures speed up proofing, while cooler temperatures slow it down. Aim for a room temperature around 70-75°F (21-24°C) for consistent results. Dough that proofs too quickly might not develop sufficient flavor, while slow proofing allows more complex flavors to emerge.
To check if your dough is ready after the first proof, perform the "poke test." Gently press a floured finger into the dough about half an inch deep. If the indentation slowly springs back only halfway, the dough is properly proofed. If it springs back immediately, it needs more time. If it stays indented completely, it might be slightly over-proofed, but you can usually still proceed.
Tips for Creating the Ideal Proofing Environment
Creating a warm, draft-free environment is crucial for successful proofing in your easy whole wheat bread recipe. A common method is to place the dough in a lightly oiled bowl, cover it with plastic wrap or a damp towel, and put it in a warm spot. Options include placing it in a turned-off oven with the light on (the light generates enough warmth), near a sunny window, or on top of a warm appliance like a refrigerator.
Alternatively, you can use a proofing box if you have one, or even create a makeshift one by placing the bowl in a larger container with a bowl of hot water next to it, then covering the larger container. The goal is a consistent, warm temperature. Avoid placing the dough in a spot that is too hot, as this can kill the yeast or cause the dough to rise too quickly without proper flavor development. Aim for that sweet spot around 75°F (24°C).
Shaping Your Whole Wheat Loaf
Shaping the dough after the first proof is important for giving your bread its final form and creating tension on the surface, which helps with oven spring (the final burst of rising in the oven). Whole wheat dough can be a bit less elastic than white dough, so handle it gently to avoid tearing the gluten network you've worked to develop.
For an easy whole wheat bread recipe, simple shaping techniques work best. The most common shapes are a boule (round loaf) or a batard (oval loaf). Before shaping, gently deflate the dough by turning it out onto a lightly floured surface and pressing out the air. This redistribution of gas helps create a finer crumb structure.
Techniques for Shaping a Perfect Loaf
To shape a boule for your easy whole wheat bread recipe, gently gather the edges of the dough towards the center, then flip it over and cup your hands around the dough, rotating it against the surface to create tension on the top. The surface should become smooth and taut. Aim for a tight skin on the outside; this tension helps the loaf hold its shape and encourages a good rise.
For a batard, gently flatten the dough into a rectangle. Fold the top third down to the center, then the bottom third up to overlap slightly. Press the seam to seal. Then, fold the dough in half lengthwise and seal the seam firmly. Roll the loaf back and forth slightly to create a uniform oval shape. Ensure all seams are sealed tightly underneath the loaf before placing it for the second proof.
Choosing the Right Baking Pan: Size and Material
The baking pan you choose for your easy whole wheat bread recipe will influence the shape and crust of your loaf. A standard 9x5 inch loaf pan is perfect for creating a sandwich-style loaf. Glass, ceramic, or metal pans all work, but metal pans often conduct heat more efficiently, leading to a darker crust. Dark metal pans can promote even darker crusts, so adjust baking time if necessary.
If you're baking a boule or batard without a loaf pan, you'll need a surface to bake on, like a baking sheet, pizza stone, or a Dutch oven. Baking in a preheated Dutch oven is an excellent method for 100% whole wheat bread as it traps steam, which helps the loaf achieve maximum oven spring and a beautiful, crackly crust. A 5 or 6-quart Dutch oven is typically sufficient for a single loaf.
Second Proofing: Preparing for the Oven
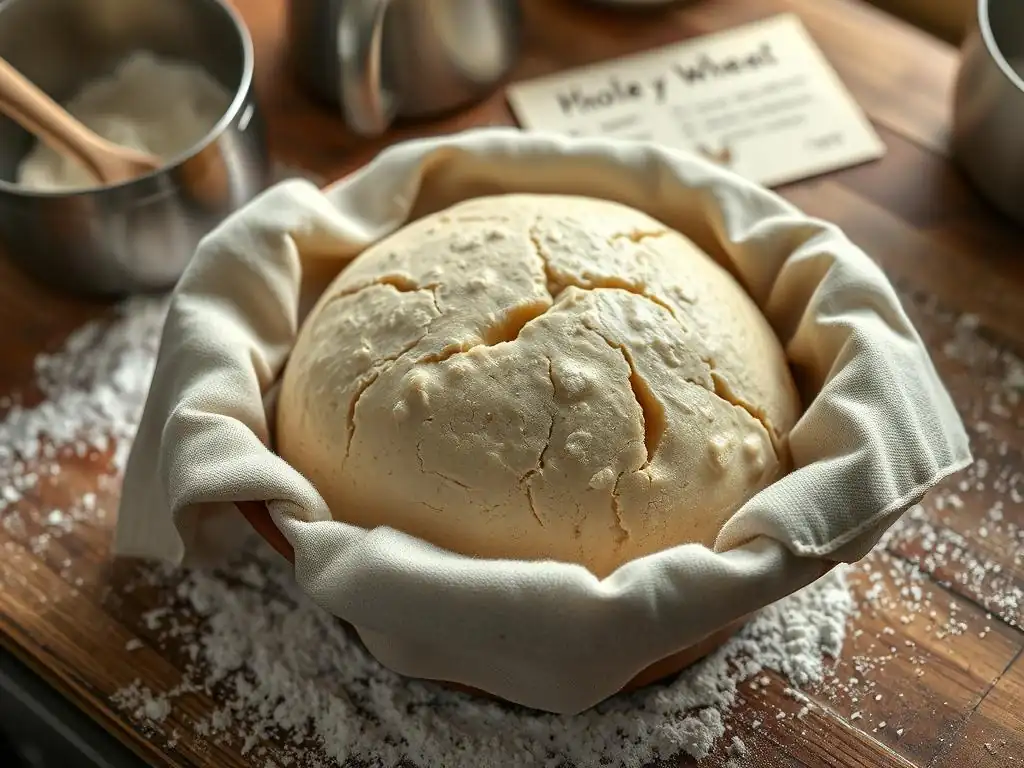
The second proof, or final proof, is the last rise before the dough goes into the oven. This stage allows the shaped loaf to regain some of the volume lost during shaping and prepares it for baking. The duration of the second proof is usually shorter than the first, typically 30-60 minutes for an easy whole wheat bread recipe, again depending on temperature.
During the second proof, the dough should increase significantly in size, though it may not quite double. It's important not to over-proof at this stage, as the loaf can lose its structure and collapse in the oven. Pay close attention to the visual cues and the poke test to determine readiness.
How to Tell When Your Dough is Ready to Bake
Knowing when your dough is perfectly proofed for baking is crucial for a successful easy whole wheat bread recipe. The dough should look visibly larger and feel light and airy. The poke test is the most reliable indicator: gently press a floured finger into the side of the loaf. If the indentation springs back very slowly and leaves a slight mark, your dough is ready.
If the indentation springs back quickly, the dough needs more time. If the indentation remains completely without springing back, the dough is likely over-proofed. While over-proofed dough can still be baked, it may not achieve significant oven spring and the texture might be slightly compromised. For best results with your easy whole wheat bread recipe, aim for that sweet spot where the indentation slowly rebounds.
Baking Your 100% Whole Wheat Bread to Perfection
Baking is the final transformation, turning your proofed dough into a fragrant loaf of bread. Proper oven temperature and baking time are essential for ensuring the bread is cooked through, has a good crust, and achieves maximum volume. Preheat your oven thoroughly before placing the bread inside.
Many easy whole wheat bread recipes call for baking at a relatively high temperature, around 400-450°F (200-230°C), at least initially. This high heat helps the loaf rise rapidly in the first few minutes (oven spring) and contributes to a well-developed crust. The total baking time for a standard 1.5 to 2-pound loaf is typically between 30 and 45 minutes.
Oven Temperature and Baking Time: A Detailed Guide
For a standard 9x5 inch loaf pan, starting your easy whole wheat bread recipe at 400°F (200°C) for the entire baking time usually works well. Bake for 30-40 minutes, or until the crust is deep golden brown and the internal temperature reaches 190-200°F (88-93°C). Using a probe thermometer is the most accurate way to check for doneness.
If baking a freeform loaf (boule or batard), especially in a Dutch oven, you might start at a higher temperature like 450°F (230°C) for the first 20 minutes with the lid on to trap steam, then remove the lid, reduce the temperature to 400°F (200°C), and bake for another 20-25 minutes until golden brown and the internal temperature is correct. This two-stage baking process helps achieve a fantastic crust and oven spring.
Achieving a Golden-Brown Crust: Steam and Other Techniques
A beautiful, golden-brown crust is a hallmark of well-baked bread. For 100% whole wheat bread, achieving this often requires managing moisture in the oven. Steam in the oven during the initial baking phase keeps the surface of the dough moist, allowing it to expand fully before the crust sets. This results in better oven spring and a thinner, crispier crust.
If you're not using a Dutch oven (which naturally creates steam), you can generate steam by placing a pan of hot water on the bottom rack of the oven when you preheat it. Alternatively, you can spray the inside walls of the oven with water just before loading the bread, or even place ice cubes in a hot pan on the bottom rack. Another technique for an easy whole wheat bread recipe is to lightly brush the top of the loaf with water or an egg wash before baking for added color and shine.
Cooling and Slicing Your Homemade Whole Wheat Bread
Once your easy whole wheat bread recipe loaf emerges from the oven, it will smell incredible, and the temptation to slice into it immediately will be strong. However, resting the bread is a crucial step for the best texture and flavor. As the bread cools, residual heat continues to cook the interior slightly, and moisture redistributes evenly throughout the loaf.
Slicing hot bread often results in a gummy or doughy texture inside. Allow your loaf to cool completely on a wire rack. For a standard-sized loaf, this typically takes at least 1.5 to 2 hours. A wire rack ensures air circulates around the entire loaf, preventing the bottom crust from becoming soggy.
The Importance of Cooling Before Slicing
Cooling your bread fully is vital for several reasons. First, the internal structure of the bread is still setting as it cools. Slicing too early can compress the crumb and ruin the texture you worked hard to achieve. Second, the flavors continue to develop and meld as the bread cools. The complex notes of the whole wheat flour become more pronounced.
Cutting into a hot loaf also allows steam to escape rapidly, resulting in a drier bread once it cools down. Patience during the cooling phase is rewarded with a loaf that has a better texture, better flavor, and stays fresh longer. For your easy whole wheat bread recipe, make sure it's cool to the touch before slicing.
Best Methods for Slicing and Storing Your Bread
Once your homemade whole wheat bread is completely cool, it's time to slice! A serrated bread knife is the best tool for the job, allowing you to cut through the crust and crumb cleanly without crushing the loaf. Use a gentle sawing motion rather than pressing down hard.
For storing your easy whole wheat bread recipe loaf, the best method depends on how quickly you plan to eat it. For consumption within 1-2 days, store the cooled loaf at room temperature in a paper bag or a cloth bread bag to keep the crust from getting soft. For longer storage, wrap the cooled loaf tightly in plastic wrap or aluminum foil, or place it in an airtight container.
For freezing, slice the cooled loaf first, then wrap the slices or half-loaves tightly before freezing for up to 3 months. Thaw at room temperature or toast directly from frozen.
Troubleshooting Common Whole Wheat Bread Baking Problems
Even with an easy whole wheat bread recipe, baking isn't always perfectly predictable. Understanding common issues and how to address them will help you improve with each loaf. Don't be discouraged by imperfect results; they are part of the learning process!
Here are some frequent problems encountered when baking 100% whole wheat bread and how to troubleshoot them. Most issues can be traced back to ingredient measurements, mixing, proofing, or baking temperature.
Dense and Heavy Bread: Identifying the Cause
A dense and heavy loaf is one of the most common frustrations when baking 100% whole wheat bread. Several factors can contribute to this. One primary cause is insufficient gluten development during mixing and kneading. Whole wheat flour has bran particles that can interfere with gluten formation, so adequate mixing time is crucial. Another key factor is under-proofing; if the dough doesn't rise enough before baking, it won't expand properly in the oven.
Other potential causes include using expired or inactive yeast, using water that is too cold or too hot, or adding too much flour during mixing or kneading, which results in a stiff dough that struggles to rise. Ensure your yeast is active by proofing it in warm water with a pinch of sugar before adding it to the dry ingredients if using active dry yeast. Pay close attention to the dough's texture and the poke test during proofing stages for your easy whole wheat bread recipe.
Dry and Crumbly Bread: Solutions for a Moist Loaf
Dry and crumbly whole wheat bread often results from insufficient hydration or over-baking. Whole wheat flour absorbs more liquid than white flour due to the presence of bran and germ. If your recipe doesn't call for enough water, or if you add too much extra flour during mixing or kneading, the dough will be dry from the start, leading to a crumbly texture in the final loaf.
Ensure you measure your liquid accurately and resist the urge to add excessive amounts of flour during shaping, using just enough to prevent sticking. Over-baking at too high a temperature or for too long can also dry out the loaf. Use an internal thermometer to check for doneness (190-200°F / 88-93°C) rather than relying solely on visual cues. For future batches of your easy whole wheat bread recipe, consider slightly increasing the water content (by 1-2%) if your flour seems particularly thirsty.
Flat Bread: Ensuring Proper Rise and Oven Spring
Flat bread can be caused by issues during proofing or baking. Under-proofing means the dough hasn't developed enough gas to expand properly. Over-proofing, on the other hand, can cause the gluten structure to weaken and collapse before or during baking, leading to a loaf that spreads rather than rises. Ensure your dough passes the poke test before baking.
Lack of sufficient oven spring can also result in a flat loaf. This can happen if the oven isn't fully preheated, if there isn't enough steam in the oven during the initial bake (especially for freeform loaves), or if the dough wasn't shaped with enough surface tension. Make sure your oven is at the correct temperature and consider using a steam method or a Dutch oven for your easy whole wheat bread recipe to promote better oven spring.
Bitter Taste: Understanding Whole Wheat Flour and Tannins
Sometimes, 100% whole wheat bread can have a slightly bitter or astringent taste. This is often attributed to tannins present in the bran and germ of the wheat kernel. The concentration of tannins can vary depending on the specific wheat variety and how the flour was milled. While a slight bitterness is natural and part of whole wheat's characteristic flavor, an overpowering bitterness can be undesirable.
Using a small amount of sweetener, like molasses, honey, or maple syrup (as often included in an easy whole wheat bread recipe), can help balance this bitterness. Autolysing the dough (resting flour and water before adding other ingredients) can also help reduce bitterness by allowing enzymes to break down some compounds. Ensuring the bread is baked thoroughly is also important, as under-baked whole wheat can sometimes taste more bitter.
Variations and Additions to Your Easy Whole Wheat Bread Recipe
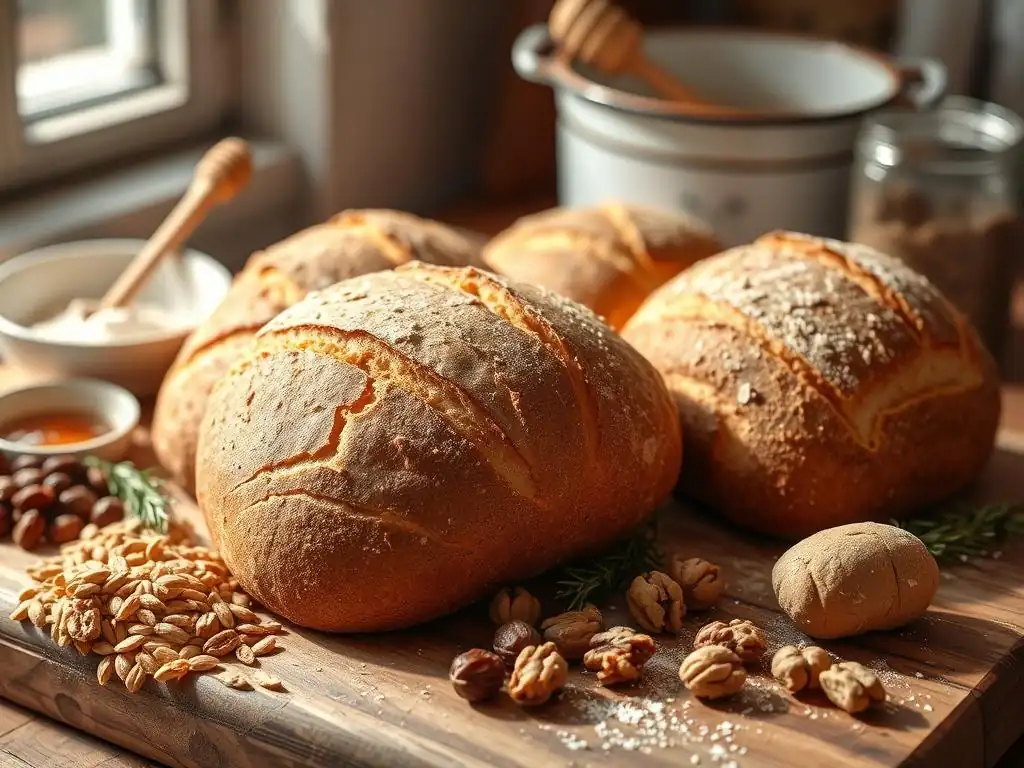
Once you've mastered the basic easy whole wheat bread recipe, you can start experimenting with variations to add flavor, texture, and nutrients. Whole wheat bread is a fantastic base for incorporating various seeds, grains, and sweeteners.
Adding mix-ins can transform your simple loaf into something truly unique. Remember to adjust the hydration slightly when adding dry ingredients like seeds, as they will absorb some moisture from the dough.
Adding Seeds and Grains for Texture and Flavor
Incorporating seeds and grains is a popular way to enhance 100% whole wheat bread. Common additions include sunflower seeds, pumpkin seeds, flax seeds, sesame seeds, chia seeds, or rolled oats. These add a delightful crunch, nutty flavor, and boost the fiber and nutritional content. You can add them directly to the dough during the final minutes of mixing, or sprinkle them on top of the shaped loaf before the second proof.
For a more pronounced texture, you can soak some of the seeds or grains in hot water for 30 minutes to an hour before adding them to the dough. This is particularly useful for harder grains like rye berries or wheat berries if you choose to include them (though these might be more suitable for slightly more advanced recipes). A typical addition rate is about 1/4 to 1/2 cup of seeds or grains per standard loaf in your easy whole wheat bread recipe.
Incorporating Sweeteners: Honey, Maple Syrup, and Molasses
While the basic easy whole wheat bread recipe may include a small amount of sweetener to balance the flavor, you can experiment with different types and amounts. Honey adds a distinct floral sweetness, maple syrup offers an earthy, caramel-like note, and molasses provides a deep, slightly bitter sweetness and rich color.
Using liquid sweeteners like honey or maple syrup might require a slight reduction in the amount of water used in the recipe to maintain the correct dough hydration. Generally, substituting 1:1 by volume works, but you might need to adjust slightly based on the consistency of the sweetener and the flour. Start with 1-2 tablespoons in your easy whole wheat bread recipe and adjust in future batches based on your preference.
Making Whole Wheat Bread Rolls and Buns
Your easy whole wheat bread recipe dough is versatile enough to be shaped into rolls or buns instead of a single loaf. This is a great option for sandwiches, burgers, or dinner rolls. The process is largely the same through the first proofing stage.
After the first proof, divide the dough into equal portions (typically 8-12 pieces for rolls). Shape each piece into a tight ball or desired roll shape. Place them on a baking sheet lined with parchment paper, leaving some space between them. Proceed with the second proofing (usually shorter for rolls, about 30-45 minutes) and then bake at the temperature specified in the main recipe, but for a shorter time, typically 15-25 minutes, until golden brown and cooked through.
Advanced Whole Wheat Bread Baking Techniques
Once you feel comfortable with the easy whole wheat bread recipe, you might be interested in exploring more advanced techniques to further enhance your 100% whole wheat loaves. These methods can improve flavor, texture, and complexity.
These techniques often require a bit more time, attention, or specialized knowledge, but they can be very rewarding for the dedicated home baker looking to elevate their whole wheat baking skills.
Working with Sourdough Starter in Whole Wheat Bread
Using a sourdough starter instead of commercial yeast is a popular advanced technique for whole wheat bread. A sourdough starter is a living culture of wild yeast and bacteria that provides leavening and imparts a unique tangy flavor and chewy texture. Incorporating a starter into your 100% whole wheat bread recipe requires understanding starter maintenance and how its activity affects proofing times, which are typically much longer than with commercial yeast.
A common approach is to replace some or all of the commercial yeast and a portion of the flour and water with an active sourdough starter. The fermentation process with sourdough is slower, often involving overnight proofing in the refrigerator, which develops more complex flavors and acids that can help break down some of the components in whole wheat, potentially improving digestibility. While not an easy whole wheat bread recipe for beginners, it's a rewarding path for those seeking deeper flavor.
Improving Flavor and Texture with Different Milling Techniques
The way whole wheat flour is milled significantly impacts its flavor and texture. Exploring flours milled using different techniques can elevate your baking. Stone-ground whole wheat flour, for example, often retains more of the germ and bran in larger particles, which can impart a richer flavor and a slightly coarser texture compared to finely roller-milled flour.
Some bakers even experiment with milling their own whole wheat flour at home using a grain mill. Milling fresh flour just before baking can provide unparalleled flavor and nutritional value, as some nutrients begin to degrade once the grain is ground. Using fresh, stone-ground flour in your easy whole wheat bread recipe, perhaps substituting a portion of your regular flour, can introduce exciting new dimensions to your loaf.
Experimenting with Different Types of Whole Wheat Flour
Beyond general 100% whole wheat flour, there are different varieties of wheat that produce distinct flours. Hard red wheat, often used for standard whole wheat flour, is high in protein and produces a robust loaf. Soft white wheat, on the other hand, yields a whole wheat flour that is lighter in color and flavor, with a softer texture, which can be excellent for less dense whole wheat breads or pastries.
Exploring heritage grains like Spelt, Einkorn, or Emmer, which are ancient varieties of wheat, can also add unique flavors and characteristics to your whole wheat baking. These flours often behave differently due to varying gluten structures and absorption rates, requiring adjustments to your easy whole wheat bread recipe. Experimenting with blending different types of whole wheat or heritage flours can lead to truly exceptional loaves.
Enjoying Your Homemade 100% Whole Wheat Bread
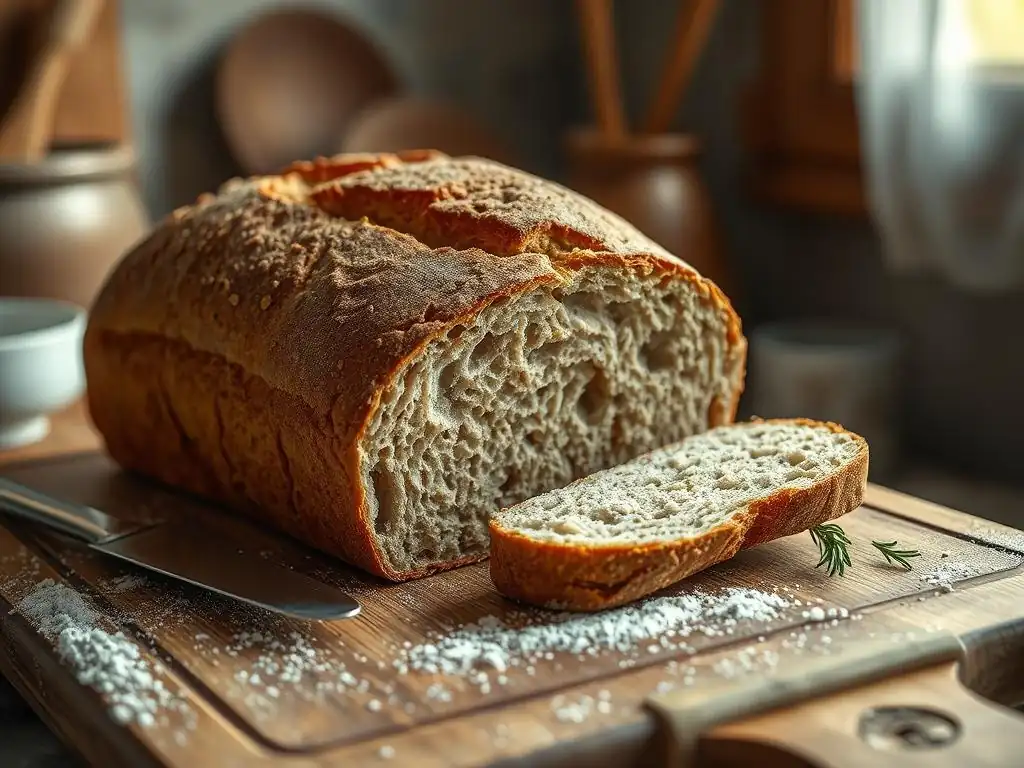
The best part of baking an easy whole wheat bread recipe is finally getting to enjoy your creation! The aroma of fresh bread is intoxicating, and the taste of a loaf you made yourself is incredibly satisfying.
Whether you slice it thick for toast, use it for sandwiches, or simply enjoy it with butter, your homemade 100% whole wheat bread is a testament to your baking skills.
Serving Suggestions and Complementary Dishes
Your delicious homemade 100% whole wheat bread is incredibly versatile. Serve thick slices toasted with butter and jam for a simple, wholesome breakfast. It makes fantastic sandwiches, holding up well to hearty fillings. Try it with avocado and a sprinkle of everything bagel seasoning.
Pair warm slices with soups, stews, or chili – the robust flavor complements savory dishes beautifully. It's also wonderful alongside salads or used as a base for bruschetta or open-faced melts. Don't forget the classic: a slice with just a smear of good quality butter, allowing the bread's natural flavor to shine through.
Storing Your Bread for Maximum Freshness
Proper storage is key to keeping your easy whole wheat bread recipe loaf fresh for as long as possible. As mentioned earlier, once completely cooled, store the loaf at room temperature. A paper bag or cloth bread bag is ideal for keeping the crust crisp for a day or two. Avoid plastic bags if you want to preserve the crust's texture in the short term.
For longer storage, or if you live in a humid climate, wrapping the cooled loaf tightly in plastic wrap or aluminum foil helps prevent it from drying out. Stored this way at room temperature, it should stay fresh for 3-4 days. For anything longer, freezing is the best option. Slice the loaf before freezing for easy access to individual servings. Properly wrapped, frozen whole wheat bread can last for up to 3 months.
Conclusion: Bake With Ease and Enjoy Delicious, Healthy Bread
Mastering an easy whole wheat bread recipe is a rewarding endeavor that brings delicious, healthy bread into your home. By understanding the unique properties of whole wheat flour and following simple steps, you can consistently bake beautiful and flavorful loaves.
Remember that baking is a journey of learning and experimentation. Don't be afraid to try again if your first loaf isn't perfect. With this guide from BakeWithEase, you have the tools and knowledge to bake 100% whole wheat bread with confidence and ease. Enjoy the process, savor the aroma, and delight in sharing your homemade bread with friends and family. Happy baking!
Frequently Asked Questions
What makes this whole wheat bread recipe "easy"?
This recipe focuses on simple techniques and readily available ingredients, eliminating complex steps often found in whole wheat bread baking. It also provides clear, step-by-step instructions, making it accessible to bakers of all skill levels.
Why choose whole wheat flour over white flour for bread baking?
Whole wheat flour offers superior nutritional value, providing more fiber, vitamins, and minerals compared to refined white flour. It also contributes to a heartier texture and a nuttier flavor in the final bread.
What are some common challenges when baking with whole wheat flour, and how does this recipe address them?
Whole wheat flour can sometimes result in a dense or dry bread. This recipe incorporates techniques like proper hydration and longer proofing times to counteract these issues, leading to a softer loaf.
Can I substitute any ingredients in this recipe?
While substitutions are possible, it's important to understand their impact. For example, using a different type of sweetener might alter the flavor, and substituting liquid could affect the dough's hydration and final texture.
How do I know when my whole wheat bread is fully baked?
The bread is done when it reaches an internal temperature of 190-200°F (88-93°C). You can also check for a hollow sound when tapping the bottom of the loaf, and a golden-brown crust.
Final Reflection: The Enduring Power of Simple, Whole Wheat Bread
The ease of baking delicious, wholesome bread is not just a culinary skill; it's a gateway to a more mindful and connected approach to food. In a world increasingly dominated by processed foods and fast-paced lifestyles, the ability to craft something nourishing and satisfying from simple ingredients offers a powerful antidote. This article has explored the surprisingly straightforward process of mastering 100% whole wheat bread, proving that achieving this seemingly complex feat is within everyone's reach.
The journey of baking whole wheat bread, for me, has been a journey of rediscovering the simple pleasures and deep satisfaction of creating something with my own hands. It's a connection to a long tradition of food preparation, a reminder of the tangible rewards of patience and attention to detail. Bread is the staff of life,
a common saying reminds us, and the act of making it, even in its simplest form, connects us to this fundamental truth. The impact of this simple act extends beyond the individual, fostering a deeper appreciation for the ingredients we consume and the process of transforming them into sustenance.
Now, I invite you to take this knowledge and apply it to your own kitchen. Don't be intimidated by the idea of whole wheat bread; embrace the challenge, experiment with different flours and techniques, and discover the joy of creating something truly special. The reward isn't just a delicious loaf; it's the empowerment that comes from mastering a fundamental skill, the satisfaction of nourishing yourself and your loved ones with food made with love and intention. The journey begins with a single loaf. Bake on!
Here's a CTA for an article on mastering whole wheat bread baking, tailored for BakeWithEase.com:
Unlock Your Inner Baker: Rise to the Challenge of Perfect Whole Wheat!
Thanks for joining us on this whole wheat baking journey! We hope you've gained valuable tips and tricks to confidently tackle this delicious, nutritious bread. Now it's time to put your newfound knowledge into action.
- Bake your first perfect loaf! Use the techniques you learned today to create your own masterpiece. Don't be afraid to experiment!
- Share your baking triumph! Post a picture of your creation on social media and tag us – we'd love to see your results!
- Explore other whole wheat recipes on our site and discover new flavour combinations.
Ready to transform your kitchen into a bakery? What unique ingredient will you add to your next whole wheat loaf?