
The Mystery of the Sunken Bread Top Solved


Welcome to BakeWithEase, where we unravel the mysteries of baking and empower you to create delicious treats with confidence! Ever wondered why your bread sinks during baking, leaving you with a disappointing loaf? We're diving deep into this common bread-baking conundrum, exploring the science and techniques behind achieving that perfect rise. Get ready to unlock the secrets to a beautifully baked bread – let's get started!
- The Mystery of the Sunken Bread Top Solved: A Comprehensive Guide
- Introduction: Understanding Collapsed Bread
- Bread Baking Troubleshooting: Why Bread Sinks
- Identifying the Culprit: Diagnosing Sunken Bread
- Solutions and Prevention: Baking Perfect Loaves
- Advanced Techniques: Preventing Future Issues
- Conclusion: Baking with Confidence.
- Frequently Asked Questions
- Final Reflection: The Rising Crust of Understanding
- Unlock Your Inner Baker: Master the Art of the Perfect Crust!
The Mystery of the Sunken Bread Top Solved: A Comprehensive Guide
Introduction: Understanding Collapsed Bread
There's little more disheartening in the baking world than pulling a beautiful loaf from the oven only to watch its proud dome slowly deflate. A sunken bread top is a common frustration for bakers of all levels, turning a potentially perfect loaf into a dense, squat disappointment. This phenomenon, often leaving us wondering why bread sinks baking, is usually a symptom of issues that occurred before the bread even entered the oven, or perhaps during the initial stages of baking. Understanding the root causes is the first step to banishing the dreaded sunken top forever.
This guide will walk you through the primary reasons why bread sinks baking, from subtle errors in ingredient measurement to critical mistakes in proofing and baking temperature. We'll delve into how to diagnose the problem in your own kitchen and provide actionable solutions and preventive measures. By the end, you'll be equipped to troubleshoot common bread-baking woes and consistently achieve well-risen, perfectly structured loaves.
Bread Baking Troubleshooting: Why Bread Sinks
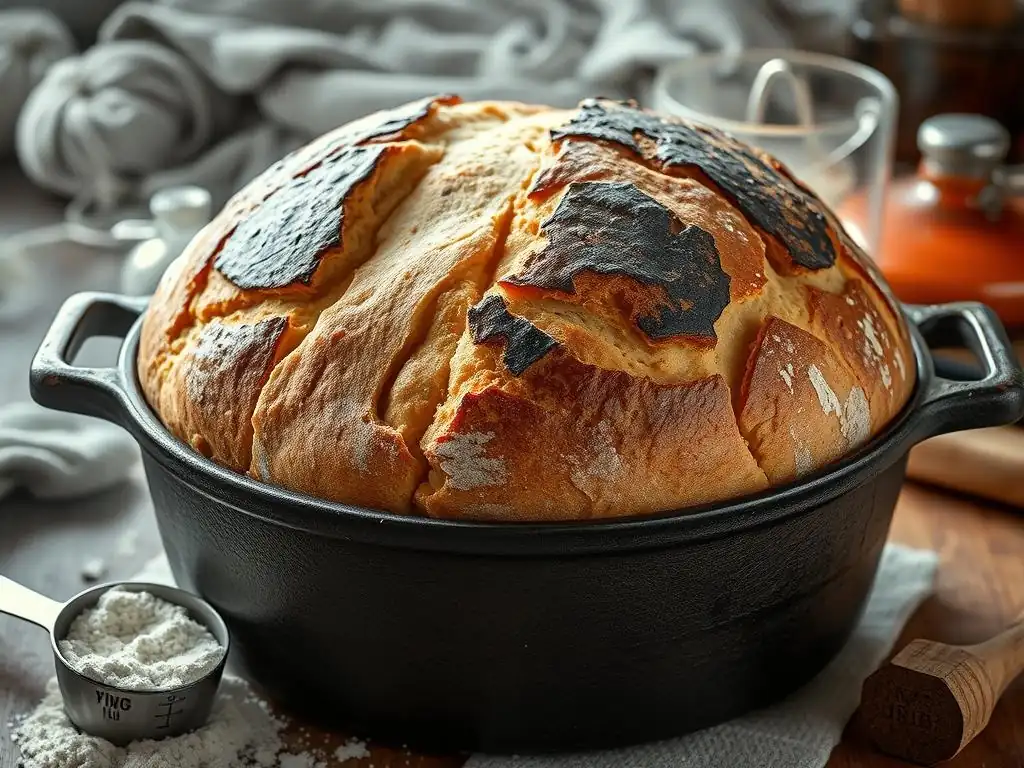
Pinpointing why bread sinks baking can feel like detective work, but the clues are often found in your process and ingredients. While multiple factors can contribute, the collapse is fundamentally linked to a failure in the dough's structure to support itself, either during the final rise or while it's setting in the oven. This structural weakness can stem from several common issues, each requiring a slightly different approach to fix.
Understanding these potential pitfalls is crucial for any baker. By systematically examining your method, you can identify the specific reason your loaf is collapsing. Let's break down the most frequent culprits behind a sunken bread top.
Common Causes of Bread Collapse
- Under-Proofing: Insufficient rise before baking.
- Over-Proofing: Weakened gluten structure.
- Oven Temperature Issues: Inaccurate or fluctuating temperature.
- Incorrect Flour Measurement: Ingredient imbalance.
- Excessive Moisture: Overly hydrated dough.
One of the most frequent reasons why bread sinks baking relates directly to the proofing stage. Under-proofing means the yeast hasn't produced enough gas to create a strong, airy structure. When this dough hits the heat of the oven, it tries to expand rapidly, but the gluten hasn't developed enough elasticity to support this sudden surge, leading to a dense crumb and potential collapse as the top sets before the interior has a chance to fully bake and firm up.
Conversely, over-proofing is equally problematic. If dough proofs for too long, the yeast consumes all available sugars, and the gluten structure, stretched to its limit, begins to break down. This weakened network cannot hold the gas produced during baking, resulting in a loaf that may look puffy before the oven but deflates dramatically as it bakes because it lacks the foundational strength.
Beyond proofing, issues with your oven and ingredients are major contributors to why bread sinks baking. An oven that isn't properly preheated or has fluctuating temperatures means the bread doesn't receive the necessary initial burst of heat (oven spring) to set its structure quickly. If the oven is too cool, the loaf spreads outwards rather than rising upwards, and the top can sink as the interior struggles to catch up.
Incorrect ingredient measurements, particularly too much liquid or too little flour, can also lead to a dough that is simply too weak or wet to maintain its shape during baking. For instance, adding just 20-30 grams too much water in a standard 500g flour recipe can significantly increase hydration, making the dough slack and prone to collapse unless handled with specific techniques.
Identifying the Culprit: Diagnosing Sunken Bread
When a loaf collapses, it's time to play detective. The appearance of the sunken loaf itself, combined with a review of your process, can provide significant clues about why bread sinks baking. Was the crust thick and pale, or thin and wrinkled? Was the crumb dense and gummy, or just slightly compressed at the top? Each detail points towards a specific issue, allowing you to make targeted adjustments for your next bake.
Diagnosing the problem effectively requires you to systematically examine the most common failure points: the state of your dough before it went into the oven, the conditions within your oven, and the accuracy of your initial ingredient mix. Let's look at specific ways to check each of these areas.
Assessing Proofing: Under or Over?
- The Poke Test: Checking dough readiness.
- Visual Cues: Recognizing proofing stages.
- [Proofing time guidelines for sourdough].
Assessing whether your dough was under- or over-proofed is critical to understanding why bread sinks baking. The "poke test" is a classic method: gently press your floured finger about half an inch into the dough. If the indentation springs back immediately, the dough is likely under-proofed. If it springs back slowly, leaving a slight indentation, it's perfectly proofed.
If the indentation remains completely, the dough is over-proofed and its structure is compromised. Visual cues are also helpful; under-proofed dough will have increased slightly in size but still feel dense, while perfectly proofed dough will have significantly increased (often doubled) and look airy and domed. Over-proofed dough might look very large and puffy, but its surface might appear slack or even start to recede slightly.
For specific types of bread, like sourdough, proofing times can vary significantly based on ambient temperature and the activity of your starter. A typical bulk fermentation for sourdough might take 4-6 hours at room temperature (around 70-75°F / 21-24°C), followed by a cold proof in the refrigerator for 8-12 hours or even longer. If your kitchen is warmer, proofing will be faster; if it's cooler, it will take longer.
Misjudging these times, whether rushing a cold proof or letting a warm proof go too long, directly impacts the gluten structure's ability to support the loaf, explaining why bread sinks baking in these scenarios. Always watch the dough, not just the clock.
Evaluating Oven Performance
- Checking Oven Accuracy: Using an oven thermometer.
- Oven Hot Spots: Identifying and mitigating uneven heating.
- [Adjusting baking time for convection ovens].
An inaccurate or inconsistent oven temperature is a major factor why bread sinks baking. Without the intense heat required for "oven spring" – the rapid expansion of the dough in the first 10-15 minutes – the crust sets too slowly, and the internal structure doesn't firm up before gravity takes over. Using an inexpensive oven thermometer placed inside your oven is essential; you might be surprised to find your oven is 25-50°F (approx.
15-30°C) off from the dial setting. If your oven runs cool, your bread won't get the necessary initial lift, and the top is more likely to sag. Preheating for a sufficient time, often 30-60 minutes after the oven reaches the set temperature, is also crucial, especially when using baking stones or steel, to ensure even and sustained heat.
Oven hot spots and the presence of a convection fan can also influence why bread sinks baking. Hot spots cause uneven baking, potentially leading one part of the loaf to set faster than others, creating structural imbalance. Rotating your loaf halfway through the bake can help mitigate this. Convection ovens circulate air, which can initially boost oven spring but can also cause crusting too quickly or lead to uneven heat distribution if not used correctly.
If using a convection oven, you might need to reduce the temperature by about 25°F (approx. 15°C) compared to a conventional oven setting and potentially shorten the baking time slightly, as the circulating air transfers heat more efficiently. Ignoring these oven specifics can leave your bread vulnerable to collapse.
Ingredient Inspection: Accurate Measurements Matter
- The Role of Flour: Gluten content and flour types.
- Measuring Flour Correctly: Weight vs. Volume.
- Water Content: Hydration's impact on structure.
The foundation of any good loaf lies in its ingredients, and inaccuracies here can certainly explain why bread sinks baking. Flour isn't just flour; its protein content dictates how much gluten can be developed, which is the network that gives bread its structure. Bread flour, with its higher protein percentage (typically 12-14%), forms stronger gluten than all-purpose flour (typically 10-12%). Using a lower-protein flour in a recipe designed for bread flour can result in a weaker dough that struggles to hold its shape and is prone to collapse.
Perhaps the most significant measurement error contributing to why bread sinks baking is inaccurate hydration. Using volume measurements for flour (like cup measures) is notoriously imprecise because flour compacts differently each time. A cup of flour can weigh anywhere from 100g to 150g depending on how it's scooped and leveled. This variability throws off the crucial flour-to-water ratio.
Using a kitchen scale to weigh ingredients ensures consistency. For example, a recipe calling for 500g of flour and 325g of water is at 65% hydration (325/500 = 0.65 or 65%). Adding an extra 50g of water accidentally increases the hydration to 75% (375/500 = 0.75 or 75%), resulting in a much wetter, slacker dough that requires different handling and may collapse if not properly supported during baking.
Solutions and Prevention: Baking Perfect Loaves
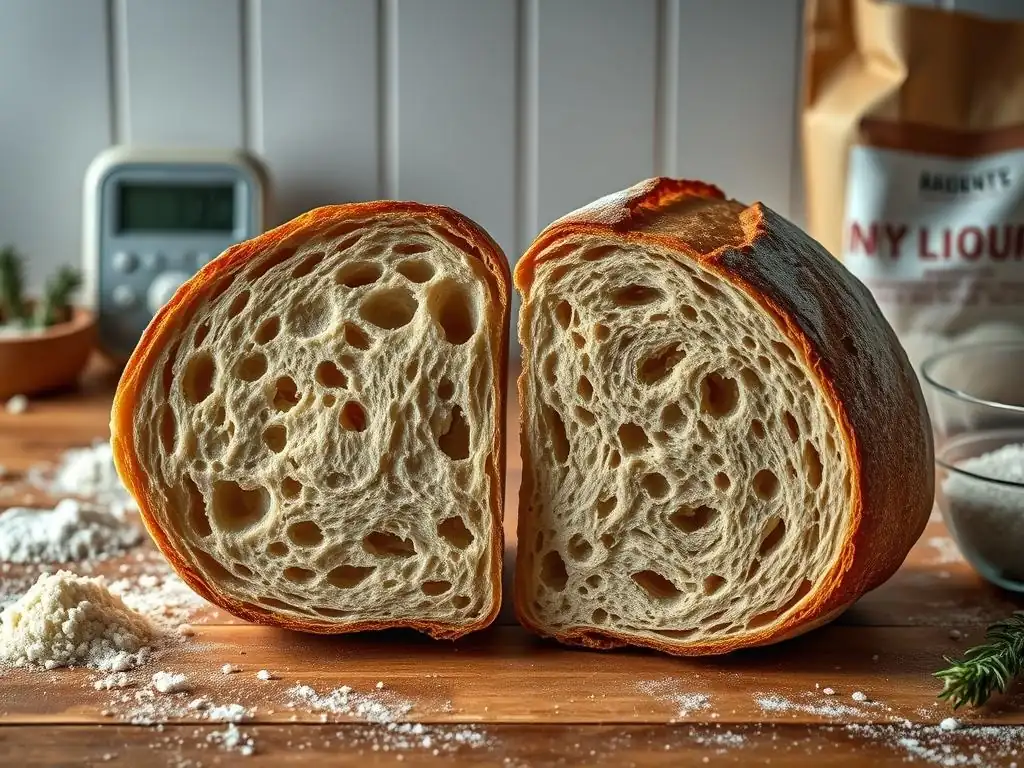
Now that we've explored why bread sinks baking, let's focus on how to prevent it. Addressing the potential issues identified in the diagnosis phase is key to achieving consistently successful loaves. Implementing better practices in proofing, oven management, and ingredient measurement will significantly reduce the likelihood of a sunken top.
Preventing collapsed bread involves a combination of careful technique and attention to detail at each stage of the baking process. By mastering these fundamental skills, you build the necessary structure and ensure optimal conditions for your bread to rise tall and proud.
Mastering Proofing Techniques
- Creating the Ideal Proofing Environment: Temperature and Humidity.
- Adjusting Proofing Time: Adapting to environmental factors.
- [Bulk fermentation and final proof techniques].
Mastering the art of proofing is arguably the most impactful way to prevent why bread sinks baking. Dough proofs best in a warm, slightly humid environment. An ideal temperature range is often between 75°F and 80°F (approx. 24-27°C). You can create this by placing the covered dough in a turned-off oven with the light on, or in a microwave next to a cup of hot water. This controlled environment ensures steady yeast activity.
However, proofing time is not fixed; it depends heavily on the dough's temperature and the ambient temperature. A dough that might take 2 hours to proof at 75°F could take only 1 hour at 85°F (approx. 30°C) or 3-4 hours at 65°F (approx. 18°C). Learning to read the dough using the poke test and visual cues is more reliable than strictly following recipe times.
Understanding the difference between bulk fermentation and final proof is also crucial for preventing a sunken loaf. Bulk fermentation (the first rise) develops flavor and strength throughout the entire dough mass. The final proof (after shaping) is about giving the individual loaf its final volume and airy texture before baking.
For many breads, including sourdough, bulk fermentation might involve several folds over a few hours to build structure, while the final proof is a gentler process. Over-handling dough during the final proof or shaping can deflate it, weakening its structure and making it susceptible to collapse in the oven. Ensuring adequate, but not excessive, development during both stages is key to avoiding why bread sinks baking.
Optimizing Oven Temperature
- Preheating Properly: Ensuring consistent temperature.
- Adjusting Baking Time and Temperature: Fine-tuning for your oven.
- Using a Baking Stone or Dutch Oven: Improving heat distribution.
Optimizing your oven environment is essential for a successful bake and directly addresses why bread sinks baking. Always use an oven thermometer to verify the internal temperature matches your recipe setting, and preheat for a sufficient amount of time – typically 30 to 60 minutes after the oven indicates it's reached temperature. This ensures the oven walls and any baking surfaces are fully heated, providing consistent radiant heat to the loaf.
Many bread recipes call for a high initial temperature (e.g., 450-500°F / 230-260°C) for the first 15-20 minutes to maximize oven spring, followed by a reduction (e.g., to 400-425°F / 200-220°C) to allow the interior to bake through without burning the crust. Experimenting with these temperature adjustments based on how your specific oven performs is key.
Using a baking stone, steel, or a Dutch oven significantly improves heat distribution and helps prevent why bread sinks baking. These tools absorb and retain heat, transferring it efficiently to the base of the loaf. This rapid heat transfer causes the yeast to produce a final burst of gas and helps the crust set quickly, providing a stable structure for the rising interior.
Baking in a preheated Dutch oven is particularly effective as it traps steam released by the dough, keeping the crust soft and pliable longer, allowing for maximum expansion before it sets. After the initial rise (typically 20-30 minutes with the lid on), removing the lid allows the crust to brown and crisp up.
Precise Measurements
- Using a Kitchen Scale: Accuracy in baking.
- Ingredient Ratios: Following recipes for balanced dough.
- [Recommended hydration percentages for high-hydration breads].
Achieving precise measurements is fundamental to baking success and a direct method to combat why bread sinks baking. The most effective way to ensure accuracy is to use a digital kitchen scale to weigh all your ingredients, especially flour and water. While cup measures can vary significantly, weighing guarantees you're using the exact quantities specified in the recipe, often down to the gram.
This consistency is vital because even slight variations in the flour-to-water ratio can change the dough's consistency and strength. For example, a recipe might be formulated for 68% hydration; hitting that percentage accurately ensures the dough has the intended structure and handling characteristics.
Understanding ingredient ratios, particularly baker's percentage, gives you deeper insight into how ingredients interact and helps prevent why bread sinks baking due to imbalance. In baker's percentage, the flour is always 100%, and all other ingredients are measured as a percentage of the flour's weight. This system makes it easy to compare recipes and understand hydration levels.
For instance, a high-hydration dough (often 75% or more) will be much wetter and require different handling than a lower-hydration dough (say, 60-65%). Recipes for high-hydration breads are specifically designed to manage that moisture; attempting high hydration with a recipe meant for lower hydration will likely result in a slack, unstable dough that collapses in the oven.
Managing Moisture Content
- Adjusting Hydration Levels: Adapting recipes to flour type.
- Handling Sticky Dough: Working with high-hydration doughs.
- [Understanding baker's percentage for hydration].
Effectively managing moisture content is key to preventing a sunken loaf, as overly wet dough is a prime reason why bread sinks baking. Different types of flour absorb varying amounts of water. Whole wheat flour, for instance, typically absorbs significantly more water than white bread flour due to the presence of bran and germ. If you substitute whole wheat for white flour without increasing the hydration, your dough will be too dry.
Conversely, using a recipe designed for high-absorption flour with a lower-absorption flour will result in an excessively wet dough. It's often necessary to slightly adjust the water amount based on the specific flour you are using and even the humidity of your environment. Start with slightly less water than the recipe calls for and add more only if the dough feels too dry.
Working with high-hydration doughs (say, 75% hydration or higher) requires different techniques than standard doughs to prevent collapse. These doughs are naturally stickier and weaker until gluten is well-developed. Instead of traditional kneading, methods like stretch and folds performed over an hour or two can build strength gently.
Techniques like using wet hands, a bench scraper, or keeping the dough in a lightly oiled container can make handling easier. Understanding baker's percentage is invaluable here; if a recipe uses 500g flour and 400g water, that's 80% hydration (400/500 = 0.8). Knowing this tells you it will be a wet dough requiring minimal handling and likely benefit from baking in a Dutch oven for support, helping prevent why bread sinks baking issues related to excessive moisture.
Advanced Techniques: Preventing Future Issues
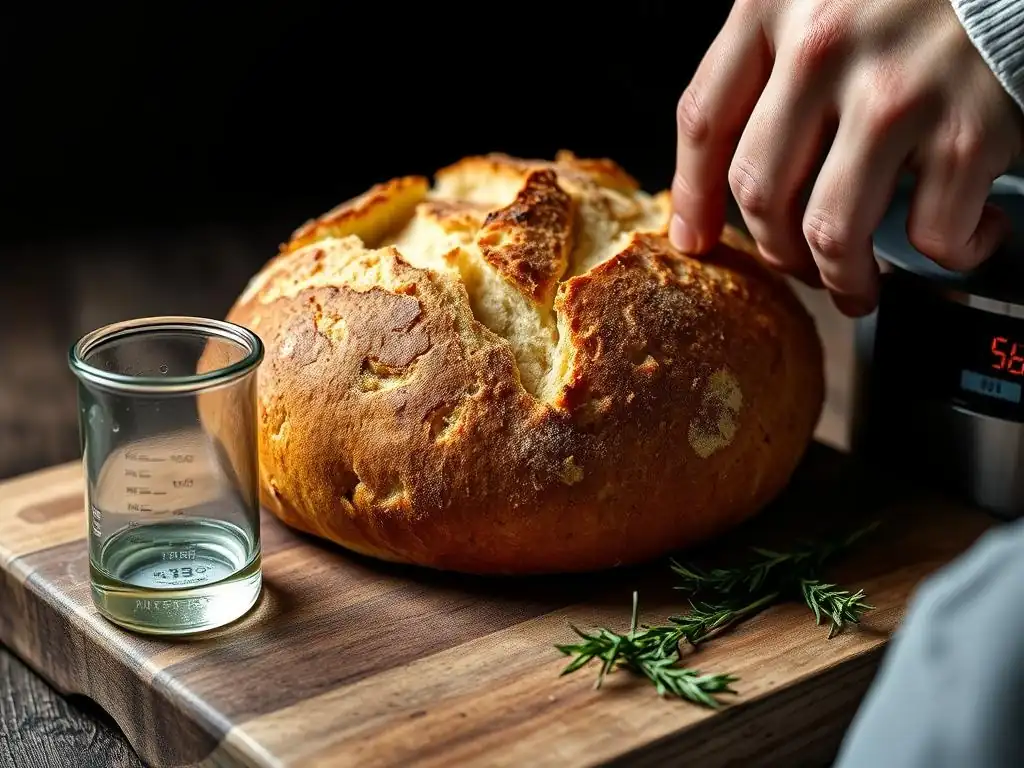
Beyond the fundamentals, incorporating advanced techniques can further enhance your dough's structure and resilience, providing additional insurance against why bread sinks baking. These methods focus on optimizing gluten development and refining your handling skills, allowing you to bake more challenging recipes with confidence.
Implementing techniques like autolyse or honing your shaping and scoring methods can make a significant difference in the final outcome of your bread. They contribute to a stronger, more stable dough that is less likely to collapse under its own weight or during the intense heat of the oven.
Gluten Development
- Kneading Techniques: Hand vs. machine kneading.
- The Windowpane Test: Assessing gluten development.
- [Autolyse and its benefits].
Proper gluten development is foundational to preventing why bread sinks baking. Gluten, formed when water is mixed with flour proteins (glutenin and gliadin) and then kneaded or manipulated, creates an elastic network that traps the gases produced by yeast, allowing the bread to rise and hold its shape. Whether kneading by hand or machine, the goal is to stretch and fold the dough until this network is sufficiently strong.
Under-kneaded dough will be shaggy and tear easily, resulting in poor rise and a dense crumb. Over-kneaded dough can become tight or even start to break down, also leading to structural issues. The time required varies based on flour type, hydration, and method; machine kneading is often faster (e.g., 8-12 minutes on medium speed) than hand kneading (e.g., 10-20 minutes).
A reliable way to assess gluten development is the "windowpane test." Take a small piece of dough and gently stretch it between your fingers. If the dough can be stretched thin enough to see light through it without tearing, forming a translucent "window," the gluten is well-developed. If it tears quickly, it needs more kneading.
Another advanced technique is autolyse, which involves mixing just the flour and water from the recipe and letting it rest for 20 to 60 minutes before adding the salt and yeast. This rest period allows the flour to fully hydrate and enzyme activity to begin breaking down proteins, which helps gluten start to form without kneading. When you later add the remaining ingredients and knead, the gluten develops much faster and more efficiently, resulting in a smoother, more extensible dough that is less likely to have issues with why bread sinks baking.
Dough Handling
- Shaping Techniques: Preventing deflation.
- Scoring the Dough: Controlling expansion.
- [Using a lame for effective scoring].
How you handle the dough during shaping and transferring to the oven significantly impacts whether you'll face why bread sinks baking. After the bulk fermentation, dough is often "degassed" gently before shaping, but rough handling or punching down aggressively can expel too much gas and damage the delicate gluten network built during the rise.
Shaping techniques aim to create tension on the surface of the dough, forming a "skin" that provides structure and encourages upward expansion during baking. Techniques vary for different loaf shapes (batards, boules, sandwich loaves), but the principle is to create a taut surface without tearing the dough.
Scoring the dough just before baking is a critical step to prevent uncontrolled tearing and contributes to preventing why bread sinks baking. Cuts made with a sharp blade (like a baker's lame) direct the dough's expansion during oven spring. Without scoring, the crust will tear randomly at the weakest point, potentially leading to an uneven shape or a sunken top if the tears occur structurally. The depth and pattern of scoring influence the final shape and appearance.
Using a lame allows for clean, precise cuts that open beautifully in the oven. For instance, a single deep cut down the length of a batard helps it expand upwards, while a circular score on a boule allows even expansion outwards. Proper scoring ensures controlled lift, supporting the structure and helping you avoid the issue of a collapsed loaf.
Conclusion: Baking with Confidence.
Frequently Asked Questions
Why does my bread sink in the middle after baking?
This is often due to under-baked bread or too much moisture. Insufficient gluten development can also contribute.
What are the common causes of a bread's sunken top?
Over-proofing, excess hydration in the dough, and a weak gluten structure are frequent culprits leading to a collapse.
How can I prevent my bread from sinking during baking?
Ensure your bread is fully baked by checking its internal temperature. Also, carefully measure your ingredients and avoid over-proofing.
Does the type of flour I use affect whether my bread sinks?
Yes, using a flour with a lower protein content can result in a weaker gluten network and a greater risk of sinking. Bread flour is recommended for stronger structure.
What role does oven temperature play in a sunken bread top?
An oven that is not hot enough may not allow the bread to set properly, leading to a sunken or collapsed loaf. Precise temperature control is crucial.
Final Reflection: The Rising Crust of Understanding
The seemingly simple question of why bread sinks during baking reveals a surprisingly complex interplay of science and technique. Understanding this, as we've explored, is not just about avoiding a soggy bottom; it's about mastering the fundamental principles of baking and achieving consistently delicious results. This knowledge, far from being niche, is directly applicable to every loaf, every roll, every pastry we create.
The journey from a simple observation – a sunken bread top – to a deeper understanding of gluten development, yeast activity, and oven spring, has been profoundly illuminating. It underscores the power of careful observation and the importance of understanding the underlying chemistry at play in even the most familiar culinary processes. The more I learn, the more I realize how much I don't know,
– Albert Einstein. This quote perfectly encapsulates the ongoing learning process involved in mastering the art of baking, a process that this exploration of sunken bread tops has only served to highlight.
Now, consider your own baking experiences. Have you ever encountered a sunken loaf? What adjustments might you make to your technique, informed by the insights shared in this article, to prevent this from happening again? I encourage you to experiment, to observe, and to refine your approach. The next time you pull a perfectly risen loaf from the oven, remember the journey we've taken together, and the subtle science that makes all the difference between a sunken disappointment and a culinary triumph.
Unlock Your Inner Baker: Master the Art of the Perfect Crust!
Thanks for joining us on this delicious journey into the world of bread baking! We hope you discovered some valuable tips and tricks to elevate your crust game. Now it's time to put your newfound knowledge into action.
- Experiment with your next loaf: Try incorporating one of the techniques we discussed – perhaps the steam method or a new flour blend – and see the amazing difference it makes. This is your chance to become a bread-baking superhero.
- Share your baking triumphs (or even your hilarious fails!): We'd love to see your results and hear your stories! Post a picture of your masterpiece (or your learning experience) on social media using #BakeWithEasePerfectCrust.
- Dive deeper into our bread-baking library: Explore our other articles for more insights into creating stunning loaves, from sourdough starters to artisan techniques.
Ready to take your baking to the next level? What unique crust creation will you attempt first?