
GlutenFree Bread Baking Mistakes Beginners Make

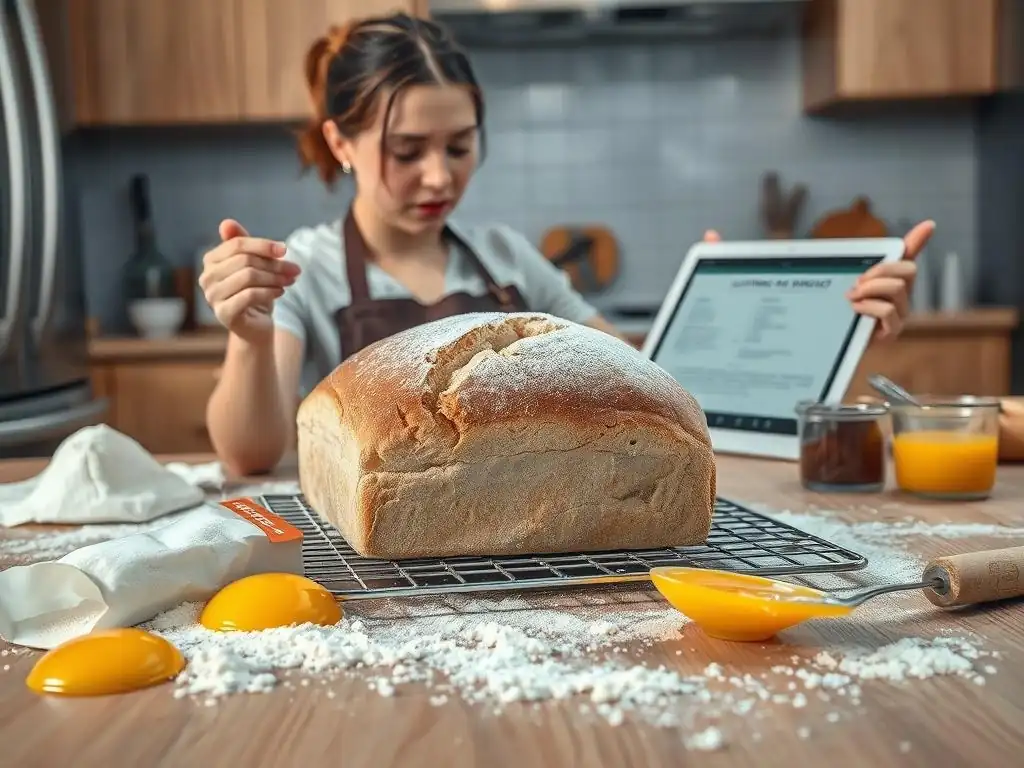
Welcome to BakeWithEase, your guide to baking bliss! Are you diving into the world of gluten-free bread and finding it... challenging? You're not alone! Many bakers stumble on common pitfalls when crafting delicious and perfectly textured loaves. Let's uncover those GlutenFree Bread Baking Mistakes that beginners often make, and more importantly, how to avoid them. Discover the secrets that will transform your gluten-free bread baking journey from frustrating to fantastic – are you ready to create bakery-worthy bread at home?
- Gluten-Free Bread Baking: Avoiding Common Mistakes
- Understanding Gluten-Free Bread Baking
- Key Mistakes and Solutions
- Troubleshooting
- Advanced Techniques
- Conclusion: Mastering Gluten-Free Bread.
-
Frequently Asked Questions
- What is the most common mistake beginners make when baking gluten-free bread?
- Why is hydration so crucial in gluten-free bread baking, and what happens if I get it wrong?
- What role do gums like xanthan gum or guar gum play in gluten-free bread, and can I omit them?
- How important is the baking temperature and time for gluten-free bread, and what are the risks of underbaking or overbaking?
- Why does my gluten-free bread sometimes collapse after baking, and how can I prevent this?
- Final Reflection: The Unexpected Joys (and Challenges) of Gluten-Free Baking
- Unlock Your Gluten-Free Baking Potential!
Gluten-Free Bread Baking: Avoiding Common Mistakes
Understanding Gluten-Free Bread Baking
Challenges of Gluten-Free Bread
Baking gluten-free bread presents unique challenges compared to traditional wheat-based baking. The absence of gluten, the protein network that provides structure and elasticity in wheat dough, means bakers must find alternative ways to achieve a similar texture, rise, and crumb. This often involves using a blend of different flours and starches, each contributing specific properties, along with binders to mimic the cohesive function of gluten. Without careful attention to ingredient ratios and techniques, the resulting bread can be dense, crumbly, or gummy, leading to frustration for beginners.
The lack of gluten also affects the dough's ability to hold gas produced by yeast during fermentation. Wheat dough is elastic and stretches, trapping bubbles and allowing for a significant rise. Gluten-free doughs are typically less extensible and can collapse more easily if not handled correctly. This necessitates precise hydration levels, gentle handling, and often different proofing and baking temperatures to ensure the loaf develops a good structure and doesn't become a heavy brick. Mastering these nuances is key to avoiding common gluten-free bread baking mistakes.
Common Pitfalls and Solutions
Beginners often encounter similar issues when venturing into gluten-free bread baking. One frequent pitfall is treating gluten-free flour blends like wheat flour, expecting them to behave identically. This leads to problems with hydration, as gluten-free flours absorb liquid differently. A common solution is to measure ingredients by weight using a kitchen scale, which is far more accurate than volume measurements, especially for flours and liquids, helping to avoid hydration errors. For instance, a cup of gluten-free flour blend can vary significantly in weight depending on how it's scooped, potentially throwing off the entire recipe's balance.
Another prevalent mistake is underestimating the role of binders like xanthan gum or psyllium husk. These ingredients are crucial for providing structure and preventing the bread from crumbling. Omitting them, or using too little, is a common error that results in dry, brittle loaves. The simple solution is to ensure the recipe includes an appropriate amount of a suitable binder and to measure it accurately, often just a teaspoon or two per cup of flour blend can make a significant difference. Understanding these common gluten-free bread baking mistakes and their straightforward solutions is the first step toward successful baking.
Key Mistakes and Solutions
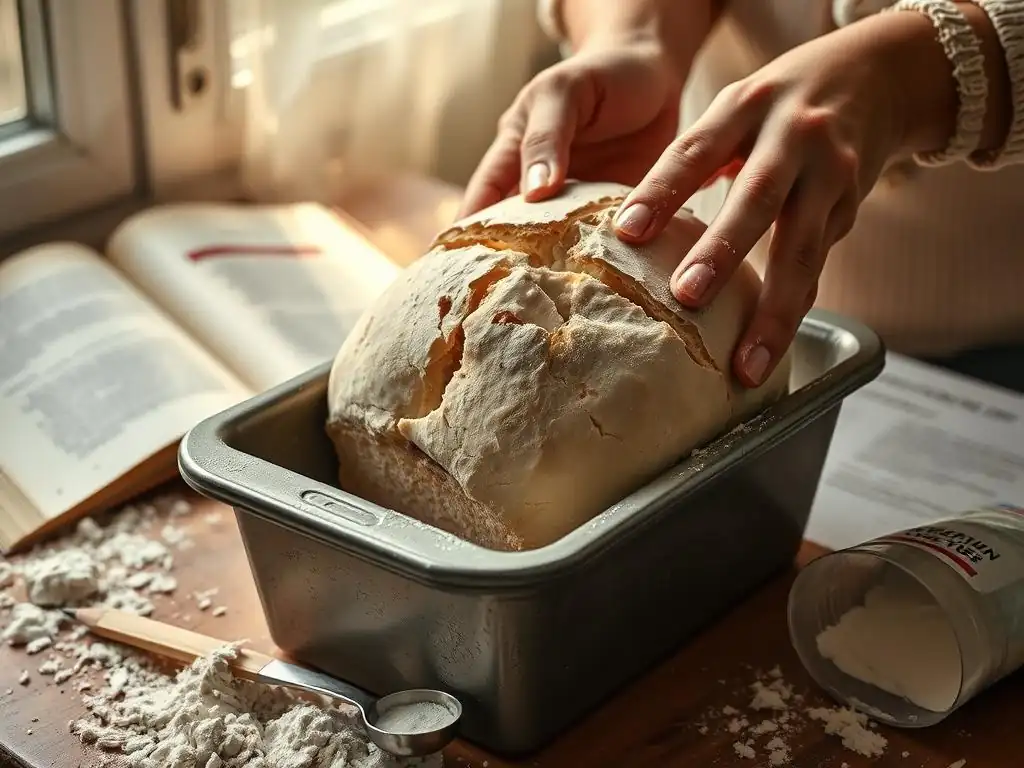
Mistake #1: Inappropriate Flour Selection
Choosing the wrong gluten-free flour or flour blend is one of the most significant gluten-free bread baking mistakes a beginner can make. Not all gluten-free flours are created equal, and simply substituting a single gluten-free flour like almond flour or coconut flour directly for wheat flour in a traditional recipe will almost certainly fail.
Successful gluten-free bread relies on a combination of flours and starches that together provide structure, texture, and flavor. Using a blend designed specifically for bread baking is crucial, as these blends typically balance protein-rich flours (like brown rice or sorghum) with starchy flours (like tapioca or potato starch) and often include binders.
Using a blend intended for cakes or cookies, which usually contains higher starch content and less structure, will result in a loaf that lacks integrity and collapses during baking. Even within bread blends, quality varies; some store-bought blends can lead to gummy or dense results. Understanding the basic components of a good gluten-free bread blend helps in selecting a reliable product or even creating your own. For example, a common ratio might be 40% whole grain gluten-free flour, 30% starchy flour, 20% white rice flour, and 10% protein flour, plus binders.
Understanding Flour Blend Composition
A well-formulated gluten-free flour blend for bread typically includes a mix of different types of flours and starches, each serving a purpose. Whole-grain gluten-free flours such as brown rice flour, sorghum flour, millet flour, or oat flour (certified gluten-free) provide structure, flavor, and nutrients. Starchy flours like tapioca starch, potato starch (not potato flour), or cornstarch help lighten the texture and contribute to the crust.
White rice flour is often used as a base and provides structure. Sometimes, alternative flours like almond flour or coconut flour are included in smaller amounts for flavor and texture, but they absorb liquid very differently.
The proportion of these components is key. Too much starch can lead to a gummy interior, while too much whole-grain flour can result in a heavy, dense loaf. Commercial blends aim for a balance, but their exact ratios vary, affecting how they perform in different recipes. Paying attention to the ingredients listed on the package can give you clues about its suitability for bread. A blend primarily composed of tapioca starch and cornstarch might be better for lighter baked goods than a hearty loaf.
Selecting the Right Blend
Selecting the right blend often involves some trial and error, but starting with blends specifically marketed for gluten-free bread baking is a good strategy to avoid common gluten-free bread baking mistakes. Look for blends that list a variety of flours, including whole grains. Some popular and generally reliable options include blends from reputable gluten-free brands known for their bread mixes or all-purpose blends suitable for bread. Reading reviews or consulting gluten-free baking communities can also provide insights into which blends perform well for others.
Alternatively, many experienced gluten-free bakers prefer to mix their own blends. This allows for greater control over the ingredients and the ability to tailor the blend to specific recipes or desired outcomes. A basic homemade blend might combine brown rice flour, white rice flour, tapioca starch, and potato starch in specific ratios, adding the binder separately as required by the recipe. This approach requires a bit more effort but can lead to more consistent results once you find your preferred ratio.
High-Quality Gluten-Free Flour Recommendations
While specific brand names can vary in availability, looking for certain characteristics helps identify quality. High-quality gluten-free flours and blends are often finely milled, resulting in a smoother texture in the final bread. They should also ideally be free from additives beyond the flours and starches themselves, although some blends include binders. For instance, certified gluten-free oat flour offers a lovely flavor and texture but must be specifically labeled gluten-free to avoid cross-contamination.
Using a mix of flours like finely ground brown rice flour, sweet rice flour (which is starchy and helps with binding), tapioca starch, and sorghum flour often yields good results. Brands that specialize in gluten-free products and maintain strict quality control for cross-contamination are generally preferred, especially for those with celiac disease. Ultimately, experimenting with a few different highly-rated gluten-free bread blends or individual flours is the best way to discover which ones work best for your baking style and desired bread characteristics.
Mistake #2: Improper Hydration
Hydration refers to the ratio of liquid to dry ingredients in a recipe, and it is critically important in gluten-free bread baking. Unlike wheat dough, which develops structure through kneading and gluten development, gluten-free dough relies heavily on proper hydration to activate starches and binders, allowing them to create a structure that can hold air.
Too little liquid results in a dry, crumbly dough that won't rise well, while too much liquid leads to a batter-like consistency that spreads rather than holds its shape, resulting in a dense, gummy loaf. Getting the hydration right is essential to avoid common gluten-free bread baking mistakes.
The optimal hydration level for gluten-free bread dough is often higher than for traditional wheat bread. This is because gluten-free flours and starches absorb liquid differently and typically require more moisture to achieve a workable consistency. A typical gluten-free bread dough might have a hydration level of 80-100% (liquid weight relative to flour weight), whereas wheat doughs are often in the 60-70% range. However, this varies significantly depending on the specific flour blend used, as some flours (like coconut flour) are much more absorbent than others (like white rice flour).
Hydration's Importance
Proper hydration directly impacts the texture, rise, and overall success of your gluten-free loaf. Adequate moisture allows the starches in the flour blend to gelatinize during baking, contributing to a soft, moist crumb. It also helps the binders (like xanthan gum or psyllium husk) to fully hydrate and form their gel-like structure, which is vital for trapping the carbon dioxide produced by yeast and providing elasticity to the dough. Without sufficient hydration, the dough will be stiff, the yeast activity will be limited, and the bread will be dense and dry.
Conversely, excessive hydration can overwhelm the structural components provided by the flour blend and binders. The dough becomes too weak to support itself, leading to a loaf that spreads outwards instead of rising upwards. During baking, the excess moisture can also contribute to a gummy texture in the interior. Therefore, paying close attention to the liquid amount specified in a gluten-free recipe, and understanding how different flours absorb water, is a critical step in avoiding these hydration-related gluten-free bread baking mistakes.
Identifying Over-Hydration
An over-hydrated gluten-free dough is typically very wet and sticky, more like a thick batter or a very wet porridge than a traditional dough. It will be difficult or impossible to shape by hand and will likely just spread out when placed on a baking surface or in a proofing basket. When baked, bread made from over-hydrated dough often has a poor rise, a very dense and sometimes gummy or wet-looking interior crumb, and a flat top. The crust might be pale and soft rather than developing a nice color and texture.
If you suspect your dough is over-hydrated while mixing, you can try adding a small amount (a tablespoon at a time) of your flour blend, mixing thoroughly, until it reaches the desired consistency. However, it's better to avoid this mistake by measuring ingredients accurately by weight from the start. For example, if a recipe calls for 400g of flour blend and 360g of liquid, that's 90% hydration, which is quite wet but typical for some gluten-free doughs. If your dough feels significantly wetter than expected for the recipe, it might be over-hydrated.
Identifying Under-Hydration
Under-hydrated gluten-free dough will feel stiff, dry, and potentially crumbly. It might be difficult to mix properly, leaving dry pockets of flour. When you try to handle it, it might break apart easily rather than holding together. During proofing, an under-hydrated dough will likely show minimal rise because the yeast struggles to produce gas and the dry structure inhibits expansion.
The baked bread from under-hydrated dough is characteristically dense and crumbly. It won't have a soft, moist interior; instead, it will be dry and can fall apart easily when sliced. The crust might be hard or tough.
If you notice your dough is too dry during mixing, gradually add more liquid (a teaspoon or tablespoon at a time), mixing well after each addition, until the dough reaches the consistency described in the recipe. Many gluten-free bread recipes describe the dough as being like a thick cake batter or a very wet cookie dough – it won't be like elastic wheat dough.
Achieving Optimal Hydration
Achieving optimal hydration begins with accurate measurement, ideally using a kitchen scale. Weighing your flour blend and liquids ensures you are using the exact proportions intended by the recipe developer. Different flour blends absorb liquid differently, so even if you measure correctly, you might need minor adjustments. Pay attention to the description of the dough's consistency provided in the recipe; this is your best guide. Gluten-free bread dough is typically wetter than traditional dough.
Some recipes might suggest holding back a small amount of liquid initially and adding it gradually until the correct consistency is reached. This is a good technique, especially when trying a new flour blend or recipe. The dough should be moist and cohesive but not excessively sticky or runny. It should hold a loose shape but not be stiff or dry. Practice and paying close attention to the dough's feel are key to mastering hydration and avoiding common gluten-free bread baking mistakes related to moisture balance.
Mistake #3: Omitting Binders
One of the most critical gluten-free bread baking mistakes is neglecting to include a binder, or using the wrong type or amount. Gluten is the protein network in wheat that provides structure, elasticity, and coherence, allowing dough to be kneaded and hold its shape while trapping gases. In the absence of gluten, gluten-free doughs require alternative ingredients to perform these functions. Binders like xanthan gum, psyllium husk, or sometimes guar gum step in to create a structure that mimics gluten's properties, providing elasticity and preventing the bread from crumbling.
Without a binder, gluten-free bread would essentially be a pile of cooked crumbs. The flour and starch mixture, even when hydrated, lacks the cohesive network needed to form a loaf that holds together, rises properly, and has a palatable texture. Adding the correct binder in the right proportion is non-negotiable for successful gluten-free bread baking. It helps the dough hold its shape during proofing and baking, contributes to a softer crumb, and prevents the dreaded dry, crumbly texture.
Understanding Binders
Binders in gluten-free baking are typically hydrocolloids, substances that form a gel when hydrated. This gel provides stickiness and elasticity to the dough, mimicking the function of gluten. When mixed with liquid, they swell and create a viscous network that helps hold the disparate gluten-free flour particles together. This network traps the gas produced by yeast, allowing the bread to rise. They also help retain moisture, contributing to a softer, less crumbly loaf.
Different binders behave slightly differently. Xanthan gum is a polysaccharide produced by fermentation and is a common additive in gluten-free baking. Psyllium husk, derived from the seeds of the Plantago ovata plant, is another popular binder that absorbs a significant amount of water and provides excellent structure, often resulting in a chewier, more "wheaty" texture. Guar gum, extracted from guar beans, is also used but is sometimes considered less effective for bread than xanthan or psyllium. The choice of binder can impact the final texture and appearance of the bread.
Common Gluten-Free Binders (Xanthan Gum, Psyllium Husk)
Xanthan gum is perhaps the most widely used binder in gluten-free baking. It's potent, and typically only a small amount is needed – often just 1/2 to 1 teaspoon per cup of gluten-free flour blend, though this varies by recipe and application. It provides good elasticity and structure, helping to prevent crumbling. However, using too much xanthan gum can result in a gummy or slightly slimy texture, which is another common gluten-free bread baking mistake to avoid. It's important to measure it accurately.
Psyllium husk, particularly whole psyllium husk or psyllium husk powder, has gained popularity for gluten-free bread. It absorbs significantly more water than xanthan gum and provides a more robust structure, often leading to a better rise and a less fragile crumb. Recipes using psyllium husk often call for a higher quantity compared to xanthan gum, sometimes several tablespoons per loaf. Psyllium husk can give the crumb a slightly purple hue, especially the powder, which is harmless but worth noting. It's crucial to use the form specified in the recipe (whole husk vs. powder) as they absorb liquid differently.
Binder Usage Guidelines
The correct amount of binder depends on several factors: the specific binder used (xanthan gum is used in smaller quantities than psyllium husk), the type of gluten-free flour blend (some blends already contain binders), and the specific recipe. Always follow the recipe's instructions precisely regarding the type and amount of binder. If your blend already contains xanthan or guar gum, you may need to reduce or omit the extra binder called for in a recipe, otherwise, you risk a gummy texture.
As a general guideline for blends without added binder: for xanthan gum, use about 1/2 to 1 teaspoon per cup of flour blend for bread. For psyllium husk powder, use roughly 1 to 2 tablespoons per cup of flour blend, and for whole psyllium husk, it might be slightly less. However, these are just starting points; recipe-specific instructions are best. Accurately measuring the binder, often by weight for consistency, is vital to avoid common gluten-free bread baking mistakes related to structure and texture.
Mistake #4: Insufficient Mixing
Unlike wheat dough, which requires extensive kneading to develop gluten, gluten-free dough does not benefit from long kneading. However, it does require sufficient mixing to properly hydrate the flours and starches and, crucially, to activate the binders. Insufficient mixing is a common gluten-free bread baking mistake that prevents the ingredients from fully combining and the binders from forming their necessary structure. This leads to a poorly developed dough that won't rise correctly and will result in a dense, unevenly textured loaf.
The goal of mixing gluten-free dough is not to develop elasticity through kneading, but rather to ensure homogeneity and binder hydration. The dough should be mixed until no dry pockets of flour remain and the mixture is smooth and cohesive, albeit often quite wet or sticky. Proper mixing ensures that the leavening agents (yeast or baking powder) are evenly distributed, the salt and sugar are dissolved, and the fats are incorporated, all contributing to a better rise and texture.
Mixing's Role
Mixing plays several vital roles in gluten-free bread making. Firstly, it distributes all ingredients evenly throughout the dough. This is important for consistent flavor, leavening, and structure. Secondly, and perhaps most importantly for gluten-free doughs, mixing provides the necessary time and action for the flours, starches, and binders to absorb the liquid and for the binders to form their gel-like network. Binders like xanthan gum and psyllium husk need contact with water and mechanical action (mixing) to fully hydrate and develop their structure.
Insufficient mixing means these binders won't fully activate, resulting in a dough that lacks cohesion and strength. The dough might feel lumpy or grainy, and it won't be able to trap the gases produced by yeast effectively. This directly impacts the loaf's volume and crumb structure. Adequate mixing ensures that the dough is ready to support the fermentation process and hold its shape during baking, helping to prevent one of the common gluten-free bread baking mistakes: a flat or collapsed loaf.
Effective Mixing Techniques
Gluten-free bread dough is often too wet to knead by hand in the traditional sense. Effective mixing is usually achieved using a stand mixer with a paddle attachment or dough hook, or vigorously with a sturdy wooden spoon or spatula by hand. The key is to mix for the time specified in the recipe, which is typically shorter than for wheat dough, often just 5-10 minutes in a stand mixer after all ingredients are combined.
Start by combining the wet and dry ingredients and mixing on a low speed until just combined, scraping down the sides of the bowl. Then, increase the speed to medium and mix for the recommended duration. The dough should become smoother and more cohesive. For doughs made with psyllium husk, you'll often see it thicken considerably and might even become slightly stretchy. Hand mixing requires vigorous stirring and folding to ensure everything is well combined and the binders are activated.
Stand Mixer vs. Hand Mixing
Using a stand mixer is highly recommended for gluten-free bread dough, especially for wetter recipes. The power and consistent action of a stand mixer make it much easier to achieve the necessary mixing time and ensure thorough hydration and binder activation. It also saves considerable effort, as gluten-free doughs can be quite stiff or sticky to mix by hand for an extended period. A stand mixer with a paddle attachment is often preferred initially to combine ingredients, switching to a dough hook once a cohesive dough forms, or simply continuing with the paddle for wetter doughs.
While hand mixing is possible, it requires more effort and attention to ensure the dough is mixed sufficiently. Use a sturdy spoon or spatula and mix vigorously, scraping the sides and bottom of the bowl frequently. Aim for a smooth, uniform consistency with no dry pockets. Whether using a stand mixer or hand mixing, pay attention to the dough's appearance and texture as described in the recipe to ensure you've mixed it enough to avoid common gluten-free bread baking mistakes related to underdeveloped structure.
Mistake #5: Incorrect Proofing
Proofing, the process where yeast dough rises, is just as important in gluten-free bread baking as it is in traditional baking, but it behaves differently. Incorrect proofing is another common gluten-free bread baking mistake. Gluten-free doughs, lacking the strong, elastic gluten network, tend to rise less dramatically and can be more prone to collapse if over-proofed. Under-proofing results in a dense loaf with poor volume, while over-proofing weakens the fragile structure, leading to a collapsed or flat loaf during or after baking.
Finding the sweet spot for proofing gluten-free bread requires understanding its unique characteristics. The dough relies on the structure provided by binders and the matrix formed by hydrated starches and flours to hold the gas produced by the yeast. This structure is less resilient than a gluten network. Therefore, proofing times and visual cues differ from wheat bread. Factors like room temperature, yeast activity, and the specific flour blend used all influence the optimal proofing time.
Proofing's Impact
Proofing allows the yeast to ferment the sugars in the dough, producing carbon dioxide gas and alcohol. This gas gets trapped within the dough's structure, causing it to expand and increase in volume. This expansion is crucial for developing a light, airy crumb texture in the final baked bread. Proofing also allows flavors to develop as a result of the fermentation process. A properly proofed loaf will have a good rise, an even crumb, and a pleasant flavor.
If the dough is under-proofed, the yeast hasn't produced enough gas, and the structure hasn't relaxed sufficiently. The loaf will be dense and heavy with a tight crumb. If it's over-proofed, the yeast has produced too much gas for the fragile gluten-free structure to contain. The structure weakens and can't support the gas, leading to deflation during handling or baking. The over-proofed loaf will often be flat, potentially gummy, and may have large, irregular holes or a collapsed top.
Identifying Proper Proofing
Identifying proper proofing in gluten-free dough requires different cues than wheat dough. The "poke test" commonly used for wheat dough (where the dough springs back slowly) is less reliable for gluten-free dough, which is often stickier and less elastic. Instead, look for the dough to have increased in volume, typically about 50-75%, rather than doubling, which is common for wheat bread. The surface should look puffy and aerated.
Another indicator is the appearance of small bubbles on the surface or sides of the dough. The dough should look significantly expanded from its initial state but should not look bubbly or fragile to the point of collapse. Pay close attention to the recipe's description of how the dough should look or feel after proofing. Gluten-free dough often has a shorter optimal proofing window than wheat dough, so it's easy to over-proof, especially in a warm environment.
Adjusting Proofing Time
Proofing time is highly dependent on temperature. In a warm kitchen (around 75-80°F or 24-27°C), gluten-free dough might proof in 45-60 minutes. In a cooler kitchen (around 70°F or 21°C), it could take 60-90 minutes or longer. Recipes provide estimated times, but it's crucial to watch the dough itself. If your kitchen is warmer, start checking earlier. If it's cooler, be patient.
To help control proofing, you can create a warm environment. This could be a slightly warm oven (turned off, perhaps with the light on), a proofing box, or simply placing the covered dough in a warm spot away from drafts. Avoid placing it in a very hot place, as this can kill the yeast or cause the dough to over-proof too quickly.
If you need to slow down proofing, a cooler spot or even the refrigerator can be used for a longer, slower rise, which can sometimes improve flavor. Learning to read the dough's visual cues rather than relying solely on time is key to avoiding common gluten-free bread baking mistakes with proofing.
Mistake #6: Inaccurate Baking Temperature
Baking temperature is a critical factor in the success of any bread, and gluten-free bread is no exception. Using an inaccurate baking temperature is a common gluten-free bread baking mistake that can lead to issues ranging from a pale, undercooked interior to a burnt crust with a raw center. Gluten-free bread often benefits from specific temperature profiles to ensure it cooks through properly, develops a good crust, and achieves optimal volume.
If the oven temperature is too low, the bread will spread instead of rising, and it will take too long to bake, potentially drying out. If the temperature is too high, the crust will set too quickly, preventing the loaf from rising fully, and the outside may burn before the inside is cooked. Furthermore, many home ovens are not accurately calibrated; the temperature displayed might differ significantly from the actual temperature inside the oven. Using an oven thermometer is highly recommended to ensure accuracy.
Temperature's Impact
Baking temperature significantly impacts the bread's rise, crust development, and internal structure. The initial burst of heat in a hot oven, known as "oven spring," causes the gases within the dough to expand rapidly, giving the loaf its final volume. Gluten-free bread, with its less robust structure, relies on this initial heat to set the crumb before it can collapse. Baking at the correct temperature helps to solidify the structure provided by the starches and binders.
The temperature also affects crust formation. High heat promotes the Maillard reaction and caramelization on the surface, creating a flavorful, golden-brown crust. Too low a temperature results in a pale, soft crust, while too high can lead to burning. Proper temperature ensures the interior cooks evenly, converting starches and setting the crumb without drying it out.
Recommended Baking Temperatures
Most gluten-free bread recipes recommend baking temperatures similar to traditional bread, typically ranging from 350°F to 425°F (175°C to 220°C). However, some recipes might suggest starting at a higher temperature for the first 10-15 minutes to maximize oven spring, then reducing the temperature to ensure the interior cooks through without burning the crust. For example, a recipe might call for baking at 425°F (220°C) for 15 minutes, then reducing to 375°F (190°C) for the remaining 30-40 minutes.
Using an oven thermometer is crucial to verify that your oven reaches and maintains the temperature specified in the recipe. Preheating the oven adequately is also important – allow at least 20-30 minutes after the oven indicates it has reached temperature to ensure the heat is stable, especially if using a baking stone or steel. This attention to detail helps prevent common gluten-free bread baking mistakes related to under or over-baking.
Checking for Doneness: Internal Temperature
Relying solely on visual cues like crust color to determine if gluten-free bread is done can be misleading. The most reliable way to check for doneness is to measure the internal temperature of the loaf using an instant-read thermometer. Insert the thermometer into the center of the loaf, avoiding any large air pockets.
Gluten-free bread is typically considered fully baked when its internal temperature reaches between 200°F and 210°F (93°C and 99°C). Baking to this temperature ensures that the starches have fully gelatinized and the crumb is set. If the crust looks done but the internal temperature is below this range, loosely tent the loaf with foil to prevent the crust from burning and continue baking until the target temperature is reached. This simple step is essential for avoiding common gluten-free bread baking mistakes that result in a gummy, undercooked interior.
Mistake #7: Premature Slicing
The final common gluten-free bread baking mistake beginners make is slicing into the loaf too soon after it comes out of the oven. While the aroma of freshly baked bread is incredibly tempting, slicing a hot loaf of gluten-free bread is a recipe for disaster. The internal structure of the bread is still setting and consolidating as it cools. Cutting into it prematurely disrupts this process, leading to a gummy, dense, or mushy texture, and the loaf may even collapse.
Allowing the bread to cool completely on a wire rack is a non-negotiable step. During the cooling period, moisture redistributes throughout the loaf, and the starches finalize their structure. This process is essential for achieving the correct texture and preventing the crumb from being sticky or wet. Patience is key after the baking is done!
Cooling's Importance
Cooling is an integral part of the baking process. As the bread cools, residual heat continues to cook the interior gently, and moisture from the hotter center moves towards the cooler crust. This redistribution of moisture is vital for a balanced texture. The starches, which gelatinized during baking, solidify and firm up as the bread cools, creating the final crumb structure.
If you slice the bread while it's still hot, the steam trapped inside will escape rapidly, taking moisture with it, and the starches won't have had time to set properly. This results in a gummy, sticky, and often dense texture. The loaf might also appear undercooked even if it reached the correct internal temperature in the oven. Proper cooling allows the bread to finish cooking through residual heat and develop its final, desirable texture.
Recommended Cooling Time
The recommended cooling time for gluten-free bread varies depending on the size and density of the loaf, but it is significantly longer than for many wheat breads. As a general rule, a standard loaf of gluten-free bread should be allowed to cool completely on a wire rack for at least 2-3 hours, and ideally even longer, up to 4 hours, before slicing. Smaller loaves or rolls might cool faster, perhaps in 1-2 hours, but a large, dense loaf requires ample time.
Cooling on a wire rack is important because it allows air circulation around the entire loaf, preventing the bottom crust from becoming soggy due to trapped steam. Resist the temptation to slice it until it feels cool to the touch throughout. This patience will be rewarded with a much better texture and helps avoid one of the most frustrating gluten-free bread baking mistakes.
Gluten-Free Bread Storage
Once your gluten-free bread has cooled completely, proper storage is important to maintain its freshness and texture. Unlike wheat bread, gluten-free bread tends to dry out more quickly and can become hard or crumbly if left exposed. Storing it at room temperature in an airtight container, a bread box, or a plastic bag is generally recommended for consumption within 1-2 days.
For longer storage, freezing is the best option. Slice the cooled loaf first, then wrap individual slices or small portions tightly in plastic wrap or foil, and place them in a freezer-safe bag or container. Frozen gluten-free bread can last for several months. Slices can be toasted directly from frozen, or thawed at room temperature. Freezing helps preserve the texture and prevent it from becoming stale too quickly.
Troubleshooting
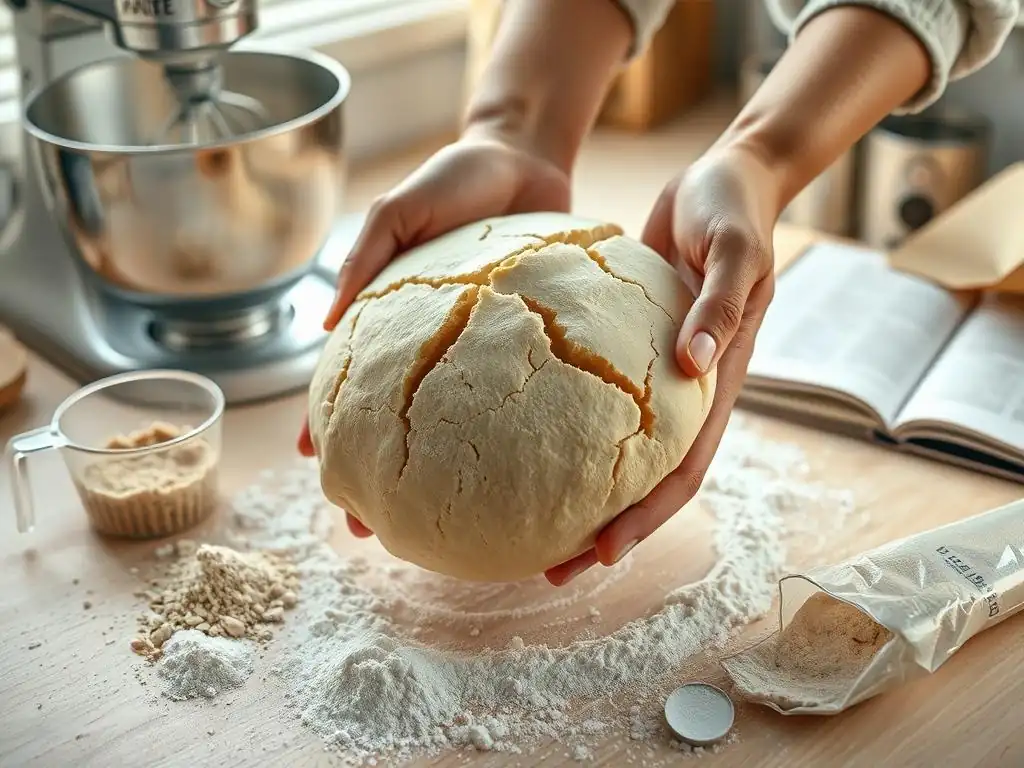
Dense and Gummy Bread
Dense and gummy bread is a very common gluten-free bread baking mistake. This usually stems from issues with hydration, mixing, binders, proofing, or cooling.
- Possible Causes:
- Over-hydration (too much liquid for the flour blend).
- Insufficient mixing (binders not activated).
- Wrong type or amount of binder (too little or too much, especially xanthan gum).
- Under-proofing (not enough rise before baking).
- Over-proofing (structure collapsed).
- Under-baking (internal temperature too low).
- Slicing the loaf too soon (before it cools completely).
- Solutions:
- Ensure accurate measurement of ingredients by weight.
- Mix for the full time recommended in the recipe to activate binders.
- Verify you are using the correct type and amount of binder for your recipe and flour blend.
- Check proofing cues – is the dough rising sufficiently but not collapsing?
- Always check the internal temperature (200-210°F / 93-99°C) before removing from the oven.
- Cool the bread completely on a wire rack for at least 2-3 hours before slicing.
Dry and Crumbly Bread
Dry and crumbly bread is another frequent gluten-free bread baking mistake, often the opposite problem of dense and gummy bread.
- Possible Causes:
- Under-hydration (not enough liquid).
- Wrong flour blend (too much absorbent flour, not enough starch/binder).
- Insufficient or incorrect binder (not enough to hold it together).
- Over-baking (baked too long or at too high a temperature).
- Storing improperly (left exposed to air).
- Solutions:
- Measure ingredients accurately by weight, ensuring sufficient liquid.
- Use a flour blend suitable for bread, or add extra starchy flour or binder.
- Confirm the recipe includes an appropriate binder and you've added the correct amount.
- Check for doneness using internal temperature (200-210°F / 93-99°C) and avoid baking longer than necessary.
- Store cooled bread in an airtight container or bag.
Insufficient Rise
A loaf that doesn't rise much during proofing or baking is a common gluten-free bread baking mistake.
- Possible Causes:
- Inactive yeast (yeast is old or killed by hot liquid).
- Under-proofing (not enough time for yeast to produce gas).
- Under-hydration (dough too stiff for yeast to work).
- Insufficient mixing (binders not activated to trap gas).
- Cold environment (yeast activity is slow).
- Over-proofing (structure collapsed before baking).
- Incorrect oven temperature (too low initial temperature).
- Solutions:
- Check yeast viability by proofing it in warm water with sugar before adding to the dough.
- Allow adequate proofing time in a warm environment, watching for visual cues.
- Ensure proper dough hydration.
- Mix dough thoroughly to activate binders.
- Proof dough in a warm spot (75-80°F / 24-27°C).
- Ensure oven is fully preheated to the correct temperature, perhaps starting higher for oven spring.
Unusual Texture
Sometimes, gluten-free bread has an unexpected texture, such as being sticky, chewy, or having large tunnels.
- Possible Causes:
- Gummy: Over-hydration, under-baking, slicing too soon, too much binder (especially xanthan gum).
- Sticky: Under-baking, slicing too soon.
- Chewy: Too much psyllium husk or other high-fiber flour, insufficient fat.
- Large Tunnels: Over-proofing, uneven mixing, too high initial oven temperature setting the crust too fast.
- Solutions:
- Review hydration levels, baking time/temperature, and cooling time.
- Adjust binder amount based on recipe and flour blend.
- Experiment with different flour blends or slightly adjust the flour ratio in your own blend.
- Ensure thorough and even mixing.
- Monitor proofing closely to avoid over-proofing.
Advanced Techniques
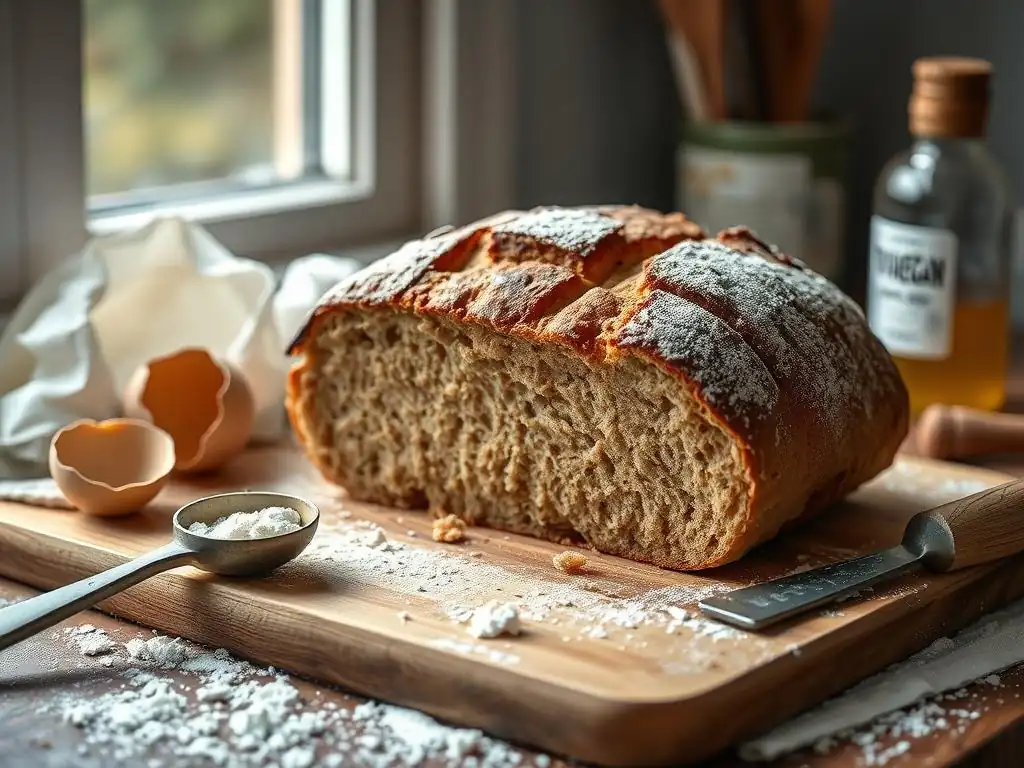
Flour Experimentation
Once you've mastered the basics and consistently avoid common gluten-free bread baking mistakes, experimenting with different gluten-free flours and starches can elevate your bread. While starting with a reliable blend is recommended, creating your own allows customization of flavor, texture, and nutritional profile. For example, incorporating a percentage of teff flour adds a unique earthy flavor and denser crumb, while using more tapioca starch can result in a lighter, airier texture. Using sweet rice flour (glutinous rice flour, though gluten-free) can improve chewiness and binding.
Experimentation requires careful note-taking. Change only one variable at a time (e.g., swap 10% of brown rice flour for sorghum flour) and record the results regarding dough consistency, rise, texture, and flavor. Remember that different flours absorb liquid differently, so you may need to adjust hydration slightly. A common starting point for experimentation is a blend like 40% whole grain flour (brown rice, sorghum, millet), 30% white rice flour, and 30% starch (tapioca, potato).
Flavor Enhancement
Gluten-free flours can sometimes produce a bland or slightly off-flavor compared to wheat. Enhancing the flavor is a simple yet effective technique. Adding ingredients like a tablespoon of apple cider vinegar or lemon juice can not only help activate baking soda (if used) but also add a subtle tang that improves overall flavor depth. A touch of honey, maple syrup, or molasses instead of just sugar can add complexity and aid in crust browning.
Incorporating seeds (like poppy, sesame, sunflower, or flax seeds), nuts, dried herbs (rosemary, thyme), or spices (caraway, fennel) into the dough adds both flavor and texture. Using alternative liquids like buttermilk (dairy or non-dairy), yogurt, or even a small amount of beer (ensure it's gluten-free) can contribute unique flavor notes. Developing a starter culture for gluten-free sourdough is another advanced technique that provides a wonderful tangy flavor and can improve texture, moving beyond standard yeasted loaves.
Achieving a Perfect Crust
A common challenge in gluten-free bread baking is achieving a desirable crust – often it's too thin, too hard, or too pale. Several advanced techniques can help create a beautiful, golden-brown, and satisfyingly chewy or crisp crust. Baking with steam is highly effective; placing a pan of hot water in the bottom of the oven during the initial baking phase creates steam, which keeps the dough surface moist, allowing it to expand fully before the crust sets and promoting a thinner, crisper crust.
Baking on a preheated baking stone or steel also helps by providing a burst of heat from below, contributing to oven spring and crust development. Brushing the loaf with water, milk, or an egg wash before baking can also enhance browning and create a softer or glossier crust.
Some recipes benefit from baking in a covered pot (like a Dutch oven) for the first part of the bake, which traps steam around the loaf, similar to the pan of water method, before finishing uncovered to allow the crust to brown. Achieving a perfect crust requires experimenting with temperature, steam, and surface treatments.
Conclusion: Mastering Gluten-Free Bread.
Mastering gluten-free bread baking is a rewarding journey that involves understanding the unique properties of gluten-free ingredients and learning to avoid common gluten-free bread baking mistakes. While the absence of gluten presents challenges, these can be overcome with accurate measurement, careful ingredient selection, proper mixing, attentive proofing, precise baking temperatures, and essential cooling.
By focusing on key areas such as selecting appropriate flour blends, achieving optimal hydration, correctly using binders, ensuring sufficient mixing, monitoring proofing cues, verifying baking temperature, and allowing adequate cooling time, beginners can significantly improve their results. Troubleshooting common issues like dense, crumbly, or flat loaves becomes easier when you understand the underlying causes related to these fundamental steps. Moving beyond the basics to experiment with flours, enhance flavors, and refine crust techniques opens up a world of delicious possibilities. With practice and patience, baking consistently excellent gluten-free bread is absolutely achievable.
Frequently Asked Questions
What is the most common mistake beginners make when baking gluten-free bread?
The most common mistake is using the wrong gluten-free flour blend. Different blends have varying starches and gums, which dramatically affect the final texture and rise.
Why is hydration so crucial in gluten-free bread baking, and what happens if I get it wrong?
Hydration is vital because gluten-free flours absorb significantly more liquid than wheat flour. Insufficient hydration leads to dry, crumbly bread, while too much results in a gummy texture.
What role do gums like xanthan gum or guar gum play in gluten-free bread, and can I omit them?
Gums act as a gluten replacement, providing structure and elasticity. Omitting them will likely result in a flat, dense, and fragile bread that crumbles easily.
How important is the baking temperature and time for gluten-free bread, and what are the risks of underbaking or overbaking?
Baking temperature and time are crucial to ensure the bread is fully cooked without drying out. Underbaking results in a gummy interior, while overbaking leads to a hard, dry crust and crumbly texture.
Why does my gluten-free bread sometimes collapse after baking, and how can I prevent this?
Collapsing often happens due to insufficient structure or uneven cooking. Ensure proper hydration, use enough gum, and allow the bread to cool completely before slicing to maintain its shape.
Final Reflection: The Unexpected Joys (and Challenges) of Gluten-Free Baking
The quest for the perfect gluten-free loaf is a journey fraught with pitfalls, but the rewards for perseverance are surprisingly delicious. Many beginners, overwhelmed by the unique demands of gluten-free baking, quickly become discouraged. This article highlighted common mistakes, from improper ingredient ratios to neglecting the crucial role of hydration, offering a roadmap to navigate these challenges. But the true impact extends far beyond simply avoiding a gummy or crumbly loaf.
The shift towards gluten-free baking reflects a broader societal change, a growing awareness of dietary needs and preferences. It's more than just avoiding gluten; it's about embracing creativity in the kitchen and finding joy in the process of experimentation. The greatest discovery of all time is that a person can change his future by merely changing his attitude.
– Oprah Winfrey. This perfectly encapsulates the spirit of gluten-free baking: a willingness to adapt, learn, and ultimately, succeed despite initial setbacks. The journey itself, with its triumphs and failures, becomes a testament to resilience and a celebration of culinary ingenuity.
You, the aspiring gluten-free baker, now hold the key to unlocking a world of flavour and texture. Don't be disheartened by initial failures; embrace them as learning opportunities. Remember the tips and techniques discussed in this article, and most importantly, trust your instincts. Experiment with different flours, adjust your methods, and most of all, enjoy the process. The perfect gluten-free loaf awaits – and the journey to get there is just as rewarding as the destination.
Unlock Your Gluten-Free Baking Potential!
Thanks for taking the time to explore the world of gluten-free bread baking with us! We hope you gained valuable insights into common pitfalls and discovered new ways to achieve that perfect loaf. Ready to put your newfound knowledge into practice?
- Bake your best gluten-free bread yet! Try out one of the recipes mentioned in the article, focusing on the tips we shared to avoid common mistakes. This is your chance to create something truly delicious.
- Share your baking journey! Post a picture of your creation on social media and tag us – we’d love to see your results!
- Explore more gluten-free baking resources on our website. Dive deeper into our other helpful guides and recipes.
What unique ingredient will you experiment with in your next gluten-free bread masterpiece?