
Your Definitive Guide to Choux Success with BakeWithEase

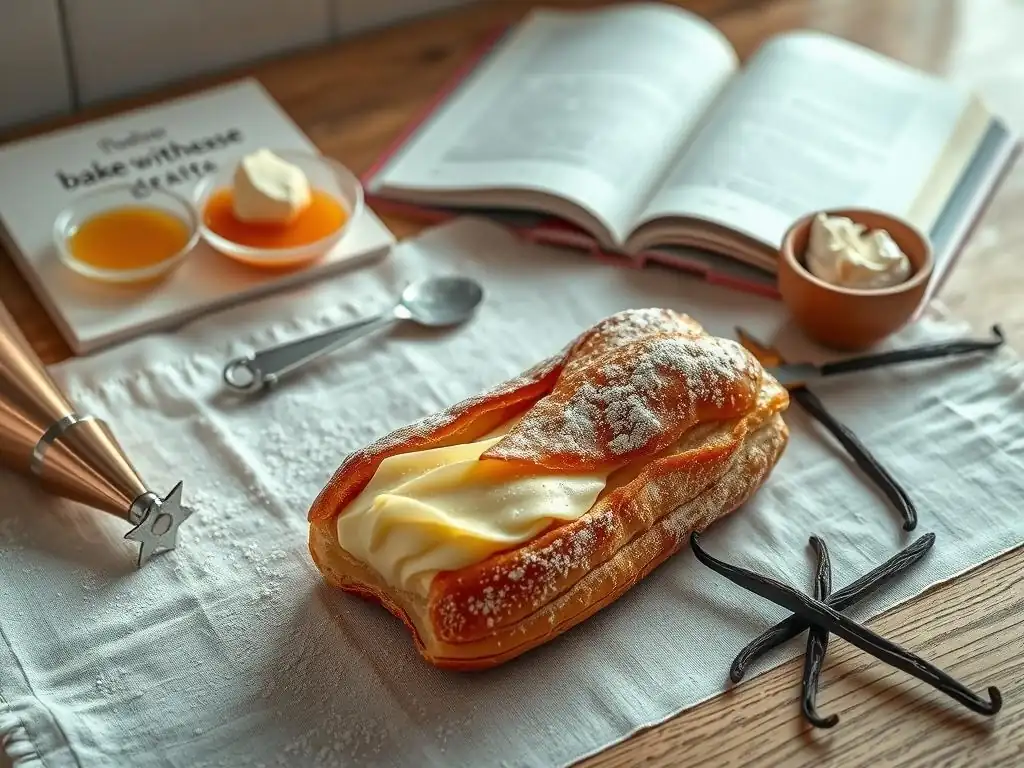
Welcome to BakeWithEase, your trusted companion in the delicious world of baking! Ever dreamt of creating light-as-air pastries that melt in your mouth? This guide dives deep into perfecting the choux pastry recipe, unlocking the secrets to consistently flawless results. Intrigued? Let's embark on this baking adventure together and transform your kitchen into a haven of delectable delights!
- Mastering Choux Pastry: Introduction to BakeWithEase's Guide
- Understanding the Fundamentals of Choux Pastry
-
Perfecting Choux Pastry Recipe: A Step-by-Step Guide
- Step 1: Preparing the Base - Water, Butter, and Flour
- Step 2: Cooking the Roux - The Key to a Stable Dough
- Step 3: Incorporating Eggs - Achieving the Perfect Consistency
- Step 4: Piping and Shaping Your Choux Creations
- Step 5: Baking the Choux - Achieving Golden Perfection
- Step 6: Cooling and Filling - Finishing Touches
- Troubleshooting Common Choux Pastry Problems
- Choux Pastry Recipe Variations and Creative Applications
- Advanced Choux Pastry Techniques for Experienced Bakers
- BakeWithEase's Tips and Tricks for Choux Pastry Success
- Conclusion: Your Journey to Choux Pastry Mastery with BakeWithEase
-
Frequently Asked Questions
- What exactly is choux pastry, and what makes it unique?
- What are the key ingredients needed for a successful choux pastry recipe on BakeWithEase?
- What are some common mistakes people make when attempting a choux pastry recipe, and how does BakeWithEase help avoid them?
- Can I adapt the BakeWithEase choux pastry recipe for different flavors or fillings?
- How does BakeWithEase's "Perfecting Choux Pastry Recipe" cater to both beginner and experienced bakers?
- Final Reflection: The Enduring Allure of the Perfect Choux
- Unleash Your Inner Pastry Chef!
Mastering Choux Pastry: Introduction to BakeWithEase's Guide
Welcome to the World of Choux: A Baker's Delight
Choux pastry, or pâte à choux as it's known in French, is a fundamental dough in classic patisserie that opens the door to an array of delightful treats. From airy cream puffs and elegant éclairs to savory gougères and impressive croquembouche towers, the versatility of choux is truly astounding. Unlike many doughs that rely on chemical leaveners or yeast, choux pastry uses steam created during baking to puff up, leaving a wonderfully hollow interior perfect for filling. Mastering this technique is a significant step in your baking journey, offering a unique combination of challenge and immense reward.
At BakeWithEase, we believe that every baker, regardless of experience, can achieve choux success. While it might seem intimidating at first glance, understanding the simple science and following precise steps is the key to unlocking its magic. This guide is designed to walk you through the process, offering insights and tips to help you confidently create perfect choux pastry, transforming basic ingredients into impressive culinary creations that will wow your friends and family.
Why Choux Pastry is a Must-Learn Baking Skill
Learning how to make choux pastry is incredibly valuable for expanding your baking repertoire and understanding fundamental dough mechanics. It teaches you about the interaction of heat, moisture, and gluten development in a unique way, offering lessons applicable to other areas of baking. Achieving the characteristic puff and hollow center is a tangible sign of successful technique, building confidence in your skills.
Beyond the technical mastery, the sheer variety of applications makes choux pastry a worthwhile skill. Once you've perfected the basic dough, the possibilities for fillings, glazes, and shapes are nearly endless. It's a foundation for creating both delicate desserts and sophisticated appetizers, proving that simple ingredients, when handled correctly, can yield spectacular results. Investing time in perfecting choux pastry recipes will undoubtedly elevate your baking game and open up exciting new avenues in the kitchen.
Understanding the Fundamentals of Choux Pastry
The Essential Ingredients for a Perfect Choux Pastry Recipe
Creating a perfect choux pastry recipe starts with understanding the role of each ingredient. While the list is short – typically water, butter, flour, and eggs – their quality and how they are combined are paramount to success. Using fresh, high-quality ingredients ensures the best flavor and texture outcomes. For instance, using fresh, room-temperature eggs is crucial for proper emulsion and structure.
Paying attention to the specific type and state of ingredients matters. Using unsalted butter allows you to control the salt content if adding a pinch, and ensuring it's cut into pieces helps it melt evenly. The type of flour, the temperature of the liquid, and the freshness of the eggs all contribute significantly to the final result, making ingredient selection the critical first step in perfecting your choux pastry recipe.
Flour Selection for Optimal Choux Texture
The type of flour used significantly impacts the structure of choux pastry. All-purpose flour is the most commonly recommended choice for a perfect choux pastry recipe because it provides a moderate protein content (typically 10-12%). This protein level allows for sufficient gluten development during the cooking process, which is essential for creating a strong structure capable of holding the steam that causes the pastry to puff.
Using flour with too low a protein content (like cake flour, around 8-10%) might result in a weaker structure that collapses. Conversely, flour with very high protein (like bread flour, 12-14%) can create a dough that is too tough. Sifting the flour before adding it to the liquid and butter mixture helps prevent lumps and ensures smooth incorporation, contributing to a consistently textured dough ready for baking.
The Role of Butter in Choux Pastry
Butter plays several vital roles in perfecting a choux pastry recipe. Firstly, it provides richness and flavor to the dough. More importantly, the fat in the butter helps tenderize the gluten structure developed by the flour, preventing the pastry from becoming tough. When heated, the butter melts and emulsifies with the liquid, contributing to the smooth consistency of the initial roux.
During baking, the fat from the butter also contributes to the crispness of the final pastry shell. As the water evaporates and creates steam, the fat helps create tiny pockets and promotes even browning, resulting in that desirable golden-brown exterior and flaky texture. Using good quality butter with a relatively high-fat content (around 80%) is recommended for the best results.
Egg Importance: Binding and Leavening in Choux
Eggs are arguably the most critical ingredient in choux pastry after the initial roux is formed. They serve as both a binder and a primary leavening agent (in conjunction with steam). The protein in the eggs coagulates during baking, providing structure and stability to the pastry walls as they expand. The fat in the yolks adds richness and contributes to the tender texture.
Crucially, the moisture in the eggs turns to steam during baking, adding to the lift initiated by the water. Eggs also provide essential emulsification, helping to bring the cooked flour mixture together into a smooth, pipeable dough. Adding eggs gradually and ensuring they are fully incorporated is vital; too few eggs result in a dense, flat pastry, while too many can make the dough too wet and cause it to collapse. A typical ratio might involve adding 3-5 large eggs per cup of flour, adjusting based on dough consistency.
Liquid: Water vs. Milk in Choux Dough
The liquid used in choux pastry is typically water or a combination of water and milk. Water is excellent for maximizing steam production because it has a higher boiling point than milk's water content when other solids are present. Using solely water tends to yield a crispier, lighter shell with a more pronounced puff, ideal for classic éclairs or cream puffs where a very hollow interior is desired.
Using milk, or a water-milk blend, results in a richer, slightly softer pastry with a less crispy crust and often a more golden color due to the milk solids browning. This can be preferable for certain applications, like gougères, where a softer crumb is acceptable. Experimenting with the liquid ratio (e.g., 50/50 water and milk) can help you fine-tune the texture and richness to achieve your perfect choux pastry recipe for specific uses.
The Science Behind Choux: How It Works
Understanding the science behind choux pastry is key to perfecting the technique. The magic lies in the interaction of moisture, fat, and heat, leading to a dramatic expansion during baking without the need for yeast or baking powder. It's a fascinating process that turns a seemingly simple dough into an airy shell.
The initial cooking of the flour, liquid, and butter creates a paste that gelatinizes the starch in the flour, trapping moisture. Adding eggs introduces more moisture and protein. When this dough hits the hot oven, the trapped moisture rapidly converts to steam. This steam forces the dough walls outwards, causing the pastry to puff dramatically. The protein from the flour and eggs then coagulates in the heat, setting the structure and creating the characteristic hollow interior.
Steam Power: The Secret to Hollow Choux
The primary leavening agent in choux pastry is steam. When the dough, which contains a significant amount of moisture from the liquid and eggs, is placed in a hot oven (typically starting around 400-425°F or 200-220°C), the water molecules within the dough turn into steam almost instantly. This steam is trapped within the developing gluten and egg protein network.
As more and more steam is generated, it exerts pressure on the dough walls, forcing them to expand rapidly. This expansion creates the large, hollow cavity inside the pastry shell. Maintaining a high initial oven temperature is crucial to generate enough steam quickly before the dough structure sets, ensuring maximum puff. Without sufficient steam, the pastry will remain flat or dense.
Gluten Development in Choux Dough
While choux pastry doesn't require the extensive kneading of bread dough, some gluten development is necessary to create a strong structure. Gluten, formed by the proteins in flour when mixed with liquid and agitated, provides the elasticity and framework that allows the dough to stretch and hold the steam during baking.
The cooking of the flour-liquid-butter mixture on the stovetop initiates some gluten development. The vigorous stirring during this phase and the subsequent beating in of eggs further develops this network. However, overworking the dough is not the goal; the aim is just enough gluten to create a resilient structure that can expand without collapsing, resulting in the ideal texture for perfecting a choux pastry recipe.
Perfecting Choux Pastry Recipe: A Step-by-Step Guide
Achieving a truly perfect choux pastry recipe requires precision and attention to detail at each stage. From preparing the initial base to the final cooling, every step contributes to the final result. This guide breaks down the process into manageable steps, highlighting key techniques and potential pitfalls to help you succeed.
Follow these steps carefully, and you'll be well on your way to creating beautiful, airy choux pastries ready for your favorite fillings. Remember that practice makes perfect, and even if your first batch isn't flawless, understanding the process will help you improve with each attempt.
Step 1: Preparing the Base - Water, Butter, and Flour
The first step in perfecting a choux pastry recipe involves combining the liquid and fat and then incorporating the flour to form a paste, often referred to as a roux. This is a critical stage where the starch in the flour begins to gelatinize, preparing the dough for the subsequent addition of eggs. Accuracy here sets the stage for the rest of the process.
Start by combining your liquid (water, milk, or a mix) and cubed butter in a saucepan. Adding a pinch of salt and perhaps a touch of sugar at this stage is common for flavor. Heat this mixture until the butter is completely melted and the liquid just reaches a rolling boil.
Combining Water and Butter: Achieving the Right Temperature
The correct temperature when combining water and butter is crucial. You need to bring the mixture to a rolling boil – not just simmering, but actively bubbling. This ensures the butter is fully melted and the liquid is hot enough to immediately cook the flour when added. Using cubed butter helps it melt faster and more evenly.
Once the mixture reaches a rolling boil, remove the pan from the heat immediately before adding the flour. This prevents excessive evaporation of the liquid before the flour is incorporated, which could affect the final dough consistency. The rapid heat helps gelatinize the starch efficiently upon flour addition.
Incorporating Flour: Creating a Roux
After removing the boiling liquid and butter from the heat, add all the sifted flour at once. This might seem counter-intuitive, but adding it all at once allows the flour to be evenly hydrated and cooked by the hot liquid. Immediately begin stirring vigorously with a wooden spoon or heatproof spatula.
Stir continuously until the mixture comes together into a smooth ball of dough that pulls away cleanly from the sides of the pan. This stage, creating the roux, is fundamental. It should form within 30-60 seconds of adding the flour.
Step 2: Cooking the Roux - The Key to a Stable Dough
Once the dough ball has formed, return the pan to medium heat. This is the "cooking" or "drying out" stage of the roux, a vital step for perfecting a choux pastry recipe. Continue to stir and work the dough vigorously for 2-3 minutes.
You'll notice a thin film forming on the bottom of the pan as you stir. This indicates that excess moisture is being cooked out of the dough. This drying process is essential because it allows the dough to absorb more eggs later, which is necessary for proper leavening and structure. Don't skip this step, or your dough might be too wet.
Stirring Techniques for a Smooth Roux
Vigorous and constant stirring is key during the roux cooking phase. Use a sturdy wooden spoon or a flat-edged heatproof spatula to scrape the bottom and sides of the pan continuously. The aim is to ensure the dough cooks evenly and to prevent it from sticking or burning.
Work the dough by folding it over on itself and pressing it against the sides of the pan. This action helps to dry out the dough and develop the necessary structure. The stirring should be energetic enough to create that thin film on the pan bottom within a couple of minutes.
Knowing When the Roux is Ready
You can tell the roux is ready for the next step when it forms a smooth, compact ball that pulls cleanly away from the sides of the pan and doesn't stick excessively. More importantly, after cooking it on the heat for 2-3 minutes, you should see a thin, starchy film coating the bottom of the saucepan when you scrape the dough away.
Another sign is the texture; the dough should look less wet and slightly more matte than when you first formed the ball. It should feel relatively firm. This drying step ensures the dough has the right consistency to properly emulsify with the eggs and puff correctly during baking.
Step 3: Incorporating Eggs - Achieving the Perfect Consistency
Adding the eggs is arguably the most delicate stage in perfecting a choux pastry recipe. This is where the dough transforms from a firm paste into a smooth, glossy, and pipeable mixture. The eggs provide the necessary moisture, fat, and protein for leavening and structure.
It's crucial to allow the roux to cool slightly before adding the eggs. If the roux is too hot, the eggs will scramble, ruining the dough. Transfer the roux to a mixing bowl (or use a stand mixer with the paddle attachment) and let it cool for 5-10 minutes until it's warm to the touch but no longer steaming hot. Around 140°F (60°C) is a safe temperature; if it's much hotter, wait longer.
Adding Eggs Gradually: Preventing Scrambling
Once the roux has cooled sufficiently, add the eggs one at a time, beating thoroughly after each addition until it is fully incorporated and the dough is smooth. Adding eggs too quickly can result in a lumpy dough that is difficult to emulsify properly. Using a stand mixer on medium speed is highly recommended for this step, as it ensures vigorous mixing and proper development.
After each egg is mixed in, the dough will initially look separated and slippery. Continue mixing until it comes back together into a cohesive, smooth mass before adding the next egg. This process of beating each egg in fully is vital for creating a stable emulsion.
Determining the Right Egg Quantity for Your Choux
The exact number of eggs needed can vary slightly depending on the humidity, the type of flour used, and how much moisture was cooked out of the roux. This is where touch and visual cues are essential. Start with the quantity specified in your recipe (e.g., 4 large eggs for a standard batch) but be prepared to adjust slightly.
The finished dough should be smooth, glossy, and thick enough to hold its shape when piped, but soft enough to fall from a spoon in a "V" shape or a thick ribbon. If you lift the paddle attachment or spoon, the dough should slowly trail off, forming a peak that eventually collapses slightly. If it's too stiff, add a partial egg (whisk an egg and add half or less) and mix again. If it's too wet, unfortunately, it's difficult to correct, which is why adding eggs gradually is so important when perfecting a choux pastry recipe.
Step 4: Piping and Shaping Your Choux Creations
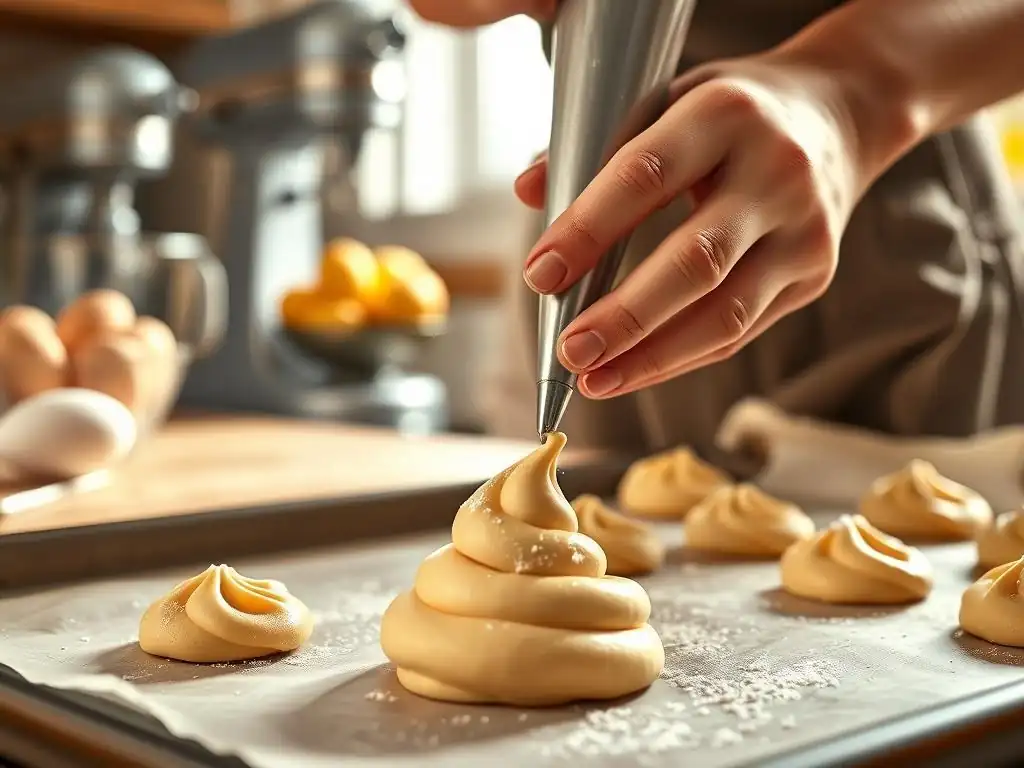
Once your choux dough has the perfect consistency, it's time to shape your pastries. Piping allows for uniform shapes and sizes, which is important for even baking. Transfer the dough to a piping bag fitted with your desired tip.
Using a piping bag provides control and allows you to create consistent shapes, whether you're making round cream puffs, elongated éclairs, or intricate rings. Prepare your baking sheets by lining them with parchment paper or a silicone baking mat.
Choosing the Right Piping Tip
The choice of piping tip depends on the shape you want to create. For classic round cream puffs, a large round tip (like an Ateco #805 or #806) is ideal. For éclairs, a large open star tip (like an Ateco #826 or #827) is often preferred as the ridges can help the pastry expand evenly and provide a nice surface for glaze.
If you don't have piping tips, you can simply cut a corner off the piping bag for round shapes, though results may be less uniform. Ensure the tip opening is large enough to allow the thick dough to pass through easily without excessive force.
Piping Techniques for Different Choux Shapes
For cream puffs, hold the piping bag vertically about half an inch above the baking sheet. Apply even pressure to pipe mounds of dough, lifting straight up when you finish. For éclairs, hold the bag at a slight angle and pipe straight lines of dough, maintaining consistent pressure and speed for even length.
Leave adequate space (at least 1-2 inches) between each piped shape on the baking sheet, as they will expand significantly during baking. You can smooth down any peaks on cream puffs by dipping a finger in water and gently pressing them down. This prevents them from burning in the oven.
Step 5: Baking the Choux - Achieving Golden Perfection
Baking is the magical stage where the steam works its wonders. The correct oven temperature and baking time are paramount to achieving that characteristic puff and crisp, hollow interior. An improperly baked choux pastry will collapse or be soggy.
Preheat your oven well in advance to ensure it reaches and maintains the target temperature. A common technique for perfecting a choux pastry recipe is to start with a high temperature to maximize steam lift, then reduce the temperature to allow the pastries to dry out and crisp up without burning.
Oven Temperature and Baking Time
A standard approach is to bake choux pastry at a high temperature, such as 400-425°F (200-220°C), for the first 15-20 minutes to achieve maximum puff. Then, the temperature is typically reduced to 350-375°F (175-190°C) for another 15-25 minutes to allow the pastries to dry out and become golden brown and crisp.
Total baking time will vary depending on the size and shape of your pastries, but it can range from 30 to 45 minutes. The pastries should be deeply golden brown all over, not just on top, and feel light and hollow when lifted. Underbaking is a common cause of collapse.
The Importance of Avoiding Oven Door Opening
It is absolutely critical not to open the oven door during the initial high-temperature baking phase (the first 15-20 minutes). Opening the door releases the trapped heat and steam, causing the temperature to drop suddenly. This can lead to the pastry collapsing before its structure has set, resulting in flat or deflated choux.
Only open the oven door after the pastries have fully puffed and the structure appears set, usually when you reduce the temperature. Even then, minimize how long the door is open. Trust the process and resist the urge to peek too early when perfecting a choux pastry recipe.
Step 6: Cooling and Filling - Finishing Touches
Once the choux pastries are baked to a deep golden brown and feel light, they need to cool properly before filling. Improper cooling can lead to condensation, which makes the pastries soggy.
Remove the baked choux from the oven and immediately transfer them to a wire rack to cool completely. For larger pastries or éclairs, you can sometimes make a small slit in the side or bottom as soon as they come out of the oven to allow steam to escape more quickly, which helps prevent sogginess.
Cooling Choux Pastry Properly
Cooling on a wire rack allows air to circulate around the entire pastry, preventing the bottom from becoming damp from residual heat and steam. Ensure the pastries are fully cooled to room temperature before attempting to fill them. Filling warm choux will cause the filling to melt or the pastry to become soggy from trapped steam.
Allowing sufficient cooling time, perhaps 30 minutes to an hour depending on size, is a small but important step in perfecting a choux pastry recipe. Patience at this stage ensures your crisp shells remain crisp.
Creative Filling Ideas for Choux Pastries
The hollow interior of choux pastry is a blank canvas for endless filling possibilities. Classic fillings include crème pâtissière (pastry cream), whipped cream, or diplomat cream (pastry cream folded with whipped cream). These can be flavored with vanilla, chocolate, coffee, or fruit purees.
For savory choux (gougères), fillings like cheese sauces, mushroom duxelles, or even smoked salmon and cream cheese are delicious. You can also fill them with ice cream for a classic profiterole dessert. Use a piping bag with a small tip to inject the filling into the cooled pastries through a small hole poked in the bottom or side.
Troubleshooting Common Choux Pastry Problems
Even when following a perfect choux pastry recipe, sometimes things don't go as planned. Understanding common issues and their causes is crucial for improving your technique and achieving consistent results. Don't be discouraged by early failures; they are learning opportunities!
The most frequent problems encountered by bakers include pastries that are flat, soggy, or don't rise properly. Each issue usually points to specific points in the process where adjustments are needed.
Why is My Choux Pastry Flat?
Flat choux pastry is one of the most common and frustrating problems. It means the dough didn't puff up sufficiently in the oven. Several factors can contribute to this lack of rise, often related to the steam generation or the dough's ability to hold that steam.
Possible causes include insufficient moisture in the dough (perhaps the roux was cooked too long), adding too few eggs (not enough moisture or structure), or not reaching a high enough initial oven temperature to generate rapid steam. Overworking the dough can also sometimes lead to a tougher structure that restricts expansion.
Addressing Insufficient Steam
Insufficient steam is a primary culprit for flat choux. Ensure your oven is fully preheated to the high starting temperature (e.g., 400-425°F or 200-220°C) before placing the pastries inside. The oven needs to be hot enough to create an immediate burst of steam from the dough's moisture.
Also, ensure your liquid was boiling when you added the flour, and you didn't overcook the roux to the point where it became excessively dry. The dough needs adequate moisture content to produce the necessary steam volume for proper puffing when perfecting a choux pastry recipe.
Correcting Egg Quantity Issues
Adding too few eggs results in a dough that is too stiff and lacks sufficient moisture and protein for proper leavening and structure. The dough won't be able to expand much from the steam. Ensure your dough has the correct consistency – it should be glossy and fall in a ribbon or V-shape from a spoon or paddle.
If your dough feels too stiff after adding the recommended number of eggs, you likely need to add more. Whisk an extra egg and add it gradually, small amounts at a time, mixing thoroughly until the correct consistency is reached. This is why adding eggs one by one is essential.
Why is My Choux Pastry Soggy?
Soggy choux pastry, especially on the bottom, is another common issue. This typically happens when the pastry hasn't been baked long enough or at the right temperature to fully dry out the interior and crisp the exterior.
Underbaking leaves too much moisture trapped inside the shell. Additionally, improper cooling can cause condensation to form, which then gets absorbed by the pastry, leading to a soggy texture.
Improving Baking Time and Temperature
Ensure you are baking the choux for the full recommended time, or until they are deeply golden brown and feel very light. Don't rely solely on visual cues of puff; the color indicates the crust has properly formed and dried. After the initial high-heat puffing phase, reducing the temperature allows the interior to cook and dry out without the exterior burning.
If your pastries are puffing but consistently coming out soggy, try increasing the baking time at the lower temperature by 5-10 minutes. You can also try baking them slightly longer at a slightly lower temperature overall. Some bakers even turn off the oven after baking is complete and leave the pastries inside with the door ajar for 5-10 minutes to finish drying out.
Ensuring Proper Cooling
As mentioned earlier, cooling choux pastry on a wire rack is essential. Placing hot pastries directly on a solid surface will trap steam underneath, causing condensation and a soggy bottom.
Ensure there is good air circulation around the pastries as they cool. Don't stack them or place them too close together on the rack until they are completely cool. Patience during the cooling phase is just as important as precision during the baking phase for perfecting a choux pastry recipe.
Why is My Choux Pastry Not Rising?
This issue is closely related to flatness but can also stem from different problems. If your choux dough isn't rising in the oven, it indicates a failure in the steam leavening process or a dough structure that cannot hold the steam.
Potential causes include an insufficiently cooked roux, adding eggs to a roux that was too hot, using stale or insufficient leavening agents (though choux doesn't use traditional ones, the ingredients must be fresh to perform correctly), or oven issues like incorrect temperature calibration.
The Importance of a Strong Roux
Properly cooking the roux (Step 2) is fundamental to achieving good rise. Cooking the flour, liquid, and butter mixture on the stovetop for 2-3 minutes after the dough ball forms gelatinizes the starch and dries out the dough. This drying process is critical as it allows the dough to absorb enough eggs later, which are vital for creating steam.
An undercooked roux will be too wet initially and won't be able to take enough eggs, resulting in a dough that lacks structure and moisture for optimal puff. Ensuring you see that film on the bottom of the pan confirms the roux has been cooked sufficiently when perfecting a choux pastry recipe.
The Role of Fresh Ingredients
While choux doesn't use baking powder or yeast, the freshness of your eggs is important. Older eggs can have slightly different moisture levels and protein structures that might affect the dough's consistency and ability to rise. Using fresh, large eggs at room temperature is recommended for consistent results.
Additionally, ensuring your butter isn't rancid and your flour hasn't been sitting around for years helps guarantee the ingredients perform as expected. While less critical than the technique, using fresh components is part of the foundation for perfecting any choux pastry recipe.
Choux Pastry Recipe Variations and Creative Applications
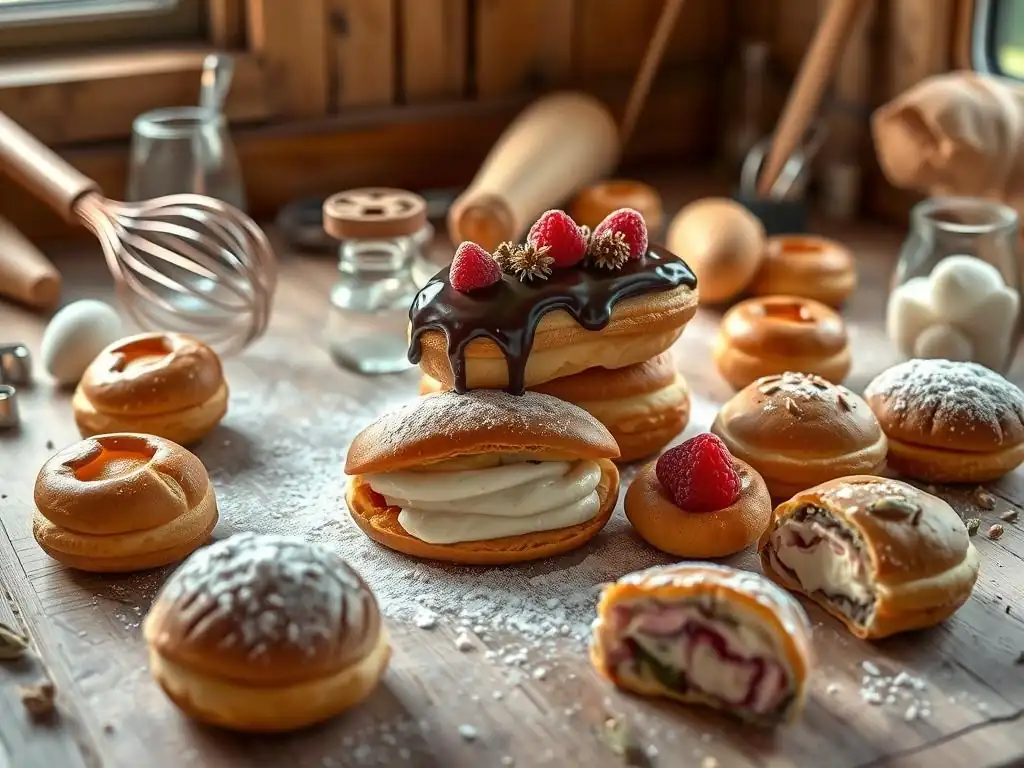
Once you've mastered the basic choux pastry recipe, a world of delicious possibilities opens up. The versatile dough can be shaped and filled in countless ways, creating both classic and innovative desserts and savory bites.
Exploring these variations allows you to practice your choux skills while creating an impressive array of treats. Each application highlights a different aspect of the dough's unique texture and structure.
Éclairs: Classic Chocolate-Covered Delights
Éclairs are one of the most iconic uses of choux pastry. They are typically piped into elongated shapes, baked until golden and hollow, and then filled with pastry cream (often vanilla or chocolate) and topped with a rich chocolate glaze or ganache.
The elongated shape provides a perfect structure for a generous amount of filling and a smooth surface for glazing. Achieving straight, evenly puffed éclairs is a key step in perfecting this specific choux pastry recipe application.
Cream Puffs: Light and Airy Indulgences
Perhaps the most straightforward application, cream puffs (or profiteroles) are made by piping round mounds of choux dough. Once baked and cooled, they are typically filled with whipped cream, pastry cream, or even ice cream.
Often served dusted with powdered sugar or drizzled with chocolate sauce, cream puffs showcase the delightful contrast between the crisp exterior and the light, airy interior, making them a perennial favorite.
Gougères: Savory Cheese Puffs
Gougères are the savory cousin of cream puffs. Made by incorporating grated cheese (like Gruyère or Parmesan) into the choux dough before piping, they are baked until golden and cheesy.
Served warm, often as an appetizer or alongside soup, gougères offer a delightful cheesy flavor and a tender, airy texture, proving that perfecting a choux pastry recipe isn't just for sweet treats.
Croquembouche: The Towering Celebration Cake
The croquembouche is a showstopping French dessert consisting of a cone-shaped tower of cream puffs (profiteroles) bound together with threads of caramel. It is often decorated with spun sugar, nougatine, or other confectioneries.
Building a croquembouche is an advanced application that requires mastering both the choux pastry itself and the tricky technique of working with hot caramel, a true test of baking skill.
Paris-Brest: A Hazelnut Cream-Filled Delight
The Paris-Brest is a classic French pastry made from choux dough piped into a ring shape, often topped with sliced almonds. After baking, it is sliced horizontally and filled with a praline-flavored cream, typically a rich mousseline cream.
Originally created to commemorate a bicycle race between Paris and Brest, its wheel shape is distinctive. Perfecting this choux pastry recipe variation involves achieving an even ring and a luscious, stable praline filling.
Advanced Choux Pastry Techniques for Experienced Bakers
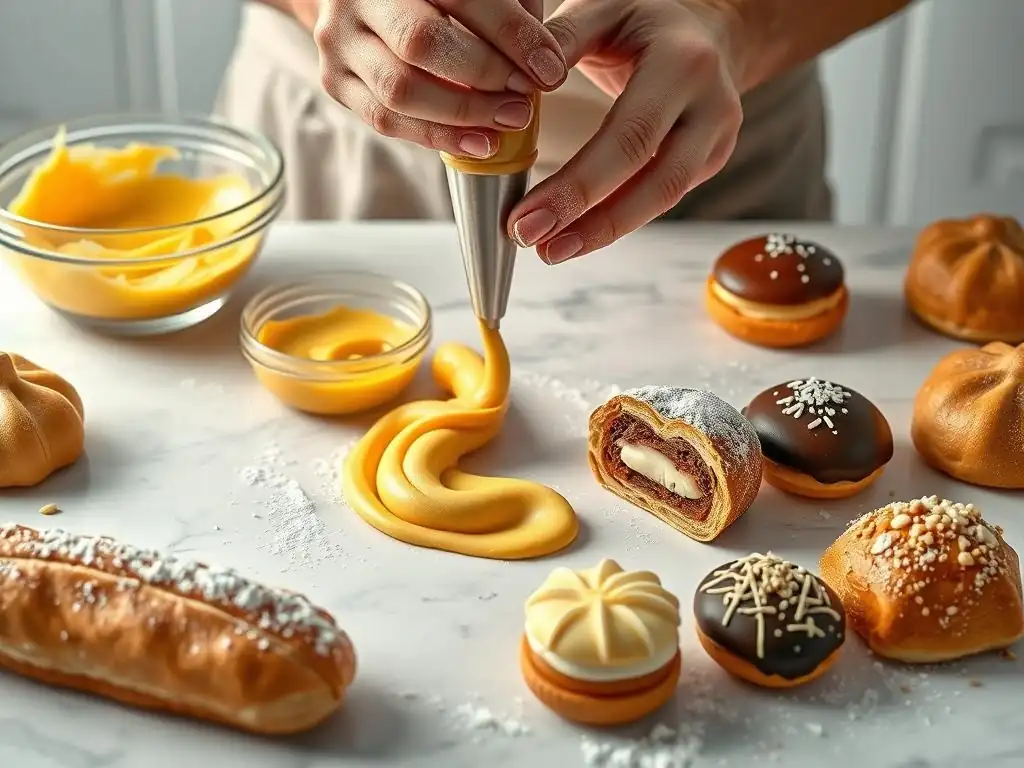
For those who have mastered the basics of perfecting a choux pastry recipe, there are several advanced techniques to explore that can add creativity and complexity to your creations. These methods allow for greater customization in terms of color, flavor, and form.
Pushing your skills with techniques like adding color or flavor directly to the dough, or creating complex shapes, can elevate your choux pastries from simple treats to impressive works of art.
Creating Colored Choux Pastry
Adding color to choux pastry can make for visually stunning presentations. This is typically done by incorporating gel or powder food coloring into the dough when adding the eggs. Liquid food coloring can add too much moisture, potentially affecting the dough consistency.
Start with a small amount of high-quality gel coloring and mix it in thoroughly with the eggs before adding them to the dough, or add it directly to the dough with the last egg addition. Mix until the color is uniform. This technique is often used for themed pastries or to signify different flavors.
Adding Flavors to Choux Dough
Flavor can be infused into the choux dough itself, not just the filling. This can be done by substituting a portion of the liquid with flavored liquids (like coffee or fruit juice, being mindful of acidity), adding spices (like cinnamon or nutmeg) with the flour, or incorporating extracts (like vanilla or almond) with the eggs.
For savory choux, adding herbs, spices, or cheese directly into the dough is common. Experimenting with different flavor combinations in the dough itself adds another layer of complexity and taste to your choux creations.
Mastering Different Choux Shapes
Beyond the standard rounds and logs, choux dough can be piped into a multitude of shapes. Creating swans, rings, or even intricate patterns requires control over the piping bag and a stable dough consistency.
Practice piping on parchment paper without dough first to get a feel for the pressure and movement needed. For complex shapes like swans, different parts (the body and neck) are piped separately and assembled after baking. Mastering these shapes adds a professional touch when perfecting a choux pastry recipe.
BakeWithEase's Tips and Tricks for Choux Pastry Success
At BakeWithEase, we've gathered insights from countless batches of choux to bring you practical tips that can make a real difference in your success. These aren't just theoretical points; they are gleaned from experience in the kitchen.
From ingredient handling to oven management, these expert pieces of advice are designed to help you avoid common pitfalls and achieve reliably excellent results when perfecting a choux pastry recipe.
Expert Advice from Our Baking Professionals
- Weigh your ingredients: Baking is a science, and precision matters, especially with choux. Using a kitchen scale to weigh flour and liquid is far more accurate than volume measurements (cups), which can vary. For example, 1 cup of all-purpose flour can weigh anywhere from 120g to 140g depending on how it's scooped, a significant difference in a delicate dough.
- Don't rush the cooling: Ensure the roux cools sufficiently before adding eggs to prevent scrambling. Aim for it to be warm to the touch, not hot.
- Listen to your dough: Pay attention to the dough's consistency when adding eggs. It should be glossy and fall in a V-shape. Don't be afraid to adjust the number of eggs slightly if needed.
- Preheat your oven properly: Give your oven ample time (20-30 minutes) to reach and stabilize at the correct temperature, especially for the initial high-heat phase. Consider using an oven thermometer to check for accuracy, as oven temperatures can vary by 25-50°F (15-30°C) from the dial setting.
- Bake until golden brown and light: Don't pull the pastries too early just because they've puffed. They need to bake until they are a deep golden color and feel light and hollow to ensure they are fully dried out and won't collapse. This might take 35-45 minutes for medium-sized pastries.
Recommended Tools and Equipment for Choux Baking
Having the right tools can make the process of perfecting a choux pastry recipe much smoother and more successful. While you don't need highly specialized equipment, a few items are particularly helpful.
- Heavy-bottomed saucepan: Provides even heat distribution for cooking the roux, preventing scorching. A 2-3 quart size is usually sufficient for a standard batch.
- Sturdy wooden spoon or heatproof spatula: Essential for vigorously stirring the roux on the stovetop.
- Stand mixer with paddle attachment: While you can incorporate eggs by hand, a stand mixer makes this step much easier and ensures thorough mixing, which is crucial for emulsification. Mixers like KitchenAid or similar models work well.
- Piping bag and tips: For uniform shaping. A standard reusable piping bag and a set of large round and star tips (e.g., Ateco #805, #826) are excellent for various choux shapes.
- Wire cooling rack: Absolutely necessary for cooling the baked pastries properly and preventing sogginess.
- Kitchen scale: For accurate ingredient measurements, especially flour and liquid. A digital scale is highly recommended.
Conclusion: Your Journey to Choux Pastry Mastery with BakeWithEase
You've now explored the essential steps, science, and troubleshooting involved in perfecting a choux pastry recipe. From understanding the role of each ingredient to mastering baking temperatures and techniques, you have the knowledge to embark on your choux baking adventure.
Remember that baking, especially something like choux, is a skill that improves with practice. Your first batch might not be perfect, but each attempt will teach you more about the dough and your oven. Don't be afraid to experiment (after mastering the basic recipe!) and find what works best for you.
Celebrate Your Baking Achievements
Take pride in each batch of choux you create! Whether they are perfectly puffed éclairs or delightfully airy cream puffs, you are developing a valuable baking skill. Share your creations with friends and family, and enjoy the delicious results of your efforts.
Baking is a rewarding process, and mastering choux pastry is a significant milestone. Every successful puff is a testament to your growing expertise in the kitchen.
Continue Exploring the World of Choux Pastry
This guide is just the beginning. The versatility of choux pastry means there's always more to learn and create. Experiment with different fillings, glazes, and shapes. Try making classic French desserts like religieuses or savory appetizers for your next gathering.
Keep practicing, keep experimenting, and keep baking with ease. The world of choux pastry is vast and delicious, and with the foundations you've built here, you're well-equipped to explore all its delightful possibilities. Happy baking!
Frequently Asked Questions
What exactly is choux pastry, and what makes it unique?
Choux pastry, also known as pâte à choux, is a light, airy pastry dough used to make various desserts like éclairs and cream puffs. Its uniqueness lies in its cooking process: it's cooked twice, first on the stovetop and then in the oven. This double cooking creates its characteristic hollow interior and crispy exterior.
What are the key ingredients needed for a successful choux pastry recipe on BakeWithEase?
The core ingredients are typically water, butter, flour, and eggs. BakeWithEase emphasizes precise measurements for these ingredients, especially the ratio of liquid to flour, to ensure proper hydration and gluten development. Using high-quality butter can also significantly improve the flavor and texture.
What are some common mistakes people make when attempting a choux pastry recipe, and how does BakeWithEase help avoid them?
Common mistakes include not cooking the dough long enough on the stovetop, adding eggs too quickly, or opening the oven door during baking. BakeWithEase provides step-by-step instructions with visual cues and troubleshooting tips to prevent these errors, focusing on dough consistency and oven temperature control.
Can I adapt the BakeWithEase choux pastry recipe for different flavors or fillings?
Absolutely! While the basic recipe provides a foundation, BakeWithEase encourages experimentation. You can incorporate flavorings like vanilla extract, citrus zest, or even herbs into the dough. The hollow interior of choux pastry makes it perfect for a wide array of sweet or savory fillings.
How does BakeWithEase's "Perfecting Choux Pastry Recipe" cater to both beginner and experienced bakers?
BakeWithEase caters to all levels by offering clear, concise instructions for beginners, while also providing advanced tips and techniques for experienced bakers looking to refine their skills. The focus is on understanding the why behind each step, allowing bakers to master the fundamentals and then explore creative variations.
Final Reflection: The Enduring Allure of the Perfect Choux
The pursuit of the perfect choux pastry transcends mere culinary skill; it's a testament to the enduring power of precision and patience in achieving culinary excellence. This guide has explored the intricacies of choux pastry, from the seemingly simple ratio of ingredients to the crucial techniques that separate a soggy failure from a crisp, airy delight. But more than just a recipe, mastering choux unlocks a world of creative possibilities, from elegant éclairs to whimsical profiteroles.
The journey of perfecting choux pastry is a microcosm of life itself – requiring careful attention to detail, a willingness to learn from mistakes, and the unwavering belief that even the most challenging endeavors can yield extraordinary results. The secret of success is to know something nobody else knows.
This quote, while not specifically about baking, perfectly encapsulates the satisfaction derived from mastering a complex technique like choux pastry, a technique that often feels elusive to the novice baker. The ongoing influence of this classic pastry, its enduring presence in patisseries worldwide, speaks to its timeless appeal and the enduring human desire for both beauty and deliciousness.
Now, I invite you to take what you've learned and embark on your own choux pastry adventure. Don't be afraid to experiment, to tweak the recipe, and to embrace the inevitable imperfections along the way. Each batch, each attempt, brings you closer to your own perfect choux. Remember the joy of that first perfectly puffed pastry, the satisfaction of a flawlessly filled éclair. That feeling, that triumph, is the true reward of mastering this classic technique. So, gather your ingredients, preheat your oven, and let the magic begin.
Unleash Your Inner Pastry Chef!
Thanks for taking the time to explore the world of choux pastry with BakeWithEase! We hope you gained valuable insights and feel empowered to create delicious treats. Now it's time to put your new knowledge into action.
- Bake your first perfect choux pastry! Use the techniques you learned today to whip up a batch of cream puffs, profiteroles, or éclairs – the possibilities are endless! Remember, practice makes perfect.
- Share your creations! Tag us on social media and show us your amazing choux creations. We’d love to see what you bake!
- Explore our other delicious recipes on bakewithease.com – you might just discover your new favorite dessert!
Ready to transform your baking skills? What choux pastry masterpiece will you create first?