
Simple Pain au Chocolat Recipe for Ambitious Beginners (Intermediate)

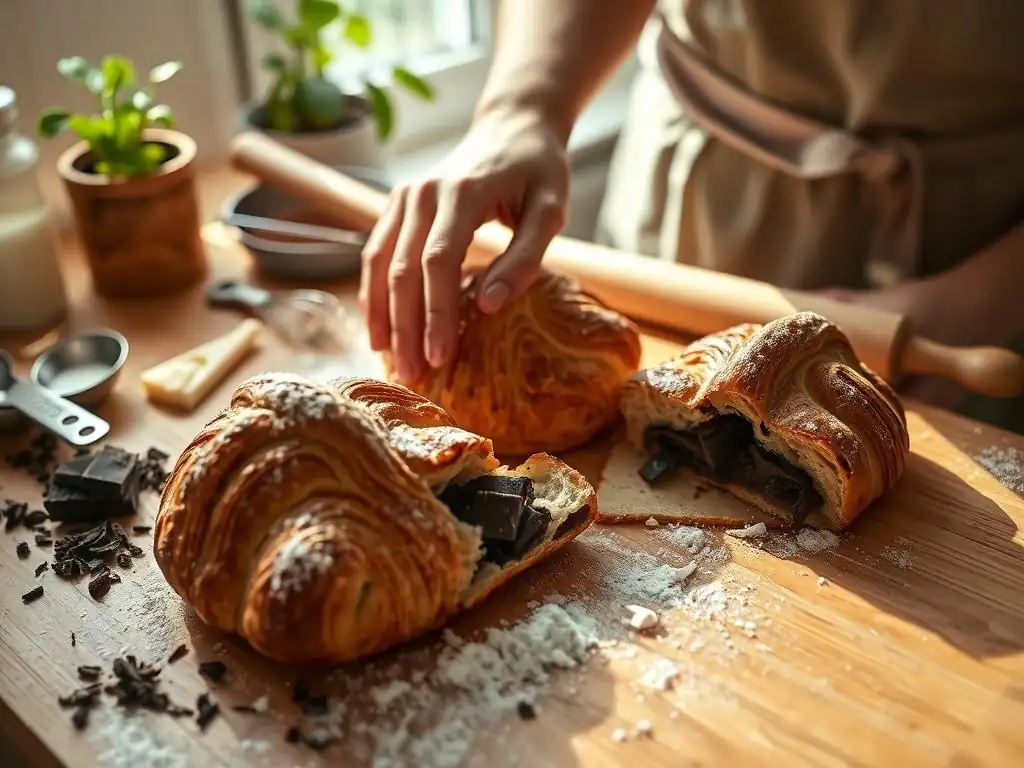
Welcome to BakeWithEase, your partner in creating delicious memories! Ever dreamt of crafting flaky, chocolate-filled pastries that rival your favorite bakery? Get ready to unlock the secrets with our easy pain au chocolat recipe – a seemingly complex treat made surprisingly accessible, even for ambitious beginners. Discover the step-by-step techniques that will transform your kitchen into a Parisian patisserie. Intrigued? Let's get baking!
- Simple Pain au Chocolat Recipe for Ambitious Beginners (Intermediate) - BakeWithEase
- Introduction: Mastering Pain au Chocolat at Home with BakeWithEase
- Why This Easy Pain au Chocolat Recipe is Perfect for Intermediate Bakers
-
The Ultimate Easy Pain au Chocolat Recipe: Step-by-Step Guide
- Pain au Chocolat Ingredients: What You'll Need
- Equipment Needed for Baking Pain au Chocolat
- Preparing the Dough: The Key to Flaky Pain au Chocolat
- Laminating the Dough: Creating the Layers
- Shaping the Pain au Chocolat
- Proofing and Baking Your Pain au Chocolat
- Cooling and Enjoying Your Homemade Pain au Chocolat
- Tips and Tricks for the Best Pain au Chocolat Recipe
- Storing Your Pain au Chocolat: Keeping Them Fresh
- Conclusion: BakeWithEase - Your Partner in Baking Success
-
Frequently Asked Questions
- What makes this pain au chocolat recipe "easy" compared to others?
- What kind of chocolate is best for making pain au chocolat?
- Can I freeze the pain au chocolat before or after baking?
- What if my puff pastry is too sticky to work with?
- How can I achieve a shiny, golden-brown crust on my pain au chocolat?
- Final Reflection: The Sweet Symphony of Effort and Reward
- Unlock Your Inner Pâtissier: Bake Your Dream Pain au Chocolat!
Simple Pain au Chocolat Recipe for Ambitious Beginners (Intermediate) - BakeWithEase
Introduction: Mastering Pain au Chocolat at Home with BakeWithEase
Welcome back to the BakeWithEase kitchen! If you've been following our beginner guides and feel ready to tackle a slightly more complex challenge, you've come to the right place. Pain au chocolat, those delightful French pastries filled with chocolate, might seem intimidating, but with the right approach and a clear, easy pain au chocolat recipe, they are absolutely within your reach. Think of this as your next exciting step on your baking journey!
This article is designed specifically for the ambitious intermediate baker. We'll guide you through the process of creating perfectly flaky, buttery pain au chocolat from scratch. While it requires a bit more time and precision than a simple cake or cookie, the satisfaction of pulling these golden beauties from your oven is unparalleled. Get ready to impress yourself and anyone lucky enough to share in your delicious success!
Why This Easy Pain au Chocolat Recipe is Perfect for Intermediate Bakers
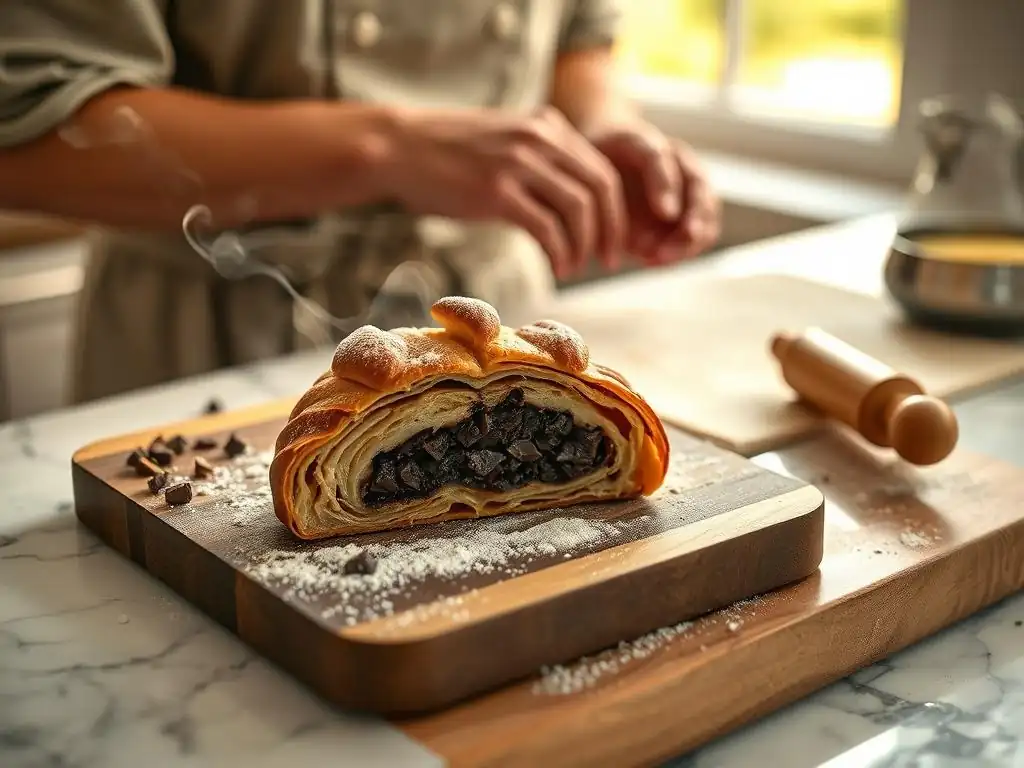
Stepping into the world of viennoiseries like pain au chocolat is a natural progression for bakers who have mastered basic doughs and techniques. This easy pain au chocolat recipe builds upon foundational skills such as accurately measuring ingredients, understanding yeast activity, and developing gluten. It introduces the crucial technique of lamination, which is the process of folding butter into dough to create numerous thin layers. This method is the secret behind the signature flakiness of croissants and pain au chocolat, and mastering it here opens the door to many other classic pastries.
Compared to a simple yeast bread that might involve active work for only 30-45 minutes before proofing and baking, tackling pain au chocolat requires patience and attention spread over several hours, primarily due to resting and chilling periods between folds. While the total time from start to finish might span 4 to 6 hours, the actual hands-on work is significantly less – perhaps only 1 to 1.5 hours in total. This structure allows intermediate bakers to practice multistep processes and temperature control, crucial skills for more advanced baking projects, without being overwhelmed by constant activity.
Stepping Up Your Baking Game: From Beginner to Intermediate Viennoiseries
Transitioning from beginner bakes to intermediate viennoiseries marks a significant milestone in your baking skill development. As a beginner, you likely focused on recipes like simple muffins, quick breads, or straightforward yeasted loaves, where the primary goals were accurate mixing, proper leavening, and achieving a pleasant texture. These recipes often involve relatively short timelines and fewer critical temperature controls. Now, with an easy pain au chocolat recipe, you introduce the complexity of laminated dough, which demands precision in handling temperature and developing layers.
This specific easy pain au chocolat recipe serves as an excellent bridge because it simplifies the lamination process slightly compared to traditional croissant recipes, making it more approachable while still teaching the fundamental technique. You'll learn how to create a cohesive butter block, perform precise folds (like the 'book fold' or 'letter fold'), and understand the importance of chilling the dough between steps.
Successfully navigating these stages, ensuring the butter remains distinct from the dough and creates those beautiful strata, demonstrates a tangible leap in your baking proficiency, moving beyond basic dough handling to the nuanced art of pastry making.
Simple Ingredients, Stunning Results: The BakeWithEase Philosophy
At BakeWithEase, we believe that extraordinary baking doesn't require an pantry full of obscure or expensive ingredients. Our philosophy centers on using fundamental, readily available components and applying precise techniques to achieve stunning results. This easy pain au chocolat recipe perfectly embodies this principle. The dough is made from just a handful of staples: flour, water, yeast, sugar, salt, and butter. The filling is simply high-quality chocolate. That's it – no complex stabilizers or special flours needed.
Despite this simplicity in ingredients, the outcome is a pastry that looks and tastes sophisticated, rivaling those found in professional patisseries. The magic lies in the lamination process, which transforms these humble ingredients into a structure of hundreds of paper-thin layers of dough separated by equally thin layers of butter.
When baked, the water in the butter turns to steam, puffing up the layers and creating the characteristic flaky texture and rich, buttery flavor. For an approximate cost comparison, making a batch of 8-10 pain au chocolat at home might cost you roughly $6-9 in ingredients, whereas buying the same quantity from a bakery could easily cost $30-50, showcasing the incredible value and rewarding process of baking them yourself.
The Ultimate Easy Pain au Chocolat Recipe: Step-by-Step Guide
Pain au Chocolat Ingredients: What You'll Need
Getting your ingredients ready is the first step to success with this easy pain au chocolat recipe. Quality matters, especially for your butter and chocolate, as they significantly impact the final flavor and texture.
Dough Ingredients for Homemade Pain au Chocolat
Here's what you'll need for the dough:
- All-purpose flour: Approximately 250 grams
- Granulated sugar: Approximately 30 grams
- Fine sea salt: Approximately 5 grams
- Instant dry yeast: Approximately 3-4 grams (or active dry yeast, see notes)
- Lukewarm milk (around 30-35°C / 85-95°F): Approximately 150 ml
- Unsalted butter, softened: Approximately 20 grams
High-Quality Chocolate for the Perfect Pain au Chocolat Filling
For the filling, opt for baking chocolate specifically designed for pastries or chocolate batons (often called "chocolatines").
- Dark or semi-sweet chocolate batons (or chopped bar): Approximately 100-150 grams (enough for 1-2 batons per pastry)
Using a chocolate with around 50-70% cocoa content works well, providing a good balance of sweetness and intensity that complements the rich pastry.
Equipment Needed for Baking Pain au Chocolat
Having the right tools makes the process smoother. You likely have most of these already:
- Large mixing bowl
- Kitchen scale (for accurate measurements)
- Measuring cups and spoons (as backup or for liquids)
- Rolling pin (preferably a long, tapered one)
- Sharp knife or pizza cutter
- Ruler or measuring tape
- Parchment paper
- Baking sheets
- Pastry brush (for egg wash)
- Plastic wrap
Preparing the Dough: The Key to Flaky Pain au Chocolat
The initial dough preparation is similar to many other enriched bread doughs, focusing on developing gluten and allowing the yeast to begin its work.
Mixing the Dough: Achieving the Right Consistency
In your large mixing bowl, whisk together the flour, sugar, salt, and yeast. If using active dry yeast, you might need to activate it first in a small amount of the lukewarm milk with a pinch of sugar for about 5-10 minutes until frothy. Add the lukewarm milk and softened butter to the dry ingredients.
Mix everything together with a spoon or your hands until a shaggy dough forms. Turn the dough out onto a lightly floured surface and knead for about 5-8 minutes until it's smooth and elastic. It should pass the "windowpane" test (stretch a small piece thinly without tearing).
The consistency should be relatively soft but not overly sticky. If it's too dry, add milk a teaspoon at a time. If too sticky, add flour a tablespoon at a time. Remember, hydrated dough leads to a tender crumb, but too much hydration makes lamination difficult. Aim for a dough that is manageable but still slightly tacky to the touch.
First Rise: Letting the Dough Develop Flavor
Place the kneaded dough back into the clean mixing bowl. Cover the bowl tightly with plastic wrap or a damp cloth. Let the dough rise in a warm place for about 1 to 1.5 hours, or until it has roughly doubled in size. The exact time will depend on the temperature of your kitchen. This first rise allows the yeast to produce carbon dioxide, which provides leavening, and also helps develop the initial flavor profile of the dough.
After the first rise, gently punch down the dough to deflate it. This step equalizes the temperature, redistributes the yeast and sugars, and makes the dough easier to handle for the subsequent lamination steps. Shape the dough into a rough rectangle, cover it again with plastic wrap, and place it in the refrigerator for at least 1-2 hours. Chilling is crucial at this stage to firm up the dough and prepare it for incorporating the butter.
Laminating the Dough: Creating the Layers
Lamination is the heart of making flaky viennoiseries. It involves enclosing a block of butter within the dough and repeatedly folding and rolling it out to create alternating layers of dough and butter.
The Butter Block: Preparing for Lamination
Take your cold, unsalted butter (you'll need approximately 120-150 grams for lamination, in addition to the 20g in the dough). Place the cold butter between two sheets of parchment paper. Using your rolling pin, gently beat the butter to soften it slightly and make it pliable, without letting it become greasy or melty. Once pliable, roll the butter into a rectangle approximately 15 cm x 20 cm (or 6 inches x 8 inches). The thickness should be uniform, ideally around 0.5 cm (about 1/4 inch). Keep the butter rectangle cold in the refrigerator until ready to use.
It's essential that the butter and the dough are roughly the same temperature and consistency – cold and firm, but pliable. If the butter is too hard, it will break through the dough during rolling. If it's too soft, it will ooze out or mix into the dough instead of creating distinct layers. A good target temperature for the butter and dough during lamination is around 10-15°C (50-60°F).
Folding and Rolling: Building the Layers
Take the chilled dough from the refrigerator. Roll it out on a lightly floured surface into a rectangle approximately twice the size of your butter block (e.g., 30 cm x 20 cm or 12 inches x 8 inches). Place the cold butter block on one half of the dough rectangle, leaving a small border around the edges. Fold the other half of the dough over the butter block, sealing the edges to completely enclose the butter. Ensure the edges are well-sealed to prevent butter leakage during subsequent steps.
Now you perform the first "turn" or fold. With the folded edge facing you, gently roll the dough rectangle out again. The goal is to lengthen it evenly without letting the butter break through.
Once rolled, perform a "book fold" or "letter fold": fold one end of the dough two-thirds of the way down, then fold the other end over the first fold, like closing a book. You should now have four layers of dough separated by three layers of butter. Wrap the dough tightly in plastic wrap and refrigerate for at least 30-60 minutes to allow the gluten to relax and the butter to firm up again.
Repeat this rolling, folding, and chilling process two more times, for a total of three turns. This process, when done correctly, will result in a theoretical 27 layers of dough and butter (3 layers from the first fold x 3 layers from the second fold x 3 layers from the third fold).
Resting the Dough: Essential for Gluten Relaxation
Resting the dough between each turn during lamination is absolutely critical for success. Rolling the dough activates the gluten, making it elastic and resistant to further stretching. If you try to roll dough that hasn't rested, it will spring back, making it difficult to achieve uniform thickness and potentially causing the butter layers to break.
Each resting period, typically 30-60 minutes in the refrigerator, allows the gluten network to relax. This makes the dough pliable and easy to roll out evenly for the next turn. It also ensures the butter remains firm and cold, maintaining distinct layers. Skipping or shortening these rests is a common mistake that can lead to uneven layers or butter integrating into the dough, resulting in a bready, rather than flaky, texture. Think of it as giving the dough a necessary pause to prepare for the next workout.
Shaping the Pain au Chocolat
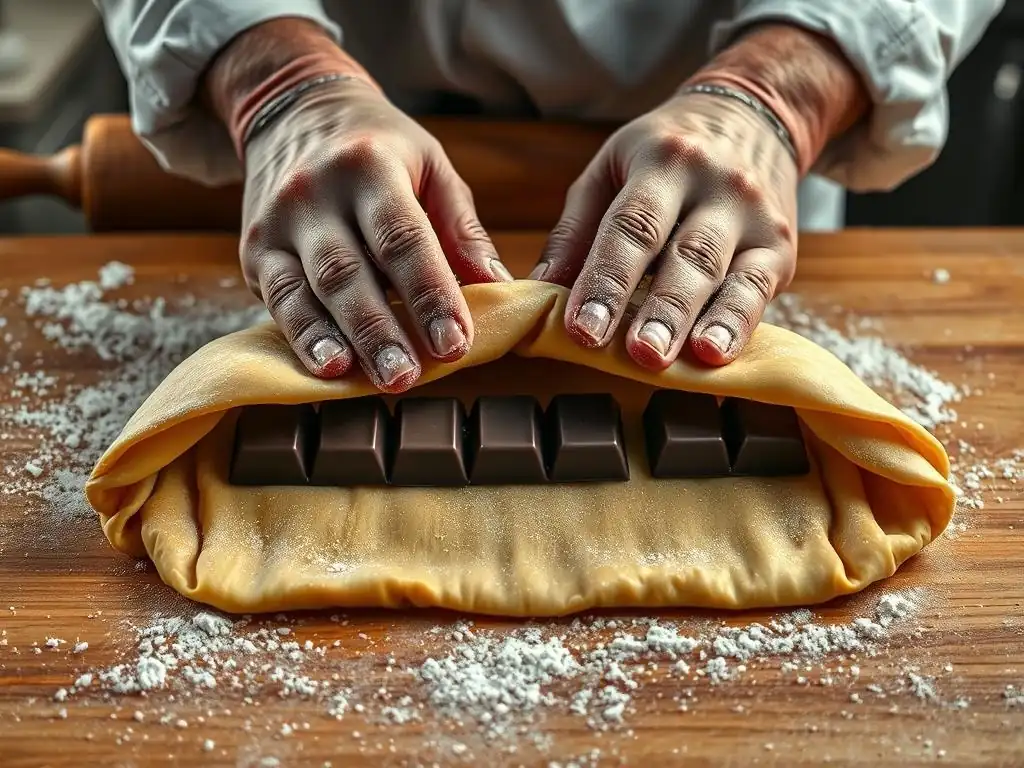
Once your dough has completed its three turns and had its final chill, it's time to shape your pastries. Precision here helps ensure even baking and a beautiful final product.
Cutting the Dough: Precise Measurements for Uniform Pastries
Take the laminated dough from the refrigerator. On a lightly floured surface, roll the dough out into a large rectangle, approximately 3 mm (about 1/8 inch) thick. Aim for a rectangle that is as even in thickness as possible. Use a ruler and a sharp knife or pizza cutter to trim the edges so you have clean, straight lines. This also helps expose the layers slightly.
Now, cut the large rectangle into smaller rectangles. For classic pain au chocolat, you'll typically cut rectangles that are roughly 8-10 cm wide by 18-20 cm long (about 3-4 inches wide by 7-8 inches long). Using a ruler to measure each piece helps ensure your pastries are uniform in size, which is important for consistent proofing and baking times.
Adding the Chocolate Batons: Ensuring Even Distribution
Place one or two chocolate batons (depending on your preference and the size of your cut rectangles) along one of the shorter ends of each dough rectangle. If using chopped chocolate, try to form a rough line of chocolate along the same area. The goal is to have a good amount of chocolate in each bite, so don't be shy, but avoid overfilling, which can lead to leakage during baking.
Position the chocolate about 1-2 cm (about 1/2 inch) from the edge of the dough. This allows you to roll the dough around the chocolate without the chocolate immediately pushing out the ends. For a richer chocolate experience, some bakers prefer two batons side-by-side in each pastry.
Rolling and Shaping: Creating the Classic Pain au Chocolat Form
Starting from the end with the chocolate batons, carefully roll the dough rectangle up towards the opposite end. Roll it snugly, ensuring the chocolate is fully enclosed. The seam should end up on the bottom of the pastry. Gently press down on the seam to help seal it.
Place the shaped pain au chocolat seam-side down on a baking sheet lined with parchment paper, leaving plenty of space between each pastry (they will expand significantly during proofing and baking). A typical baking sheet might comfortably fit 6-8 pastries, depending on their size.
Proofing and Baking Your Pain au Chocolat
The final rise and baking are the moments where your hard work truly pays off, transforming the shaped dough into golden, flaky pastries.
Second Rise: Achieving the Perfect Puff
Once shaped and placed on baking sheets, the pain au chocolat need to proof (have their second rise). This is a crucial step where the yeast produces more gas, causing the pastries to expand and the layers to separate. Cover the baking sheets loosely with plastic wrap or a light kitchen towel. Let them proof in a warm, draft-free place for about 1.5 to 2.5 hours.
The pastries are ready to bake when they look visibly puffier, have almost doubled in size, and feel light and airy. You should be able to see the distinct layers starting to separate on the sides. Be careful not to over-proof, as this can cause the layers to collapse in the oven. They should jiggle slightly if gently shaken, but not feel fragile or overly expanded. The ideal proofing temperature is usually around 24-26°C (75-80°F).
Egg Wash: For a Golden-Brown Crust
Just before baking, give your pain au chocolat a beautiful golden color and a slight sheen by applying an egg wash. Whisk one egg with a tablespoon of milk or water in a small bowl. Gently brush the tops and sides of each pastry with the egg wash, being careful not to let it pool between the layers, which can glue them together and inhibit flaking.
Apply the egg wash evenly, ensuring full coverage on the visible dough surfaces. This step is optional but highly recommended for achieving that classic, appealing look associated with perfectly baked pain au chocolat.
Baking Temperature and Time: Ensuring a Thorough Bake
Preheat your oven to 190°C (375°F). Place the baking sheets with the proofed pain au chocolat in the preheated oven. Bake for approximately 15-20 minutes, or until the pastries are puffed, deeply golden brown, and the chocolate is melted inside.
Baking time can vary depending on your oven, so keep a close eye on them, especially towards the end. The color is a good indicator of doneness; you want a rich, dark golden brown, not just pale yellow. This ensures the layers are crispy and the interior is fully baked. If they are browning too quickly, you can loosely tent them with foil.
Cooling and Enjoying Your Homemade Pain au Chocolat
Once baked, carefully remove the pain au chocolat from the oven. The smell alone is incredibly rewarding! Allow them to cool slightly on the baking sheets for a few minutes before transferring them to a wire rack to cool further.
While they are delicious warm, letting them cool for 10-15 minutes allows the butter to set slightly and the chocolate to cool to a gooey, rather than molten, state, making them easier to handle and preventing burns. Enjoy them fresh from the oven for the ultimate experience.
Tips and Tricks for the Best Pain au Chocolat Recipe
Even with an easy pain au chocolat recipe, a few extra tips can elevate your results from good to absolutely spectacular.
Achieving the Perfect Flaky Layers
The secret to those coveted flaky layers lies almost entirely in the lamination process. First and foremost, temperature control is paramount. Both your dough and butter should be cold but pliable during rolling and folding. If the butter starts to melt and ooze out during rolling, or if the dough becomes too warm and soft, pop it back into the refrigerator immediately for 10-15 minutes before continuing. Working quickly also helps keep temperatures stable.
Secondly, gentle, even pressure while rolling is essential. Avoid pressing too hard, which can force the butter into the dough or tear the layers. Use smooth, steady strokes with your rolling pin, aiming for uniform thickness across the entire rectangle. Ensure your folds are neat and square, aligning the edges as precisely as possible. This attention to detail during the three turns is what builds the approximately 27 distinct layers that create the magnificent puff and crispness when baked. A successful lamination results in pastries that shatter when you bite into them, revealing airy pockets between the delicate layers.
Troubleshooting Common Pain au Chocolat Issues
Baking laminated dough can present a few challenges, but understanding common issues helps you fix them.
Dough Too Sticky? Tips for Managing Hydration
If your dough feels too sticky after mixing, resist the urge to add large amounts of flour. A slightly sticky dough is often desirable for tenderness. However, if it's unmanageable, add flour one tablespoon at a time while kneading until it's easier to handle but still soft. Ensure your measuring cups and spoons are accurate, or ideally, use a kitchen scale for precision with flour and liquid measurements. The hydration level (ratio of liquid to flour) in this easy pain au chocolat recipe is designed for manageability, but environmental factors like humidity can affect consistency.
Butter Leaking During Baking? Preventing Butter Run-Out
Butter leaking during baking, often called "butter run-out," usually indicates that the layers weren't sealed properly during folding and shaping, or that the dough wasn't kept cold enough during lamination and proofing. Ensure your dough edges are well-sealed after enclosing the butter block and after shaping the pastries. Make sure the dough and butter are cold enough during rolling and resting. Also, avoid over-proofing, as excessive expansion can weaken the dough structure, leading to leaks. Baking at the correct temperature is also key; if the oven is too cool, the butter melts before the dough structure sets.
Pain au Chocolat Not Rising Enough? Optimizing Proofing
If your pain au chocolat don't puff up sufficiently during the second rise, it could be due to several factors: inactive yeast (check the expiration date! ), a proofing environment that is too cold, or under-proofing (not giving them enough time). Ensure your proofing area is warm and draft-free, ideally around 24-26°C (75-80°F). Give the pastries ample time to proof until they are visibly expanded and jiggly. Conversely, if they flatten slightly in the oven, they might have been over-proofed, losing their structural integrity. Finding the sweet spot for proofing takes practice and observation.
Flavor Variations: Exploring Different Chocolate and Fillings
While the classic pain au chocolat with dark or semi-sweet chocolate batons is undeniably delicious, this easy pain au chocolat recipe serves as a fantastic base for exploring other flavor combinations. The type of chocolate you use significantly impacts the final taste. Using a high-quality dark chocolate with a higher cocoa content, say 70-75%, will result in a more intense, slightly bitter contrast to the sweet, buttery pastry.
On the other hand, using milk chocolate will yield a sweeter, creamier filling that might appeal more to those who prefer less intensity. You could even use white chocolate for a different profile, although it's less traditional.
Beyond just the chocolate, consider adding other elements. A thin layer of almond cream (frangipane) spread on the dough before adding the chocolate is a classic addition in some regions, adding a moist, nutty element. A small sprinkle of orange zest or a pinch of cinnamon added to the chocolate can introduce subtle aromatic notes.
For a more adventurous twist, you could try enclosing a small amount of fruit preserve (like cherry or raspberry) along with the chocolate, though be cautious with moisture levels to prevent leaks. Experimenting with these simple additions can transform this easy pain au chocolat recipe into your own signature creation.
Storing Your Pain au Chocolat: Keeping Them Fresh
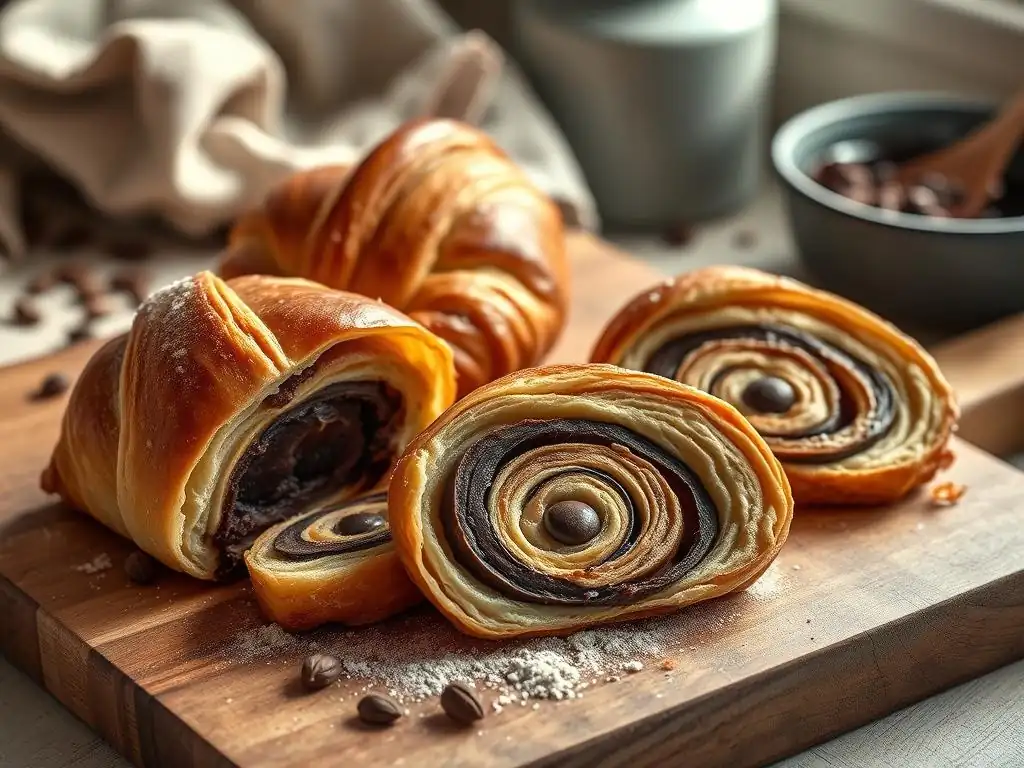
Pain au chocolat are truly best enjoyed fresh from the oven, ideally within a few hours of baking when their layers are at their crispiest. However, if you have leftovers, proper storage can help maintain their quality for a short time.
Allow the pastries to cool completely on a wire rack. Once cooled, store them in an airtight container at room temperature for up to 1-2 days. Avoid refrigerating them, as this can cause the pastry to become tough and dry.
To refresh leftover pain au chocolat, place them on a baking sheet and warm them in a preheated oven at 170°C (325°F) for about 5-8 minutes. This helps to crisp up the layers again and re-melt the chocolate slightly, bringing them closer to their freshly baked glory. You can also freeze baked pain au chocolat once completely cooled. Wrap them individually in plastic wrap, then place them in a freezer-safe bag or container for up to 1-2 months. To reheat from frozen, place on a baking sheet and warm in a preheated oven at 170°C (325°F) for 10-15 minutes.
Conclusion: BakeWithEase - Your Partner in Baking Success
Mastering pain au chocolat might seem like a big leap, but as this easy pain au chocolat recipe demonstrates, it's an achievable and incredibly rewarding goal for intermediate bakers. By breaking down the process into manageable steps, understanding the importance of temperature and technique, and approaching it with patience, you can create these stunning pastries right in your own kitchen.
At BakeWithEase, our mission is to empower you with the knowledge and confidence to tackle new baking challenges. This journey from simple doughs to flaky viennoiseries is a testament to your growing skills. Keep practicing, keep learning, and most importantly, keep baking! We're here to provide the recipes, tips, and support you need every step of the way. Enjoy the process, and savor the delicious results of your homemade pain au chocolat.
Frequently Asked Questions
What makes this pain au chocolat recipe "easy" compared to others?
This recipe simplifies the process by using pre-made puff pastry, significantly reducing the time and complexity associated with making the dough from scratch. It focuses on mastering the filling and shaping techniques.
What kind of chocolate is best for making pain au chocolat?
For the best flavor and melt, use good-quality dark chocolate batons specifically designed for pain au chocolat or high-quality chocolate bars cut into batons. Avoid using chocolate chips, as they don't melt as smoothly.
Can I freeze the pain au chocolat before or after baking?
Yes, you can freeze the unbaked pain au chocolat after shaping. Freeze them on a baking sheet until solid, then transfer them to a freezer bag. Bake directly from frozen, adding a few extra minutes to the baking time.
What if my puff pastry is too sticky to work with?
If your puff pastry is sticky, ensure it's properly chilled before using it. Lightly flour your work surface and rolling pin to prevent sticking. Return the pastry to the refrigerator if it becomes too soft during handling.
How can I achieve a shiny, golden-brown crust on my pain au chocolat?
Brushing the pain au chocolat with an egg wash (egg yolk mixed with a little milk or cream) before baking is crucial for achieving a beautiful, shiny crust. Apply a thin, even layer for best results.
Final Reflection: The Sweet Symphony of Effort and Reward
The journey of baking, much like life itself, is often about mastering the seemingly simple. This pain au chocolat recipe, while designed for ambitious beginners, reveals the profound satisfaction found in achieving something delicious and beautiful through focused effort. It's not just about the end result – the flaky, buttery layers and rich chocolate heart – but the process of learning, adapting, and ultimately, celebrating your own culinary growth.
The enduring appeal of baking, particularly of classic pastries like the pain au chocolat, lies in its ability to connect us to tradition while simultaneously offering a canvas for personal expression. Baking is at once child's play and adult joy. And love, of course.
This quote perfectly encapsulates the experience of creating these pastries; it's a playful exploration of technique, yet the final product offers a deep sense of accomplishment and joy, a tangible reward for time and effort invested. The simple act of sharing these treats with loved ones further amplifies this feeling, creating lasting memories and strengthening bonds.
Now, I invite you to step into your kitchen, armed with this recipe and a spirit of adventure. Don't be afraid to experiment, to adjust, to make this recipe your own. The true magic lies not in perfectly replicating a formula, but in understanding the underlying principles and allowing your creativity to flourish. Embrace the challenges, celebrate the successes, and savor the sweet symphony of effort and reward that awaits you. The perfect pain au chocolat is within your reach.
Unlock Your Inner Pâtissier: Bake Your Dream Pain au Chocolat!
Thanks for taking the time to explore this delicious pain au chocolat recipe! We hope you gained the confidence to tackle this seemingly complex treat. Now it's time to put your newfound skills to the test!
- Bake your perfect Pain au Chocolat: Gather your ingredients and follow the steps – we're confident you'll be amazed by the results! This is your chance to impress yourself (and maybe others! ).
- Share your baking journey: Snap a picture of your beautiful creation and share it with us on social media using #BakeWithEasePainAuChocolat – we’d love to see your masterpieces!
- Explore more enriched dough recipes: Ready for a new challenge? Check out our other bread recipes on BakeWithEase.com for even more baking adventures.
Ready to transform your kitchen into a Parisian patisserie? What unique twist will you add to your Pain au Chocolat?