
Safe Practices for Handling Dairy and Cream in Baked Goods


Welcome to BakeWithEase, your kitchen companion for all things baking! Ever wondered how to ensure your dairy-rich creations are as safe as they are delicious? This article dives deep into essential dairy baking safety tips, crucial knowledge, particularly if you're dreaming of turning your passion into a home baking business. Discover how to handle ingredients, avoid common pitfalls, and maintain the highest standards in your kitchen. Ready to bake with confidence and peace of mind? Let's get started!
- Dairy Baking Safety Tips: A Guide to Safe Dairy and Cream Handling in Baked Goods (BakeWithEase)
- Understanding the Risks: Why Dairy and Cream Demand Extra Care in Baking
-
Best Practices for Safe Dairy and Cream Handling: A Baker's Checklist
- Purchasing Dairy for Baking: Freshness and Quality Matters
- Checking Expiration Dates: A Non-Negotiable Step
- Selecting Reputable Suppliers: Ensuring Dairy Quality
- Proper Storage at the Grocery Store: Maintaining Temperature Control
- Safe Storage of Dairy and Cream at Home: Protecting Your Ingredients
- Refrigerator Temperature: The Key to Dairy Preservation
- Storing Dairy Separately: Preventing Cross-Contamination
- Proper Sealing and Labeling: Maintaining Dairy Freshness
- Preparing Dairy for Baking: Safe Handling Techniques
- Handwashing: The First Line of Defense Against Bacteria
- Clean Utensils and Surfaces: Essential for Dairy Safety
- Avoiding the Danger Zone: Temperature Control During Preparation
- Baking with Dairy: Ensuring Food Safety Through Heat
- Internal Temperatures for Baked Goods: Killing Harmful Bacteria
- Checking for Doneness: Using a Food Thermometer
- Cooling Baked Goods Properly: Preventing Bacterial Growth
- Using Pasteurized vs. Unpasteurized Dairy: Understanding the Differences
- The Pasteurization Process: Enhancing Dairy Safety
- Risks Associated with Unpasteurized Dairy: Considerations for Home Bakers
- When to Use Pasteurized Options: Prioritizing Safety
- Specific Dairy Products and Safety Considerations
- Cream Cheese Safety: Handling and Storage Tips
- Butter Safety: Preventing Rancidity and Contamination
- Milk Safety: Pasteurization and Storage Guidelines
- Sour Cream Safety: Proper Handling to Avoid Spoilage
- Yogurt Safety: Maintaining Cold Chain and Preventing Contamination
- Recognizing Signs of Dairy Spoilage: What to Look For
- Cleaning and Sanitizing After Baking with Dairy: Preventing Contamination
- Addressing Common Dairy Baking Safety Concerns
- Conclusion: Prioritizing Dairy Safety for Delicious and Worry-Free Baking
-
Frequently Asked Questions
- What are the most important dairy baking safety tips to remember when working with milk and cream?
- How can I tell if my milk or cream has gone bad before I use it in a recipe?
- What is the recommended safe temperature range for storing dairy products used in baking?
- How long can baked goods containing dairy be left at room temperature before becoming unsafe to eat?
- What are some alternatives to dairy that can be used in baking to avoid potential dairy baking safety issues for those with allergies?
- Final Reflection: The Sweet Science of Safe Baking
- Unlock Your Baking Potential: Mastering Dairy & Cream!
Dairy Baking Safety Tips: A Guide to Safe Dairy and Cream Handling in Baked Goods (BakeWithEase)
Introduction to Dairy Safety in Baking
Baking is a joyous activity, transforming simple ingredients into delicious treats. However, when working with dairy and cream, a little extra care goes a long way in ensuring both the quality and safety of your baked goods. These ingredients are fundamental to many recipes, providing richness, moisture, and structure, but their nature requires diligent handling to prevent spoilage and potential foodborne illness. Mastering dairy baking safety tips is crucial for any home baker, whether you're whipping up a batch of cookies for family or preparing goods for a small business.
Understanding the best practices for handling dairy from the moment of purchase through storage, preparation, baking, and even cleanup is an essential skill. This guide will walk you through key considerations and practical steps to ensure your dairy-based creations are not only delightful but also safe to eat. By implementing these dairy baking safety tips, you can bake with confidence, knowing you're protecting yourself and those who enjoy your treats.
Understanding the Risks: Why Dairy and Cream Demand Extra Care in Baking
The Perishable Nature of Dairy Products
Dairy products are highly perishable due to their rich composition of proteins, fats, and water. This environment is ideal for microbial growth if not kept under strict temperature control. Unlike dry ingredients like flour or sugar, dairy contains natural sugars and nutrients that bacteria thrive on, leading to rapid spoilage when exposed to warmer temperatures.
For instance, milk left at room temperature can become a breeding ground for bacteria within just a couple of hours. This rapid degradation means that lapses in temperature control during storage or preparation can significantly compromise the safety and quality of your dairy ingredients before they even make it into the oven. Implementing effective dairy baking safety tips starts with respecting this inherent perishability.
Bacteria Growth in Dairy: A Baker's Concern
Several types of bacteria can grow in dairy products, some of which can cause illness. Listeria monocytogenes, Salmonella, and E. coli are notable examples that can contaminate dairy if not handled properly. While baking at high temperatures typically kills these pathogens, using contaminated ingredients or allowing bacteria to multiply excessively before baking can still pose risks, especially if the final product isn't cooked uniformly or if cross-contamination occurs.
Bacteria reproduce rapidly under favorable conditions, often doubling their population every 20-30 minutes in the "danger zone" between 40°F and 140°F (approx. 4°C to 60°C). A small number of bacteria can quickly multiply into millions, reaching levels that can make someone sick. Adhering to dairy baking safety tips, particularly regarding temperature, is paramount to minimizing this risk.
Cross-contamination is a significant concern when handling dairy, just as it is with raw meats or poultry. This occurs when bacteria from one source, such as raw dairy or unwashed hands, are transferred to another ingredient or surface. For example, using the same cutting board for cheese without proper cleaning before using it for vegetables in a quiche filling can transfer harmful bacteria.
Another common scenario is using an unwashed utensil that previously touched raw milk to stir a finished, ready-to-eat frosting. Even if the dairy is pasteurized, other contaminants can be introduced. Implementing rigorous cleaning and separation practices is a vital part of dairy baking safety tips to prevent the spread of pathogens throughout your kitchen.
Best Practices for Safe Dairy and Cream Handling: A Baker's Checklist
Purchasing Dairy for Baking: Freshness and Quality Matters
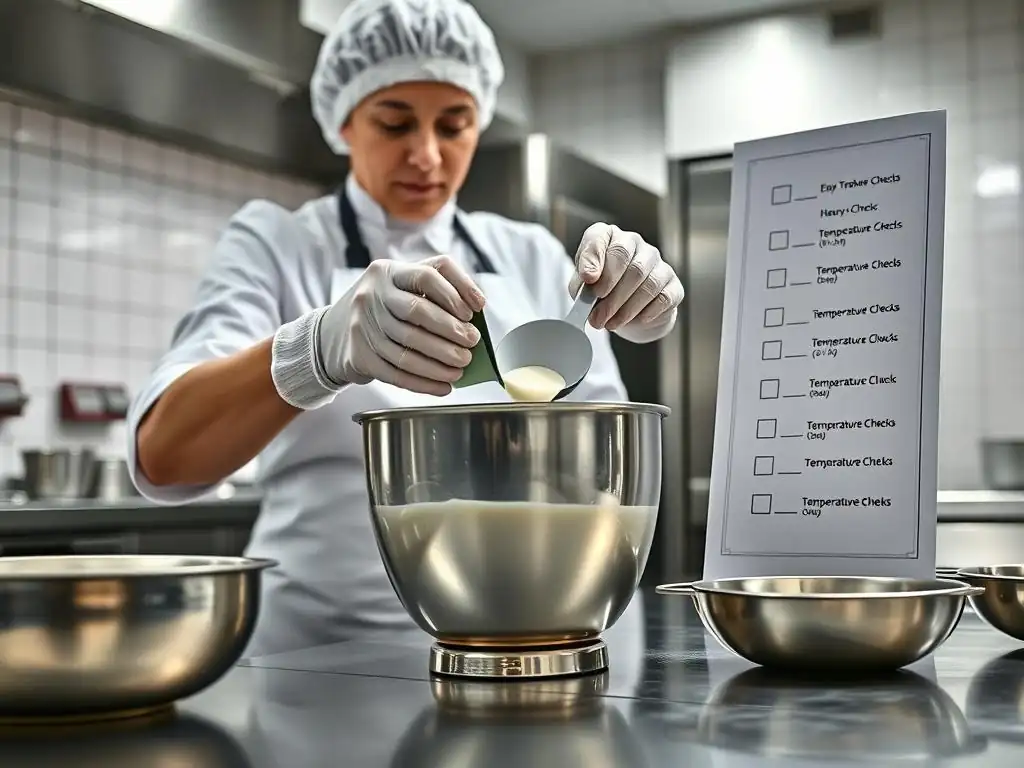
Ensuring the safety of your baked goods begins before you even start mixing ingredients. The quality and freshness of the dairy products you purchase are foundational. Always make the dairy section one of your last stops in the grocery store to minimize the time these items spend outside of refrigeration. Look for products stored in properly cooled display cases that feel cold to the touch.
Taking these initial steps helps maintain the cold chain, which is crucial for inhibiting bacterial growth from the moment the dairy leaves the processor until it reaches your home refrigerator. Prioritizing freshness and quality at the point of sale is a key dairy baking safety tip that sets the stage for safe handling throughout your baking process.
Checking Expiration Dates: A Non-Negotiable Step
Always check the expiration date (often labeled "Sell By" or "Use By") on dairy packaging. This date indicates the timeframe within which the product is expected to be at its best quality and safety when stored correctly. While some products might be safe for a short period after the "Sell By" date, "Use By" dates are more critical indicators of safety.
Using dairy past its prime significantly increases the risk of spoilage and potential bacterial contamination. A carton of milk past its "Use By" date, for example, may contain high levels of bacteria even if it doesn't yet smell or look spoiled. Make checking and respecting these dates a strict rule in your dairy baking safety tips routine.
Selecting Reputable Suppliers: Ensuring Dairy Quality
When possible, consider the source of your dairy. Purchasing from reputable grocery stores or local dairies known for their quality control and adherence to safety standards can provide an extra layer of confidence in the products you buy. Larger retailers typically have robust cold chain management systems in place.
For local dairy sources, inquire about their pasteurization processes and handling practices. Choosing suppliers who prioritize hygiene and proper temperature control is a smart dairy baking safety tip. While not always feasible to trace every product, being mindful of the source contributes to overall ingredient safety.
Proper Storage at the Grocery Store: Maintaining Temperature Control
The journey from the dairy aisle to your home is a critical window for maintaining temperature control. Use insulated bags, especially during warmer weather or if you have a long commute home. Grouping cold items together in your shopping cart can also help them stay cooler for longer.
Upon arriving home, immediately transfer dairy products to your refrigerator. Leaving groceries containing dairy sitting on the counter while you unpack other items breaks the cold chain and allows temperatures to rise, potentially accelerating bacterial growth. Swift and proper storage upon arrival is a simple yet effective dairy baking safety tip.
Safe Storage of Dairy and Cream at Home: Protecting Your Ingredients
Once dairy products are in your home, their safety relies heavily on proper storage conditions. The goal is to keep them consistently cold to slow down or halt bacterial growth. This requires attention to both temperature and placement within your refrigerator.
Implementing correct storage procedures is a cornerstone of dairy baking safety tips. It ensures that your ingredients remain fresh and safe to use up until their expiration date, preventing spoilage that could ruin your baked goods and pose health risks.
Refrigerator Temperature: The Key to Dairy Preservation
Your refrigerator's temperature is the single most important factor in dairy preservation. It should be set at or below 40°F (4°C). Temperatures above this allow bacteria to multiply more rapidly. Use a refrigerator thermometer to periodically check that your fridge is maintaining the correct temperature, as the internal thermostat might not always be accurate.
Store dairy products in the coldest part of the refrigerator, typically the back of the main shelves, rather than in the door, which is subject to temperature fluctuations every time it's opened. Maintaining this consistent cold environment is a fundamental dairy baking safety tip for extending the shelf life of your ingredients.
Storing Dairy Separately: Preventing Cross-Contamination
To avoid cross-contamination, store dairy products away from raw meats, poultry, and seafood. Ideally, keep dairy on upper shelves to prevent any drips from raw foods stored below from contaminating it. Use separate containers or keep dairy in its original, well-sealed packaging.
This simple separation strategy minimizes the risk of transferring harmful bacteria from other foods to your dairy, which could then be incorporated into your baked goods. Practicing this form of segregation is a practical and essential dairy baking safety tip.
Proper Sealing and Labeling: Maintaining Dairy Freshness
After opening dairy packaging, ensure it is properly sealed to prevent exposure to air and other contaminants in the refrigerator. Use airtight containers or tightly close original packaging. For products like sour cream or yogurt, using a clean spoon each time you scoop some out prevents introducing bacteria from other foods or utensils.
If you transfer dairy to a new container, label it with the contents and the date you opened it or the original expiration date. This helps you keep track of freshness and ensures you use the oldest products first, a smart practice for dairy baking safety tips and minimizing waste.
Preparing Dairy for Baking: Safe Handling Techniques
Even with properly stored dairy, safe handling during preparation is crucial. Your hands, utensils, and work surfaces can all be sources of contamination if not clean. This stage involves bringing ingredients together, making it a critical point for preventing the introduction or spread of bacteria.
Adhering to strict hygiene protocols during preparation is a non-negotiable dairy baking safety tip. It ensures that the clean, safe dairy you've stored is not compromised before it goes into the oven.
Handwashing: The First Line of Defense Against Bacteria
Always wash your hands thoroughly with soap and warm water for at least 20 seconds before handling any food, especially dairy. Wash them again after touching raw ingredients (like eggs or flour) or anything else that could be contaminated (like phones or door handles) and before returning to handle dairy or other ready-to-use ingredients.
This simple act is perhaps the most effective barrier against transferring bacteria from your hands to your ingredients. Proper handwashing is a fundamental hygienic practice and a top dairy baking safety tip.
Clean Utensils and Surfaces: Essential for Dairy Safety
Ensure all utensils, bowls, mixers, and work surfaces that will come into contact with dairy are spotlessly clean. Wash them with hot, soapy water or run them through a dishwasher. Pay special attention to crevices or areas where food particles could hide.
Using clean equipment prevents the transfer of residual bacteria from previous tasks to your dairy ingredients. This is particularly important when working with ingredients that won't be cooked, like cream for whipping or dairy used in frostings. Maintaining clean tools is a vital dairy baking safety tip.
Avoiding the Danger Zone: Temperature Control During Preparation
Minimize the time dairy products spend at room temperature during preparation. Take them out of the refrigerator just before you need them and return any unused portions immediately. If a recipe requires dairy to be at room temperature (like butter for creaming), only take out the amount needed and use it within the recommended time frame (typically no more than 2 hours total time out of the fridge, including prep).
The temperature range between 40°F and 140°F (approx. 4°C to 60°C) is known as the "danger zone" because bacteria multiply fastest within this range. Keeping dairy out of this zone as much as possible during prep is a critical dairy baking safety tip.
Baking with Dairy: Ensuring Food Safety Through Heat
The baking process itself is a significant step in ensuring the safety of baked goods containing dairy. The heat from the oven works to kill most harmful bacteria that might be present in the ingredients. However, the effectiveness of this process depends on reaching and maintaining adequate temperatures throughout the product.
Understanding how the heat of baking contributes to safety is key, but it shouldn't replace safe handling practices beforehand. The oven is a kill step, but preventing excessive bacterial growth before baking is still essential for overall dairy baking safety tips.
Internal Temperatures for Baked Goods: Killing Harmful Bacteria
While there isn't a specific required internal temperature just for dairy within a baked good, the overall baking process needs to reach temperatures sufficient to kill potential pathogens. For most baked goods containing dairy and eggs, reaching an internal temperature of 160°F (71°C) is generally considered safe to eliminate bacteria like Salmonella and Listeria.
Ensure that dense areas or the center of larger baked items, like cheesecakes or quiches, reach the appropriate temperature. Relying solely on visual cues like browning might not be sufficient to guarantee the interior is safe. Using a food thermometer is recommended for larger or denser items as part of comprehensive dairy baking safety tips.
Checking for Doneness: Using a Food Thermometer
For items where reaching a specific internal temperature is critical (like quiches, custards, or cheesecakes), a food thermometer is your best friend. Insert the thermometer into the thickest part of the baked good, avoiding any bones or pans, to get an accurate reading.
Checking doneness with a thermometer provides objective proof that the item has reached a safe temperature internally, ensuring that any potential bacteria have been eliminated. This step adds an extra layer of assurance to your dairy baking safety tips, especially for items with a custard-like filling.
Cooling Baked Goods Properly: Preventing Bacterial Growth
Once baked, dairy-containing goods must be cooled properly to prevent bacteria that survived baking (or were introduced after baking) from multiplying. Do not leave baked goods containing dairy at room temperature for extended periods. Cool them rapidly before storing.
For items like cakes or muffins, letting them cool on a wire rack allows air circulation for quicker cooling. Custards, pies, or cheesecakes should be cooled initially at room temperature for a short period (typically no more than 1-2 hours) until they are no longer steaming, then transferred to the refrigerator to complete cooling. Rapid cooling is a crucial dairy baking safety tip to move the product quickly out of the danger zone.
Using Pasteurized vs. Unpasteurized Dairy: Understanding the Differences
The vast majority of dairy available in grocery stores in many countries is pasteurized. This process significantly enhances dairy safety and is a key consideration for home bakers. Understanding the difference is vital for practicing effective dairy baking safety tips.
While some recipes or preferences might call for unpasteurized dairy, it's important to be aware of the associated risks. Making informed choices about the type of dairy you use is part of responsible baking.
The Pasteurization Process: Enhancing Dairy Safety
Pasteurization is a process that involves heating milk or cream to a specific temperature for a set amount of time to kill harmful bacteria, including Listeria, Salmonella, E. coli, and Campylobacter. For example, High-Temperature Short-Time (HTST) pasteurization commonly heats milk to at least 161°F (72°C) for 15 seconds. This process significantly reduces the risk of foodborne illness associated with raw dairy.
Pasteurization does not make dairy sterile, and it doesn't eliminate all microorganisms, but it effectively eliminates the most dangerous pathogens commonly found in raw milk. Using pasteurized dairy is a fundamental dairy baking safety tip recommended by public health authorities.
Risks Associated with Unpasteurized Dairy: Considerations for Home Bakers
Unpasteurized, or raw, dairy products have not undergone the heating process to kill harmful bacteria. They can carry dangerous pathogens that can cause severe illness, particularly in vulnerable populations such as children, the elderly, pregnant women, and individuals with weakened immune systems.
Even dairy from healthy animals under sanitary conditions can be contaminated. The Centers for Disease Control and Prevention (CDC) estimates that raw milk is 150 times more likely to cause foodborne illness than pasteurized milk. While baking might heat the dairy sufficiently, relying solely on this is risky, especially for recipes that don't reach high temperatures or use dairy in uncooked components.
When to Use Pasteurized Options: Prioritizing Safety
For home baking, especially when baking for others, using pasteurized dairy products is always the safest choice. Most recipes are developed assuming the use of pasteurized ingredients, and their flavor and performance in baking are generally consistent.
Prioritizing pasteurized options aligns perfectly with dairy baking safety tips focused on minimizing health risks. Unless you have a specific, informed reason and accept the higher risk, stick to pasteurized milk, cream, butter, cheese, and other dairy products for your baking endeavors.
Specific Dairy Products and Safety Considerations
Different dairy products have varying compositions and characteristics, leading to slightly different handling and storage requirements. While the core principles of cold storage and hygiene apply universally, being aware of product-specific tips can further enhance your dairy baking safety tips.
Understanding the nuances for popular baking ingredients like cream cheese, butter, milk, sour cream, and yogurt ensures you're providing the best care for each type of dairy.
Cream Cheese Safety: Handling and Storage Tips
Cream cheese, a staple in cheesecakes and frosting, is a soft, perishable cheese. It must be kept refrigerated at or below 40°F (4°C). Once opened, cream cheese should be used within about 1-2 weeks, even if the "Use By" date is further out, as exposure to air increases the risk of spoilage.
Always use a clean knife or spoon to scoop out cream cheese to avoid introducing contaminants. If a recipe calls for softened cream cheese, leave it at room temperature only until it's workable, typically an hour or two depending on the kitchen temperature, and then use it promptly or return it to the fridge. These specific dairy baking safety tips for cream cheese help maintain its quality and safety.
Butter Safety: Preventing Rancidity and Contamination
Butter, due to its high-fat content and lower water activity compared to milk or cream, is less prone to rapid bacterial growth when refrigerated. However, it can still go rancid or become contaminated. Refrigerated butter should ideally be used within its "Use By" date, often several months.
If you store butter at room temperature for spreading (which is common but slightly increases risk), keep only a small amount out and use it within a couple of days. Store the bulk in the refrigerator. When baking, use refrigerated butter unless the recipe specifically calls for softened or melted butter, and handle it with clean hands and utensils. Proper butter handling is an important aspect of dairy baking safety tips.
Milk Safety: Pasteurization and Storage Guidelines
Milk is one of the most common and perishable dairy ingredients. Always buy pasteurized milk and keep it refrigerated at or below 40°F (4°C). Store it away from the door. Once opened, milk is typically best used within 5-7 days, regardless of the printed expiration date, as it's exposed to air and potential contaminants each time it's opened.
Discard milk immediately if it develops an off smell, changes color, or curdles, even if it's before the date on the carton. Using fresh, properly stored milk is fundamental to both the success and safety of your baked goods, making it a core dairy baking safety tip.
Sour Cream Safety: Proper Handling to Avoid Spoilage
Sour cream is cultured, which gives it a longer refrigerated shelf life than milk, but it is still highly perishable. It should be stored at or below 40°F (4°C) and used within 1-2 weeks of opening. Always use a clean spoon to avoid introducing mold spores or bacteria.
Check for signs of spoilage like excessive liquid separation (beyond a little whey on top), mold, or an overly sharp or "off" smell. Proper handling and storage of sour cream are key dairy baking safety tips for recipes like cakes, muffins, or dips.
Yogurt Safety: Maintaining Cold Chain and Preventing Contamination
Like sour cream, yogurt is a cultured dairy product requiring strict refrigeration at or below 40°F (4°C). Once opened, plain yogurt is typically good for about 1-2 weeks. Fruit-on-the-bottom or flavored yogurts might have a slightly shorter lifespan due to the added ingredients.
Always use a clean utensil when scooping yogurt for baking or consumption. Discard yogurt if you see mold, notice an unusual color change, or if it smells strongly of yeast or spoilage. Maintaining the cold chain from store to fridge and handling with clean utensils are crucial dairy baking safety tips for yogurt.
Recognizing Signs of Dairy Spoilage: What to Look For
Even with the best handling practices, dairy products can spoil. Recognizing the signs of spoilage is essential to avoid using unsafe ingredients in your baking. Trust your senses, but be aware that some harmful bacteria do not cause noticeable changes in appearance, smell, or texture.
When in doubt, it's always safer to err on the side of caution. Knowing what to look for is a fundamental dairy baking safety tip.
Visual Indicators: Changes in Appearance
Visual cues are often the first sign of dairy spoilage. Look for mold growth, which can appear as fuzzy spots of various colors (green, black, white). Also, observe changes in color; milk might turn yellowish, or cream might develop discolored patches. Excessive separation of liquids or solids beyond what is normal for the product can also indicate spoilage.
For instance, while some whey separation in yogurt is normal, excessive liquid and a grainy texture are signs of deterioration. Visible signs are a clear indicator that the product should not be used, reinforcing basic dairy baking safety tips.
Smell Test: Detecting Off-Odors
A strong, unpleasant odor is a reliable indicator that dairy has spoiled. Milk will develop a sour or rancid smell. Cream and sour cream might smell yeasty or overly pungent. Butter can smell cheesy or rancid.
While smelling is a good test, it's not foolproof. Some bacteria that cause illness do not produce strong odors. However, if a dairy product smells bad, it's definitely unsafe to use. The smell test is a quick check, but should be combined with other dairy baking safety tips.
Texture Changes: Identifying Signs of Degradation
Changes in texture can also signal spoilage. Milk might become thick or lumpy. Sour cream or yogurt could become excessively watery or develop a slimy consistency. Cream cheese might become hard and dry around the edges with liquid pooling elsewhere.
These textural changes indicate that the dairy product is breaking down, often due to microbial activity. Using dairy with significant texture changes can affect the outcome of your baked goods and potentially pose a health risk. Checking the texture is another important dairy baking safety tip.
When in Doubt, Throw it Out: Prioritizing Safety
This is the golden rule of food safety, especially with perishable items like dairy. If a dairy product is past its expiration date, has been left out at room temperature for too long, or shows any signs of spoilage (visual, smell, or texture), do not use it.
The cost of discarding a small amount of dairy is negligible compared to the potential health risks of using a spoiled product. Prioritizing safety by choosing to discard questionable ingredients is the most important dairy baking safety tip you can follow.
Cleaning and Sanitizing After Baking with Dairy: Preventing Contamination
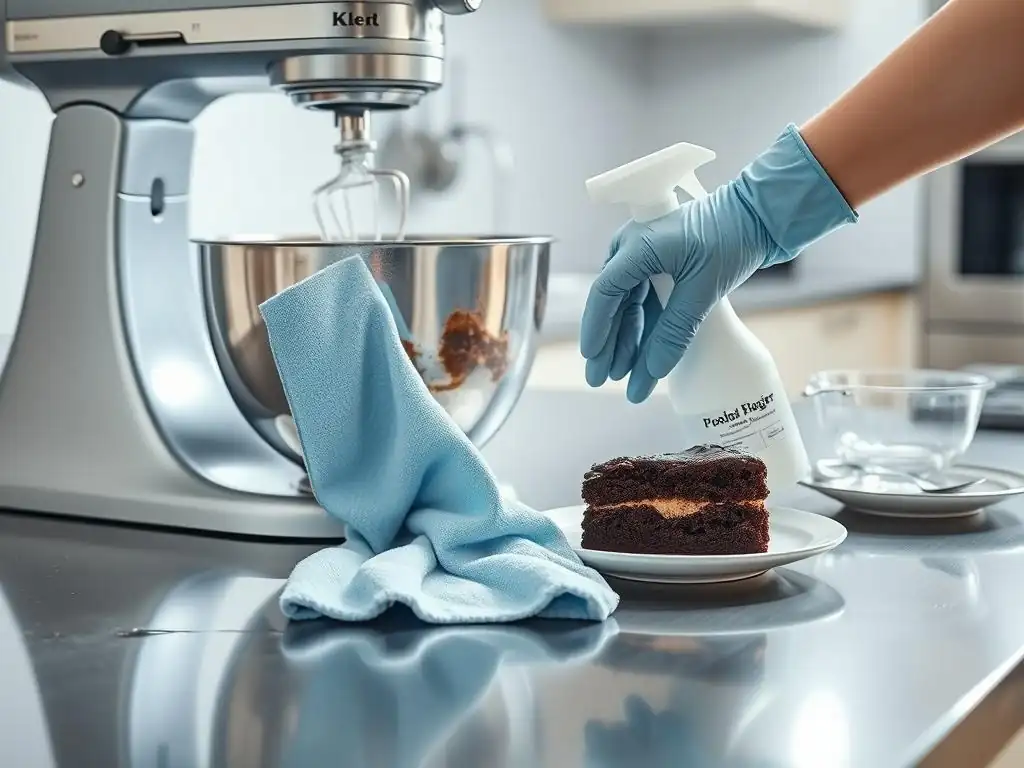
Food safety doesn't end when your baked goods come out of the oven. Proper cleanup is essential to prevent cross-contamination in your kitchen and maintain a hygienic baking environment for next time. This is particularly important after handling raw ingredients or dairy.
Thorough cleaning and sanitizing of all surfaces and equipment that came into contact with dairy is the final step in a comprehensive approach to dairy baking safety tips.
Washing Utensils and Equipment Thoroughly
Immediately after use, wash all bowls, whisks, spatulas, measuring cups, and other equipment that touched dairy with hot, soapy water. If using a dishwasher, ensure items are loaded correctly for effective cleaning. Don't let dairy residue sit on equipment for long periods, as this allows bacteria to multiply and makes cleaning harder.
Handwashing should be vigorous, paying attention to handles and any intricate parts of tools. Proper washing removes food particles and most bacteria, preparing equipment for the sanitizing step if needed. This is a fundamental part of post-baking dairy baking safety tips.
Sanitizing Surfaces: Eliminating Bacteria
After washing, sanitizing surfaces and equipment kills most remaining bacteria. This can be done using a food-safe chemical sanitizer spray or solution (following product instructions) or by using a solution of 1 tablespoon of unscented liquid chlorine bleach per gallon of water. Apply the sanitizer to surfaces that contacted dairy and let it air dry.
For items like cutting boards or counters that had direct contact with raw dairy or potentially contaminated ingredients, sanitizing is particularly important. This step provides an extra layer of protection, ensuring that your kitchen is safe for your next baking project and reinforcing effective dairy baking safety tips.
Proper Disposal of Dairy Waste: Preventing Contamination
Dispose of any spoiled dairy or packaging that contained dairy promptly and properly. Seal garbage bags containing dairy waste and remove them from the kitchen regularly, especially in warm weather. This prevents odors and avoids attracting pests.
Pouring spoiled milk or cream down the drain is acceptable, but rinse the sink thoroughly afterward. Proper waste disposal prevents potential sources of contamination from lingering in your kitchen environment, completing the cycle of dairy baking safety tips.
Addressing Common Dairy Baking Safety Concerns
Even when following best practices, questions can arise. Addressing common scenarios helps home bakers feel more confident in their ability to handle dairy safely.
What if I accidentally left dairy out at room temperature?
If perishable dairy like milk, cream, sour cream, or yogurt has been left out at room temperature (above 40°F or 4°C) for more than two hours (or one hour if the temperature is above 90°F or 32°C), it should be discarded. Within this "danger zone," bacteria can multiply rapidly to unsafe levels, even if the product doesn't look or smell bad. Soft cheeses like cream cheese also fall under this rule. Butter is less risky but should still be refrigerated if left out for extended periods.
How long can I safely store baked goods containing dairy?
Baked goods containing dairy (like cheesecakes, cream pies, custards, or items with cream cheese frosting) are perishable and must be stored in the refrigerator. Generally, these items are safe to eat when stored properly in the fridge for 3-5 days. Always check for signs of spoilage before consuming. Layer cakes with buttercream (which is mostly sugar and fat) are less risky but still benefit from refrigeration for quality and extended shelf life.
Can I refreeze dairy products after thawing?
Most dairy products should not be refrozen after thawing, as this can significantly degrade their texture and quality and potentially increase bacterial risk if they thawed improperly. Milk and cream can become grainy or separated. Cheese might become crumbly. While technically some hard cheeses could be refrozen, it's generally not recommended for quality. Butter is an exception and can usually be refrozen without significant quality loss, provided it was thawed safely in the refrigerator.
Conclusion: Prioritizing Dairy Safety for Delicious and Worry-Free Baking
Frequently Asked Questions
What are the most important dairy baking safety tips to remember when working with milk and cream?
The most critical tips are to store dairy properly at refrigerated temperatures and to check expiration dates religiously before using them in your baking. Always sanitize your workspace before and after handling dairy products.
How can I tell if my milk or cream has gone bad before I use it in a recipe?
Look for signs like a sour smell, a lumpy texture, or a change in color. If any of these are present, discard the dairy immediately. It is never worth the risk to your health.
What is the recommended safe temperature range for storing dairy products used in baking?
Dairy products should always be stored at or below 40°F (4°C). Maintaining this temperature is crucial for preventing bacterial growth and ensuring food safety.
How long can baked goods containing dairy be left at room temperature before becoming unsafe to eat?
Baked goods with dairy should not be left at room temperature for more than two hours. In warmer temperatures (above 90°F or 32°C), reduce this time to one hour to avoid bacterial contamination.
What are some alternatives to dairy that can be used in baking to avoid potential dairy baking safety issues for those with allergies?
Many alternatives are available, such as almond milk, soy milk, or coconut cream, can be safely substituted in many recipes. Be sure to adjust the recipe as needed for texture and flavor.
Final Reflection: The Sweet Science of Safe Baking
The meticulous handling of dairy in baking isn't just about avoiding spoiled cakes; it's about ensuring the health and safety of everyone who enjoys the fruits – or should we say, the sweets – of our labor. Ignoring proper dairy handling techniques can lead to serious foodborne illnesses, underscoring the critical importance of the practices discussed throughout this article. The seemingly simple act of baking becomes a powerful demonstration of responsibility when we prioritize safety.
The impact of safe food handling practices extends far beyond the individual baker; it shapes the entire culinary landscape. We are all interconnected through the food we share, and a commitment to safety fosters trust and confidence in the food we consume. As the old adage goes, An ounce of prevention is worth a pound of cure,
and this holds especially true when dealing with perishable ingredients like dairy and cream. The potential consequences of negligence are simply too high to ignore. This personal responsibility extends to educating others, ensuring that safe practices become the norm, not the exception.
Now, consider your own baking practices. Do you meticulously follow temperature guidelines? Do you understand the risks associated with cross-contamination? Take a moment to reflect on your current methods and identify areas for improvement. By consciously incorporating the safety tips outlined in this article into your routine, you're not just improving your baking; you're actively contributing to a safer and more enjoyable culinary experience for yourself and everyone you share your creations with. Let's bake with confidence, knowing we've taken every precaution to ensure the deliciousness is matched by the safety of our baked goods.
Unlock Your Baking Potential: Mastering Dairy & Cream!
Thanks for taking the time to learn about safe dairy handling in baking! You've now got the knowledge to create delicious and safe treats. Ready to put your newfound expertise into practice?
- Bake your masterpiece: Try a recipe you've been eyeing, focusing on safe handling of the dairy ingredients. Remember those temperature guidelines!
- Share your baking success (and any dairy-related questions!) in the comments below. Let's learn from each other!
- Experiment with different types of cream and dairy – maybe try that unique cheese you’ve always wanted to use!
What delicious dairy-driven treat will you bake first?