
Berry Galette with DairyFree Crust and Coconut Cream

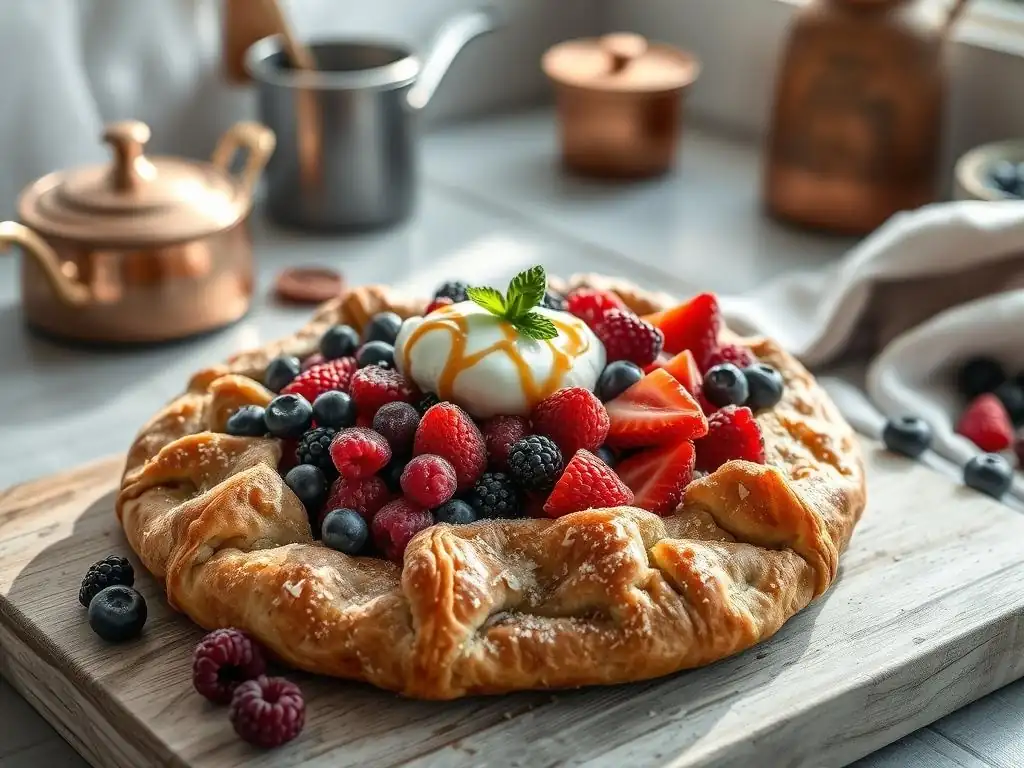
Welcome to BakeWithEase, where delicious baking meets effortless execution! Ever dreamed of a perfect summer treat that's also kind to dietary needs? Dive into our latest article and discover the secrets to a stunning Dairyfree Berry Galette. But that's just a taste of what we offer! Curious about how to achieve that flaky, dairy-free crust? Read on and unlock a world of simple recipes and expert tips that will transform your baking.
- Dairy-Free Berry Galette Recipe with Coconut Cream: A BakeWithEase Guide
- Introduction to Dairy-Free Baking: The Berry Galette
- Crafting the Perfect Dairy-Free Galette Crust
- Preparing the Berry Filling for Your Galette
- Assembling and Baking the Dairy-Free Berry Galette
- Dairy-Free Coconut Cream Topping
- Serving and Storing Your Dairy-Free Berry Galette
- Tips and Tricks for a Successful Dairy-Free Galette
- Variations on the Dairy-Free Berry Galette Recipe
- Conclusion: Enjoy Your Delicious Dairy-Free Berry Galette
-
Frequently Asked Questions
- How can I ensure the galette crust remains flaky when using a dairy-free alternative?
- What is the best dairy-free substitute for butter in the galette crust?
- Can I use frozen berries in this dairy-free berry galette recipe?
- What other toppings can I use instead of coconut cream?
- How long will the dairy-free berry galette keep, and how should I store it?
- Final Reflection: A Taste of Freedom, A Slice of Delight
- Unleash Your Inner Baker: Craft This Delicious Galette!
Dairy-Free Berry Galette Recipe with Coconut Cream: A BakeWithEase Guide
Introduction to Dairy-Free Baking: The Berry Galette
Welcome to BakeWithEase, where we believe that delicious baking should be accessible to everyone, regardless of dietary needs. Today, we're diving into the wonderful world of dairy-free baking with a classic dessert: the galette. A galette is a rustic, freeform tart, less intimidating than a traditional pie but just as satisfying. It's perfect for showcasing seasonal fruits, and our version features a delightful dairy-free crust paired with a luscious coconut cream topping. This easy-to-follow guide will walk you through creating a spectacular dairyfree berry galette recipe that's sure to impress.
Whether you're navigating a dairy allergy, lactose intolerance, or simply choosing a plant-based lifestyle, mastering dairy-free baking opens up a world of possibilities. Our focus with this dairyfree berry galette recipe is to demonstrate that removing dairy doesn't mean sacrificing flavor or texture. We'll explore simple substitutions and techniques that yield a flaky crust and a vibrant, juicy filling, proving that dairy-free desserts can be just as rich and rewarding as their traditional counterparts. Get ready to bake something truly special with BakeWithEase!
Why Choose a Dairy-Free Galette?
Choosing a dairy-free galette is a fantastic option for many reasons, extending beyond just dietary restrictions. For individuals with dairy allergies, even a tiny amount of milk protein can trigger severe reactions, making a guaranteed dairy-free recipe essential for safety. Lactose intolerance, affecting roughly 68% of the world's population, causes digestive discomfort from the sugar in milk, and a dairy-free alternative eliminates this issue entirely, allowing everyone to enjoy a slice without worry.
Furthermore, many people are opting for plant-based diets for ethical, environmental, or health reasons. A dairyfree berry galette recipe fits perfectly into this lifestyle. It utilizes plant-based fats and creams, reducing reliance on animal products. From a culinary perspective, using dairy-free butter substitutes can sometimes even enhance flakiness in crusts, and coconut cream provides a rich, tropical alternative to whipped cream, offering a unique and delicious flavor profile that complements the berries beautifully in this specific dairyfree berry galette recipe.
BakeWithEase Presents: A Simple and Delicious Berry Galette
At BakeWithEase, our mission is to simplify baking, and this dairyfree berry galette recipe is a prime example. We've streamlined the process to ensure even novice bakers can achieve fantastic results. The beauty of a galette lies in its rustic nature – imperfections are part of its charm! You don't need fancy pie plates or intricate crimping techniques. Just a simple sheet pan and a love for delicious fruit desserts.
Our recipe focuses on readily available ingredients and straightforward steps. We'll guide you through making a pliable, easy-to-work-with dairy-free dough that bakes up golden and flaky. The berry filling requires minimal effort – just tossing fruit with a few essential ingredients. This dairyfree berry galette recipe is designed to be a joyful baking experience, resulting in a show-stopping dessert that's both healthy-ish and incredibly satisfying, perfect for sharing or enjoying yourself.
Crafting the Perfect Dairy-Free Galette Crust
The crust is the foundation of any great galette, and achieving a flaky, tender dairy-free crust is absolutely possible with the right ingredients and techniques. Traditional pie crusts rely heavily on butter for their texture, but excellent plant-based alternatives work just as well. The key is using a solid, cold fat and handling the dough minimally to prevent gluten development, resulting in that desirable flakiness.
Our approach to this dairyfree berry galette recipe crust involves using a reliable dairy-free butter substitute and keeping all ingredients, especially the fat and water, very cold. This ensures that the fat melts slowly in the oven, creating steam pockets that separate the layers of dough, resulting in a beautifully flaky texture. We'll also provide options for gluten-free flour blends for those with additional dietary needs, ensuring this dairyfree berry galette recipe is as inclusive as possible.
Ingredients for the Dairy-Free Galette Crust
Making a delicious dairyfree berry galette recipe starts with gathering the right ingredients for the crust. You'll need a good quality all-purpose flour or a suitable gluten-free blend, a reliable dairy-free butter substitute, ice water, a touch of sugar for flavor and browning, and salt to enhance all the other flavors. The simplicity of the ingredient list belies the wonderful texture you can achieve.
Let's look at the specific components. For a standard recipe yielding one large galette (serving 6-8 people), you might typically use around 1.5 cups of all-purpose flour, 1/2 teaspoon of salt, 1 teaspoon of sugar, 1/2 cup (1 stick) of very cold dairy-free butter substitute cut into cubes, and about 1/4 to 1/2 cup of ice water. Having these measured and ready, especially the chilled fat and water, is crucial for success when tackling this dairyfree berry galette recipe.
Gluten-Free Flour Blend Options
For those needing a gluten-free option for their dairyfree berry galette recipe, there are several excellent blends available commercially. Look for blends designed for pie crusts or all-purpose baking, often containing a mix of rice flour, sorghum flour, tapioca starch, and potato starch, sometimes with a binder like xanthan gum. King Arthur Baking Company's Gluten-Free All-Purpose Flour or Bob's Red Mill 1-to-1 Baking Flour are popular choices that often work well as a direct substitute for wheat flour in pastry recipes.
When using a gluten-free blend for this dairyfree berry galette recipe, you might find the dough behaves slightly differently than wheat flour dough. It can sometimes be more crumbly. Ensure your dairy-free butter substitute is well distributed and add ice water gradually until the dough just comes together. Handling it gently is key. Some blends may absorb slightly more or less liquid, so trust your judgment and add just enough water for the dough to form a cohesive mass without being sticky.
Dairy-Free Butter Substitutes
Choosing the right dairy-free butter substitute is vital for a flaky dairyfree berry galette recipe crust. Not all substitutes are created equal when it comes to baking, particularly for pastry. Look for sticks of dairy-free butter that are solid and firm when cold, similar in consistency to traditional butter. Brands like Miyoko's Kitchen Cultured Vegan Butter, Earth Balance Vegan Butter Sticks, or Melt Organic Vegan Butter are often recommended for their ability to create flaky layers.
Avoid using soft, spreadable margarines or dairy-free butter alternatives sold in tubs for this dairyfree berry galette recipe. These typically have a higher water content and different fat composition that won't yield the desired flaky texture. For best results, ensure your chosen dairy-free butter substitute is straight from the refrigerator and cut into small cubes before incorporating it into the flour. Keeping the fat cold is the single most important factor for a flaky crust.
Other Crust Ingredients
Beyond flour and the dairy-free butter substitute, the other ingredients for your dairyfree berry galette recipe crust are minimal but play important roles. Salt is essential for flavor, balancing the sweetness of the filling and enhancing the taste of the crust itself. Use fine sea salt or table salt; about half a teaspoon is usually sufficient for a single crust.
A small amount of sugar, typically 1 teaspoon for a savory crust or up to a tablespoon for a sweeter one like in this dairyfree berry galette recipe, helps with browning and adds a subtle sweetness that complements the fruit. Finally, ice water is the binder. The cold temperature is crucial as it prevents the dairy-free butter substitute from melting before baking. You'll need just enough to bring the dough together, usually between 1/4 and 1/2 cup, added a tablespoon at a time.
Step-by-Step Guide to Making the Dairy-Free Crust
Creating the dairy-free crust for your dairyfree berry galette recipe is a straightforward process if you follow a few key steps. The goal is to combine the ingredients quickly and gently, keeping everything cold. This method traps small pieces of cold fat within the flour, which later melt in the oven to create steam and push the layers of dough apart, resulting in that coveted flaky texture.
We'll walk through the traditional method using your hands or a pastry blender, or you can use a food processor for an even quicker approach. Regardless of the tool, the principle remains the same: cut the fat into the flour until you have a mixture resembling coarse meal with some pea-sized pieces of fat visible. Then, add just enough ice water to hydrate the dry ingredients and bring the dough together.
Combining Dry Ingredients
The first step in making the crust for your dairyfree berry galette recipe is to combine the dry ingredients. In a large bowl, whisk together the flour (either all-purpose or your chosen gluten-free blend), salt, and sugar. Whisking ensures that the salt and sugar are evenly distributed throughout the flour, preventing pockets of intense saltiness or sweetness and ensuring consistent flavor in every bite of your dairyfree berry galette recipe.
If using a food processor, pulse the dry ingredients a couple of times to combine them. This simple step is crucial for the overall success of the crust. Make sure there are no clumps of salt or sugar. A well-mixed dry base provides a uniform foundation for incorporating the fat and liquid, leading to a more consistent and reliable dough texture for your dairyfree berry galette recipe.
Incorporating the Dairy-Free Butter Substitute
Now comes the critical step for flakiness in your dairyfree berry galette recipe crust: cutting in the cold dairy-free butter substitute. If using your hands or a pastry blender, add the cold, cubed dairy-free butter substitute to the dry ingredients. Work the fat into the flour mixture by cutting, pinching, or rubbing until the mixture resembles coarse meal with some larger pieces of fat still visible, roughly the size of small peas or lentils.
This should take about 5-8 minutes by hand or pastry blender. Avoid overworking the mixture into a fine powder; those larger pieces are essential for flakiness.
Using a food processor is faster. Add the cold, cubed dairy-free butter substitute to the food processor bowl with the dry ingredients. Pulse in short bursts (about 10-15 pulses) until the mixture resembles coarse meal with some pea-sized pieces of fat remaining. Be careful not to over-process; you want distinct pieces of fat, not a smooth paste. This step is fundamental to the texture of your finished dairyfree berry galette recipe.
Adding Water and Forming the Dough
Once the dairy-free butter substitute is properly incorporated, it's time to add the ice water to your dairyfree berry galette recipe crust mixture. Drizzle the ice water, one tablespoon at a time, over the flour-fat mixture. Gently mix with a fork or your hands after each addition. If using a food processor, pulse a few times after each tablespoon of water. The goal is to add just enough water for the dough to come together when you press a small amount between your fingers.
You'll know you've added enough water when the mixture looks shaggy but holds together when squeezed. It might not look perfectly smooth yet, and that's okay. Typically, this requires between 1/4 and 1/2 cup of ice water for a standard recipe, but the exact amount can vary based on humidity and the type of flour used. Stop adding water as soon as the dough starts to clump together; too much water will make the crust tough, which is the opposite of what we want for this dairyfree berry galette recipe.
Chilling the Dairy-Free Galette Dough
After the dough for your dairyfree berry galette recipe has just come together, gather it gently into a ball (or two smaller balls if making multiple galettes). Flatten the ball into a disc shape, about 1 inch thick. This disc shape makes it easier to roll out later. Do not knead the dough; overworking develops gluten and leads to a tough crust. Handle it as little as possible.
Wrap the disc tightly in plastic wrap or beeswax wrap. Refrigerate the dough for at least 30 minutes, but preferably for 1 to 2 hours. This chilling period is crucial: it allows the gluten (if using wheat flour) to relax, making the dough easier to roll, and more importantly, it re-hardens the dairy-free butter substitute. Cold fat is key to achieving a flaky crust when you bake your dairyfree berry galette recipe. You can even make the dough a day or two in advance and store it in the refrigerator.
Preparing the Berry Filling for Your Galette
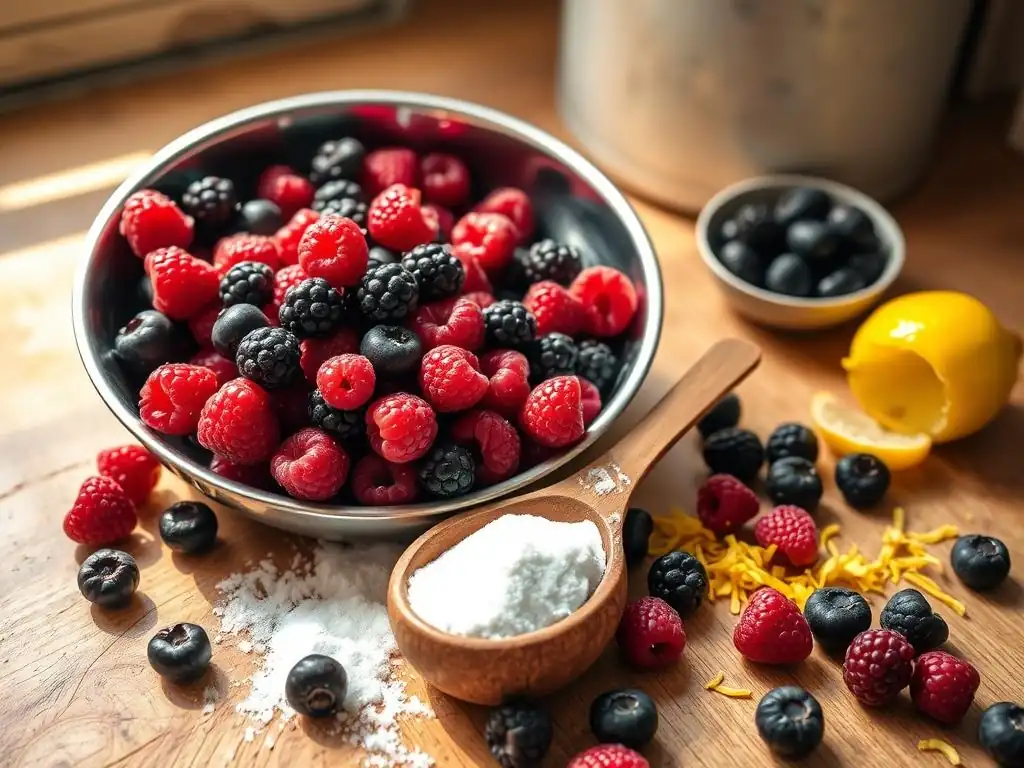
The berry filling is the vibrant heart of your dairyfree berry galette recipe, providing juicy sweetness and a beautiful pop of color. The beauty of a galette filling is its simplicity – minimal ingredients are needed to let the natural flavor of the fruit shine. We'll focus on selecting the best berries and combining them with just enough sweetener and thickener to create a luscious, slightly set filling that doesn't make the crust soggy.
This section will guide you through choosing your berries, discussing the pros and cons of fresh versus frozen, and suggesting delightful flavor combinations. We'll also cover the essential ingredients needed to sweeten and thicken the filling, ensuring a perfect balance of flavor and texture for your dairyfree berry galette recipe. Getting the filling right is key to a successful and delicious result.
Selecting the Best Berries for Your Dairy-Free Galette
Choosing the right berries is crucial for a delicious dairyfree berry galette recipe. You can use a single type of berry or a mix, depending on what's in season and your personal preference. Classic choices include strawberries, blueberries, raspberries, and blackberries. A mix of two or three types often provides a more complex flavor profile and visual appeal.
When selecting berries, look for fruit that is ripe, plump, and flavorful. If using strawberries, hull and quarter or slice larger ones. Raspberries and blackberries can usually be used whole, while blueberries are always used whole. Aim for about 3-4 cups of berries for a standard galette. This amount provides a generous filling without overflowing during baking, which is important for the success of your dairyfree berry galette recipe.
Fresh vs. Frozen Berries
Both fresh and frozen berries can be used in your dairyfree berry galette recipe, each with their own considerations. Fresh berries, especially those in peak season, offer the best flavor and texture. They require minimal preparation, usually just a gentle rinse and pat dry. Using fresh berries allows their natural sweetness and slight tartness to really shine in the finished galette.
Frozen berries are a convenient option, especially when fresh berries are out of season or expensive. They are typically picked at their peak ripeness and flash-frozen, locking in nutrients and flavor. However, frozen berries release significantly more liquid as they thaw and bake. If using frozen berries for your dairyfree berry galette recipe, you may need to increase the amount of thickener slightly (perhaps by 1-2 teaspoons) or partially thaw and drain them before mixing with other filling ingredients to prevent a soggy crust.
Berry Combinations
Experimenting with berry combinations can add exciting layers of flavor to your dairyfree berry galette recipe. A classic mix is strawberries and rhubarb (though rhubarb isn't a berry, it pairs wonderfully and adds tartness). A simple blend of blueberries and raspberries offers a balance of sweetness and slight tang. For a richer flavor, combine blackberries and blueberries.
Consider adding other fruits too, like sliced peaches or cherries (pitted, of course), which pair excellently with berries. A popular combination for this dairyfree berry galette recipe might be 2 cups of blueberries and 2 cups of sliced strawberries. Or perhaps 1 cup of raspberries, 1 cup of blackberries, and 2 cups of blueberries. The possibilities are nearly endless, allowing you to customize your dairyfree berry galette recipe to your taste and what's available.
Ingredients for the Berry Filling
Once your berries are selected and prepped, you'll need a few more ingredients to create the perfect filling for your dairyfree berry galette recipe. These include a sweetener to balance the fruit's tartness, a thickener to prevent the filling from becoming too runny, and often a touch of acid like lemon juice to brighten the flavors.
The exact quantities will depend on the type and sweetness of your berries, but for about 4 cups of mixed berries, you might typically use 1/4 to 1/2 cup of sugar (or other sweetener), 2-3 tablespoons of cornstarch or other thickener, and 1 tablespoon of lemon juice. Having these measured and ready before combining with the berries ensures a smooth assembly process for your dairyfree berry galette recipe.
Sweeteners
The amount and type of sweetener used in your dairyfree berry galette recipe filling can be adjusted based on the sweetness of your berries and your personal preference. Granulated sugar is a common choice, dissolving easily and providing clean sweetness. For a slightly richer flavor, you could use light brown sugar.
If you prefer using natural sweeteners, maple syrup or agave nectar can work, but they add liquid, so you might need to increase the thickener slightly. Coconut sugar is another option, offering a lower glycemic index and a subtle caramel note. Start with the lower end of the suggested amount (e.g., 1/4 cup) and taste a berry or two mixed with a tiny bit of sweetener to gauge if you need more. Remember, the sweetness will concentrate slightly during baking.
Thickening Agent
A thickener is essential in your dairyfree berry galette recipe filling to absorb the juices released by the fruit during baking, preventing a soggy crust. Cornstarch is the most common and reliable choice, providing a clear, glossy finish. For about 4 cups of berries, 2-3 tablespoons of cornstarch is usually sufficient. If using particularly juicy berries (like raspberries) or frozen berries, lean towards 3 tablespoons.
Other thickeners can be used, such as tapioca starch (often preferred for gluten-free baking, use slightly more than cornstarch, maybe 3-4 tablespoons) or all-purpose flour (use 3-4 tablespoons, but it can make the filling slightly cloudy). Arrowroot starch is another option, but it's best added towards the end of cooking or baking as it can break down under prolonged heat. Whichever thickener you choose for your dairyfree berry galette recipe, ensure it's thoroughly mixed with the sugar before combining with the berries to prevent lumps.
Lemon Juice for Brightness
A splash of acid, typically lemon juice, is a secret weapon in fruit fillings, including this dairyfree berry galette recipe. It doesn't just add a bit of tartness; it brightens and enhances the natural flavors of the berries, preventing the filling from tasting flat or overly sweet. It also helps balance the richness of the crust and the coconut cream topping.
One tablespoon of fresh lemon juice is usually enough for about 4 cups of berries. Don't skip this step! It makes a noticeable difference in the final taste of your dairyfree berry galette recipe. If you don't have fresh lemon juice, a small amount of apple cider vinegar (about half a tablespoon) can also work in a pinch, though lemon is preferred for its pure citrus flavor.
Assembling the Berry Filling
Assembling the berry filling for your dairyfree berry galette recipe is incredibly simple – essentially, you're just tossing the ingredients together in a bowl. The key is to do this just before you're ready to assemble the galette. Mixing the berries with the sugar and thickener too far in advance can cause the sugar to draw out too much juice from the fruit, making the filling excessively wet before it even hits the oven.
Have your prepped berries, sweetener, thickener (mixed together), and lemon juice ready. Combine them gently but thoroughly. The thickener and sugar should coat the berries relatively evenly. This minimal handling ensures the berries largely retain their shape during baking while the released juices are properly managed by the thickener, leading to a perfect dairyfree berry galette recipe filling.
Combining Berries, Sweetener, and Thickener
In a medium bowl, combine your selected berries. In a separate small bowl, whisk together the sugar (or chosen sweetener) and the thickener (cornstarch, tapioca starch, etc.). This step is important to prevent the thickener from clumping when it hits the wet berries.
Pour the sugar-thickener mixture over the berries. Gently toss the berries with a spoon or spatula until they are evenly coated. You should see the powdery mixture adhering to the fruit. Be careful not to mash the berries, especially softer ones like raspberries. This coating is what will create that lovely, slightly thickened sauce around the fruit as your dairyfree berry galette recipe bakes.
Adding Lemon Juice
Once the berries are coated with the sugar and thickener, drizzle the fresh lemon juice over the mixture. Gently toss again to distribute the lemon juice evenly. You might notice the mixture becoming slightly glossy or wetter as the lemon juice interacts with the sugar and thickener.
This is the final step before the filling is ready to be placed onto the rolled-out crust for your dairyfree berry galette recipe. The filling is now complete and waiting to be baked into a delicious dessert. Proceed immediately to assembling the galette to minimize the time the fruit sits with the sugar, which can cause excessive juice release.
Assembling and Baking the Dairy-Free Berry Galette
With the dairy-free dough chilled and the berry filling ready, it's time to bring everything together and bake your spectacular dairyfree berry galette recipe. The assembly process for a galette is much more forgiving than a pie. There's no need for precise crimping or fitting into a dish; the rustic, freeform shape is part of its charm.
This section will guide you through rolling out the dough, transferring it, arranging the filling, and folding the edges to create that signature galette look. Finally, we'll cover the baking process, including optimal temperature and time, and how to tell when your dairyfree berry galette recipe is perfectly golden brown and bubbly.
Rolling Out the Dairy-Free Galette Crust
Rolling out the dough is the first step in assembling your dairyfree berry galette recipe. Remove the chilled dough disc from the refrigerator. If it's very hard, let it sit at room temperature for just 5-10 minutes to soften slightly, but keep it cold. Lightly flour a clean work surface (a pastry mat or parchment paper works well) and your rolling pin.
Place the dough disc in the center of your floured surface. Begin rolling from the center outwards, rotating the dough occasionally to ensure it doesn't stick and to help maintain a circular shape. Aim for a rough circle about 12-14 inches in diameter and about 1/8 to 1/4 inch thick. Don't worry if the shape isn't a perfect circle; the rustic look is part of the galette's appeal.
Rolling Techniques for a Perfect Crust
Achieving an evenly thick crust is important for uniform baking in your dairyfree berry galette recipe. Roll with even pressure, starting from the center and rolling towards the edges. Lift and rotate the dough frequently, adding a little more flour underneath if needed to prevent sticking. If cracks appear at the edges, you can gently pinch them back together.
Some bakers find it helpful to roll the dough between two sheets of parchment paper. This prevents sticking and makes transferring the dough easier, especially with potentially more delicate dairy-free or gluten-free crusts. Simply roll the dough between the sheets to your desired size and thickness. This technique can simplify the assembly of your dairyfree berry galette recipe.
Preventing the Crust from Sticking
Preventing the crust from sticking to your work surface is key to a smooth assembly for your dairyfree berry galette recipe. A generous but not excessive amount of flour on your surface and rolling pin is the first line of defense. If using parchment paper, you may need less flour or none at all directly on the paper.
As you roll, periodically lift the edge of the dough and gently slide your hand or a spatula underneath to ensure it's not adhering. If using a pastry mat, check the instructions as some are designed to be non-stick. If the dough does stick stubbornly, you might need to scrape it up carefully and add more flour, then gently re-roll the area. Working quickly while the dough is cold also helps prevent sticking.
Transferring the Crust to a Baking Sheet
Once your dairyfree berry galette recipe crust is rolled out to the desired size, it needs to be transferred to the baking sheet. This is where using parchment paper can be particularly helpful. If you rolled the dough directly on parchment paper, you can simply lift the paper with the dough and place it onto a baking sheet.
If you rolled directly on a floured surface, carefully loosen the dough using a large spatula. You can then gently roll the dough loosely around your rolling pin and unroll it onto a baking sheet lined with parchment paper. Alternatively, fold the dough in half or quarters, lift it onto the baking sheet, and then unfold it. Be gentle to avoid tearing, but don't panic if it tears; small tears can be patched easily.
Arranging the Berry Filling on the Crust
With the dairy-free crust on the baking sheet, it's time to add the delicious berry filling to your dairyfree berry galette recipe. Spoon the prepared berry mixture onto the center of the rolled-out dough. Distribute the berries relatively evenly.
Avoid piling the filling too high in the center; aim for a somewhat flat layer. This helps ensure the filling bakes evenly and prevents it from bubbling over excessively during baking. Using a slotted spoon to transfer the berries can help leave behind any excess liquid that may have accumulated, further preventing a soggy bottom crust in your dairyfree berry galette recipe.
Leaving a Border for Folding
A crucial step when arranging the filling for your dairyfree berry galette recipe is to leave a generous border of dough around the edges. You need this border to fold over the filling to create the galette's rustic edge. Aim to leave a border of about 2-3 inches of bare dough all the way around the circle of filling.
This border ensures you have enough dough to fold and pleat, securely containing the berry filling as it bakes and bubbles. It also creates that lovely contrast between the golden, flaky crust and the vibrant fruit filling that is characteristic of a perfect dairyfree berry galette recipe.
Folding the Edges of the Galette Crust
Now for the fun part – folding the edges of your dairyfree berry galette recipe! This is where the rustic nature of the galette truly comes through. Starting from one point, gently lift the edge of the dough border and fold it up and over a portion of the berry filling.
Continue working your way around the circle, folding and pleating the dough border over the filling. Each fold should overlap the previous one slightly. The goal is to create a circular border that encloses the filling, leaving the center exposed. Don't aim for perfection; uneven folds and pleats add to the charm of a homemade dairyfree berry galette recipe.
Creating a Rustic Look
The beauty of a galette lies in its rustic, freeform nature. As you fold the edges of your dairyfree berry galette recipe, embrace the imperfections. The pleats don't need to be uniform, and the circle doesn't need to be perfectly round. This casual approach makes the galette much less intimidating than a traditional pie.
Think of it as a freeform tart where the dough is simply wrapped around the filling. The goal is functional – to keep the filling contained – but the aesthetic is one of relaxed elegance. Enjoy the process; the resulting dairyfree berry galette recipe will look beautifully homemade and inviting.
Sealing the Edges
As you fold and pleat the dough around the filling for your dairyfree berry galette recipe, gently press down on the folded edge where it meets the underlying dough. This helps to seal the edges, preventing the berry juices from leaking out during baking. You don't need to press hard, just enough to adhere the layers.
If you want a little extra shine and color on your crust, you can brush the folded edges with a dairy-free milk alternative (like almond or soy milk) or a little melted dairy-free butter substitute. For a touch of sparkle and crunch, you can sprinkle the brushed edges with coarse sugar (like turbinado sugar). This step is optional but adds a lovely finish to your dairyfree berry galette recipe.
Baking the Dairy-Free Berry Galette
Your assembled dairyfree berry galette recipe is now ready for the oven! Baking is where the magic happens, transforming the raw dough and fruit into a golden, bubbly, delicious dessert. Proper temperature and timing are key to ensuring the crust is fully baked and flaky and the filling is hot and slightly thickened.
We recommend baking the galette on a preheated baking sheet, which helps ensure a crisp bottom crust. The baking time will vary depending on your oven and the specific ingredients used, but you'll be looking for visual cues like a deep golden-brown crust and a bubbling, slightly thickened filling.
Optimal Baking Temperature and Time
Preheat your oven to a relatively high temperature, typically between 375°F (190°C) and 400°F (200°C). A hotter oven helps the crust set quickly and encourages flakiness. Place your baking sheet in the oven while it preheats, if possible, to give it a head start on heating the bottom crust.
Carefully transfer the assembled dairyfree berry galette recipe (on its parchment paper) onto the hot baking sheet in the oven. Bake for approximately 35-50 minutes. The exact time will depend on your oven and the size of your galette. Begin checking around the 35-minute mark.
Checking for Doneness
You'll know your dairyfree berry galette recipe is done when the crust is a deep golden brown all around, including the bottom (you can carefully lift an edge with a spatula to check). The berry filling should be visibly bubbling in the center, and the juices should look slightly thickened, not watery.
If the crust is browning too quickly but the filling isn't bubbling, you can loosely tent the galette with aluminum foil. If the filling looks too wet after the crust is golden, you might need to bake it for a few extra minutes. A perfectly baked dairyfree berry galette recipe is a beautiful sight, with vibrant fruit peeking from a flaky, golden crust.
Dairy-Free Coconut Cream Topping
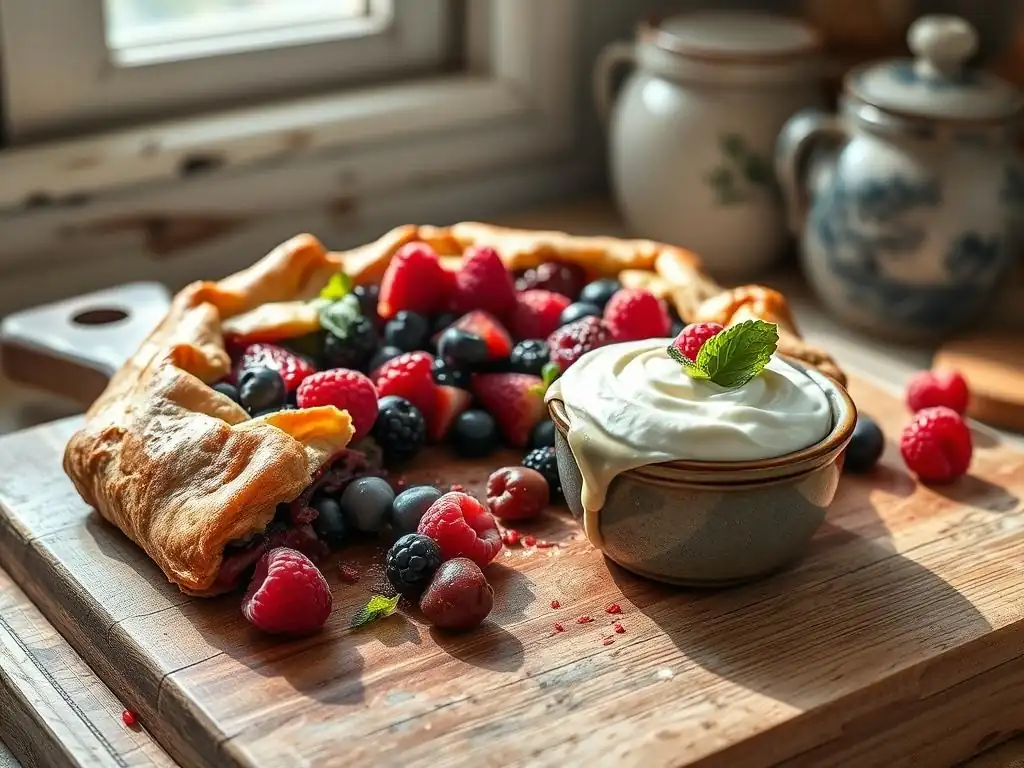
No berry galette is complete without a dollop of something creamy on top, and for our dairyfree berry galette recipe, we're making a simple and luxurious dairy-free coconut cream. This provides a wonderful contrast in texture and temperature to the warm, juicy fruit and flaky crust.
Making dairy-free whipped cream from full-fat coconut milk is surprisingly easy and yields a rich, decadent topping that pairs beautifully with berries. It requires minimal ingredients and just a little bit of planning ahead to ensure the coconut milk is properly chilled.
Ingredients for the Coconut Cream
Making dairy-free coconut cream for your dairyfree berry galette recipe requires just a few simple ingredients. The star is full-fat canned coconut milk. You'll also need a sweetener and a touch of vanilla extract for flavor.
For a generous amount of topping for one galette, you'll typically need one standard 13.5-ounce can of full-fat coconut milk (not 'light' or 'lite'), 1-2 tablespoons of powdered sugar (also known as confectioners' sugar), and about 1/2 teaspoon of vanilla extract. Ensure you use full-fat coconut milk, as the lower-fat versions will not whip.
Full-Fat Coconut Milk: The Key Ingredient
The success of your dairy-free coconut cream for this dairyfree berry galette recipe hinges entirely on using full-fat canned coconut milk. As full-fat coconut milk chills, the solid cream separates from the liquid coconut water. It is this thick, solid cream that you will whip.
Look for cans that feel heavy and aren't shaken. Brands vary in their cream-to-water ratio; some popular brands known for a good amount of solid cream include Thai Kitchen, Aroy-D, or Native Forest Organic. Avoid 'lite' or 'reduced-fat' versions, as they contain too much water and won't whip into a stable cream.
Sweetener Options
Powdered sugar is the most common sweetener for dairy-free coconut cream in a dairyfree berry galette recipe. Its fine texture dissolves easily, creating a smooth cream. Start with 1-2 tablespoons for one can of coconut milk and add more to taste after whipping.
Other sweeteners can be used, but they might affect the texture. Liquid sweeteners like maple syrup or agave can be used, but add them sparingly (start with 1 teaspoon) as they can weigh down the cream and prevent it from whipping fully. Granulated sugar won't dissolve properly and will leave a grainy texture. For the best results in this dairyfree berry galette recipe, powdered sugar is recommended.
Vanilla Extract for Flavor
A touch of vanilla extract enhances the flavor of the dairy-free coconut cream for your dairyfree berry galette recipe, complementing both the coconut base and the berry filling. Pure vanilla extract provides the best flavor.
Add about 1/2 teaspoon of good quality vanilla extract per can of coconut milk. You can adjust this amount based on your preference. Other flavorings like almond extract, a pinch of cinnamon, or even citrus zest can also be used to customize the coconut cream for your dairyfree berry galette recipe, but vanilla is a classic pairing.
Making the Coconut Cream
Making dairy-free coconut cream for your dairyfree berry galette recipe is simple, but it requires a little planning as the coconut milk needs to be thoroughly chilled. Once chilled, the process is quick and easy, resulting in a fluffy, dairy-free whipped topping.
You'll need a chilled can of full-fat coconut milk, a bowl, and a whisk or electric mixer. The key is to separate the solid cream from the liquid and whip only the cream. The liquid can be saved for smoothies or other recipes.
Chilling the Coconut Milk
This is the most important step for making dairy-free coconut cream for your dairyfree berry galette recipe. Place the can (or cans) of full-fat coconut milk in the refrigerator for at least 24 hours, or even longer if possible. Do not shake the can before chilling or opening.
The goal is to allow the solid coconut cream to separate and rise to the top of the can, leaving the liquid coconut water at the bottom. A full 24 hours of chilling ensures maximum separation and firmness of the cream, which is essential for whipping into a stable topping for your dairyfree berry galette recipe.
Scooping Out the Coconut Cream
Once the coconut milk is thoroughly chilled, carefully open the can. Do not shake it first! You should see a solid layer of white coconut cream at the top. Using a spoon, carefully scoop the solid cream into a chilled mixing bowl. Try to leave as much of the clear liquid coconut water behind as possible.
You may get anywhere from 1/2 cup to a little over 1 cup of solid cream per can, depending on the brand. Reserve the liquid for another use (it's great in curries or smoothies). Only the solid cream will whip into a light and fluffy topping for your dairyfree berry galette recipe.
Whipping the Cream with Sweetener and Vanilla
Add the powdered sugar and vanilla extract to the chilled coconut cream in the mixing bowl. Using an electric mixer (handheld or stand mixer) fitted with the whisk attachment, start whipping the mixture on medium speed.
Whip for 2-5 minutes, or until the cream is light, fluffy, and holds soft peaks, similar to dairy whipped cream. Be careful not to over-whip, as it can become grainy. Taste and add more powdered sugar if desired. Your dairy-free coconut cream is now ready to dollop onto your warm dairyfree berry galette recipe!
Serving and Storing Your Dairy-Free Berry Galette
Your beautiful dairyfree berry galette recipe is baked and smells incredible! Serving it correctly enhances the experience, and knowing how to store leftovers ensures you can enjoy it for a few days. A galette is best served warm, allowing the flavors to meld and the textures to shine.
We'll cover the crucial cooling step, how to top it with your freshly made dairy-free coconut cream, and the best way to store any remaining slices to maintain their quality. Enjoying the fruits of your labor is the final, and perhaps most satisfying, part of making this dairyfree berry galette recipe.
Allowing the Galette to Cool
While it's tempting to slice into your dairyfree berry galette recipe the moment it comes out of the oven, allowing it to cool is a crucial step. As the galette cools, the filling continues to thicken and set. Slicing into it too soon will result in a runny filling that spills out, making for a messy slice and potentially a soggy crust.
Let the galette cool on the baking sheet for at least 15-20 minutes before attempting to slice it. For even better results, especially if you used particularly juicy berries or frozen fruit, letting it cool for 30-60 minutes allows the filling to firm up considerably. The crust will remain wonderfully crisp while the filling becomes perfectly spoonable, ideal for serving your dairyfree berry galette recipe.
Topping with Coconut Cream
Once your dairyfree berry galette recipe has cooled sufficiently, it's time to add the finishing touch: the dairy-free coconut cream. You can dollop generous spoonfuls directly onto individual slices just before serving, or place a larger dollop in the center of the galette for everyone to serve themselves.
The cool, creamy texture of the coconut cream provides a delightful contrast to the warm, sweet-tart berry filling and the flaky crust. It elevates the simple dairyfree berry galette recipe into a truly decadent dessert experience. Feel free to be generous with the topping!
Storing Leftover Galette
If you're lucky enough to have leftovers of your dairyfree berry galette recipe, proper storage is key to maintaining its quality. Galettes are best enjoyed within 2-3 days of baking. The crust will lose some of its crispness over time, but the flavors will still be delicious.
Allow the galette to cool completely to room temperature before storing. Storing it while still warm can create condensation, making the crust soggy. Once cooled, the best way to store is usually in the refrigerator.
Refrigeration Instructions
To refrigerate leftover dairyfree berry galette recipe, cover it loosely with plastic wrap or aluminum foil, or transfer slices to an airtight container. Storing it in the refrigerator helps to keep the fruit filling fresh and prevents spoilage.
When you want to enjoy a slice, you can eat it cold directly from the fridge. For a warmer experience closer to freshly baked, reheat individual slices gently in a toaster oven at around 300°F (150°C) for 5-10 minutes, or in a conventional oven. Avoid microwaving, as it will make the crust soft and chewy. Reheating helps to crisp up the crust again.
Tips and Tricks for a Successful Dairy-Free Galette
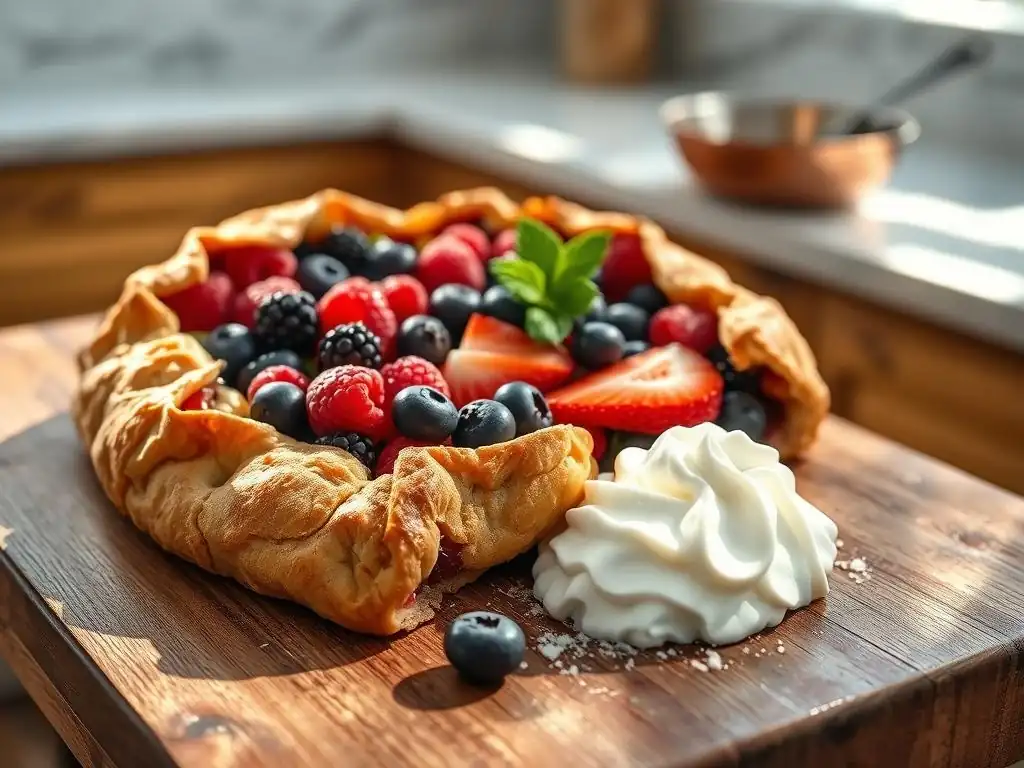
Baking a dairyfree berry galette recipe is relatively forgiving, but a few tips and tricks can help ensure your success and make your galette truly outstanding. These cover common challenges like achieving a flaky crust and preventing a soggy bottom, as well as how to adjust the sweetness to your liking.
Paying attention to ingredient temperatures, handling the dough gently, and managing the fruit's juices are key factors. Implementing these simple strategies will help you bake a beautiful and delicious dairyfree berry galette recipe every time.
Ensuring a Flaky Crust
Achieving a flaky crust in your dairyfree berry galette recipe relies on keeping the fat cold and not overworking the dough. Use very cold dairy-free butter substitute, cut into small pieces, and ensure your ice water is indeed icy. Work the fat into the flour until it resembles coarse meal with visible pea-sized pieces of fat. These pieces are crucial for creating steam pockets during baking.
Handle the dough minimally when combining ingredients and forming the disc. Overworking develops gluten, leading to a tough crust. Chill the dough thoroughly for at least 30 minutes before rolling; this re-hardens the fat. Roll the dough quickly on a floured surface and transfer it gently. A cold oven and a hot baking sheet can also contribute to a flakier bottom crust in your dairyfree berry galette recipe.
Preventing a Soggy Bottom
A soggy bottom crust is a common issue in fruit tarts, but there are ways to prevent it in your dairyfree berry galette recipe. The primary strategy is managing the moisture from the fruit. Ensure you use enough thickener (cornstarch, tapioca, etc.) mixed thoroughly with the sugar and berries. For juicy or frozen fruit, consider adding an extra tablespoon of thickener.
Another technique is to pre-bake the center of the crust slightly before adding the filling. Roll out the dough, transfer it to the baking sheet, and prick the center area (where the filling will go) with a fork. Bake at 375°F (190°C) for about 5-8 minutes until slightly set, then add the filling and fold the edges.
Alternatively, you can sprinkle a thin layer of breadcrumbs, ground nuts (like almond meal), or crushed cookies (like graham crackers) on the center of the dough before adding the filling. These absorb some of the fruit juices, protecting the bottom crust of your dairyfree berry galette recipe.
Adjusting Sweetness Levels
The sweetness of your dairyfree berry galette recipe can be easily adjusted based on the tartness of your berries and your personal preference. As mentioned earlier, start with the lower end of the suggested sugar amount (e.g., 1/4 cup for 4 cups of berries). Taste a few berries mixed with a small amount of the sugar/thickener mixture to get an idea of the sweetness level.
If using very ripe, sweet berries (like blueberries), you might need less sugar. If using tart berries (like cranberries or some raspberries), you might need more, up to 1/2 cup or slightly more. Remember that the sweetness concentrates slightly as the galette bakes. You can also rely on the dairy-free coconut cream topping to add extra sweetness if needed, allowing you to keep the fruit filling less sweet.
Variations on the Dairy-Free Berry Galette Recipe
One of the joys of baking a dairyfree berry galette recipe is how easily you can customize it. While the classic berry filling is wonderful, you can experiment with different additions to the crust or filling to create unique flavor profiles. These variations allow you to put your own spin on this versatile dessert.
From adding nuts for crunch to incorporating different fruit combinations or warm spices, there are many ways to modify this dairyfree berry galette recipe. Don't be afraid to get creative and try new combinations based on what's in season or what flavors you love.
Adding Nuts or Seeds to the Crust
Adding finely chopped nuts or seeds to the dairy-free crust of your dairyfree berry galette recipe can provide extra flavor, texture, and even a bit more richness. Almonds, pecans, walnuts, or even pumpkin seeds can work well.
Finely chop about 1/4 to 1/2 cup of your chosen nuts or seeds and whisk them in with the dry ingredients before cutting in the dairy-free butter substitute. This adds a lovely nutty undertone and a slight crunch to each bite of your dairyfree berry galette recipe crust.
Experimenting with Different Berry Combinations
As discussed earlier, the berry filling is highly adaptable in your dairyfree berry galette recipe. Beyond the classic mixes, consider less common combinations. Try blueberries with a handful of chopped fresh mint or basil for a surprising herbaceous note. Strawberries pair well with balsamic vinegar, which enhances their sweetness.
You could also move beyond just berries. Sliced apples or pears mixed with berries work well, especially with a pinch of cinnamon. Stone fruits like plums or apricots, when in season, are fantastic in a galette, either alone or mixed with berries. Let the seasonality of fruits inspire your dairyfree berry galette recipe filling choices.
Incorporating Spices
Adding spices to the berry filling can introduce warmth and complexity to your dairyfree berry galette recipe. Cinnamon is a classic pairing with berries, particularly blueberries and apples. A pinch of ground nutmeg or cardamom can also add a lovely aromatic quality.
About 1/4 to 1/2 teaspoon of ground cinnamon, nutmeg, or cardamom whisked in with the sugar and thickener before adding to the berries is usually sufficient. For a more complex spice blend, consider a tiny pinch of ground ginger or cloves. These additions transform a simple dairyfree berry galette recipe into something with deeper, more comforting flavors.
Conclusion: Enjoy Your Delicious Dairy-Free Berry Galette
Congratulations! You've successfully baked a delicious dairyfree berry galette recipe with coconut cream, guided by BakeWithEase. This rustic, freeform tart proves that dietary restrictions don't have to mean sacrificing flavor or enjoyment. With a flaky dairy-free crust, a vibrant berry filling, and a luscious coconut cream topping, this dessert is a true delight for everyone, dairy-free or not.
We hope this detailed guide has empowered you to tackle dairy-free baking with confidence. This dairyfree berry galette recipe is perfect for any occasion, from a casual weeknight treat to a special gathering. Share it with friends and family, and watch their faces light up when they discover how incredibly tasty dairy-free can be.
A Guilt-Free Dessert from BakeWithEase
This dairyfree berry galette recipe offers a wonderful way to enjoy a classic dessert while adhering to dairy-free needs. By using plant-based ingredients, you create a treat that is not only delicious but also potentially lighter and suitable for a wider range of dietary preferences. It's a dessert you can feel good about making and sharing.
At BakeWithEase, we are committed to providing recipes that are accessible, enjoyable, and deliver fantastic results. This dairyfree berry galette recipe is a prime example of how simple substitutions and straightforward techniques can open up a world of delicious possibilities in your kitchen. Happy baking!
Frequently Asked Questions
How can I ensure the galette crust remains flaky when using a dairy-free alternative?
Using cold ingredients is crucial. Ensure your dairy-free butter alternative is very cold, and consider adding a splash of ice water to the dough for extra moisture and flakiness.
What is the best dairy-free substitute for butter in the galette crust?
While there are various options, a high-quality dairy-free butter alternative designed for baking usually yields the best results, mimicking the texture and flavor of traditional butter.
Can I use frozen berries in this dairy-free berry galette recipe?
Yes, you can use frozen berries! Just make sure to thaw and drain them thoroughly before adding them to the galette to prevent a soggy crust.
What other toppings can I use instead of coconut cream?
You can use other dairy-free alternatives like cashew cream, dairy-free ice cream, or even a simple dusting of powdered sugar.
How long will the dairy-free berry galette keep, and how should I store it?
The galette is best enjoyed fresh, but it can be stored in an airtight container at room temperature for up to two days, or in the refrigerator for up to four days.
Final Reflection: A Taste of Freedom, A Slice of Delight
The pursuit of delicious, dairy-free baking is not just a dietary choice; it's a testament to the boundless creativity of the culinary arts. This simple berry galette, with its surprisingly flaky coconut-based crust and luscious coconut cream filling, proves that indulgence and dietary restrictions can coexist beautifully. The recipe presented here isn't just a collection of ingredients; it's a gateway to a world of flavor possibilities, accessible to everyone.
Creating this galette was more than just following a recipe; it was a journey of discovery. I found myself deeply engaged in the process, appreciating the subtle nuances of each ingredient and the satisfying simplicity of the technique. The final product, a rustic masterpiece bursting with fresh berry sweetness, felt like a personal triumph. The best things in life are simple,
a phrase often repeated, rings truer than ever when considering the joy derived from creating something delicious and wholesome from humble ingredients.
Now, it's your turn. I encourage you to try this recipe, to experiment with different berries, to adapt it to your own tastes and preferences. Don't be afraid to get your hands a little messy, to embrace the imperfections of homemade baking, and to savor the sweet reward of your efforts. Let this galette be a reminder that delicious, dairy-free baking is within everyone's reach, and that the journey of culinary exploration is a rewarding one filled with delightful surprises.
Unleash Your Inner Baker: Craft This Delicious Galette!
Thanks for joining us on this baking adventure! We hope you’ve gained some delicious inspiration and newfound confidence in the kitchen. Ready to bring this berry galette to life?
- Bake your own masterpiece: Follow the recipe and impress your friends and family with this stunning (and surprisingly simple!) dairy-free galette.
- Share your creation: Snap a picture of your finished galette and share it on social media using #BakeWithEaseBerryGalette – let's see those beautiful results!
- Explore more dairy-free delights: Dive into our recipe archives for more exciting plant-based baking ideas – we’ve got a whole world of deliciousness waiting for you!
What’s your favorite summer berry to bake with? Let us know in the comments!