
Your Roadmap to Perfect Choux Pastry Success

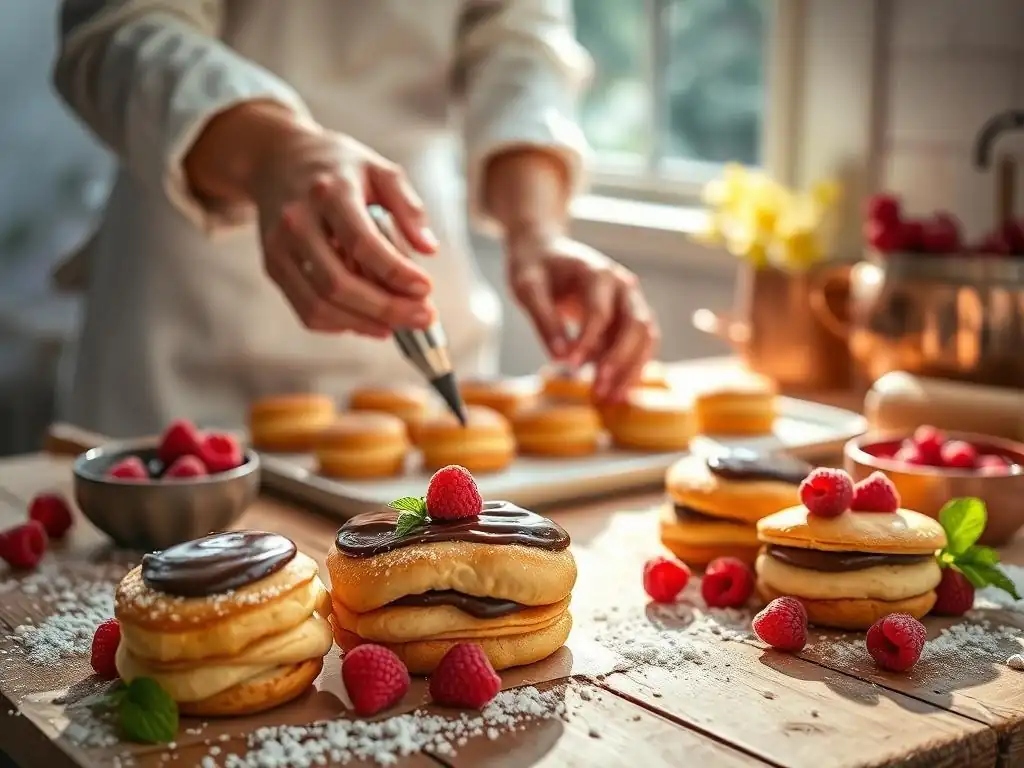
Welcome to BakeWithEase, your trusted companion in the delightful world of baking! Ever dreamt of creating delicate, airy cream puffs or impressive éclairs? Our perfect choux pastry recipe easy guide unlocks the secrets to mastering this versatile dough. Dive in and discover the simple steps to transform basic ingredients into stunning, bakery-worthy creations. Are you ready to embark on your choux pastry adventure?
- Mastering Choux Pastry: A Comprehensive Guide
- Understanding Choux Pastry: The Foundation for Success
- Step-by-Step: The Choux Pastry Recipe
- Troubleshooting Common Choux Pastry Problems
- Delicious Choux Pastry Variations: Beyond the Basics
- Tips and Tricks for Choux Pastry Perfection
- Conclusion: Enjoying Your Perfect Choux Pastry Success
-
Frequently Asked Questions
- How difficult is it to master choux pastry using BakeWithEase.com's "Perfect Choux Pastry Recipe Easy"?
- What kind of ingredients do I need for BakeWithEase.com's choux pastry recipe?
- Does BakeWithEase.com provide guidance on common choux pastry problems?
- Can I adapt the "Perfect Choux Pastry Recipe Easy" from BakeWithEase.com for different fillings?
- Where can I find the "Perfect Choux Pastry Recipe Easy" on BakeWithEase.com?
- Final Reflection: Mastering the Art of the Perfect Choux
- Unlock Your Inner Pastry Chef!
Mastering Choux Pastry: A Comprehensive Guide
Welcome to your ultimate guide to creating perfect choux pastry recipe easy! Often seen as intimidating, choux pastry (or pâte à choux) is surprisingly simple once you understand the basic principles. It's a fundamental dough in the world of baking, serving as the base for beloved treats like cream puffs, éclairs, and gougères. With this roadmap, you'll gain the confidence to whip up consistently light, airy, and delicious choux pastry every time. Let's demystify this classic French dough and make it an easy addition to your baking repertoire.
Understanding Choux Pastry: The Foundation for Success
Choux pastry is unique because it's a cooked dough, meaning part of the preparation happens on the stovetop before it even sees the oven. This initial cooking step is crucial for developing the structure needed to capture steam during baking, which is what makes choux pastry puff up dramatically and become hollow inside. Unlike many other doughs that rely on chemical leaveners or yeast, choux pastry's rise is primarily physical, driven by water turning to steam within the dough's structure.
Getting the dough consistency right before baking is paramount. It shouldn't be too stiff or too wet. The goal is a smooth, glossy paste that holds its shape when piped but is soft enough to expand rapidly in the heat of the oven. Mastering this consistency is a key step towards achieving that perfect choux pastry recipe easy result you're aiming for.
What is Choux Pastry?
Choux pastry, also known as pâte à choux, translates literally to "cabbage paste" in French, likely due to the rough shape of baked cream puffs resembling small cabbages. It's a versatile dough made from just four basic ingredients: water (or milk), butter, flour, and eggs. Its magic lies in its ability to puff up dramatically when baked, creating large hollow cavities ideal for filling with creams, custards, or even savory ingredients.
Originating in France, its creation is often credited to Queen Catherine de' Medici's pastry chef, Pantanelli, in the 16th century, later perfected by chefs like Antoine Carême in the 18th century. The technique involves cooking the liquid, fat, and flour together on the stovetop to create a thick paste (a panada or roux), which is then cooled slightly before eggs are beaten in. This process gelatinizes the starch in the flour and emulsifies the ingredients, forming a stable dough structure that can withstand the high heat of the oven and capture steam effectively, resulting in a light, airy puff.
The Key Ingredients for Perfect Choux: A Simple Recipe Overview
Achieving a perfect choux pastry recipe easy starts with understanding the role of each ingredient. While the list is short, the quality and proportion of each element are critical for success. A typical starting point for a simple batch might involve roughly equal weights of liquid and fat, the same weight of flour, and about twice the weight of eggs as flour, though this can vary slightly. For example, a common ratio by volume could be 1 cup water, 1/2 cup (1 stick) butter, 1 cup all-purpose flour, and 4-5 large eggs.
Using fresh, high-quality ingredients is always recommended in baking, and choux pastry is no exception. The fat content of the butter, the protein level in the flour, and the size and temperature of the eggs all influence the final dough consistency and baking outcome. Paying attention to these details sets the stage for a successful batch of choux.
Flour Selection for Light and Airy Choux
For most perfect choux pastry recipe easy guides, all-purpose flour is the standard choice. It provides a good balance of protein (typically 10-12%) to develop sufficient gluten structure to hold the steam produced during baking, without making the dough too tough. The gluten network formed during the cooking process on the stovetop is essential for the dough to expand and maintain its shape.
While some recipes might suggest bread flour for a stronger structure or pastry flour for a more tender result, all-purpose flour is generally the most forgiving and widely available option for home bakers. Using the correct amount, often measured by weight (like 120-130 grams per cup), is more critical than the slight variations in protein content between standard brands of all-purpose flour.
The Role of Butter in Choux Pastry Structure
Butter serves multiple purposes in choux pastry. First, it provides richness and flavor. Second, and perhaps more importantly, it contributes to the structure and leavening process. When heated with the liquid, the fat melts and disperses. During baking, the water in the dough turns to steam, and this steam is trapped by the gluten-fat network. The fat also helps to tenderize the dough slightly and contributes to a crisp exterior crust.
Using unsalted butter is generally preferred as it gives you control over the salt content in the final product, especially important if making savory gougères. Ensure the butter is fully melted with the liquid before adding the flour to ensure even distribution throughout the dough base. The amount of butter is typically about half the volume or weight of the liquid used.
Eggs: Binding and Leavening Your Choux Dough
Eggs are arguably the most crucial ingredient for achieving that signature puff. They act as both a binder, bringing the cooked flour-fat mixture together into a cohesive dough, and a primary leavening agent. The high water content in eggs contributes significantly to the steam production during baking. Egg proteins also coagulate in the heat, providing structure and stability to the puffed shells.
The number of eggs required can vary slightly depending on their size and the consistency of the initial cooked dough. It's often recommended to add eggs one at a time, beating well after each addition, until the dough reaches the correct consistency – it should be smooth, glossy, and fall from a spoon in a thick ribbon or 'V' shape. Using large eggs is standard in most recipes, and having them at room temperature can help them incorporate more smoothly into the dough.
Water (or Milk): Hydration and Steam in Choux Pastry
The liquid component, usually water or milk (or a combination), is essential for hydrating the flour and, most importantly, for generating the steam that leavens the pastry. As the dough bakes at high temperatures, the liquid rapidly converts to steam, which expands against the relatively rigid dough structure, causing it to puff up.
Water is the most common choice as it creates the most steam, leading to a very light and airy interior. Using milk instead of or in addition to water adds richness and contributes to a more golden-brown crust due to the milk solids caramelizing. However, milk can sometimes result in a slightly less dramatic puff compared to water alone. Regardless of the liquid choice, ensuring it is brought to a rolling boil with the butter before adding the flour is a critical first step in the perfect choux pastry recipe easy process.
Step-by-Step: The Choux Pastry Recipe
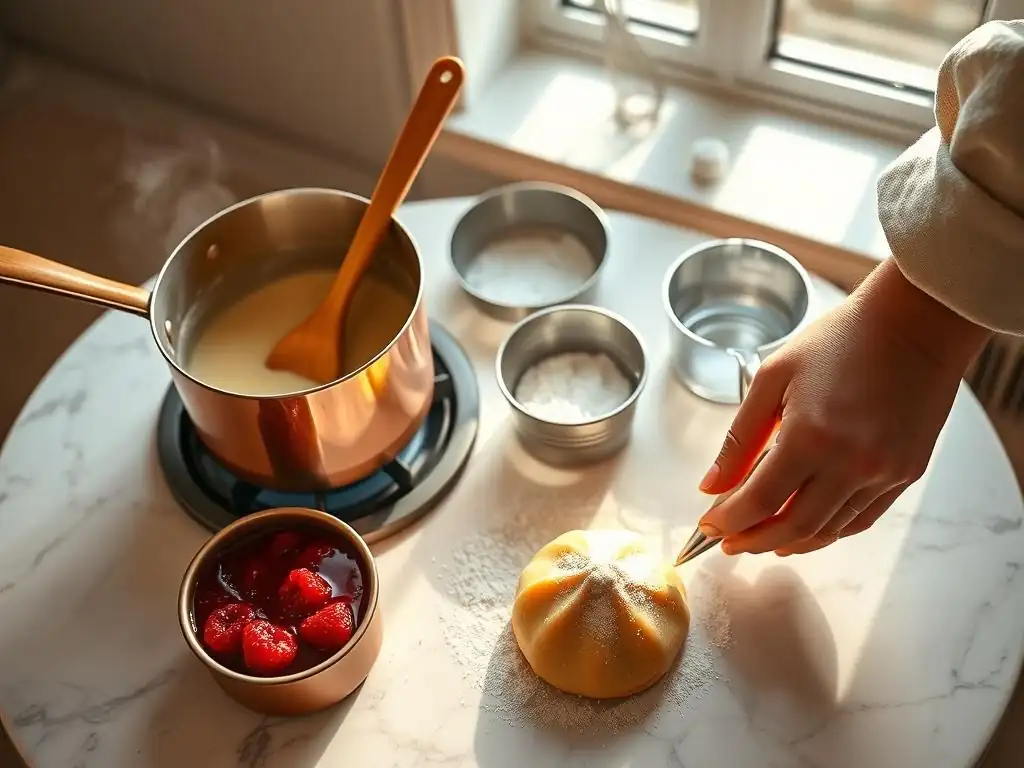
Making perfect choux pastry recipe easy involves following a series of precise steps. The process can be broken down into preparing ingredients, cooking the base on the stovetop, and finally baking. Each stage is important for developing the right texture and structure that allows the dough to puff up beautifully in the oven. Don't rush any step, especially the cooling and egg incorporation phases.
Think of this as building blocks: first, you create a stable, cooked paste; then, you add the necessary components (eggs) to make it pliable and ready to leaven; finally, you bake it correctly to trigger the puffing magic. Following these steps diligently is the secret to a successful batch of choux pastry, whether you're making classic cream puffs or elegant éclairs.
Preparing Your Ingredients: Mise en Place
"Mise en place," a French term meaning "everything in its place," is particularly important when making choux pastry. Because the stovetop cooking happens relatively quickly, having all your ingredients measured and ready before you start is crucial. This includes accurately weighing your flour and eggs, having your butter cut into pieces, and measuring your liquid.
Weighing ingredients, especially flour (e.g., 125 grams) and eggs (e.g., needing around 200-250 grams of whisked egg, which is typically 4-5 large eggs), provides the most consistent results. Unlike volume measurements which can vary based on how ingredients are packed, weighing ensures you have the exact proportions needed for the recipe. Crack your eggs into a separate bowl and lightly whisk them before adding them to the dough. This allows for easier, more even incorporation.
The Stove Top: Creating the Perfect Choux Paste Base
This is where the magic begins! The stovetop cooking phase creates the essential panada or roux that forms the backbone of your choux pastry. It gelatinizes the starch in the flour and starts the gluten development, creating a stable base capable of trapping steam later. This step requires a bit of vigorous stirring, but it's relatively quick.
Using a heavy-bottomed saucepan helps distribute heat evenly and prevents the mixture from scorching. Make sure you have a sturdy wooden spoon or heatproof spatula ready for stirring. The goal is to cook out enough moisture from the flour-liquid-fat mixture to create a cohesive ball that pulls away cleanly from the sides and bottom of the pan, leaving a slight film.
Melting Butter and Water: The First Crucial Step
Combine your liquid (water, milk, or both) and butter in a saucepan. Add a pinch of salt and perhaps a little sugar if making a sweet choux. Place the pan over medium-high heat and bring the mixture to a rolling boil, ensuring the butter is completely melted before the liquid reaches a boil. This timing helps prevent too much liquid from evaporating before the flour is added.
A rolling boil means the liquid is bubbling rapidly and continuously. Once you reach this stage, you are ready for the next step, which happens immediately. Having your flour measured and ready to dump in all at once is essential at this point to ensure proper hydration of the flour.
Adding Flour and Cooking the Roux: Developing the Choux Structure
As soon as the butter and liquid mixture reaches a rolling boil, remove the pan from the heat and dump all the measured flour into the hot liquid at once. Stir vigorously with your wooden spoon or spatula. The mixture will quickly come together into a thick, lumpy paste.
Return the pan to medium heat and continue stirring and beating the dough for 1 to 2 minutes. This step is crucial for drying out the dough and further developing the gluten structure. You'll know it's ready when the dough forms a cohesive ball that pulls away from the sides of the pan, and a thin film forms on the bottom of the pan. This cooking process ensures the starch is properly gelatinized, which is vital for the dough's ability to puff.
Cooling the Roux: Preventing Scrambled Eggs
After cooking the flour mixture, transfer it from the hot saucepan to a clean bowl or the bowl of a stand mixer fitted with the paddle attachment. It's important to let the dough cool slightly before adding the eggs. If the dough is too hot (above ~140°F or 60°C), the eggs will cook and scramble when added, ruining the dough.
You can speed up the cooling process by stirring the dough with your spoon or mixer for a few minutes. The goal is to cool it down to a temperature where it's still warm but cool enough that you can comfortably touch it without burning yourself (around 120-130°F or 50-55°C). This typically takes about 5-10 minutes of stirring. Proper cooling ensures the eggs incorporate smoothly and function as a binder and leavener, not just cooked bits.
Incorporating Eggs: Achieving the Right Choux Consistency
This is the final stage of making the dough and requires careful attention to consistency. Add the whisked eggs gradually to the cooled dough, beating well after each addition. If using a stand mixer, beat on medium speed. If mixing by hand, be prepared for a workout! The dough will initially look like it's breaking apart or greasy, but keep beating, and it will come back together and become smooth and glossy.
Add the eggs one by one, or in small portions if you've pre-whisked them, until the dough reaches the correct consistency. The ideal choux dough should be smooth, shiny, and thick enough to hold its shape when piped, but soft enough to fall slowly from a spoon or spatula in a "V" shape or a thick ribbon. It should also stick to your finger but feel slightly elastic.
You might not need all of the last egg, so add it incrementally. Getting this consistency right is key to a perfect choux pastry recipe easy result; too stiff, and it won't puff; too wet, and it will collapse.
Piping and Shaping: Creating Choux Pastry Creations
Once your choux dough is ready, it's time to shape it. The most common method is piping, which allows for uniform sizes and shapes, leading to even baking. Transfer the dough into a piping bag fitted with your desired tip. Place parchment paper or a silicone baking mat on your baking sheets – choux pastry is notoriously sticky before baking.
Pipe the dough onto the prepared baking sheet, leaving ample space between each piece (they will expand significantly, often doubling in size). For cream puffs, pipe mounds. For éclairs, pipe straight lines. For gougères, you might simply drop spoonfuls or pipe mounds and flatten slightly. Uniformity is important for consistent baking times and appearance.
Choosing the Right Piping Tip: Round vs. Star Tips
The choice of piping tip affects the final appearance and texture of your choux pastry. A large round tip (like an Ateco #808 or #809) is standard for piping classic cream puffs or profiteroles. It creates smooth, rounded mounds that puff up into spherical shapes.
Using a large star tip (like an Ateco #826 or #827) creates ridges on the surface of the choux shapes. These ridges can sometimes help the pastry rise more evenly and contribute to a slightly crispier exterior crust due to the increased surface area. For éclairs, a large plain round tip is traditional, but a star tip can also be used for a different aesthetic.
Piping Techniques: Even Shapes for Uniform Baking
Proper piping technique is crucial for creating evenly sized and shaped choux pastry pieces. Hold the piping bag perpendicular to the baking sheet (for puffs) or at a slight angle (for éclairs). Apply steady, even pressure to extrude the dough. For puffs, stop squeezing and then quickly twist or flick the bag away to break the dough cleanly. For éclairs, pipe a continuous strip of the desired length.
Aim for consistent size and height across all pieces on the baking sheet. Pieces that are too close together can merge, and uneven sizes will bake at different rates, leading to some being undercooked or overcooked. If there are any peaks on your piped shapes, gently smooth them down with a damp fingertip before baking to prevent them from burning.
Egg Wash: Achieving a Golden-Brown Shine
Applying a simple egg wash before baking gives your choux pastry a beautiful golden-brown color and a lovely sheen. An egg wash is typically made by whisking one whole egg with a tablespoon or two of water or milk.
Gently brush the tops of your piped choux shapes with the egg wash using a pastry brush. Be careful not to let the egg wash drip down the sides onto the parchment paper, as this can glue the pastry to the paper and prevent it from rising properly. A light, even coating is all you need for that professional finish on your perfect choux pastry recipe easy creations.
Baking to Perfection: The Key to Light and Airy Choux
Baking is perhaps the most critical stage for achieving that signature hollow interior and light, airy texture. Choux pastry relies on a hot oven to create rapid steam expansion. The baking process is typically done in two stages: an initial period at a higher temperature to promote maximum puff, followed by a period at a lower temperature to dry out the interior and crisp the shell.
Resist the urge to open the oven door during the initial high-heat baking phase! This can cause the temperature to drop suddenly, preventing the steam from fully expanding and potentially causing your choux to collapse. Patience is key during baking to ensure your perfect choux pastry recipe easy truly lives up to its name.
Oven Temperature: The Importance of Consistent Heat
A common baking approach for choux pastry starts with a high oven temperature, often around 400-425°F (200-220°C), for the first 15-20 minutes. This high heat causes the water in the dough to turn to steam rapidly, forcing the pastry to expand quickly and create the hollow cavity.
After this initial puff, the temperature is typically reduced to around 350-375°F (175-190°C) for the remaining baking time. The lower temperature allows the pastry to continue drying out and firming up without burning the exterior. This two-stage baking ensures the shells are fully cooked through and won't collapse upon cooling. Always preheat your oven thoroughly and consider using an oven thermometer to verify the temperature is accurate.
Baking Time: Avoiding Soggy Choux
The total baking time for choux pastry varies depending on the size and shape of the pieces, but it typically ranges from 25 to 35 minutes. The initial high-heat phase might last 15-20 minutes, followed by 10-15 minutes at the lower temperature. Small cream puffs will bake faster than large éclairs.
Your choux pastry is fully baked when it is deeply golden brown, feels light and hollow when lifted, and sounds hollow when tapped on the bottom. It's crucial to bake them long enough to ensure the interior is dry. Underbaked choux pastry will collapse and become soggy upon cooling. If unsure, you can always bake for a few extra minutes, especially at the lower temperature setting.
Avoiding Opening the Oven: Maintaining Steam for Leavening
This is one of the golden rules of choux pastry baking. Avoid opening the oven door during the crucial first phase of baking (the first 15-20 minutes at high heat). The steam generated within the dough is the primary leavening agent, and opening the door releases this steam and causes a sudden drop in temperature.
A sudden temperature drop can interrupt the puffing process and cause the delicate structure to deflate before it has set. Once the pastry has puffed and the structure has solidified (usually after the temperature has been reduced), it is generally safe to briefly open the oven to check for doneness, but it's best to rely on visual cues through the oven door whenever possible. Trust the process and let the steam do its work!
Troubleshooting Common Choux Pastry Problems
Even with a perfect choux pastry recipe easy guide, baking can sometimes present challenges. Understanding why things go wrong is the first step to fixing them. Don't be discouraged if your first batch isn't perfect; choux pastry takes a little practice. Most common issues relate back to the dough consistency, the cooking of the roux, or the baking process.
Let's look at some frequent problems encountered when making choux pastry and how to diagnose and correct them for future attempts. Identifying the root cause is key to improving your technique and achieving consistent success with your easy choux pastry.
Why is My Choux Pastry Flat? Identifying the Cause
Flat choux pastry that doesn't puff up is a common frustration. This usually means the dough didn't develop enough structure or didn't have enough trapped steam to expand properly. Several factors can contribute to this disappointing result.
- Too much liquid (either initially or from too many eggs) can make the dough too weak to hold its shape and puff.
- Insufficient cooking of the roux on the stovetop means the starch wasn't fully gelatinized and the dough wasn't dried out enough to build a strong structure.
- Opening the oven door too early releases steam and causes the pastry to deflate before it sets.
Too Much Liquid: Adjusting the Recipe
If your dough is too wet after adding the eggs, it will be too slack and won't hold a firm shape when piped. This excess moisture can weigh the dough down and prevent it from rising. This often happens if you add too many eggs or if your eggs were very large.
To fix this for future batches, be more cautious when adding the last egg. Add it in small increments, beating well after each, until the dough reaches the correct ribbon consistency. If you suspect your dough is already too wet, there's unfortunately little you can do for the current batch, but adjust your egg quantity next time.
Insufficient Cooking of the Roux: Developing Gluten Properly
The stovetop cooking step is essential for drying out the flour mixture and developing the gluten structure. If you only cook it for a short time (less than 1-2 minutes after adding the flour), the dough will retain too much moisture and the starch won't be fully gelatinized.
Ensure you cook the mixture over medium heat, stirring vigorously, until it forms a ball and a film appears on the bottom of the pan. This ensures the dough is properly dried out and has developed the necessary structure to support the puffing process. Don't skip this step or cut it short!
Improper Egg Incorporation: Achieving the Right Consistency
Adding eggs correctly is vital. If the dough is too hot when eggs are added, they can cook, leading to a dough with small cooked bits and poor structure. If not enough eggs are added, the dough will be too stiff and won't have enough moisture to generate sufficient steam for leavening.
Ensure the roux cools slightly before adding eggs. Add eggs gradually, beating thoroughly after each addition until the dough is smooth, glossy, and falls in a ribbon. This ensures proper emulsification and hydration, giving the dough the right balance of structure and moisture needed for a good puff.
Why is My Choux Pastry Soggy? Baking Solutions
Soggy or collapsed choux pastry after cooling indicates that the interior was not fully dried out during baking. The shell might look golden and puffed in the oven, but it lacks the internal structure to maintain its shape once removed from the heat. This is primarily a baking issue.
The main culprits are usually insufficient baking time or baking at a temperature that is too low, particularly during the second, lower-temperature phase. Proper air circulation in the oven can also play a role; overcrowding the baking sheet can trap steam and prevent the shells from drying out.
Low Oven Temperature: Ensuring Proper Rise
While starting at a high temperature is key for the initial puff, baking at a sufficiently high temperature during the second phase (around 350-375°F or 175-190°C) is crucial for drying the pastry from the inside out. If the temperature is too low during this phase, the interior remains moist and steamy.
Verify your oven temperature with an oven thermometer. If your oven runs cool, you may need to increase the temperature slightly or bake for a longer time. The shells should feel very light and hollow when done.
Insufficient Baking Time: Achieving a Dry Interior
This is the most common reason for soggy choux. Bakers often remove the pastry from the oven as soon as it looks golden and puffed, but the interior may still be damp. The lower-temperature baking phase is specifically for drying out the inside.
Bake the choux pastry until it is a deep golden brown and feels very light and hollow. Don't be afraid to bake them for the full recommended time or even a few minutes longer, especially if making larger shapes. If you're unsure, you can sacrifice one pastry from the batch and break it open to check if the interior is fully dry and airy.
Overcrowding the Baking Sheet: Allowing Proper Air Circulation
Placing choux pastry pieces too close together on the baking sheet can impede proper air circulation around them. This can trap steam released during baking, preventing the shells from drying out effectively and contributing to sogginess.
Ensure you leave ample space (at least 1-2 inches) between each piped piece on the baking sheet. If you have a large batch of dough, use two baking sheets rather than crowding one. This allows hot air to circulate freely around each pastry, promoting even baking and drying.
Why is My Choux Pastry Cracked? Addressing Surface Issues
While a little rustic cracking is sometimes desired (like on gougères), excessive or uneven cracking on choux pastry shells can be a sign that something wasn't quite right, often related to the dough's moisture level or the oven temperature.
Significant cracking can occur if the exterior crust forms and sets too quickly relative to the expansion of the interior. This can happen if the initial oven temperature is too high, causing the outside to bake too fast, or if the dough itself was slightly too dry, lacking the elasticity to stretch smoothly as it puffs.
Oven Temperature Too High: Adjusting for Even Baking
If your oven's initial temperature is significantly higher than recommended (e.g., much hotter than 425°F or 220°C), the surface of the choux pastry can form a hard crust very rapidly. As the interior continues to steam and expand, this rigid crust is forced to break, resulting in cracks.
Use an oven thermometer to ensure your oven is calibrated correctly. Start at the recommended high temperature (around 400-425°F or 200-220°C) and ensure it's not drastically higher. If you consistently get very cracked choux, you might try starting at the lower end of the recommended high-temperature range.
Dough Too Dry: Correcting Moisture Balance
A choux dough that is too stiff (lacking enough eggs) will have less elasticity. When the steam tries to expand the pastry during baking, the less pliable dough is more likely to tear and crack rather than stretch smoothly.
Ensure you add enough eggs to achieve the correct dough consistency – a smooth, glossy dough that falls in a thick ribbon. Don't stop adding eggs just because the recipe calls for a certain number; always check the dough's consistency and add eggs until it's just right. This ensures the dough is moist and elastic enough to expand without excessive cracking.
Delicious Choux Pastry Variations: Beyond the Basics
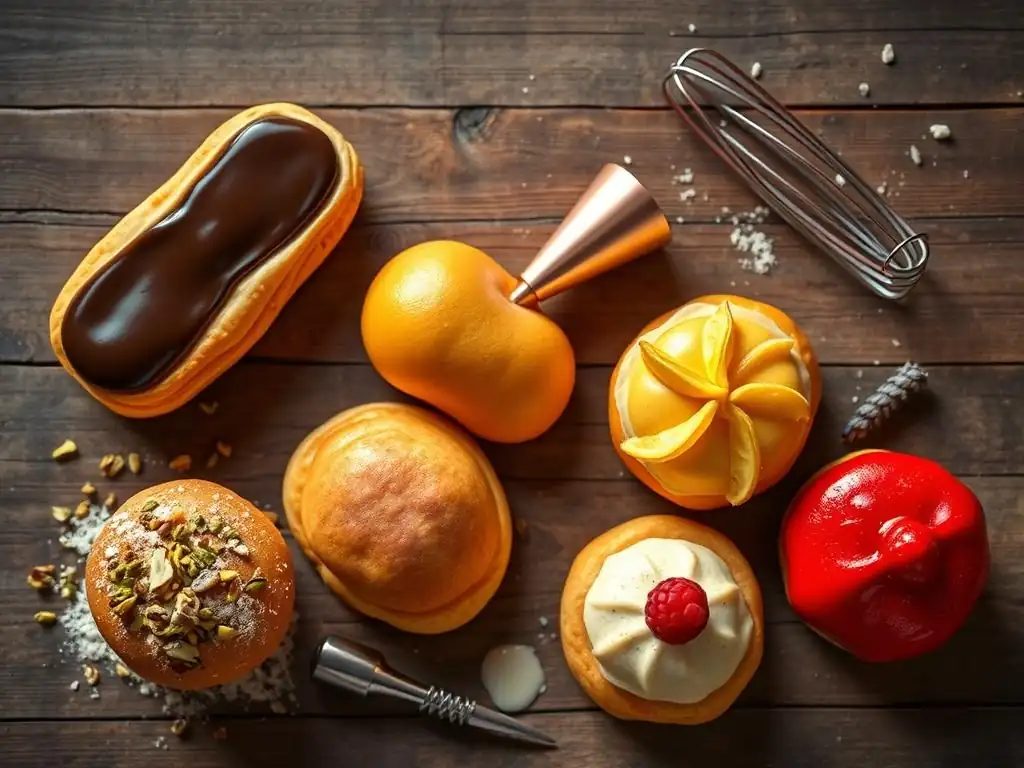
Once you've mastered the perfect choux pastry recipe easy, a world of delicious possibilities opens up! The neutral base flavor of choux pastry makes it incredibly versatile, adaptable for both sweet and savory applications. From classic desserts to impressive centerpieces, choux pastry is a fantastic foundation.
Exploring these variations allows you to practice your choux skills while creating delightful treats. Each variation might require slight adjustments in shape or baking time, but the fundamental dough remains the same. Let's look at some popular ways to use your freshly baked choux shells.
Classic Cream Puffs: A Simple and Elegant Dessert
Perhaps the most iconic use of choux pastry, cream puffs ( profiteroles) are simple yet elegant. They are typically piped into round mounds, baked until golden and hollow, and then filled with whipped cream, pastry cream ( crème pâtissière), ice cream, or even a rich chocolate mousse.
To fill, you can slice the puff horizontally and spoon in the filling, or make a small hole in the bottom and pipe the filling inside using a piping bag fitted with a small tip. Cream puffs are often dusted with powdered sugar or drizzled with chocolate sauce. A batch of 12-15 standard-sized cream puffs is a perfect way to enjoy your easy choux pastry.
Éclairs: Mastering the Oblong Shape and Filling
Éclairs are elongated choux pastry shells, traditionally filled with coffee or chocolate pastry cream and topped with a glaze or fondant. Mastering the straight, even piping of éclairs takes a little practice, but the principle is the same as for cream puffs.
Pipe the dough into strips about 4-5 inches long onto your prepared baking sheet. Ensure they are relatively uniform in width and thickness for even baking. After baking and cooling, éclairs are typically filled by making small holes in the bottom or ends and piping in the filling. The classic chocolate glaze is made from melted chocolate or cocoa powder mixed with powdered sugar and liquid.
Gougères: Savory Cheese Puffs for Any Occasion
Gougères are a delightful savory application of choux pastry, made by incorporating grated cheese (like Gruyère, Parmesan, or cheddar) into the dough before baking. They are typically piped or spooned into small mounds and baked until puffed and golden.
Adding about 1/2 cup to 1 cup (50-100 grams) of finely grated cheese to a standard batch of choux dough (like one made with 1 cup flour) transforms them into savory snacks perfect for appetizers or alongside soup. Gougères are best served warm, straight from the oven, when they are crisp on the outside and wonderfully cheesy and airy on the inside.
Croquembouche: The Show-Stopping Choux Pastry Tower
For a truly impressive display, the croquembouche is a towering cone of cream puffs ( profiteroles) held together with caramel. Often served at weddings and celebrations in France, it's a testament to the strength and versatility of choux pastry.
Making a croquembouche requires baking many cream puffs, filling them, and then assembling them using hot caramel as glue. It's a challenging but rewarding project that showcases the structural integrity of well-made choux pastry. This is definitely a project for when you've mastered the perfect choux pastry recipe easy and are ready for an advanced challenge!
Tips and Tricks for Choux Pastry Perfection
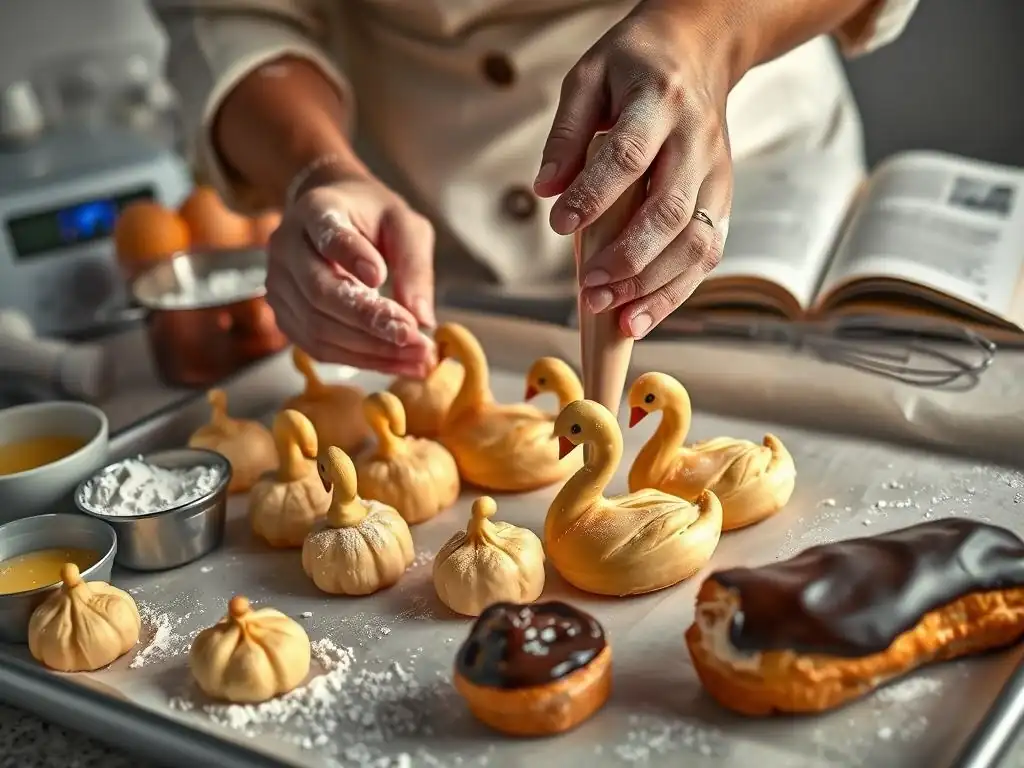
Even with a solid recipe and technique, a few extra tips can help ensure your success with perfect choux pastry recipe easy. These are lessons learned through experience and can make a noticeable difference in the final outcome, from consistency to storage.
Incorporating these simple tips into your process can elevate your choux pastry from good to truly outstanding. They address common pitfalls and provide guidance for handling and storing the finished product.
Measuring Ingredients Accurately: The Key to Consistent Results
As mentioned earlier, accuracy in measuring ingredients is paramount for choux pastry. Using a kitchen scale to weigh your flour (e.g., 125g), butter (e.g., 113g), and especially your eggs (e.g., aiming for 200-250g of whisked egg) will yield far more consistent results than using volume measurements (cups).
The hydration and fat content in choux pastry are finely balanced, and even slight variations can impact the final dough consistency and puffing ability. Weighing ensures you replicate the recipe's intended proportions precisely each time you bake.
Working Quickly: Preventing the Dough from Drying Out
Once the choux dough is made, it's best to pipe and bake it relatively quickly. The dough can start to form a skin and dry out if left sitting for too long, which can impede its ability to puff evenly in the oven.
Have your piping bag and prepared baking sheets ready as soon as the dough is finished. Transfer the dough to the bag and begin piping immediately. While a few minutes won't hurt, letting the dough sit for extended periods before shaping is not recommended.
Storing Choux Pastry: Maintaining Freshness and Texture
Baked choux pastry shells are best used the same day they are baked, ideally filled just before serving to prevent them from becoming soggy. However, you can store baked shells for a short time or even freeze them.
Cooled, unfilled choux pastry shells can be stored in an airtight container at room temperature for 1-2 days. For longer storage, they freeze exceptionally well. Place cooled shells in a single layer on a baking sheet to freeze, then transfer to a freezer bag or container.
They can be frozen for up to 2-3 months. To revive frozen shells, place them on a baking sheet in a preheated oven (around 300°F or 150°C) for 5-10 minutes until crisp. Unbaked piped dough can also be frozen on baking sheets and then transferred to a container; bake from frozen, adding a few extra minutes to the baking time.
Conclusion: Enjoying Your Perfect Choux Pastry Success
You've now completed your roadmap to mastering choux pastry! From understanding the science behind the puff to troubleshooting common issues, you have the knowledge and steps needed to create perfect choux pastry recipe easy. Remember that baking is a skill that improves with practice, so don't be discouraged if your first batch isn't absolutely flawless.
The satisfaction of biting into a light, airy cream puff or a savory gougère you made yourself is immense. Armed with this comprehensive guide, you're well-equipped to tackle any choux pastry challenge. So gather your ingredients, follow the steps, and get ready to enjoy the delightful world of easy choux pastry creations. Happy baking!
Frequently Asked Questions
How difficult is it to master choux pastry using BakeWithEase.com's "Perfect Choux Pastry Recipe Easy"?
The recipe is designed for all skill levels, focusing on simple techniques and easy-to-follow instructions. Even beginners can achieve success with our roadmap.
What kind of ingredients do I need for BakeWithEase.com's choux pastry recipe?
The recipe uses common baking ingredients like flour, butter, eggs, water, and salt. These are designed to be easily accessible for every baker.
Does BakeWithEase.com provide guidance on common choux pastry problems?
Yes, the guide addresses potential pitfalls and offers solutions for common issues like flat pastry or uneven baking. Troubleshooting is a key feature of our resource.
Can I adapt the "Perfect Choux Pastry Recipe Easy" from BakeWithEase.com for different fillings?
Absolutely! The recipe provides a versatile base that can be filled with sweet or savory fillings. We encourage experimentation and creativity.
Where can I find the "Perfect Choux Pastry Recipe Easy" on BakeWithEase.com?
The recipe is prominently featured on our website's baking section, easily found through the recipe index or by searching "Perfect Choux Pastry Recipe Easy" in the search bar.
Final Reflection: Mastering the Art of the Perfect Choux
The pursuit of the perfect choux pastry, once a daunting culinary challenge, is now within everyone's reach. This article has demystified the process, breaking down the seemingly complex steps into manageable, easily repeatable actions. No longer is the fear of a deflated puff or a gummy interior a barrier to entry for aspiring bakers; with the right technique and a little patience, anyone can achieve choux pastry perfection.
The journey of mastering choux pastry is more than just about achieving a visually stunning and delicious result; it's about embracing the process, understanding the science behind the seemingly simple ingredients, and finding joy in the transformation from humble batter to airy delight. The most beautiful thing we can experience is the mysterious. It is the source of all true art and science.
- Albert Einstein. This quote resonates deeply because the seemingly magical transformation of choux pastry from a simple mixture to a light, airy puff is a testament to the power of understanding fundamental principles. The subtle nuances of temperature and hydration, once confusing, become clear and empowering as you master the technique.
Now, it's your turn. Don't be intimidated by the seemingly complex nature of choux pastry. Take the knowledge you've gained from this article, experiment with different fillings and flavors, and most importantly, enjoy the journey. The satisfaction of creating these delicate, beautiful pastries, from the perfectly golden-brown exterior to the light and airy interior, is a reward in itself. So, gather your ingredients, follow the steps, and embark on your own choux pastry adventure. The perfect puff awaits!
Unlock Your Inner Pastry Chef!
Thanks for joining us on this choux pastry journey! We hope you've gained the confidence to tackle this classic dessert. Now it's time to put your newfound knowledge into action.
- Master your choux: Try the recipe from the article – we're confident you'll be amazed at how easy it is to create perfect, airy puffs! Don't forget to share your creations!
- Experiment with fillings: Once you've perfected the base, get creative! Explore different creams, fruits, and chocolate ganaches to make your choux truly unique.
- Join our baking community: Share your photos and ask questions on our BakeWithEase forum (link removed as per instructions). Let's inspire each other!
What delicious choux pastry creation will you bake first?