
Whole Grain Artisan Flours: Nutritional Powerhouses for Your Bread

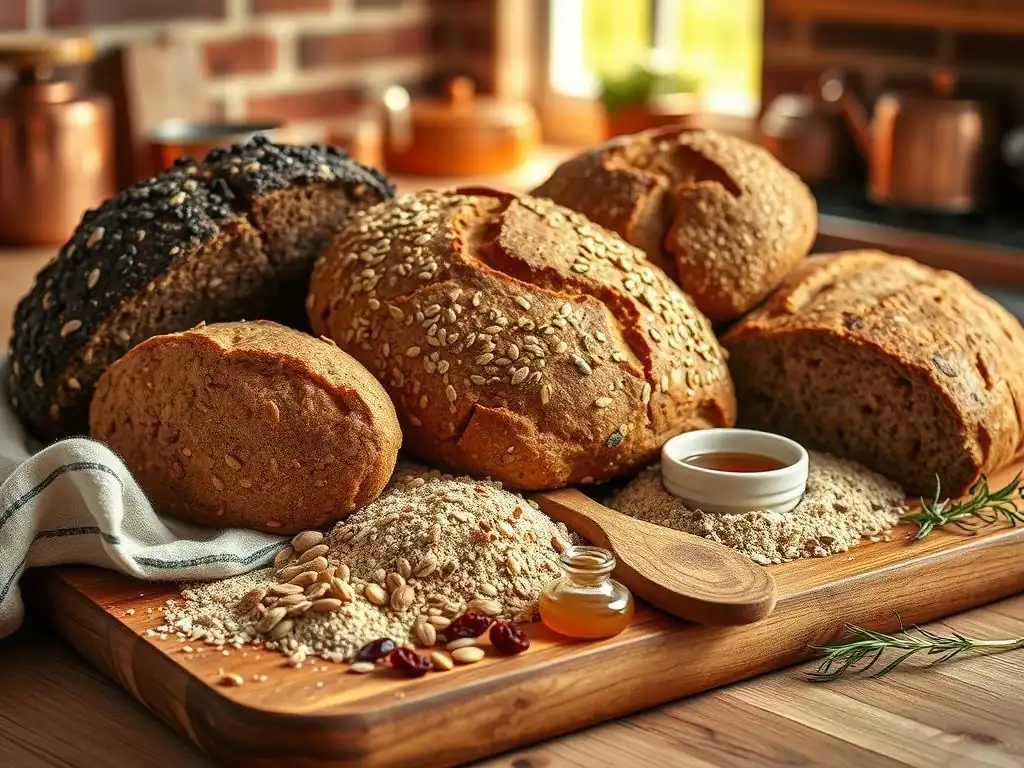
Welcome to BakeWithEase, your trusted companion in the delightful world of baking! Ever wondered how to unlock the full potential of your loaves, both in flavor and nutrition? Dive into our latest article where we explore the secrets behind crafting a truly exceptional whole grain artisan bread recipe. Discover how selecting the right flours can transform your baking and elevate your creations to new heights. Intrigued? Let's get started!
- Unlock Flavor and Nutrition: Exploring Whole Grain Artisan Flours for Baking
- Choosing the Best Whole Grain Flour for Your Artisan Bread Recipe
- Mastering the Whole Grain Artisan Bread Recipe: Techniques and Tips
- A Step-by-Step Whole Grain Artisan Bread Recipe: BakeWithEase Style
- Troubleshooting Common Whole Grain Artisan Bread Problems
- Beyond the Basics: Exploring Advanced Whole Grain Baking Techniques
-
Frequently Asked Questions
- What exactly is whole grain flour, and why is it considered a nutritional powerhouse in breadmaking?
- Can I substitute whole grain flour entirely for all-purpose flour in any bread recipe?
- What are some common types of whole grain flours suitable for artisan bread, besides whole wheat?
- How does the use of whole grain flour affect the rise and texture of artisan bread?
- Where can I find reliable "Whole Grain Artisan Bread Recipe" and techniques for working with these flours?
- Final Reflection: The Flour Power of Artisan Bread
- Unleash the Flavor & Nutrition: Bake Your Best Bread Yet!
Unlock Flavor and Nutrition: Exploring Whole Grain Artisan Flours for Baking
What are Whole Grain Artisan Flours and Why Use Them?
Whole grain artisan flours are produced from the entire grain kernel – including the bran, germ, and endosperm. This contrasts sharply with refined flours, where the bran and germ are removed during milling, stripping away vital nutrients and fiber.
Artisan milling often uses traditional methods, such as stone grinding, which can preserve more of the grain's natural oils and nuances, contributing to richer flavors and aromas in your baked goods. Using these flours is a conscious choice to bake bread that is not only delicious but also significantly more nutritious, offering a higher content of dietary fiber, B vitamins, iron, magnesium, and antioxidants compared to loaves made with white flour.
Embracing whole grain artisan flours elevates your baking beyond simple sustenance to a craft focused on quality, flavor, and health. Baking a whole grain artisan bread recipe with these ingredients introduces complex flavors – from the nutty undertones of spelt to the earthy depth of rye – that are simply absent in refined flour breads. Furthermore, the increased fiber content impacts the dough's hydration needs and fermentation process, requiring a slightly different approach than baking with all-purpose flour.
For example, a typical whole wheat flour might contain around 13-14% protein and 12% fiber, significantly higher than the 10-12% protein and 3% fiber found in white bread flour. This difference directly influences how the flour absorbs liquid and develops gluten.
The Rise of Artisan Bread Baking with Whole Grains
The renewed interest in baking, particularly artisan bread, has brought whole grains back into the spotlight. Home bakers and professional patissiers alike are rediscovering the incredible variety and benefits that whole grain flours offer. This movement is fueled by a desire for healthier food options and a growing appreciation for traditional baking methods and the unique characteristics that heritage and ancient grains bring to a loaf. The texture, aroma, and nutritional profile of a whole grain artisan bread recipe are vastly superior to mass-produced counterparts, making the effort of working with these flours incredibly rewarding.
This shift towards whole grains isn't just about nutrition; it's about flavor complexity and engaging with the ingredients more deeply. Bakers are exploring how different whole grain flours interact with sourdough starters, how their unique protein structures affect crumb development, and how varying hydration levels unlock their full potential.
For instance, incorporating 30% whole wheat flour into a standard white flour sourdough recipe can dramatically change the flavor profile, adding layers of nuttiness and a pleasant chewiness, while also boosting the fiber content significantly. This hands-on exploration is key to mastering the art of baking truly exceptional whole grain artisan bread.
Choosing the Best Whole Grain Flour for Your Artisan Bread Recipe
Understanding Different Types of Whole Grain Flours
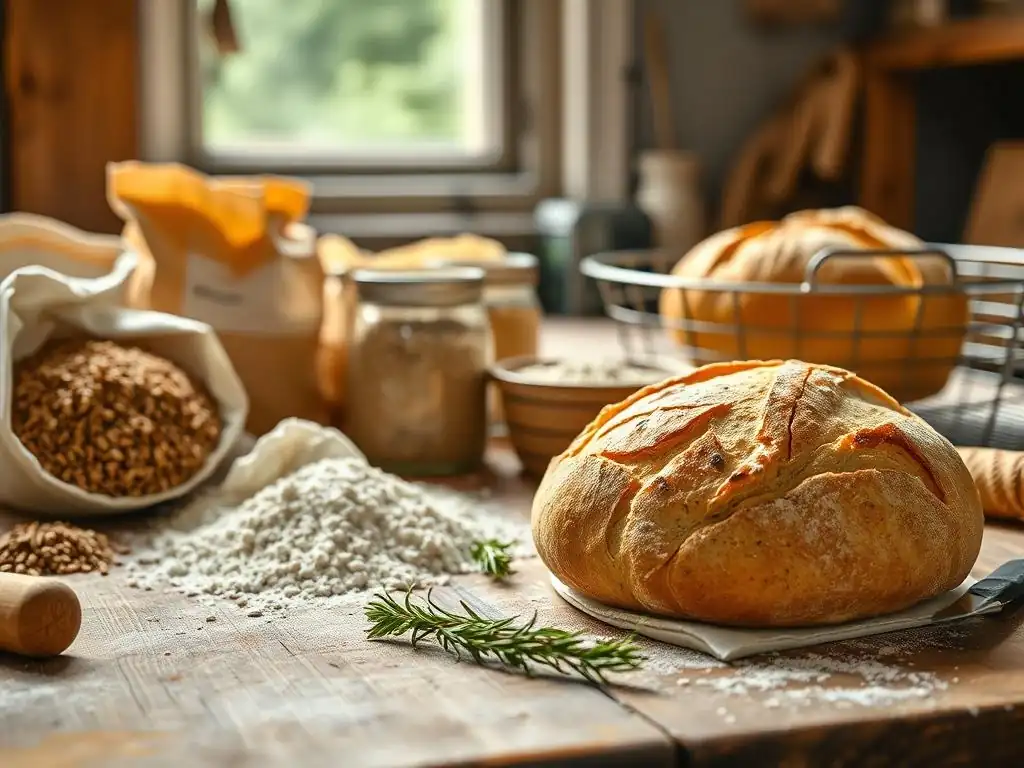
Exploring the world of whole grain flours opens up a spectrum of possibilities for your whole grain artisan bread recipe. Each type offers a unique flavor profile, nutritional composition, and baking characteristic. Understanding these differences is crucial for selecting the right flour to achieve your desired loaf. From common whole wheat to ancient grains like Kamut, the choice of flour significantly impacts the final outcome in terms of texture, flavor, and appearance.
The variety available means you can tailor your flour choice to the specific bread you want to bake. Want a robust, hearty loaf? Rye might be your answer. Seeking a softer crumb with a slightly sweet note? Spelt could be ideal. The key is to experiment and learn how each flour behaves. For example, while most whole grain flours absorb more water than white flour, the degree varies. Rye flour, for instance, is known for its high water absorption but lower gluten potential, requiring different handling techniques than whole wheat.
-
Whole Wheat Flour: The Classic Choice for Whole Grain Bread
Whole wheat flour is the most common and widely available whole grain flour, made from grinding the entire wheat berry. It's a staple for many whole grain artisan bread recipes due to its relatively high protein content, which contributes to gluten development. A good quality whole wheat flour, like King Arthur Baking Company Whole Wheat Flour, typically boasts a protein content around 13-14%, providing the structure needed for a well-risen loaf. While the bran and germ can interfere with gluten formation compared to white flour, proper hydration and kneading techniques can help develop sufficient strength.
King Arthur Baking Company's Whole Wheat Flour is milled from hard red wheat and is known for its consistent quality and higher protein levels, making it an excellent choice for a variety of whole grain breads, including rustic loaves, sandwich bread, and even pizza dough. Its robust flavor pairs well with yeasted and sourdough recipes. When using it in an artisan loaf, starting with 20-30% whole wheat blended with white bread flour is a great way to introduce its flavor and nutrition while still making the dough manageable, gradually increasing the percentage as you gain experience.
-
Rye Flour: Adding Depth and Complexity to Your Bake
Rye flour, milled from rye grain, is celebrated for its distinctive tangy flavor and dense texture, making it a favorite for hearty, rustic breads. Unlike wheat, rye gluten structure is weaker due to a higher proportion of pentosans, which are water-absorbing carbohydrates. This means rye doughs are often stickier and require less kneading than wheat doughs.
Rye flour is classified by its extraction rate, determining its color and nutrient content: light rye (lower extraction, less bran/germ), medium rye, and dark rye (higher extraction, more bran/germ). Dark rye flour, like Bob's Red Mill Dark Rye Flour, offers the most intense flavor and nutritional benefits.
Recipes that truly shine with rye flour include traditional European breads like Pumpernickel and Borodinsky. A Pumpernickel Bread recipe often uses a high percentage of dark rye flour, sometimes combined with coarse rye meal and molasses, for a deeply colored, moist, and flavorful loaf that benefits from a long, slow bake. Bob's Red Mill Dark Rye Flour, stone-ground from whole rye kernels, provides that authentic, robust flavor and dense crumb characteristic of traditional rye breads. Its high fiber content also contributes to a longer shelf life for the finished loaf.
-
Spelt Flour: A Nutty and Slightly Sweet Alternative
Spelt is an ancient grain, a subspecies of wheat, that has seen a resurgence in popularity. Whole spelt flour is milled from the entire spelt kernel and offers a delightful nutty and slightly sweet flavor profile. Many people find spelt easier to digest than modern wheat, although it does contain gluten. The gluten structure in spelt is more fragile than that of modern wheat, which means spelt dough can become easily overworked. It's best to mix spelt dough gently and avoid excessive kneading.
For baking, Arrowhead Mills Organic Spelt Flour is a widely available and high-quality option. Its delicate flavor makes it versatile for various baked goods, including artisan loaves, pancakes, muffins, and cookies. When using it in a whole grain artisan bread recipe, you can substitute it partially or entirely for whole wheat flour. Due to its slightly weaker gluten, a loaf made with 100% spelt flour might have a slightly denser crumb than a pure wheat loaf, but it will compensate with its unique flavor and tenderness. It works particularly well in softer bread recipes or blended with stronger flours.
-
Kamut Flour: Ancient Grain with a Rich, Buttery Flavor
Kamut, also known as Khorasan wheat, is another ancient grain known for its large kernel size and rich, buttery, slightly sweet flavor. Whole Kamut flour is milled from this grain and boasts a higher protein content (often 14-15%) than common wheat, as well as higher levels of certain minerals like selenium and zinc. Despite the high protein, its gluten structure behaves differently than modern wheat, sometimes requiring careful handling to prevent tearing.
Baking with Kamut flour introduces a wonderful depth of flavor to your bread. Jovial Foods Organic Kamut Flour is a popular choice, milled from organically grown Khorasan wheat. It can be used in a variety of recipes, from simple loaves to enriched doughs. It performs exceptionally well in recipes like Ciabatta, where its flavor can truly shine and its protein contributes to an open crumb structure, provided hydration and fermentation are managed appropriately. A whole grain artisan bread recipe using Kamut flour will yield a loaf with a beautiful golden hue and a distinctly rich taste.
-
Oat Flour: A Delicate Flour for Soft Crumb
Whole oat flour is made by grinding rolled oats or oat groats into a fine powder. It provides a wonderfully soft crumb and a mild, slightly sweet flavor to baked goods. While oats themselves are naturally gluten-free, cross-contamination is common during processing, so if baking for someone with celiac disease or gluten sensitivity, ensure you use certified gluten-free oat flour, such as Bob's Red Mill Gluten Free Oat Flour. Oat flour contains no gluten, meaning it cannot form a protein network for structure on its own.
Adding oat flour to your whole grain artisan bread recipe is typically done in smaller percentages (often 10-30% of the total flour weight) blended with wheat or spelt flour to provide structure. It contributes moisture, tenderness, and a lovely texture. Bob's Red Mill Gluten Free Oat Flour, being finely ground, integrates smoothly into doughs, adding nutritional value and a delicate crumb without making the loaf too dense. It's an excellent addition to enriched doughs or soft sandwich breads where tenderness is desired.
Factors to Consider When Selecting Whole Grain Flour
Choosing the right whole grain flour for your whole grain artisan bread recipe involves considering several key factors beyond just the type of grain. These elements significantly influence the dough's behavior and the final characteristics of your baked loaf. Understanding how protein content, granulation, freshness, and milling process impact the flour will help you make informed decisions and achieve better baking results. Paying attention to these details is part of mastering the craft of whole grain baking.
The interplay between these factors can be complex. For example, a coarsely ground whole wheat flour with high protein might absorb water differently and develop gluten slower than a finely ground version of the same flour. Similarly, the freshness of the flour is paramount, as the oils in the germ are prone to oxidation, which can lead to off-flavors. Storing whole grain flours properly is therefore essential for maintaining their quality and performance.
-
Protein Content: Its Impact on Gluten Development
Protein content is a critical factor when selecting flour, especially for bread baking. Wheat flours contain proteins (glutenin and gliadin) that, when hydrated and worked, form gluten – the network that provides structure and elasticity to dough, allowing it to trap gases and rise. Whole wheat flours typically have a higher protein content (13-14%) than all-purpose flour (10-12%), but the bran and germ can interfere with gluten development.
Flours like Kamut often have even higher protein levels (14-15%). Higher protein generally means stronger gluten potential, leading to a loaf with better structure and oven spring, although techniques must be adapted for whole grains' unique characteristics.
The percentage of protein in your whole grain flour directly influences how much water the dough can absorb and how much kneading or folding is required to develop a strong gluten network. For example, a whole wheat flour with 14% protein will likely require more hydration than one with 12% protein to achieve a similar dough consistency. Understanding the protein content helps you adjust your whole grain artisan bread recipe's hydration levels and mixing time to build sufficient dough strength for a well-risen loaf.
-
Granulation: Fine vs. Coarse Ground
The granulation, or how finely the flour is ground, significantly impacts its performance in a whole grain artisan bread recipe. Finely ground whole grain flours absorb water more quickly and evenly, and the smaller bran particles interfere less with gluten development, often leading to a more consistent and predictable dough. Coarsely ground flours, on the other hand, have larger bran and germ particles that can cut through the developing gluten network, potentially resulting in a denser loaf with a more rustic texture.
While fine granulation might be easier to work with for beginners, coarsely ground flours can offer a different texture and often a more pronounced flavor from the larger bran particles. For instance, a stone-ground whole wheat flour might be more coarsely ground than a roller-milled one. When using coarsely ground flour, you might need a longer autolyse or rest period to allow the larger particles to fully hydrate. The choice depends on the desired texture and handling properties for your specific whole grain artisan bread recipe.
-
Freshness and Storage: Tips for Optimal Results
Freshness is paramount for whole grain flours because the germ contains oils that can become rancid over time, leading to off-flavors. Unlike refined white flour, which has a long shelf life, whole grain flours are more perishable. Ideally, buy whole grain flours from a supplier with good turnover or directly from a miller. Check for a milling date if possible. Flour stored properly will yield better-tasting bread.
To maintain freshness, whole grain flours should be stored in an airtight container in a cool, dark place. For longer storage, the refrigerator or freezer is recommended, especially in warm or humid climates. Freezing can extend the shelf life significantly, preserving the flavor and nutritional quality. Before using frozen flour, allow it to come to room temperature completely to ensure accurate measurement and hydration in your whole grain artisan bread recipe.
-
Milling Process: Stone Ground vs. Roller Ground
The milling process used to produce whole grain flour can affect its quality and characteristics. Stone grinding uses traditional millstones to grind the entire grain kernel in a single pass. This process generates less heat than high-speed roller milling, potentially preserving more of the grain's nutrients and flavor compounds. Stone-ground flours often have a slightly more varied granulation, sometimes including larger flecks of bran and germ.
Roller milling, a more modern and industrial process, separates the grain components (bran, germ, endosperm) before grinding them individually and then recombining them to create "whole wheat" flour. This method allows for greater control over granulation and consistency, but some argue it can produce less flavorful flour compared to stone grinding. For an authentic whole grain artisan bread recipe, many bakers prefer stone-ground flours for their superior flavor complexity and texture, although high-quality roller-milled whole wheat is also excellent.
Mastering the Whole Grain Artisan Bread Recipe: Techniques and Tips
Baking a successful whole grain artisan bread recipe requires understanding that whole grain flours behave differently than refined flours. Their higher fiber content and unique protein structures demand adjustments in hydration, mixing, and fermentation techniques. Mastering these nuances is key to transforming dense, heavy loaves into light, airy, and flavorful works of art. It's a journey of patience and observation, learning how the dough feels and responds at each stage.
The techniques used are designed to overcome the challenges posed by whole grain flours, such as potential gluten interference from bran particles and increased water absorption. By adapting your approach to hydration, focusing on gentle but effective gluten development, and allowing sufficient time for fermentation, you can unlock the full potential of these nutritious flours. These adjustments are not just about compensation; they are about optimizing the process to highlight the unique qualities of whole grains in your whole grain artisan bread.
Adjusting Your Recipe for Whole Grain Flours
Working with whole grain flours means making deliberate adjustments to your standard bread recipe. The most significant changes typically involve hydration levels, mixing methods, and fermentation times. Ignoring these differences can lead to disappointing results, such as dry, dense, or poorly risen bread. A successful whole grain artisan bread recipe is one where these adjustments are made thoughtfully to accommodate the specific flour being used.
It's often helpful to start by substituting only a portion of the white flour with whole grain flour (e.g., 25-50%) before attempting a 100% whole grain loaf. This allows you to gradually learn how whole grains affect the dough's consistency and handling. Keep detailed notes on your hydration levels and timings, as even small variations can make a difference in the final outcome.
-
Hydration: Whole Grains Absorb More Water
Whole grain flours absorb significantly more water than white flours due to the presence of the bran and germ, which are highly fibrous. A whole grain artisan bread recipe will typically require a higher hydration percentage (the ratio of water to flour by weight) compared to a recipe using refined flour. For example, while a white flour loaf might use 65-70% hydration, a whole wheat loaf might need 75-85% or even higher. Failing to add enough water will result in a stiff, difficult-to-work dough and a dense, dry crumb.
It's often best to add water gradually when working with whole grains, as different flours and even different batches of the same flour can vary in their absorption rates. Observe the dough's consistency; it should feel hydrated but not soupy. Allowing the flour to rest with the water for a period (autolyse) is particularly beneficial for whole grains, giving the bran time to soften and the flour to fully hydrate before kneading begins.
-
Mixing and Kneading: Developing Gluten in Whole Grain Dough
Developing a strong gluten network is crucial for structure, but the bran and germ in whole grain flour can impede this process. Traditional vigorous kneading can sometimes tear the delicate gluten strands as they form around the sharp edges of bran particles. For many whole grain artisan bread recipes, gentler mixing methods combined with rest periods are more effective. Techniques like the "stretch and fold" method, performed at intervals during the bulk fermentation, help build strength without overworking the dough.
An initial autolyse (mixing flour and water and letting it rest for 20-60 minutes) is highly recommended. This allows enzymes to start breaking down proteins, aiding gluten formation, and gives the bran time to absorb water, making the dough more pliable. After the autolyse, incorporating salt and yeast/starter and then proceeding with gentle mixing followed by a series of stretch and folds (e.g., 3-4 sets over 2 hours) is often more effective for whole grain doughs than continuous, aggressive kneading.
-
Fermentation: Longer Proofing Times for Flavor Development
Whole grain doughs often benefit from longer fermentation times compared to white flour doughs. The presence of bran and germ, along with the specific microbial activity when using sourdough, contributes to complex flavor development. Additionally, the density of whole grain doughs and the potential interference with gluten development mean they may rise more slowly. Allowing sufficient time for both bulk fermentation (the first rise) and proofing (the final rise before baking) is essential for achieving a good texture and depth of flavor in your whole grain artisan bread recipe.
Bulk fermentation for whole grain doughs might range from 3 to 6 hours or even longer at room temperature, depending on the ambient temperature and the strength of your leavening agent (yeast or starter). Cold proofing the shaped loaf in the refrigerator for 12-24 hours is another excellent technique for developing flavor and making the dough easier to handle for scoring and baking. This slow, cool fermentation allows enzymes to break down starches, creating more complex sugars, and deepens the characteristic tang of sourdough whole grain bread.
Whole Grain Bread Baking Equipment Essentials
Having the right tools can significantly improve your whole grain artisan bread baking experience and the quality of your final loaf. While you can start with minimal equipment, certain items make shaping, proofing, and baking whole grain doughs easier and more effective, helping you achieve that professional artisan look and texture. Investing in a few key pieces can elevate your whole grain artisan bread recipe results.
These tools are designed to manage the specific characteristics of whole grain doughs, such as their stickiness and the need for controlled environments during proofing and baking. From providing structure during the final rise to creating the perfect steamy environment in the oven, the right equipment plays a vital role in producing a beautiful and well-baked whole grain loaf.
-
Brotdoc Proofing Basket: Perfect for Shaping Your Loaf
A proofing basket, or banneton, is an essential tool for shaping and supporting your shaped dough during the final proof. Whole grain doughs, especially those with higher hydration, can sometimes be less structured than white doughs. A proofing basket, typically made of rattan or cane, dusted generously with rice flour (which is less likely to stick than wheat flour), helps the loaf hold its shape as it rises, preventing it from spreading outwards and encouraging vertical rise.
The spiral pattern of a traditional rattan banneton also imprints a beautiful design on the crust of your whole grain artisan bread recipe, adding to its rustic appeal. Using a basket ensures your loaf maintains tension and structure as it proofs, which is critical for achieving good oven spring when it hits the hot oven. A 9 or 10-inch round or oval basket is suitable for most standard loaf sizes.
-
Lodge Cast Iron Dutch Oven: Achieving Oven Spring and Crust
Baking bread in a preheated cast iron Dutch oven is a popular technique for achieving incredible oven spring and a perfectly crispy crust, especially for whole grain artisan bread. The heavy cast iron retains and radiates heat efficiently, providing a consistent baking temperature. More importantly, baking with the lid on for the first part of the bake traps the moisture released by the dough, creating a steamy environment similar to a professional deck oven. This steam keeps the crust soft initially, allowing the loaf to expand fully before the crust sets.
After baking with the lid on for 20-30 minutes, removing the lid allows the crust to dry out and brown beautifully. A 5 or 6-quart Lodge Cast Iron Dutch Oven is a standard size suitable for baking a loaf of whole grain artisan bread weighing between 750g and 1kg. Preheating the Dutch oven in a hot oven (typically 450-500°F or 230-260°C) is crucial for maximizing oven spring.
-
Mouflet Bread Lame: Scoring Techniques for Beautiful Bread
A bread lame (pronounced "lahm") is a tool used to score or slash the surface of the dough just before baking. Scoring serves both a functional and aesthetic purpose in a whole grain artisan bread recipe. Functionally, the slashes act as vents, allowing the dough to expand predictably in the oven without bursting randomly. This controlled expansion leads to better oven spring and a more open crumb structure. Aesthetically, scoring allows you to create beautiful patterns on the crust, making each loaf unique.
A sharp blade is essential for clean cuts that open up properly during baking. A Mouflet Bread Lame, often consisting of a razor blade attached to a handle, provides the necessary sharpness and control. For whole grain doughs, which can sometimes have a tougher surface due to the bran, a very sharp blade is particularly important for making decisive cuts that will open up nicely. Experimenting with different scoring patterns is a fun part of the artisan bread baking process.
A Step-by-Step Whole Grain Artisan Bread Recipe: BakeWithEase Style
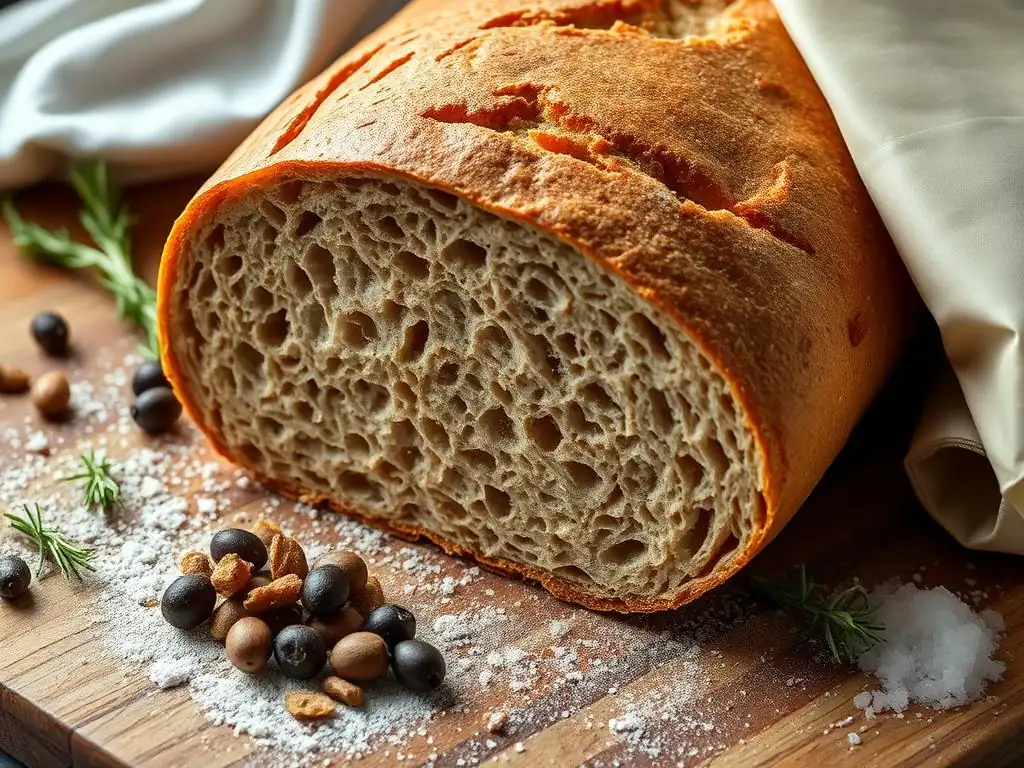
Ready to put theory into practice? This simple whole grain artisan bread recipe is designed for home bakers and uses readily available whole grain flours. It employs techniques discussed earlier, like autolyse and stretch-and-folds, to help you achieve a delicious and nutritious loaf with a great crust and crumb. This recipe focuses on a blend of whole wheat, with optional rye for added depth, providing a fantastic introduction to baking a whole grain artisan bread recipe.
Follow these steps carefully, paying attention to the dough's feel at each stage. Baking whole grain bread is as much about intuition as it is about following instructions. Don't be afraid to adjust slightly based on your flour and environment. The goal is to create a loaf that you'll be proud to share (or keep all to yourself! ).
Ingredients for a Delicious Whole Grain Loaf
Gathering your ingredients is the first step to any baking project. For this whole grain artisan bread recipe, we'll focus on quality whole grain flours and the basic elements of bread making. Using specific, high-quality flours can make a noticeable difference in the flavor and performance of your dough. This recipe provides a solid foundation that you can adapt as you become more comfortable working with different whole grains.
Ensure your ingredients are fresh, especially the whole grain flour and yeast (if using). If using a sourdough starter, make sure it is active and bubbly. Accurate weighing of ingredients, especially flour and water, is crucial for consistent results in artisan bread baking, so a kitchen scale is highly recommended.
-
King Arthur Baking Company Whole Wheat Flour
-
Bob's Red Mill Dark Rye Flour (optional)
-
Water, Salt, Yeast (or Sourdough Starter)
For a loaf around 900g:
- 400g King Arthur Baking Company Whole Wheat Flour (or 350g Whole Wheat + 50g Bob's Red Mill Dark Rye Flour for added flavor)
- 100g White Bread Flour (optional, for easier handling and lighter crumb, or use 500g total whole grain)
- 375g - 425g Water (start with 375g, adjust as needed; this is approx. 75-85% hydration based on 500g total flour)
- 9g Fine Sea Salt
- 4g Instant Yeast (approx. 1 tsp) OR 100g Active Sourdough Starter
Note on hydration: Whole grain flours absorb differently. Start with the lower end of the water range (375g) and add more if the dough feels stiff. Aim for a wet, shaggy dough.
Instructions: From Mixing to Baking
Baking a whole grain artisan bread recipe involves several distinct stages, each contributing to the final loaf. Patience is key, particularly during fermentation, which is where much of the flavor develops. Follow these steps sequentially, allowing the dough the time it needs to transform. This process, from initial mixing to the final bake, is a rewarding journey.
Remember that environmental factors like room temperature can affect timings. Watch the dough, not just the clock. The dough's activity and feel are better indicators of readiness than strict adherence to time estimates.
-
Mixing and Autolyse: Hydrating the Flour
In a large bowl, combine the whole grain flour(s) and white flour (if using) with the initial amount of water (e.g., 375g). Mix with your hand or a spoon until no dry flour remains and you have a shaggy dough. Cover the bowl and let it rest for 30-60 minutes. This is the autolyse phase, allowing the flour to hydrate fully and enzymes to start working. If using yeast, you can add it now or after the autolyse. If using sourdough starter, mix flour, water, and starter now, then add salt after the autolyse.
After the autolyse, the dough should feel slightly smoother and more pliable. If using yeast, sprinkle it over the dough now if you didn't add it initially. Add the salt. If the dough feels too stiff, add the remaining water (up to 425g) a little at a time, incorporating it by squeezing the dough or using folds. The dough will be wet and sticky, which is desirable for whole grain bread hydration.
-
Kneading and Bulk Fermentation: Developing Strength and Flavor
After adding the salt (and yeast/starter if applicable), mix everything together for a few minutes until the salt is incorporated. The dough will still be quite wet. Now begins the bulk fermentation, which will involve a series of stretch and folds to develop gluten gently. Cover the bowl and let the dough rest for 30 minutes.
After 30 minutes, perform the first set of stretch and folds: with wet hands, grab one side of the dough, stretch it up gently, and fold it over the center. Rotate the bowl and repeat with the other three sides. This counts as one set.
Repeat the stretch and folds every 30-45 minutes for the next 2-3 hours (3-4 sets total). As you perform the folds, you'll notice the dough becoming smoother, stronger, and more elastic. After the final set of folds, let the dough rest undisturbed until it has increased in volume by about 50-75% (this can take 1-3 more hours depending on temperature and leavening). Look for signs of fermentation: bubbles on the surface and around the edges, and the dough should feel lighter and airy. Total bulk fermentation time might be 4-6 hours at room temperature (around 72-75°F or 22-24°C).
-
Shaping and Proofing: Preparing the Loaf
Once the bulk fermentation is complete, gently turn the dough out onto a lightly floured surface. Be careful not to degas it completely. Shape the dough into a round or oval (depending on your proofing basket shape). For a boule (round), gently tuck the edges underneath to create tension on the surface. For a batard (oval), fold the dough into thirds like a letter, then roll it up tightly. Aim to create a taut surface.
Generously dust your proofing basket with rice flour to prevent sticking. Carefully transfer the shaped dough into the basket, seam-side up if you plan to bake seam-side down, or seam-side down if you plan to score the top. Cover the basket with a clean kitchen towel or plastic wrap. Proof at room temperature for 1-2 hours (until slightly puffy but not fully doubled) or, for better flavor and handling, cold proof in the refrigerator for 12-24 hours. The cold proof is highly recommended for artisan whole grain bread.
-
Baking: Achieving a Golden Crust and Perfect Crumb
Preheat your oven with the empty Dutch oven inside to 475°F (245°C) for at least 30-45 minutes. This is crucial for achieving good oven spring. If cold proofing, take the dough directly from the refrigerator when the oven is ready. Carefully turn the dough out of the proofing basket onto a piece of parchment paper or directly into the hot Dutch oven (be cautious of the heat!). If baking seam-side up, no scoring is needed. If baking seam-side down, score the top using a sharp lame with quick, confident strokes.
Carefully lower the dough on the parchment paper (if using) into the preheated Dutch oven. Place the lid on the Dutch oven and bake for 20-25 minutes. The trapped steam will help the loaf expand. After this initial bake, remove the lid.
Lower the oven temperature to 450°F (230°C) and continue baking for another 20-30 minutes, or until the crust is deeply golden brown and the internal temperature reaches 200-210°F (93-99°C). A well-baked whole grain artisan bread recipe will have a rich, dark crust. Remove the loaf from the Dutch oven and let it cool completely on a wire rack before slicing – this is essential for the crumb structure to set properly.
Troubleshooting Common Whole Grain Artisan Bread Problems
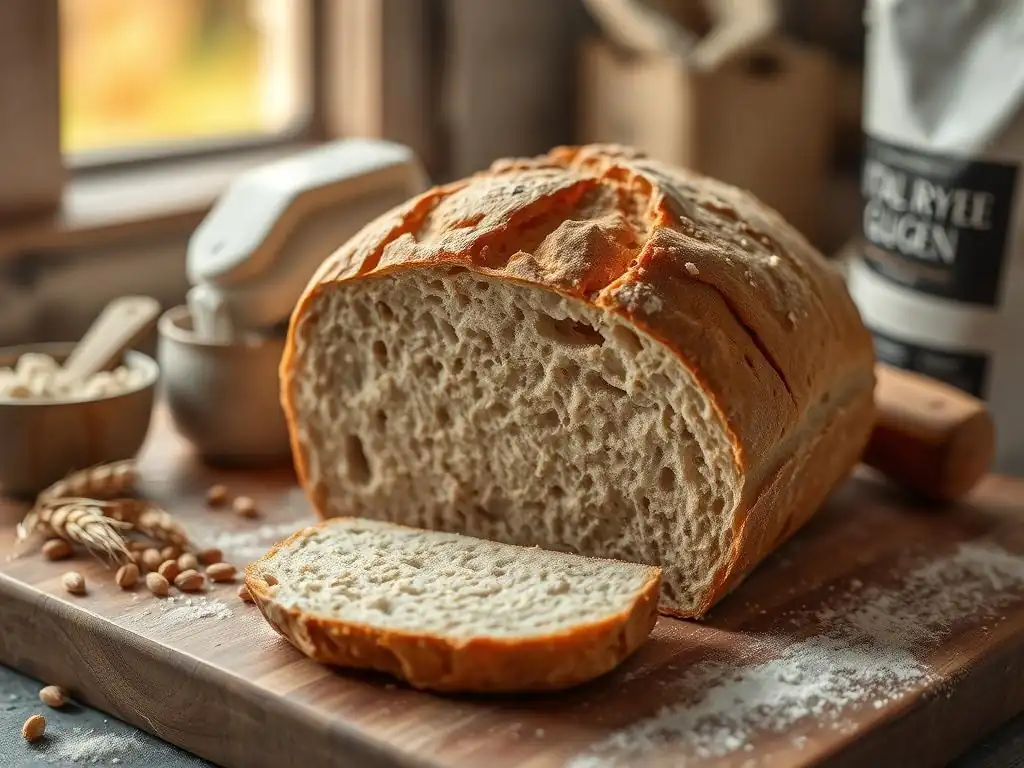
Even with a great whole grain artisan bread recipe, sometimes things don't go exactly as planned. Working with whole grains presents unique challenges compared to white flour. Understanding common issues and their likely causes will help you diagnose problems and improve your baking results over time. Don't be discouraged by a less-than-perfect loaf; every bake is a learning opportunity.
Most problems can be traced back to issues with hydration, gluten development, or fermentation. By paying close attention to these factors and making adjustments in subsequent bakes, you can overcome these hurdles and consistently produce beautiful whole grain bread.
Dense Bread: Understanding and Solving the Issue
One of the most common complaints when baking whole grain bread is a dense, heavy crumb. This can be incredibly frustrating when aiming for a light, airy artisan loaf. Density often stems from insufficient rise, which in turn can be caused by a few key factors. Identifying the root cause is the first step to fixing it.
Potential culprits include insufficient hydration, underdeveloped gluten, or under-proofing (not allowing enough time for the dough to rise). Whole grain flours need plenty of water, and their gluten requires gentle, patient development. Make sure you are adding enough water for your specific flour, and allow sufficient time for fermentation, ensuring the dough has visibly increased in volume and shows signs of activity before shaping and baking.
Sour or Bitter Taste: Adjusting Fermentation Times
While a pleasant tang is characteristic of sourdough whole grain bread, an overly sour or even bitter taste can indicate issues with fermentation. This is often a sign that the dough has been over-fermented, particularly in warm conditions or if the starter is too acidic. Over-fermentation leads to the breakdown of starches and proteins to an excessive degree, resulting in off-flavors.
To avoid this, monitor your dough's fermentation progress closely, especially during bulk fermentation at room temperature. If your kitchen is warm (above 78°F or 26°C), the dough will ferment faster. Consider reducing fermentation times or using cooler water. If using a sourdough starter, ensure it is fed regularly and active before use; a weak or overly acidic starter can also contribute to undesirable flavors. Cold proofing in the refrigerator helps slow down fermentation and develop a balanced flavor profile.
Poor Oven Spring: Identifying the Causes and Solutions
Poor oven spring – when your loaf doesn't expand much in the oven – results in a flatter loaf with a potentially dense crumb. This can be caused by several issues, including underdeveloped gluten, over-proofing, under-proofing, or insufficient steam during the initial bake. A weak gluten structure cannot hold the gas produced by fermentation, while dough that has risen too much (over-proofed) may collapse in the oven. Under-proofed dough hasn't built enough gas or strength to expand fully.
Ensure your dough has developed sufficient strength through proper mixing and stretch-and-folds. Pay close attention during bulk fermentation and proofing; the dough should be airy and have increased significantly but not look deflated. Using a preheated Dutch oven is highly effective for maximizing oven spring by creating a steamy environment that allows the crust to remain pliable as the loaf expands. Also, make sure your oven is fully preheated to the correct temperature.
Beyond the Basics: Exploring Advanced Whole Grain Baking Techniques
Once you've mastered a basic whole grain artisan bread recipe, a world of advanced techniques and variations opens up. Exploring these methods allows you to further refine your skills, introduce new flavors and textures, and truly make your whole grain loaves unique. From incorporating sourdough for deeper complexity to adding seeds and grains, there are endless possibilities to enhance your baking.
These techniques build upon the fundamental principles of whole grain baking but introduce new variables to manage. Experimentation is key here. Don't be afraid to try new combinations of flours, adjust hydration significantly, or play with longer fermentation schedules.
Sourdough Whole Grain Bread: A Deeper Dive
Baking whole grain artisan bread with a sourdough starter takes your loaves to the next level in terms of flavor, texture, and digestibility. Sourdough relies on a natural leavening culture of wild yeasts and lactic acid bacteria, which ferment the dough more slowly and produce complex organic acids that contribute to the characteristic tang and aroma. The long fermentation process in sourdough also helps break down phytic acid in whole grains, potentially making nutrients more available.
Working with a whole grain sourdough starter requires understanding its unique needs. Whole grain flours feed the starter robustly due to their rich nutrient content, but they can also lead to a faster, more acidic fermentation. Maintaining a healthy, active starter fed with whole grain flour (like a mix of whole wheat and rye) is crucial. The bulk fermentation and proofing times for whole grain sourdough are often longer than with commercial yeast, allowing ample time for flavor development and dough maturation. Mastering the timing and feel of whole grain sourdough dough is a rewarding challenge.
Adding Seeds and Grains for Texture and Flavor
Incorporating seeds and grains is a fantastic way to add nutritional boosts, textural contrast, and layers of flavor to your whole grain artisan bread recipe. Seeds like flax, sunflower, sesame, and pumpkin, or grains like oats, millet, and quinoa, can be added directly to the dough or soaked/sprouted beforehand. Soaking or sprouting helps make them more digestible and prevents them from absorbing moisture from the dough during fermentation, which could otherwise lead to a drier loaf.
For example, adding Spectrum Essentials Ground Flaxseed provides omega-3 fatty acids and fiber, while Gerbs Raw Sunflower Seeds add a delightful crunch and nutty flavor. You can mix seeds into the dough during the initial mixing or during the stretch-and-fold stage. Alternatively, you can create a "soaker" by combining seeds/grains with hot water and letting them sit for a few hours or overnight, then adding the soaker to the dough. Aim for adding seeds/grains up to 10-20% of the total flour weight to avoid making the dough too heavy or dense.
Experimenting with Different Whole Grain Flour Combinations
One of the most exciting aspects of baking whole grain artisan bread is the ability to experiment with different combinations of flours. Blending various whole grains allows you to balance their unique characteristics – combining the structure of whole wheat with the tenderness of spelt, or the earthiness of rye with the sweetness of Kamut. This allows you to tailor your whole grain artisan bread recipe to achieve specific flavor profiles and textures.
Start by substituting small percentages of your base whole wheat flour with other whole grains (e.g., 10-20% rye, spelt, or Kamut). Observe how the dough handles and how the final loaf tastes and feels. As you gain experience, you can try higher percentages or more adventurous blends. For example, a mix of 50% whole wheat, 30% spelt, and 20% rye can create a complex, flavorful loaf that is both hearty and relatively easy to handle. Keeping a baking journal to note your flour blends, hydration levels, and results is invaluable for refining your whole grain artisan bread recipes.
Frequently Asked Questions
What exactly is whole grain flour, and why is it considered a nutritional powerhouse in breadmaking?
Whole grain flour includes all parts of the grain – the bran, germ, and endosperm – making it rich in fiber, vitamins, and minerals. This contrasts with refined flours, which only contain the endosperm and are therefore less nutritious.
Can I substitute whole grain flour entirely for all-purpose flour in any bread recipe?
While possible in some recipes, it's often best to start with a partial substitution. Whole grain flour can absorb more liquid and result in a denser loaf. Experiment to find the right ratio for your desired texture.
What are some common types of whole grain flours suitable for artisan bread, besides whole wheat?
Beyond whole wheat, consider flours like rye, spelt, and kamut. Each offers a unique flavor profile and can contribute to a more complex and interesting bread.
How does the use of whole grain flour affect the rise and texture of artisan bread?
Whole grain flour can sometimes inhibit gluten development, leading to a slower rise and potentially a denser texture. Proper hydration and longer fermentation times can help overcome this.
Where can I find reliable "Whole Grain Artisan Bread Recipe" and techniques for working with these flours?
BakeWithEase.com offers a variety of simple recipes, techniques, and tips specifically designed for working with whole grain flours in artisan bread baking, catering to all skill levels.
Final Reflection: The Flour Power of Artisan Bread
The resurgence of interest in whole grain artisan bread isn't just a culinary trend; it's a powerful statement about our growing awareness of the vital connection between food and well-being. We've explored the nutritional benefits of whole grains, the artistry of crafting artisan loaves, and the surprisingly accessible methods for incorporating these nutritious powerhouses into your daily diet. This isn't simply about baking; it's about reclaiming control over our food choices and embracing a healthier, more mindful approach to eating.
The journey from refined white flour to the complex textures and flavors of whole grain artisan bread represents a significant shift in our cultural relationship with food. We've moved beyond the bland uniformity of mass-produced loaves to appreciate the nuanced tastes and textures that come from using thoughtfully sourced, whole-grain flours. This shift reflects a broader societal movement towards sustainability, conscious consumption, and a deeper understanding of the impact of our food choices on our health and the environment. Bread is the staff of life,
a simple phrase that carries profound weight when we consider the nutritional value and cultural significance of this staple food.
Now, consider your own kitchen. What will you bake next? Will you experiment with a new whole grain flour, challenging yourself to create a loaf that nourishes both body and soul?
Embrace the challenge, the creativity, and the satisfaction of crafting your own artisan bread. The journey is as rewarding as the destination, and each loaf you bake is a testament to your commitment to a healthier, more flavorful, and more conscious way of life. Let the aroma of freshly baked whole grain bread fill your home, a symbol of nourishment, connection, and the enduring power of simple, wholesome ingredients.
Unleash the Flavor & Nutrition: Bake Your Best Bread Yet!
Thanks for taking the time to explore the amazing world of whole grain artisan flours! You've now discovered the key to unlocking incredible flavor and nutritional benefits in your baking. Ready to put this knowledge into action?
- Bake a loaf today! Choose your favorite whole grain flour (or try a new one!) and experiment with a simple recipe. The results will be incredibly rewarding.
- Share your baking journey! Post a picture of your creation on social media and tag us – we'd love to see what you've made!
- Explore further: Dive deeper into the world of whole grains by researching different varieties and their unique properties. What will you discover next?
What unique flavor combination will you create with your newfound whole grain knowledge?