
Troubleshooting Cheesecake: Fix Common Baking Mistakes

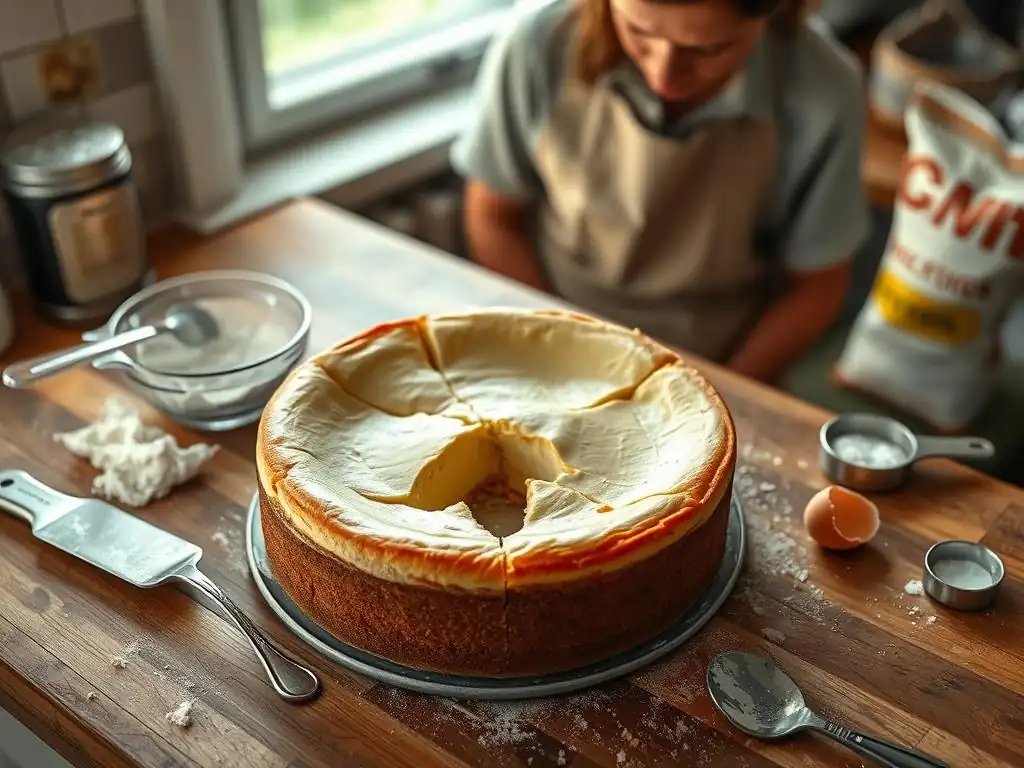
Welcome to BakeWithEase, your haven for effortless baking! Ever wondered why your cheesecake cracks, sinks, or just doesn't quite achieve that perfect creamy texture? This week, we're diving deep into the secrets of this beloved dessert. Explore our insights on Cheesecake baking common mistakes and discover how to avoid them, leading you to cheesecake perfection. Ready to transform your cheesecake skills from frustrating to fantastic? Let's get baking!
- Troubleshooting Cheesecakes: Achieving Baking Perfection
- Understanding Cheesecake Challenges
- Troubleshooting Common Cheesecake Issues
- Advanced Techniques
- Conclusion: Baking Perfect Cheesecakes
- Frequently Asked Questions
- Final Reflection: The Sweet Science of Cheesecake Success
- Unlock Your Perfect Cheesecake!
Troubleshooting Cheesecakes: Achieving Baking Perfection
Understanding Cheesecake Challenges
Factors Affecting Cheesecake Texture and Appearance
Achieving that perfect, creamy cheesecake texture and smooth, unblemished surface can feel like a culinary quest. Several key factors influence the final outcome. Temperature plays a crucial role throughout the entire process, from ensuring ingredients like cream cheese and eggs are at room temperature for smooth blending, to the oven temperature during baking, and finally, the cooling process. Using cold ingredients can lead to lumps and overmixing, resulting in a dense texture. Similarly, baking at too high a temperature or cooling too rapidly can cause cracks and sinking.
The composition of the batter itself is also a significant factor. The ratio of dairy (cream cheese, sour cream, heavy cream) to eggs and sugar determines the richness and structure. Too many eggs can lead to a rubbery texture, while not enough can result in a cheesecake that doesn't set properly.
The fat content of the dairy products used directly impacts the creaminess. For instance, using full-fat cream cheese is typically recommended for a classic, rich cheesecake texture, whereas lower-fat options can result in a less satisfying, potentially watery consistency. Understanding how these ingredients interact is fundamental to avoiding common cheesecake baking common mistakes.
Common Cheesecake Problems and Their Impact
Bakers frequently encounter a range of issues when making cheesecakes, which can significantly impact the final dessert. One of the most visible problems is a cracked surface, which, while not affecting taste, detracts from the cheesecake's aesthetic appeal. Another common issue is a soggy crust, often caused by moisture seeping from the filling during baking, leaving the base unpleasantly soft or gummy. This is a prevalent issue in cheesecake baking common mistakes.
Beyond appearance and crust issues, texture problems like a dense or rubbery interior, or a sunken center, are also frequent. A dense texture often results from overmixing the batter, incorporating too much air initially and then deflating it, or overdeveloping the proteins. A sunken cheesecake can indicate underbaking or cooling the cheesecake too quickly, causing the center to collapse as it cools. Each of these problems stems from specific errors in technique or temperature control and requires targeted troubleshooting to achieve a perfect bake.
Troubleshooting Common Cheesecake Issues
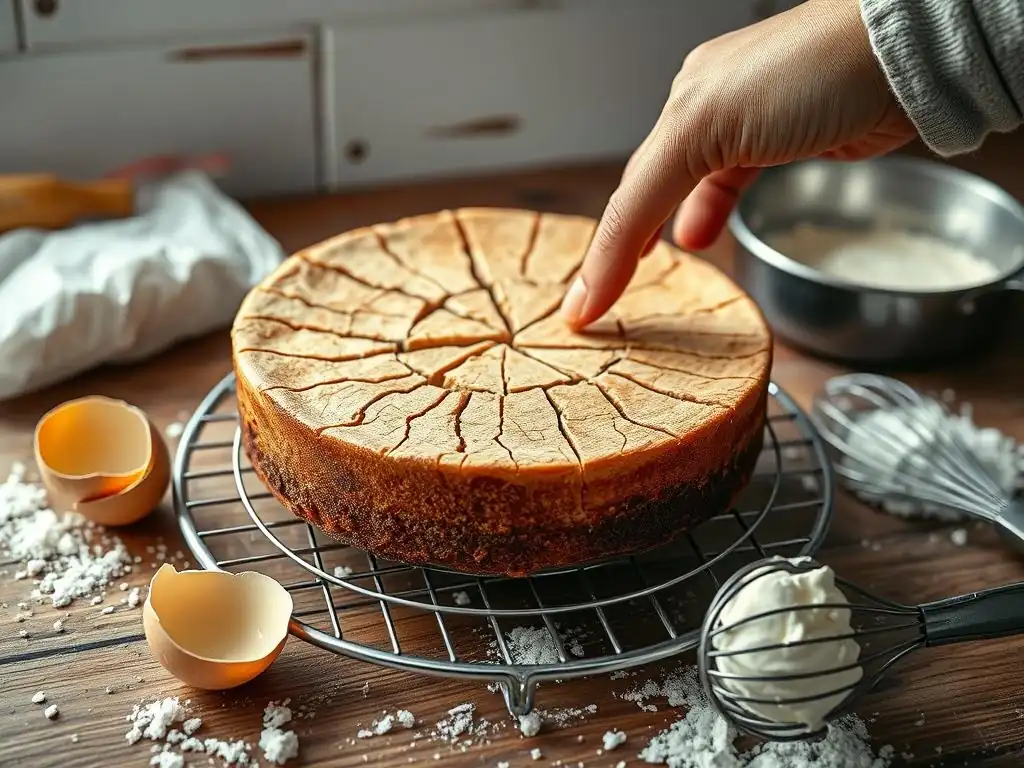
1. Cracked Cheesecake Surface
Causes: Overbaking and Temperature Shock
A cracked surface is perhaps the most common and frustrating issue in cheesecake baking. The primary culprits are almost always related to temperature extremes. Overbaking causes the center of the cheesecake to heat up and set too quickly while the edges are already firm. As the cheesecake cools, the still-setting center contracts more than the edges, leading to tension and eventually a crack. Think of it like drying mud – the edges dry first and shrink, causing cracks in the still-wet center as it catches up.
Temperature shock, or cooling the cheesecake too rapidly, is the other major cause. Taking a hot cheesecake directly from the oven into a cold kitchen environment or, worse, the refrigerator, forces it to cool and contract too quickly. This rapid temperature change creates internal stress, especially between the cooler exterior and hotter interior, which the delicate structure cannot withstand, resulting in cracks radiating from the center or edges. Avoiding these abrupt temperature changes is key to preventing many cheesecake baking common mistakes.
Solutions: Water Bath, Lower Temperature, Gradual Cooling
Employing a water bath during baking is one of the most effective solutions for preventing cracks. The water bath provides gentle, even heat to the cheesecake, preventing the edges from setting too quickly and ensuring the entire cheesecake bakes uniformly. It also adds moisture to the oven environment, which helps keep the surface moist and flexible. A standard water bath involves placing the springform pan containing the cheesecake into a larger pan filled with about 1-2 inches of hot water.
Baking at a lower temperature for a longer time also helps prevent cracks by promoting even cooking. Instead of a high initial temperature, maintain a steady, moderate temperature, typically between 300°F and 325°F (150°C to 160°C). Finally, gradual cooling is essential. Once baked, turn off the oven and leave the cheesecake inside with the door propped open slightly (using a wooden spoon works well) for 30-60 minutes before removing it to a wire rack to cool completely at room temperature. Only transfer it to the refrigerator once it is no longer warm to the touch.
Prevention: Monitoring Internal Temperature, Avoiding Drafts
The most reliable way to ensure your cheesecake is perfectly baked and less prone to cracking is to monitor its internal temperature. A finished cheesecake should register around 150°F to 155°F (65°C to 68°C) in the center when tested with an instant-read thermometer, about an inch from the edge. The center might still look slightly wobbly, but it will firm up as it cools. Baking to this temperature range indicates it is set but not overcooked.
Beyond temperature, controlling the cheesecake's environment during and after baking is crucial. Avoid opening the oven door unnecessarily during baking, as this causes temperature fluctuations. Once removed from the oven for cooling, place the cheesecake in a location free from drafts or sudden temperature changes. Don't place it near an open window, an air conditioning vent, or directly in front of a fan. Patience during the cooling process is a virtue that pays off with a beautiful, crack-free surface.
2. Soggy Crust
Causes: Insufficient Baking, Excess Moisture
A soggy crust is a common grievance, particularly with graham cracker or cookie crusts. This issue typically arises from two main causes: insufficient baking of the crust before adding the filling, and excess moisture migrating from the wet filling into the dry crust during baking. If the crust isn't properly set and slightly hardened in the oven before the filling goes in, it remains porous and acts like a sponge, absorbing moisture.
The high moisture content of the cheesecake batter, combined with the long, slow baking time, provides ample opportunity for water to leach downwards. This is especially true if using a water bath, as steam can sometimes find its way to the crust if the pan isn't properly sealed. This moisture absorption breaks down the crust's structure, turning it from delightfully crisp to unpleasantly soft and soggy. Addressing this is vital in preventing cheesecake baking common mistakes.
Solutions: Pre-Baking, Sealing with Egg Wash, Using Graham Cracker Crumbs
Pre-baking the crust is the most effective solution for preventing sogginess. After pressing the crust mixture into the pan, bake it in a preheated oven, usually around 350°F (175°C), for 8-12 minutes, or until it looks lightly golden and feels firm. This sets the crust structure and creates a barrier against moisture. Allow the pre-baked crust to cool slightly before adding the filling.
For extra protection, some bakers seal the pre-baked crust with a thin layer of egg wash (a beaten egg or egg white) brushed over the bottom and sides. This creates a protein layer that further inhibits moisture absorption. While butter-based cookie crusts are popular, using graham cracker crumbs mixed with melted butter often yields a crust less prone to sogginess due to the texture and absorbency of the crumbs.
Crisp Crust Techniques: Blind Baking, Proper Ingredient Ratios
Blind baking, as described above, is the cornerstone technique for a crisp crust. Ensure you bake it long enough to set, but not so long that it burns. The ratio of fat (usually melted butter) to dry crumbs is also critical. Too little butter results in a crumbly crust that won't hold its shape, while too much can make it greasy and contribute to sogginess if not baked properly. A common ratio is about 1/2 cup (1 stick or 113g) of melted butter to 1 ½ cups of graham cracker crumbs.
For extra crispness, especially around the edges, ensure the crust is pressed firmly and evenly into the pan. Pay particular attention to creating a defined edge up the sides of the springform pan. Some bakers also lightly brush the finished, baked crust edge with melted butter after removing it from the oven, although this is less common. Combining proper blind baking with the correct crumb-to-butter ratio provides the best defense against a soggy base.
3. Uneven Baking
Causes: Oven Hot Spots, Improper Pan Placement
Uneven baking manifests as parts of the cheesecake being more set or even browned than others. The most frequent cause is oven hot spots – areas within your oven that are significantly hotter than others. Most home ovens have temperature variations, sometimes as much as 25-50°F (15-30°C) from one spot to another. This leads to uneven heat distribution, causing the section of the cheesecake in the hotter spot to bake faster.
Improper pan placement within the oven also contributes to unevenness. Placing the cheesecake too close to a heating element (bottom or top) or too close to the oven walls can expose one side or section to more direct heat than others. If using multiple racks, the heat distribution might vary between levels. Understanding your oven's quirks and how heat circulates is key to overcoming this challenge in cheesecake baking common mistakes.
Solutions: Oven Thermometer, Rotating Pan, Water Bath
Using an independent oven thermometer is the first step to identifying and managing hot spots. Place the thermometer in the center of your oven to get an accurate reading, and also test different locations if you suspect variability. Knowing your oven's true temperature and where its hot spots are allows you to adjust baking time or placement accordingly.
Rotating the cheesecake pan halfway through the baking time is a simple yet effective solution. For instance, if baking for 60-75 minutes, rotate the pan 180 degrees after 30-35 minutes. This ensures that all sides of the cheesecake spend an equal amount of time in any potential hot or cool spots, leading to more uniform baking. As mentioned earlier, a water bath also promotes even baking by surrounding the pan with consistent, gentle heat.
Achieving Uniform Cooking: Proper Rack Position, Even Batter Distribution
For most cheesecakes, the optimal rack position is the middle or slightly lower-middle rack. This position typically provides the most consistent heat distribution, placing the cheesecake away from direct heat sources at the top and bottom. Avoid placing the cheesecake on the very top or bottom rack unless specifically instructed by a recipe designed for that placement.
Ensuring the batter is evenly distributed in the pan before baking is also crucial. After pouring the batter into the prepared crust, gently tap the pan on the counter a few times to help settle the batter and remove any large air bubbles trapped near the surface (more on bubbles later). Use an offset spatula or the back of a spoon to ensure the top surface is relatively level. An uneven batter height will inevitably lead to uneven cooking times for different sections.
4. Sticking to the Pan
Causes: Insufficient Greasing, Wrong Pan Type
Cheesecake sticking to the pan is a frustrating problem, especially when using a standard cake pan or even a springform pan that isn't properly prepared. Insufficient greasing is a primary culprit. If the sides and bottom of the pan aren't adequately coated with butter or baking spray, the delicate, cooked cheesecake can adhere firmly as it cools and contracts, making clean removal difficult and often damaging the edges.
Using the wrong type of pan is also a common error. While it's technically possible to bake cheesecake in a standard cake pan, it's incredibly difficult to remove without inverting and risking damage. Springform pans are specifically designed for cheesecakes and tarts precisely because their sides can be detached, allowing for easy release of the finished dessert without flipping. Not using a springform pan significantly increases the risk of sticking.
Solutions: Springform Pan, Parchment Paper, Thorough Greasing
The most fundamental solution is to use a springform pan. These pans have sides that clamp around a base; releasing the clamp allows the sides to expand and be lifted away from the finished cheesecake. Ensure the springform mechanism is functioning correctly and creates a tight seal to prevent leaks, especially if using a water bath.
Thoroughly greasing the pan is non-negotiable, even with a springform. Use softened butter or baking spray to coat the inside bottom and sides generously. For added insurance, cut a circle of parchment paper to fit the bottom of the pan and place it over the greased base before adding the crust. Some bakers also line the sides with strips of parchment paper, cut to the height of the pan, which guarantees an easy release and perfectly smooth sides.
Preventing Sticking: Proper Cooling Time, Gentle Release
Allowing the cheesecake to cool properly before attempting to remove it from the pan is essential for preventing sticking. As mentioned earlier, gradual cooling is key for texture and preventing cracks, but it also helps the cheesecake set and firm up enough to handle. Attempting to release a warm cheesecake is likely to cause it to break or stick.
Once the cheesecake is completely cooled (chilled in the refrigerator for several hours, ideally overnight), run a thin, sharp knife or an offset spatula gently around the inside edge of the pan before unclamping the springform sides. This helps loosen any tiny bits that might still be adhered. Unclamp the pan slowly and lift the sides straight up. If using parchment on the sides, gently peel it away. If the cheesecake was cooled overnight, the contraction should make it relatively easy to release from well-greased and lined sides.
5. Dense Texture
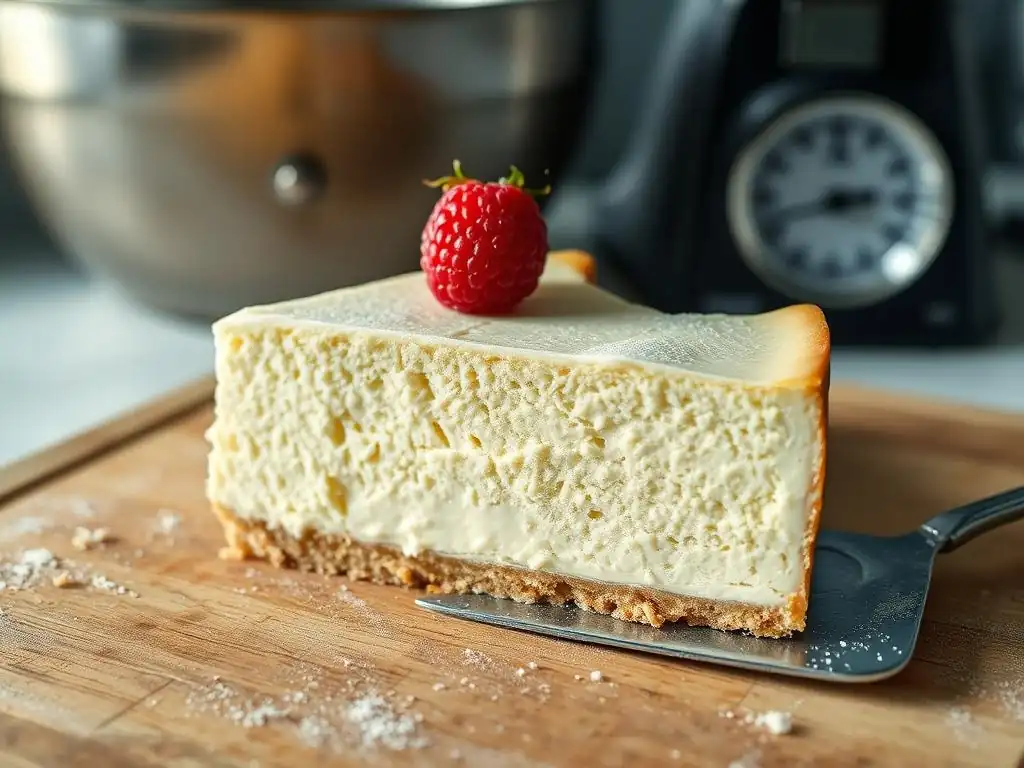
Causes: Overmixing, Cold Ingredients
A dense, heavy, or even rubbery texture is a common disappointment and often stems from how the batter is mixed. The primary cause is overmixing, particularly after the eggs have been added. Cream cheese batter relies on aeration from ingredients like whipped cream or simply the process of creaming the cream cheese and sugar together. However, overmixing develops the proteins in the eggs too much and can deflate any air that was incorporated, leading to a tough, dense crumb structure instead of a smooth, creamy one.
Using cold ingredients, especially cream cheese and eggs, exacerbates the need for mixing. Cold cream cheese is stiff and lumpy, requiring vigorous beating to become smooth. This excessive beating incorporates too much air initially, which is then easily lost or causes protein development issues. Cold eggs don't emulsify as well and can be harder to incorporate smoothly without overmixing the batter.
Solutions: Gentle Mixing, Room Temperature Ingredients
The key to a light, creamy texture is gentle mixing. Once the cream cheese and sugar are smoothly combined, add ingredients like eggs, sour cream, or heavy cream on low speed, mixing just until they are incorporated. Stop the mixer and scrape down the bowl frequently with a rubber spatula to ensure everything is combined without overbeating the main batter. Hand mixing the final ingredients, especially eggs, can provide more control and prevent overdevelopment.
Ensuring all dairy ingredients and eggs are at room temperature is absolutely critical. Room temperature cream cheese creams smoothly with minimal effort, sugar dissolves better, and eggs incorporate seamlessly without lumps or the need for excessive beating. Plan ahead and take these ingredients out of the refrigerator an hour or two before you plan to bake. This simple step dramatically reduces the risk of a dense texture and is fundamental in avoiding cheesecake baking common mistakes related to texture.
Achieving Light Texture: Incorporating Air, Avoiding Overdevelopment of Gluten
While overmixing is detrimental after eggs are added, incorporating some air before adding eggs can contribute to a lighter texture. For instance, creaming the softened cream cheese with the sugar until light and fluffy introduces beneficial air pockets. However, this should be done at a moderate speed and stopped once smooth.
Cheesecake batter contains no flour (or very little, depending on the recipe), so gluten development isn't the primary concern as it is in bread or cakes. The focus is on the proteins in the eggs. Avoiding overmixing after eggs are added is paramount to preventing these proteins from toughening. Think of mixing cheesecake batter as folding ingredients together rather than beating them into submission. The goal is homogeneity, not volume increase through vigorous mixing.
6. Sunken Cheesecake
Causes: Underbaking, Rapid Cooling
A sunken cheesecake, where the center dips significantly after cooling, is often a sign of underbaking or cooling the cheesecake too quickly after baking. If the cheesecake hasn't baked long enough to fully set the proteins throughout the center, that undercooked portion lacks the structural integrity to support itself as it cools. As the outer, more set edges contract, the soft, underbaked center collapses inwards, creating a noticeable dip.
Rapid cooling exacerbates this issue, similar to how it causes cracks. When a hot, still-delicate cheesecake is suddenly exposed to a much cooler environment, the exterior cools and contracts much faster than the interior. If the center is even slightly underbaked, this rapid, uneven contraction provides the final push for the center to sink. These are classic cheesecake baking common mistakes that affect structure.
Solutions: Baking to Correct Internal Temperature, Gradual Cooling
As previously mentioned, baking to the correct internal temperature is the most reliable indicator of doneness and the best defense against sinking. Aim for 150°F to 155°F (65°C to 68°C) in the center. The edges should appear set, and the area just inside the edge might be slightly puffed, but the very center (a 2-3 inch diameter circle) should still be slightly wobbly when the pan is gently nudged. This wobble indicates it's set enough to hold but will finish cooking from residual heat as it cools.
Gradual cooling, using the oven method with the door ajar, is crucial. This allows the cheesecake's temperature to decrease slowly and evenly, giving the center time to finish setting from residual heat and preventing the drastic temperature difference that causes collapse. Leaving it in the oven for 30-60 minutes after turning off the heat significantly reduces the risk of sinking.
Preventing Collapse: Leaving Cheesecake in Oven with Door Ajar
The practice of leaving the cheesecake in the cooling oven with the door ajar is perhaps the single most effective step for preventing both cracks and sinking. This technique mimics a controlled, slow descent in temperature. The oven initially holds much of its heat, providing a warm environment for the cheesecake to transition from baking to cooling.
After the initial period in the turned-off oven, move the cheesecake to a wire rack to cool completely at room temperature, away from drafts. Only transfer it to the refrigerator once it is cool to the touch, usually several hours later. This two-stage cooling process (oven then room temperature) is far superior to rushing it into the fridge and is a key technique to master when troubleshooting cheesecake baking common mistakes.
7. Bubbles
Causes: Overmixing, Rapid Temperature Changes
Unsightly bubbles trapped just beneath the surface of a cheesecake are usually a sign of air being incorporated into the batter during mixing and not properly released before baking. Overmixing the batter, especially at high speeds, whips excessive air into the mixture. While some air is desirable for texture, too much creates bubbles.
Rapid temperature changes can also contribute, particularly if the batter is very cold when poured into the pan. As the cold batter hits the heat of the oven, trapped air expands quickly, potentially forming large bubbles that rise to the surface and set there. While not as structurally damaging as cracks or sinking, bubbles detract from the smooth, elegant finish characteristic of a perfect cheesecake.
Solutions: Tapping Pan, Gently Swirling Batter
Once the batter is poured into the prepared pan over the crust, gently tapping the pan on the counter several times is a simple yet effective way to encourage large air bubbles to rise and pop. Lift the pan about an inch or two and drop it flat onto the counter. Repeat this 5-10 times. You'll often see bubbles appear and burst on the surface.
For smaller bubbles, or to achieve an even smoother top, gently swirling the surface of the batter with a skewer or the tip of a knife can help release trapped air. Run the skewer through the top layer of the batter in a gentle S-shape or circular pattern. Be careful not to drag the skewer down to the crust, just work the top half-inch or so of the batter. This technique helps smooth out any remaining air pockets near the surface.
Achieving Smooth Surface: Using a Skewer to Release Air Bubbles
Using a skewer specifically to pop any visible bubbles on the surface after tapping the pan is the final step for achieving a perfectly smooth top. Look closely at the batter surface under good light. Identify any remaining bubbles and gently touch the tip of a skewer or toothpick to the center of each bubble to break the surface tension and release the trapped air.
Another tip for a smooth surface is to ensure the cream cheese is exceptionally soft and lump-free before mixing. Starting with a perfectly smooth base batter minimizes the amount of mixing needed and thus reduces the amount of air incorporated in the first place. Combining room temperature ingredients, gentle mixing, tapping the pan, and popping surface bubbles with a skewer provides the best chance for that coveted flawless cheesecake top, effectively addressing common cheesecake baking common mistakes related to appearance.
Advanced Techniques
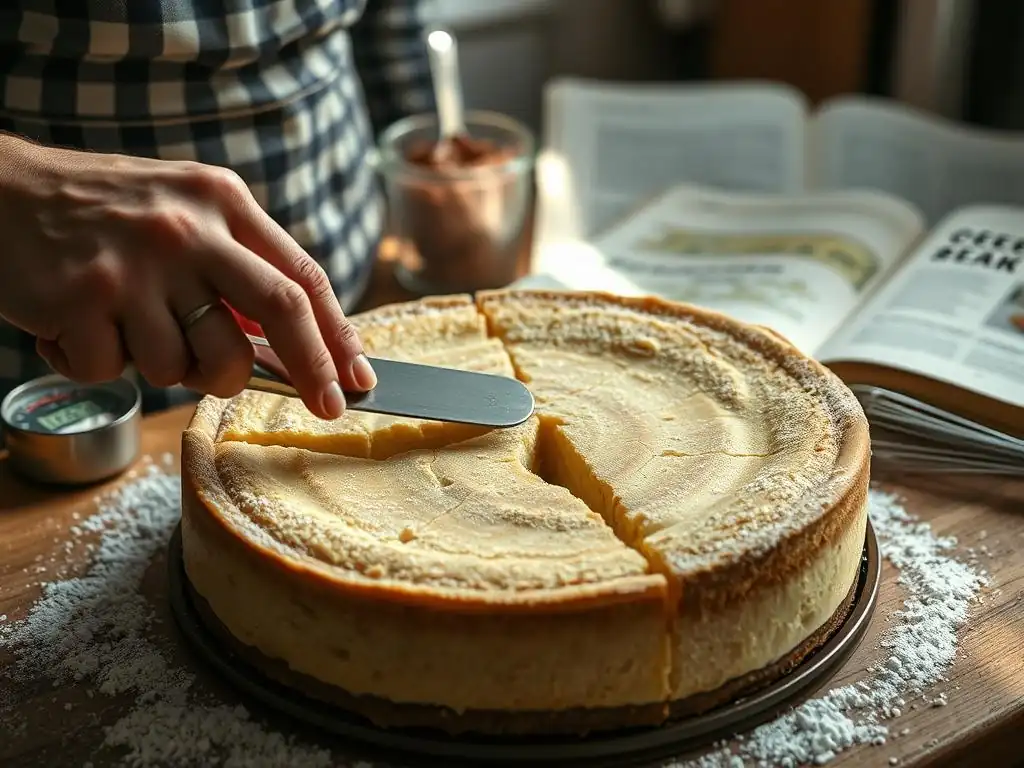
Adjusting Recipes for Oven Variations
Understanding and adjusting for oven variations is crucial for consistent baking results, especially with sensitive items like cheesecake. Most recipes assume your oven bakes true to the temperature you set, but this is rarely the case. As noted earlier, variations of 25-50°F (15-30°C) are common, and many ovens also have hot spots or uneven heating patterns. Relying solely on the oven's thermostat can lead to over or underbaking, contributing to issues like cracks, sinking, or uneven texture.
Using a reliable oven thermometer is the first and most important step. Place it in the center of your oven to verify the actual temperature. If your oven consistently runs hot, you'll need to set it lower than the recipe calls for (e.g., if the recipe says 325°F and your oven thermometer reads 350°F, set your oven to around 300°F).
Conversely, if it runs cool, set it slightly higher. Pay attention to how your cheesecake bakes – if one side consistently browns faster or sets quicker, you know where your hot spot is and can plan to rotate the pan more frequently.
High Altitude Adjustments
Baking at high altitudes (generally above 3,000 feet or 900 meters) presents unique challenges due to lower atmospheric pressure and reduced humidity. The lower pressure causes leavening gases to expand more quickly, liquids to evaporate faster, and water to boil at a lower temperature. For cheesecake, this means the batter can rise too much and collapse, the increased evaporation can lead to drying and cracking, and the lower boiling point of water in a water bath is less effective at buffering temperature.
High altitude adjustments for cheesecake typically involve slightly reducing the sugar, which can weaken the structure; slightly increasing the liquid (like sour cream or heavy cream) to counteract increased evaporation; and sometimes slightly increasing the oven temperature to set the proteins faster before the structure collapses. For example, at 5,000 feet, you might reduce sugar by 1-2 tablespoons per standard recipe and increase liquid by a similar amount.
Baking time might be slightly shorter due to the faster expansion, but monitoring internal temperature remains the best guide. Using a generous water bath is even more critical at high altitude to provide moisture and even heating.
Substituting Ingredients for Dietary Restrictions
Adapting cheesecake recipes for dietary restrictions involves understanding how substitutions affect texture and structure, which are already common challenges in regular cheesecake baking. For instance, substituting dairy cream cheese with a non-dairy alternative can significantly change the fat and protein content, potentially leading to a less firm or creamy result. Many non-dairy cream cheeses contain more water or stabilizers that behave differently when baked.
Using alternative sweeteners instead of sugar also impacts texture, as sugar contributes to tenderness and moisture retention. Some sugar substitutes don't caramelize or dissolve the same way. Similarly, using egg substitutes for allergies or vegan diets requires understanding their binding and setting properties, which are usually different from eggs. Often, achieving a successful texture with substitutions involves adding stabilizers like cornstarch or agar-agar, or adjusting baking times and temperatures. Researching specific substitute behaviors and potentially testing small batches can help mitigate common cheesecake baking common mistakes when adapting recipes.
Conclusion: Baking Perfect Cheesecakes
Summary of Key Troubleshooting Tips
Mastering the art of cheesecake baking requires patience and attention to detail, particularly when it comes to temperature and mixing. To summarize the key strategies for avoiding common cheesecake baking common mistakes: always start with room temperature ingredients for a smooth, lump-free batter that requires minimal mixing. This gentle mixing is crucial, especially after adding eggs, to prevent a dense or rubbery texture and minimize air bubbles.
Employing a water bath is your best defense against cracks and uneven baking, providing gentle, consistent heat. Baking at a moderate temperature, typically between 300°F and 325°F (150°C to 160°C), and baking only until the internal temperature reaches 150°F-155°F (65°C-68°C) is essential for proper setting without overbaking. Finally, the most critical step for preventing both cracks and sinking is gradual cooling – first in the turned-off oven with the door ajar, then at room temperature, before chilling. For the crust, pre-baking and thorough pan preparation (greasing and parchment paper) are vital to prevent sogginess and sticking.
Resources for Advanced Cheesecake Baking
While this guide covers many common cheesecake baking common mistakes, the journey to baking perfection is ongoing. For those looking to delve deeper, exploring resources focused on the science of baking can be incredibly beneficial. Understanding the roles of different ingredients – how proteins in eggs set, how fats contribute to richness, or how sugar affects structure and moisture – provides a deeper insight into why certain techniques work.
Many excellent baking books and reputable online culinary resources offer detailed explanations of baking chemistry and physics, often with specific sections dedicated to custard-based desserts like cheesecake. These resources can provide advanced troubleshooting tips, explanations for less common issues, and guidance on recipe development or modification. Engaging with a baking community, whether online forums or local classes, also offers opportunities to learn from others' experiences and troubleshoot specific problems you encounter. Continuous learning and practice are the best ingredients for achieving consistently perfect cheesecakes.
Frequently Asked Questions
How can I prevent my cheesecake from cracking?
Cracking is a common problem. To avoid it, bake the cheesecake in a water bath to ensure even heat distribution, and avoid overbaking. Let it cool gradually in the oven with the door ajar.
My cheesecake is lumpy, what did I do wrong?
Lumps are often caused by improperly mixed ingredients, especially cream cheese. Make sure the cream cheese is at room temperature and beat it until smooth before adding other ingredients.
Why is my cheesecake soggy in the middle?
A soggy center indicates underbaking. Use an oven thermometer to ensure your oven temperature is accurate, and bake until the center is slightly jiggly but not liquid.
My cheesecake is too dense, how can I make it lighter?
Overmixing the batter can lead to a dense cheesecake. Avoid overmixing after adding the eggs. Gently fold in the ingredients until just combined to keep it light and airy.
What can I do if my cheesecake sticks to the pan?
To prevent sticking, grease the pan thoroughly or use parchment paper to line the bottom. Also, allowing the cheesecake to cool completely before removing it from the pan helps prevent sticking.
Final Reflection: The Sweet Science of Cheesecake Success
Mastering the art of cheesecake isn't just about following a recipe; it's about understanding the delicate dance between ingredients, temperature, and technique. A perfectly smooth, creamy cheesecake, bursting with flavor, is a testament to patience and precision, a reward well worth the effort. But even the most experienced bakers encounter challenges.
The journey of perfecting cheesecake, for me, has been a lesson in embracing imperfection and learning from every crack, every wobble, every slightly burnt edge. It's a reflection of our own lives, where setbacks are inevitable, but the pursuit of mastery is what truly matters. The only way to do great work is to love what you do.
- Steve Jobs. This applies not only to professional baking, but to the joy of creating something delicious for ourselves and those we love. The process, with all its potential pitfalls, is as rewarding as the final product.
Now, armed with the knowledge to troubleshoot common cheesecake mishaps, I invite you to embark on your own cheesecake adventure. Don't be afraid to experiment, to learn from your mistakes, and to savor the sweet victory of a perfectly baked cheesecake. Remember, every cracked crust or sunken center is a step closer to achieving your own cheesecake nirvana. The journey is as important as the destination, and the taste of success is all the sweeter for the lessons learned along the way.
Unlock Your Perfect Cheesecake!
Thanks for taking the time to explore the world of cheesecake baking with us! We hope you gained valuable insights into avoiding those common pitfalls. Ready to create your dream dessert?
- Bake your own masterpiece: Put your newfound knowledge into practice! Try making a cheesecake this week, focusing on the tips we discussed.
- Share your triumph (or even your funny fails!): Let us know how it went in the comments below – we love seeing your creations.
- Discover more baking secrets: Explore other articles on BakeWithEase.com for even more tips and recipes.
What unexpected ingredient will you experiment with in your next cheesecake attempt?