
Elevate Cookie Designs Using Intricate Stenciling Methods

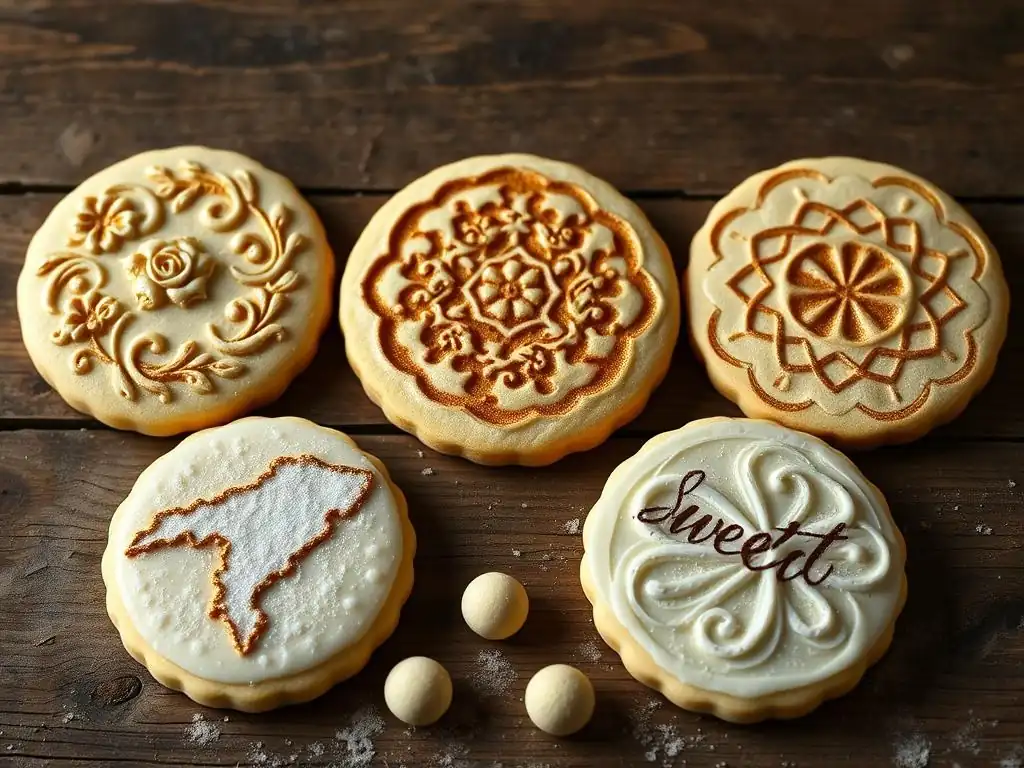
Welcome to BakeWithEase, where baking dreams become delicious realities! Ready to transform your cookies from simple treats to edible masterpieces? Prepare to be amazed as we unveil intricate cookie stenciling techniques that are surprisingly easy to master. Discover how to add stunning detail and professional flair to your pastries, leaving everyone wondering about your secret. Intrigued? Let's dive in and unlock the secrets to creating breathtaking cookie designs!
- Introduction to Intricate Cookie Stenciling
- Why Choose Stenciling for Detailed Cookie Decorating?
- Essential Tools and Materials for Intricate Cookie Stenciling
- Step-by-Step Guide to Intricate Cookie Stenciling Techniques
- Advanced Stenciling Techniques for Cookie Design
- Troubleshooting Common Cookie Stenciling Problems
- Inspiring Intricate Cookie Stenciling Ideas
- Mastering Intricate Cookie Stenciling: Practice and Patience
- Conclusion: Unleash Your Creativity with Cookie Stenciling
-
Frequently Asked Questions
- How do I choose the right stencil for intricate cookie designs?
- What kind of royal icing consistency is best for cookie stenciling?
- How can I prevent royal icing from bleeding under the stencil?
- What are some easy intricate stencil designs for beginners?
- How do I clean intricate cookie stencils properly?
- Final Reflection: The Enduring Allure of Intricate Cookie Art
- Unleash Your Inner Cookie Artist!
Cookie decorating offers a wonderful canvas for creativity, and one technique stands out for adding fine detail and elegance: stenciling. While hand-piping offers unique charm, achieving perfectly uniform, complex patterns across many cookies can be incredibly time-consuming and requires significant skill. This is where stenciling comes in, providing a reliable method to transfer beautiful, intricate designs onto your baked treats quickly and consistently. It opens up a world of possibilities, from geometric patterns and floral motifs to detailed holiday scenes and personalized messages, making intricate cookie stenciling techniques accessible to decorators of all levels.
Stenciling essentially acts as a mask, allowing you to apply a medium, most commonly royal icing, through cut-out areas onto the cookie surface. The result is a crisp, raised design that looks incredibly professional. Whether you're aiming for delicate lace patterns, bold graphic elements, or repeating textures, stencils provide the precision needed to make your cookies truly pop. Mastering intricate cookie stenciling techniques is a game-changer for anyone looking to elevate their cookie art without spending hours on painstaking detail work, offering a path to stunning results with relative ease.
Stenciling offers distinct advantages over freehand decorating, particularly when aiming for detailed and uniform designs across a batch of cookies. It simplifies the process of applying consistent patterns, which is often the most challenging aspect of achieving a professional look. Instead of meticulously piping each line and curve, you simply apply your medium over the stencil, letting the cutouts guide the design. This not only saves time but also ensures that every cookie in your batch looks remarkably similar, a key factor for impressive presentations, whether for gifts, parties, or sales.
Beyond consistency, stenciling allows for patterns that would be difficult, if not impossible, to create with traditional piping methods alone. Think of complex geometric repeats, highly detailed illustrations, or delicate lace-like textures. Stencils can capture these intricate details with precision. Furthermore, stenciling can be combined with other decorating techniques, such as airbrushing or even dusting with edible powders, offering versatility in creating unique effects. Exploring intricate cookie stenciling techniques makes previously daunting designs achievable and enjoyable.
Using stencils dramatically enhances the efficiency and quality of cookie decoration. One of the most significant benefits is the ability to replicate complex designs flawlessly. Imagine needing 50 cookies with a specific, detailed floral pattern for an event; hand-piping this would be a monumental task, likely resulting in variations between cookies. With a stencil, you can achieve near-identical results on every single cookie, saving significant time and reducing fatigue. This consistency is invaluable for professional bakers or anyone preparing large batches.
Another key advantage is the accessibility of intricate designs. Many patterns available as stencils, such as intricate mandalas or detailed damask prints, require an extremely steady hand and years of practice to replicate freehand. Stencils lower this barrier, allowing even relatively new decorators to produce stunning, complex artwork on their cookies.
This makes learning intricate cookie stenciling techniques easy and rewarding, quickly elevating the perceived skill level of your baking. For example, a simple circular cookie base can be transformed into a piece of edible art with a beautiful lace stencil pattern applied in just a few minutes per cookie.
Stencils are a secret weapon for achieving that polished, professional finish seen in high-end cookie shops and social media feeds. The crisp lines and uniform patterns created by stenciling give cookies a sophisticated appearance that is hard to match with freehand methods for certain design types. This technique ensures that elements like repeating patterns or detailed motifs are perfectly aligned and spaced, creating a sense of order and precision that is the hallmark of professional work.
Furthermore, stenciling allows for clean edges and defined shapes within the design, provided the correct technique and icing consistency are used. A well-executed stencil design looks sharp and intentional, unlike potentially shaky or inconsistent lines from hand-piping. This level of detail and uniformity significantly enhances the visual appeal of the cookies.
Mastering intricate cookie stenciling techniques is relatively easy compared to developing advanced piping skills, offering a faster route to creating cookies that look like they were made by an expert. A batch of cookies decorated with a clean, intricate stencil pattern can command a higher perceived value and impress recipients far more than simpler designs.
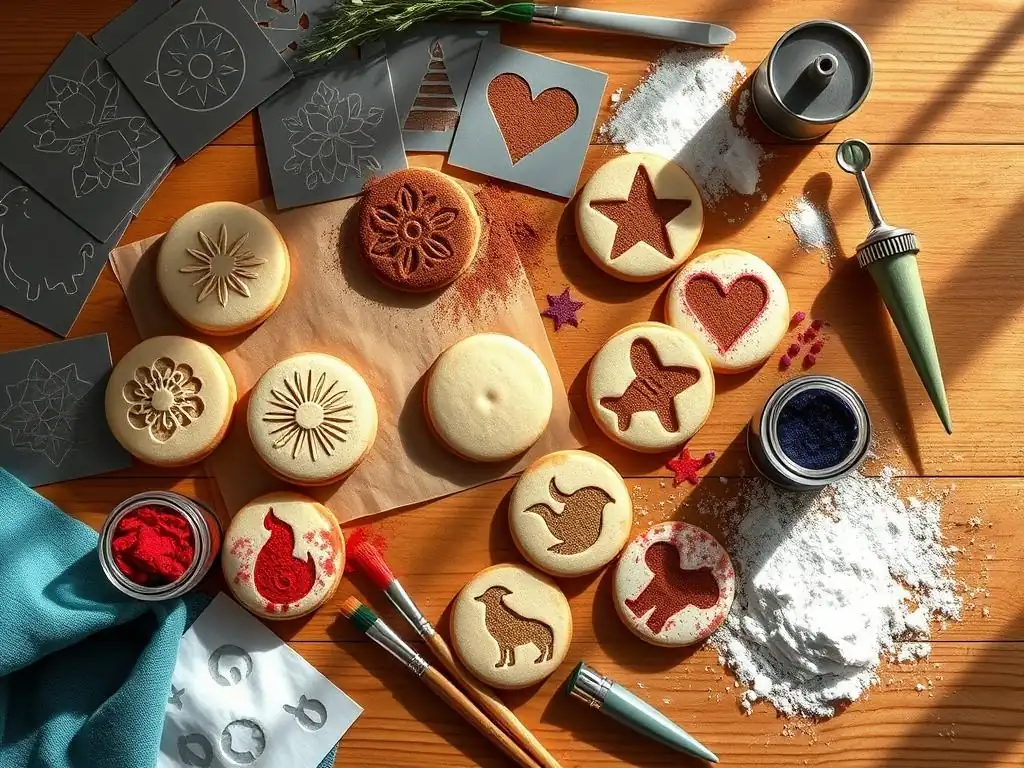
To successfully apply intricate cookie stenciling techniques, having the right tools and materials is crucial. The quality of your stencil, the consistency of your royal icing, and the specific tools you use for application all play a significant role in the final outcome. Gathering these items before you begin will streamline the process and help prevent common issues like bleeding or uneven coverage.
Cookie stencils are typically made from thin, food-grade plastic sheets, often Mylar or acetate. The material needs to be durable enough to withstand repeated use and washing, yet flexible enough to lay flat on the cookie surface. Stencil thickness can vary; thinner stencils (around 0.005 inches) offer finer detail but can be more delicate, while thicker stencils (around 0.007-0.010 inches) are sturdier and easier to handle, especially for beginners learning intricate cookie stenciling techniques.
When selecting designs, consider the size and shape of your cookies. Stencils come in various sizes and shapes, including full-coverage patterns, center designs, and border stencils. For intricate patterns, look for stencils where the cutouts are not excessively small or close together, as this can make application and cleaning more challenging. Choosing designs that complement the overall theme or occasion is also important. For instance, a delicate lace stencil works beautifully for wedding cookies, while geometric patterns might suit modern designs.
Royal Icing Consistency for Stenciling
The consistency of your royal icing is perhaps the most critical factor for successful intricate cookie stenciling. It must be thick enough that it doesn't bleed under the stencil but thin enough to spread smoothly through the cutouts. This is often referred to as 'stiff peak' or 'stencil consistency' icing. It should hold its shape when lifted with a spoon but still be pliable enough to spread.
A good test for stencil consistency is the 'peak test': when you lift a spoon or spatula from the icing, a peak should form and hold its shape firmly without drooping significantly. If it's too thin (like flood consistency), it will seep under the stencil edges. If it's too thick, it will be difficult to spread evenly and may tear when the stencil is removed.
Achieving this precise consistency might require adding powdered sugar for thickness or small amounts of water for thinning, adjusting gradually until it's just right for intricate cookie stenciling techniques easy application. A common starting point is adding just enough water to standard piping consistency icing until it's spreadable but not fluid.
Essential Stenciling Tools: Scrapers, Needles, and More
Beyond the stencil and royal icing, several tools make the stenciling process smoother and more effective.
- Stenciling Scraper or Spatula: A small, flexible scraper or offset spatula is essential for applying and smoothing the royal icing over the stencil. Plastic scrapers are often preferred as they are less likely to damage the stencil than metal ones. A bench scraper or even a credit card can work in a pinch, but dedicated stenciling scrapers are designed for this purpose.
- Stencil Holder or Magnets: To keep the stencil securely in place on the cookie, you might use a stencil holder (a frame that holds the cookie and stencil together) or small food-safe magnets on a magnetic surface (like a baking sheet) if using square or rectangular cookies. For round cookies, simply holding the stencil firmly with one hand while scraping with the other is often sufficient for applying intricate cookie stenciling techniques.
- Scribe Tool or Needle: A fine-tipped scribe tool or toothpick is invaluable for cleaning up any small areas where icing might have seeped under the stencil or for gently coaxing icing into tiny cutouts if needed.
- Paper Towels or Clean Cloths: Keep these handy for wiping excess icing from your scraper and for cleaning the stencil between uses.
Having these tools ready will make the process of applying intricate cookie stenciling techniques much more efficient and enjoyable.
Mastering intricate cookie stenciling techniques involves a few key steps, from preparing your materials to applying and removing the stencil. Following these steps carefully will help ensure crisp, clean results.
Before you begin stenciling, ensure your cookies are fully baked and completely cooled. The surface should be dry and firm. If you are stenciling onto a base layer of royal icing, that base layer must be completely dry and hardened. This usually takes at least 6-8 hours, or overnight, depending on humidity. Applying a stencil to damp or soft icing will inevitably lead to smudging and damage.
Prepare your royal icing to the correct stencil consistency as described earlier. It should be thick enough to hold its shape but spreadable. Color your icing if desired; remember that the color will appear bolder once dry. Have your chosen stencil and all necessary tools within easy reach. Working on a flat, stable surface is also helpful. Having everything prepped allows you to focus on the application process for intricate cookie stenciling techniques easy execution.
Securing the Stencil: Methods for Precise Application
Keeping the stencil perfectly still while applying the icing is critical for achieving sharp lines and preventing bleeding. There are several effective methods for securing the stencil:
- Manual Hold: For many cookies, simply holding the stencil firmly with your non-dominant hand while applying the icing with your dominant hand is sufficient. Position the stencil exactly where you want the design to appear and press down gently but firmly around the edges to prevent the stencil from lifting.
- Stencil Holders: These frames are designed to hold a cookie securely underneath a stencil, providing a stable platform. They are particularly useful for repeated designs or if you find it difficult to hold the stencil steady yourself. Some holders are adjustable for different cookie sizes.
- Magnets: If working on a metal surface like a baking sheet, you can use small food-safe magnets to hold the stencil in place, especially effective for square or rectangular cookies where the magnets can be placed at the corners of the stencil.
Choosing the best method depends on your comfort level, the cookie shape, and the stencil design. The goal is always to ensure there is no gap between the stencil and the cookie surface during application when using intricate cookie stenciling techniques.
Applying Royal Icing with Precision: Stenciling Techniques
Once the stencil is secured, it's time to apply the royal icing. The technique involves applying a small amount of icing and spreading it evenly over the stencil cutouts.
Apply a dollop of your stencil-consistency royal icing just above the design area on the stencil. Using your scraper or spatula held at a slight angle (around 45 degrees), gently spread the icing downwards across the stencil, covering all the cutouts. Use smooth, even strokes. Don't use too much pressure, as this can force icing under the stencil edges. The aim is to fill the cutouts with a thin, even layer of icing.
After covering the design, use the scraper to carefully remove excess icing by holding the scraper at a steeper angle (closer to 90 degrees) and scraping across the stencil surface. This leaves just enough icing in the cutouts to form the design. You want a relatively thin layer; too thick, and the design can be messy or difficult to remove the stencil from. This scraping step is key to achieving clean lines when applying intricate cookie stenciling techniques.
The Scraper Method: A Detailed Walkthrough
The scraper method is the most common and effective technique for applying royal icing through a stencil.
- Position and Secure: Place your stencil over the fully dry base icing (or bare cookie surface) and secure it using one of the methods described above (holding, holder, or magnets). Ensure the stencil is flat against the cookie surface.
- Apply Icing: Place a small amount of stencil-consistency royal icing just above the top edge of the design.
- Spread: Hold your scraper at a 45-degree angle and gently pull the icing downwards across the stencil, covering all the cutouts. Ensure even coverage.
- Scrape Excess: Hold your scraper at a steeper angle (around 75-90 degrees) and scrape firmly, but not forcefully, across the stencil to remove any excess icing. Work in the direction that best suits the design, usually away from yourself or across the width of the cookie. You should see the stencil surface become clean, with icing only remaining in the cutouts.
- Check: Briefly check that all cutouts are filled and the surface is smooth. Add a tiny bit more icing and scrape again if any areas are missed.
- Remove Stencil: Proceed immediately to the removal step. Do not let the icing dry on the stencil.
This systematic approach makes applying intricate cookie stenciling techniques relatively easy and repeatable.
Dry Brushing Techniques for Stenciled Cookies
While royal icing is the most common medium, stencils can also be used with edible dusts or powders for a different effect, known as dry brushing. This technique creates a softer, shaded look rather than a raised design.
- Base Surface: Ensure your cookie has a dry base layer, often flood-consistency royal icing that has hardened.
- Secure Stencil: Place and secure the stencil over the dry surface.
- Apply Dust: Dip a soft, dry food-safe brush (like a blush brush or dedicated edible dust brush) into edible luster dust, petal dust, or cocoa powder. Tap off any excess powder.
- Brush Through Stencil: Gently brush the powder over the stencil cutouts using a light, circular motion or dabbing motion. Build up the color gradually.
- Remove Stencil: Carefully lift the stencil straight up.
This method is excellent for adding subtle color gradients or metallic finishes to intricate cookie stenciling techniques, providing a different texture and visual style compared to icing. For instance, you could use a damask stencil and brush it with gold luster dust over a white base for an elegant, non-raised metallic pattern.
Removing the Stencil Without Smudging
Removing the stencil correctly is just as important as the application for achieving a clean design. As soon as you have finished scraping the icing or brushing the dust, carefully lift the stencil straight up off the cookie. Do not slide it. Lifting straight up minimizes the risk of smudging the wet icing or disturbing the dry powder.
Work relatively quickly, especially with royal icing, before it starts to crust. If you are stenciling multiple cookies, it's best to stencil one, remove the stencil, and then clean the stencil before moving to the next cookie. This prevents wet icing from transferring where it shouldn't be. Keeping a damp cloth or paper towel handy to wipe the back of the stencil after each use is a good practice when mastering intricate cookie stenciling techniques.
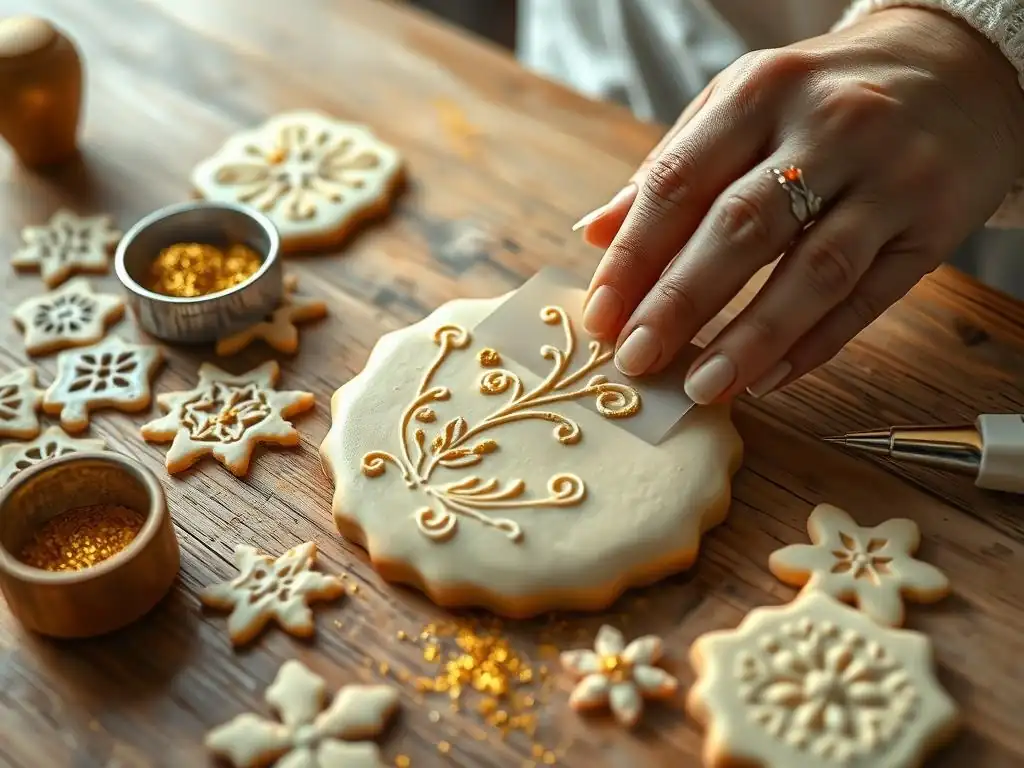
Once you're comfortable with basic stenciling, you can explore more advanced methods to create even more complex and visually striking cookie designs. These techniques often involve layering, using multiple colors, or combining stenciling with other decorating skills.
Layering Stencils for Complex Designs
Layering involves using multiple stencils or applying the same stencil multiple times to build up a complex design. Some intricate designs, like multi-colored floral patterns or highly detailed scenes, are broken down into several stencils, each representing a different color or layer of the design.
For example, a layered floral stencil might have one stencil for the leaves, another for the flower petals, and a third for the center. You would stencil the leaves in green, let the icing dry completely (which could take 2-4 hours per layer depending on humidity), then align the flower petal stencil and apply pink icing, let that dry, and finally add the yellow center with the third stencil.
This requires precise alignment and patience between layers, but the result is a stunning, multi-dimensional design. Mastering intricate cookie stenciling techniques often involves learning how to register (align) layered stencils accurately.
You can introduce multiple colors into a single stenciling application, even with just one stencil. This can be done by carefully applying different colors of royal icing to specific areas of the stencil before scraping.
For instance, if you have a stencil with both leaves and flowers, you could carefully place green icing onto the leaf cutouts and pink icing onto the flower cutouts using a small spatula or piping bag tip, avoiding mixing them. Then, scrape across the entire stencil in one smooth motion. This requires careful placement of the icing and a clean scrape.
Alternatively, you can stencil the entire design in one color, let it dry, and then use a smaller stencil or hand-paint details in other colors. Another technique is to use different colors of edible dust with the dry brushing method on different parts of the stencil. Using multiple colors adds depth and vibrancy, making intricate cookie stenciling techniques even more versatile.
Stenciling works beautifully in conjunction with other cookie decorating techniques, creating unique textures and visual interest.
- Stenciling over Flooded Bases: The most common combination is stenciling a design onto a base layer of flooded and dried royal icing. The smooth, flat surface provides the perfect canvas for the stencil.
- Stenciling on Bare Cookies: For a rustic look, you can stencil directly onto the surface of a baked cookie using thicker icing or even melted chocolate.
- Piping and Stenciling: Pipe a border or central element onto the cookie, let it dry, and then stencil a pattern around or behind it. You can also stencil a base pattern and then pipe details on top once the stenciled icing is dry. For example, stencil a vintage lace pattern and then pipe delicate dots or pearls along its edges.
- Airbrushing and Stenciling: Use a stencil as a mask for airbrushing edible colors onto the cookie surface. This creates a softer, gradient effect compared to icing. You can airbrush a background color through one stencil and then stencil a design on top with icing.
By combining methods, you can achieve complex, layered looks that showcase intricate cookie stenciling techniques alongside your other decorating skills.
Even with careful preparation, you might encounter issues when stenciling. Knowing how to identify and fix common problems will save you frustration and help you achieve better results.
Royal Icing Bleeding Under the Stencil: Causes and Solutions
Bleeding is perhaps the most common issue and occurs when wet royal icing seeps under the edges of the stencil cutouts, resulting in blurry or undefined lines.
- Cause 1: Icing Consistency is Too Thin.
- Solution: Your royal icing is likely too runny. Add more sifted powdered sugar gradually, mixing thoroughly, until it reaches the correct stiff, spreadable consistency. It should not flow readily.
- Cause 2: Stencil Not Secured Properly.
- Solution: There might be a gap between the stencil and the cookie surface. Ensure the stencil is held flat and firmly against the cookie. Use a stencil holder or magnets if necessary, especially on uneven cookie surfaces.
- Cause 3: Applying Too Much Icing or Pressure.
- Solution: Applying a thick layer of icing or pressing too hard with the scraper can push icing under the edges. Use a smaller amount of icing and a lighter hand when spreading, then scrape off excess gently but firmly.
Addressing these points is key to mastering intricate cookie stenciling techniques and achieving those coveted crisp edges.
Uneven Stencil Application: Achieving Smooth Results
Sometimes the stenciled design looks patchy or unevenly filled.
- Cause 1: Icing Consistency is Too Thick.
- Solution: If the icing is too stiff, it won't spread smoothly into all the stencil cutouts. Add tiny amounts of water (literally drops) and mix until it's spreadable but still holds its shape.
- Cause 2: Insufficient Icing Applied.
- Solution: You might not have used enough icing to cover all the cutouts completely. Apply a slightly larger dollop and ensure you spread it across the entire design area before scraping.
- Cause 3: Scraper Technique.
- Solution: Not scraping evenly or firmly enough can leave some areas thicker than others, or some cutouts partially filled. Ensure your scraper is held at a consistent angle and pressure across the entire stencil surface. A single, smooth pass is often better than multiple choppy strokes.
Practice with applying intricate cookie stenciling techniques will help you develop a feel for the right amount of icing and pressure.
Stencil Cleaning and Maintenance
Proper cleaning extends the life of your stencils and prevents cross-contamination or old icing from affecting new designs. Clean stencils immediately after use, especially if using royal icing.
- Rinse: Rinse the stencil under warm water to remove most of the wet icing or dust.
- Wash: Use mild soap and a soft brush (like a toothbrush dedicated to stencils) to gently scrub away any remaining icing from the cutouts. Pay special attention to intricate areas.
- Rinse Thoroughly: Rinse again to remove all soap residue.
- Dry: Lay the stencil flat on a paper towel or clean cloth to air dry completely before storing. Avoid bending or creasing them while wet.
Store stencils flat in a binder or container to prevent them from warping or getting damaged. Proper care ensures your stencils are ready for your next intricate cookie stenciling techniques project.
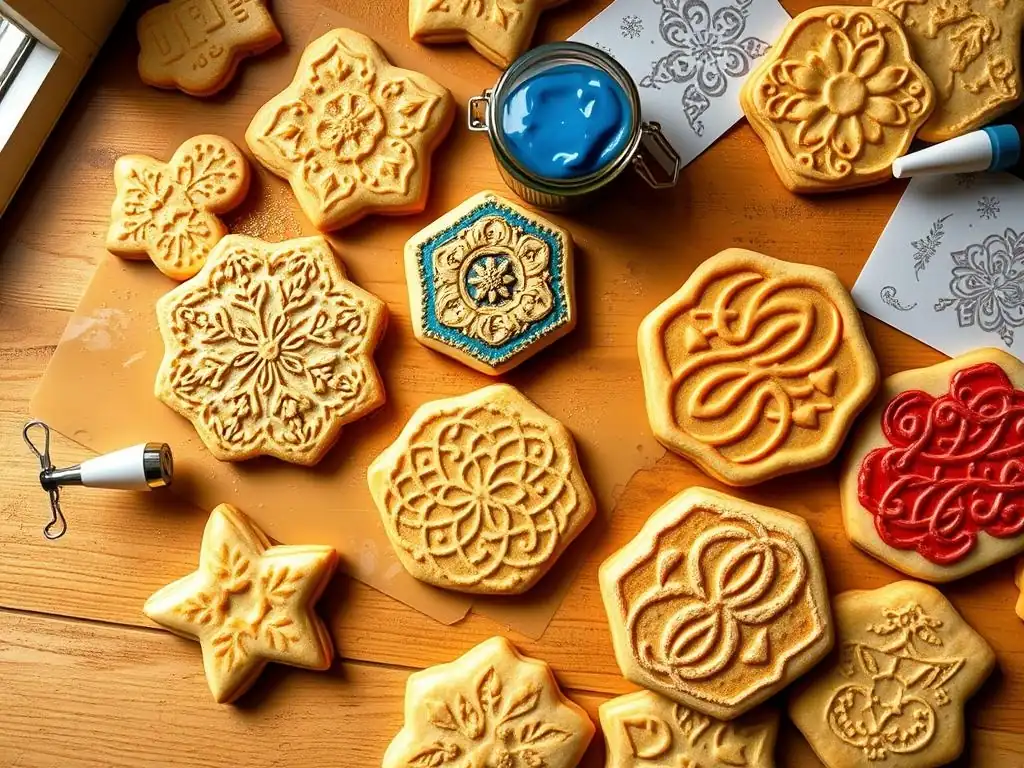
The possibilities with cookie stenciling are nearly endless. Here are a few popular themes and ideas to spark your creativity and demonstrate the versatility of intricate cookie stenciling techniques.
Mandala patterns, with their intricate, circular, and often symmetrical designs, are a perfect fit for cookie stenciling. These designs look incredibly complex but are surprisingly easy to achieve with a stencil.
A single mandala stencil can transform a simple round cookie into a mesmerizing piece of art. You can stencil the entire design in one color for a classic look, or use the dry brushing technique with multiple metallic dusts (like gold, silver, and bronze) over different sections of the stencil before lifting to create a multi-tonal effect.
The detailed lines and curves of mandala stencils truly showcase the precision that stenciling offers, making intricate cookie stenciling techniques ideal for creating stunning, meditative patterns. Imagine a set of cookies, each with a different, vibrant mandala design – they are sure to be conversation starters.
Damask patterns, characterized by their elaborate, scrolling floral or geometric motifs, evoke a sense of classic elegance and luxury. These patterns are notoriously difficult to pipe freehand with consistency, making them an excellent candidate for stenciling.
Applying a damask stencil in a contrasting color (like white on a dark base or gold on white) instantly elevates a cookie's sophistication. These patterns are perfect for wedding favors, anniversary cookies, or any occasion requiring a touch of formal beauty. You can use a full-coverage damask stencil for an all-over pattern or a border stencil to frame a central design. Pairing a stenciled damask background with a simple piped monogram or single flower can create a stunning, layered effect, highlighting the power of intricate cookie stenciling techniques in creating elegant designs.
Holiday Themed Stencil Designs
Stenciling makes decorating for holidays incredibly efficient and fun. From delicate snowflakes and festive holly patterns for winter holidays to spooky spiderwebs for Halloween or intricate floral patterns for spring, there's a stencil for every season and occasion.
Holiday-themed stencils often feature detailed imagery that would take significant time to pipe, such as intricate Christmas tree patterns, detailed Easter eggs, or complex patriotic motifs. Using a stencil allows you to replicate these intricate designs quickly across a large batch of cookies needed for holiday gatherings or gifts. For example, you could stencil delicate snowflakes in white royal icing on blue-flooded cookies or apply intricate spiderweb patterns in black on orange cookies. These intricate cookie stenciling techniques make mass-producing beautifully decorated holiday cookies easy and enjoyable.
Like any decorating skill, mastering intricate cookie stenciling techniques takes practice. Your first few attempts might not be perfect – you might have some bleeding, uneven spots, or issues with removing the stencil. This is completely normal! Don't get discouraged. Each cookie is an opportunity to learn and refine your technique. Pay attention to what went wrong and adjust your icing consistency, stencil securing method, or scraping pressure accordingly.
Patience is also key, especially when working with royal icing that requires drying time between layers or before stenciling onto a base. Rushing the process is the quickest way to end up with smudges or damaged designs. Take your time, work methodically, and celebrate your progress. With consistent practice, you'll develop a feel for the right consistency and technique, making intricate cookie stenciling techniques easy and second nature.
Resources for Further Learning and Inspiration
The online baking community is a fantastic resource for anyone looking to delve deeper into cookie decorating and stenciling. Many talented cookiers share tutorials, tips, and inspiration through blogs, social media platforms (like Instagram and Pinterest), and YouTube channels.
Look for video tutorials specifically demonstrating intricate cookie stenciling techniques, as seeing the process in action can be incredibly helpful. Websites dedicated to cookie decorating and stencil suppliers often have guides and galleries showcasing creative uses of stencils. Joining online cookie decorating groups can also provide support, allow you to ask questions, and expose you to a wide range of styles and ideas. Exploring these resources will fuel your creativity and help you discover new ways to apply intricate cookie stenciling techniques to your own baked creations.
Intricate cookie stenciling techniques offer a powerful way to add stunning detail and professional polish to your baked goods. From achieving perfect uniformity across a batch to tackling complex patterns that would be challenging to pipe, stenciling opens up a world of design possibilities. By understanding the essential tools, mastering the correct royal icing consistency, and practicing the application and removal techniques, you can confidently create cookies that look like edible works of art.
Don't be afraid to experiment with different stencils, colors, and techniques. With a little practice, you'll find that applying intricate cookie stenciling techniques is not only achievable but also incredibly rewarding, allowing you to unleash your creativity and impress everyone with your beautifully decorated cookies.
Frequently Asked Questions
Choosing the right stencil depends on the complexity of the design and the size of your cookies. Look for stencils made of durable, food-safe material and with clean, sharp edges for the best results.
The ideal consistency is often referred to as "15-second icing". This means the icing smooths over within about 15 seconds, preventing bleeding under the stencil and creating crisp, defined lines.
How can I prevent royal icing from bleeding under the stencil?
Ensure your royal icing is the correct consistency and apply it in thin, even layers. Also, firmly hold the stencil in place or use stencil holders to prevent any movement during application, ensuring minimal bleeding.
What are some easy intricate stencil designs for beginners?
Start with repeating patterns or geometric shapes as they are more forgiving. Floral designs with simple lines are also a good option. Avoid overly detailed designs until you're comfortable with the basic techniques.
Immediately after use, gently wash the stencils with warm, soapy water. Use a soft brush to remove any remaining royal icing. Ensure they are completely dry before storing to prevent mold or damage.
The art of intricate cookie stenciling isn't just a fleeting trend; it's a testament to the enduring human desire to create beauty and share joy through edible artistry. These detailed designs, once considered the domain of professional bakers, are now accessible to anyone with a little patience and the right techniques. The ease of access to these methods, coupled with the stunning results, has sparked a global community of cookie artists, transforming simple baked goods into miniature masterpieces.
The impact of this accessible artistry extends far beyond the kitchen table. It fosters creativity, encourages self-expression, and provides a tangible outlet for stress relief. The process of creating something beautiful is itself a form of meditation.
This quote perfectly encapsulates the meditative and therapeutic aspects of intricate cookie stenciling. The focus required to achieve precise designs allows for a mindful escape from the daily grind, fostering a sense of accomplishment and pride in the finished product. The sharing of these creations further strengthens community bonds, creating connections through shared passion and appreciation for artistry.
Now, it's your turn. Don't just admire the intricate designs; try your hand at it! Pick up a stencil, gather your supplies, and let your creativity flow. Embrace the challenge, celebrate the small victories, and experience the immense satisfaction of transforming ordinary cookies into extraordinary works of art. You might surprise yourself with the beauty you can create, and the joy you can share.
Thanks for taking the time to explore the world of intricate cookie stenciling! We hope you've gained valuable techniques to elevate your baking skills. Now it's time to put your newfound knowledge into action.
- Master a new stencil design: Challenge yourself to create a cookie masterpiece using one of the techniques discussed, and share your results on social media using #BakeWithEaseStencils. This is your chance to shine!
- Experiment with different frosting consistencies: Fine-tune your frosting to achieve the perfect flow for even, detailed stenciling. The key is practice!
- Share your cookie creations: Show us your stunning, stenciled cookies! Tag us @BakeWithEase on Instagram (or your preferred platform) to inspire others.
Ready to transform ordinary cookies into extraordinary works of art? What unique stencil design will you create next?